当然,你可以先按照IDEA搭建SSM框架【配置类、新手向】完成基础框架的搭建
步骤 1:设计并实现服务器端的用户数据库
在这个示例中,我们将使用MySQL数据库。首先,你需要安装MySQL并创建一个数据库以存储用户信息。以下是一些基本步骤:
- 安装MySQL,并确保MySQL服务器正在运行。
- 使用MySQL客户端工具登录到MySQL服务器。
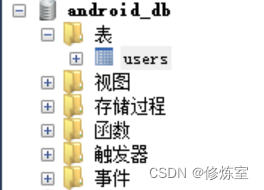
- 创建一个新的数据库,例如 “android”。
CREATE DATABASE android_db;
- 创建一个用户表,用于存储用户信息,包括用户名和密码。
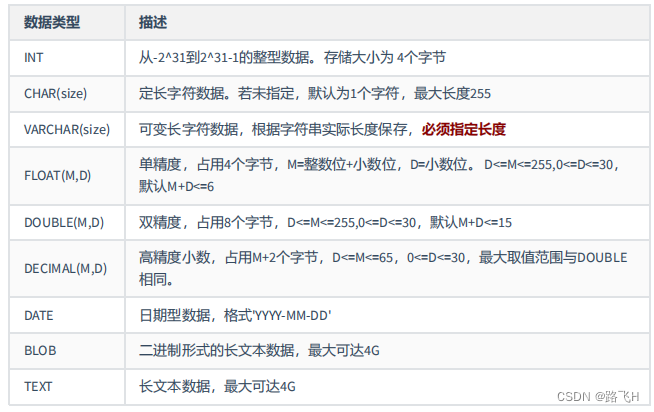
USE android_db;CREATE TABLE users (id INT AUTO_INCREMENT PRIMARY KEY,username VARCHAR(255) NOT NULL,password VARCHAR(255) NOT NULL
);
步骤 2:使用Spring Boot搭建Web服务器
1. 创建一个Spring Boot项目
你可以使用Spring Initializer(https://start.spring.io/)来生成项目模板,包含Web和MySQL依赖。
2. 配置数据库连接信息
在 application.properties 或 application.yml 文件中添加以下内容:
spring.datasource.url=jdbc:mysql://localhost:3306/userdb
spring.datasource.username=your_username
spring.datasource.password=your_password
spring.datasource.driver-class-name=com.mysql.cj.jdbc.Driver
spring.jpa.hibernate.ddl-auto=update
spring:datasource:driver-class-name: com.mysql.cj.jdbc.Driverurl: jdbc:mysql:///数据库名称?useSSL=false&useUnicode=true&characterEncoding=utf8username: 数据库用户名password: 数据库密码
mybatis:mapper-locations: classpath:mappers/*.xmltype-aliases-package: com.leo.springbootbackend.pojo.doconfiguration:map-underscore-to-camel-case: true
确保替换 your_username 和 your_password 为你的数据库用户名和密码。
3. 导入lombook
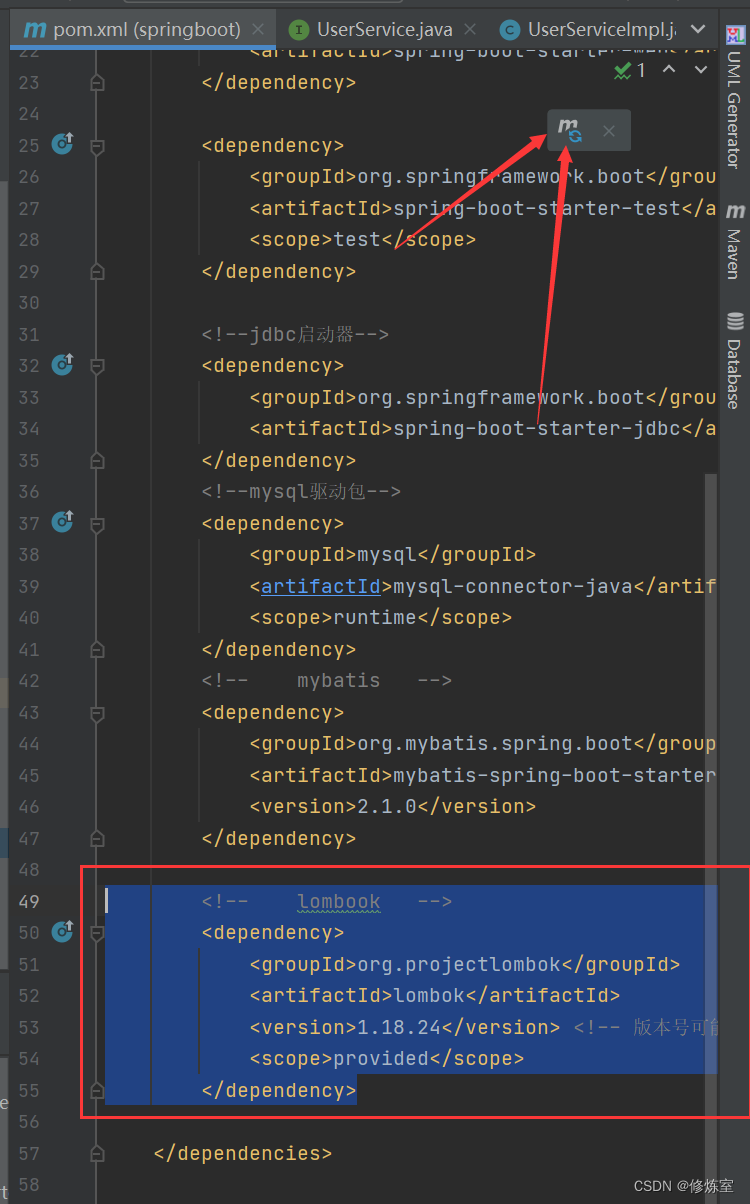
在项目中引入 Lombok 依赖并启用 Lombok 插件,以便编译器能够正确处理 Lombok 注解。如果你使用的是 Maven,你可以在pom.xml添加以下依赖:
<!-- lombook --><dependency><groupId>org.projectlombok</groupId><artifactId>lombok</artifactId><version>1.18.24</version> <!-- 版本号可能会有所不同 --><scope>provided</scope></dependency>
如果你使用的是 Gradle,你可以在 build.gradle 文件中添加以下依赖:
implementationOnly 'org.projectlombok:lombok:1.18.22' // 版本号可能会有所不同
annotationProcessor 'org.projectlombok:lombok:1.18.22' // 版本号可能会有所不同
确保配置正确,以使 Lombok 能够在你的项目中正常工作。
4. 创建一个实体类 User 用于表示用户信息。
package com.leo.springboot.pojo.entity;import lombok.Data;
import lombok.NonNull;@Data
public class User {@NonNull private Long id;@NonNull private String username;@NonNull private String password;
}
5. 创建一个用户仓库接口 UserDAO。
package com.leo.springboot.dao;import com.leo.springboot.pojo.entity.User;
import org.apache.ibatis.annotations.Insert;
import org.apache.ibatis.annotations.Mapper;
import org.apache.ibatis.annotations.Select;@Mapper
public interface UserDao {@Select("SELECT * FROM users WHERE username = #{username}")User findByUsername(String username);@Insert("INSERT INTO users (username, password) VALUES (#{username}, #{password})")Integer save(User user);
}
方法一:使用注解:
package com.leo.springboot.dao;import com.leo.springboot.pojo.entity.User;
import org.apache.ibatis.annotations.Insert;
import org.apache.ibatis.annotations.Mapper;
import org.apache.ibatis.annotations.Select;@Mapper
public interface UserDao {@Select("SELECT * FROM user WHERE username = #{username}")User findByUsername(String username);@Insert("INSERT INTO user (username, password) VALUES (#{username}, #{password})")User save(User user);
}上面的代码中,通过@Select注解在findByUsername方法上定义了查询操作的SQL语句。
方法二:使用XML映射文件:
如果你更愿意将SQL语句定义在XML映射文件中,你可以在XML文件中定义findByUsername方法的SQL语句,就像之前所示。
UserMapper.xml:
<?xml version="1.0" encoding="UTF-8" ?>
<!DOCTYPE mapper PUBLIC "-//mybatis.org//DTD Mapper 3.0//EN" "http://mybatis.org/dtd/mybatis-3-mapper.dtd"><mapper namespace="com.leo.springboot.dao.UserDao"><select id="findByUsername" parameterType="java.lang.String" resultType="com.leo.springboot.pojo.entity.User">SELECT * FROM user WHERE username = #{username}</select><insert id="save" parameterType="java.lang.Integer">INSERT INTO user (username, password) VALUES (#{username}, #{password})</insert>
</mapper>
然后,再次确保你的application.properties或application.yml中指定了映射文件的位置:
mybatis.mapper-locations=classpath:mapper/*.xml
6. 创建用户服务(Service)
1.创建一个UserService接口和实现类UserServiceImpl:
UserService.java:
package com.leo.springboot.service;import com.leo.springboot.pojo.entity.User;
import org.springframework.stereotype.Service;public interface UserService {User getByUsername(String username);Integer save(User user);
}
UserServiceImpl.java:
package com.leo.springboot.service.impl;import com.leo.springboot.dao.UserDao;
import com.leo.springboot.pojo.entity.User;
import com.leo.springboot.service.UserService;
import org.springframework.beans.factory.annotation.Autowired;
import org.springframework.stereotype.Service;@Service
public class UserServiceImpl implements UserService {@Autowiredprivate UserDao userRepository;@Overridepublic User getByUsername(String username) {return userRepository.findByUsername(username);}@Overridepublic Integer save(User user) {return userRepository.save(user);}
}
7. 创建用户控制器(Controller)
package com.leo.springboot.controller;import com.leo.springboot.pojo.entity.User;
import com.leo.springboot.service.UserService;
import org.springframework.beans.factory.annotation.Autowired;
import org.springframework.web.bind.annotation.*;@RestController
@RequestMapping("/user")
public class UserController {@Autowiredprivate UserService userService;@PostMapping("/login")public Boolean loginUser(@RequestBody User user) {String username = user.getUsername();String password = user.getPassword();User storedUser = userService.getByUsername(username);if (storedUser != null && storedUser.getPassword().equals(password)) {return true;}return false; // Return null or an error message for failed login}@PostMapping("/register")public Integer registerUser(@RequestBody User user) {// You can add validation and error handling herereturn userService.save(user);}
}
使用
@RestController注解标识这是一个REST控制器。@RequestMapping注解定义了控制器的基本路径。
8. 运行应用
-
使用IDE运行Spring Boot应用程序。
-
应用将启动并监听端口8080(可以在
application.properties或application.yml文件中进行配置)。
并在数据库中插入数据
步骤8:测试API
你可以使用工具如Postman或curl来测试你的API。以下是一些示例API调用:
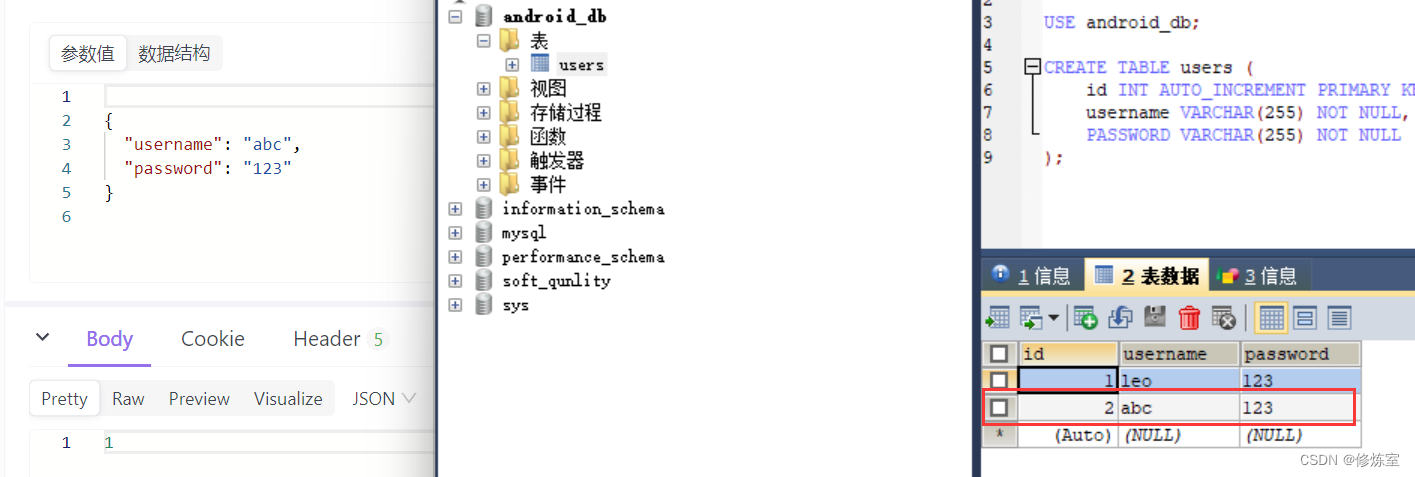
- 注册用户:POST请求
http://localhost:8080/user/register,并在请求体中传入JSON数据,例如:
{"username": "abc","password": "123"
}
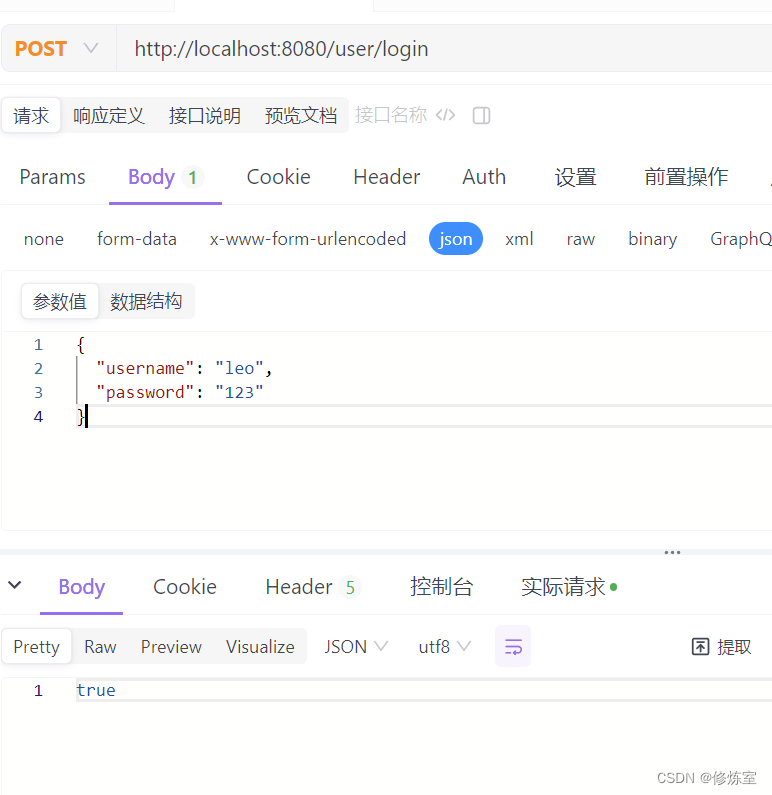
- 用户登录:POST请求
http://localhost:8080/users/login,并在请求体中传入JSON数据,例如:
{"username": "leo","password": "123"
}
