一、效果展示
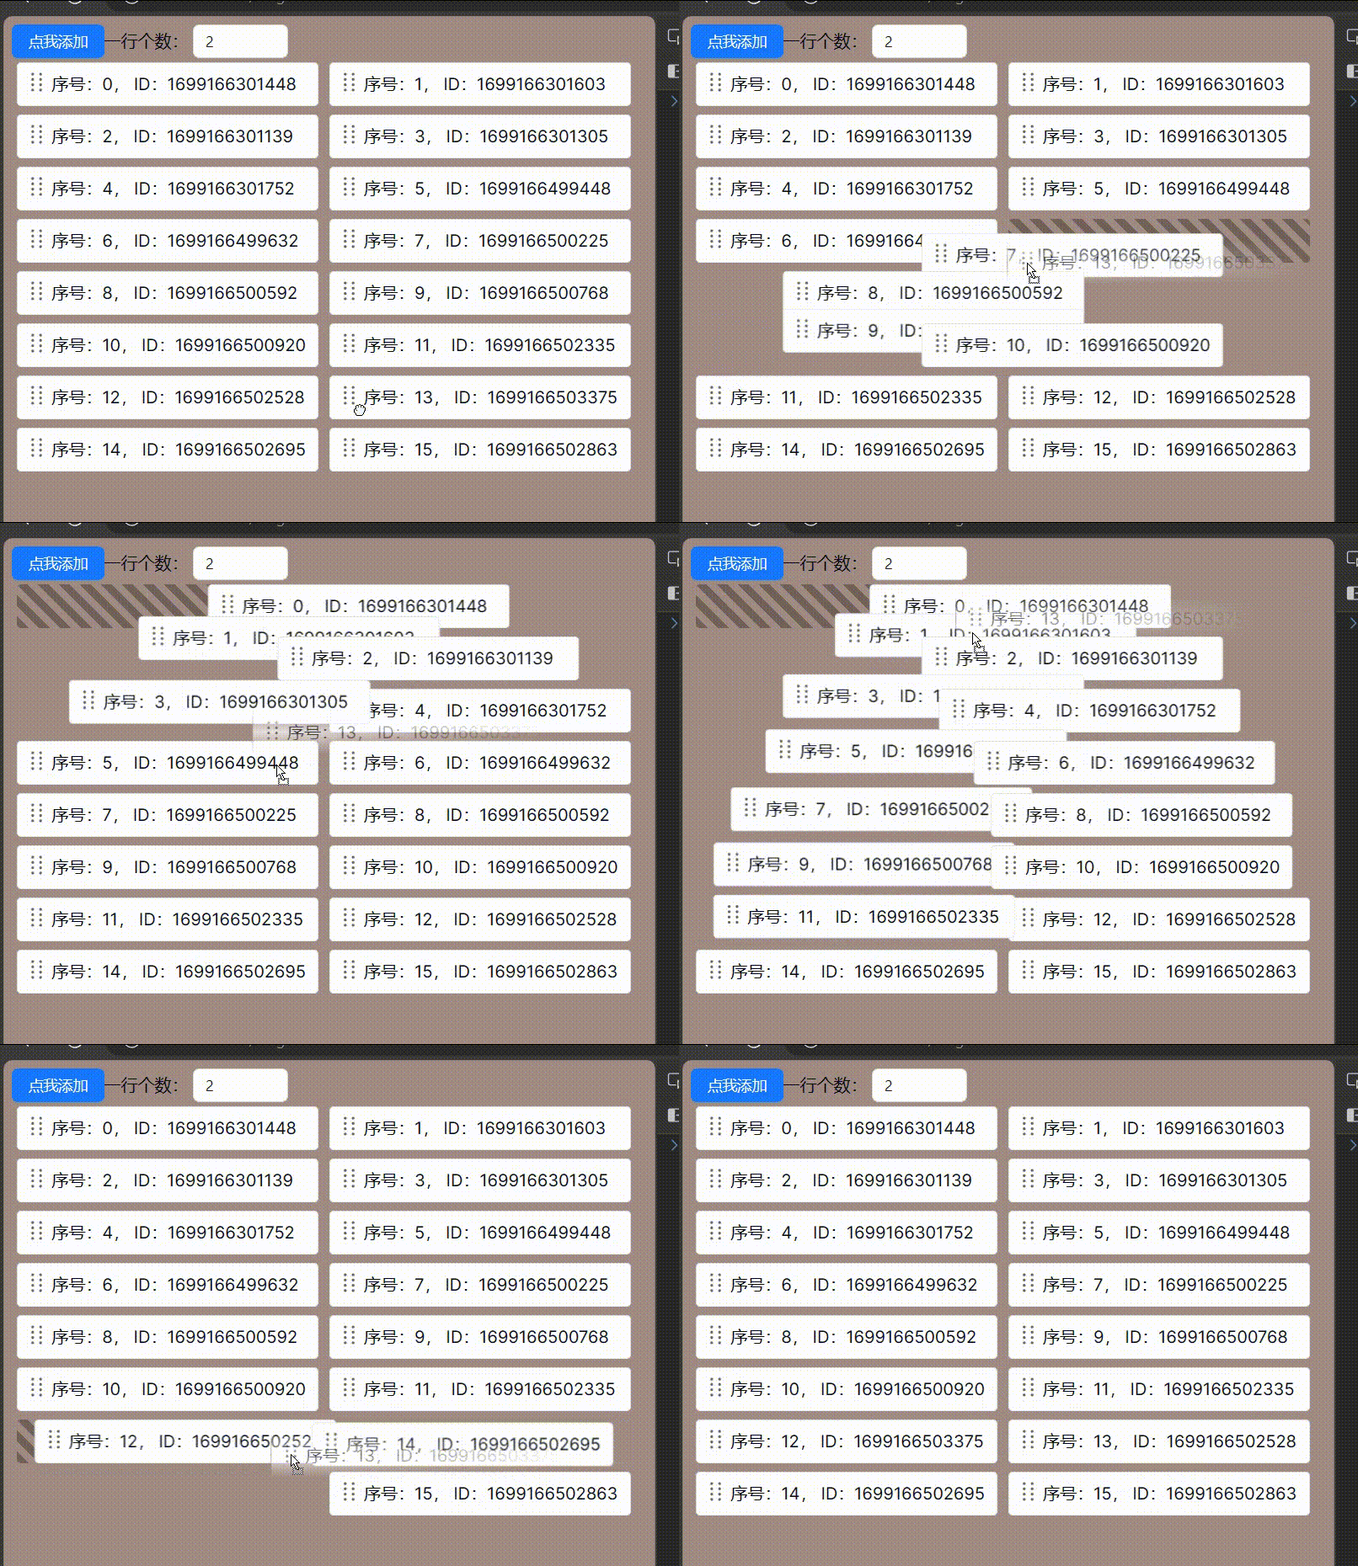
排序:
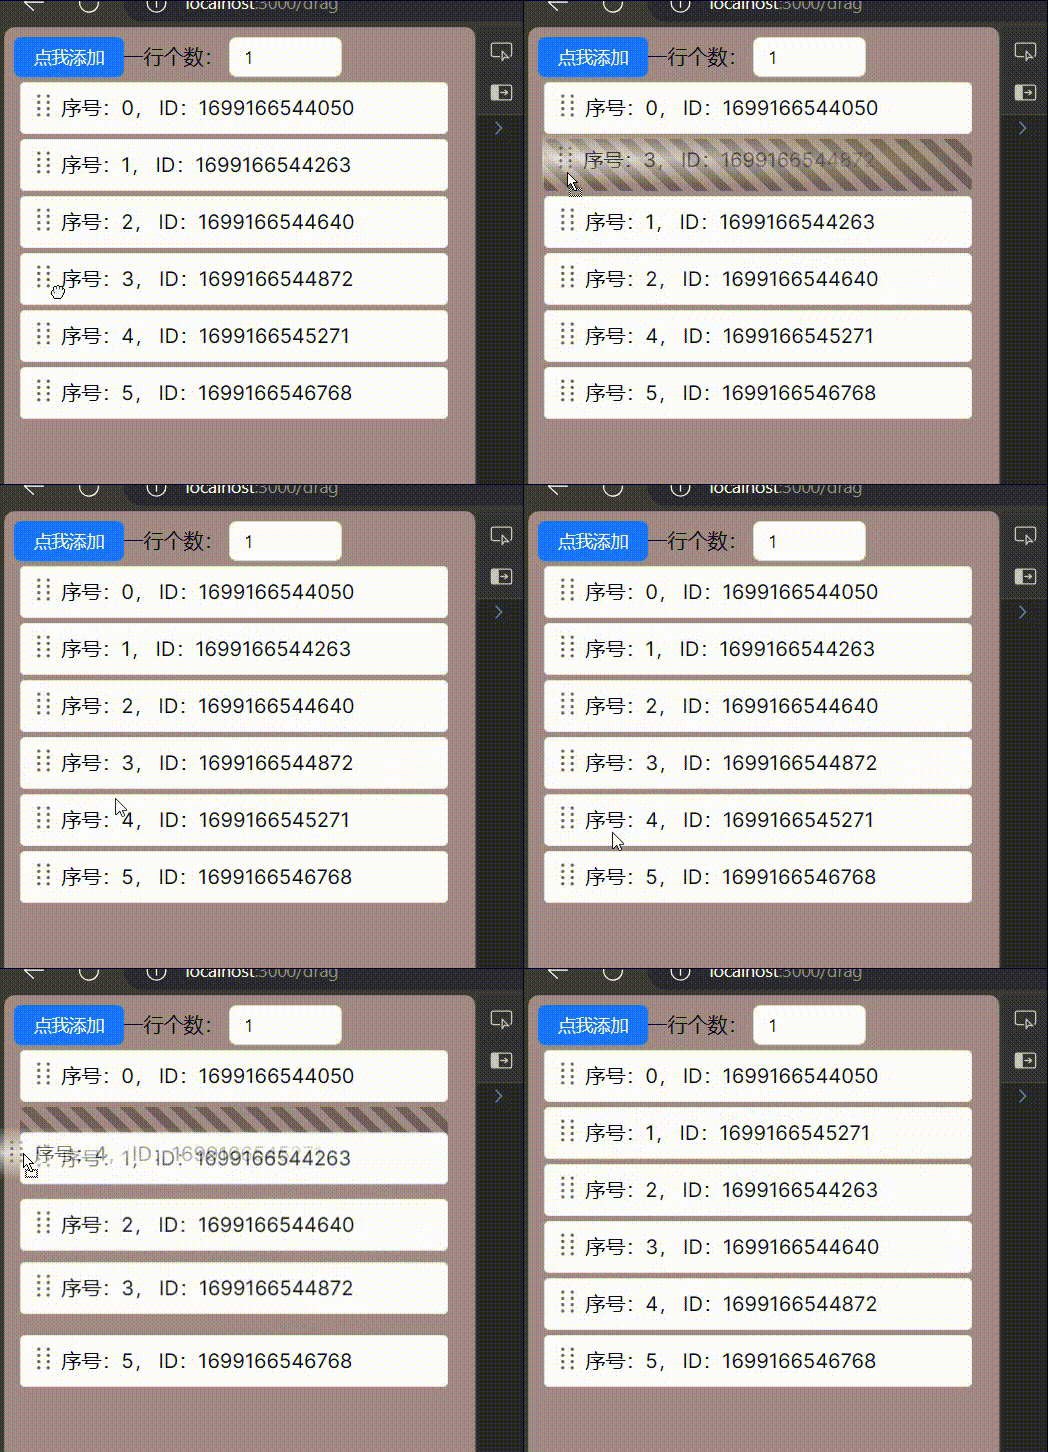
丝滑的Flip动画
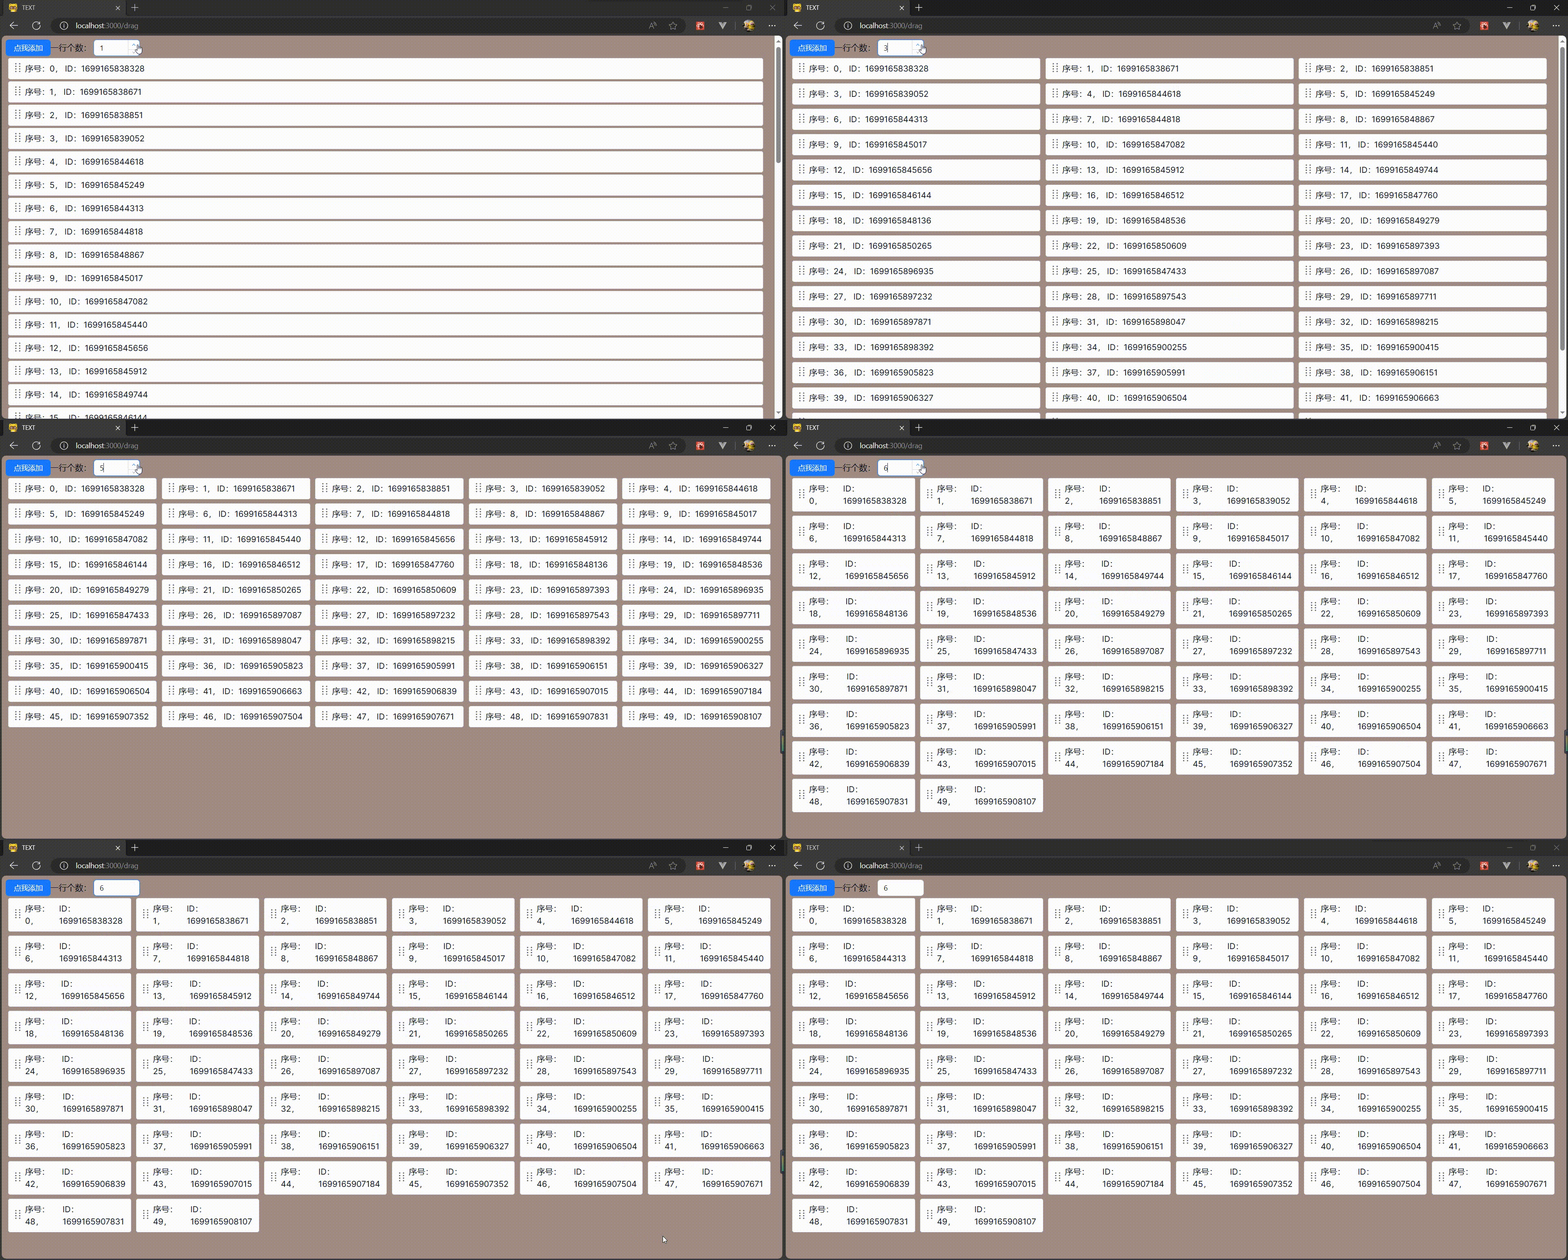
自定义列数 (并且宽度会随着屏幕宽度自适应)
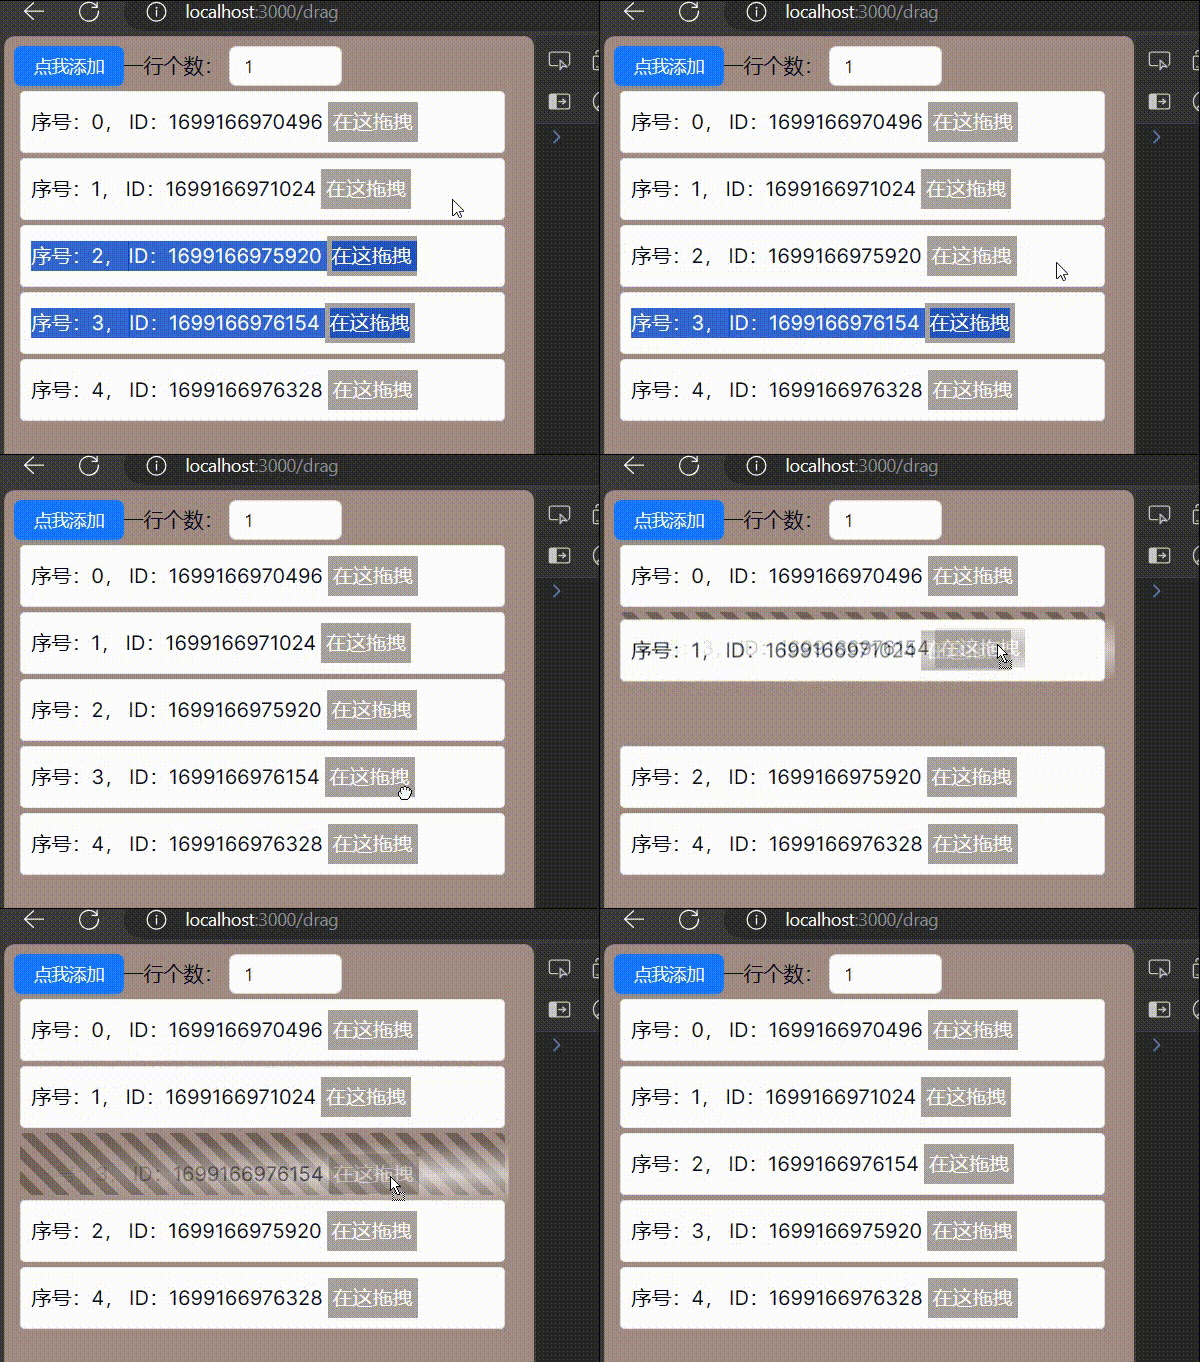
自定义拖拽区域:(扩展性高,可以全部可拖拽、自定义拖拽图标)
二、主要思路
Tip: 本代码的CSS使用Tailwindcss, 如果没安装的可以自行安装这个库,也可以去问GPT,让它帮忙改成普通的CSS版本的代码
1. 一些ts类型:
import { CSSProperties, MutableRefObject, ReactNode } from "react"
/**有孩子的,基础的组件props,包含className style children */
interface baseChildrenProps {/**组件最外层的className */className?: string/**组件最外层的style */style?: CSSProperties/**孩子 */children?: ReactNode
}
/**ItemRender渲染函数的参数 */
type itemProps<T> = {/**当前元素 */item: T,/**当前索引 */index: number,/**父元素宽度 */width: number/**可拖拽的盒子,只有在这上面才能拖拽。自由放置位置。提供了一个默认的拖拽图标。可以作为包围盒,将某块内容作为拖拽区域 */DragBox: (props: baseChildrenProps) => ReactNode
}
/**拖拽排序组件的props */
export interface DragSortProps<T> {/**组件最外层的className */className?: string/**组件最外层的style */style?: CSSProperties/**列表,拖拽后会改变里面的顺序 */list: T[]/**用作唯一key,在list的元素中的属性名,比如id。必须传递 */keyName: keyof T/**一行个数,默认1 */cols?: number/**元素间距,单位px,默认0 (因为一行默认1) */marginX?: number/**当列表长度变化时,是否需要Flip动画,默认开启 (可能有点略微的动画bug) */flipWithListChange?: boolean/**每个元素的渲染函数 */ItemRender: (props: itemProps<T>) => ReactNode/**拖拽结束事件,返回排序好的新数组,在里面自己调用setList */afterDrag: (list: T[]) => any
}
2. 使用事件委托
监听所有子元素的拖拽开始、拖拽中、拖拽结束事件,减少绑定事件数量的同时,还能优化代码。
/**拖拽排序组件 */
const DragSort = function <T>({list,ItemRender,afterDrag,keyName,cols = 1,marginX = 0,flipWithListChange = true,className,style,
}: DragSortProps<T>) {const listRef = useRef<HTMLDivElement>(null);/**记录当前正在拖拽哪个元素 */const nowDragItem = useRef<HTMLDivElement>();const itemWidth = useCalculativeWidth(listRef, marginX, cols);//使用计算宽度钩子,计算每个元素的宽度 (代码后面会有)const [dragOpen, setDragOpen] = useState(false); //是否开启拖拽 (鼠标进入指定区域开启)/**事件委托- 监听 拖拽开始 事件,添加样式 */const onDragStart: DragEventHandler<HTMLDivElement> = (e) => {if (!listRef.current) return;e.stopPropagation(); //阻止冒泡/**这是当前正在被拖拽的元素 */const target = e.target as HTMLDivElement;//设置被拖拽元素“留在原地”的样式。为了防止设置正在拖拽的元素样式,所以用定时器,宏任务更晚执行setTimeout(() => {target.classList.add(...movingClass); //设置正被拖动的元素样式target.childNodes.forEach((k) => (k as HTMLDivElement).classList?.add(...opacityClass)); //把子元素都设置为透明,避免影响}, 0);//记录当前拖拽的元素nowDragItem.current = target;//设置鼠标样式e.dataTransfer.effectAllowed = "move";};/**事件委托- 监听 拖拽进入某个元素 事件,在这里只是DOM变化,数据顺序没有变化 */const onDragEnter: DragEventHandler<HTMLDivElement> = (e) => {e.preventDefault(); //阻止默认行为,默认是不允许元素拖动到人家身上的if (!listRef.current || !nowDragItem.current) return;/**孩子数组,每次都会获取最新的 */const children = [...listRef.current.children];/**真正会被挪动的元素(当前正悬浮在哪个元素上面) */ //找到符合条件的父节点const realTarget = findParent(e.target as Element, (now) => children.indexOf(now) !== -1);//边界判断if (realTarget === listRef.current || realTarget === nowDragItem.current || !realTarget) {// console.log("拖到自身或者拖到外面");return;}//拿到两个元素的索引,用来判断这俩元素应该怎么移动/**被拖拽元素在孩子数组中的索引 */const nowDragtItemIndex = children.indexOf(nowDragItem.current);/**被进入元素在孩子数组中的索引 */const enterItemIndex = children.indexOf(realTarget);//当用户选中文字,然后去拖动这个文字时,就会触发 (可以通过禁止选中文字来避免)if (enterItemIndex === -1 || nowDragtItemIndex === -1) {console.log("若第二个数为-1,说明拖动的不是元素,而是“文字”", enterItemIndex, nowDragtItemIndex);return;}if (nowDragtItemIndex < enterItemIndex) {// console.log("向下移动");listRef.current.insertBefore(nowDragItem.current, realTarget.nextElementSibling);} else {// console.log("向上移动");listRef.current.insertBefore(nowDragItem.current, realTarget);}};/**事件委托- 监听 拖拽结束 事件,删除样式,设置当前列表 */const onDragEnd: DragEventHandler<HTMLDivElement> = (e) => {if (!listRef.current) return;/**当前正在被拖拽的元素 */const target = e.target as Element;target.classList.remove(...movingClass);//删除前面添加的 被拖拽元素的样式,回归原样式target.childNodes.forEach((k) => (k as Element).classList?.remove(...opacityClass));//删除所有子元素的透明样式/**拿到当前DOM的id顺序信息 */const ids = [...listRef.current.children].map((k) => String(k.id)); //根据id,判断到时候应该怎么排序//把列表按照id排序const newList = [...list].sort(function (a, b) {const aIndex = ids.indexOf(String(a[keyName]));const bIndex = ids.indexOf(String(b[keyName]));if (aIndex === -1 && bIndex === -1) return 0;else if (aIndex === -1) return 1;else if (bIndex === -1) return -1;else return aIndex - bIndex;});afterDrag(newList);//触发外界传入的回调函数setDragOpen(false);//拖拽完成后,再次禁止拖拽 };/**拖拽按钮组件 */  //只有鼠标悬浮在这上面的时候,才开启拖拽,做到“指定区域拖拽”const DragBox = ({ className, style, children }: baseChildrenProps) => {return (<divstyle={{ ...style }}className={cn("hover:cursor-grabbing", className)}onMouseEnter={() => setDragOpen(true)}onMouseLeave={() => setDragOpen(false)}>{children || <DragIcon size={20} color="#666666" />}</div>);};return (<divclassName={cn(cols === 1 ? "" : "flex flex-wrap", className)}style={style}ref={listRef}onDragStart={onDragStart}onDragEnter={onDragEnter}onDragOver={(e) => e.preventDefault()} //被拖动的对象被拖到其它容器时(因为默认不能拖到其它元素上)onDragEnd={onDragEnd}>{list.map((item, index) => {const key = item[keyName] as string;return (<div id={key} key={key} style={{ width: itemWidth, margin: `4px ${marginX / 2}px` }} draggable={dragOpen} className="my-1">{ItemRender({ item, index, width: itemWidth, DragBox })}</div>);})}</div>);
};
3. 使用Flip做动画
对于这种移动位置的动画,普通的CSS和JS动画已经无法满足了:
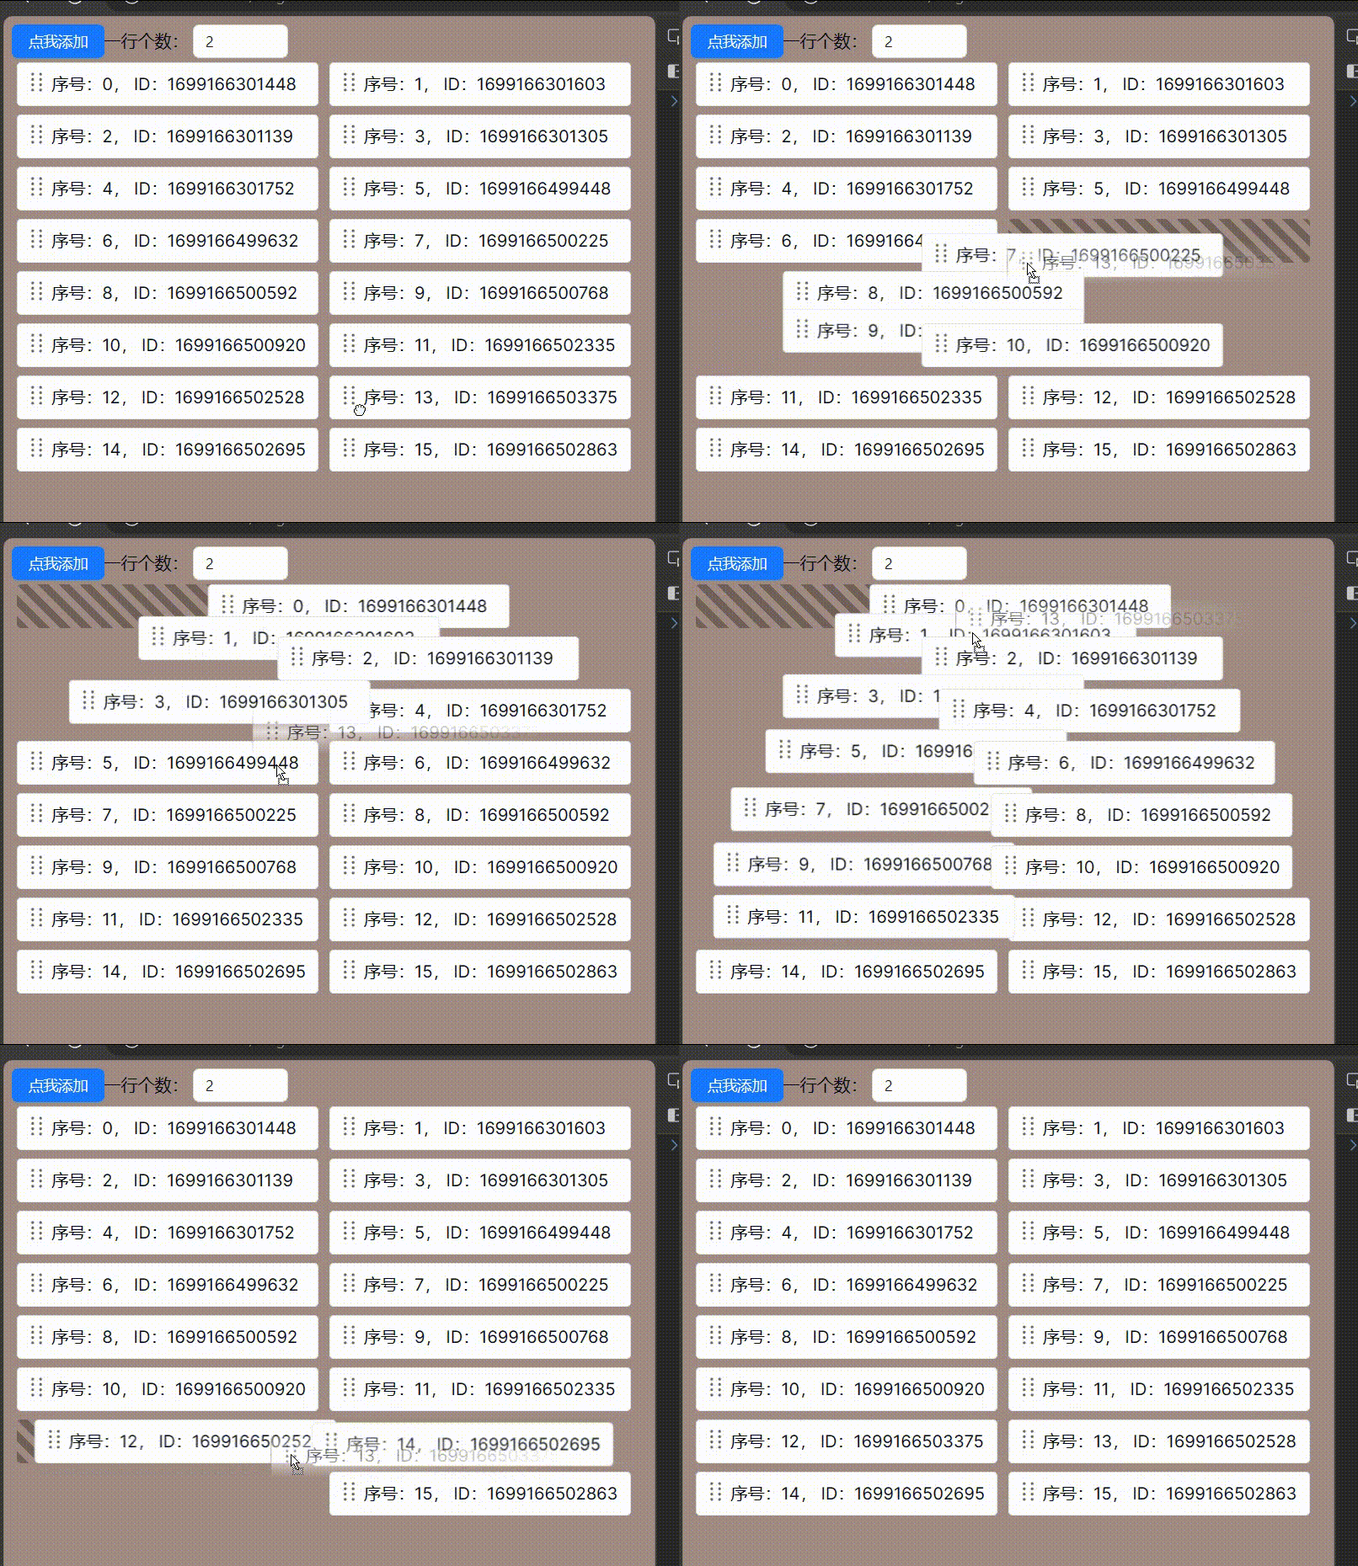
可以使用Flip动画来做:FLIP是 First、Last、Invert和 Play四个单词首字母的缩写, 意思就是,记录一开始的位置、记录结束的位置、记录位置的变化、让元素开始动画
主要的思路为: 记录原位置、记录现位置、记录位移大小,最重要的点来了, 使用CSS的 transform ,让元素在被改动位置的一瞬间, translate 定位到原本的位置上(通过我们前面计算的位移大小), 然后给元素加上 过渡 效果,再让它慢慢回到原位即可。

代码如下 (没有第三方库,基本都是自己手写实现)
这里还使用了JS提供的 Web Animations API,具有极高的性能,不阻塞主线程。
但是由于API没有提供动画完成的回调,故这里使用定时器做回调触发
/**位置的类型 */
interface position {x: number,y: number
}/**Flip动画 */
export class Flip {/**dom元素 */private dom: Element/**原位置 */private firstPosition: position | null = null/**动画时间 */private duration: number/**正在移动的动画会有一个专属的class类名,可以用于标识 */static movingClass = "__flipMoving__"constructor(dom: Element, duration = 500) {this.dom = domthis.duration = duration}/**获得元素的当前位置信息 */private getDomPosition(): position {const rect = this.dom.getBoundingClientRect()return {x: rect.left,y: rect.top}}/**给原始位置赋值 */recordFirst(firstPosition?: position) {if (!firstPosition) firstPosition = this.getDomPosition()this.firstPosition = { ...firstPosition }}/**播放动画 */play(callback?: () => any) {if (!this.firstPosition) {console.warn('请先记录原始位置');return}const lastPositon = this.getDomPosition()const dif: position = {x: lastPositon.x - this.firstPosition.x,y: lastPositon.y - this.firstPosition.y,}// console.log(this, dif);if (!dif.x && !dif.y) returnthis.dom.classList.add(Flip.movingClass)this.dom.animate([{ transform: `translate(${-dif.x}px, ${-dif.y}px)` },{ transform: `translate(0px, 0px)` }], { duration: this.duration })setTimeout(() => {this.dom.classList.remove(Flip.movingClass)callback?.()}, this.duration);}
}
/**Flip多元素同时触发 */
export class FlipList {/**Flip列表 */private flips: Flip[]/**正在移动的动画会有一个专属的class类名,可以用于标识 */static movingClass = Flip.movingClass/**Flip多元素同时触发 - 构造函数* @param domList 要监听的DOM列表* @param duration 动画时长,默认500ms*/constructor(domList: Element[], duration?: number) {this.flips = domList.map((k) => new Flip(k, duration))}/**记录全部初始位置 */recordFirst() {this.flips.forEach((flip) => flip.recordFirst())}/**播放全部动画 */play(callback?: () => any) {this.flips.forEach((flip) => flip.play(callback))}
}
然后在特定的地方插入代码,记录元素位置,做动画,插入了动画之后的代码,见下面的“完整代码”模块
三、完整代码
1.类型定义
// type.tsimport { CSSProperties, ReactNode } from "react"
/**有孩子的,基础的组件props,包含className style children */
interface baseChildrenProps {/**组件最外层的className */className?: string/**组件最外层的style */style?: CSSProperties/**孩子 */children?: ReactNode
}
/**ItemRender渲染函数的参数 */
type itemProps<T> = {/**当前元素 */item: T,/**当前索引 */index: number,/**父元素宽度 */width: number/**可拖拽的盒子,只有在这上面才能拖拽。自由放置位置。提供了一个默认的拖拽图标。可以作为包围盒,将某块内容作为拖拽区域 */DragBox: (props: baseChildrenProps) => ReactNode
}
/**拖拽排序组件的props */
export interface DragSortProps<T> {/**组件最外层的className */className?: string/**组件最外层的style */style?: CSSProperties/**列表,拖拽后会改变里面的顺序 */list: T[]/**用作唯一key,在list的元素中的属性名,比如id。必须传递 */keyName: keyof T/**一行个数,默认1 */cols?: number/**元素间距,单位px,默认0 (因为一行默认1) */marginX?: number/**当列表长度变化时,是否需要Flip动画,默认开启 (可能有点略微的动画bug) */flipWithListChange?: boolean/**每个元素的渲染函数 */ItemRender: (props: itemProps<T>) => ReactNode/**拖拽结束事件,返回排序好的新数组,在里面自己调用setList */afterDrag: (list: T[]) => any
}
2. 部分不方便使用Tailwindcss的CSS
由于这段背景设置为tailwindcss过于麻烦,所以单独提取出来
/* index.module.css *//*拖拽时,留在原地的元素*/
.background {background: linear-gradient(45deg,rgba(0, 0, 0, 0.3) 0,rgba(0, 0, 0, 0.3) 25%,transparent 25%,transparent 50%,rgba(0, 0, 0, 0.3) 50%,rgba(0, 0, 0, 0.3) 75%,transparent 75%,transparent);background-size: 20px 20px;border-radius: 5px;
}
3. 计算每个子元素宽度的Hook
一个响应式计算宽度的hook,可以用于列表的多列布局
// hooks/alculativeWidth.tsimport { RefObject, useEffect, useState } from "react";/**根据父节点的ref和子元素的列数等数据,计算出子元素的宽度。用于响应式布局* @param fatherRef 父节点的ref* @param marginX 子元素的水平间距* @param cols 一行个数 (一行有几列)* @param callback 根据浏览器宽度自动计算大小后的回调函数,参数是计算好的子元素宽度* @returns 返回子元素宽度的响应式数据*/
const useCalculativeWidth = (fatherRef: RefObject<HTMLDivElement>, marginX: number, cols: number, callback?: (nowWidth: number) => void) => {const [itemWidth, setItemWidth] = useState(200);useEffect(() => {/**计算单个子元素宽度,根据list的宽度计算 */const countWidth = () => {const width = fatherRef.current?.offsetWidth;if (width) {const _width = (width - marginX * (cols + 1)) / cols;setItemWidth(_width);callback && callback(_width)}};countWidth(); //先执行一次,后续再监听绑定window.addEventListener("resize", countWidth);return () => window.removeEventListener("resize", countWidth);}, [fatherRef, marginX, cols]);return itemWidth
}
export default useCalculativeWidth
4. Flip动画实现
// lib/common/util/animation.ts/**位置的类型 */
interface position {x: number,y: number
}/**Flip动画 */
export class Flip {/**dom元素 */private dom: Element/**原位置 */private firstPosition: position | null = null/**动画时间 */private duration: number/**正在移动的动画会有一个专属的class类名,可以用于标识 */static movingClass = "__flipMoving__"constructor(dom: Element, duration = 500) {this.dom = domthis.duration = duration}/**获得元素的当前位置信息 */private getDomPosition(): position {const rect = this.dom.getBoundingClientRect()return {x: rect.left,y: rect.top}}/**给原始位置赋值 */recordFirst(firstPosition?: position) {if (!firstPosition) firstPosition = this.getDomPosition()this.firstPosition = { ...firstPosition }}/**播放动画 */play(callback?: () => any) {if (!this.firstPosition) {console.warn('请先记录原始位置');return}const lastPositon = this.getDomPosition()const dif: position = {x: lastPositon.x - this.firstPosition.x,y: lastPositon.y - this.firstPosition.y,}// console.log(this, dif);if (!dif.x && !dif.y) returnthis.dom.classList.add(Flip.movingClass)this.dom.animate([{ transform: `translate(${-dif.x}px, ${-dif.y}px)` },{ transform: `translate(0px, 0px)` }], { duration: this.duration })setTimeout(() => {this.dom.classList.remove(Flip.movingClass)callback?.()}, this.duration);}
}
/**Flip多元素同时触发 */
export class FlipList {/**Flip列表 */private flips: Flip[]/**正在移动的动画会有一个专属的class类名,可以用于标识 */static movingClass = Flip.movingClass/**Flip多元素同时触发 - 构造函数* @param domList 要监听的DOM列表* @param duration 动画时长,默认500ms*/constructor(domList: Element[], duration?: number) {this.flips = domList.map((k) => new Flip(k, duration))}/**记录全部初始位置 */recordFirst() {this.flips.forEach((flip) => flip.recordFirst())}/**播放全部动画 */play(callback?: () => any) {this.flips.forEach((flip) => flip.play(callback))}
}
4. 一些工具函数
import { type ClassValue, clsx } from "clsx"
import { twMerge } from "tailwind-merge"/**Tailwindcss的 合并css类名 函数* @param inputs 要合并的类名* @returns */
export function cn(...inputs: ClassValue[]) {return twMerge(clsx(inputs))
}/**查找符合条件的父节点* @param node 当前节点。如果当前节点就符合条件,就会返回当前节点* @param target 参数是当前找到的节点,返回一个布尔值,为true代表找到想要的父节点* @returns 没找到则返回null,找到了返回Element*/
export function findParent(node: Element, target: (nowNode: Element) => boolean) {while (node && !target(node)) {if (node.parentElement) {node = node.parentElement;} else {return null;}}return node;
}
5. 完整组件代码
import { DragEventHandler, useEffect,  useRef, useState } from "react";
import { DragSortProps } from "./type";
import useCalculativeWidth from "@/hooks/calculativeWidth";
import { cn, findParent } from "@/lib/util";
import style from "./index.module.css";
import { DragIcon } from "../../UI/MyIcon"; //这个图标可以自己找喜欢的
import { FlipList } from "@/lib/common/util/animation";/**拖拽时,留在原位置的元素的样式 */
const movingClass = [style.background]; //使用数组是为了方便以后添加其他类名
/**拖拽时,留在原位置的子元素的样式 */
const opacityClass = ["opacity-0"]; //使用数组是为了方便以后添加其他类名/**拖拽排序组件 */
const DragSort = function <T>({list,ItemRender,afterDrag,keyName,cols = 1,marginX = 0,flipWithListChange = true,className,style,
}: DragSortProps<T>) {const listRef = useRef<HTMLDivElement>(null);/**记录当前正在拖拽哪个元素 */const nowDragItem = useRef<HTMLDivElement>();const itemWidth = useCalculativeWidth(listRef, marginX, cols);/**存储flipList动画实例 */const flipListRef = useRef<FlipList>();const [dragOpen, setDragOpen] = useState(false); //是否开启拖拽 (鼠标进入指定区域开启)/**创建记录新的动画记录,并立即记录当前位置 */const createNewFlipList = (exceptTarget?: Element) => {if (!listRef.current) return;//记录动画const listenChildren = [...listRef.current.children].filter((k) => k !== exceptTarget); //除了指定元素,其它的都动画flipListRef.current = new FlipList(listenChildren, 300);flipListRef.current.recordFirst();};//下面这两个是用于,当列表变化时,进行动画useEffect(() => {if (!flipWithListChange) return;createNewFlipList();}, [list]);useEffect(() => {if (!flipWithListChange) return;createNewFlipList();return () => {flipListRef.current?.play(() => flipListRef.current?.recordFirst());};}, [list.length]);/**事件委托- 监听 拖拽开始 事件,添加样式 */const onDragStart: DragEventHandler<HTMLDivElement> = (e) => {if (!listRef.current) return;e.stopPropagation(); //阻止冒泡/**这是当前正在被拖拽的元素 */const target = e.target as HTMLDivElement;//设置被拖拽元素“留在原地”的样式。为了防止设置正在拖拽的元素样式,所以用定时器,宏任务更晚执行setTimeout(() => {target.classList.add(...movingClass); //设置正被拖动的元素样式target.childNodes.forEach((k) => (k as HTMLDivElement).classList?.add(...opacityClass)); //把子元素都设置为透明,避免影响}, 0);//记录元素的位置,用于Flip动画createNewFlipList(target);//记录当前拖拽的元素nowDragItem.current = target;//设置鼠标样式e.dataTransfer.effectAllowed = "move";};/**事件委托- 监听 拖拽进入某个元素 事件,在这里只是DOM变化,数据顺序没有变化 */const onDragEnter: DragEventHandler<HTMLDivElement> = (e) => {e.preventDefault(); //阻止默认行为,默认是不允许元素拖动到人家身上的if (!listRef.current || !nowDragItem.current) return;/**孩子数组,每次都会获取最新的 */const children = [...listRef.current.children];/**真正会被挪动的元素(当前正悬浮在哪个元素上面) */ //找到符合条件的父节点const realTarget = findParent(e.target as Element, (now) => children.indexOf(now) !== -1);//边界判断if (realTarget === listRef.current || realTarget === nowDragItem.current || !realTarget) {// console.log("拖到自身或者拖到外面");return;}if (realTarget.className.includes(FlipList.movingClass)) {// console.log("这是正在动画的元素,跳过");return;}//拿到两个元素的索引,用来判断这俩元素应该怎么移动/**被拖拽元素在孩子数组中的索引 */const nowDragtItemIndex = children.indexOf(nowDragItem.current);/**被进入元素在孩子数组中的索引 */const enterItemIndex = children.indexOf(realTarget);//当用户选中文字,然后去拖动这个文字时,就会触发 (可以通过禁止选中文字来避免)if (enterItemIndex === -1 || nowDragtItemIndex === -1) {console.log("若第二个数为-1,说明拖动的不是元素,而是“文字”", enterItemIndex, nowDragtItemIndex);return;}//Flip动画 - 记录原始位置flipListRef.current?.recordFirst();if (nowDragtItemIndex < enterItemIndex) {// console.log("向下移动");listRef.current.insertBefore(nowDragItem.current, realTarget.nextElementSibling);} else {// console.log("向上移动");listRef.current.insertBefore(nowDragItem.current, realTarget);}//Flip动画 - 播放flipListRef.current?.play();};/**事件委托- 监听 拖拽结束 事件,删除样式,设置当前列表 */const onDragEnd: DragEventHandler<HTMLDivElement> = (e) => {if (!listRef.current) return;/**当前正在被拖拽的元素 */const target = e.target as Element;target.classList.remove(...movingClass); //删除前面添加的 被拖拽元素的样式,回归原样式target.childNodes.forEach((k) => (k as Element).classList?.remove(...opacityClass)); //删除所有子元素的透明样式/**拿到当前DOM的id顺序信息 */const ids = [...listRef.current.children].map((k) => String(k.id)); //根据id,判断到时候应该怎么排序//把列表按照id排序const newList = [...list].sort(function (a, b) {const aIndex = ids.indexOf(String(a[keyName]));const bIndex = ids.indexOf(String(b[keyName]));if (aIndex === -1 && bIndex === -1) return 0;else if (aIndex === -1) return 1;else if (bIndex === -1) return -1;else return aIndex - bIndex;});afterDrag(newList); //触发外界传入的回调函数setDragOpen(false); //拖拽完成后,再次禁止拖拽};/**拖拽按钮组件 */ //只有鼠标悬浮在这上面的时候,才开启拖拽,做到“指定区域拖拽”const DragBox = ({ className, style, children }: baseChildrenProps) => {return (<divstyle={{ ...style }}className={cn("hover:cursor-grabbing", className)}onMouseEnter={() => setDragOpen(true)}onMouseLeave={() => setDragOpen(false)}>{children || <DragIcon size={20} color="#666666" />}</div>);};return (<divclassName={cn(cols === 1 ? "" : "flex flex-wrap", className)}style={style}ref={listRef}onDragStart={onDragStart}onDragEnter={onDragEnter}onDragOver={(e) => e.preventDefault()} //被拖动的对象被拖到其它容器时(因为默认不能拖到其它元素上)onDragEnd={onDragEnd}>{list.map((item, index) => {const key = item[keyName] as string;return (<div id={key} key={key} style={{ width: itemWidth, margin: `4px ${marginX / 2}px` }} draggable={dragOpen} className="my-1">{ItemRender({ item, index, width: itemWidth, DragBox })}</div>);})}</div>);
};
export default DragSort;
6. 效果图的测试用例
一开始展示的效果图的实现代码
"use client";
import { useState } from "react";
import DragSort from "@/components/base/tool/DragSort";
import { Button, InputNumber } from "antd";
export default function page() {interface item {id: number;}const [list, setList] = useState<item[]>([]); //当前列表const [cols, setCols] = useState(1); //一行个数/**创建一个新的元素 */const createNewItem = () => {setList((old) =>old.concat([{id: Date.now(),},]));};return (<div className="p-2 bg-[#a18c83] w-screen h-screen overflow-auto"><Button type="primary" onClick={createNewItem}>点我添加</Button>一行个数: <InputNumber value={cols} min={1} onChange={(v) => setCols(v!)} /><DragSortlist={list}keyName={"id"}cols={cols}marginX={10}afterDrag={(list) => setList(list)}ItemRender={({ item, index, DragBox }) => {return (<div className="flex items-center border rounded-sm p-2 gap-1 bg-white"><DragBox /><div>序号:{index},</div><div>ID:{item.id}</div>{/* <DragBox className="bg-stone-400 text-white p-1">自定义拖拽位置</DragBox> */}</div>);}}/></div>);
}
四、结语
哪里做的不好、有bug等,欢迎指出

![[Machine Learning][Part 8]神经网络的学习训练过程](https://img-blog.csdnimg.cn/ad872654c35e4ac6954852d5d8a590f3.png)


