qt实现一个安卓测试小工具
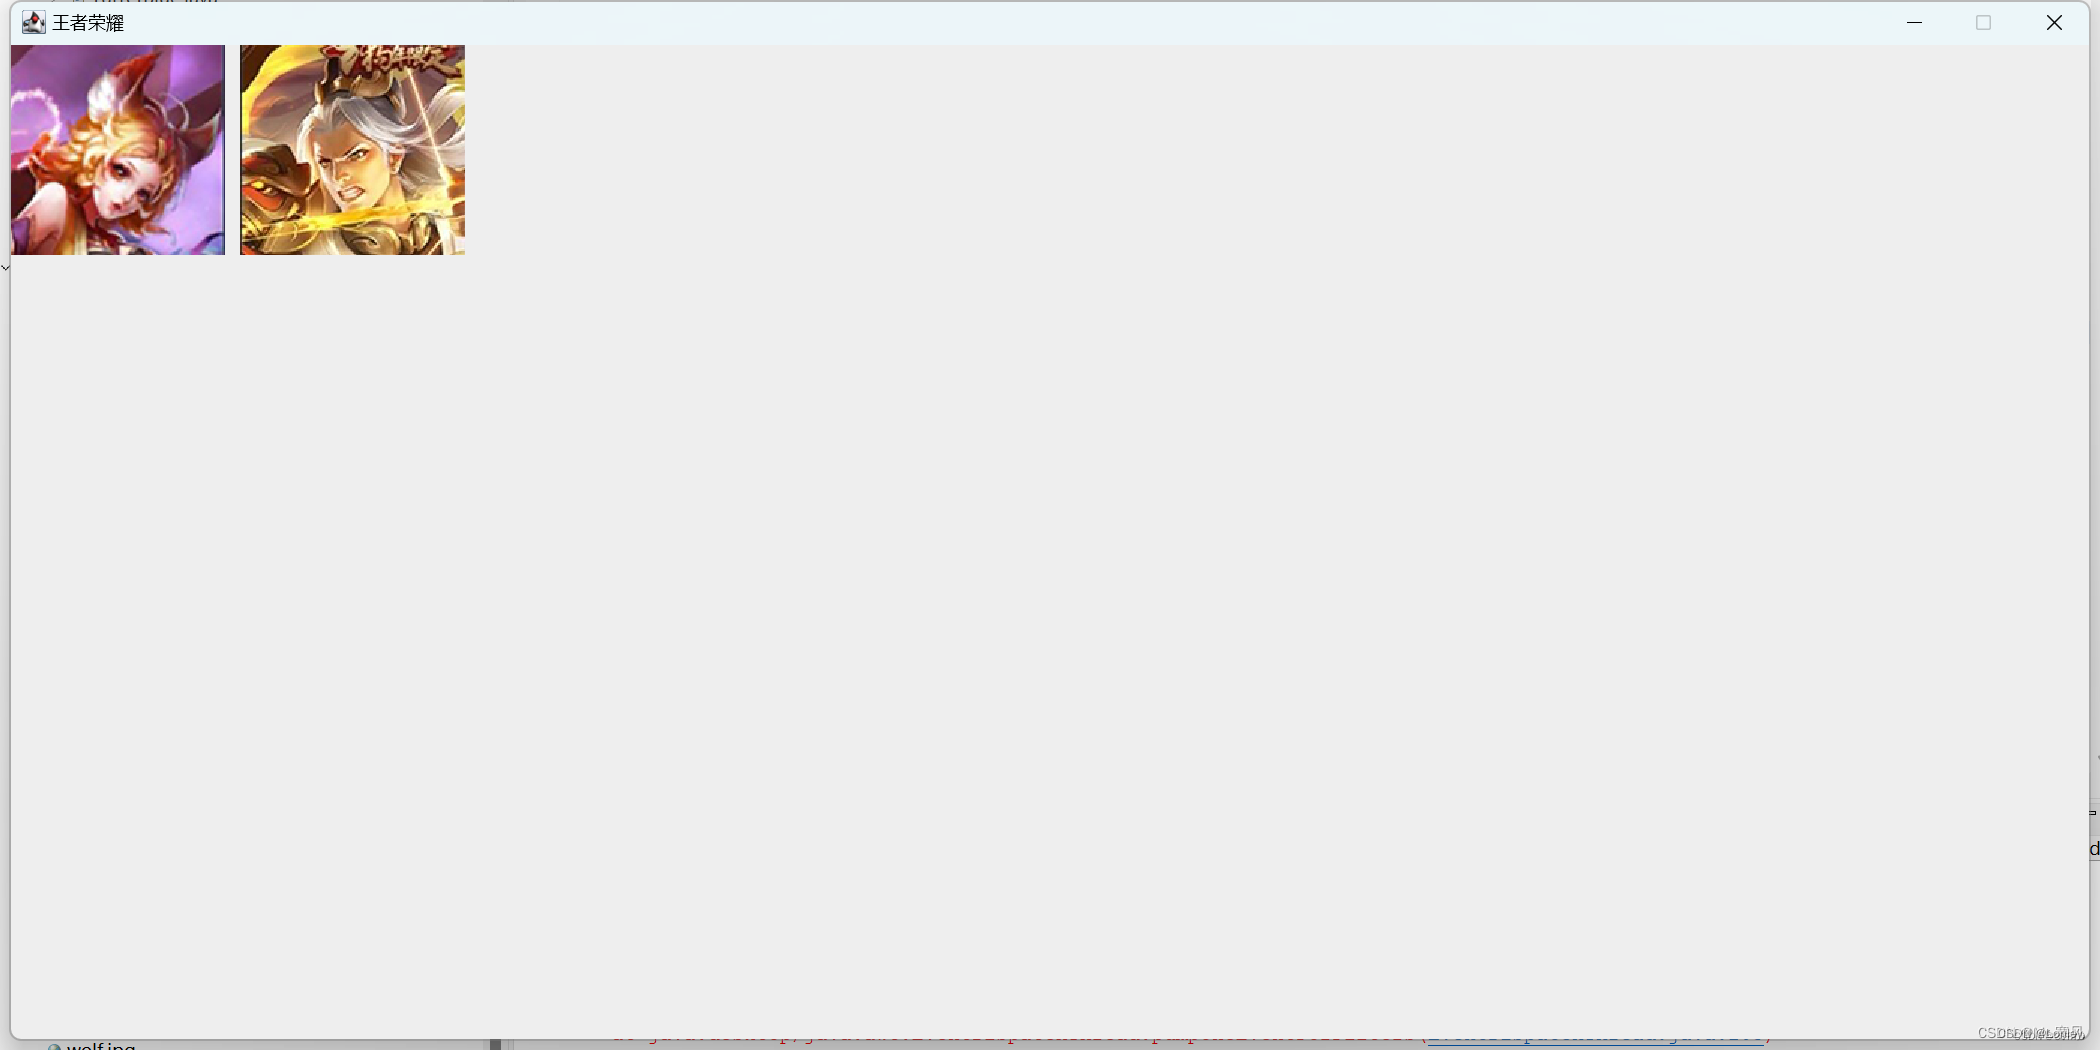
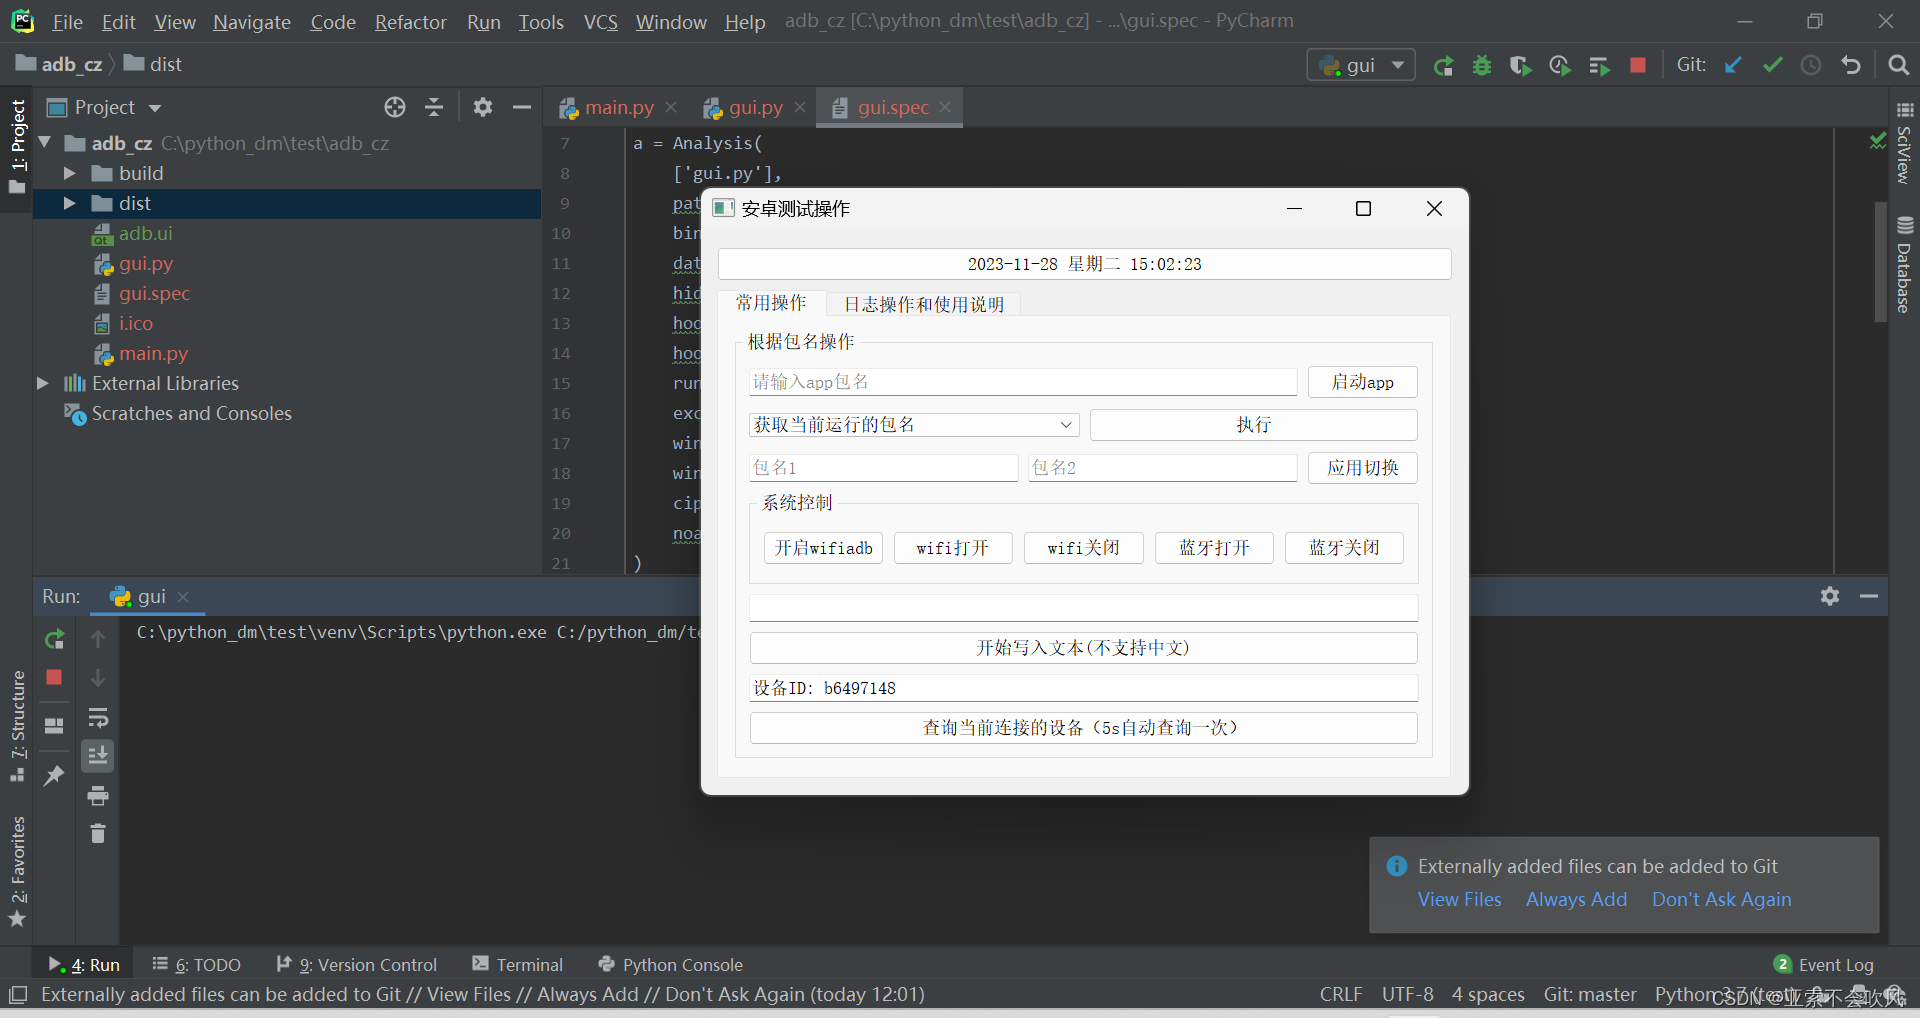
- 最终效果:
- 目录结构
- 源码
- gui.py 主要是按钮,文本控制代码
- main.py 主要是逻辑代码
- gui.spec 是打包使用的
- adb.ui
- 打包为exe
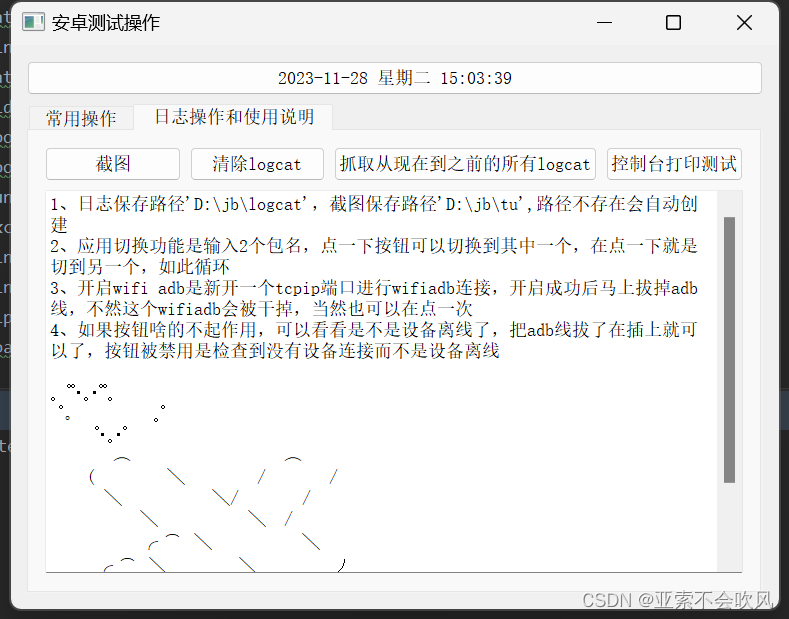
最终效果:
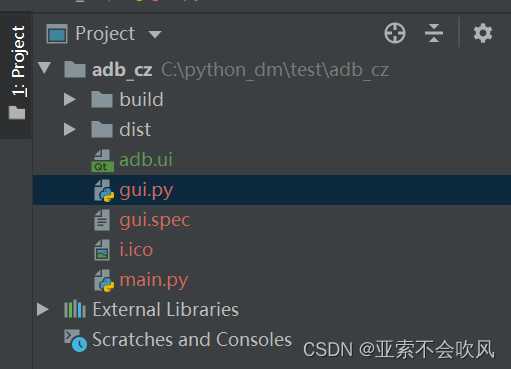
目录结构
上面2个是打包的生成的不用管
源码
gui.py 主要是按钮,文本控制代码
from PySide2.QtCore import QTimer, QTime, QDateTime
from PySide2.QtWidgets import QApplication, QMessageBox
from PySide2.QtUiTools import QUiLoader
from main import PackNameOperate, Log, wifi_adb_connect, Devices, input_text,LogcatManager,capture_screenshot
import os, sys
import subprocessdev = Devices()
log=LogcatManager('D:/jb/logcat')def processPath(path):''':param path: 相对于根目录的路径:return: 拼接好的路径'''if getattr(sys, 'frozen', False):  # 判断是否存在属性frozen,以此判断是打包的程序还是源代码。false为默认值,即没有frozen属性时返回falsebase_path = sys._MEIPASS  # 该属性也是打包程序才会有,源代码尝试获取该属性会报错else:base_path = os.path.abspath(".")  # 当源代码运行时使用该路径return os.path.join(base_path, path)txt=r'''1、日志保存路径'D:\jb\logcat',截图保存路径'D:\jb\tu',路径不存在会自动创建
2、应用切换功能是输入2个包名,点一下按钮可以切换到其中一个,在点一下就是切到另一个,如此循环
3、开启wifi adb是新开一个tcpip端口进行wifiadb连接,开启成功后马上拔掉adb线,不然这个wifiadb会被干掉,当然也可以在点一次
4、如果按钮啥的不起作用,可以看看是不是设备离线了,把adb线拔了在插上就可以了,按钮被禁用是检查到没有设备连接而不是设备离线。 ゚゚・。・゚゚。       ゚。        。゚    ゚・。・゚    ︵                 ︵(        ╲        /       /╲          ╲/       /╲          ╲  /╭ ͡   ╲          ╲╭ ͡   ╲        ╲         ノ
╭ ͡   ╲        ╲         ╱╲
'''
class Stats:def __init__(self):self.kill_list = ['获取当前运行的包名','杀掉当前启动的app','清除当前app缓存信息', '清楚缓存并且杀掉app', '清楚缓存并且杀掉app并且重新启动']self.ui = QUiLoader().load(processPath('adb.ui'))# 下拉框添加内容self.ui.kill_apps.addItems(self.kill_list)# 按钮点击事件self.ui.qd_app.clicked.connect(self.qd)self.ui.zx.clicked.connect(self.kill)self.ui.get_log.clicked.connect(self.log)self.ui.disable.clicked.connect(self.wifi_disable)self.ui.enable.clicked.connect(self.wifi_enable)self.ui.bk.clicked.connect(self.bluetooth_enable)self.ui.bg.clicked.connect(self.bluetooth_disable)self.ui.huqie.clicked.connect(self.hq)self.ui.wifi_adb.clicked.connect(self.wifi_adb_)self.ui.write_in.clicked.connect(self.text_write_in)self.ui.get_device.clicked.connect(self.devices)self.ui.suoyou.clicked.connect(self.suoyou_log)self.ui.dell.clicked.connect(self.del_log)self.ui.time.clicked.connect(self.yl)self.ui.jt.clicked.connect(self.jietu)self.timer1 = QTimer()self.timer1.setInterval(5000)  # 设置定时器1的触发间隔为3秒self.timer1.timeout.connect(self.devices)self.timer1.start()self.devices()self.timer2 = QTimer()self.timer2.setInterval(1000)  # 设置定时器2的触发间隔为1秒self.timer2.timeout.connect(self.update_button_text)self.timer2.start()self.update_button_text()  # 初始self.ui.ttt.setPlainText(txt)def update_button_text(self):current_datetime = QDateTime.currentDateTime()time_text = current_datetime.toString('yyyy-MM-dd dddd hh:mm:ss')self.ui.time.setText(time_text)def check_adb_connection(self, d):'''控制按钮是否都可用'''buttons = [self.ui.qd_app,self.ui.zx,self.ui.get_log,self.ui.disable,self.ui.enable,self.ui.bk,self.ui.bg,self.ui.huqie,self.ui.wifi_adb,self.ui.write_in,self.ui.get_device,self.ui.suoyou,self.ui.dell,self.ui.time,self.ui.jt]for button in buttons:button.setEnabled(d)def qd(self):'''app根据包名启动'''pack_name = self.ui.pack_name.text()if PackNameOperate.pack_name_start(pack_name) == 1:QMessageBox.critical(self.ui, '包名错误', '请检查包名是否输入正确!')else:QMessageBox.information(self.ui, '操作成功', f'{pack_name}启动完成')# QMessageBox.close()def kill(self):'''app杀后台,清除缓存,启动等组合操作'''xz = self.ui.kill_apps.currentText()index = self.kill_list.index(xz)if PackNameOperate.kill_app(index) == 0:QMessageBox.information(self.ui, '操作成功', f'"{xz}"执行完成')elif '包名' in PackNameOperate.kill_app(index):QMessageBox.information(self.ui, '操作成功', PackNameOperate.kill_app(index))else:QMessageBox.critical(self.ui, '错误', '设备未连接或者未启动adb模式')def log(self):'''抓日志'''Log.test()def wifi_enable(self):subprocess.getoutput('adb shell svc wifi enable')QMessageBox.information(self.ui, '操作成功', f'wifi已打开')def wifi_disable(self):subprocess.getoutput('adb shell svc wifi disable')QMessageBox.information(self.ui, '操作成功', f'wifi已关闭')def bluetooth_enable(self):subprocess.getoutput('adb shell svc bluetooth enable')QMessageBox.information(self.ui, '操作成功', f'帅哥蓝牙已打开')def bluetooth_disable(self):subprocess.getoutput('adb shell svc bluetooth disable')QMessageBox.information(self.ui, '操作成功', f'蓝牙已关闭')def wifi_adb_(self):ml = wifi_adb_connect()if ml[0]==0:QMessageBox.information(self.ui, '操作成功', f'已经连接wifiadb成功,命令为:{ml[1]},请3s内拔掉adb线')else:QMessageBox.information(self.ui, '操作失败', f'开启失败,命令为:{ml[1]},未获取到ip信息,检查是否处于同一个wifi')def text_write_in(self):text = self.ui.text.text()input_text(text)# subprocess.run(['adb', 'shell', 'input', 'text', text])QMessageBox.information(self.ui, '操作成功', '写入完成')def jietu(self):capture_screenshot()QMessageBox.information(self.ui, '操作成功', '截图成功')def devices(self):d = dev.dev_id()'''获取当前连接的设备id'''if d[0] == 0:devices_info = d[1]self.check_adb_connection(True)elif d[0] == 00:devices_info = d[1]self.check_adb_connection(True)else:devices_info = d[1]self.check_adb_connection(False)self.ui.device.setText(str(devices_info))def suoyou_log(self):log.save_logcat()QMessageBox.information(self.ui, '操作成功', '日志导出完成')def del_log(self):log.clear_logcat()QMessageBox.information(self.ui, '操作成功', '日志清除完成')def yl(self):QMessageBox.information(self.ui, '嘿嘿', '要天天开心呀')def hq(self):'''2个应用互切'''pack_1 = self.ui.pack1.text()pack_2 = self.ui.pack2.text()print(pack_1, pack_2)if pack_1 == '':QMessageBox.information(self.ui, '操作失败', '包名1填下,谢谢')elif pack_2 == '':QMessageBox.information(self.ui, '操作失败', '包名2填下,谢谢')elif PackNameOperate.huqie(pack_1, pack_2) == 11:QMessageBox.information(self.ui, '操作失败', f'找不到{pack_1}这个包')elif PackNameOperate.huqie(pack_1, pack_2) == 12:QMessageBox.information(self.ui, '操作失败', f'找不到{pack_2}这个包')elif PackNameOperate.huqie(pack_1, pack_2) == 1:QMessageBox.information(self.ui, '操作失败', '当前运行的应用不是输入自定义的2个互切应用')elif pack_1 == pack_2:QMessageBox.information(self.ui, '操作成功', '一个包写2遍没太大必要啊')else:QMessageBox.information(self.ui, '操作成功', '切换完成')app = QApplication([])
stats = Stats()
stats.ui.show()
app.exec_()
main.py 主要是逻辑代码
import os
import re
import shutil
import subprocess
import time
from time import sleep
import datetimeclass PackNameOperate():@classmethoddef pack_name_start(cls, pack_name):'''根据包名启动app'''output = subprocess.getoutput(f'adb shell monkey -p {pack_name} --throttle 1 -s 2 -v -v -v 1')if 'No activities found to run, monkey aborted' in output:print('车机不存在该包名,请检查包名是否输入正确')return 1else:return 0@classmethoddef kill_app(cls, l):''':param l: 0不输入是获取当前运行的包名,1是杀掉当前启动的app,2是清除当前app缓存信息,3是清楚缓存并且杀掉app,4是根据上一个前三个操作的包名启动app:return:'''output = subprocess.getoutput('adb shell dumpsys window | findstr mCurrentFocus')if not output == '':try:pack_name = 'com.' + re.findall(r'com.(.*?)/com', output)[0]except:pack_name = 'com.' + re.findall(r'com.(.*?)/io', output)[0]if l == 0:print(f'当前运行的包名是{pack_name}')return f'当前运行的包名是{pack_name}'if l == 1:subprocess.getoutput(f'adb shell am force-stop {pack_name}')print(f'包名为{pack_name}的app已经杀掉')elif l == 2:subprocess.getoutput(f'adb shell pm clear {pack_name}')print(f'包名为{pack_name}的app缓存清楚成功')elif l == 3:subprocess.getoutput(f'adb shell pm clear {pack_name}')subprocess.getoutput(f'adb shell am force-stop {pack_name}')print(f'包名为{pack_name}的app清楚缓存并且杀掉成功')elif l == 4:subprocess.getoutput(f'adb shell pm clear {pack_name}')subprocess.getoutput(f'adb shell am force-stop {pack_name}')cls.pack_name_start(pack_name)print(f'包名为{pack_name}的app清楚缓存并且杀掉成功')print(f'{pack_name}重新启动完成')return 0print('设备未连接或者未启动adb模式')return 1@classmethoddef get_pack_name(cls):output = subprocess.getoutput('adb shell dumpsys window | findstr mCurrentFocus')try:pack_name = 'com.' + re.findall(r'com.(.*?)/com', output)[0]except:pack_name = 'com.' + re.findall(r'com.(.*?)/io', output)[0]# print(f'当前运行的包名是{pack_name}')return pack_name@classmethoddef huqie(cls, pack1, pack2):a = cls.get_pack_name()print(f'当前在运行的包名{a}')if a == pack1:if cls.pack_name_start(pack2) == 1:# 说明包名不对return 12elif a == pack2:if cls.pack_name_start(pack1) == 1:return 11else:print('当前运行的应用不输入自定义的2个互切应用')return 1class Log():@classmethoddef test(cls):for i in range(4):sleep(0.3)print(f'控制台打印{i}')# @classmethod# def move_file(cls, besave_dir=ys__log_path, fm='zip'):#     """#     将文件夹压缩成指定格式的压缩包#     :param besave_dir: 压缩文件夹的目录 如 ---r"D:\log_dir"#     :param format: 压缩的格式:"zip", "tar", "gztar","bztar", "xztar"#     :return:#     """#     if os.path.exists(besave_dir):#         zip_name = shutil.make_archive(besave_dir, f'{fm}', besave_dir)#         print(zip_name)  # 返回文件的最终路径## @classmethod# def del_dir(cls, dir_path=pc_log_path):#     '''删除目录下所有文件'''#     for filename in os.listdir(dir_path):#         file_path = os.path.join(dir_path, filename)#         if os.path.isfile(file_path) or os.path.islink(file_path):#             os.unlink(file_path)#         elif os.path.isdir(file_path):#             shutil.rmtree(file_path)## @classmethod# def log(cls):#     cls.del_dir()#     subprocess.getoutput(f'adb pull {cj_log_path} {pc_log_path}')#     cls.move_file()# Log.test()def wifi_adb_connect():def get_car_wifi_ip():process = subprocess.run(['adb', 'shell', 'ifconfig', 'wlan0'], capture_output=True, text=True)output = process.stdout.strip()ip_line = [line for line in output.split('\n') if 'inet addr' in line]if len(ip_line) > 0:ip = ip_line[0].split()[1].split(':')[1]subprocess.run(['adb', 'tcpip', '6666'])print(f'端口号6666')return ipelse:return None# 使用示例:获取车机的WiFi IPcar_wifi_ip = get_car_wifi_ip()print(car_wifi_ip)# ip = car_wifi_ipsubprocess.run(['adb', 'disconnect'])subprocess.run(['adb', 'connect', f'{car_wifi_ip}:6666'])# 获取连接状态输出result = subprocess.run(['adb', 'devices'], capture_output=True, text=True)output = result.stdout.strip().encode('utf-8').decode('gbk')print(output)if '不知道这样的主机' in output:return 1,outputelse:return 0, f'adb connect {car_wifi_ip}:6666'class Devices:def check_adb_connection(self):try:# 检查连接状态command = 'adb devices'output = subprocess.check_output(command.split()).decode().strip()# 检查输出结果中是否包含设备列表if 'List of devices attached' in output:# 提取设备列表devices = output.split('\n')[1:]# 检查设备列表是否为空if len(devices) > 0:# 提取所有设备的设备IDdevice_ids = [device.split('\t')[0] for device in devices]return device_idselse:return Noneelse:return Noneexcept subprocess.CalledProcessError:return Nonedef dev_id(self):device_ids = self.check_adb_connection()# if 'offline' in subprocess.getoutput(f'adb shell'):#     subprocess.run(['adb', 'kill-server'])#     time.sleep(1)#     subprocess.run(['adb', 'start-server'])#     print('检测到设备离线,重启adb服务解决中')if device_ids is not None:if len(device_ids) == 1:# print(f"设备ID: {device_ids[0]}")return 0, f"设备ID: {device_ids[0]}"elif len(device_ids) > 1 :# 清除所有连接subprocess.run(['adb', 'disconnect'])# print(f'干掉了{device_ids[1:]}等设备')return 00, f"设备ID: {device_ids[0]},干掉了{device_ids[1:]}等设备"else:return 1else:# print("ADB未成功连接到任何设备")return 1, "ADB未成功连接到任何设备,按钮全部禁用"def input_text(text):# 转义特殊字符text = text.replace('\\', '\\\\').replace('"', '\\"')# 执行 adb shell input text 命令subprocess.run(['adb', 'shell', 'input', 'text', f'"{text}"'])class LogcatManager:def __init__(self, save_directory):self.save_directory = save_directorydef _get_device_info(self):# 获取设备的Android版本android_version_cmd = ['adb', 'shell', 'getprop', 'ro.build.version.release']android_version_process = subprocess.Popen(android_version_cmd, stdout=subprocess.PIPE, stderr=subprocess.PIPE,universal_newlines=True)android_version_output, _ = android_version_process.communicate()android_version = android_version_output.strip()# 获取屏幕分辨率screen_resolution_cmd = ['adb', 'shell', 'wm', 'size']screen_resolution_process = subprocess.Popen(screen_resolution_cmd, stdout=subprocess.PIPE,stderr=subprocess.PIPE, universal_newlines=True)screen_resolution_output, _ = screen_resolution_process.communicate()screen_resolution = screen_resolution_output.strip().split()[2]# 获取系统版本信息system_info_cmd = ['adb', 'shell', 'getprop', 'ro.build.description']system_info_process = subprocess.Popen(system_info_cmd, stdout=subprocess.PIPE, stderr=subprocess.PIPE,universal_newlines=True)system_info_output, _ = system_info_process.communicate()system_info = system_info_output.strip()return android_version, screen_resolution, system_infodef _create_directory(self, directory):if not os.path.exists(directory):os.makedirs(directory)def _get_current_time(self):return datetime.datetime.now().strftime('%Y-%m-%d-%H-%M-%S')def _build_file_name(self, android_version, screen_resolution, system_info):current_time = self._get_current_time()file_name = f'{current_time}.Android{android_version}.{screen_resolution}.{system_info}.logcat.txt'return file_namedef _build_file_path(self, file_name):file_path = os.path.join(self.save_directory, file_name)return file_pathdef _export_logcat(self, file_path):# 执行 adb logcat -d 命令,导出日志到文件cmd = ['adb', 'logcat', '-d']process = subprocess.Popen(cmd, stdout=subprocess.PIPE, stderr=subprocess.PIPE)# 检查目录是否存在,如果不存在则创建目录self._create_directory(self.save_directory)try:with open(file_path, 'wb') as file:for line in process.stdout:file.write(line)print(f'Logcat已成功导出到文件:{file_path}')except Exception as e:print(f'保存Logcat文件时发生错误:{e}')def save_logcat(self):# 获取设备信息android_version, screen_resolution, system_info = self._get_device_info()# 构建文件名file_name = self._build_file_name(android_version, screen_resolution, system_info)# 构建完整的文件路径file_path = self._build_file_path(file_name)# 导出Logcat并保存到文件self._export_logcat(file_path)# return 'Logcat已成功导出成功'## def save_realtime_logcat(self):#     # 获取设备信息#     android_version, screen_resolution, system_info = self._get_device_info()##     # 构建文件名#     file_name = self._build_file_name(android_version, screen_resolution, system_info)##     # 构建完整的文件路径#     file_path = self._build_file_path(file_name)#     # 执行 adb logcat 命令,实时保存日志到文件#     cmd = ['adb', 'logcat']#     print(f'实时保存的Logcat已成功保存到文件:{file_path}')#     with open(file_path, 'w') as file:#         process = subprocess.Popen(cmd, stdout=file, stderr=subprocess.PIPE, universal_newlines=True)#         try:#             process.wait()#         except KeyboardInterrupt:#             process.terminate()def clear_logcat(self):# 执行 adb shell logcat -c 命令,清除Logcat日志cmd = ['adb', 'shell', 'logcat', '-c']subprocess.run(cmd)print('Logcat日志已清除')# return 'Logcat日志已清除'
def capture_screenshot():from datetime import datetime# 获取当前时间并格式化为字符串current_time = datetime.now().strftime("%Y-%m-%d-%H_%M_%S")# 创建目录directory = "D:/jb/tu/"os.makedirs(directory, exist_ok=True)# 执行ADB命令进行截图subprocess.run(["adb", "shell", "screencap", "-p", "/sdcard/screenshot.png"])# 将截图文件复制到本地目录local_path = os.path.join(directory, f"{current_time}.png")subprocess.run(["adb", "pull", "/sdcard/screenshot.png", local_path])return 0
gui.spec 是打包使用的
# -*- mode: python ; coding: utf-8 -*-block_cipher = Nonea = Analysis(['gui.py'],pathex=[],binaries=[],datas=[('adb.ui','.')],hiddenimports=[],hookspath=[],hooksconfig={},runtime_hooks=[],excludes=[],win_no_prefer_redirects=False,win_private_assemblies=False,cipher=block_cipher,noarchive=False,
)
pyz = PYZ(a.pure, a.zipped_data, cipher=block_cipher)exe = EXE(pyz,a.scripts,a.binaries,a.zipfiles,a.datas,[],name='shy',debug=False,bootloader_ignore_signals=False,strip=False,upx=True,upx_exclude=[],runtime_tmpdir=None,console=True,disable_windowed_traceback=False,argv_emulation=False,target_arch=None,codesign_identity=None,entitlements_file=None,icon=['i.ico'],
)
adb.ui
是qt设计师生成的ui界面,设置属性配合代码操作
<?xml version="1.0" encoding="UTF-8"?>
<ui version="4.0"><class>adb_shell</class><widget class="QWidget" name="adb_shell"><property name="geometry"><rect><x>0</x><y>0</y><width>768</width><height>564</height></rect></property><property name="windowTitle"><string>安卓测试操作</string></property><layout class="QVBoxLayout" name="verticalLayout_4"><item><widget class="QPushButton" name="time"><property name="text"><string>时间</string></property></widget></item><item><widget class="QTabWidget" name="tabWidget"><property name="currentIndex"><number>0</number></property><widget class="QWidget" name="widget"><property name="minimumSize"><size><width>0</width><height>18</height></size></property><attribute name="title"><string>常用操作</string></attribute><layout class="QVBoxLayout" name="verticalLayout_2"><item><widget class="QGroupBox" name="groupBox"><property name="title"><string>根据包名操作</string></property><layout class="QVBoxLayout" name="verticalLayout"><item><layout class="QHBoxLayout" name="horizontalLayout"><item><widget class="QLineEdit" name="pack_name"><property name="placeholderText"><string>请输入app包名</string></property></widget></item><item><widget class="QPushButton" name="qd_app"><property name="text"><string>启动app</string></property></widget></item></layout></item><item><layout class="QHBoxLayout" name="horizontalLayout_2"><item><widget class="QComboBox" name="kill_apps"/></item><item><widget class="QPushButton" name="zx"><property name="text"><string>执行</string></property></widget></item></layout></item><item><layout class="QHBoxLayout" name="horizontalLayout_3"><item><widget class="QLineEdit" name="pack1"><property name="placeholderText"><string>包名1</string></property></widget></item><item><widget class="QLineEdit" name="pack2"><property name="placeholderText"><string>包名2</string></property></widget></item><item><widget class="QPushButton" name="huqie"><property name="text"><string>应用切换</string></property></widget></item></layout></item><item><widget class="QGroupBox" name="groupBox_3"><property name="title"><string>系统控制</string></property><layout class="QVBoxLayout" name="verticalLayout_3"><item><layout class="QHBoxLayout" name="horizontalLayout_4"><item><widget class="QPushButton" name="wifi_adb"><property name="text"><string>开启wifiadb</string></property></widget></item><item><widget class="QPushButton" name="enable"><property name="text"><string>wifi打开</string></property></widget></item><item><widget class="QPushButton" name="disable"><property name="text"><string>wifi关闭</string></property></widget></item><item><widget class="QPushButton" name="bk"><property name="text"><string>蓝牙打开</string></property></widget></item><item><widget class="QPushButton" name="bg"><property name="text"><string>蓝牙关闭</string></property></widget></item></layout></item></layout></widget></item><item><widget class="QLineEdit" name="text"/></item><item><widget class="QPushButton" name="write_in"><property name="text"><string>开始写入文本(不支持中文)</string></property></widget></item><item><widget class="QLineEdit" name="device"><property name="text"><string/></property></widget></item><item><widget class="QPushButton" name="get_device"><property name="text"><string>查询当前连接的设备(5s自动查询一次)</string></property></widget></item></layout></widget></item></layout></widget><widget class="QWidget" name="tab_6"><attribute name="title"><string>日志操作和使用说明</string></attribute><layout class="QVBoxLayout" name="verticalLayout_6"><item><layout class="QVBoxLayout" name="verticalLayout_5"><item><layout class="QHBoxLayout" name="horizontalLayout_5"><item><widget class="QPushButton" name="jt"><property name="text"><string>截图</string></property></widget></item><item><widget class="QPushButton" name="dell"><property name="text"><string>清除logcat</string></property></widget></item><item><widget class="QPushButton" name="suoyou"><property name="text"><string>抓取从现在到之前的所有logcat</string></property></widget></item><item><widget class="QPushButton" name="get_log"><property name="text"><string>控制台打印测试</string></property><property name="iconSize"><size><width>10</width><height>10</height></size></property></widget></item></layout></item><item><widget class="QPlainTextEdit" name="ttt"><property name="readOnly"><bool>true</bool></property></widget></item></layout></item></layout></widget></widget></item></layout></widget><resources/><connections/>
</ui>
打包为exe
https://blog.csdn.net/aaaaaaaaanjjj/article/details/134157127