一.环境;
win10,vmware16 pro,openeular23.09,linux内核 6.4.0-10.1.0.20.oe2309.x86_64,
docker-engine 2:18.09.0-328,kubernetes 1.25.3,containerd 1.6.22,calico v3.25
集群模式:一主二从
| 主机名 | IP | 角色 | CPU | 内存 | 硬盘 |
| k8s-master01 | 192.168.91.100 | master | 4C | 4G | 40G |
| k8s-worker02 | 192.168.91.101 | worker(node) | 4C | 4G | 40G |
| k8s-worker03 | 192.168.91.102 | worker(node) | 4C | 4G | 40G |
# 查看linux内核版本
uname -r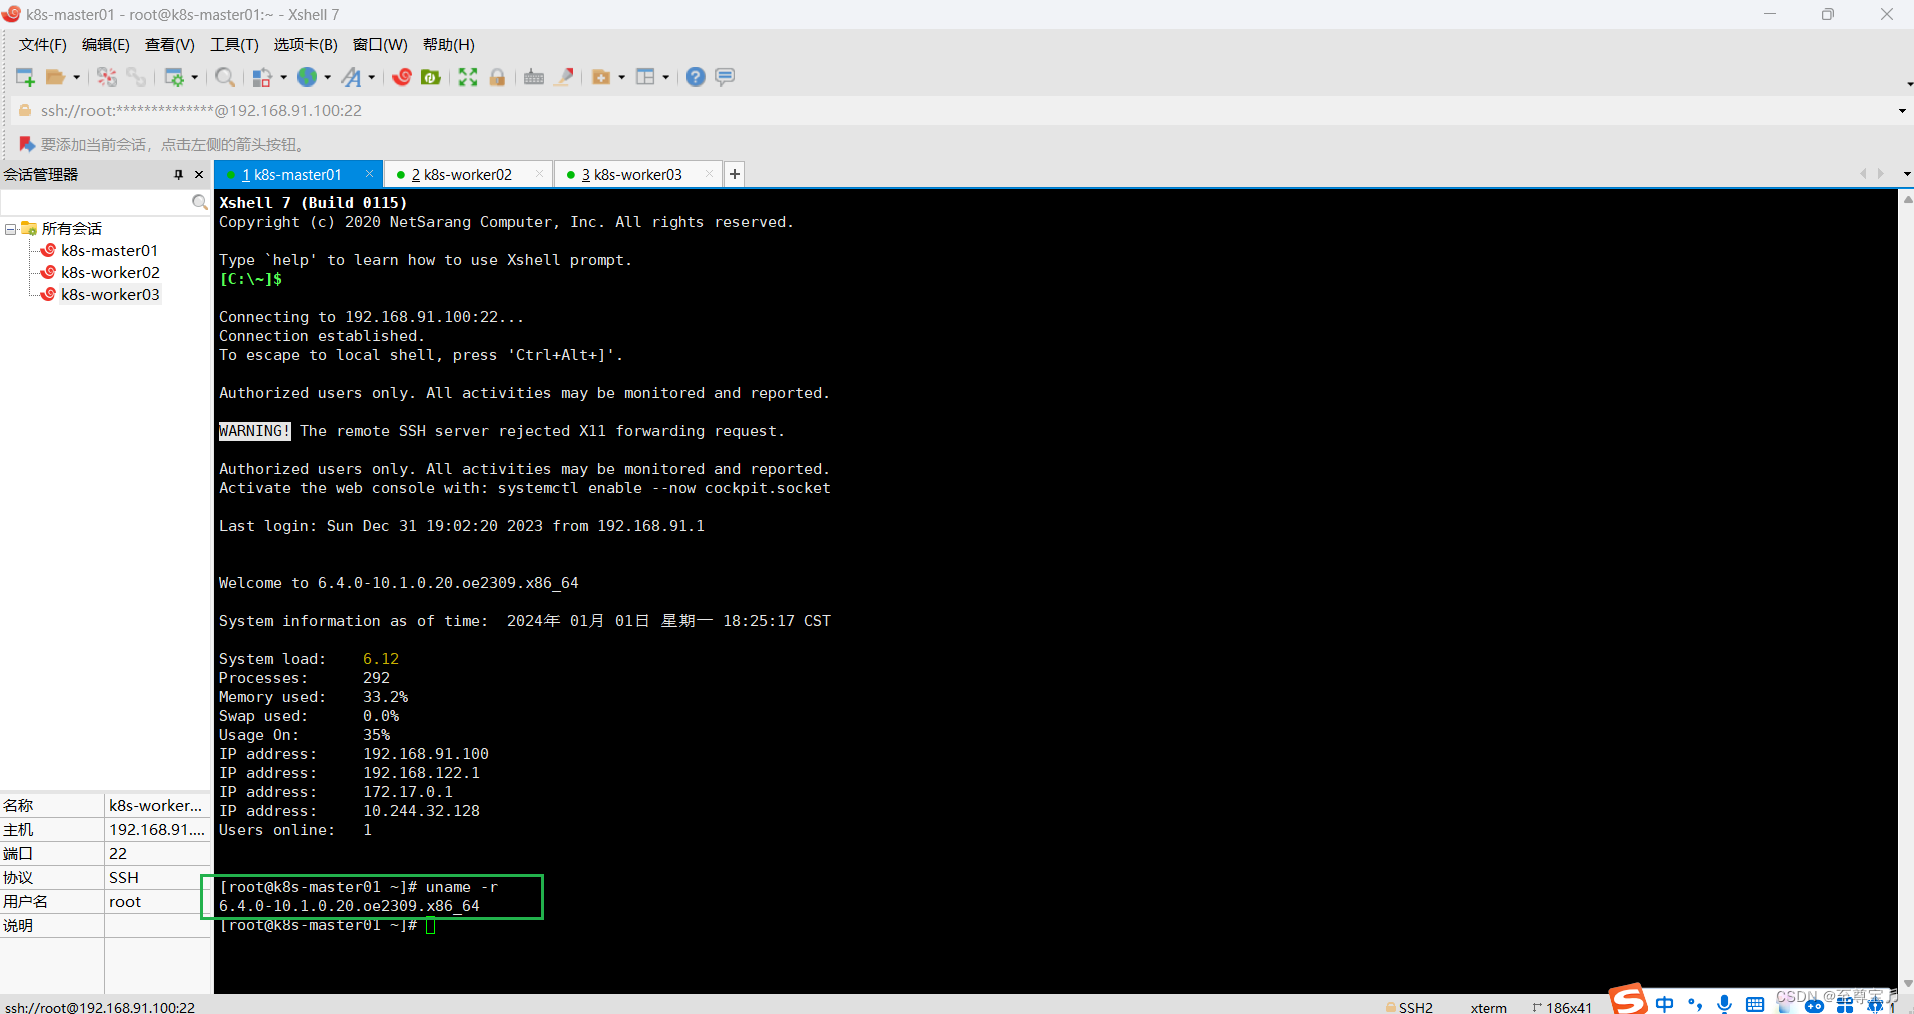
二.openEuler集群搭建;
单机版operEuler安装及配置按下面链接逐步操作即可;
VMware16 pro 安装openEuler-23.09-x86_64,详细操作流程+详图。-CSDN博客文章浏览阅读174次,点赞5次,收藏4次。那么这个空间设置成内存的2倍大小。点击IPv4设置--手动--添加--设置ip--设置DNS服务器,最后点击--“保存”;首先选中--“本地标准磁盘”,存储配置--自定义分区,点击--“完成”;在--主机名--设置主机名:(例如k8s-master01),点击--点击+,设置--挂载点/boot--期望容量,点击--添加挂载点;点击--+--挂载点swap--期望容量,点击--“添加挂载点”;默认选择--亚洲--上海,并调整日期和时间,点击--“完成”;设备类型--确认--LVM,卷组--选择“修改”;https://blog.csdn.net/shanxiderenheni/article/details/135247321
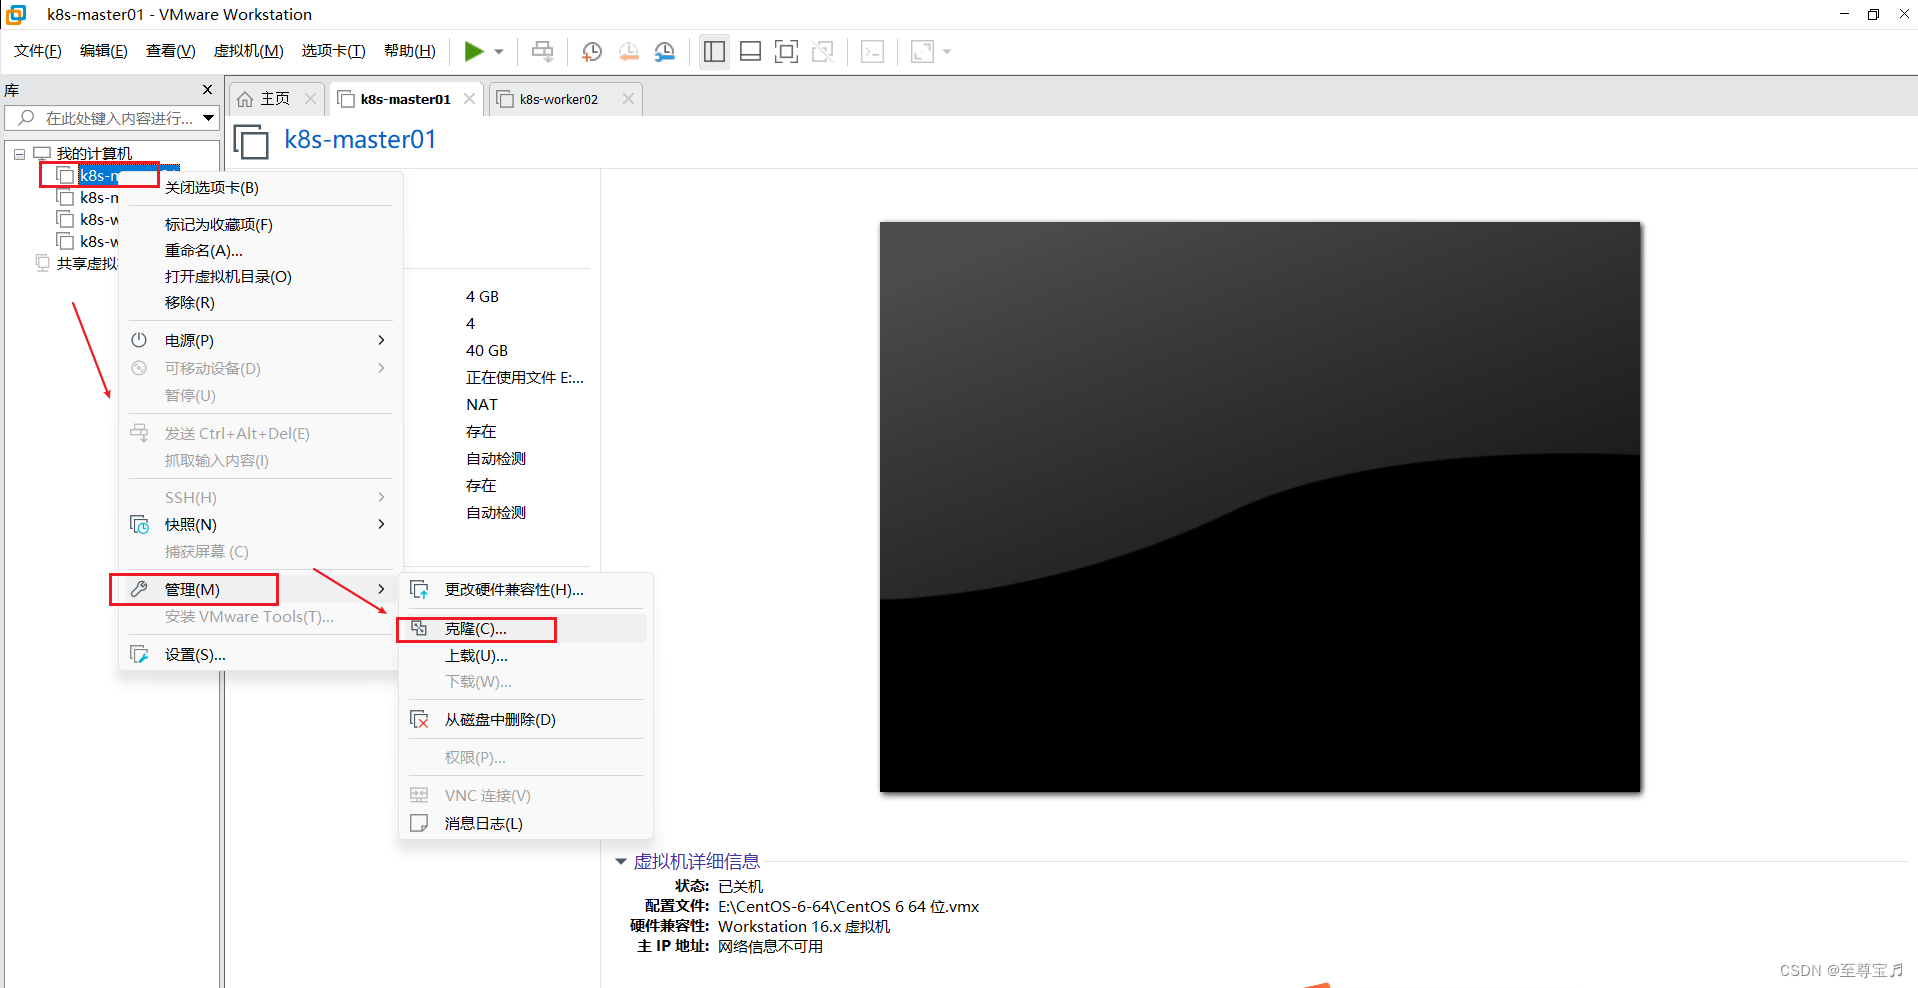
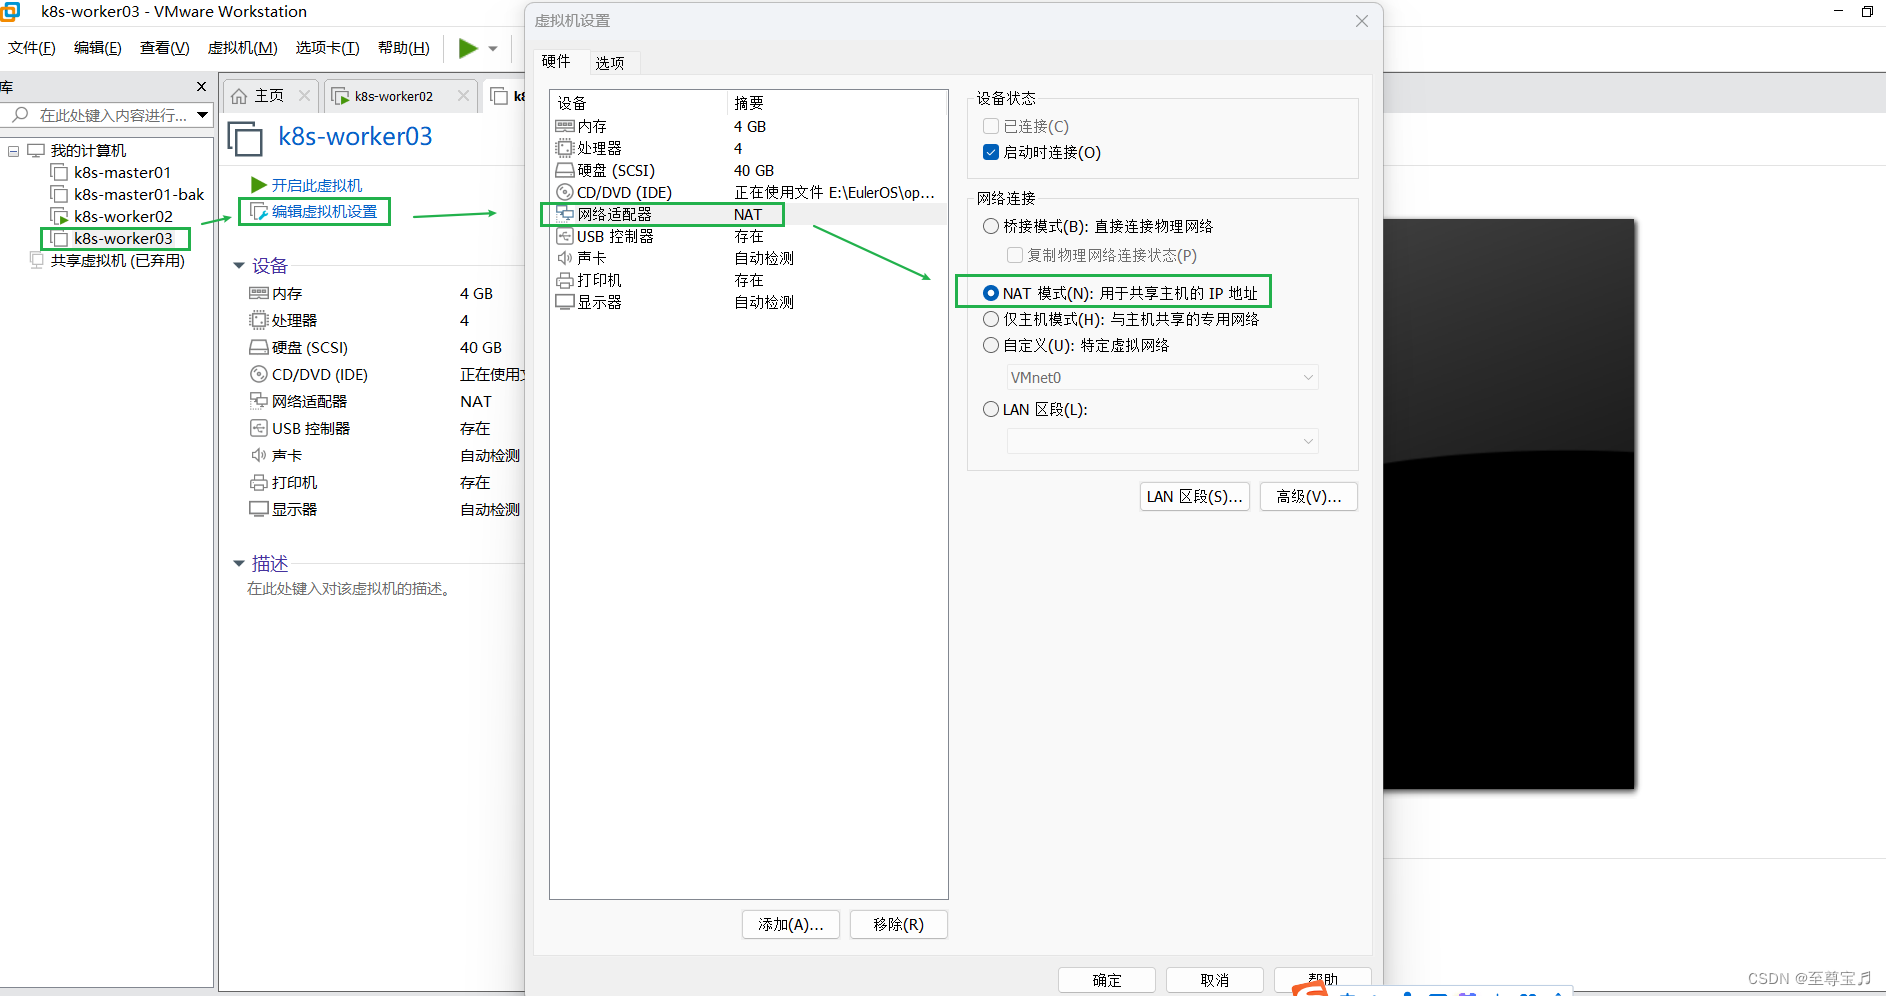
1.节点克隆;
搭建好主节点k8s-master01,先关机,再按照下图右键操作,克隆出两个工作节点k8s-worker02和k8s-worker03;(此时,三台虚拟机的账户,密码,IP,网络等信息都是一样的)
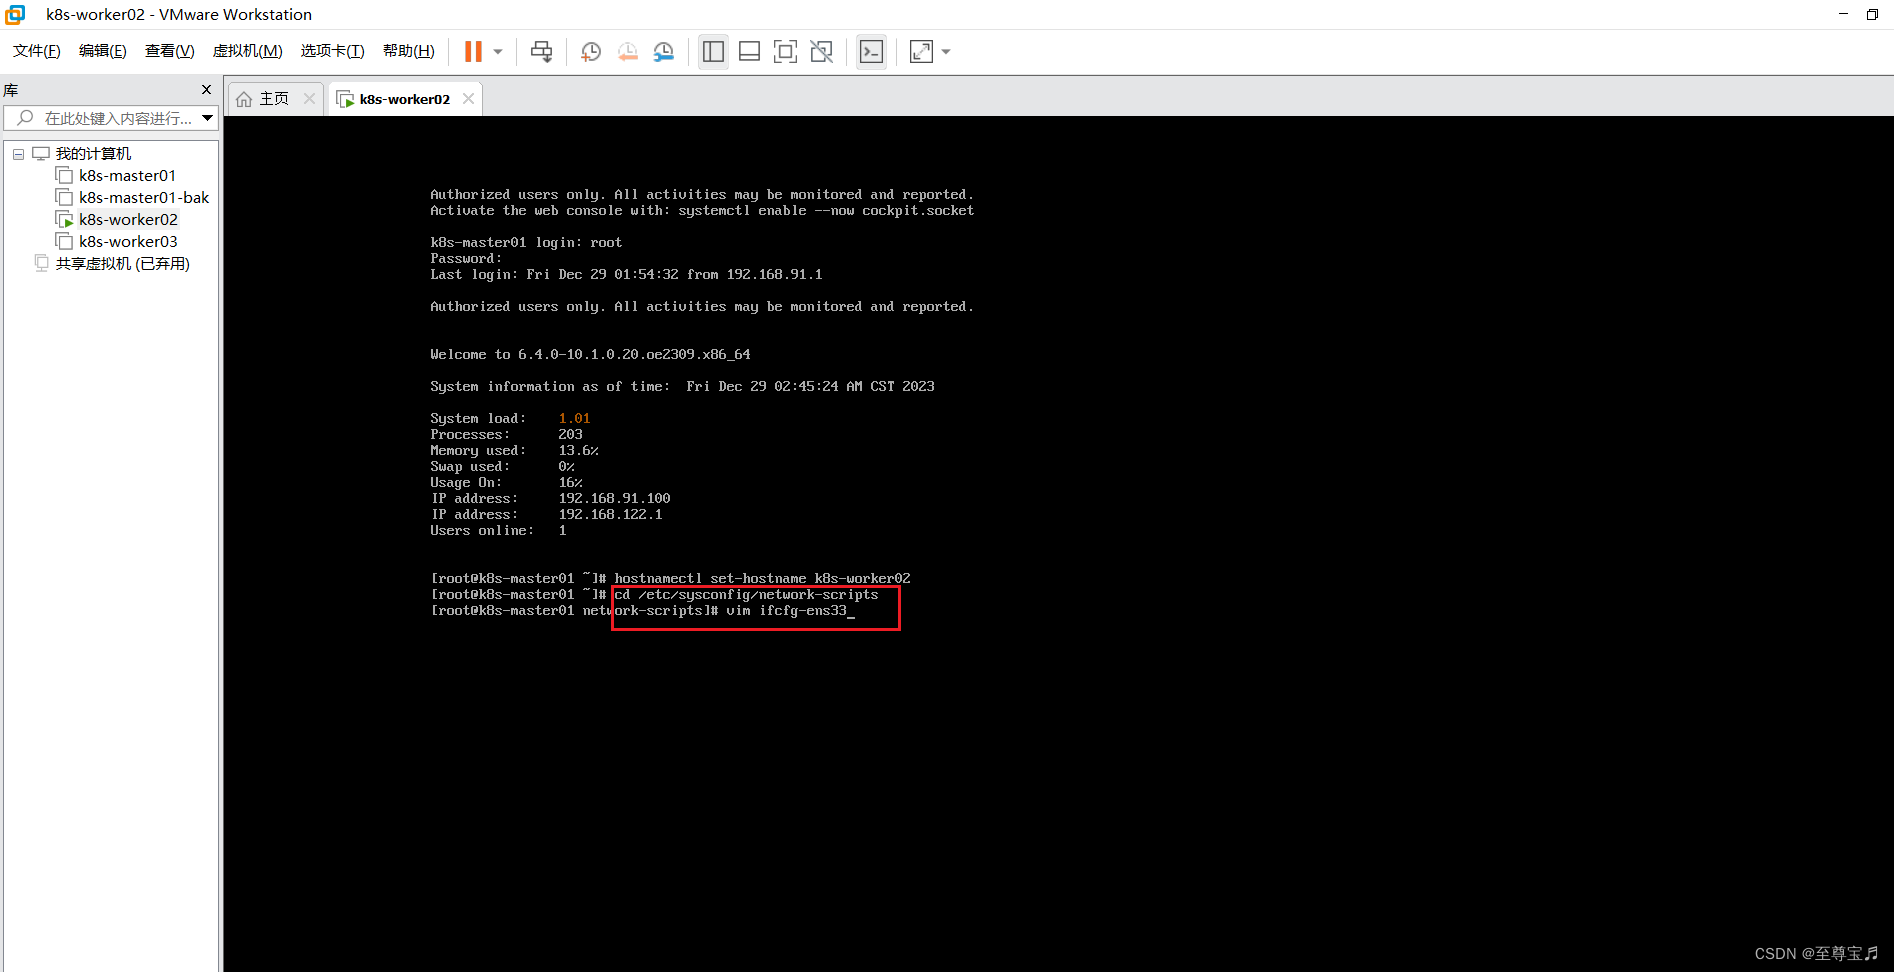
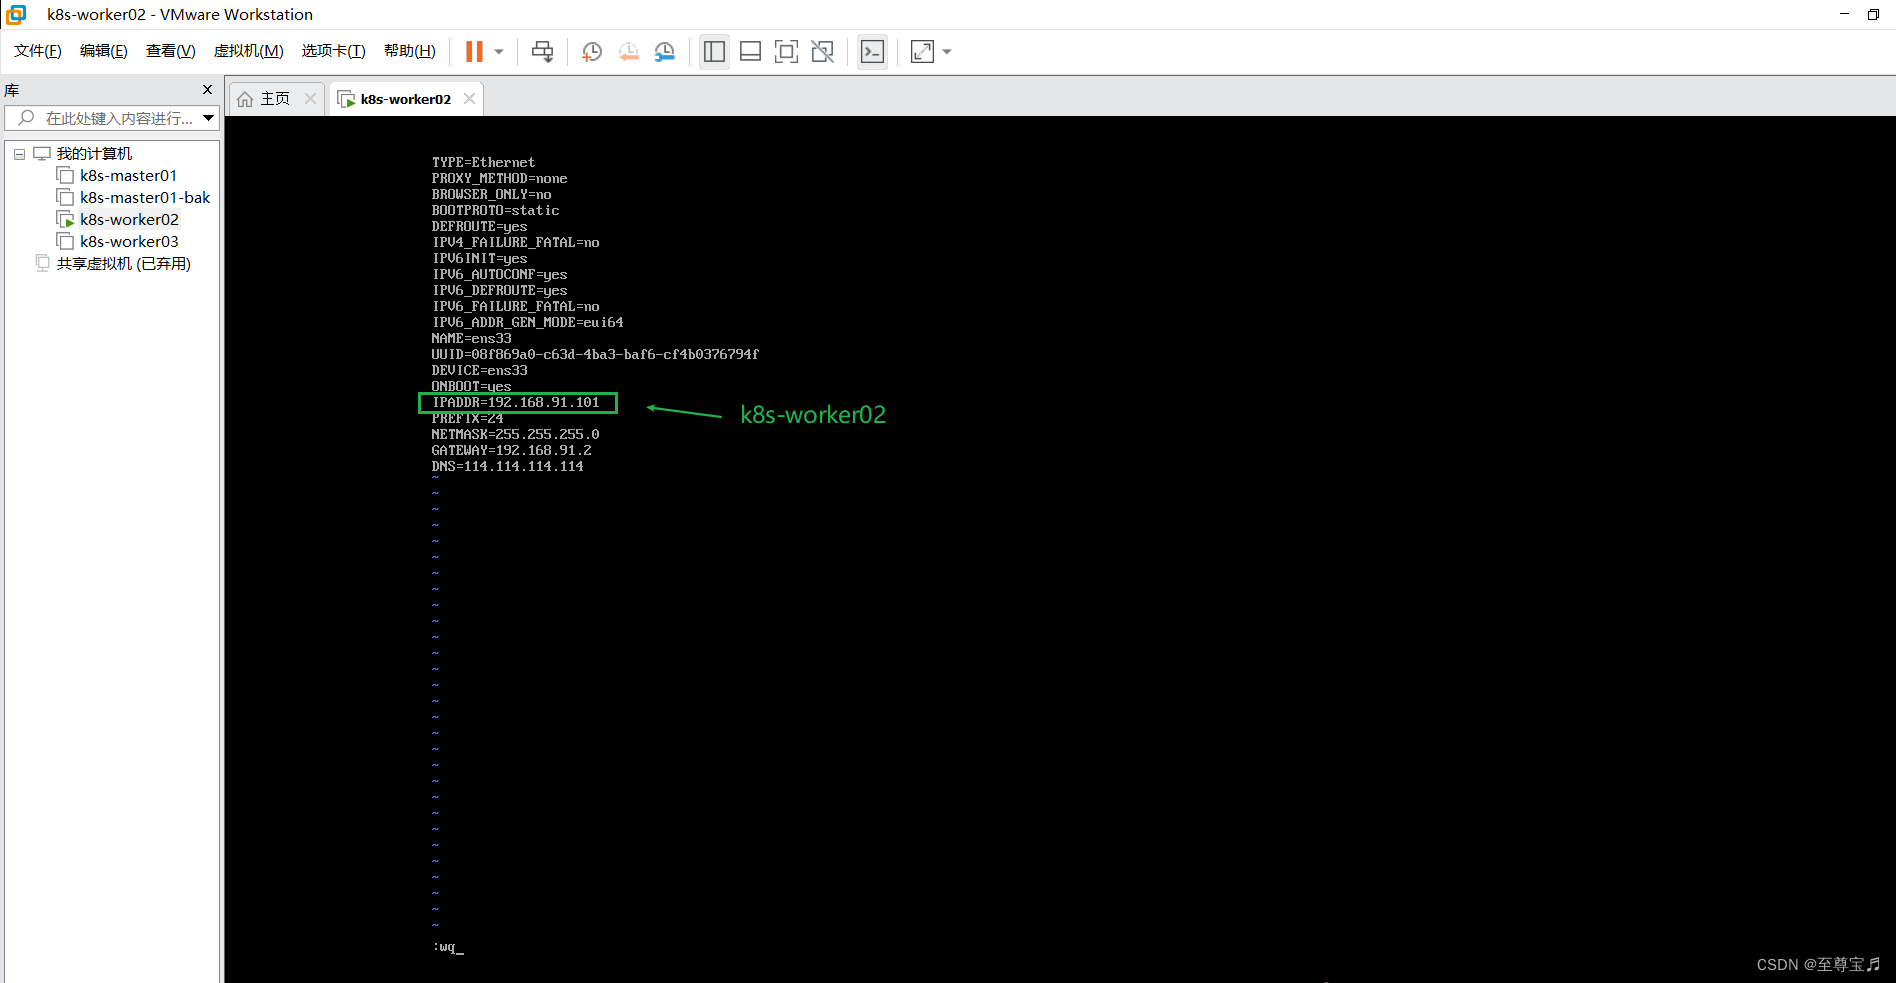
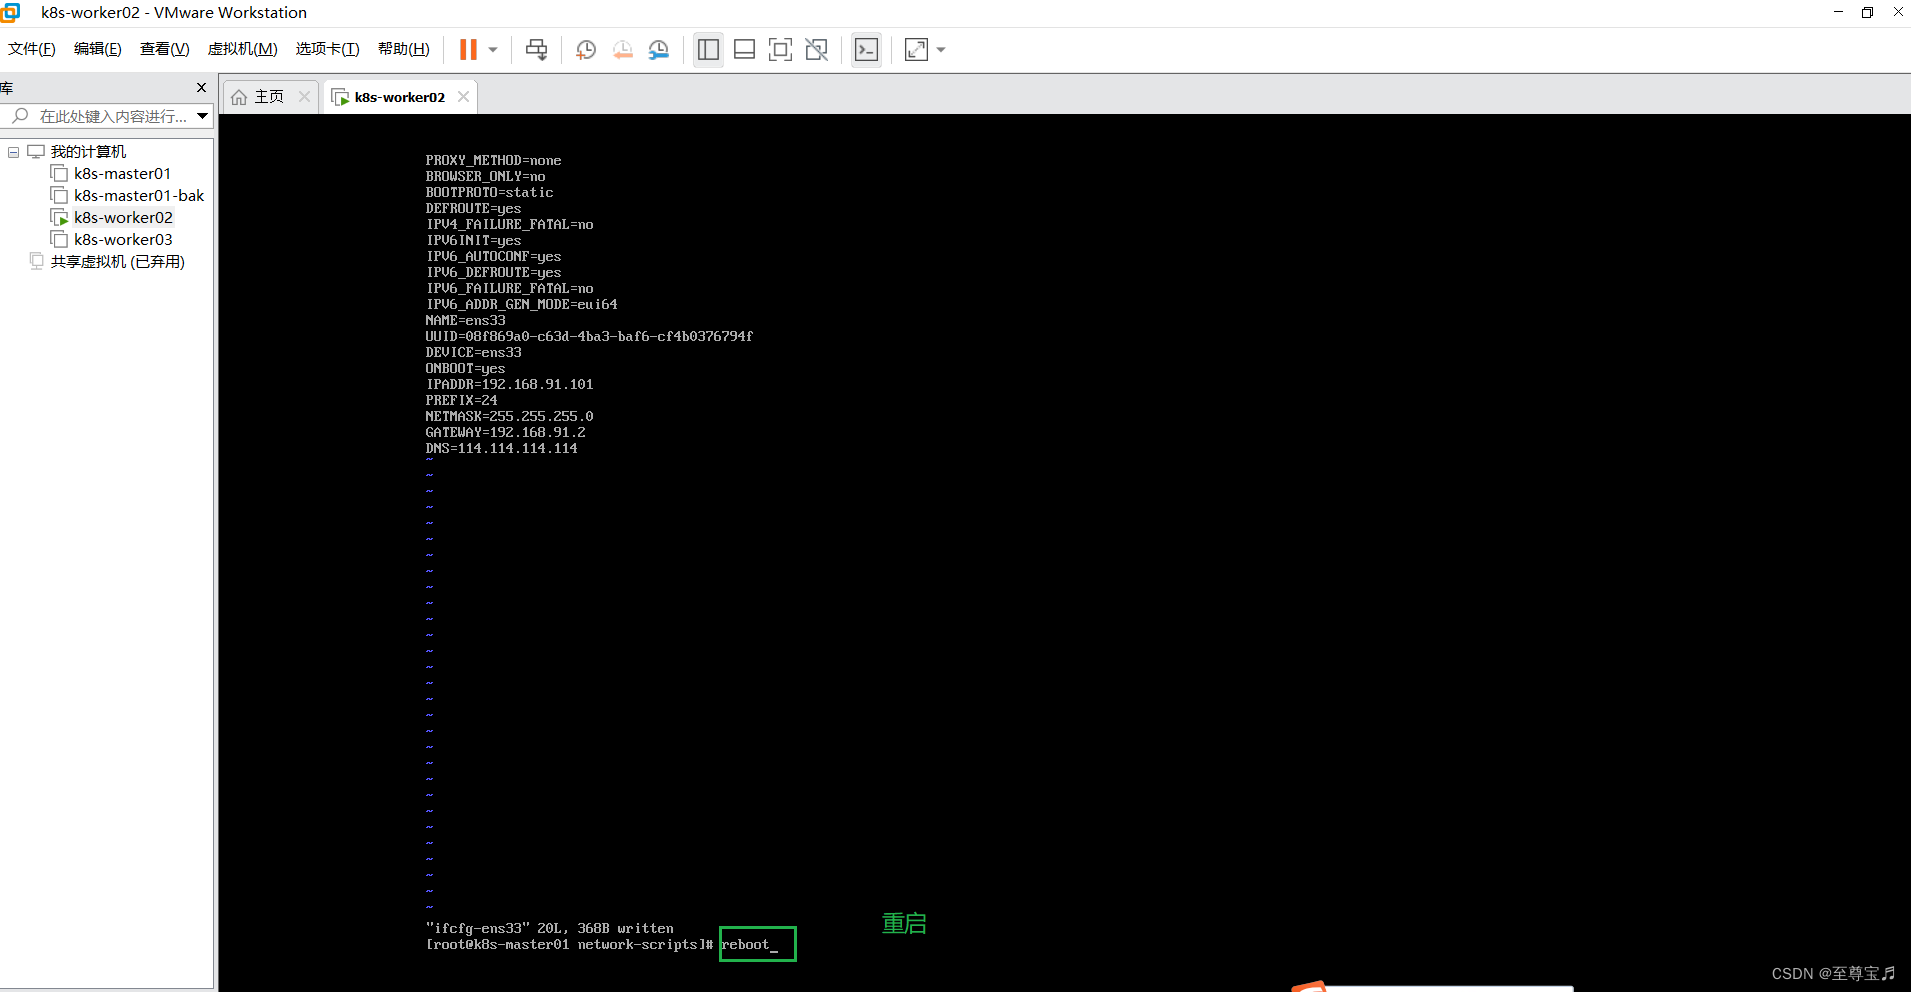
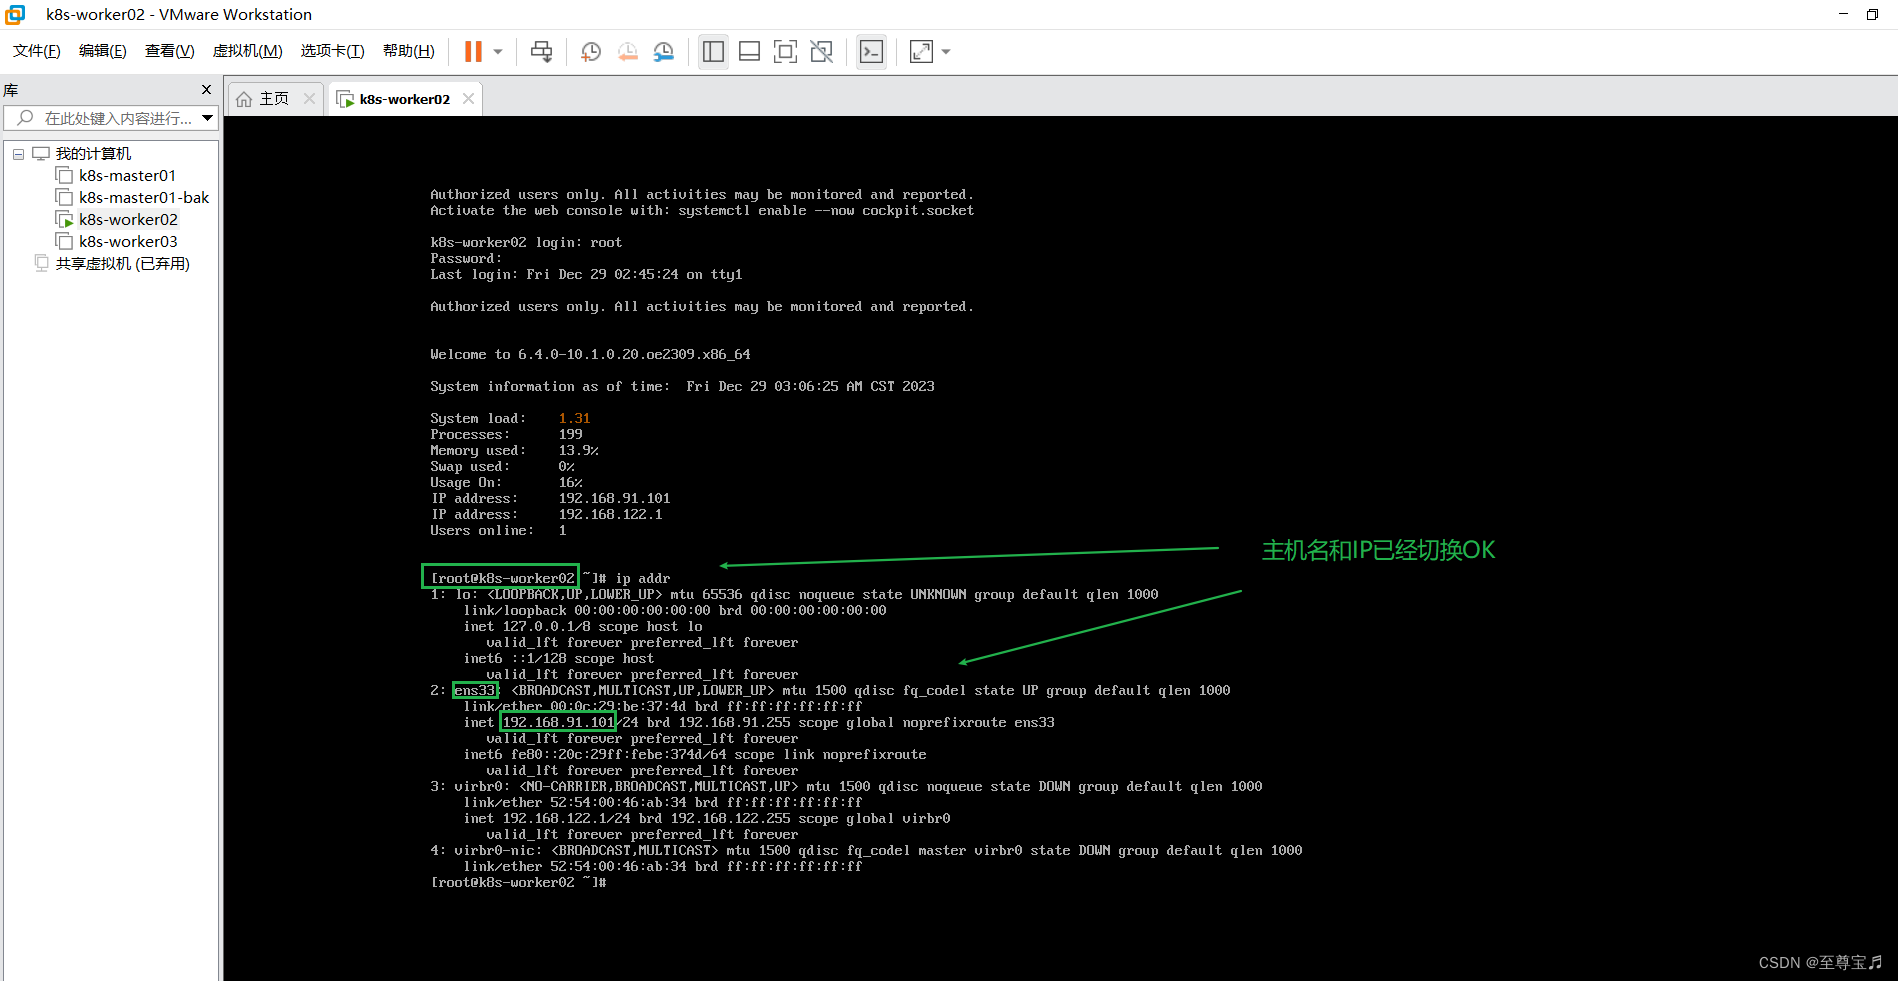
2.修改两个工作节点的主机名和IP;
hostnamectl set-hostname k8s-worker02
修改k8s-woker02节点的IP;
定位到指定目录命令:
cd /etc/sysconfig/network-scripts编辑命令:
vim ifcfg-ens33k8s-woker02:192.168.91.101

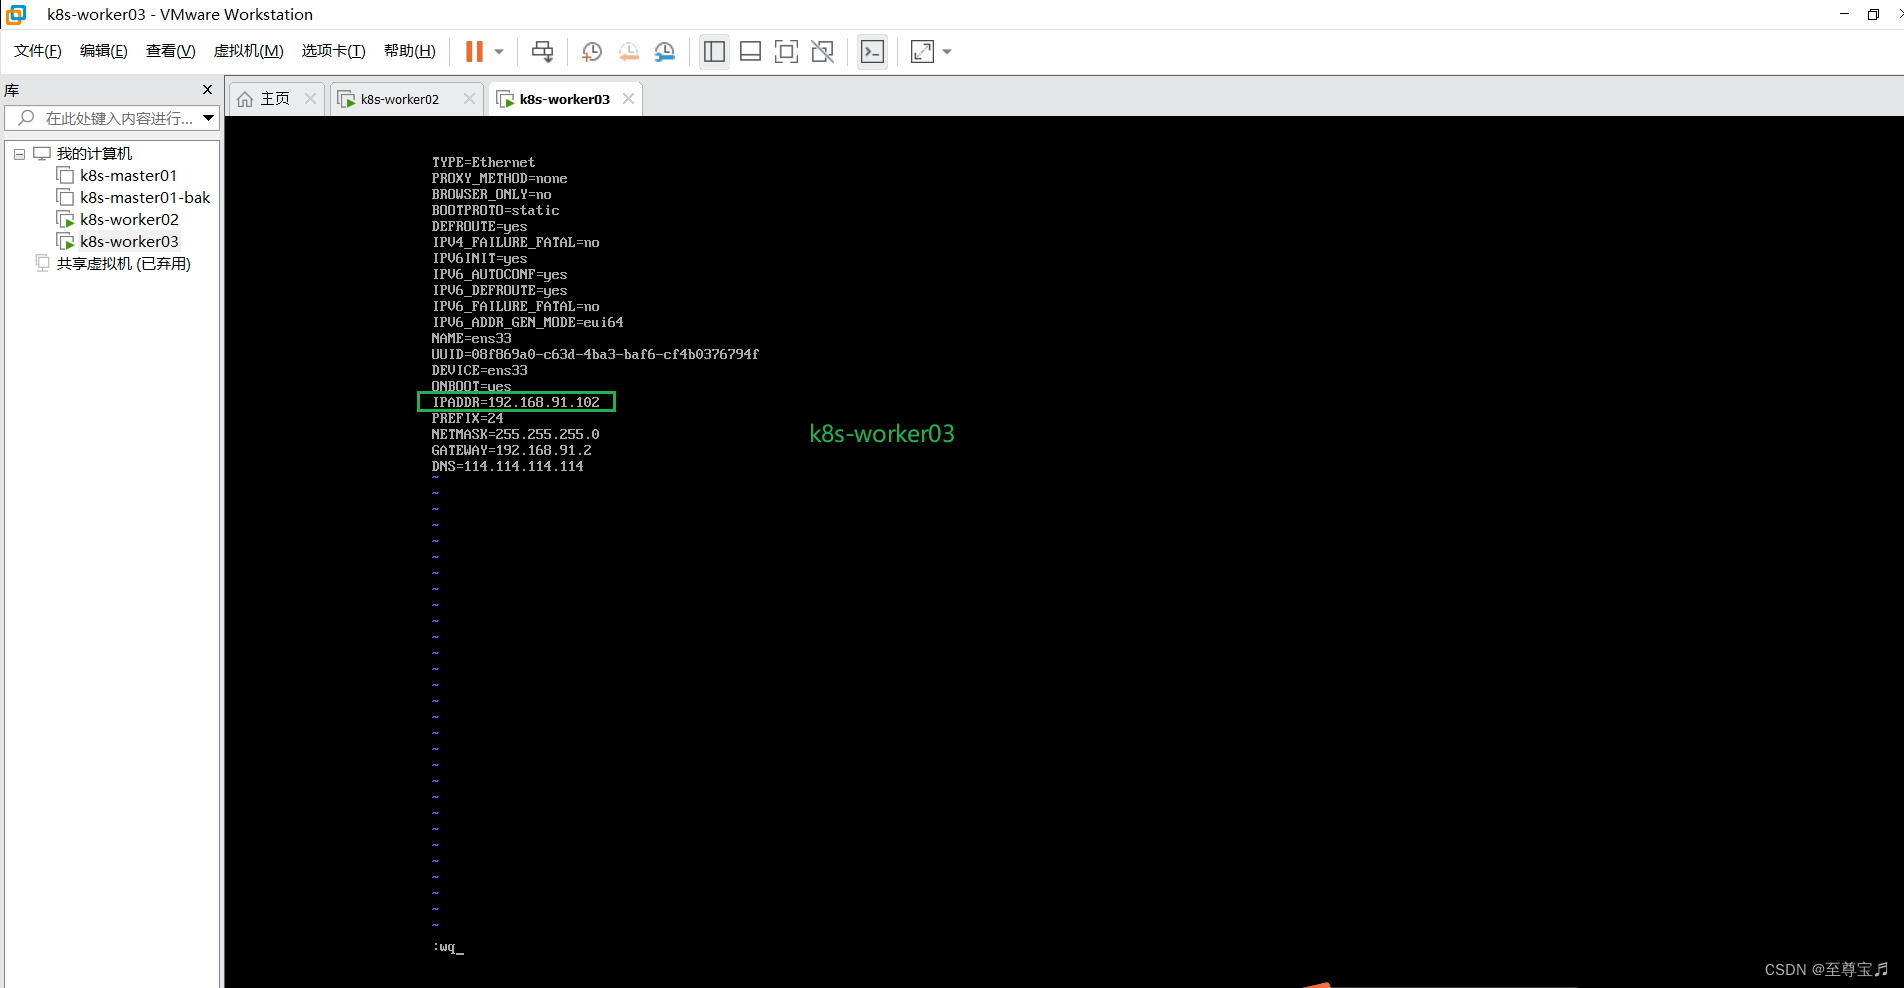
k8s-worker03节点的操作与上面相同;
k8s-worker03:192.168.91.102
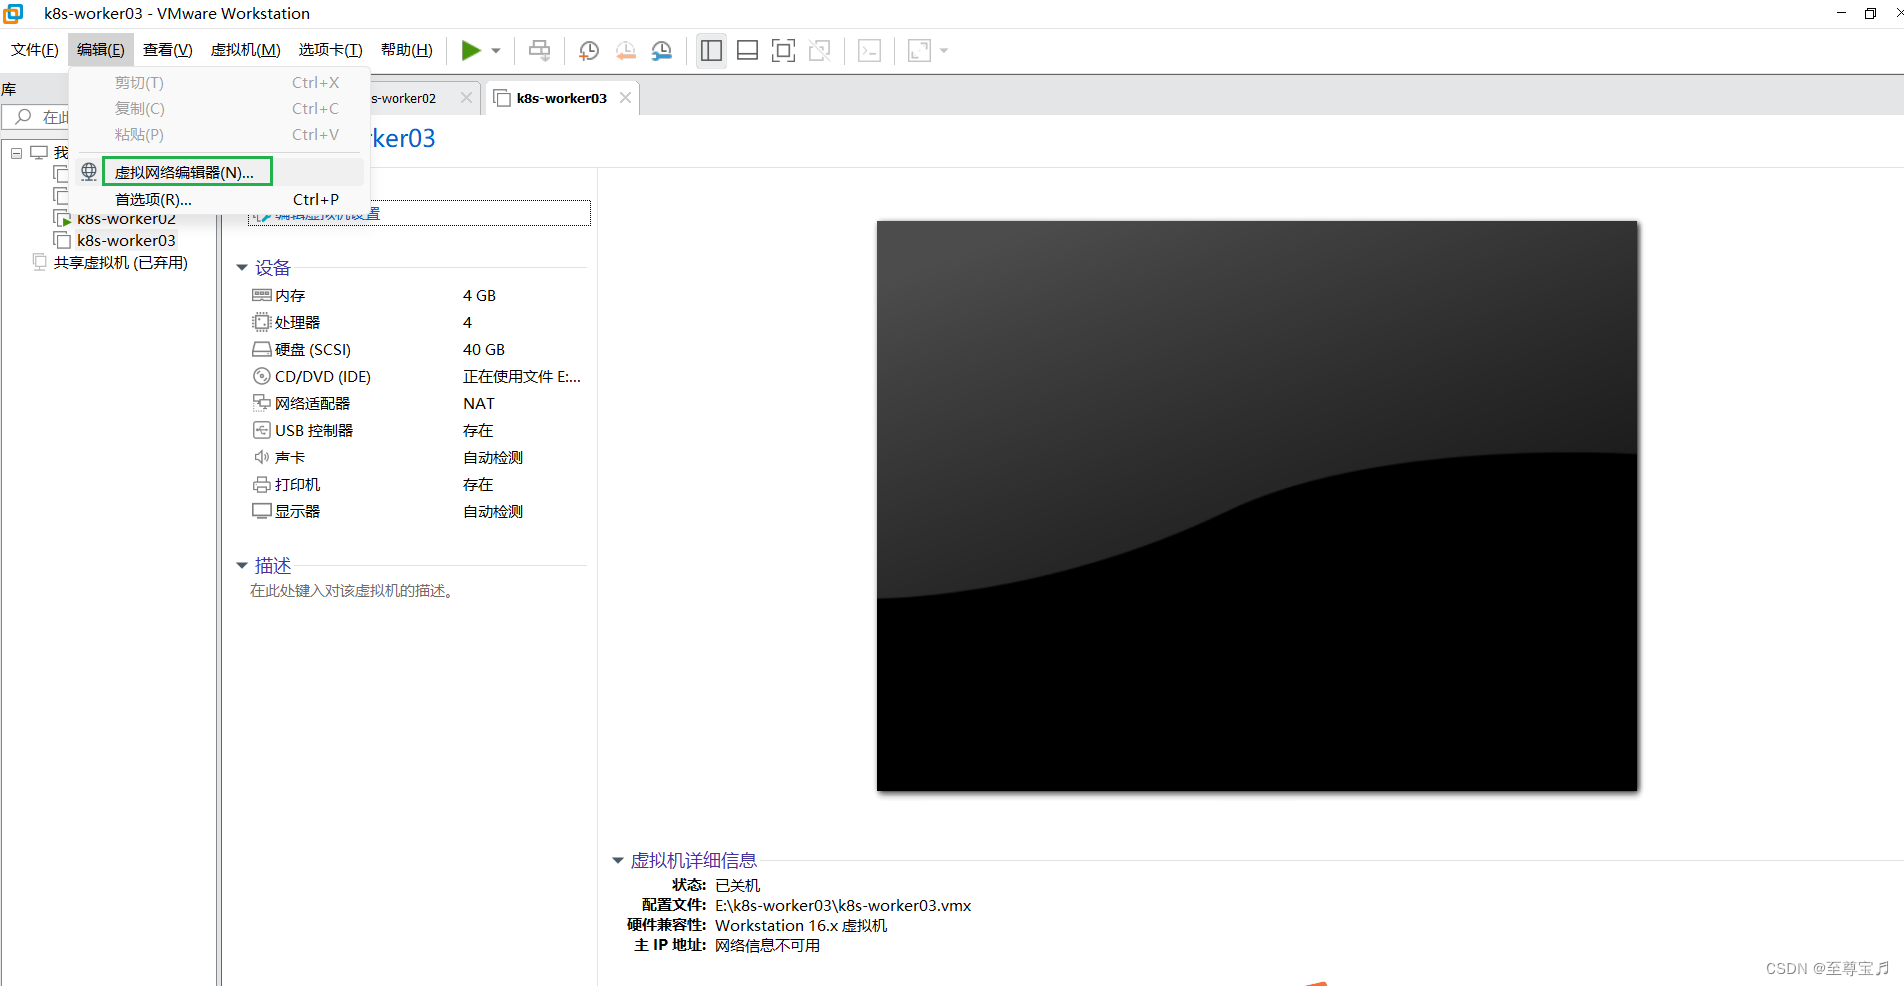
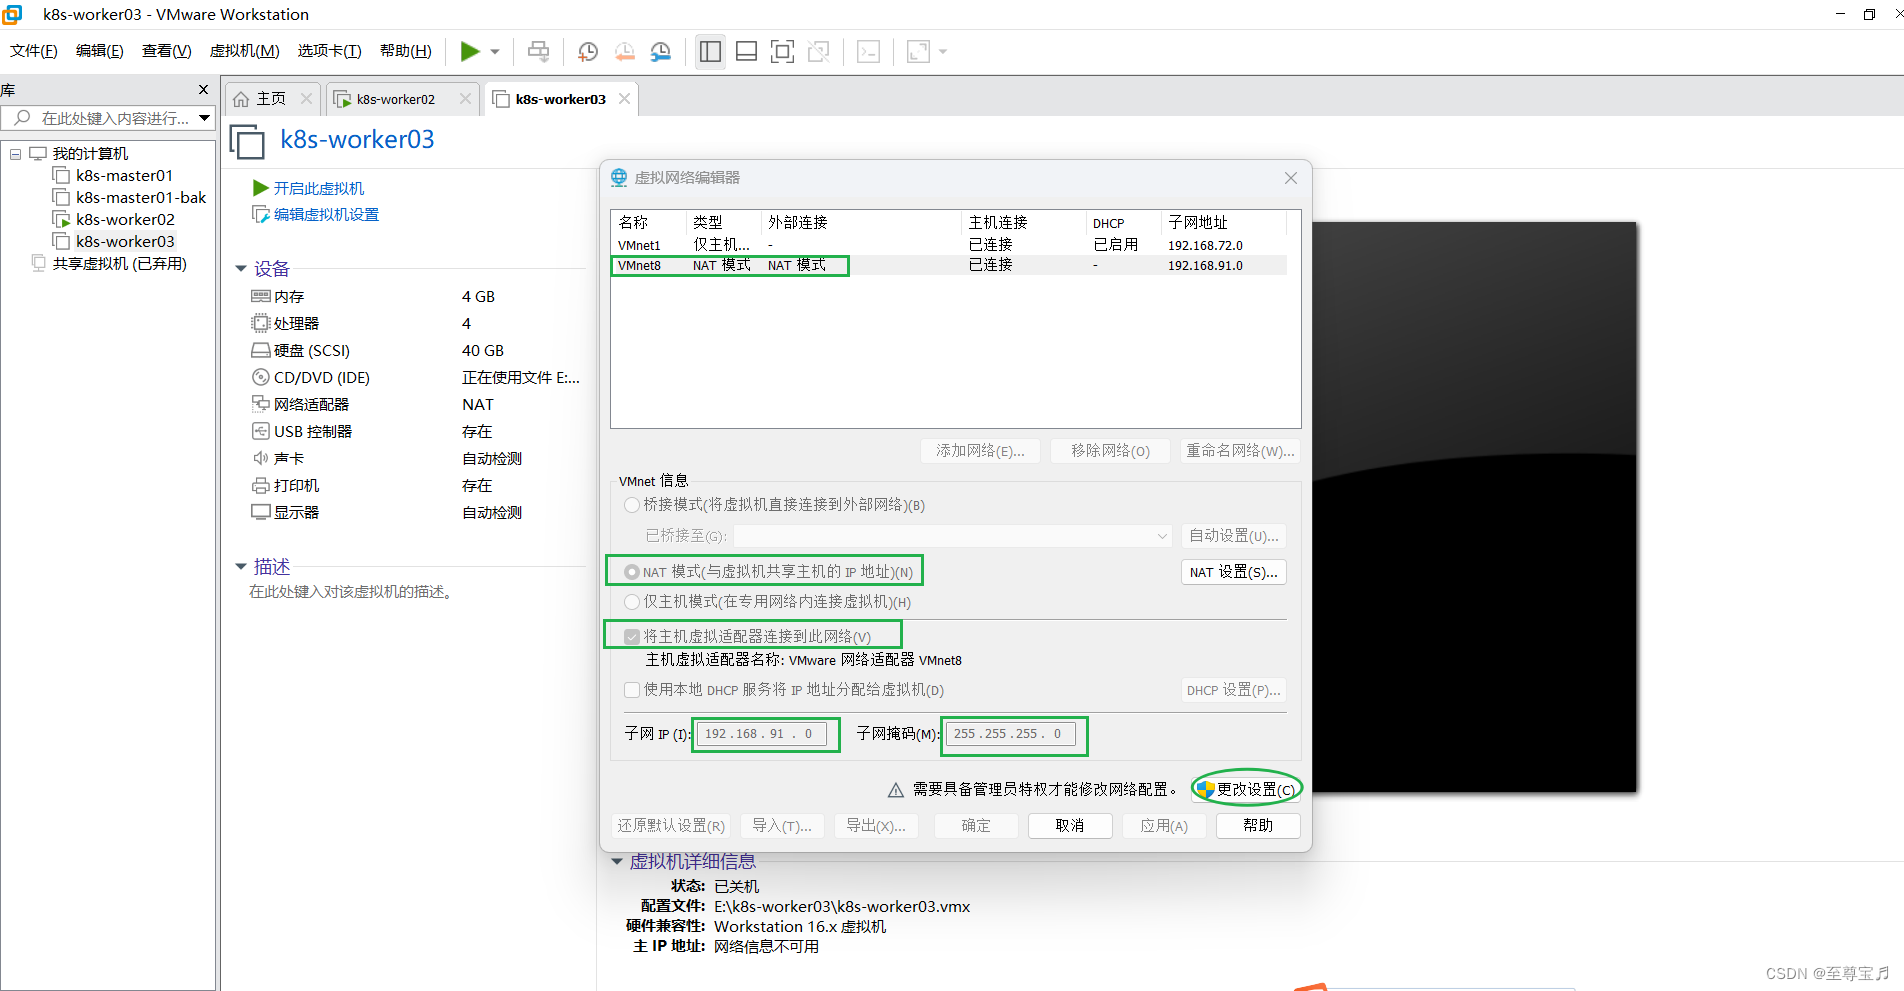
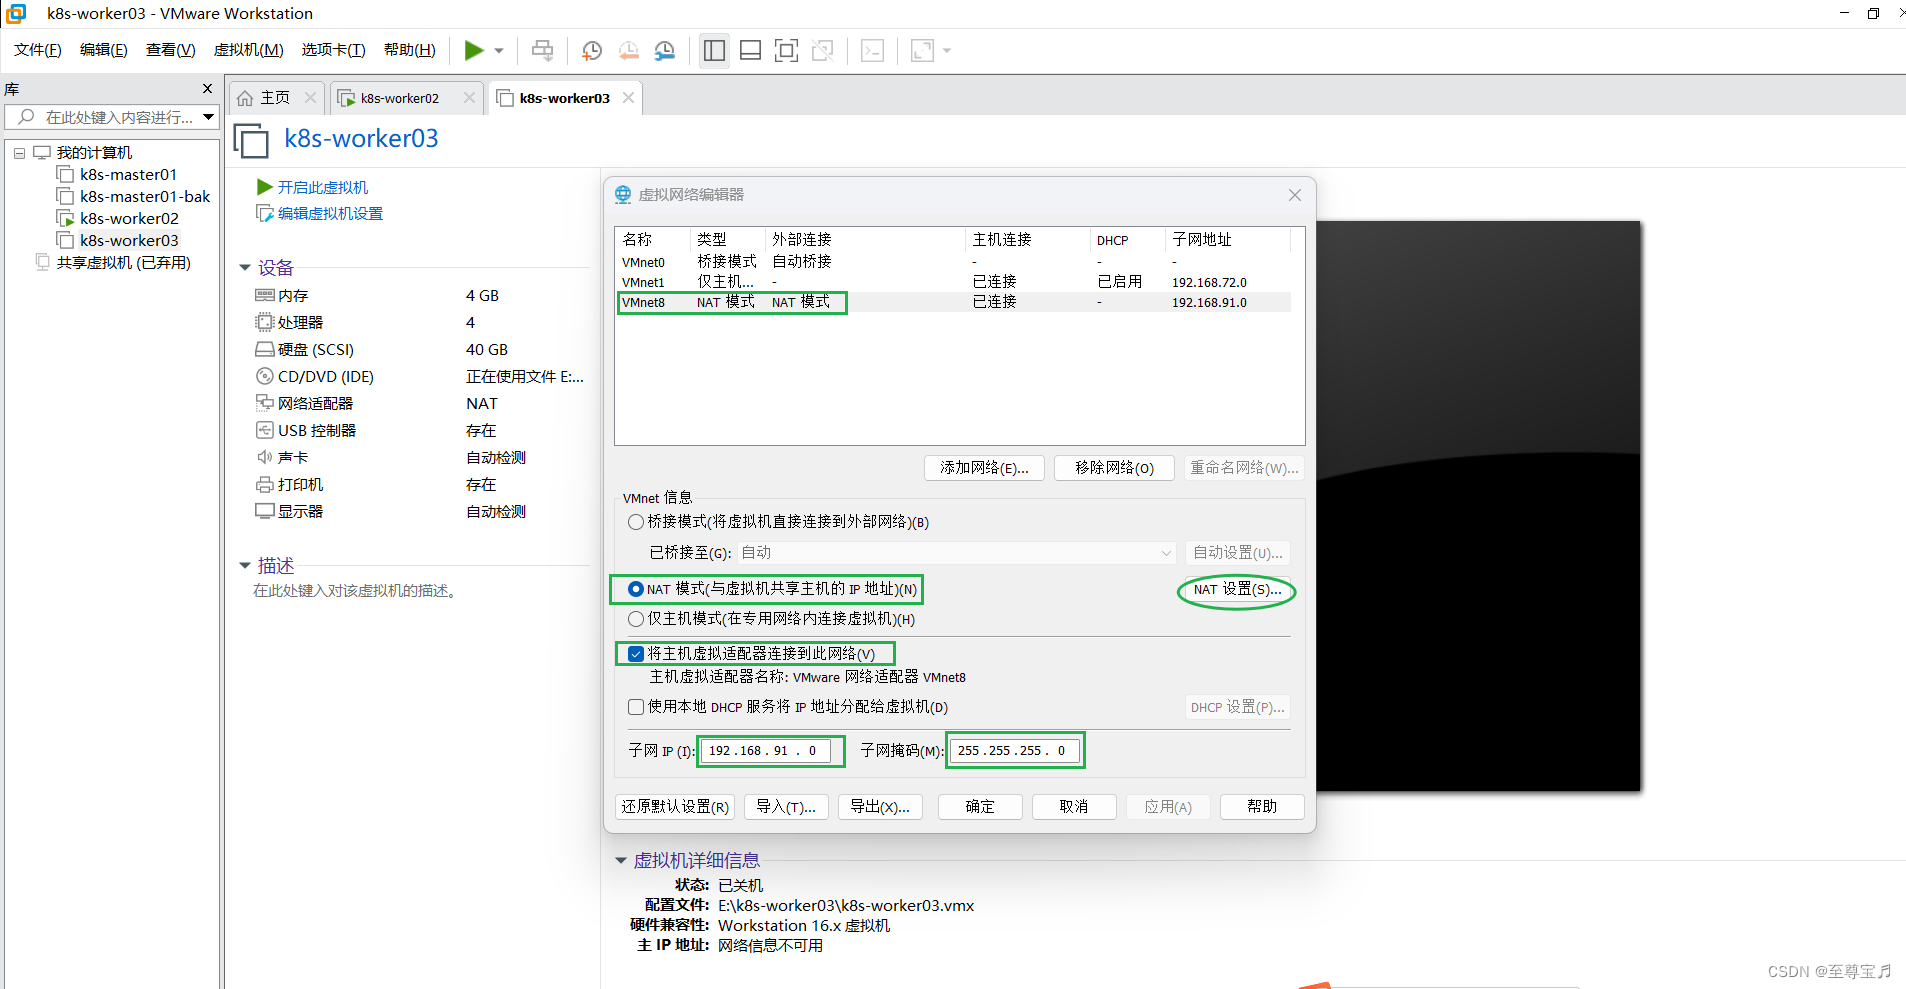
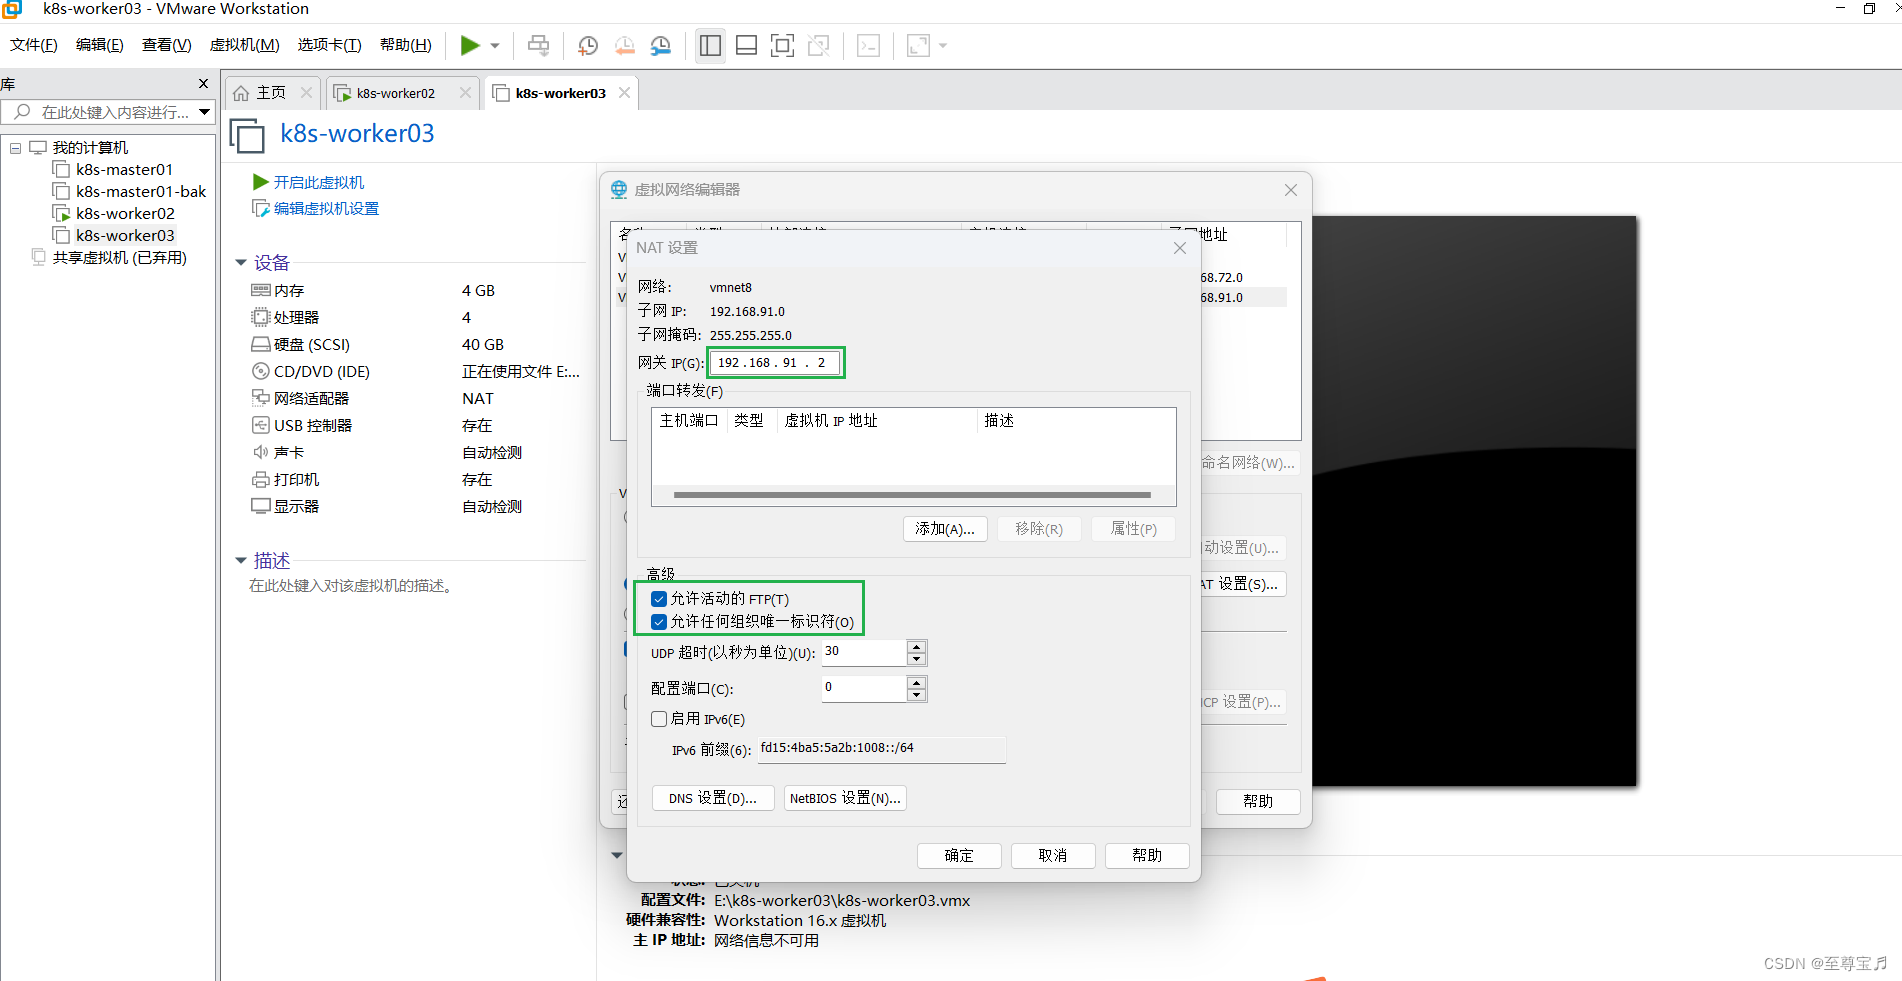
3.网络相关重要配置检查一遍,一般没啥问题,眼过一遍即可;
两个worker节点都看一遍;
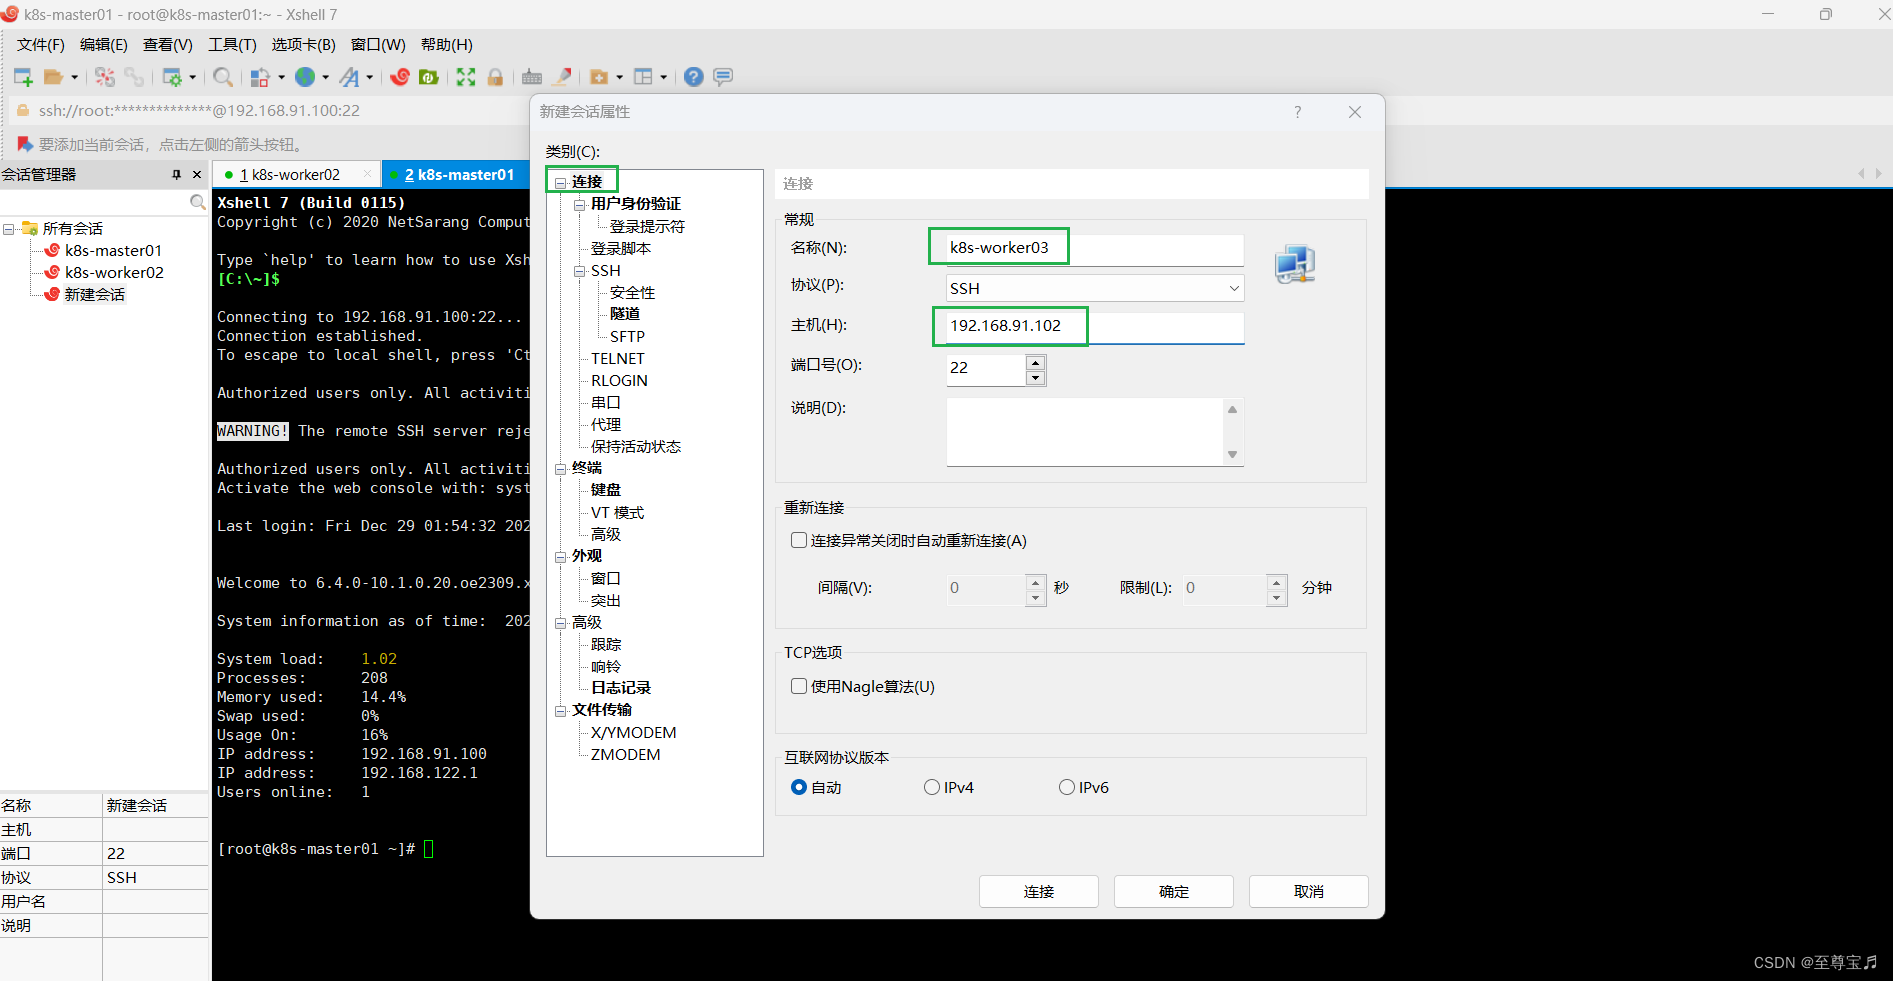
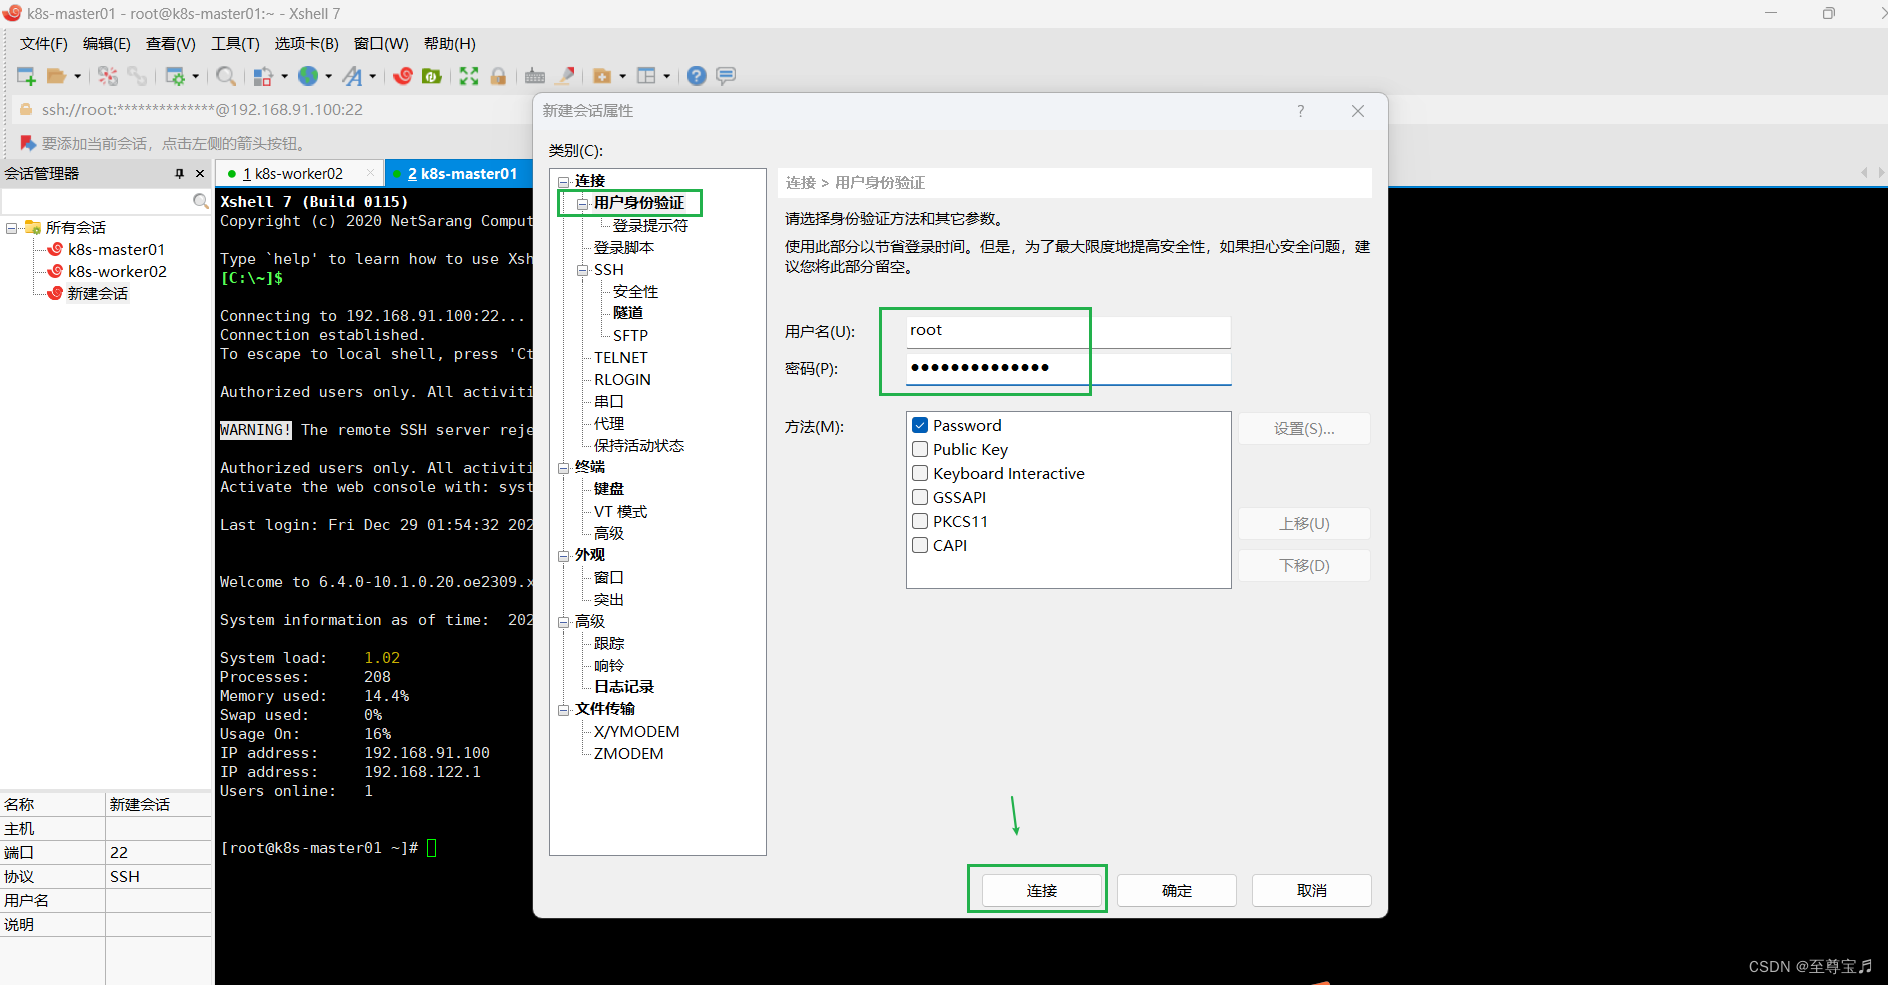
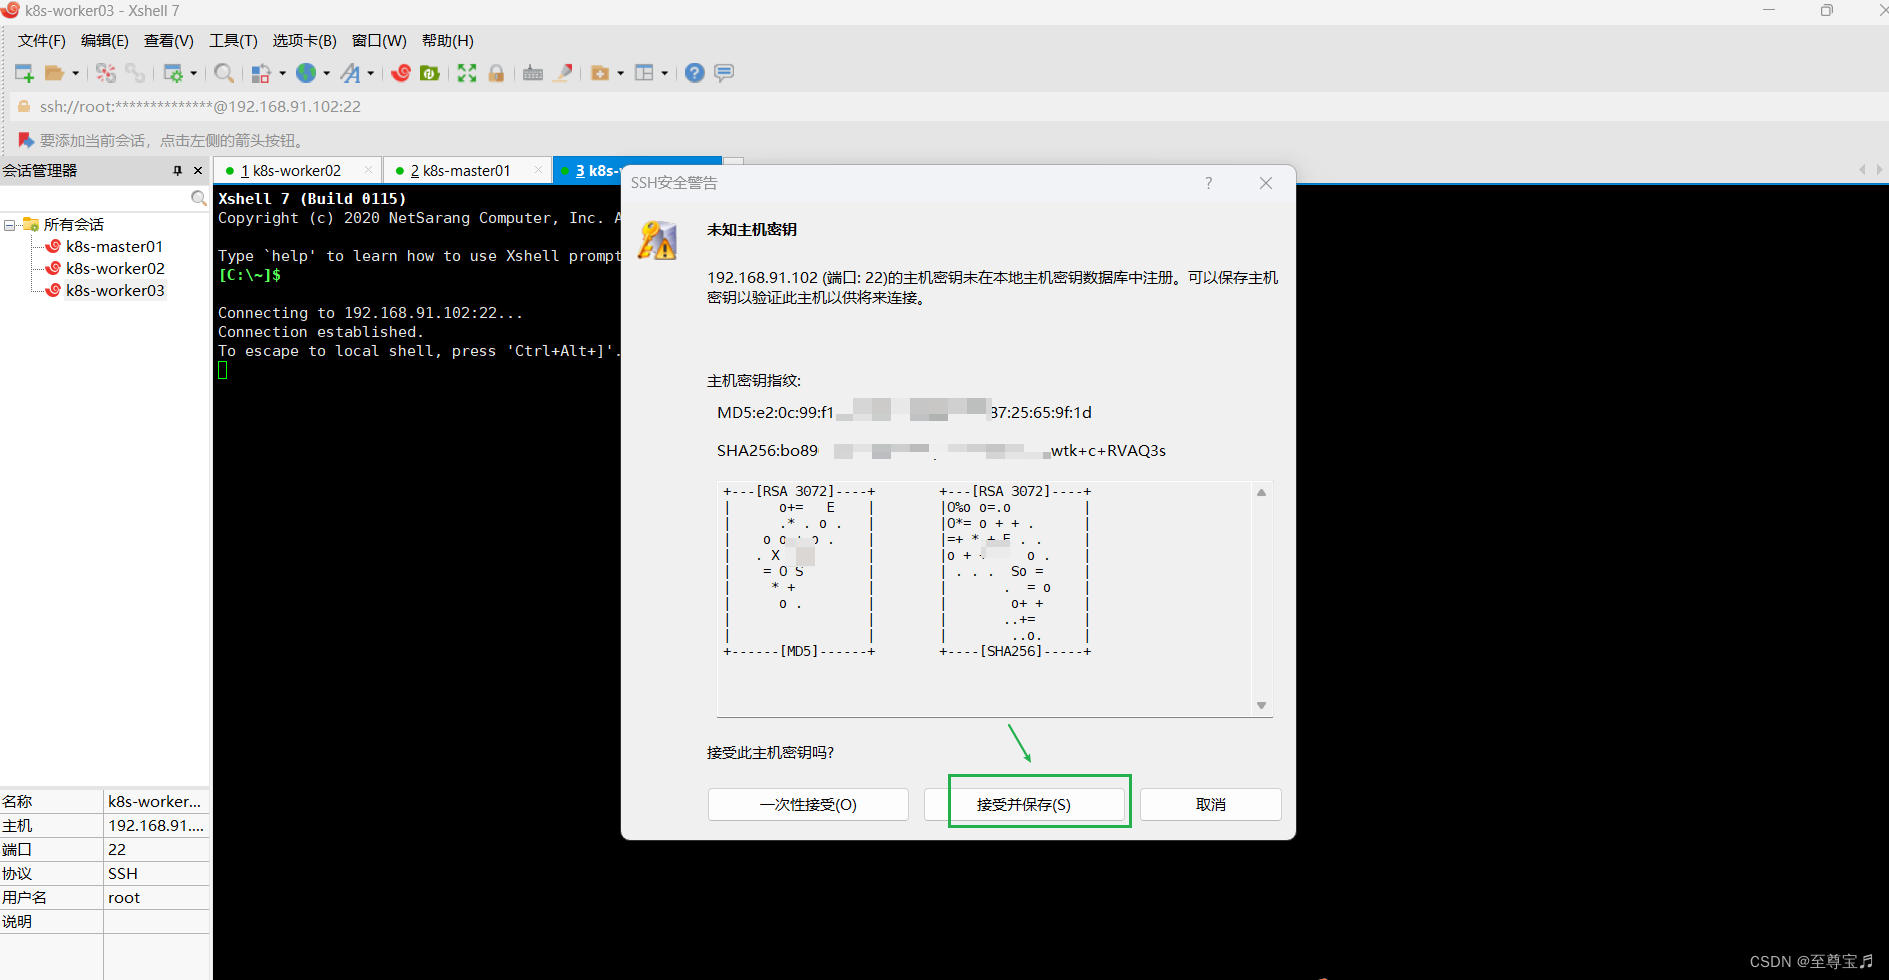
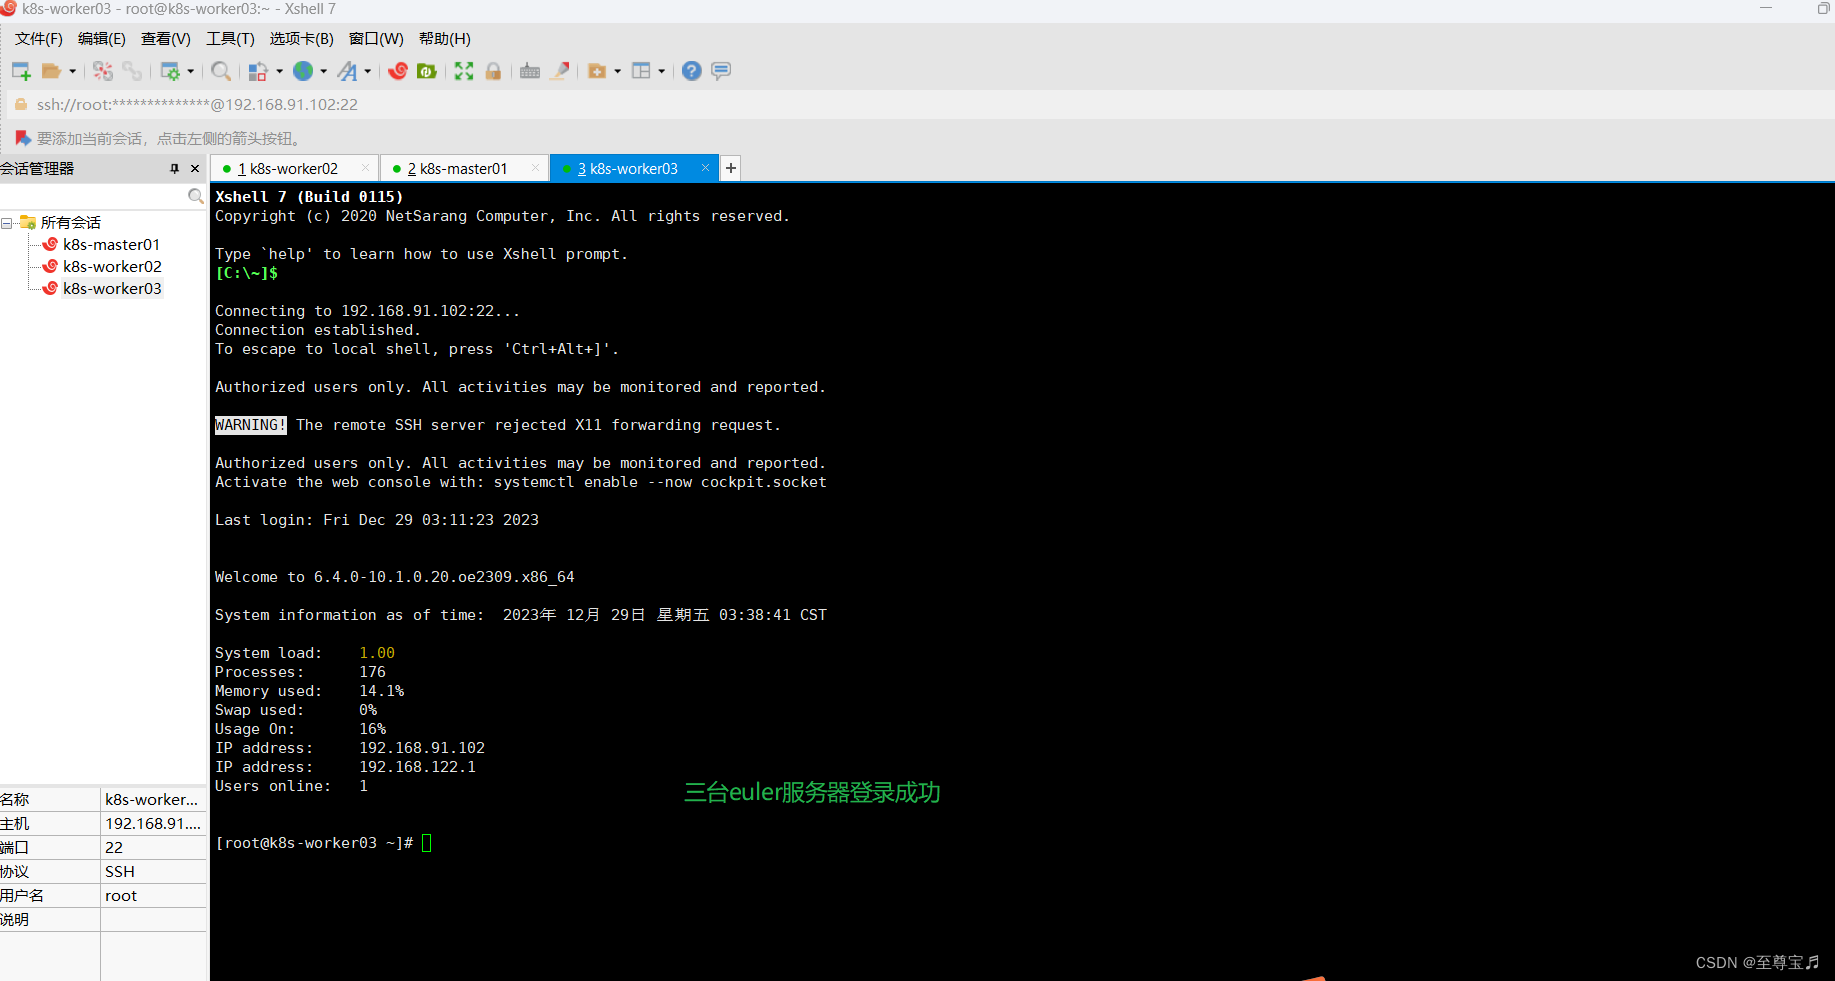
三.Xshell远程登录三台euler服务器;

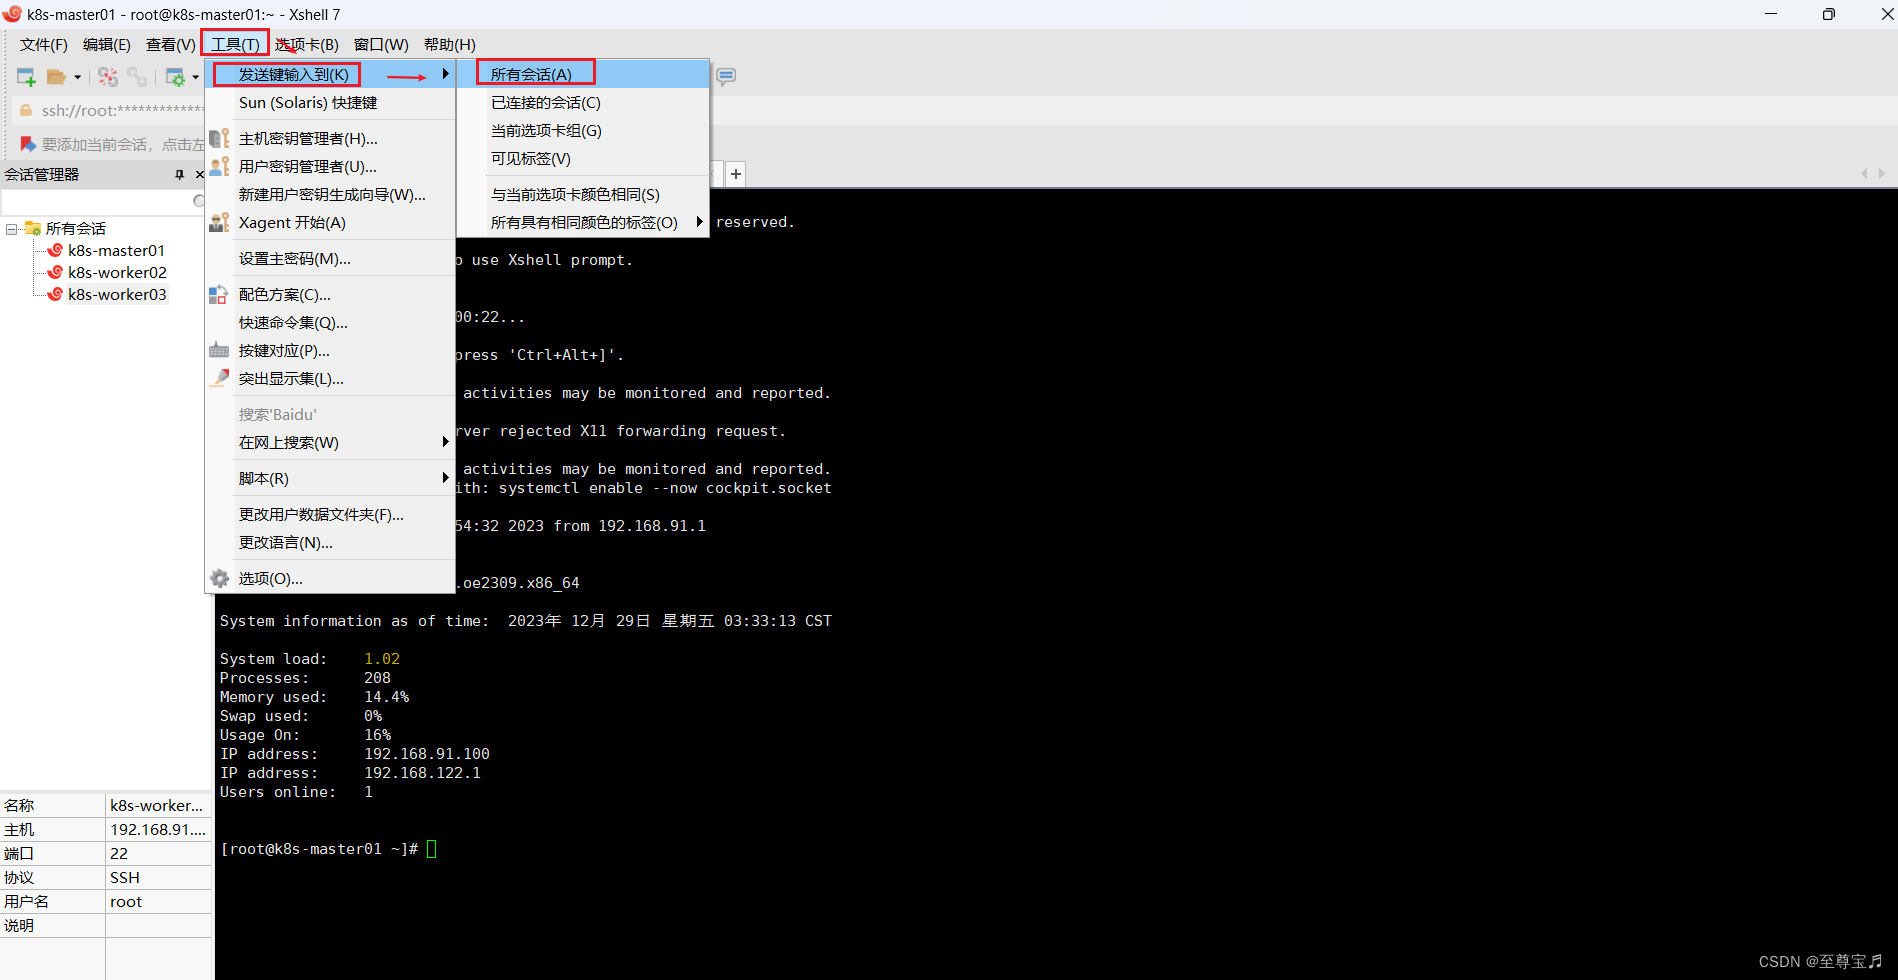
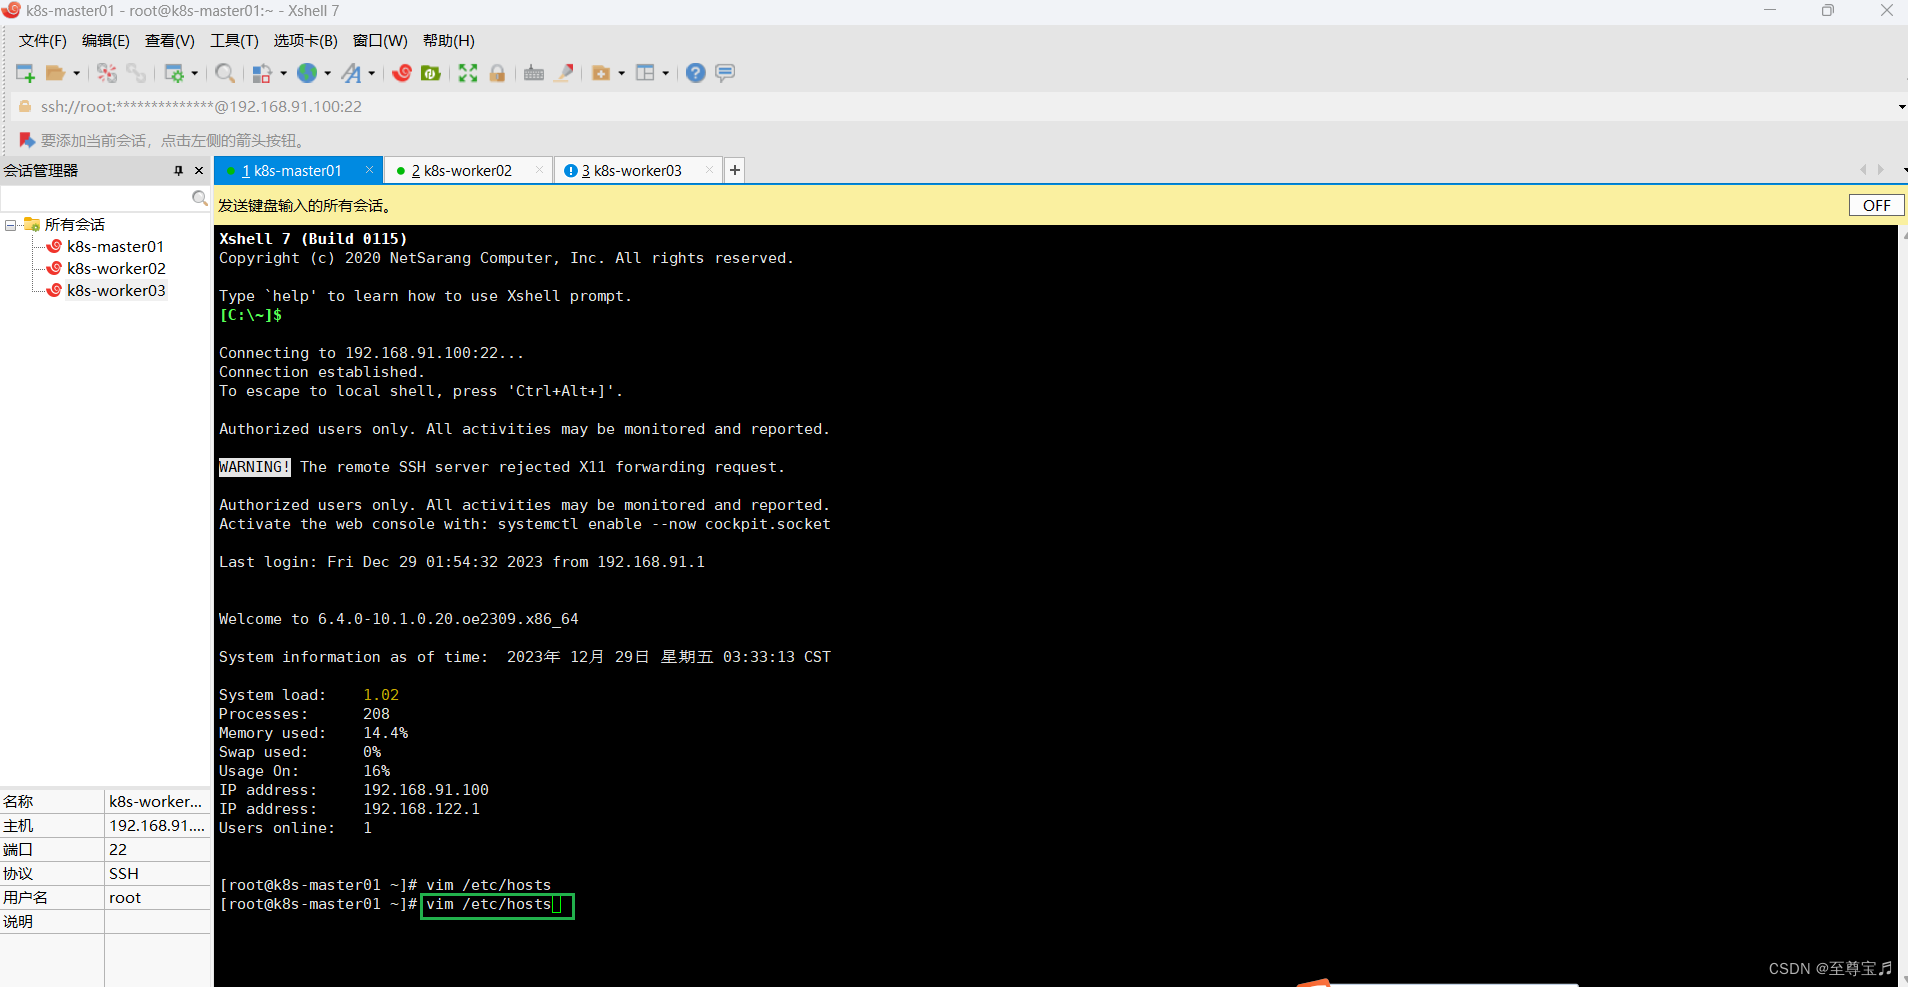
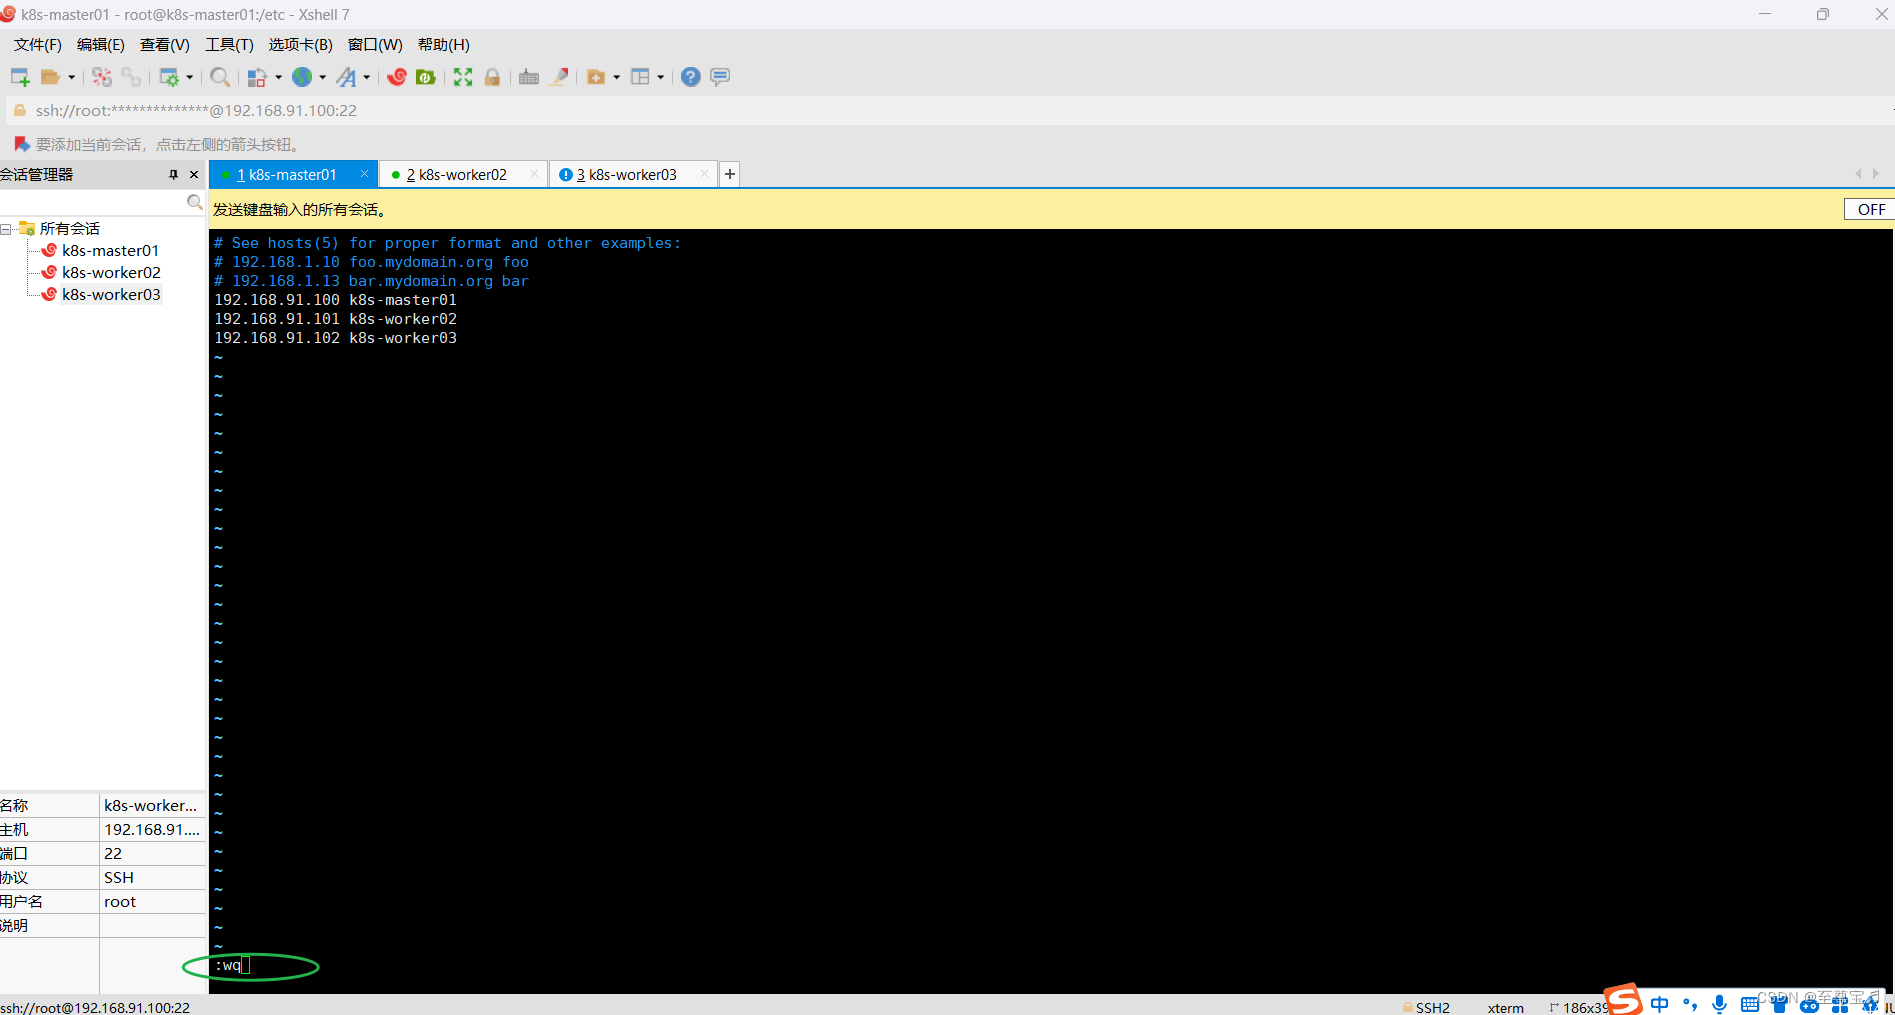
四.全部集群主机修改hosts,完成主机名与IP的映射;
vim /etc/hosts
127.0.0.1 localhost localhost.localdomain localhost4 localhost4.localdomain4
::1 localhost localhost.localdomain localhost6 localhost6.localdomain6
192.168.91.100 k8s-master01
192.168.91.101 k8s-worker02
192.168.91.102 k8s-worker03
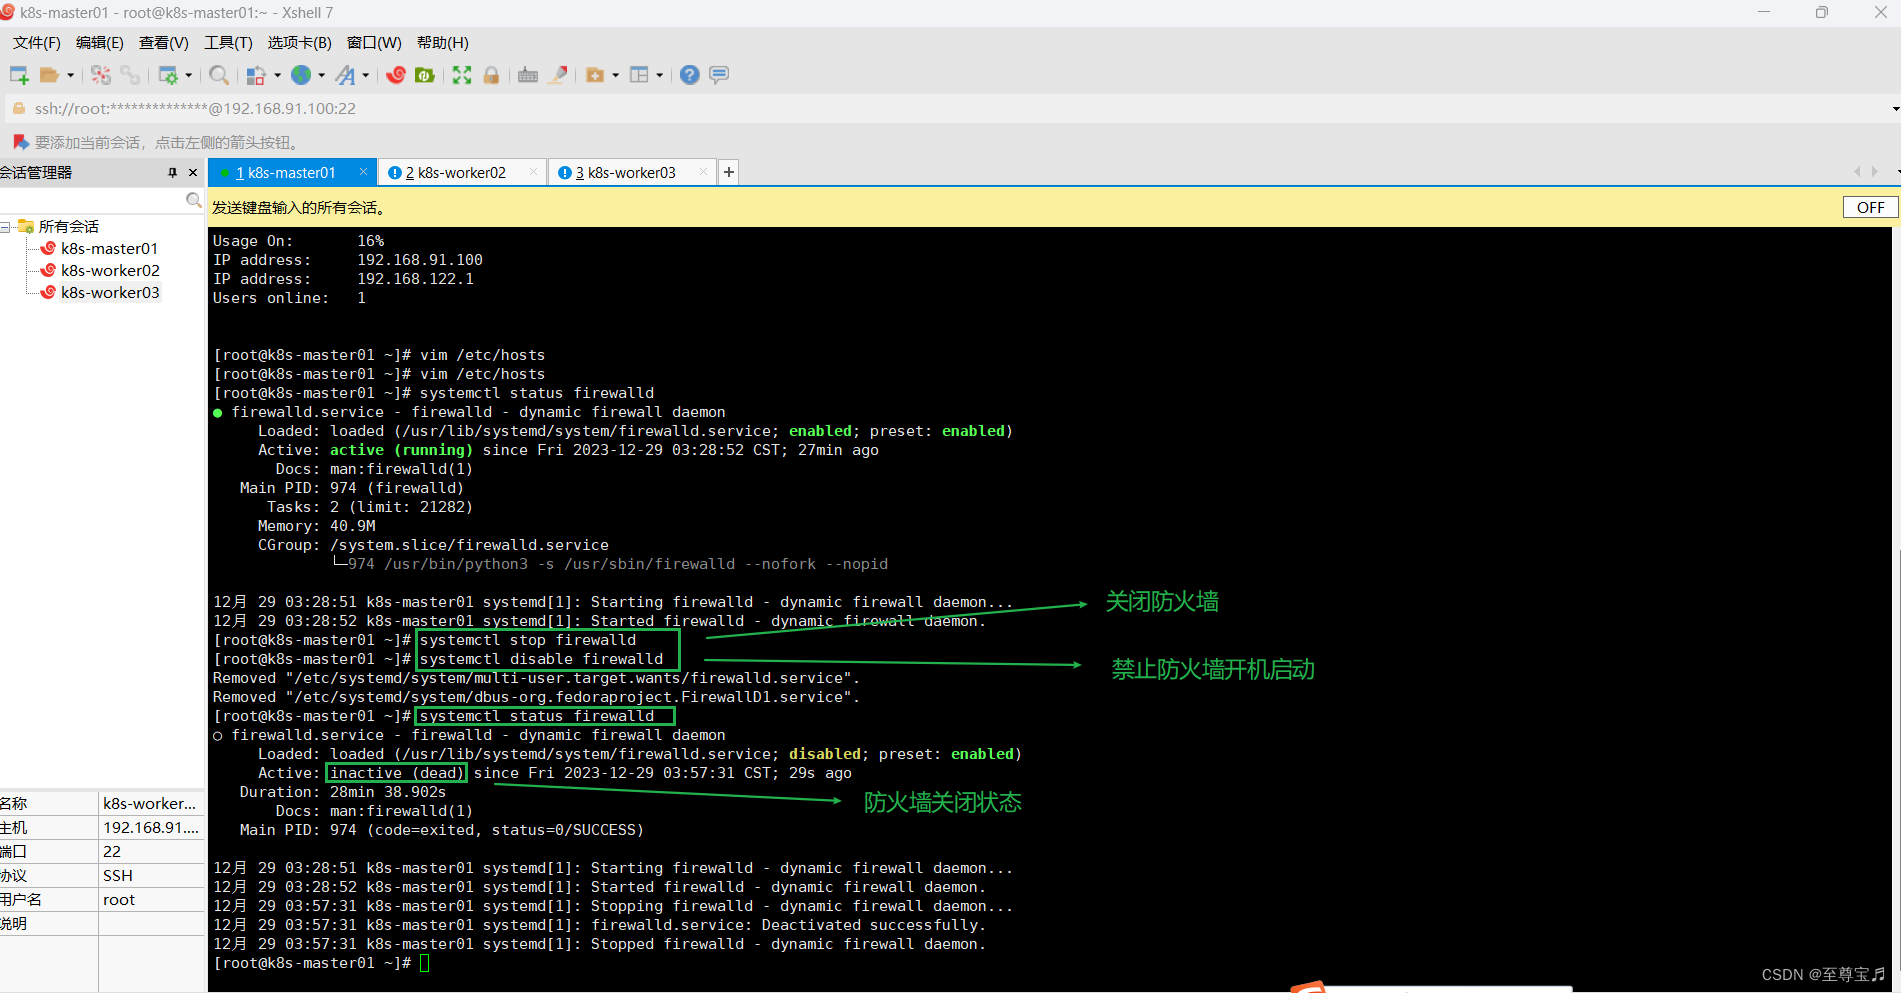
五.关闭全部主机防火墙;
关闭防火墙:
systemctl stop firewalld禁止开机自启:
systemctl disable firewalld查看防火墙状态:
systemctl status firewalld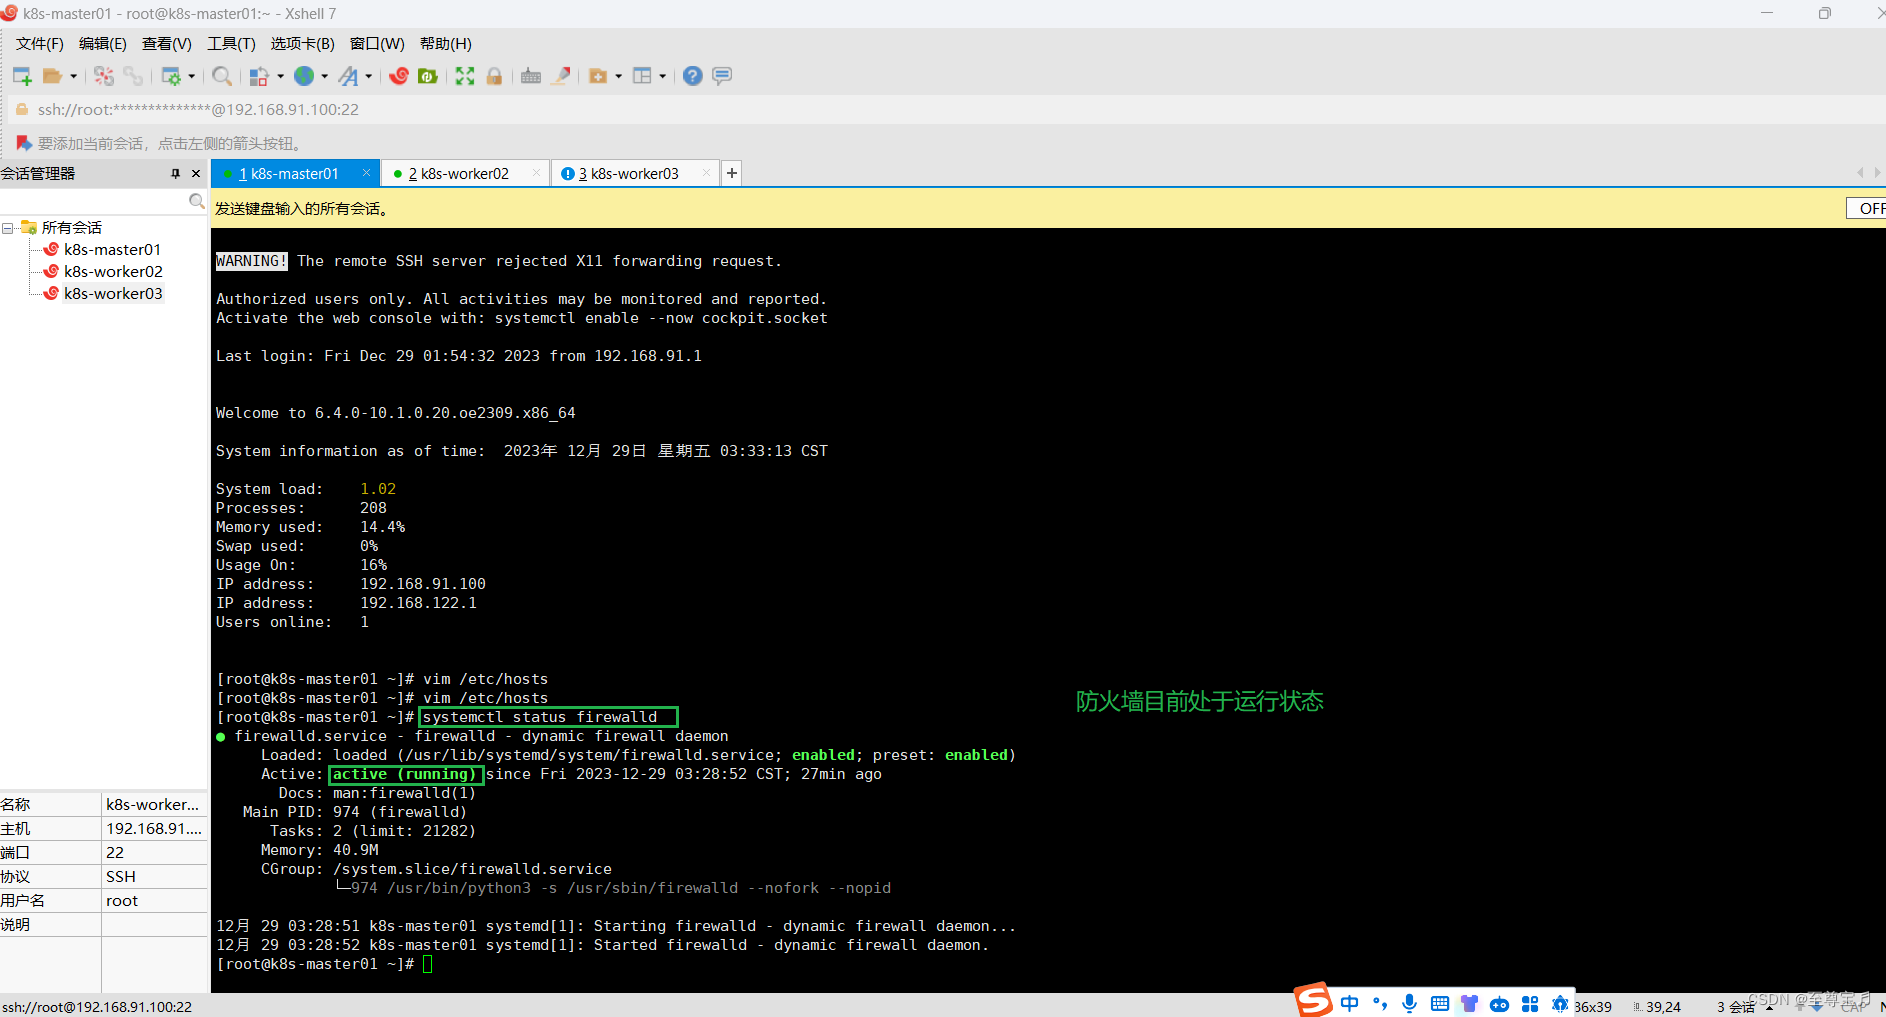
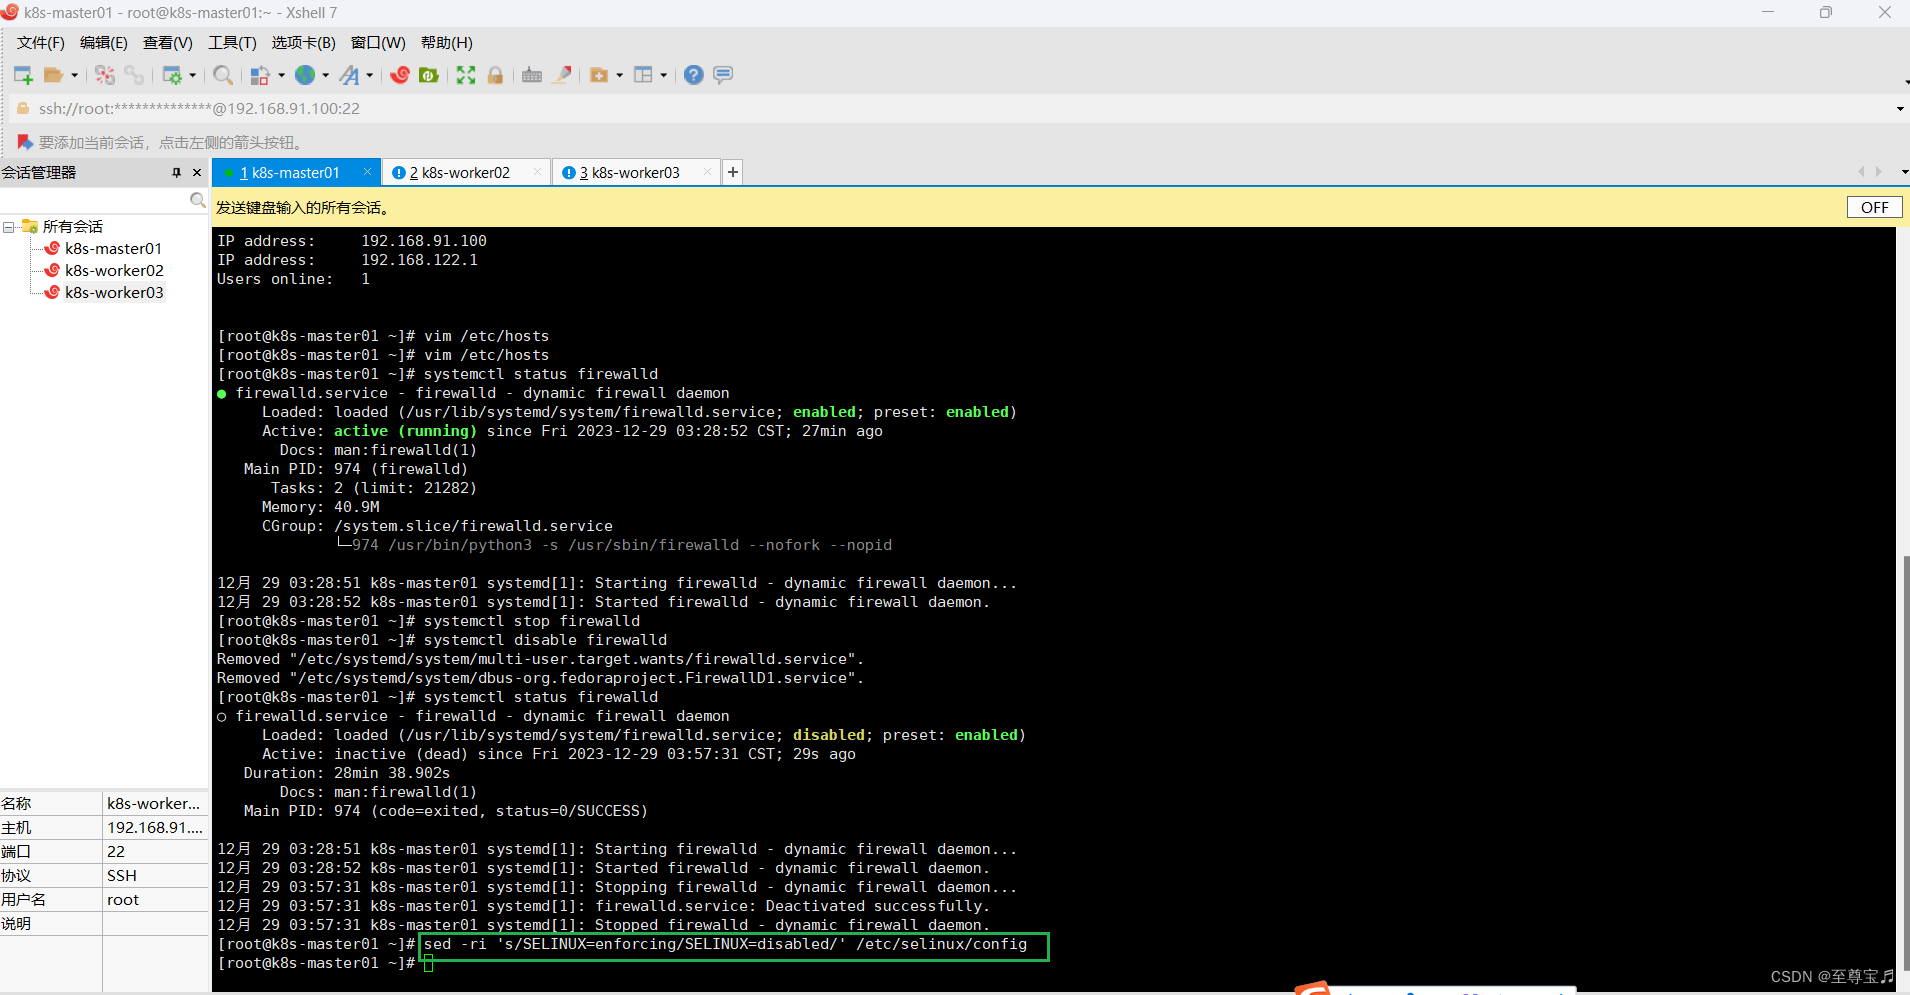
六.所有主机关闭selinux;
sed -ri 's/SELINUX=enforcing/SELINUX=disabled/' /etc/selinux/config修改SELinux配置需要重启操作系统。
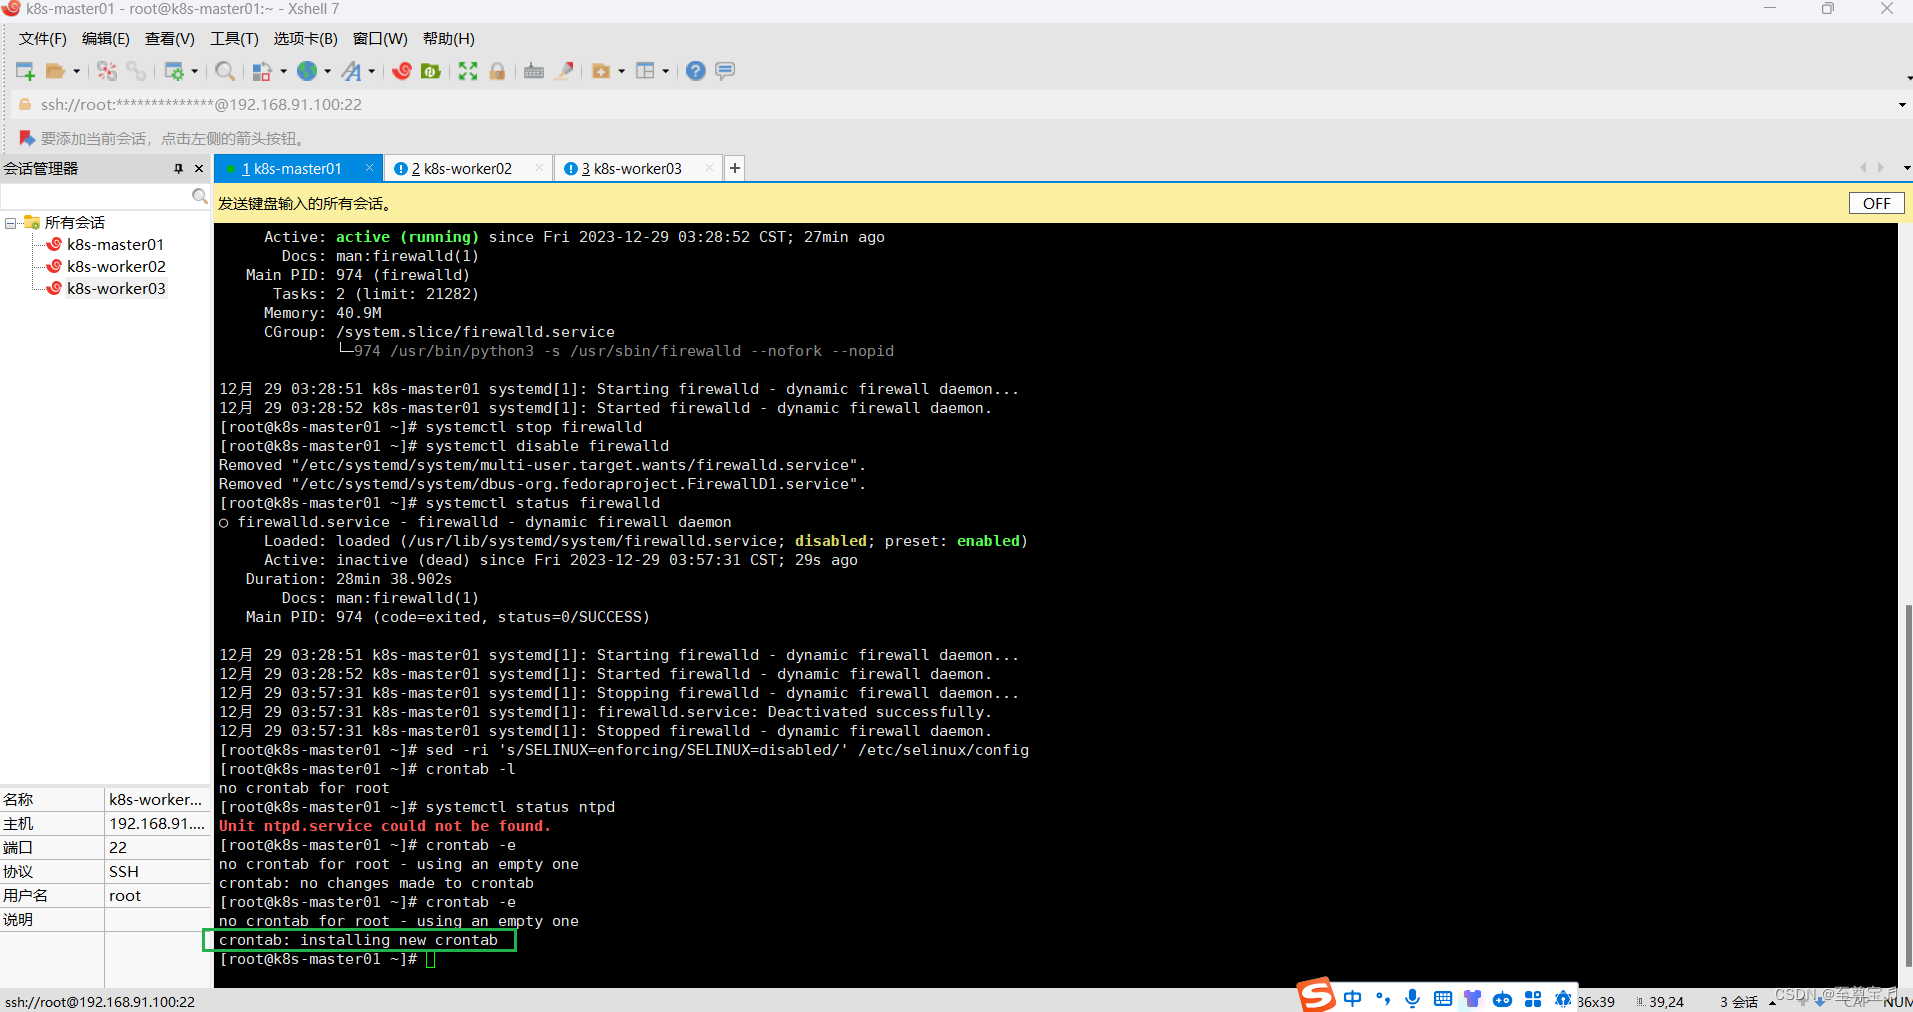
七.所有主机同步时间配置;
最小化安装系统需要安装ntpdate软件,此处安装的是服务器版本,带有update软件,直接使用即可;
安装命令:
yum -y install ntpdate编辑同步时间规则命令:
crontab -e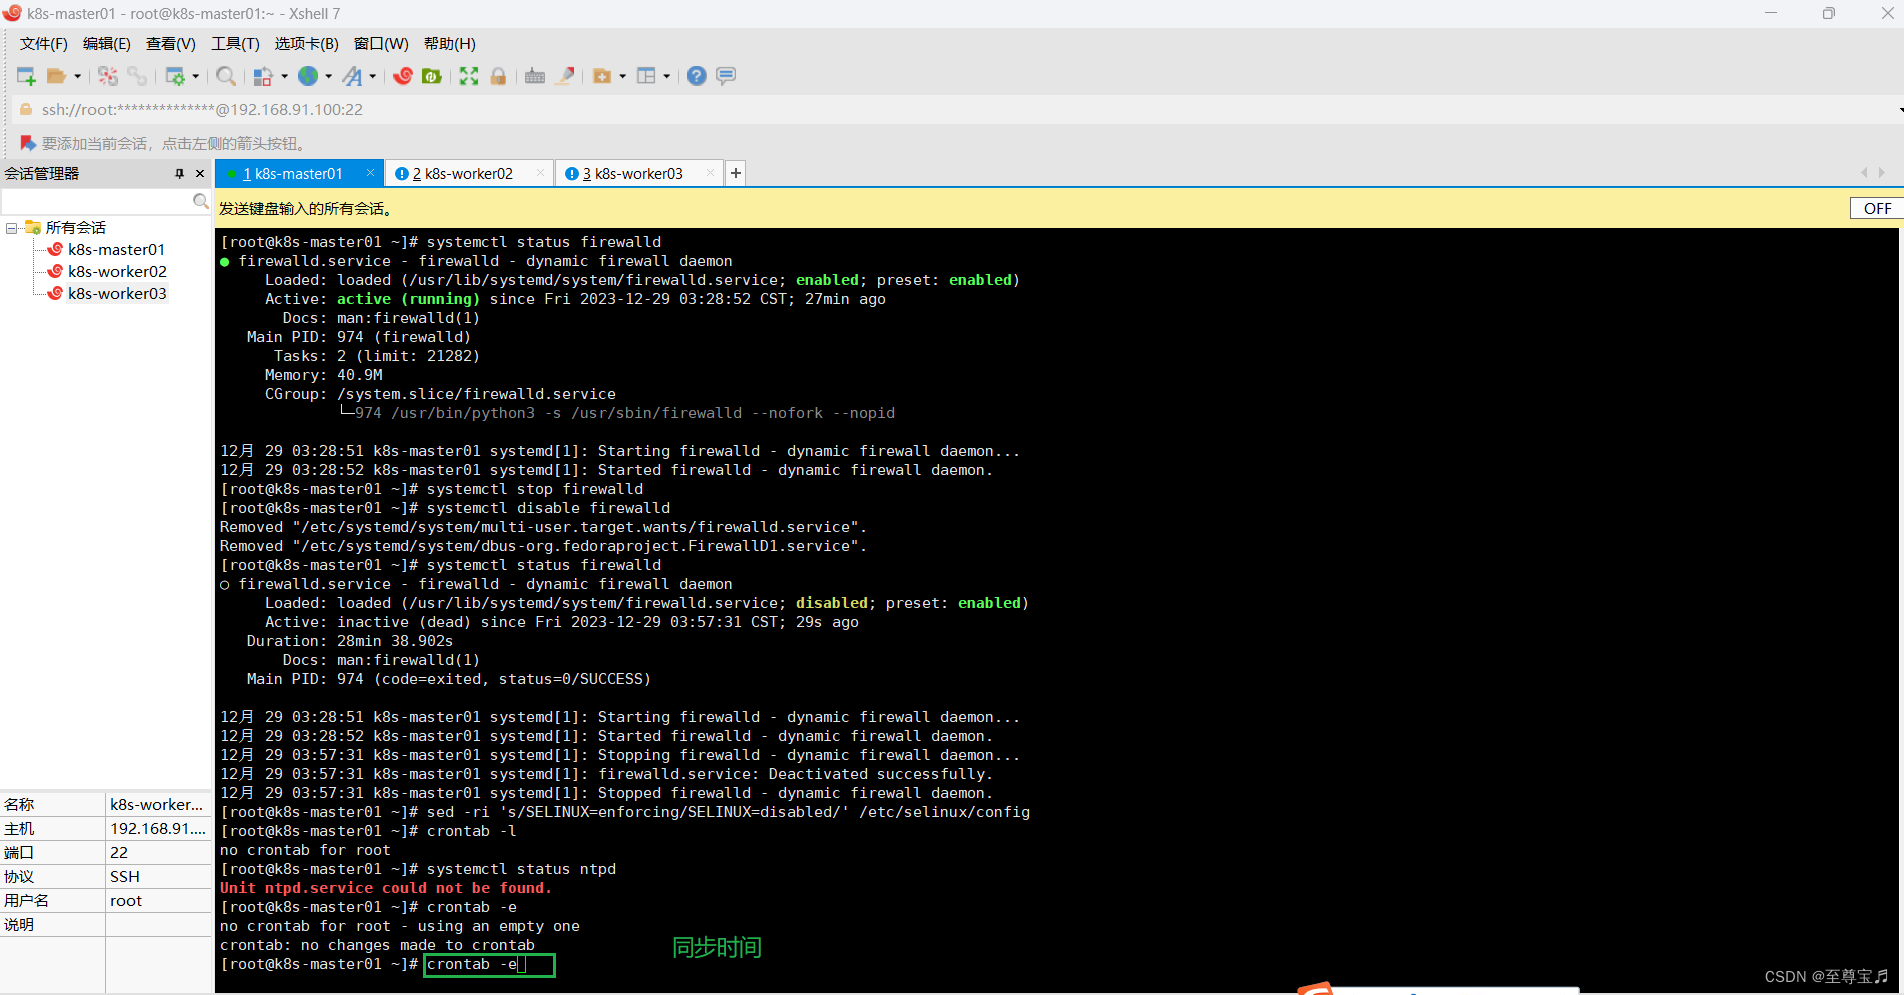
0 */1 * * * /usr/sbin/ntpdate time1.aliyun.com

八.所有主机配置内核转发及网桥过滤;
开启内核路由转发命令:
vim /etc/sysctl.conf
(截图中命令显示两次,是我测试命令可用后,二次截图的操作)

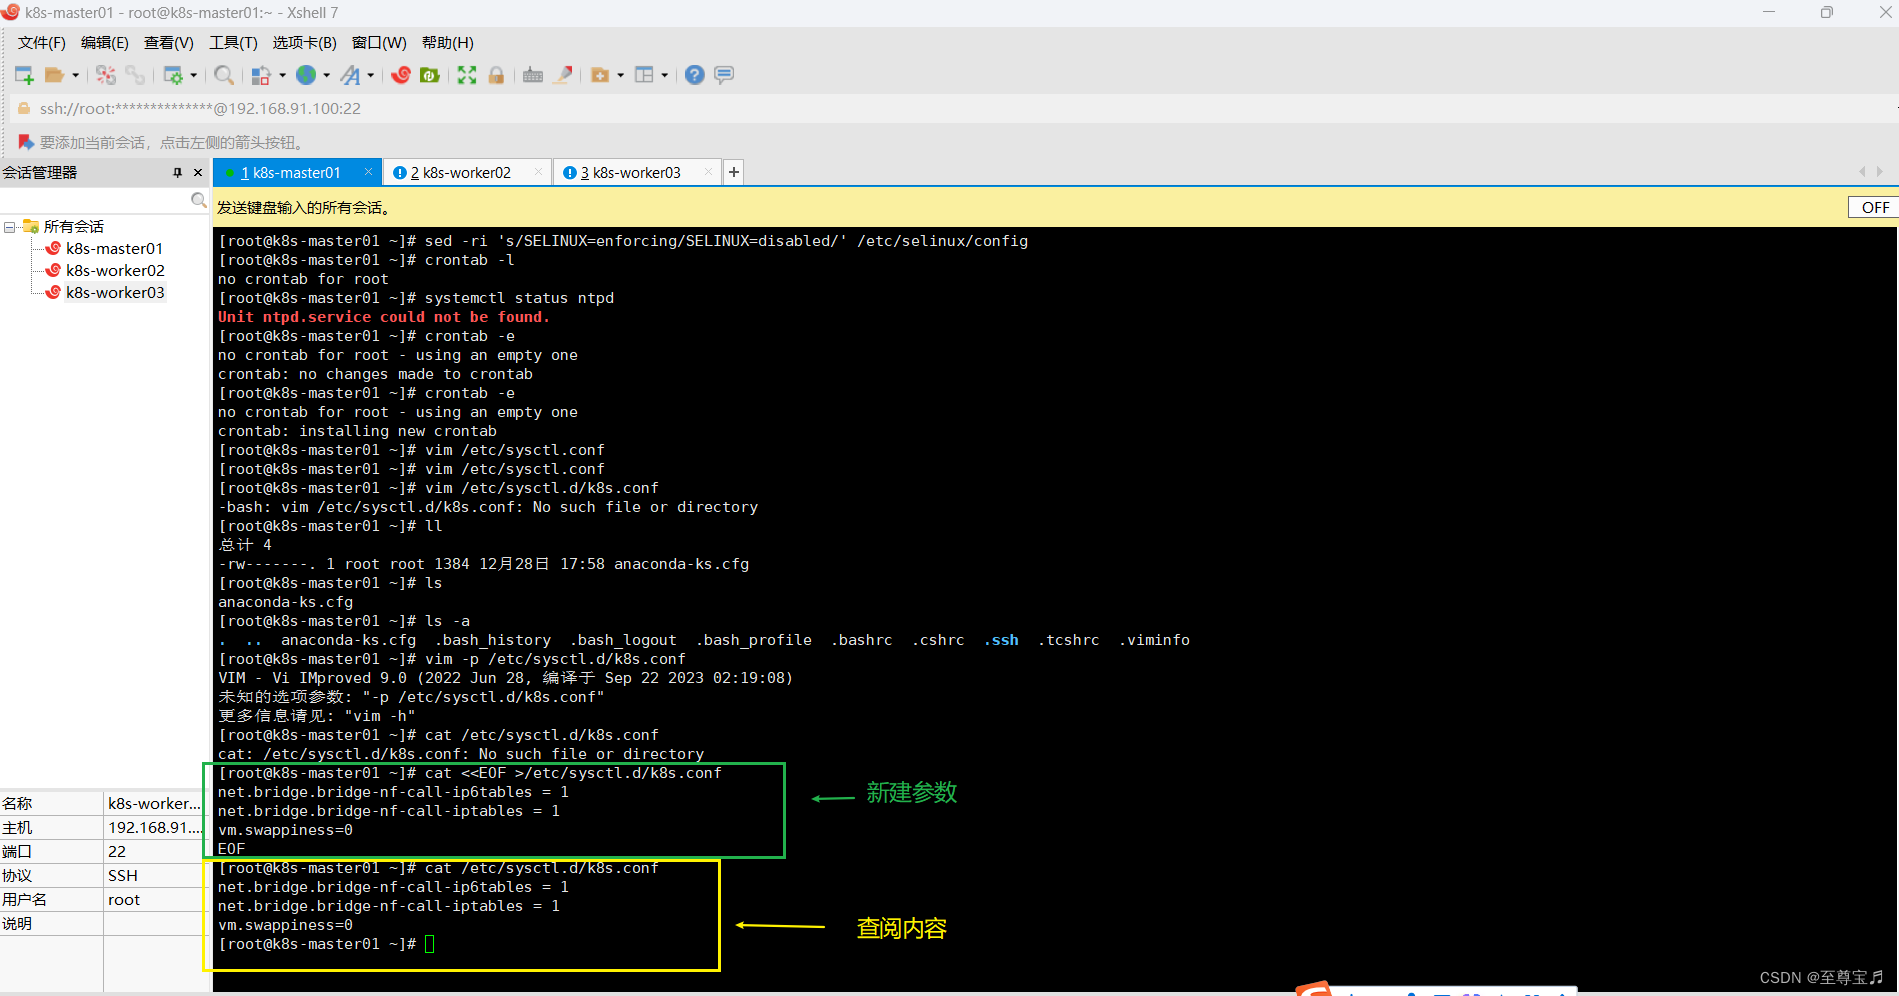
配置内核参数,将桥接的IPv4流量传递到iptables的链的命令:(创建新文件+编辑内容)
cat <<EOF >/etc/sysctl.d/k8s.conf
net.bridge.bridge-nf-call-ip6tables = 1
net.bridge.bridge-nf-call-iptables = 1
vm.swappiness=0
EOF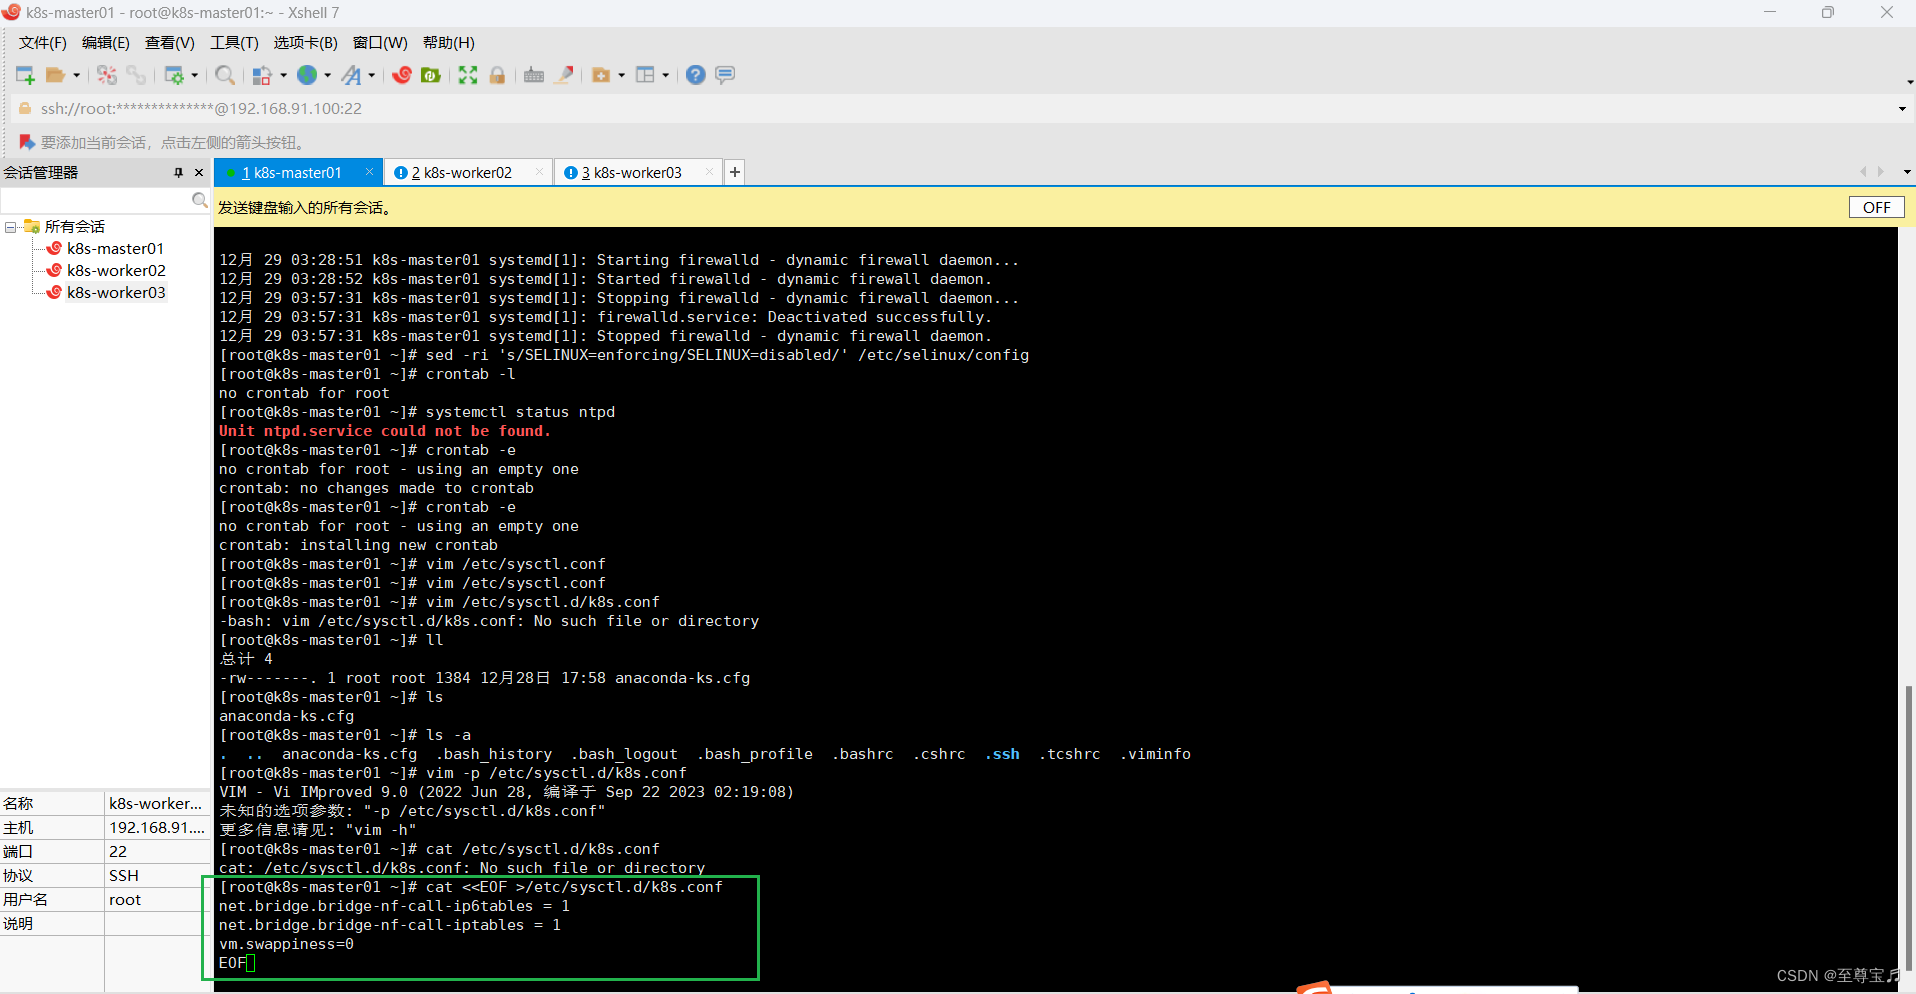
执行该命令,如果不执行就会在应用k8s.conf时出现加载错误;
modprobe br_netfilter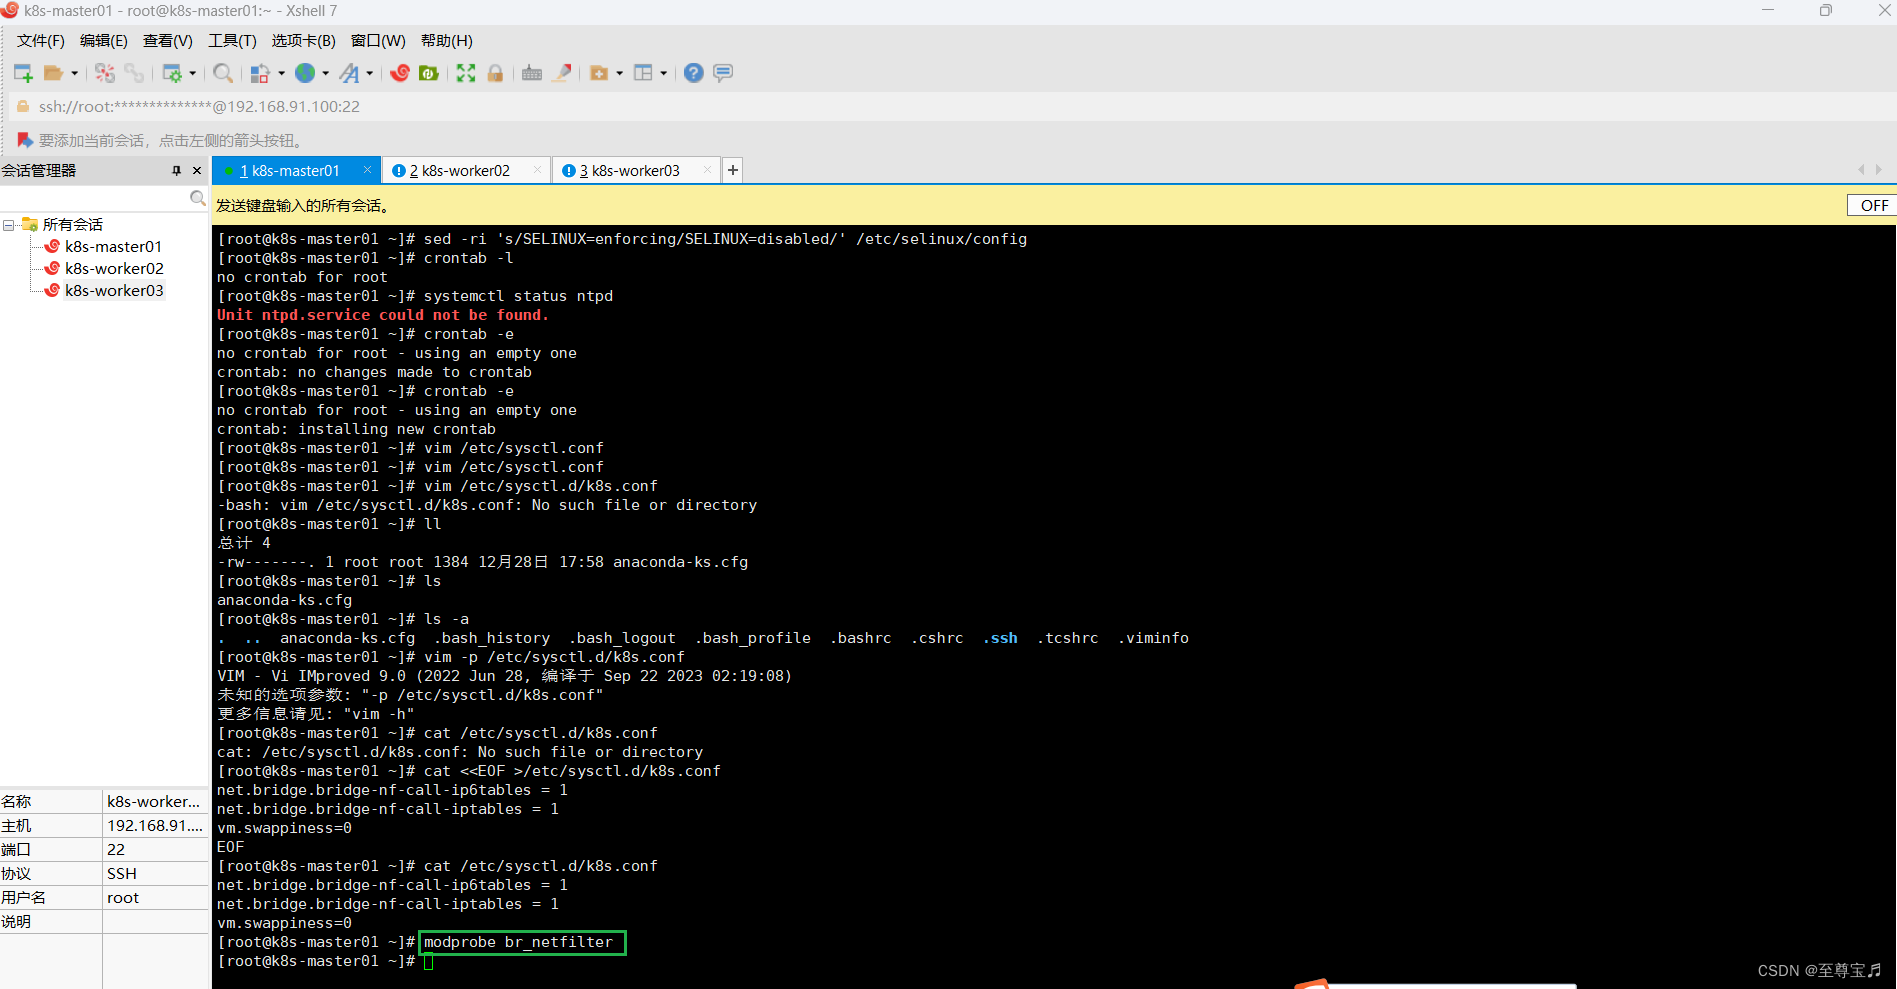
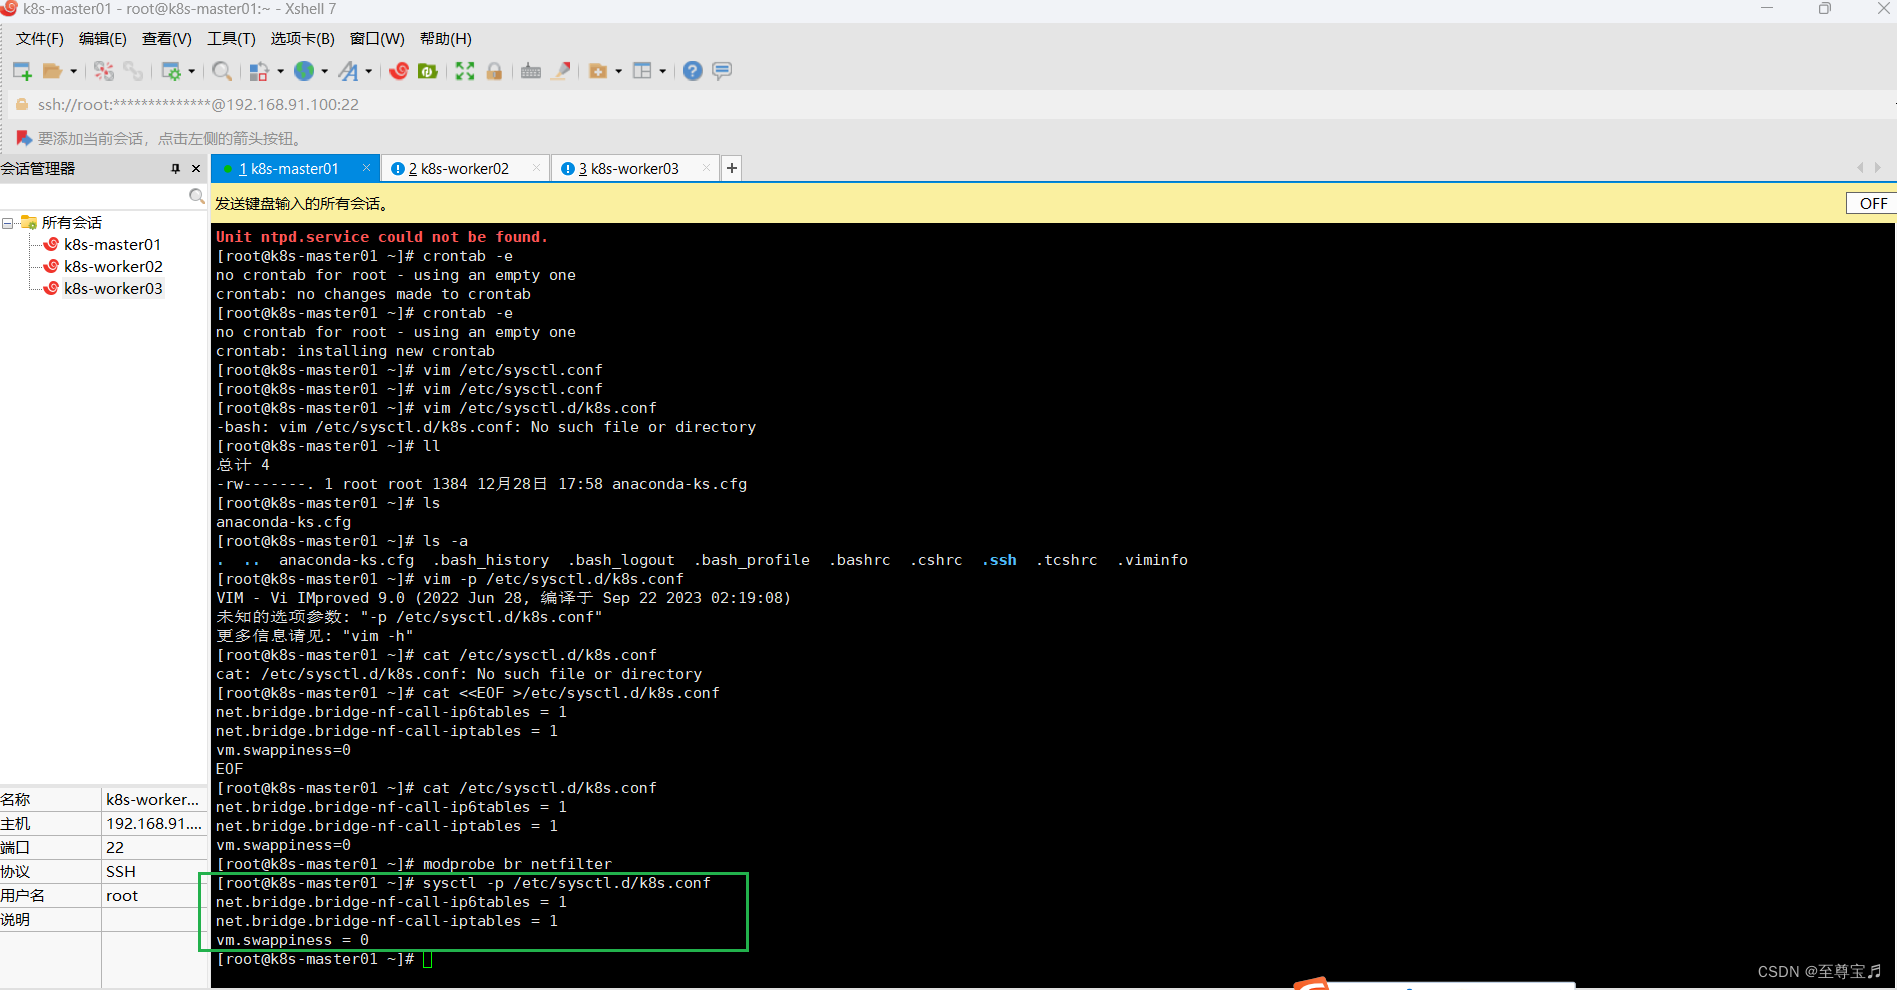
使用新添加配置文件生效;
sysctl -p /etc/sysctl.d/k8s.conf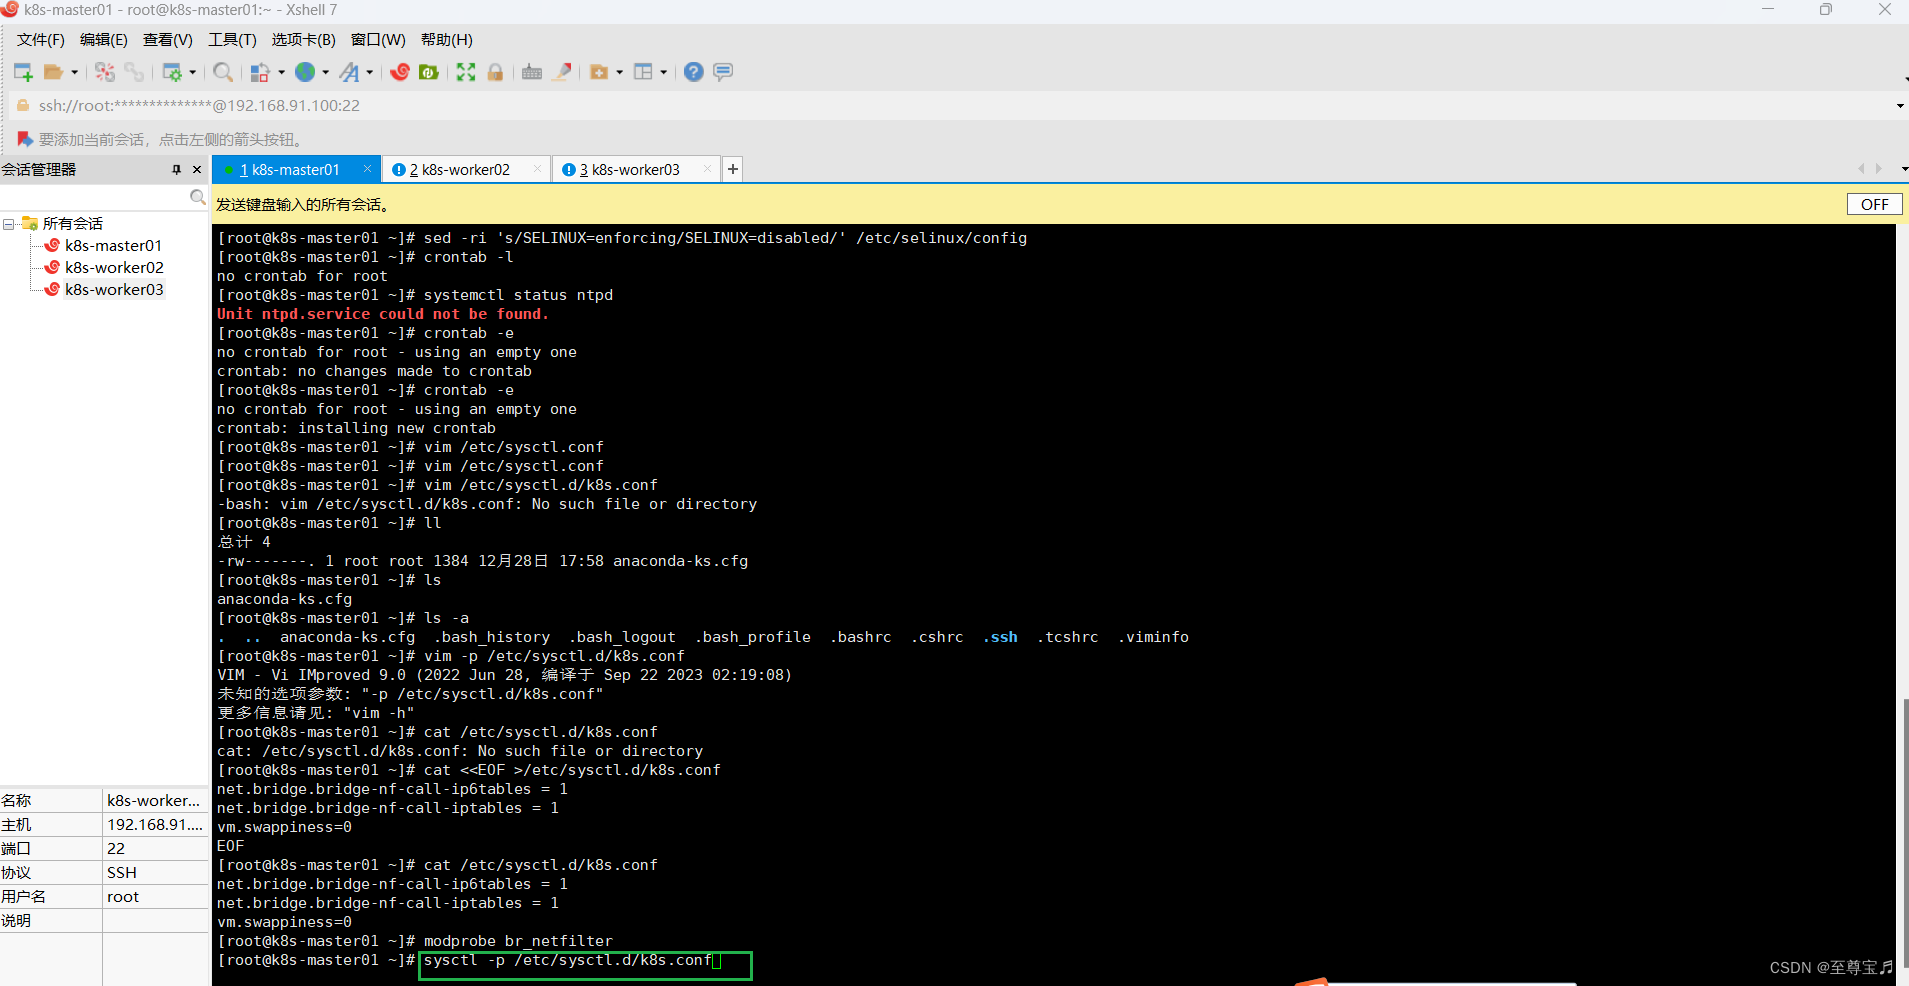
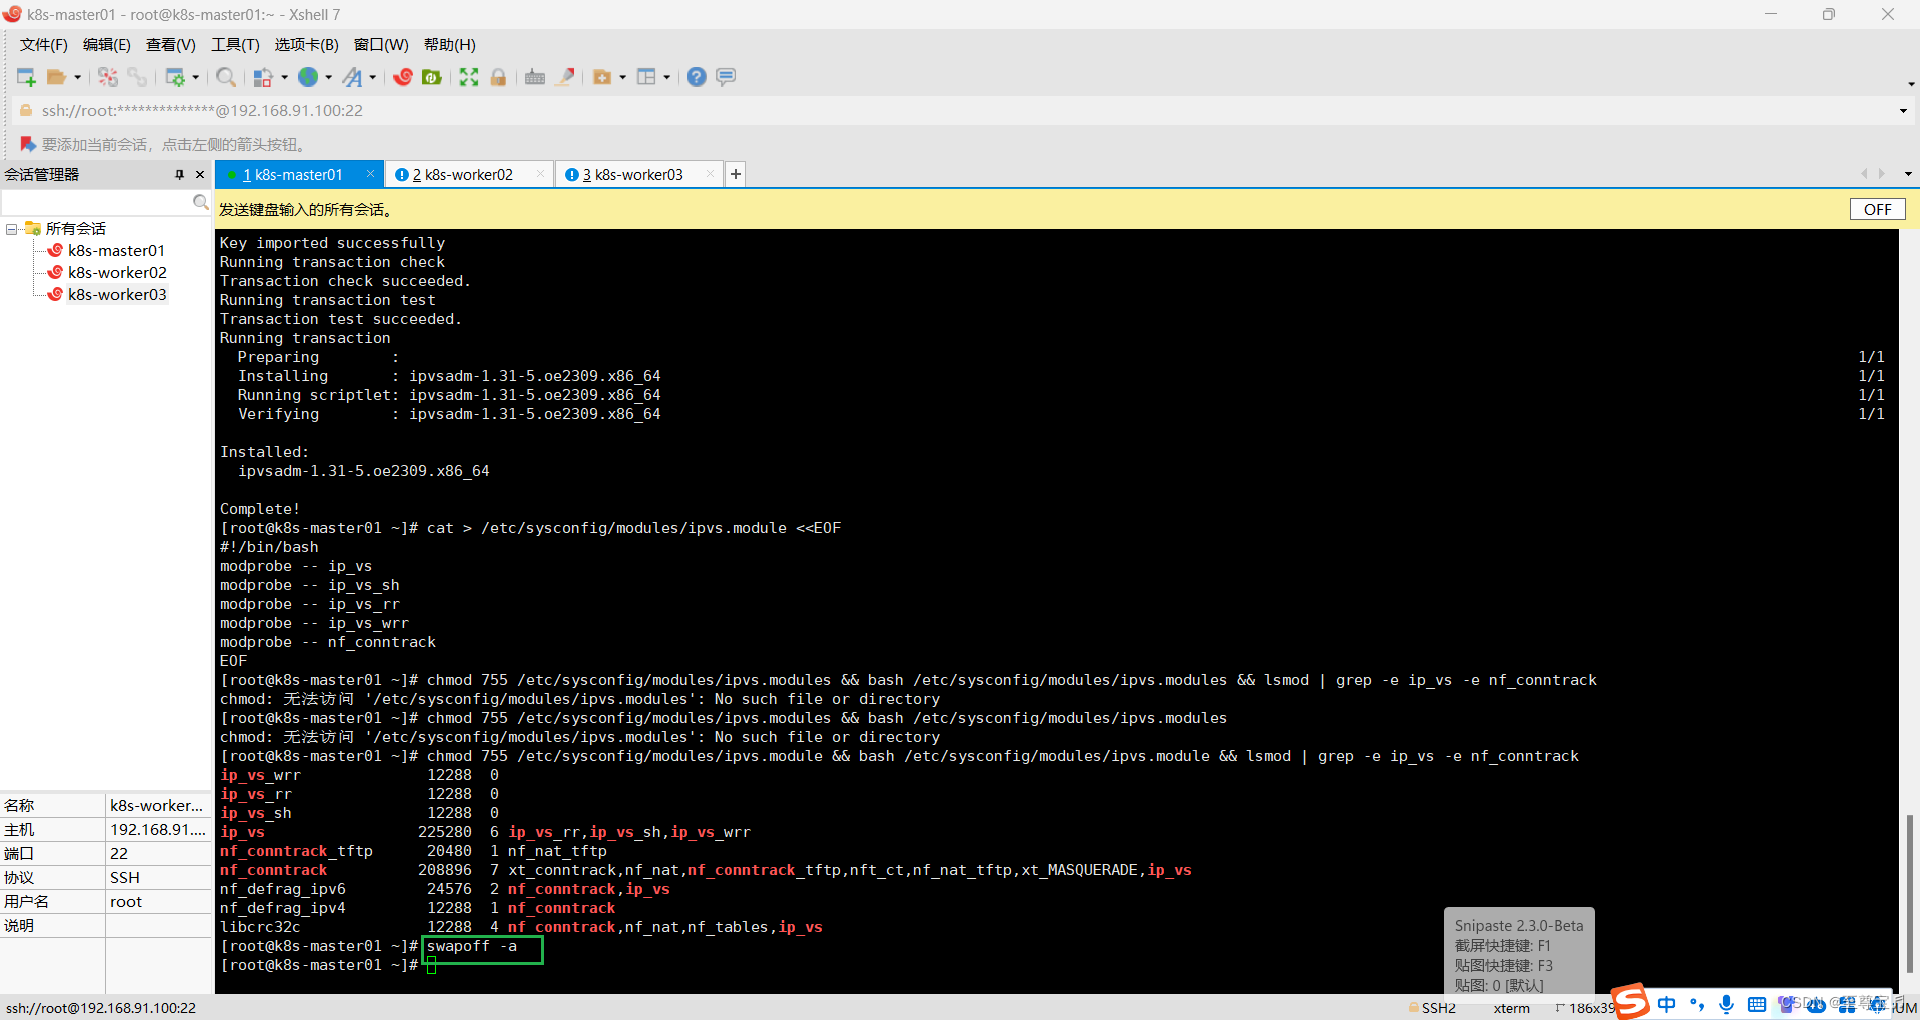
九.所有主机安装ipset及ipvsadm;
yum -y install ipset ipvsadm
回车,安装过程如下;


配置ipvsadm模块加载方式,添加需要加载的模块;
cat > /etc/sysconfig/modules/ipvs.module <<EOF
#!/bin/bash
modprobe -- ip_vs
modprobe -- ip_vs_sh
modprobe -- ip_vs_rr
modprobe -- ip_vs_wrr
modprobe -- nf_conntrack
EOF
授权、运行、检查是否加载;
chmod 755 /etc/sysconfig/modules/ipvs.module && bash /etc/sysconfig/modules/ipvs.module && lsmod | grep -e ip_vs -e nf_conntrack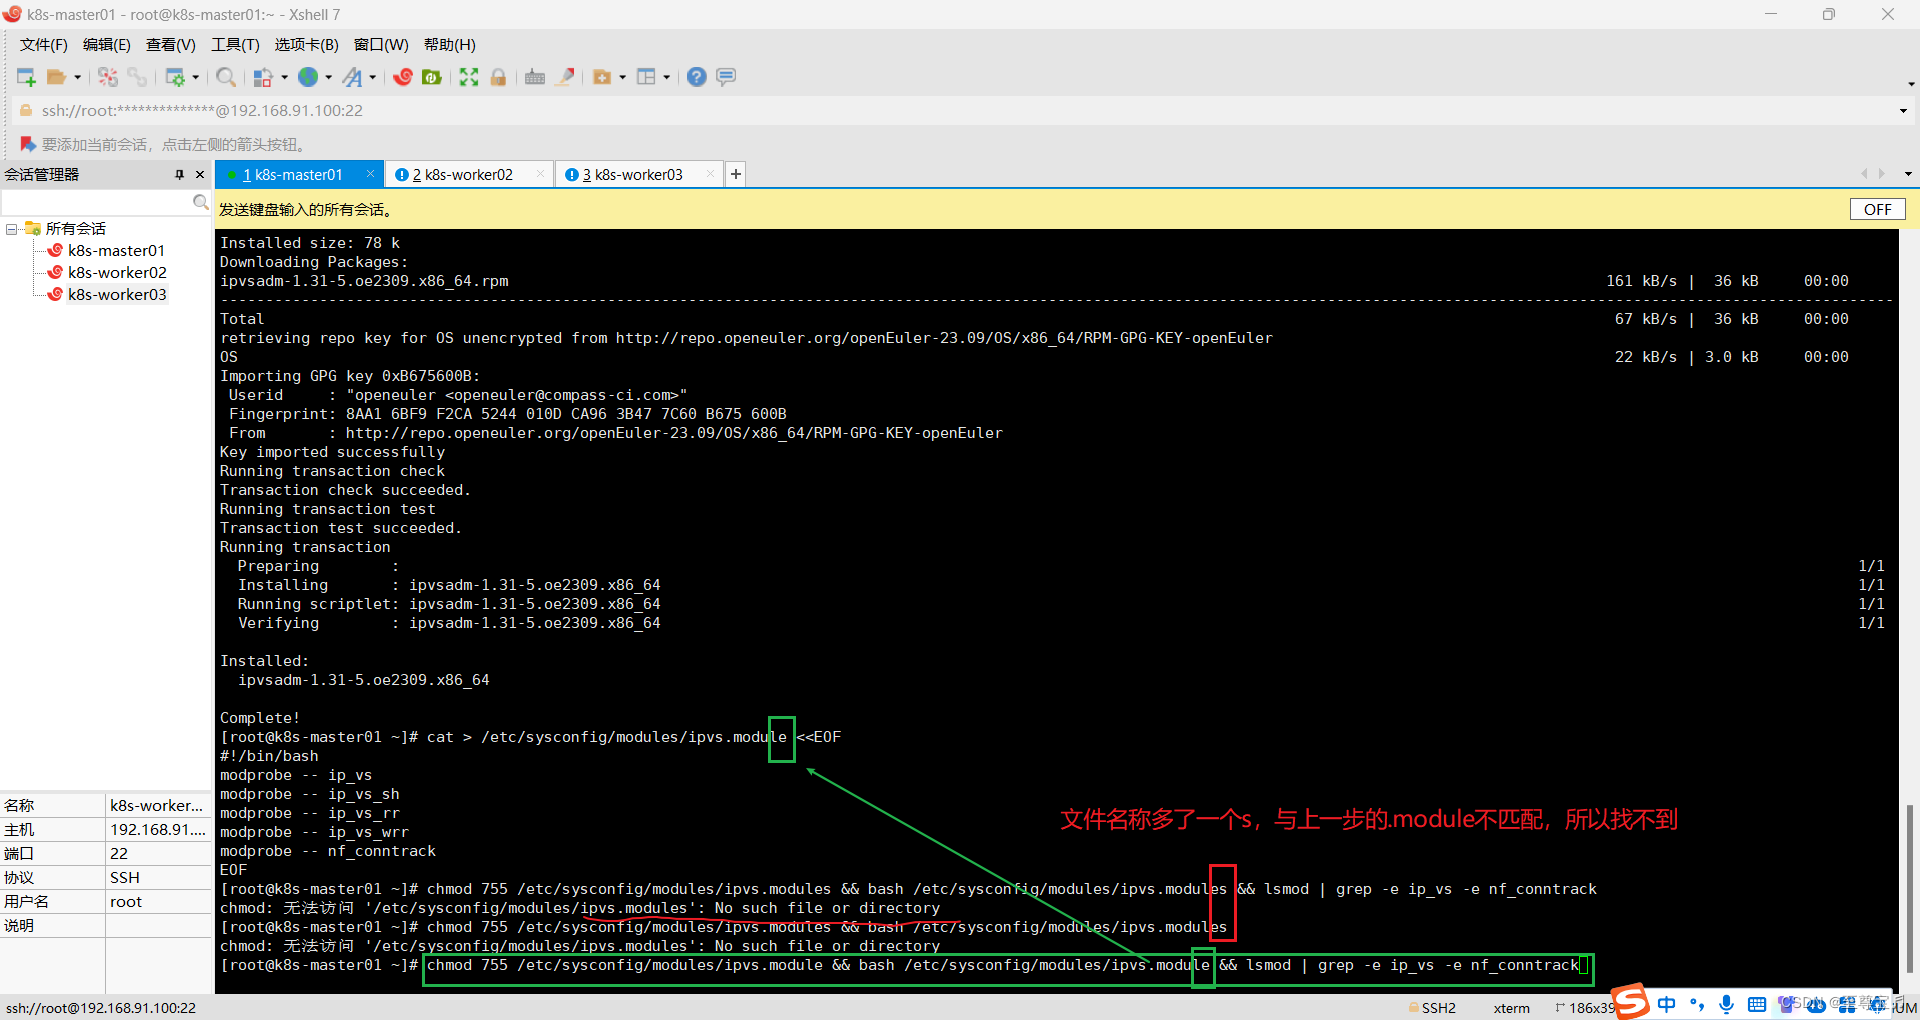

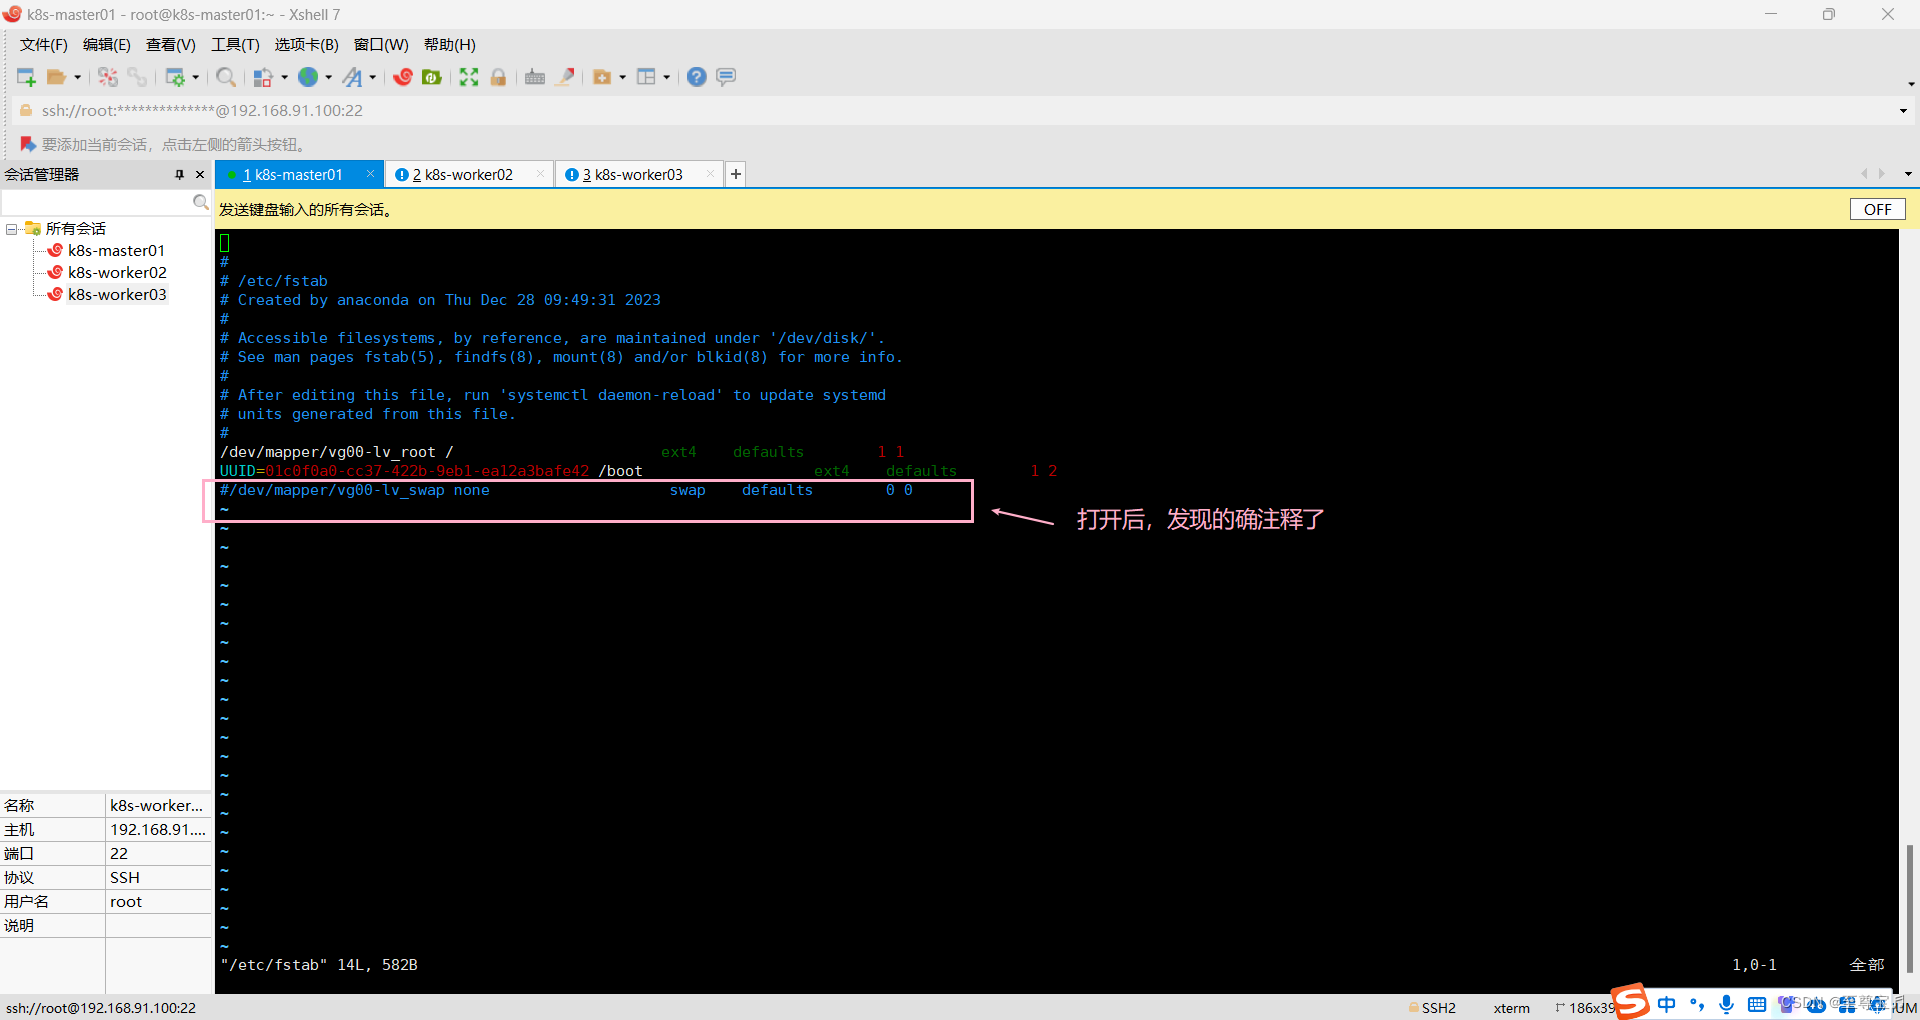
十.关闭SWAP分区;
方法一:
# 如果有的话,关闭swap分区
swapoff -a# 永久关闭swap分区,注释掉fstab中包含swap的这一行
vim /etc/fstab
# /dev/mapper/centos-swap swap                    swap    defaults        0 0
方法二:
#实时动态关闭
swapoff -a #禁止重启后自动开启
sed -i '/ swap / s/^/#/' /etc/fstab
本案例采用方法二;


十一.所有主机重启;
reboot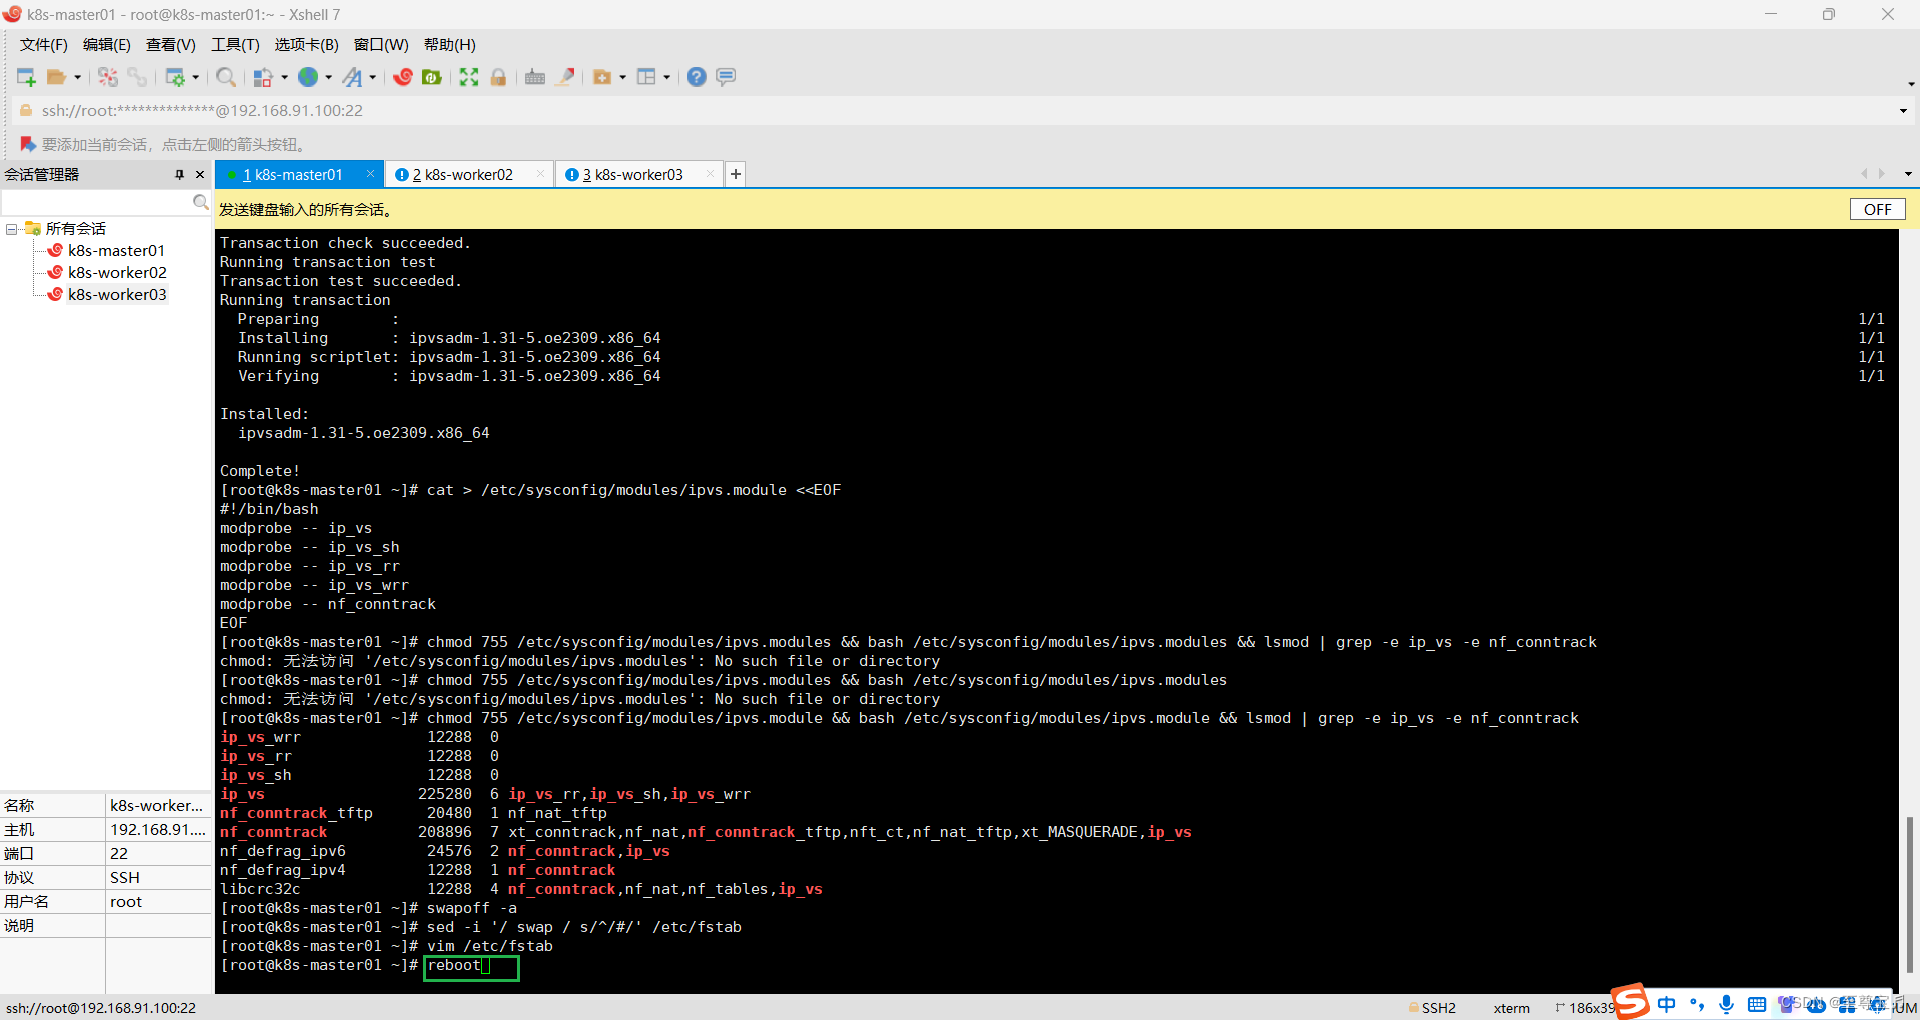


十二.所有主机docker安装;
1.查看是否存在docker软件;
yum list | grep docker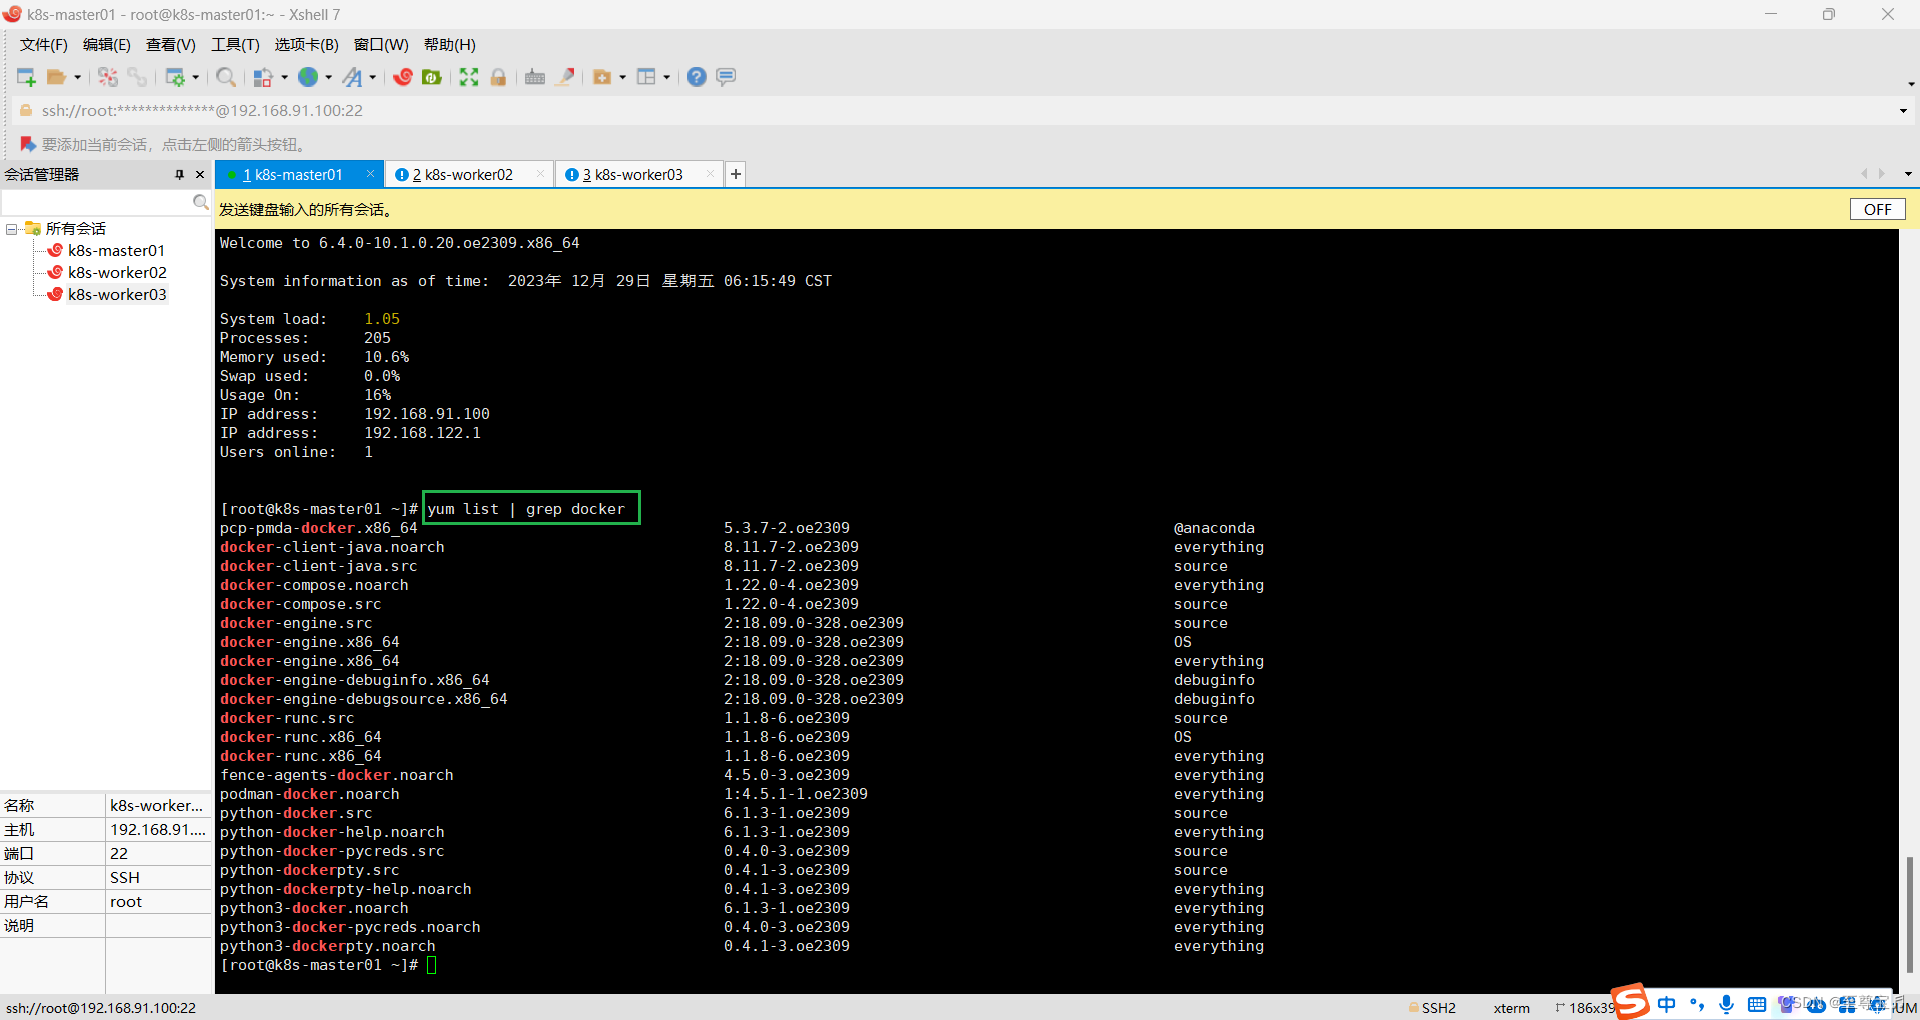
2.安装docker;
dnf install docker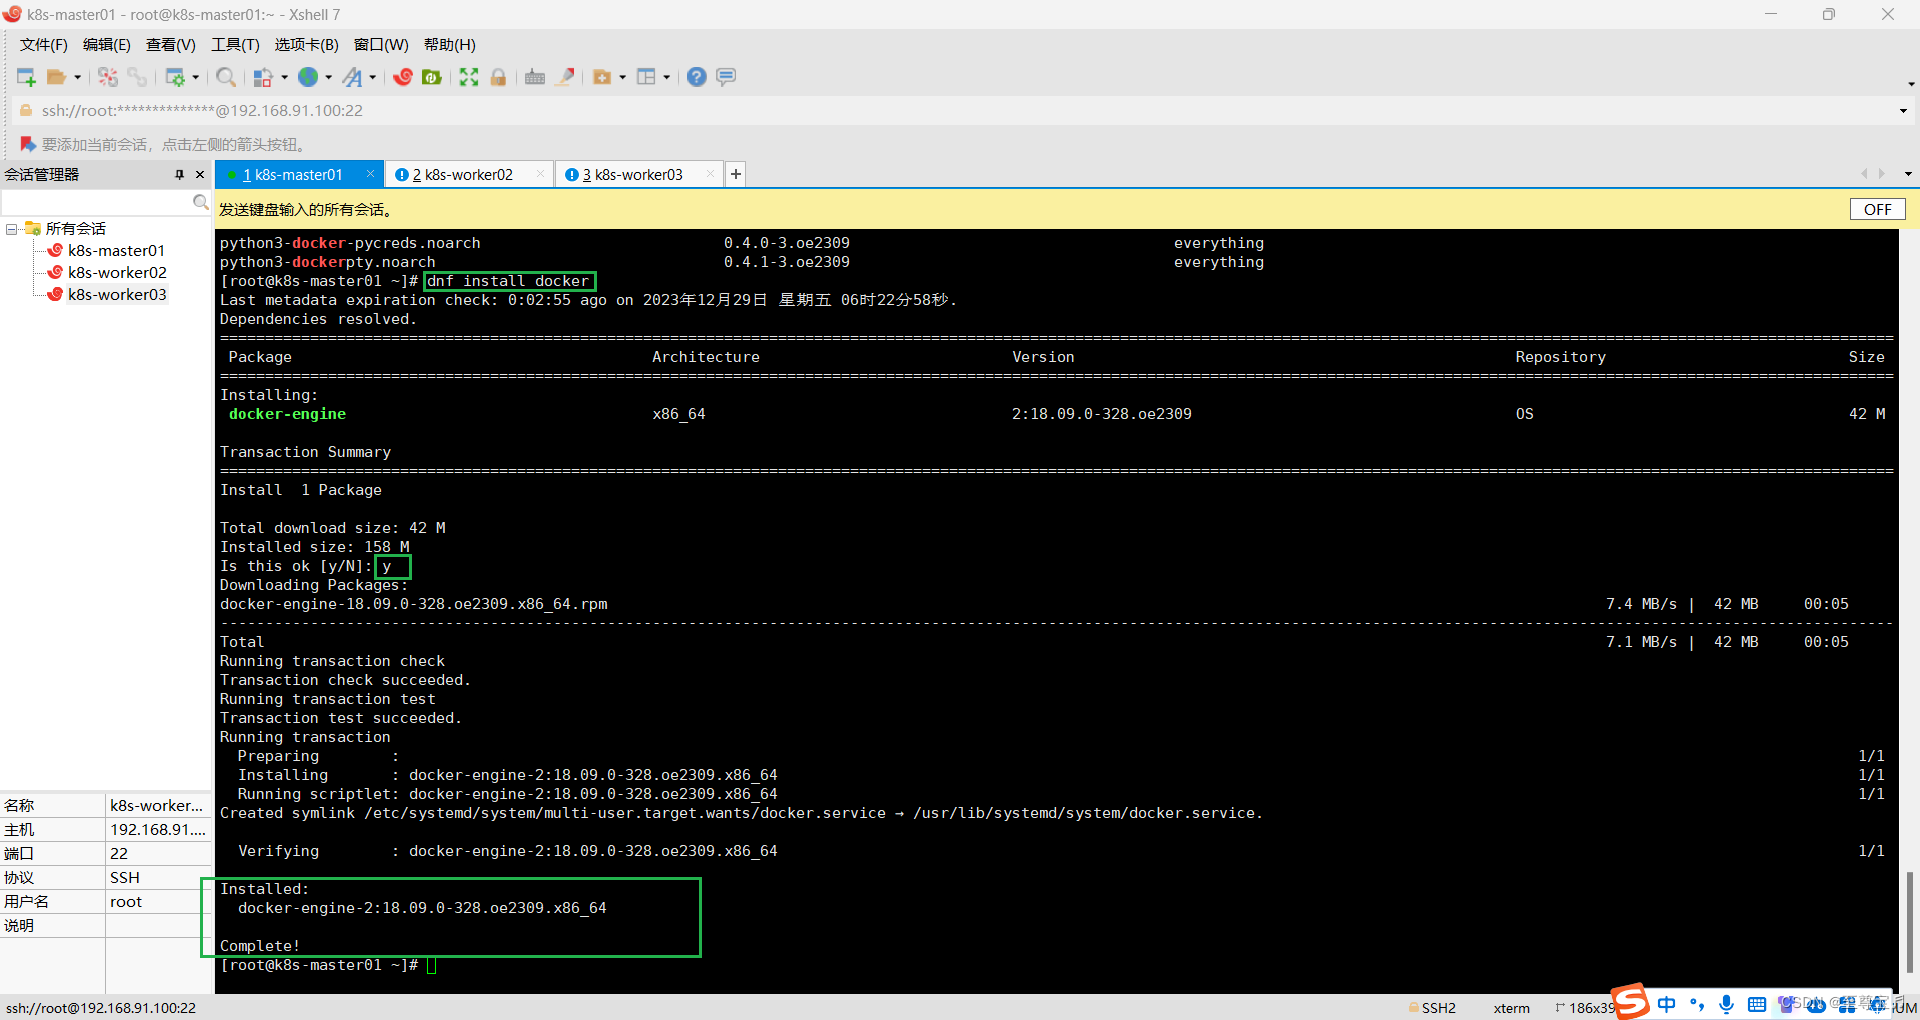
3.设置docker开机启动并启动;
systemctl enable --now docker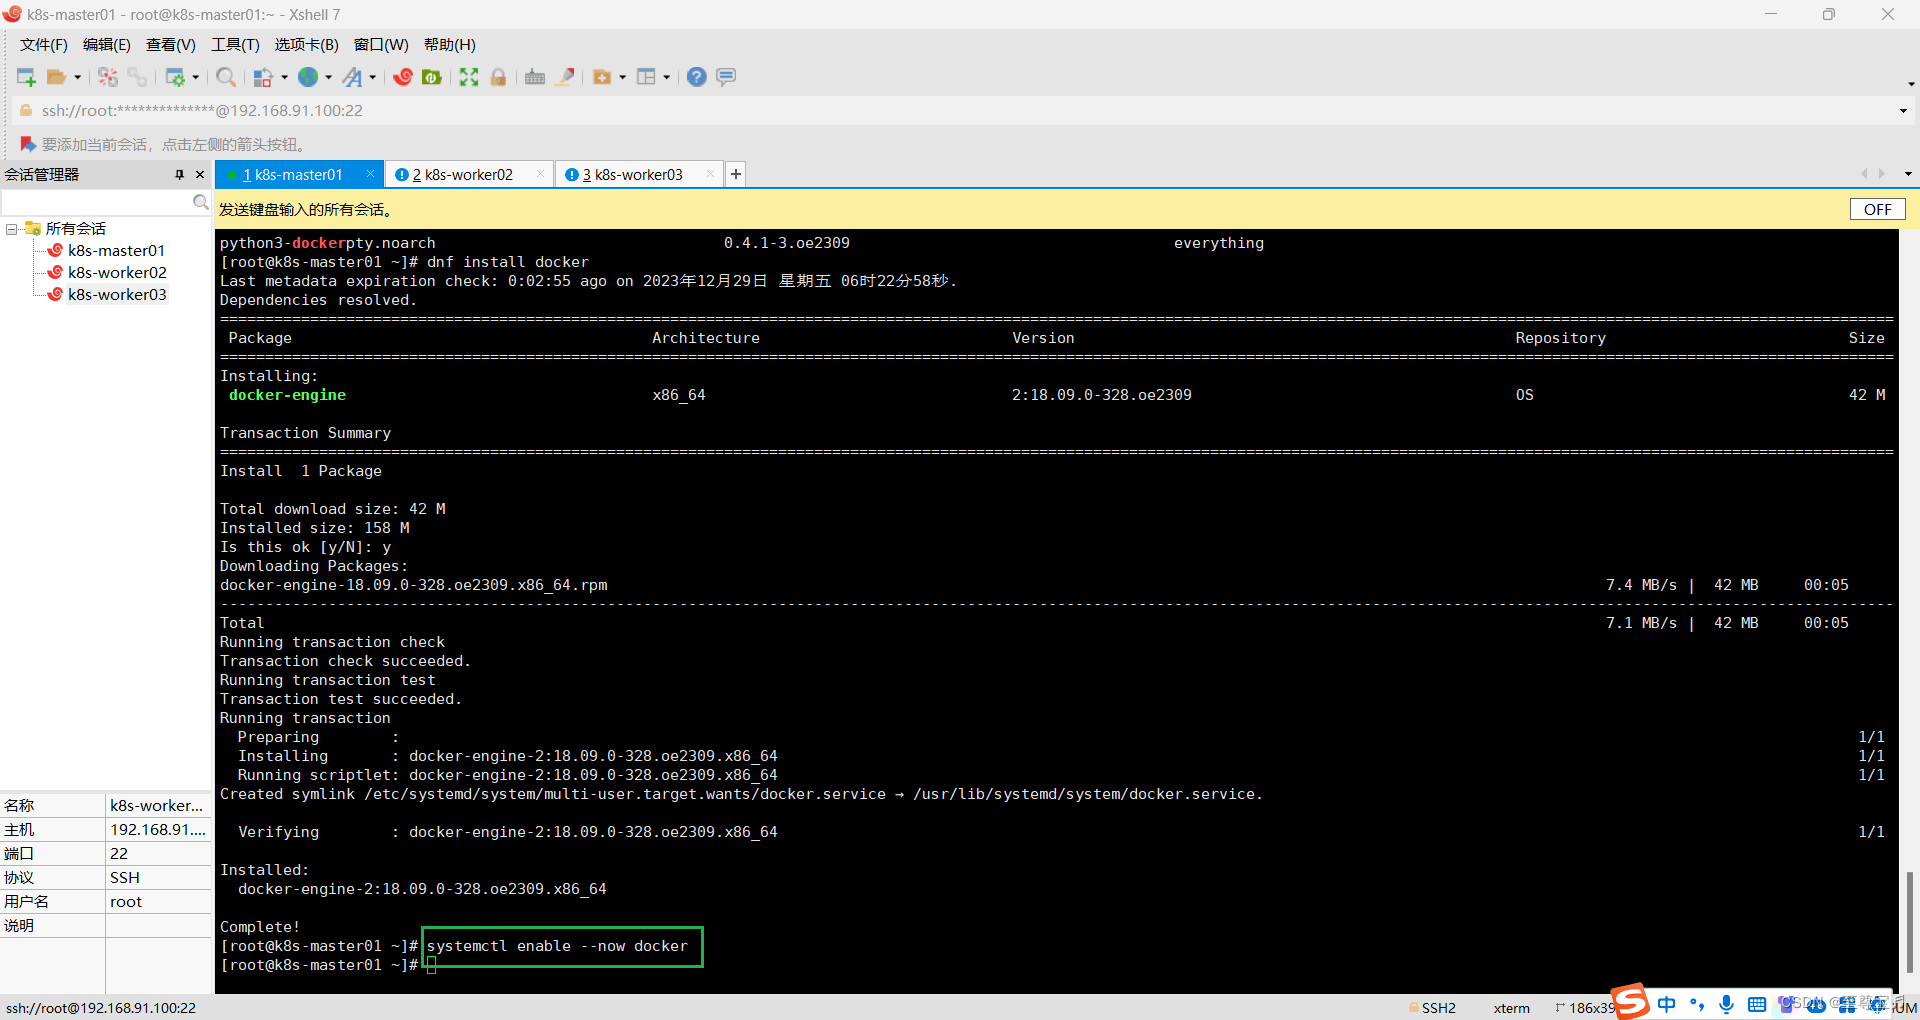
4.查看docker版本;
docker version
十三.k8s软件安装;
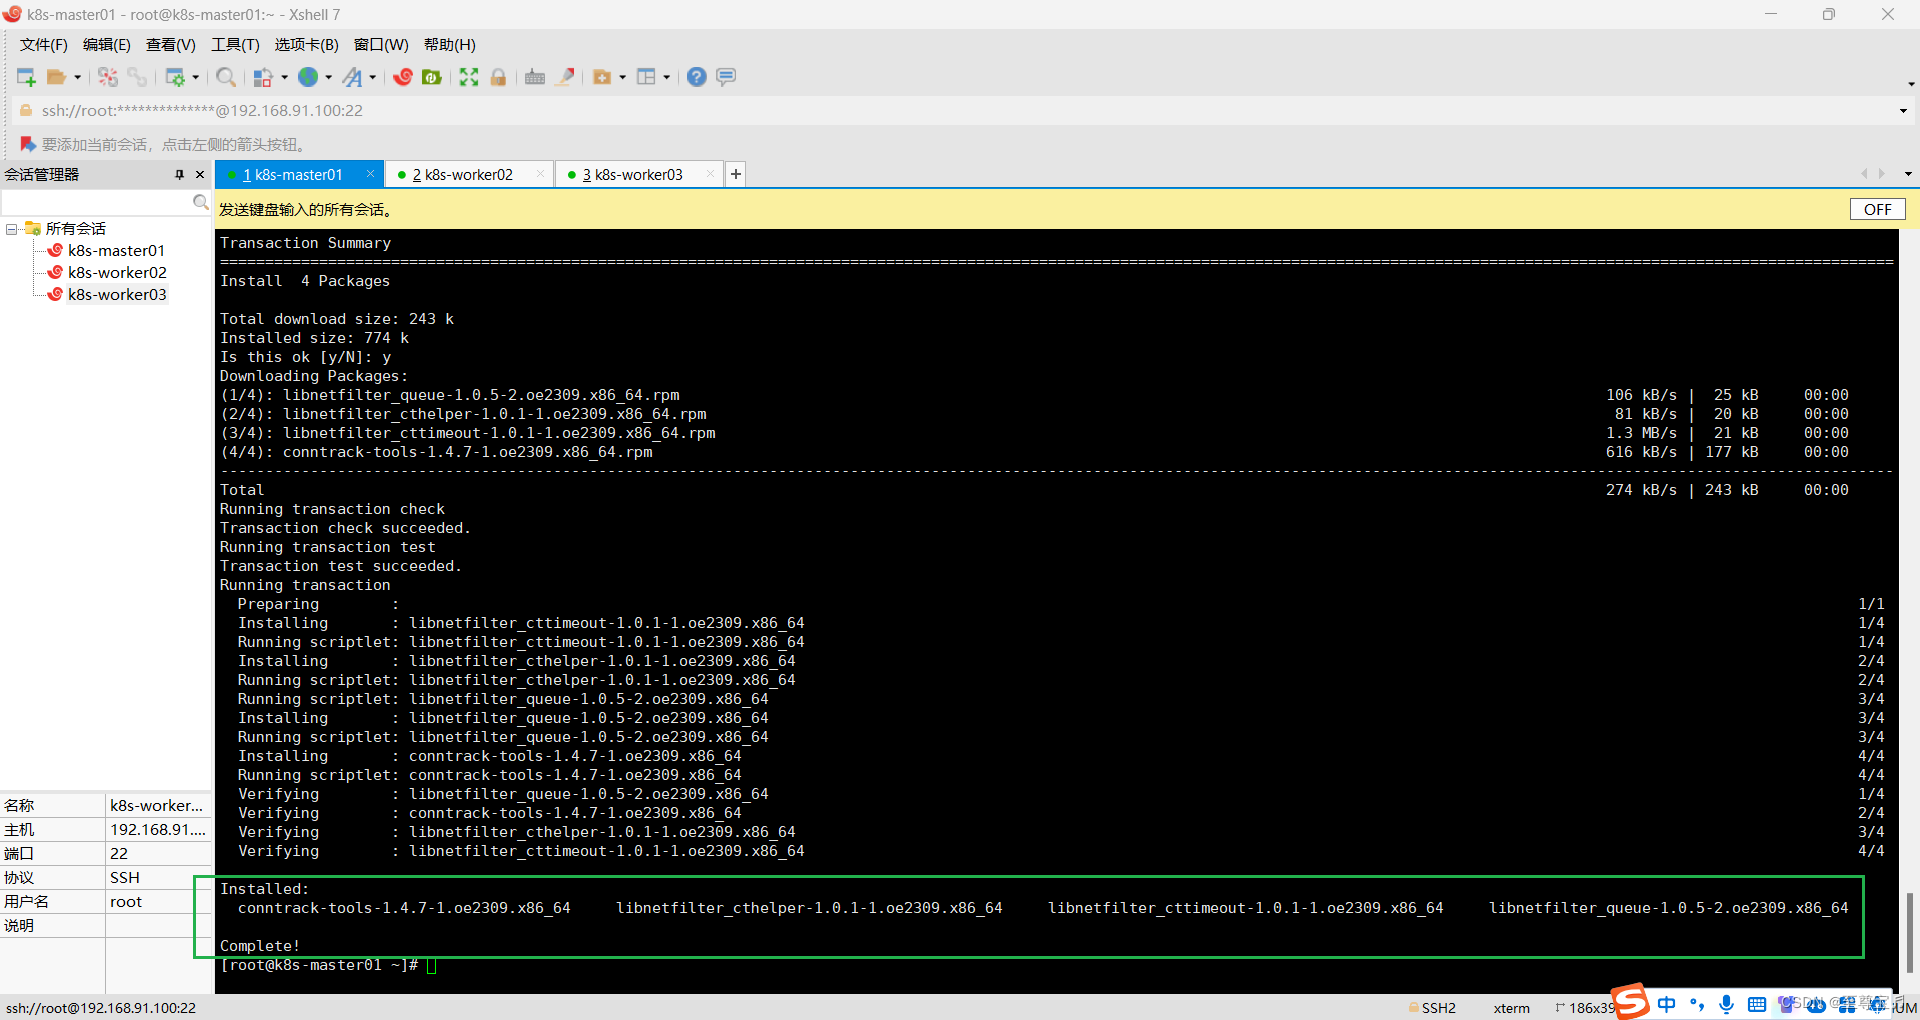
1.所有主机安装k8s依赖,连接跟踪;
dnf install conntrack
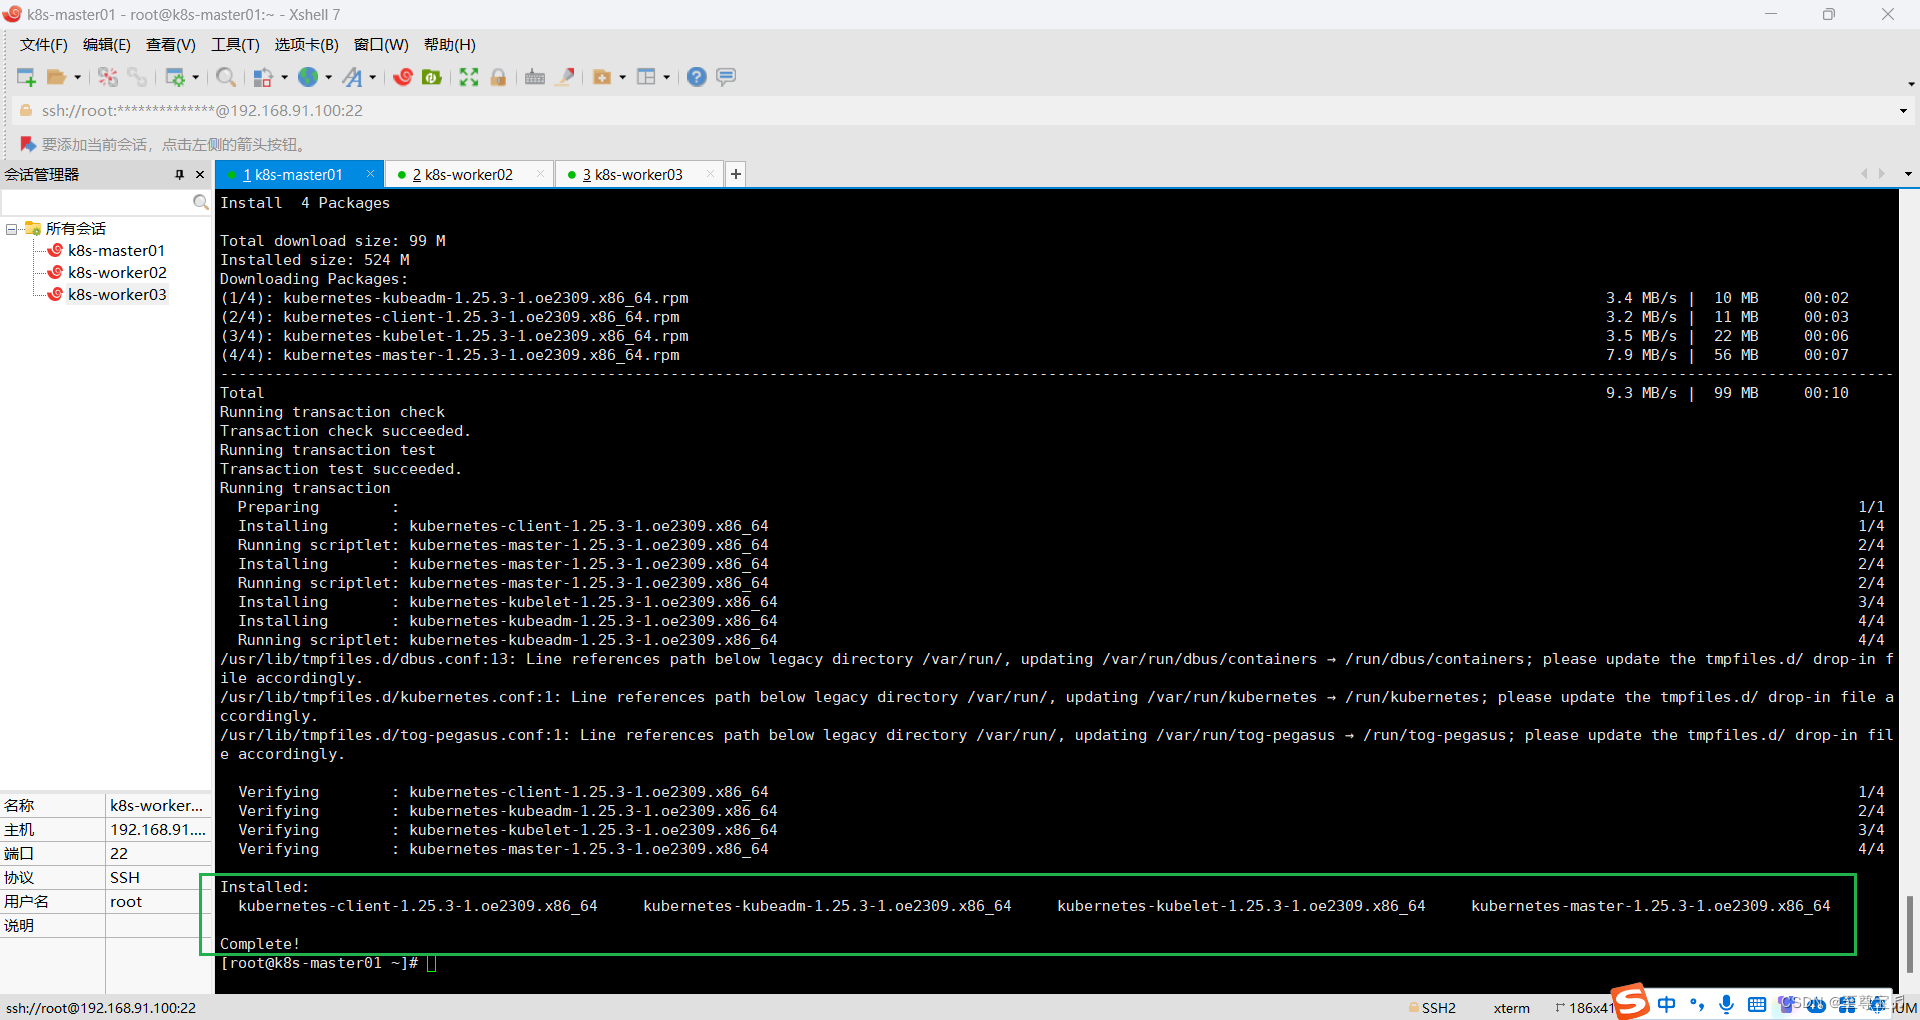
2.k8s-master01节点安装;
dnf install -y kubernetes-kubeadm kubernetes-kubelet kubernetes-master


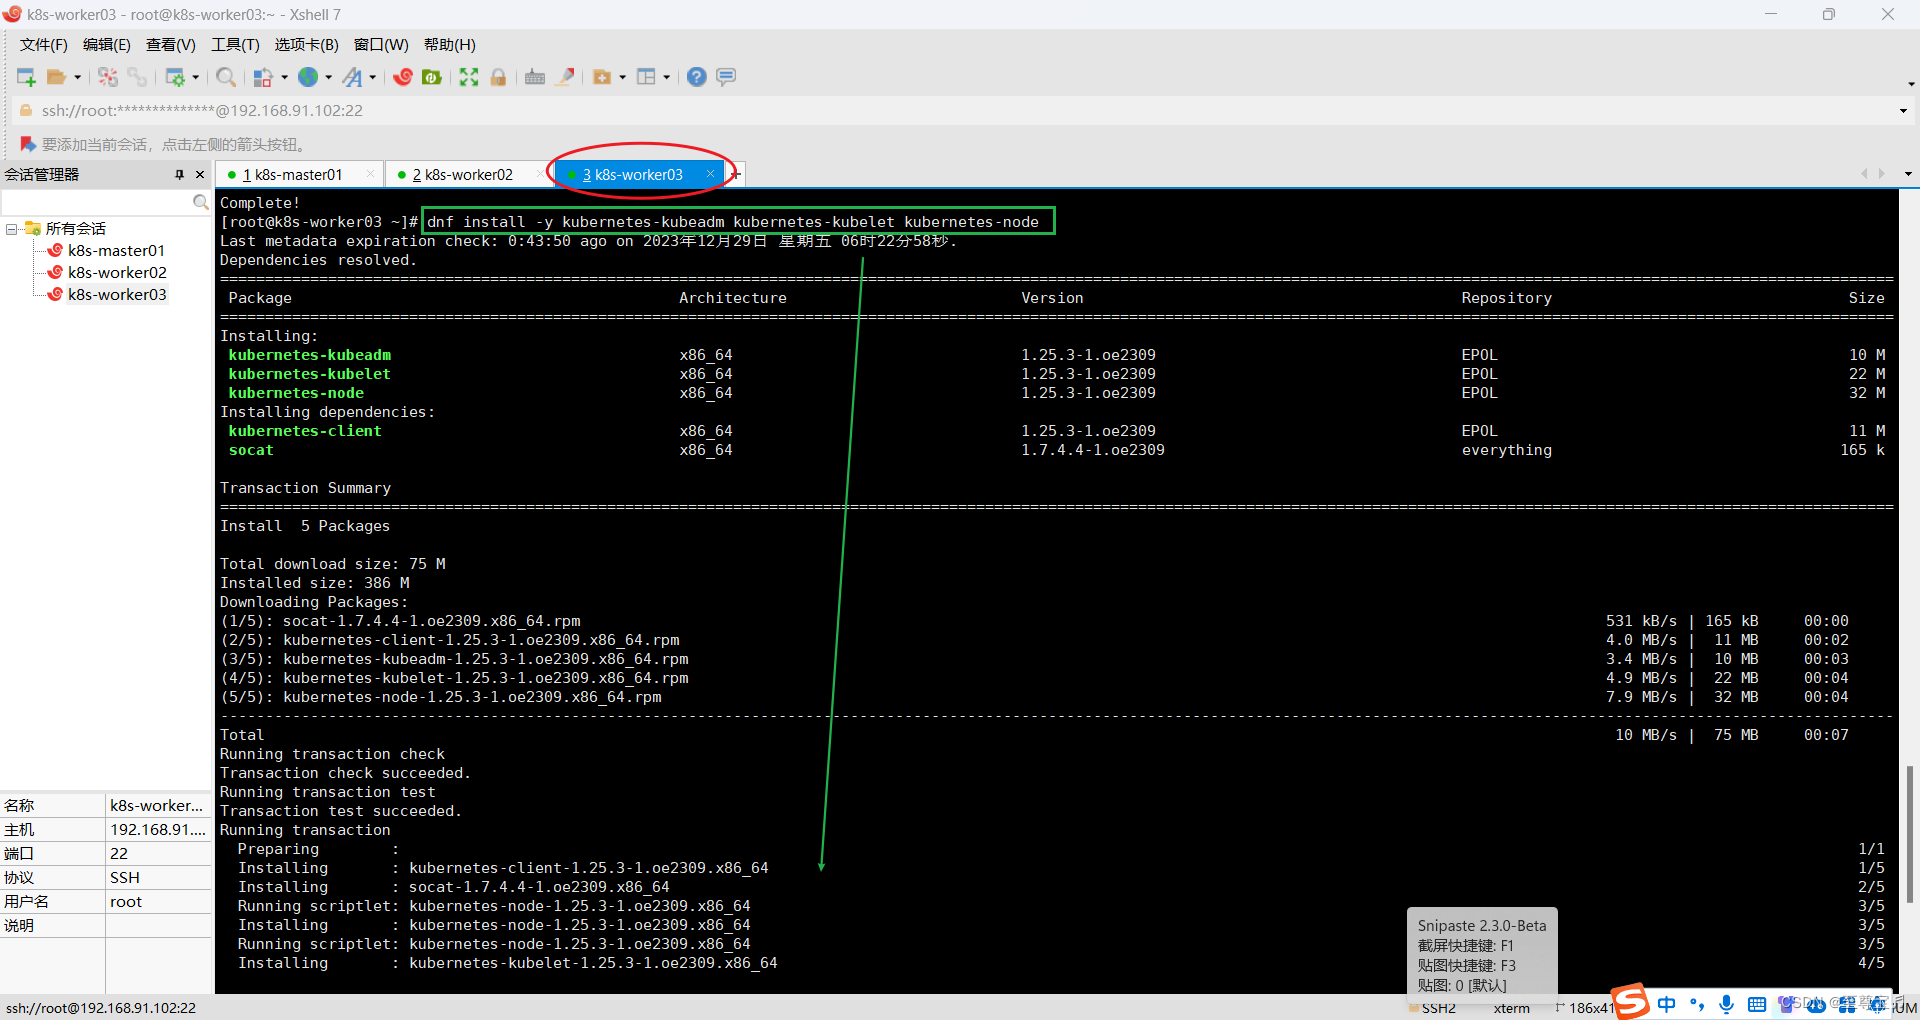
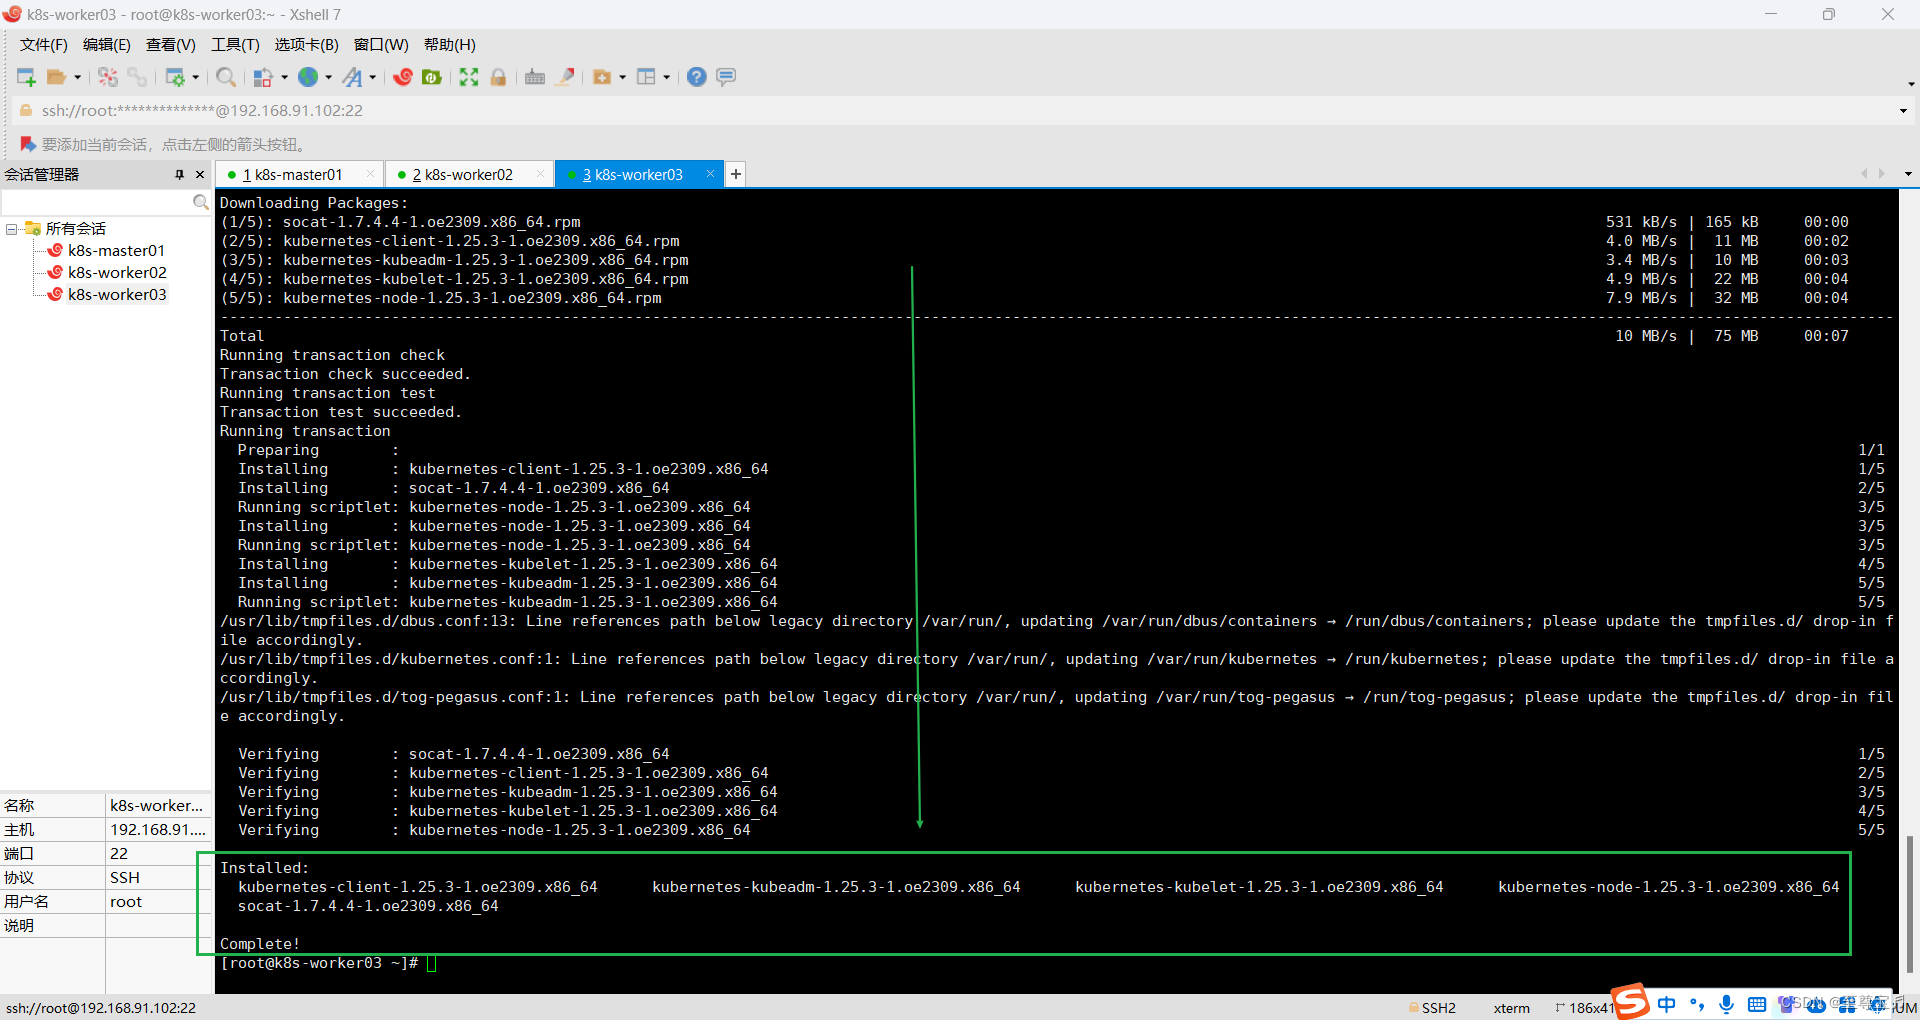
3.k8s-worker02和k8s-worker03两个节点安装;
dnf install -y kubernetes-kubeadm kubernetes-kubelet kubernetes-nodek8s-worker02

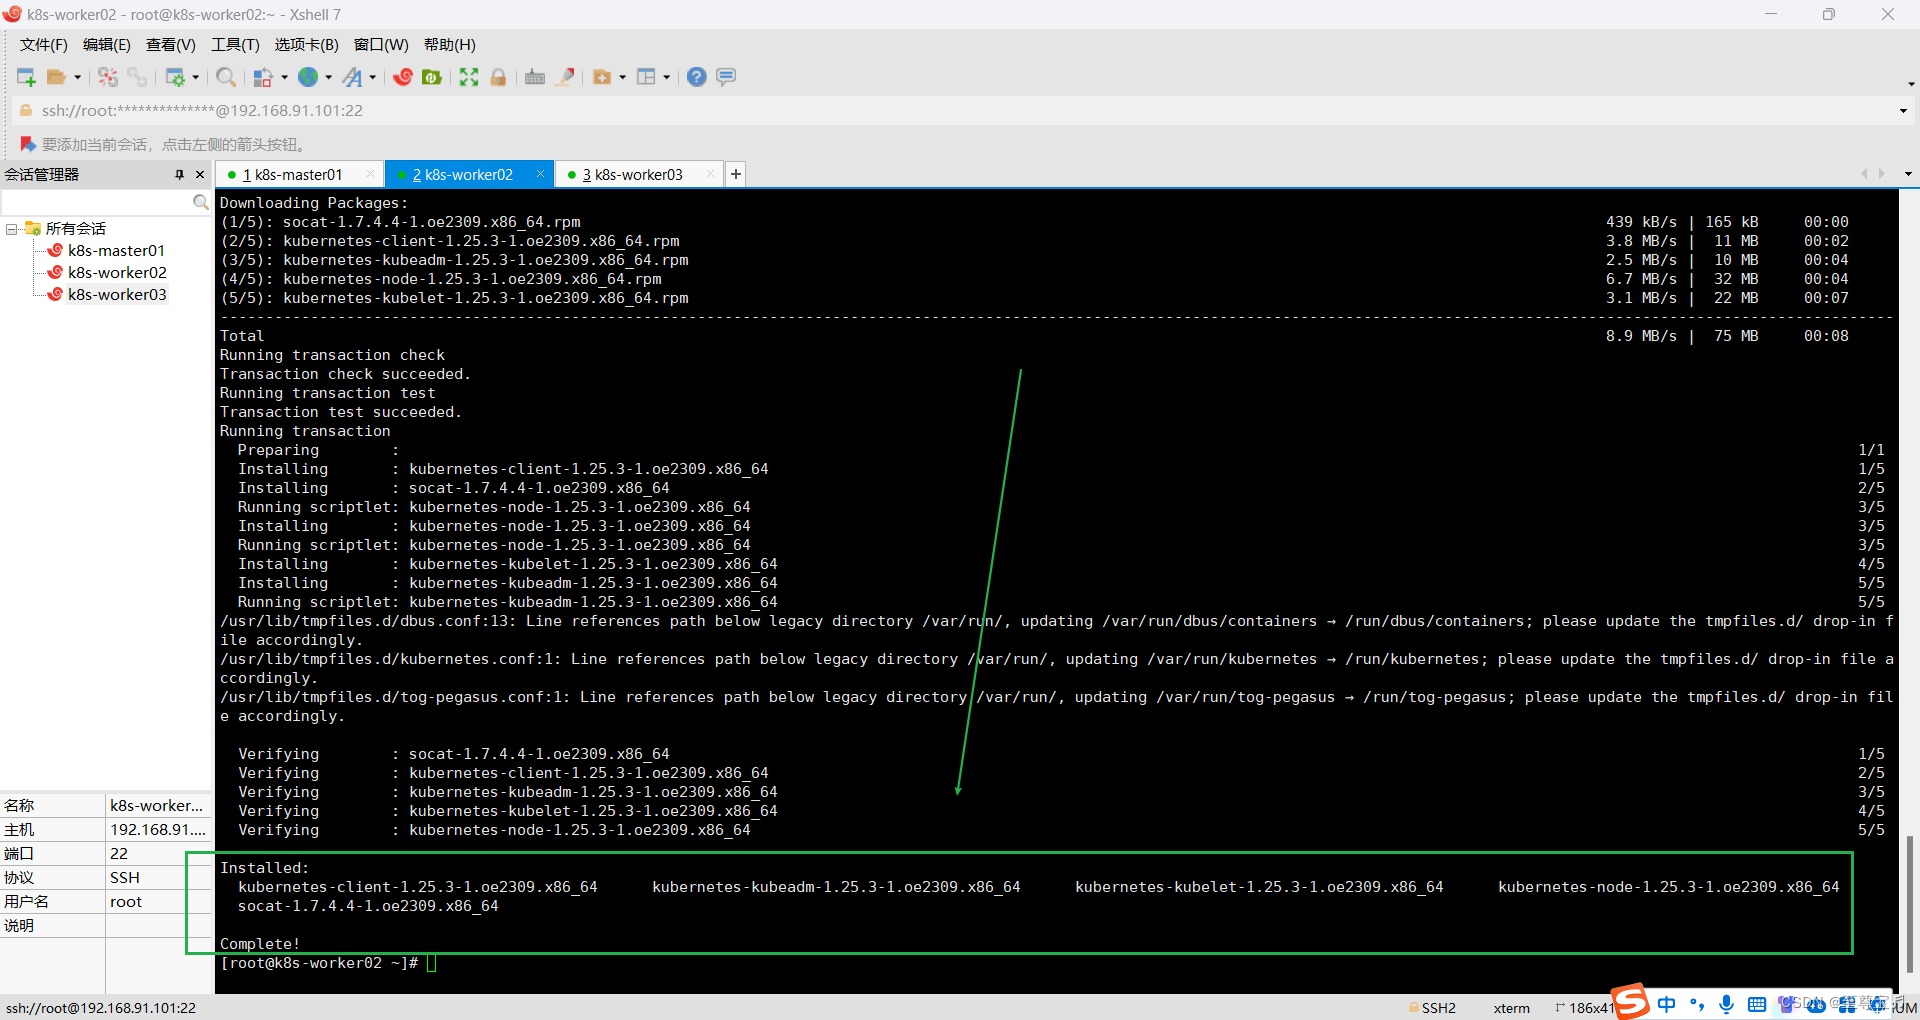
k8s-worker03
4.所有主机设置开机自启kubelet;
systemctl enable kubeletK8S通过kubeadm安装出来以后都是以Pod方式存在,即底层是以容器方式运行,所以kubelet必须设置开机自启。
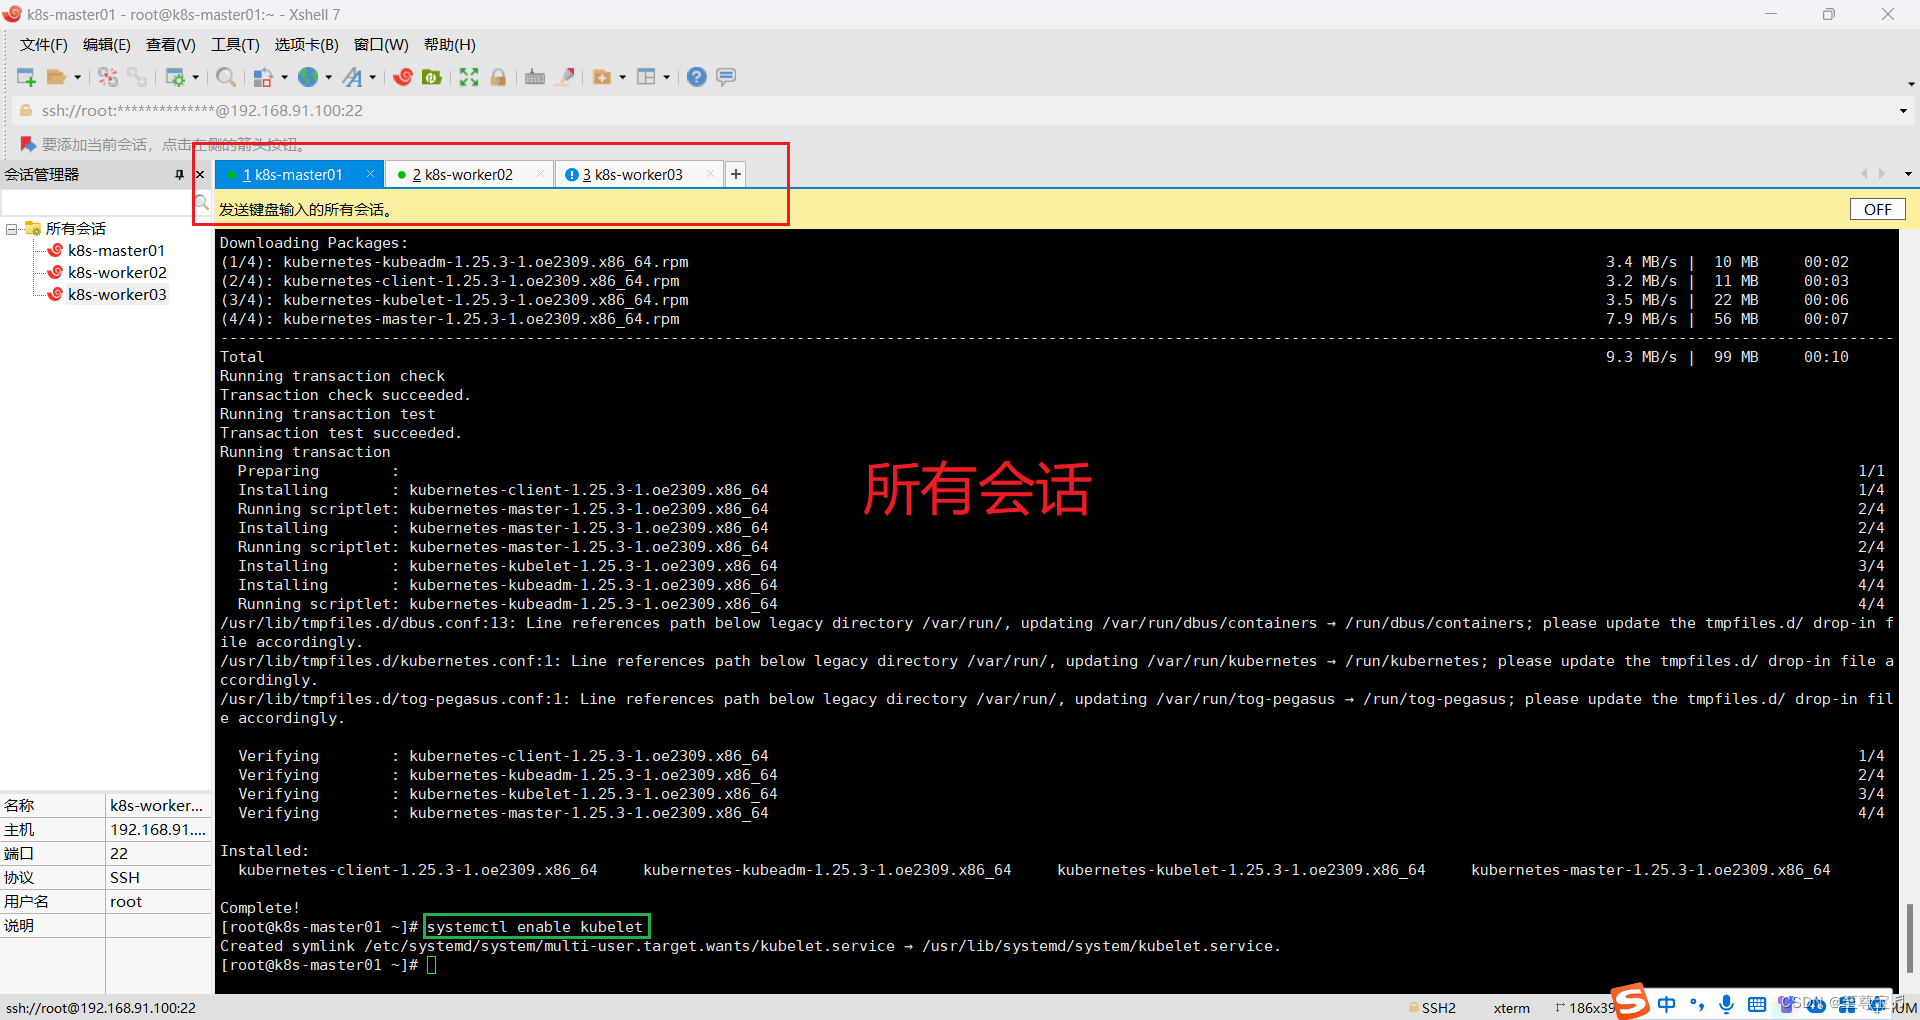
5.所有主机现在启动kubelet.service;
systemctl start kubelet.service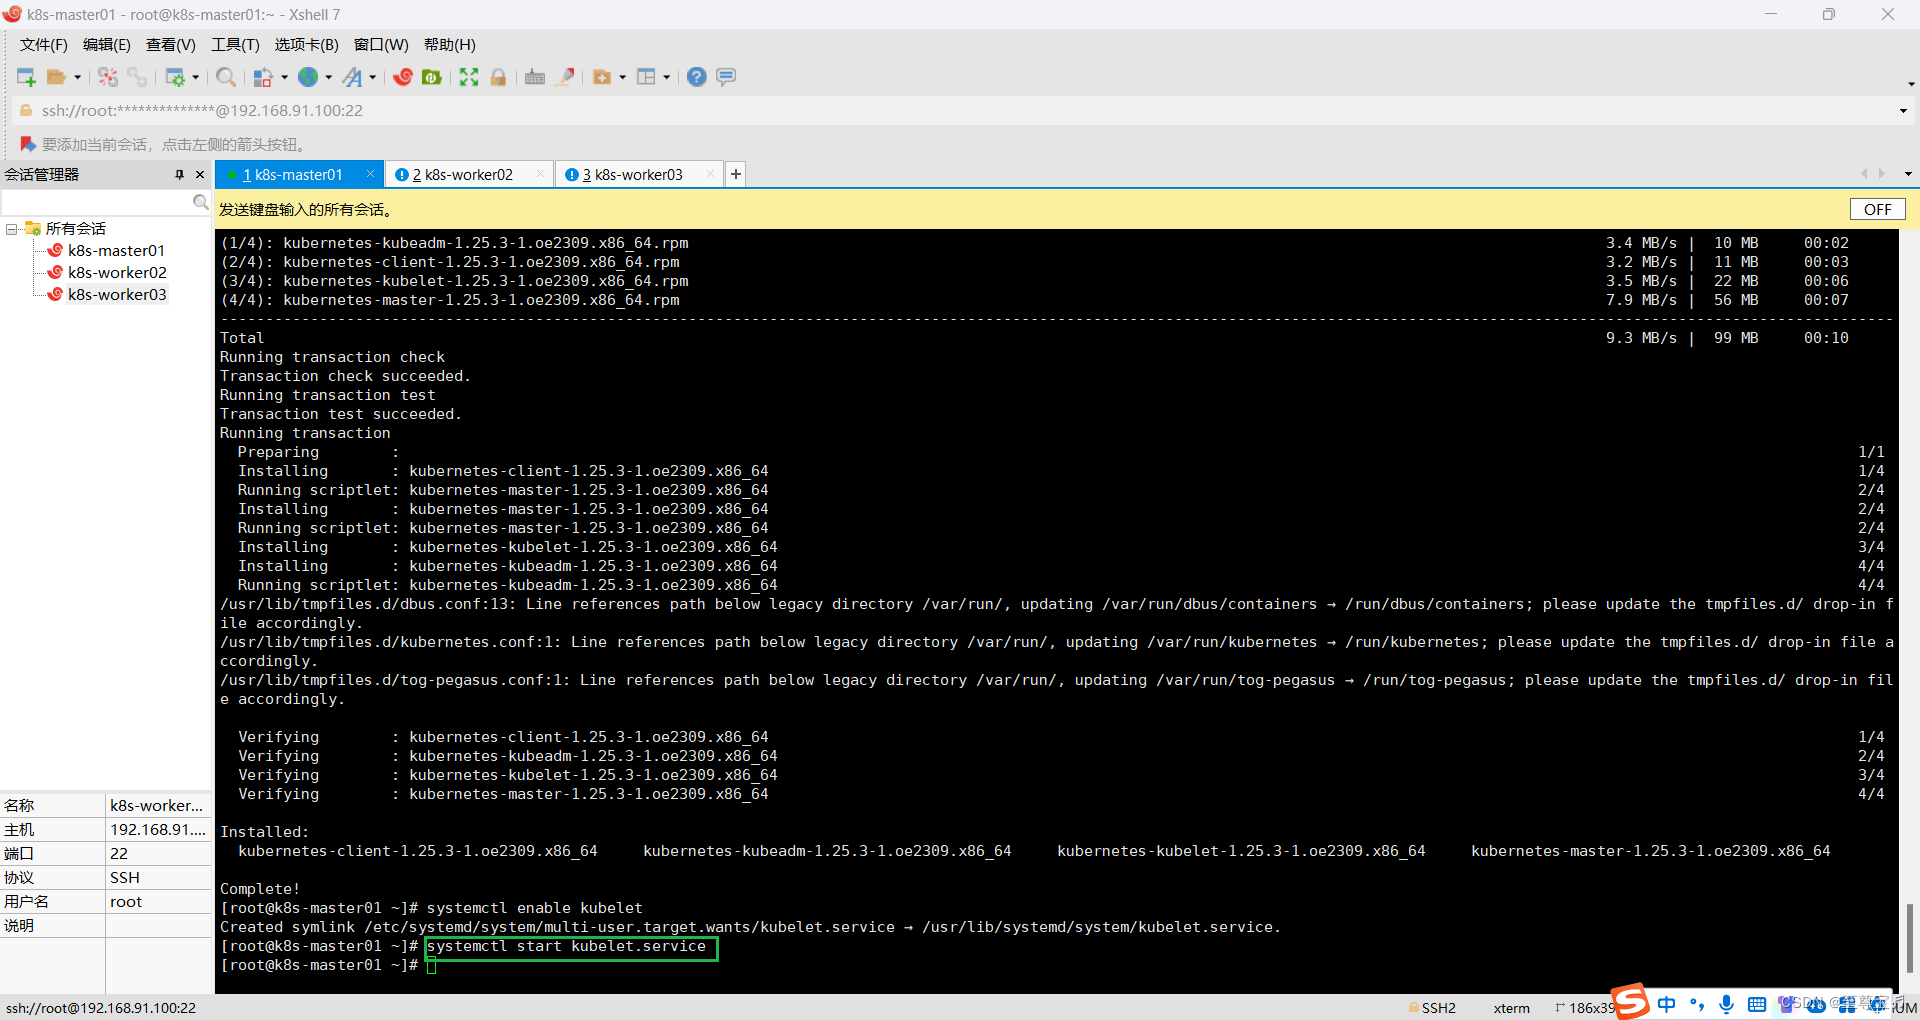
6.所有主机查看kubelet运行状态;
systemctl status kubelet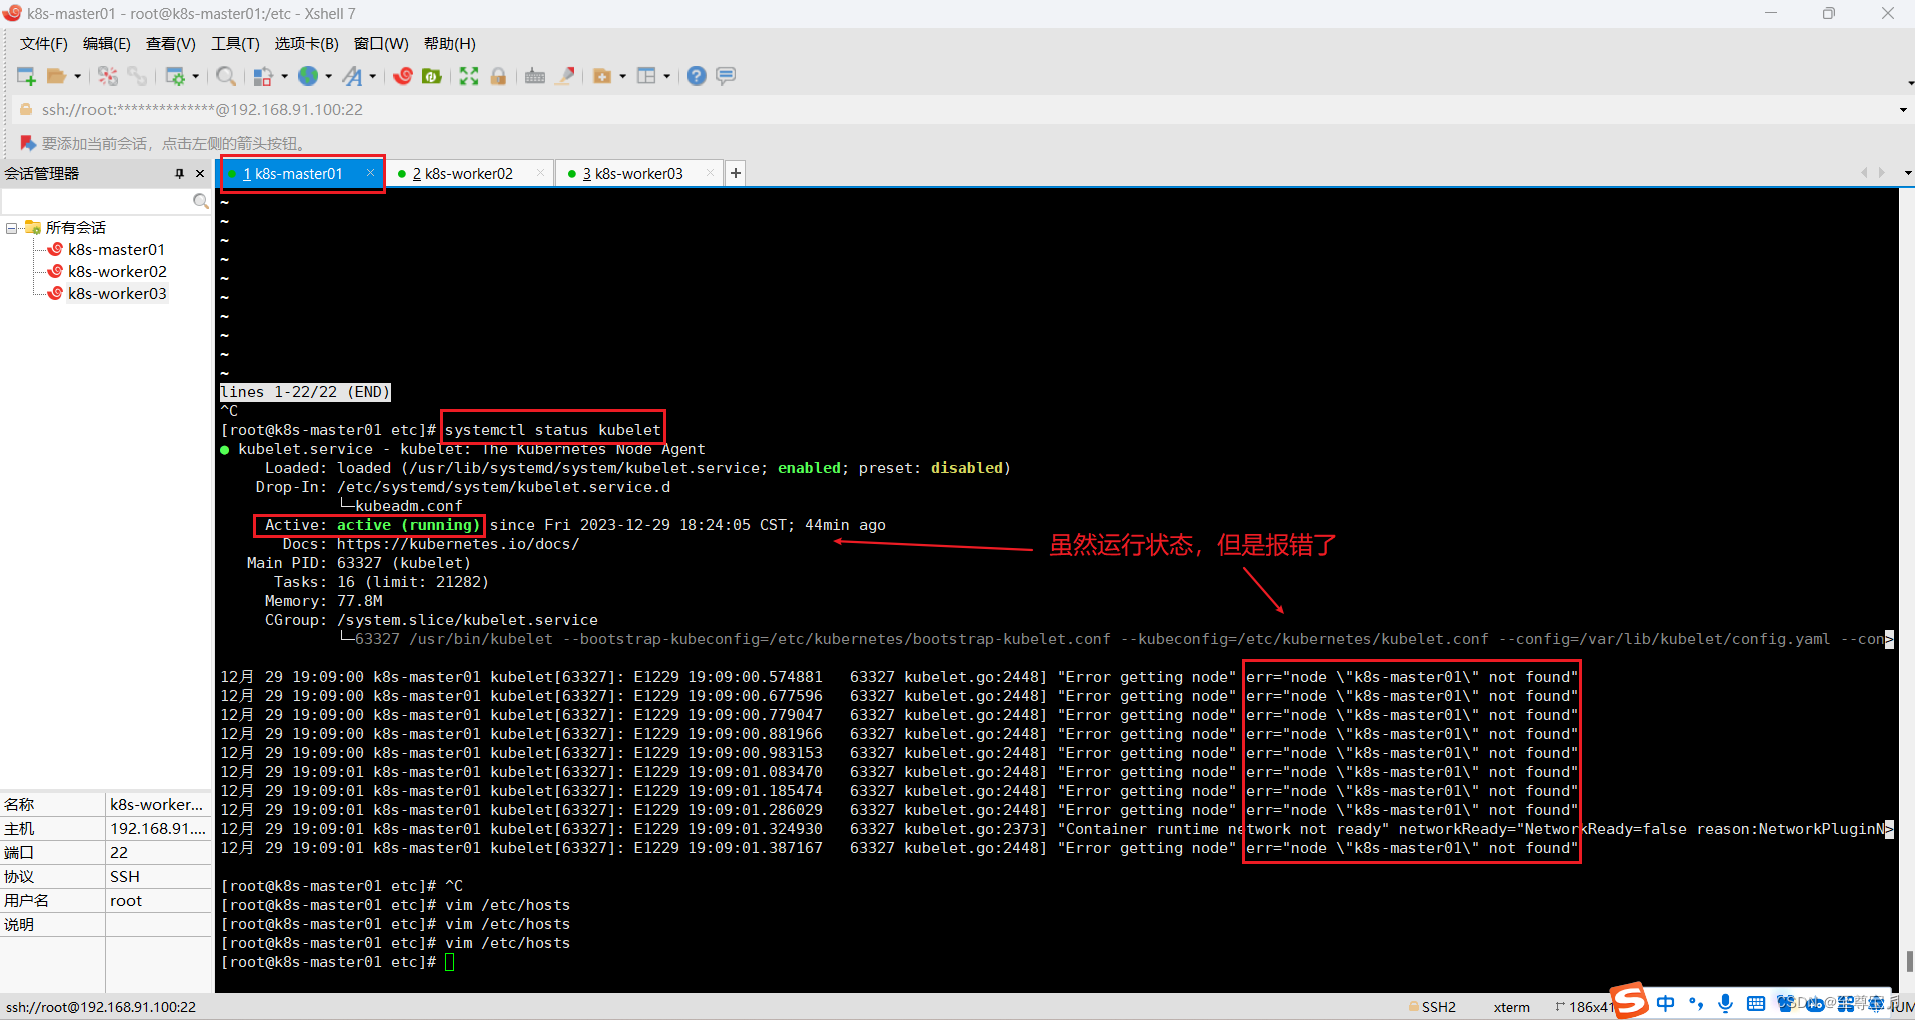


所有主机重启kubelet;
systemctl restart kubelet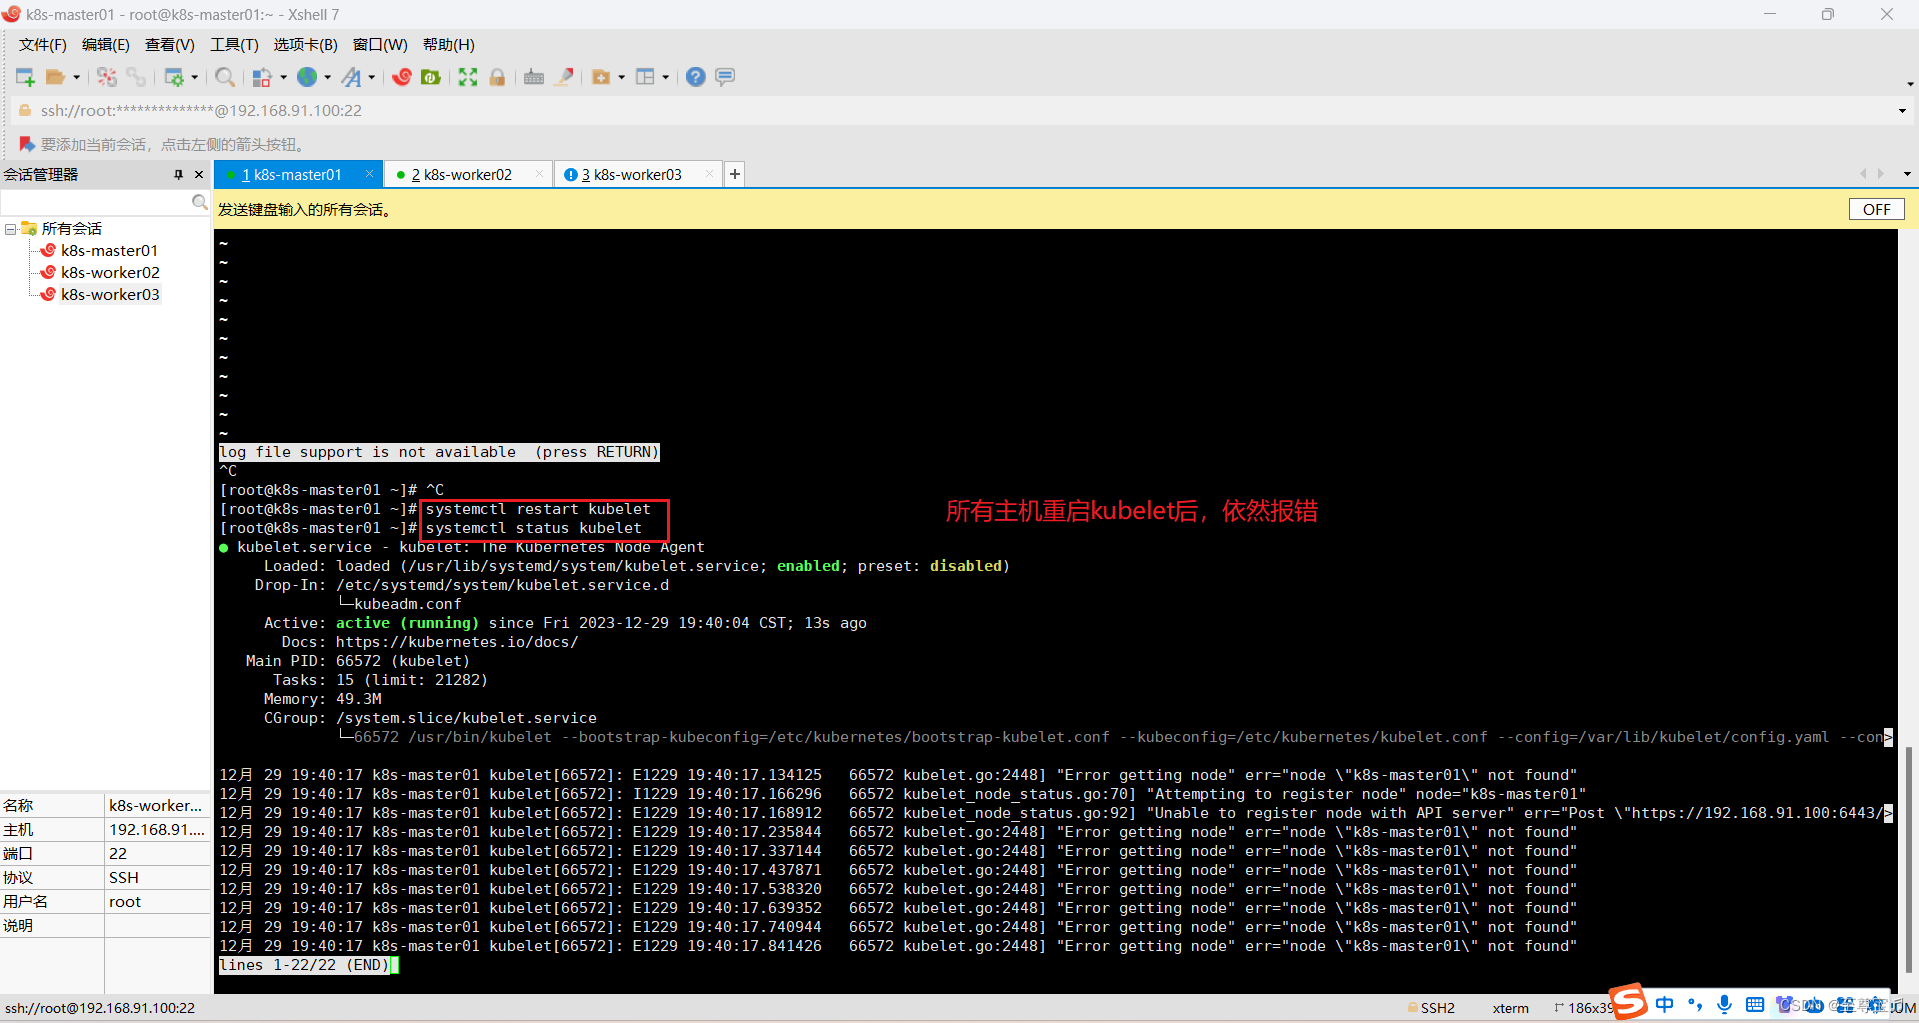
排查 hostname、etc/hosts等均正常。
十四.k8s集群初始化master节点(只在k8s-master01节点操作初始化命令);
kubeadm init --node-name=k8s-master01 \
--image-repository=registry.aliyuncs.com/google_containers \
--kubernetes-version v1.25.3 \
--cri-socket=unix:///var/run/cri-dockerd.sock \
--apiserver-advertise-address=192.168.91.100 \
--pod-network-cidr=10.244.0.0/16 \
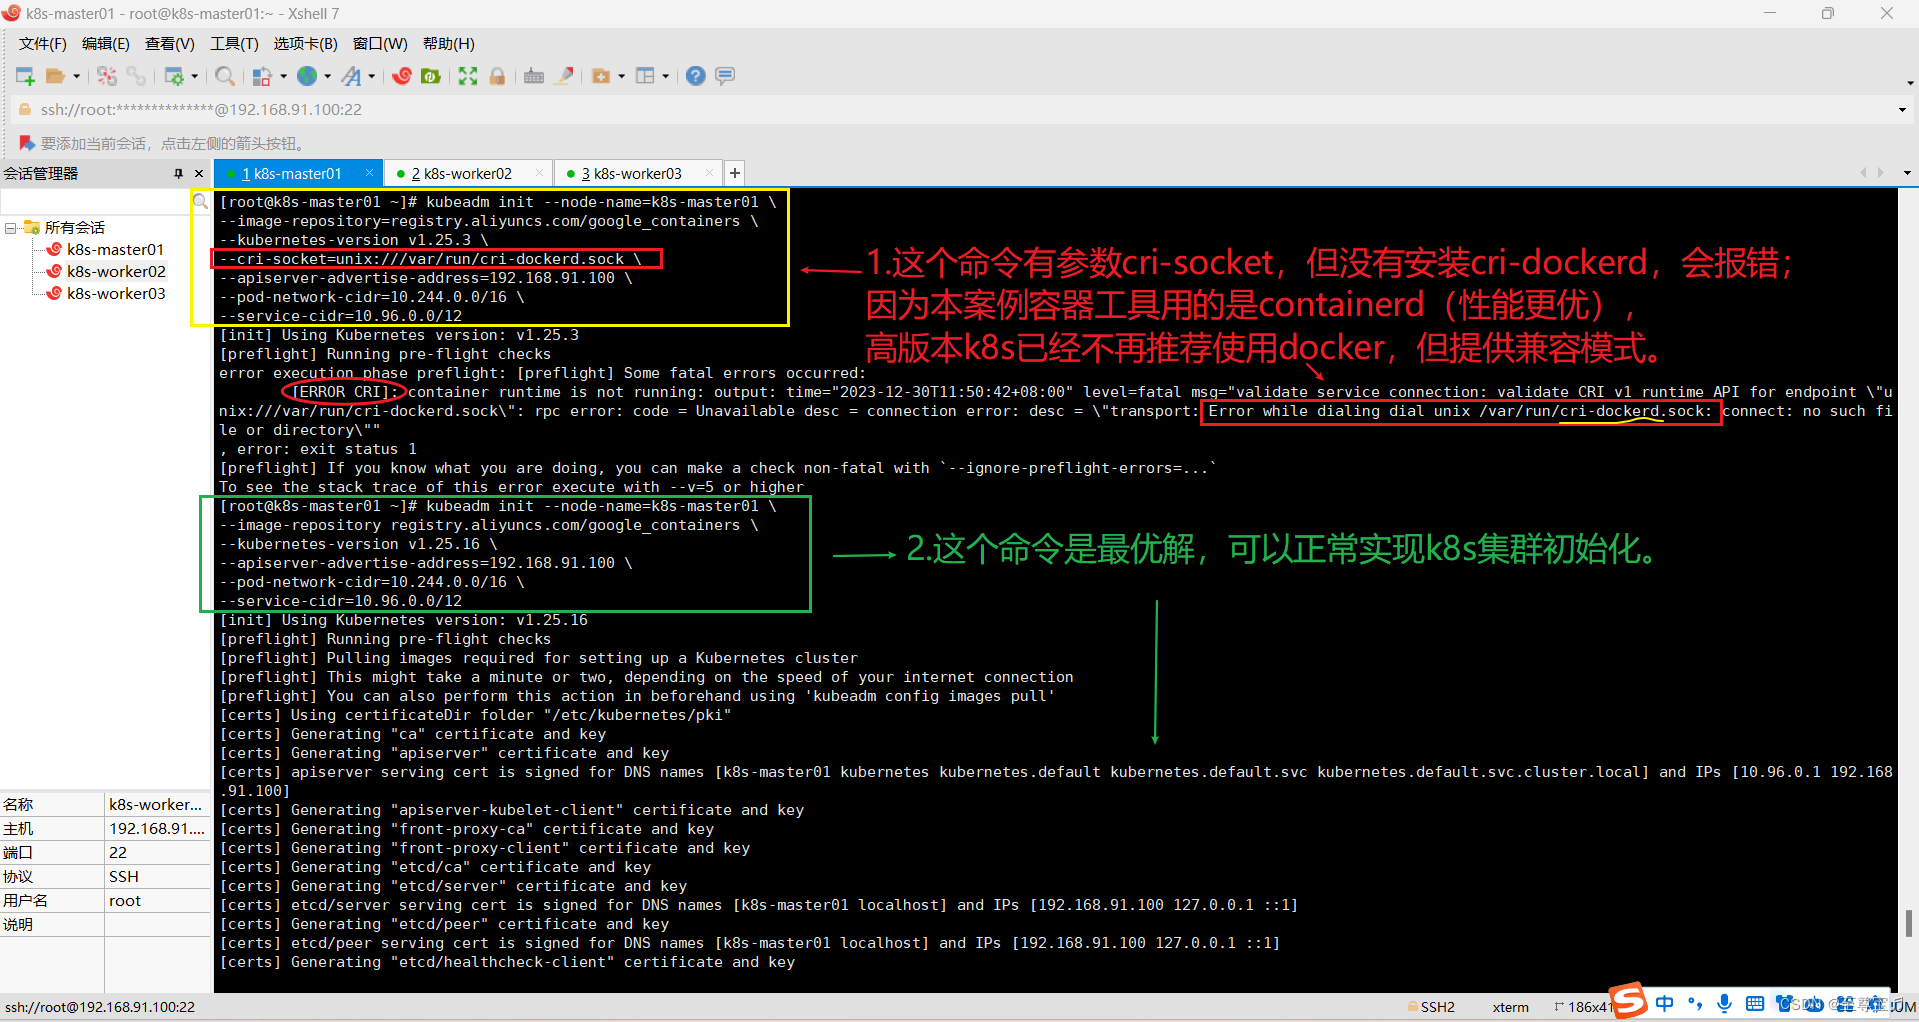
--service-cidr=10.96.0.0/12错误一:“crictl not found in system path”;
(重要提醒:此处只在master节点安装crictl,后面在k8s集群初始化完成后,执行worker节点加入master时,报错worker找不到crictl,所以全部主机都必须安装crictl。)

需要安装crictl工具;(建议所有主机都要安装crictl,后面都会用到)
yum install -y crictl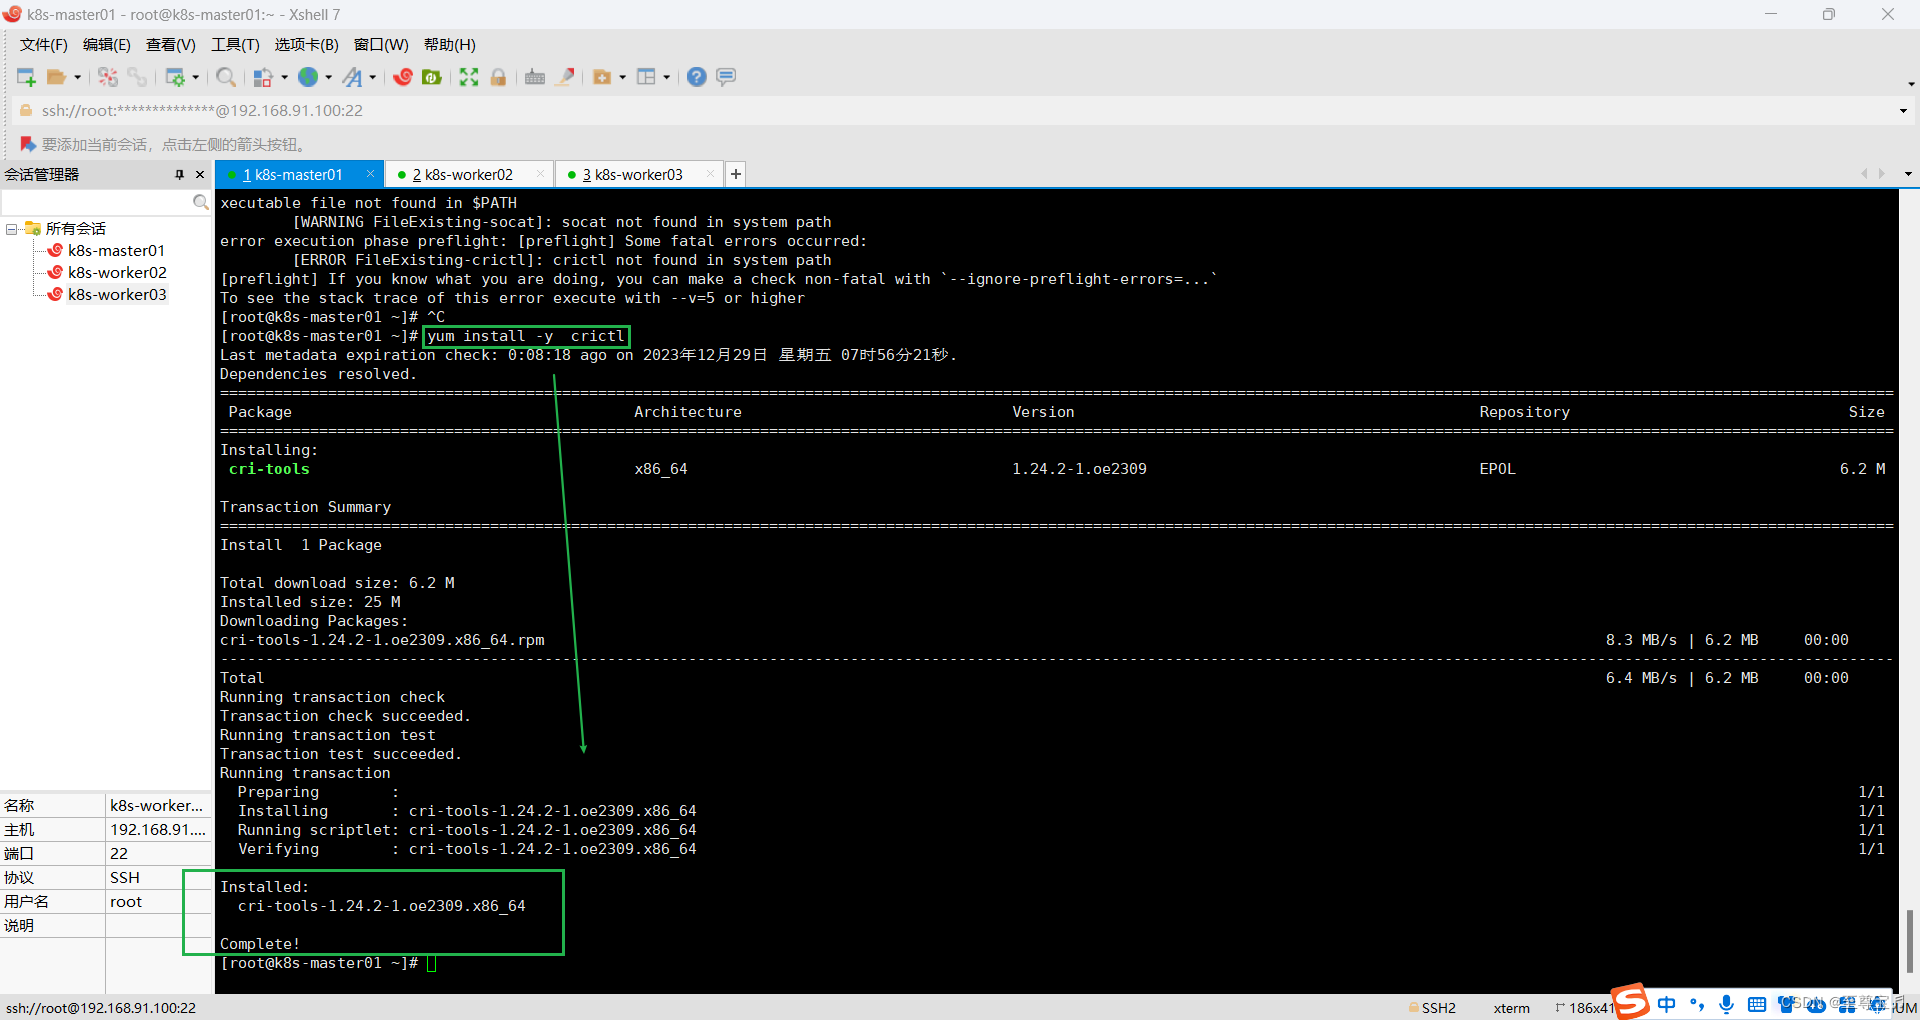
错误二:“socat not found in system path”;
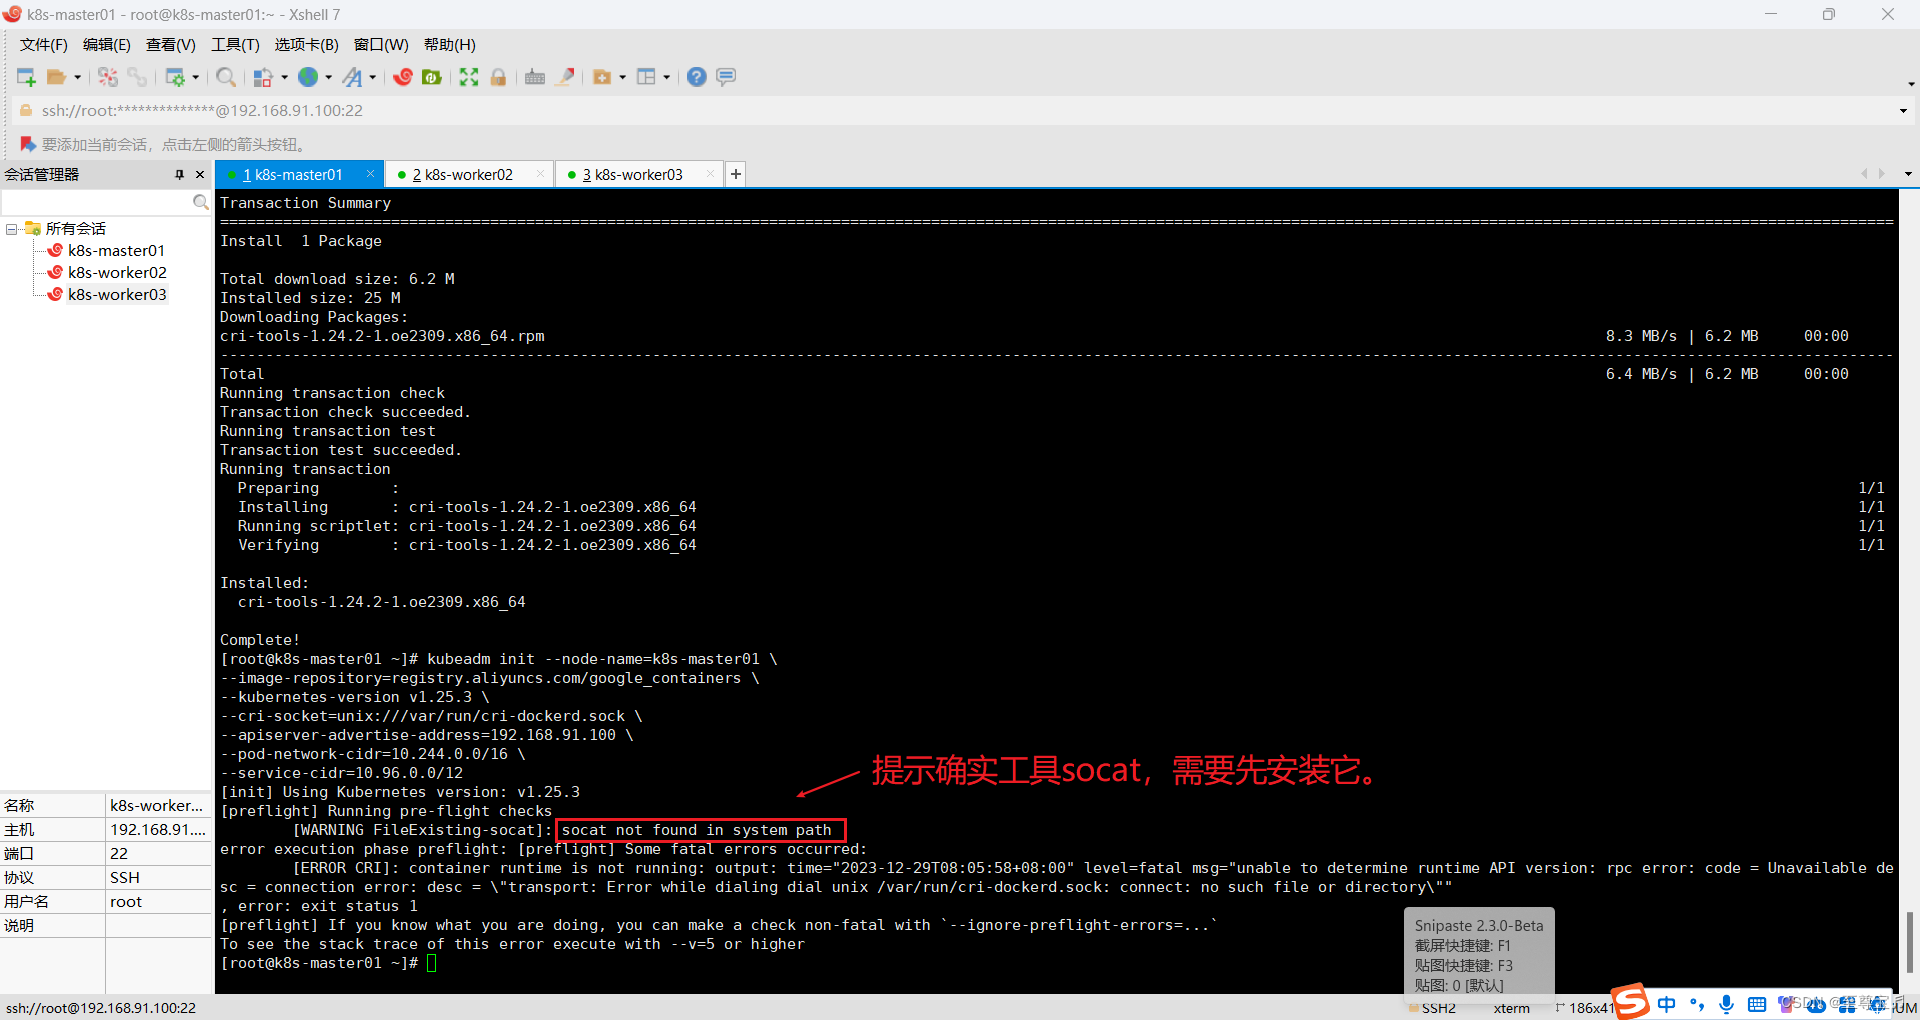
需要安装socat工具;
yum install -y socat
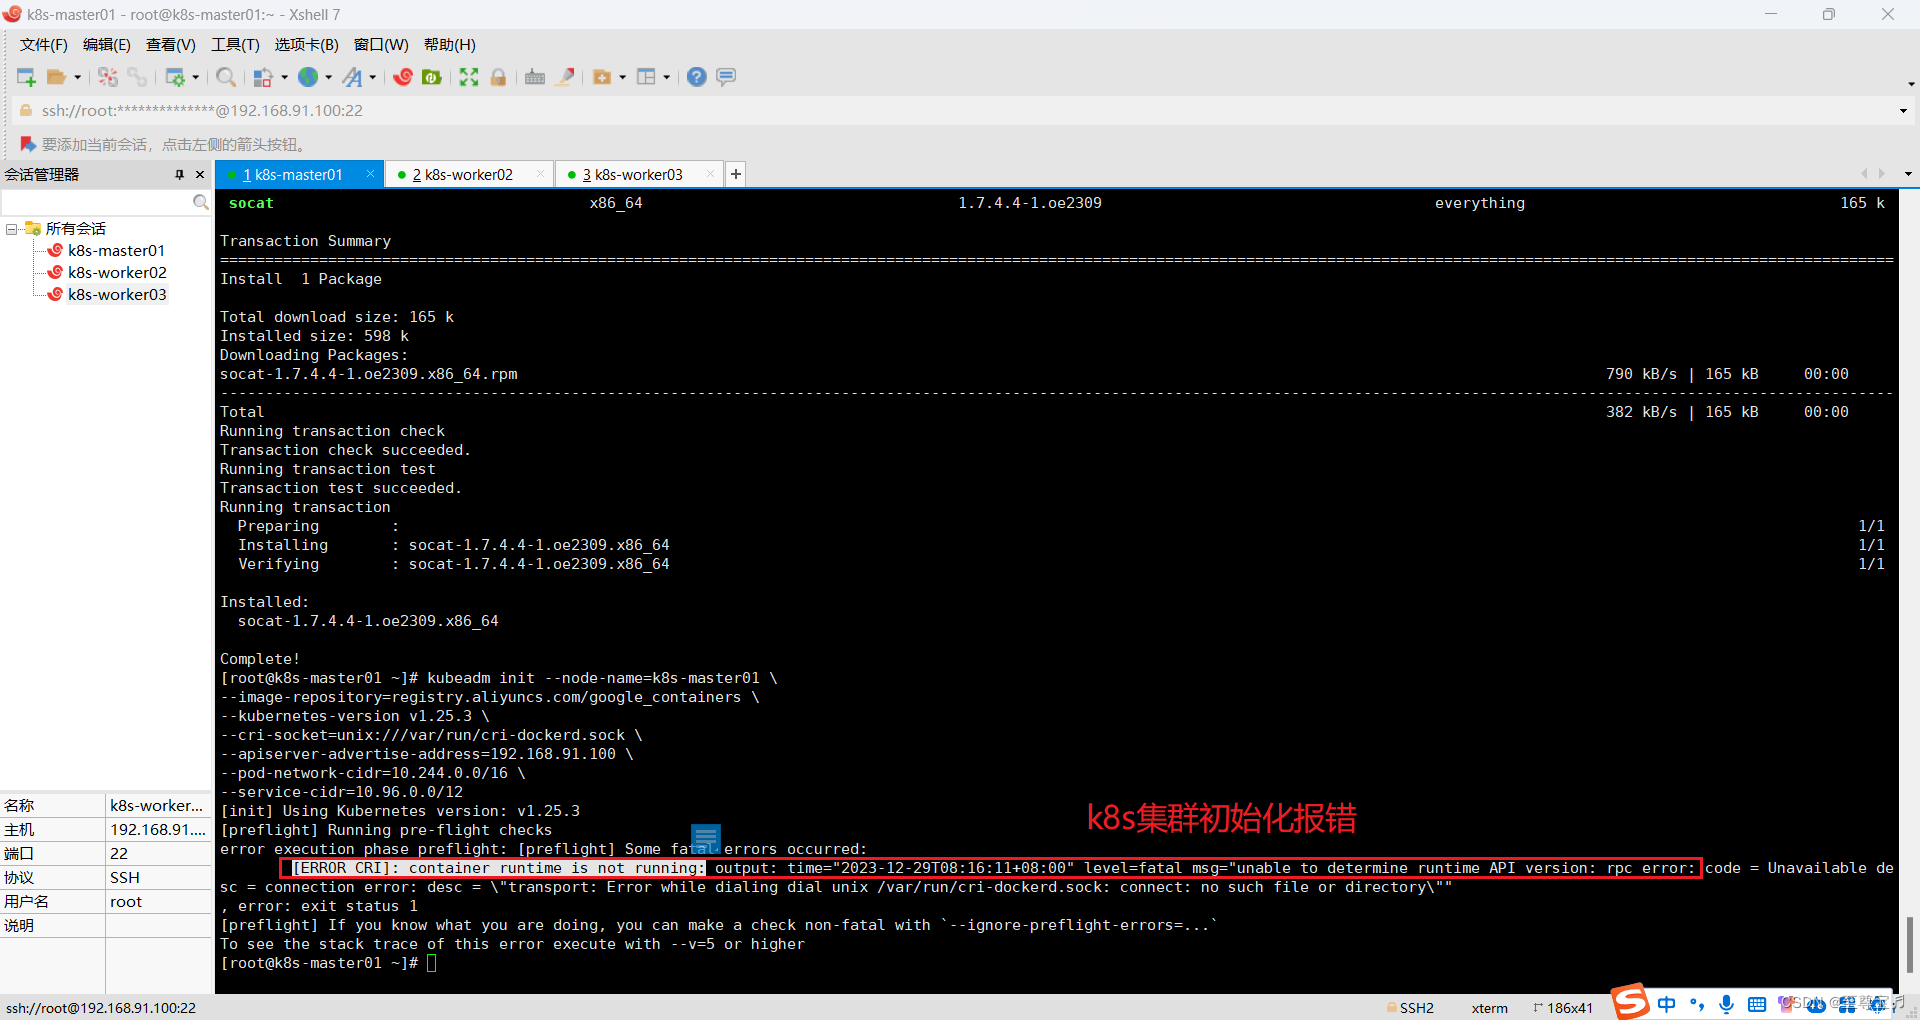
错误三:[ERROR CRI]: container runtime is not running: output: time="2023-12-29T08:16:11+08:00" level=fatal msg="unable to determine runtime API version: rpc error: code = Unavailable desc = connection error: desc = \"transport: Error while dialing dial unix /var/run/cri-dockerd.sock: connect: no such file or directory\""
, error: exit status 1
(重点注意:此处只在master节点安装containerd,推荐在所有节点都安装containerd,因为worker节点加入master时,需要用到containerd。)
| 关于containerd的介绍: |
|---|
| 1.根据k8s官网的介绍,kubernets 自v1.24.0 后,移除了docker.shim(k8s集成的docker),替换采用 containerd 作为容器运行时。因此需要安装 containerd 而containerd是docker的子项目,现在他俩分开了,所以可以单独安装containerd。 |
| 2.常用的容器运行时有docker、containerd、CRI-O等 containerd是一个CRI(Container Runtime Interface)组件,在容器运行时调用containerd组件来创建、运行、销毁容器等 CRI组件遵循OCI规范,通过runc实现与操作系统内核的交互,然后实现创建和运行容器 docker使用containerd作为运行时,k8s使用containerd、CRI-O等。 |
| 3.CRI Container Runtime Interface 容器运行时接口 container runtime is not running 容器运行时未启动 validate service connection 无效的服务连接 CRI v1 runtime API is not implemented for endpoint “unix:///var/run/containerd/containerd.sock” 容器运行时接口 v1 运行时 接口 没有实现节点文件sock,应该就是此文件未找到。 |
问题定位:
1.“container runtime is not running”,containerd服务未启动,查阅containerd运行状态;
systemctl status containerd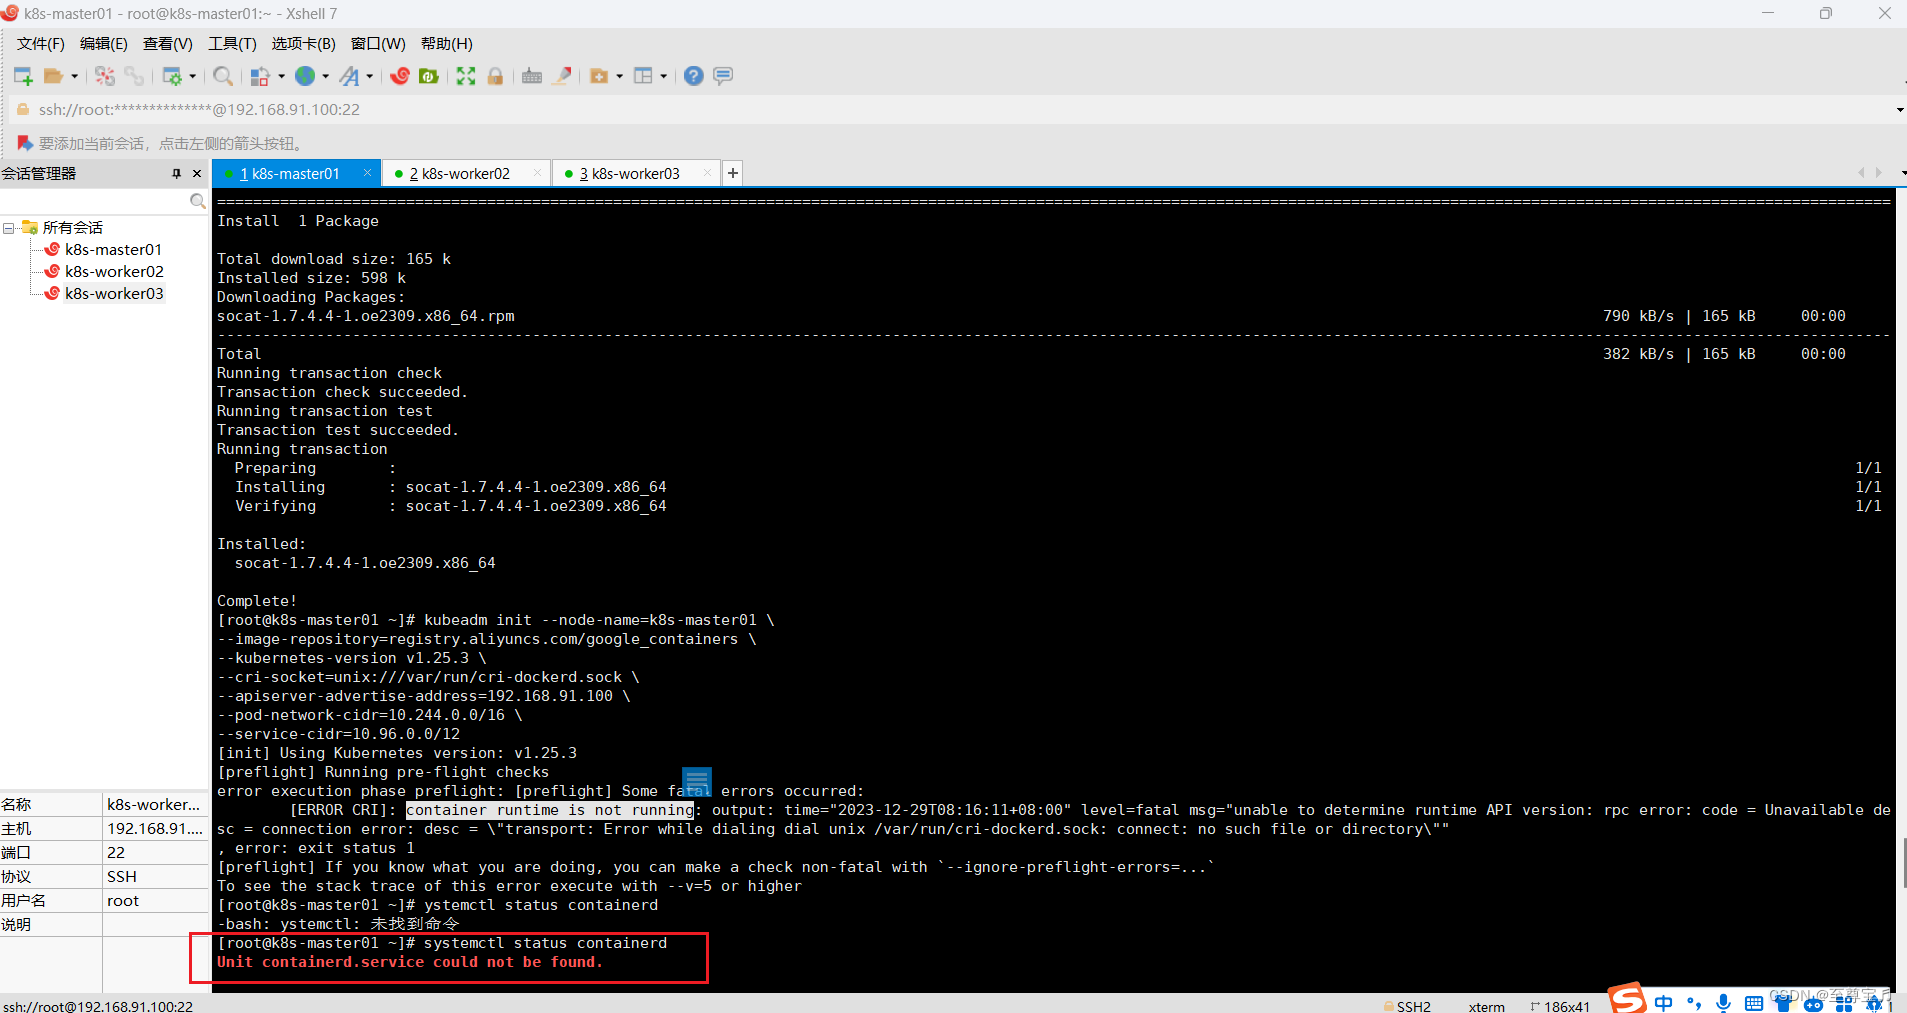
2.提示未找到containerd.service,需要安装containerd.service;
yum install -y containerd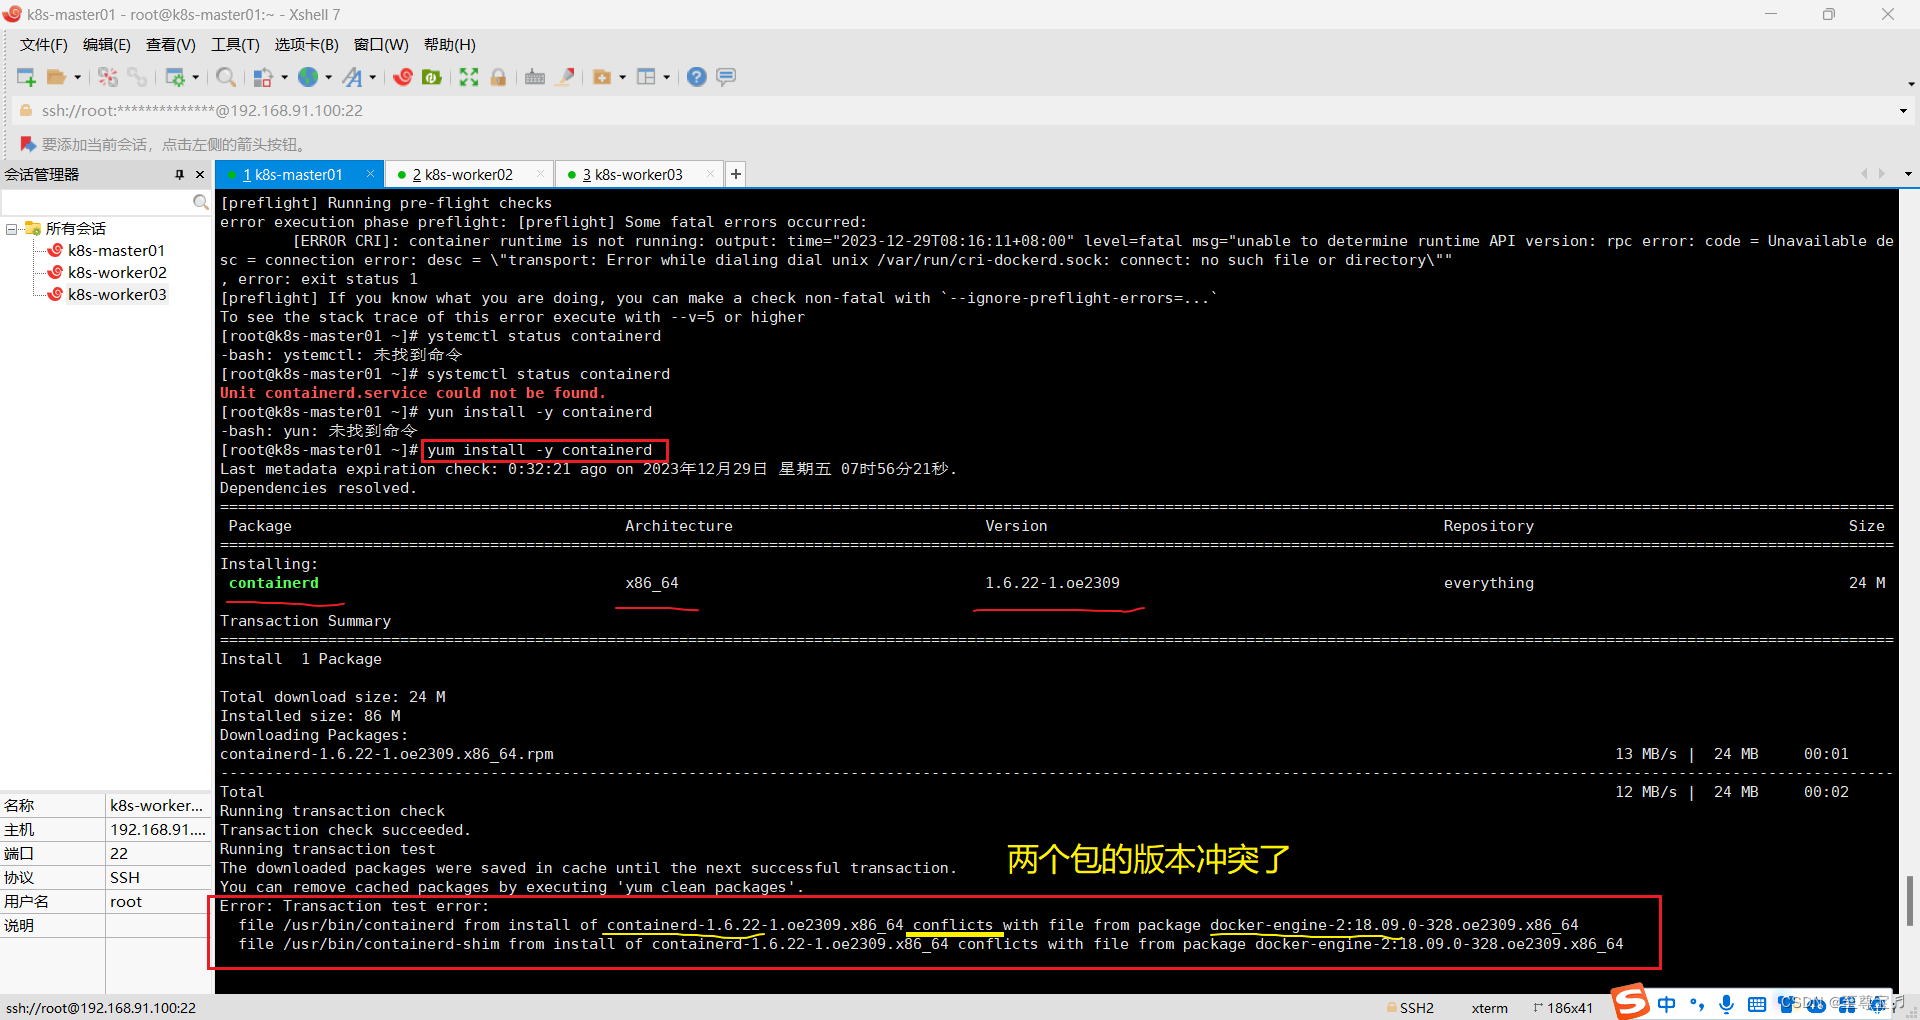
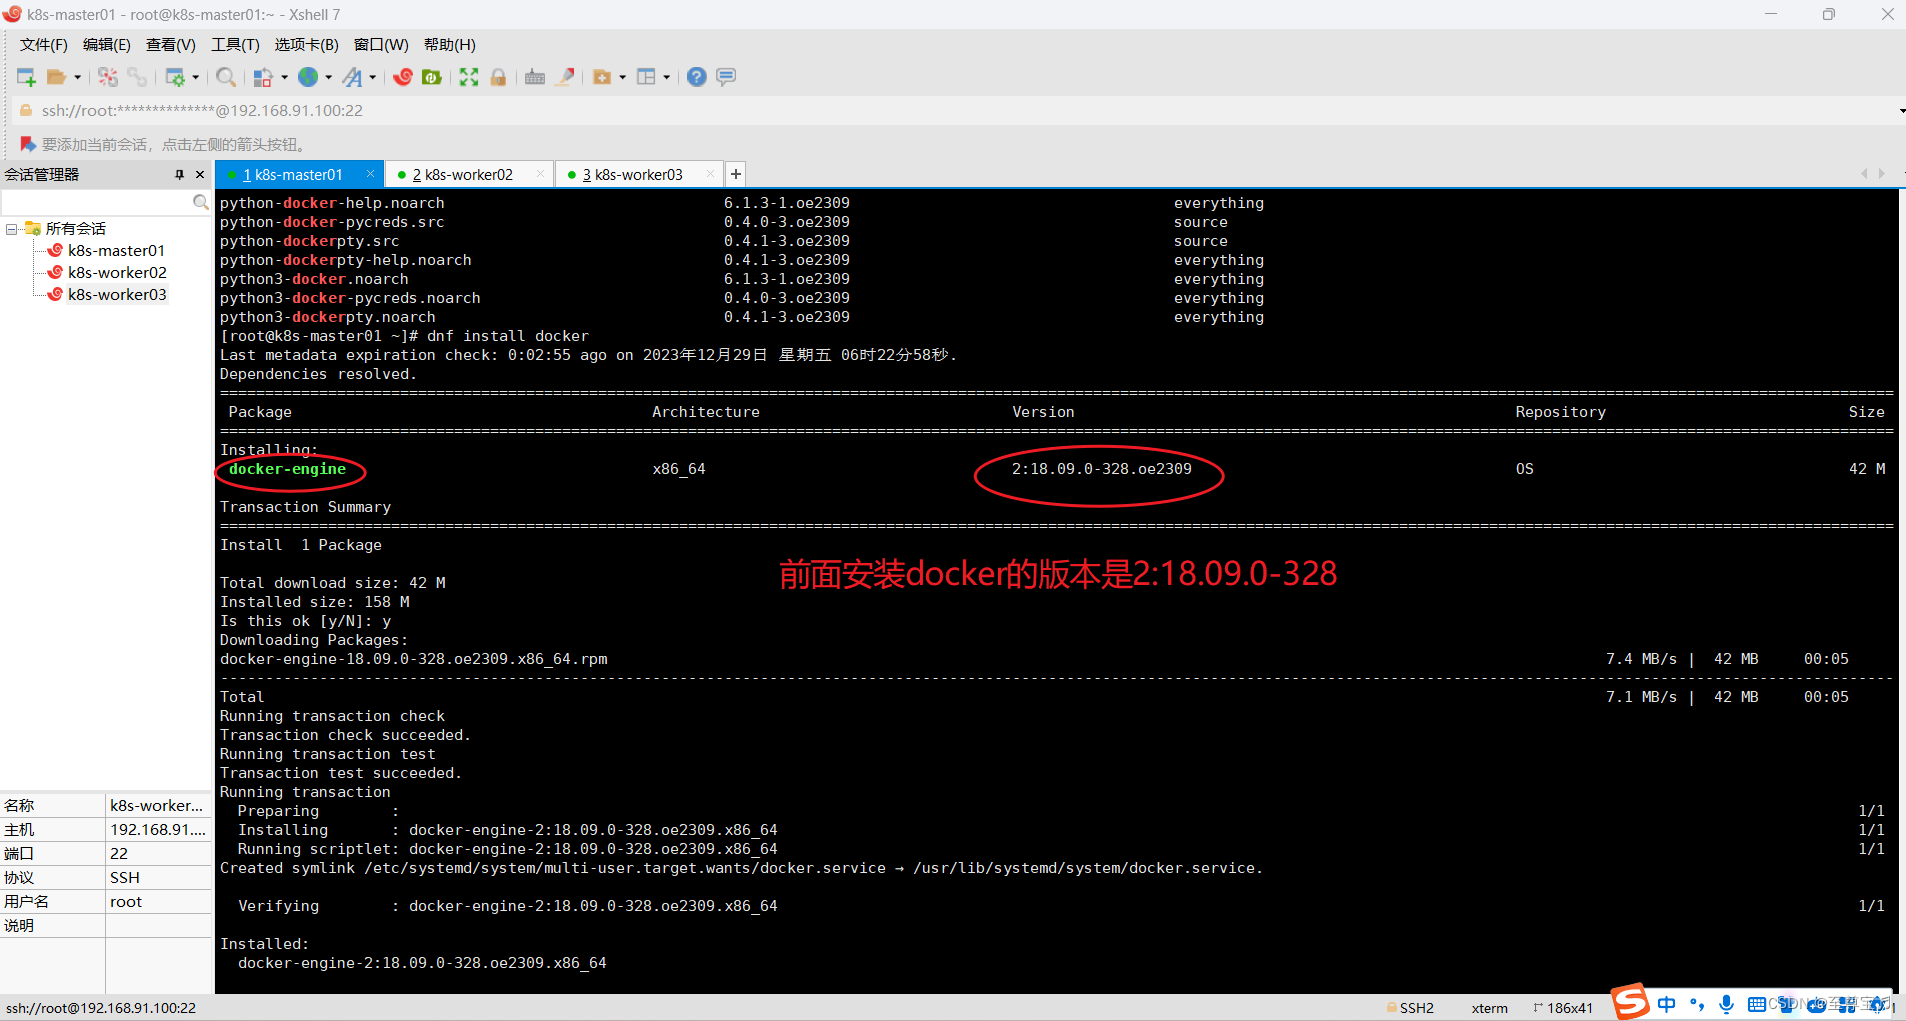
3.yum安装containerd失败原因分析:
(1)k8s 1.24之后弃用了docker-shim。
dockershim 的作用是 Kubernetes 通过 CRI 来操作 Docker,所以Kubernetes 任何的功能变动或 Docker 有任何的功能特性变更,dockershim 代码必须加以改动保证能够支持相关的变更(维护特别不方便)。
另外,Docker 的底层运行时是 containerd(大家装docker的时候应该也会发现有containerd这样几个东西),最终都是要调用 containerd且 containerd 自身也支持 CRI 。那为什么要先绕过一层 Docker 呢?是不是可以直接通过 CRI 跟 Containerd 进行交互呢?这也就造成了现在 Kubernetes 社区弃用 dockershim的原因。
(2)linux操作系统systemd的服务管理。
系统服务在/usr/lib/systemd/system目录下,名字为*.service之类的文件,systemctl可以通过文件名管理服务。这就是为什么有些systemctl 可以管理一些二进制启动的服务,linux的3.10的内核以后直接后台运行二进制程序显然不够优雅。
(3)主流的平台platform有x86(amd),arm(aarch)等等,操作系统也是分linux/windows的。
参考cpu架构,如果不熟悉的话,还是不好记住的,特别是amd/arm这种容易混。特别注意的是,用ctr命令拉取、导入、导出镜像,是需要指定平台的,否则有时候会报相关错误,ctr也支持全平台,但是文件就比较大了。
(4)containerd的工具为ctr,k8s管理containerd的工具为crictl。
ctr是containerd的工具,它运行时,需要在ctr 紧后加入-n namespace。例如k8s的镜像是放在k8s.io的命名空间下的,你直接用ctr查看,是看不到镜像的,你需要这样才能看到:ctr -n k8s.io images list。但是可以用crictl直接查看到k8s运行的服务的镜像。
4.用二进制文件安装containerd;
(1)下载地址(本测试用的是1.6.22版本,其他版本自行选择下载);
https://github.com/containerd/containerd/releases/tag/v1.6.22![]() https://github.com/containerd/containerd/releases/tag/v1.6.22
https://github.com/containerd/containerd/releases/tag/v1.6.22
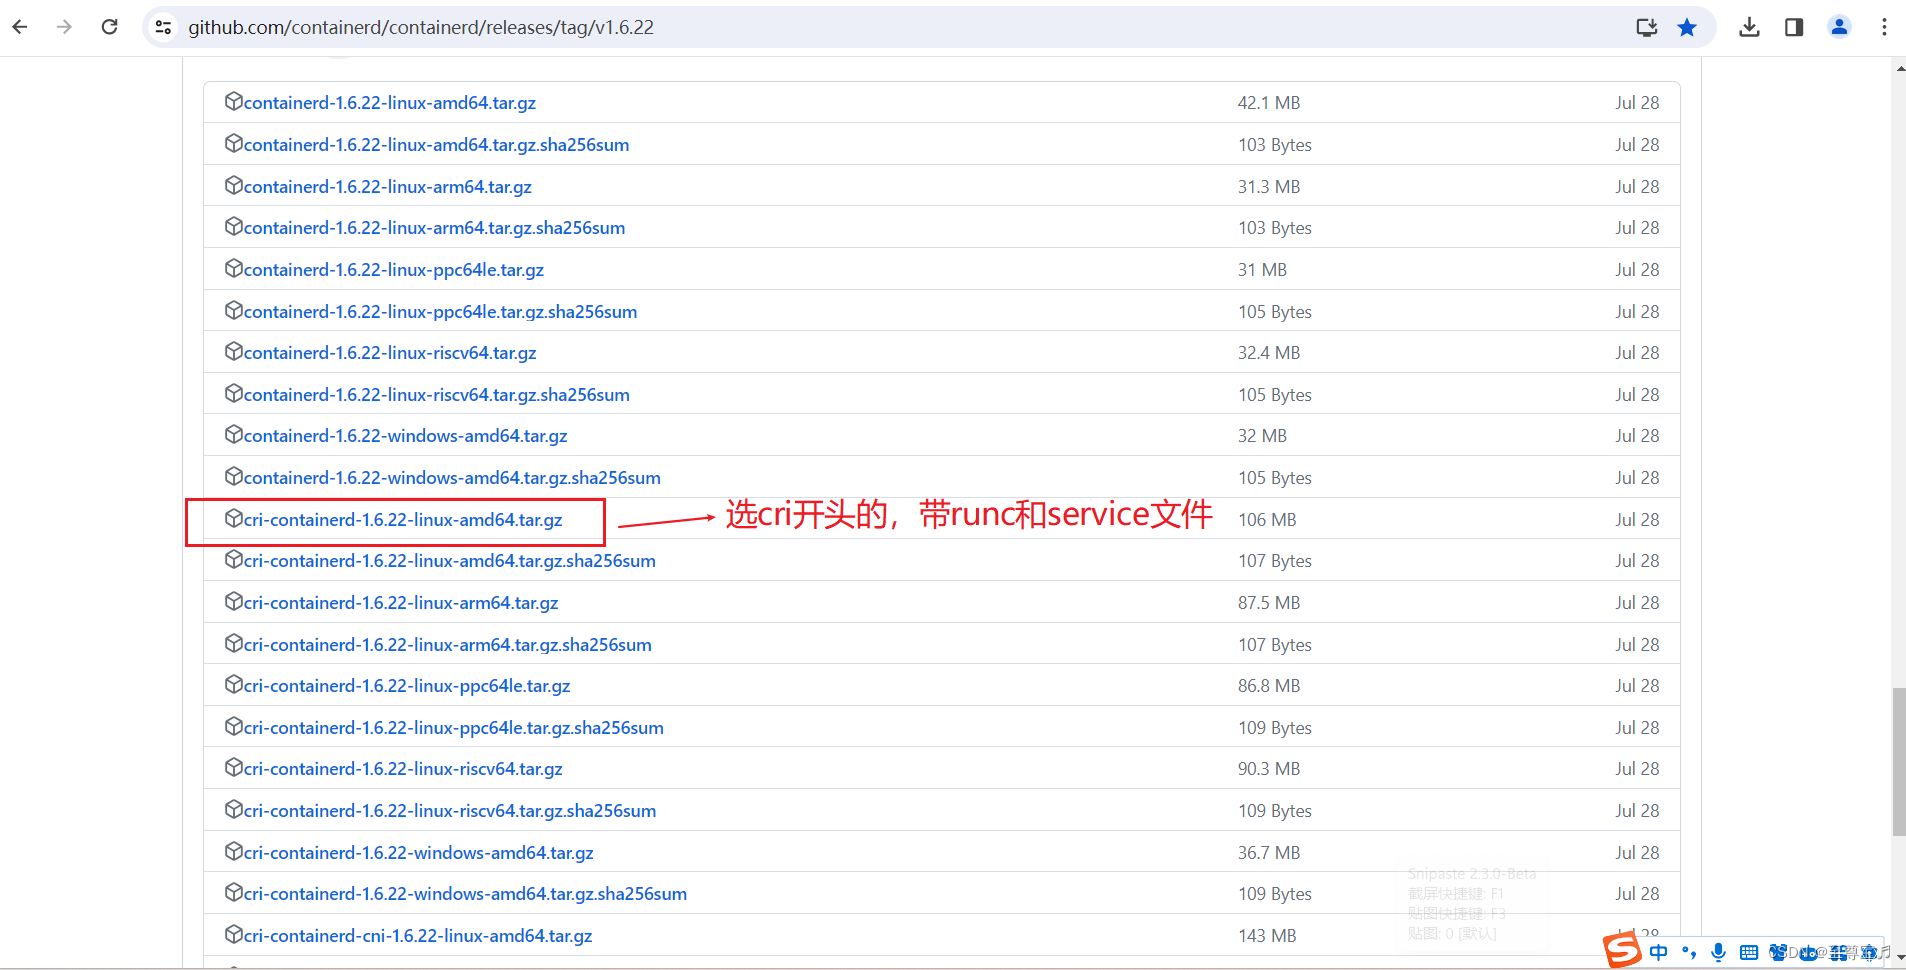
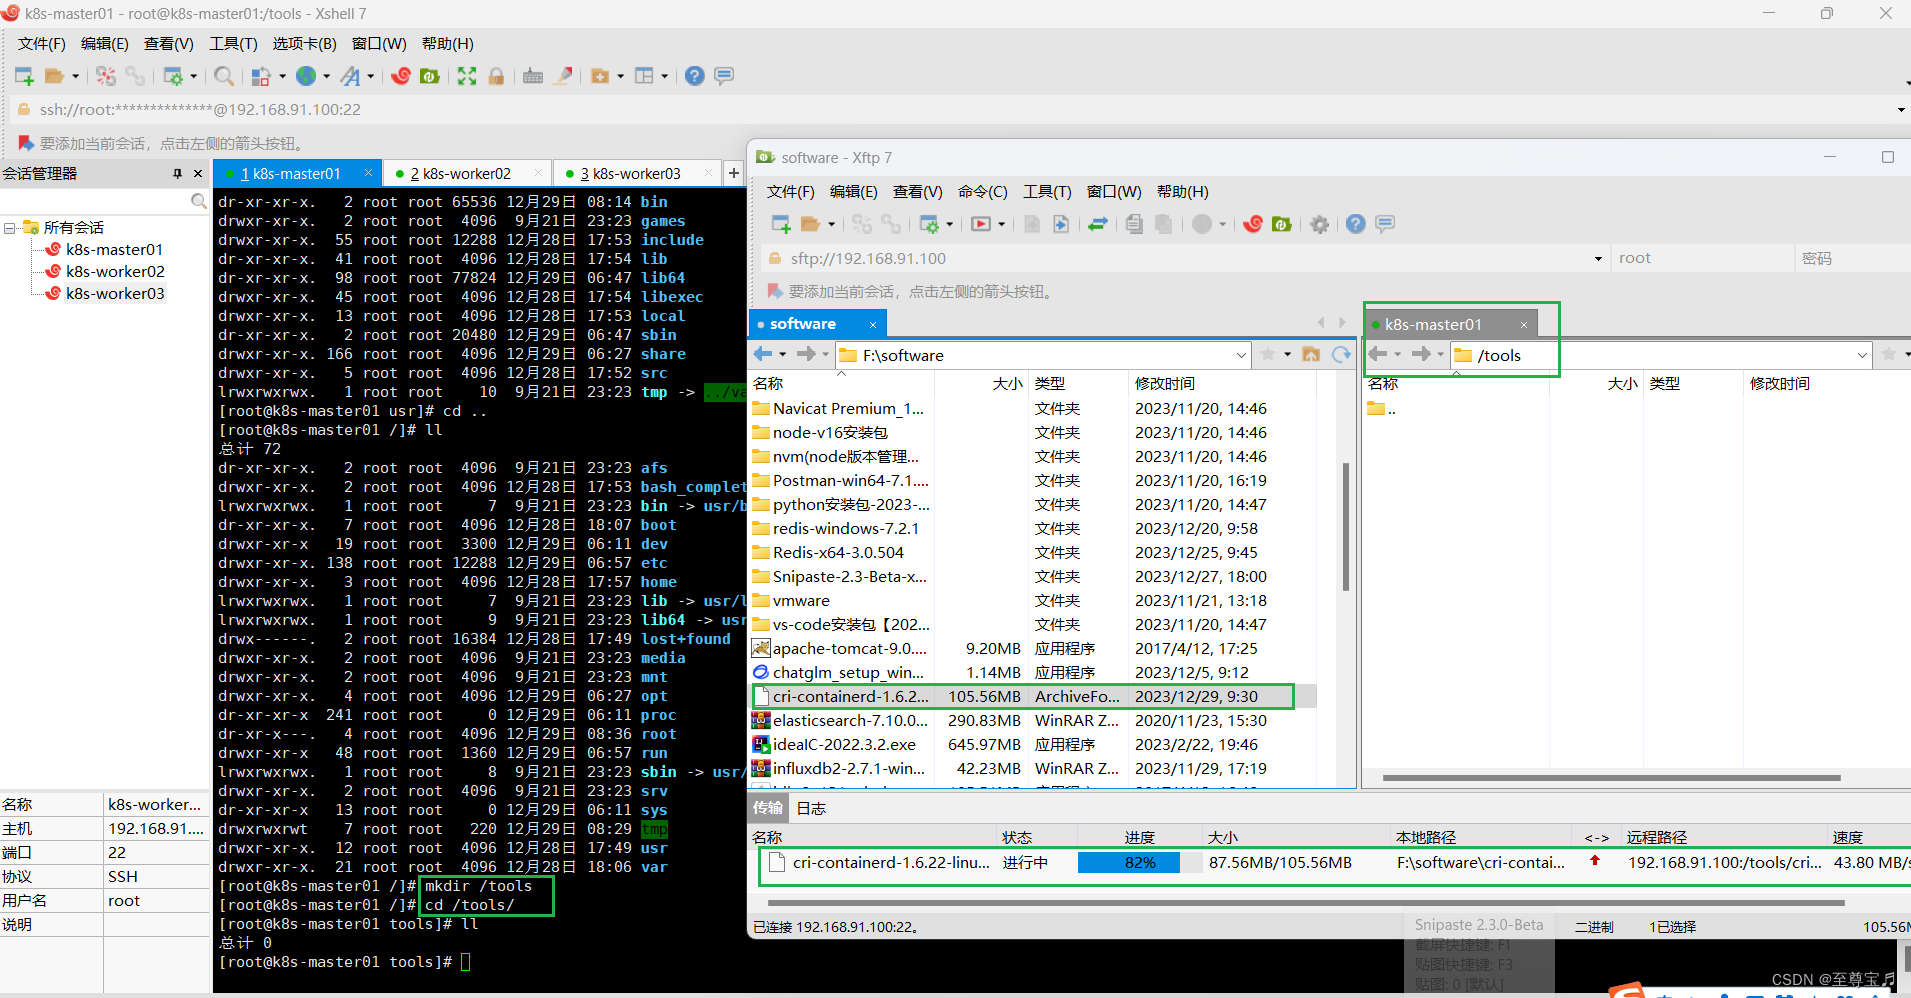
(2)上传,解压“cri-containerd-1.6.22-linux-amd64.tar.gz”;
上传containerd压缩包到k8s-master01节点,位置自选;
(3)解压containerd压缩包到“/usr/bin/”,或“/usr/local/bin/”;
因为这两个目录都具有系统的环境变量,可以直接运行。比如ssh命令其实就在/usr/bin/ssh
①本案例是解压到“/usr/local/bin/”,(因为该路径本来是空的,万一解压失败,回退也方便清理);
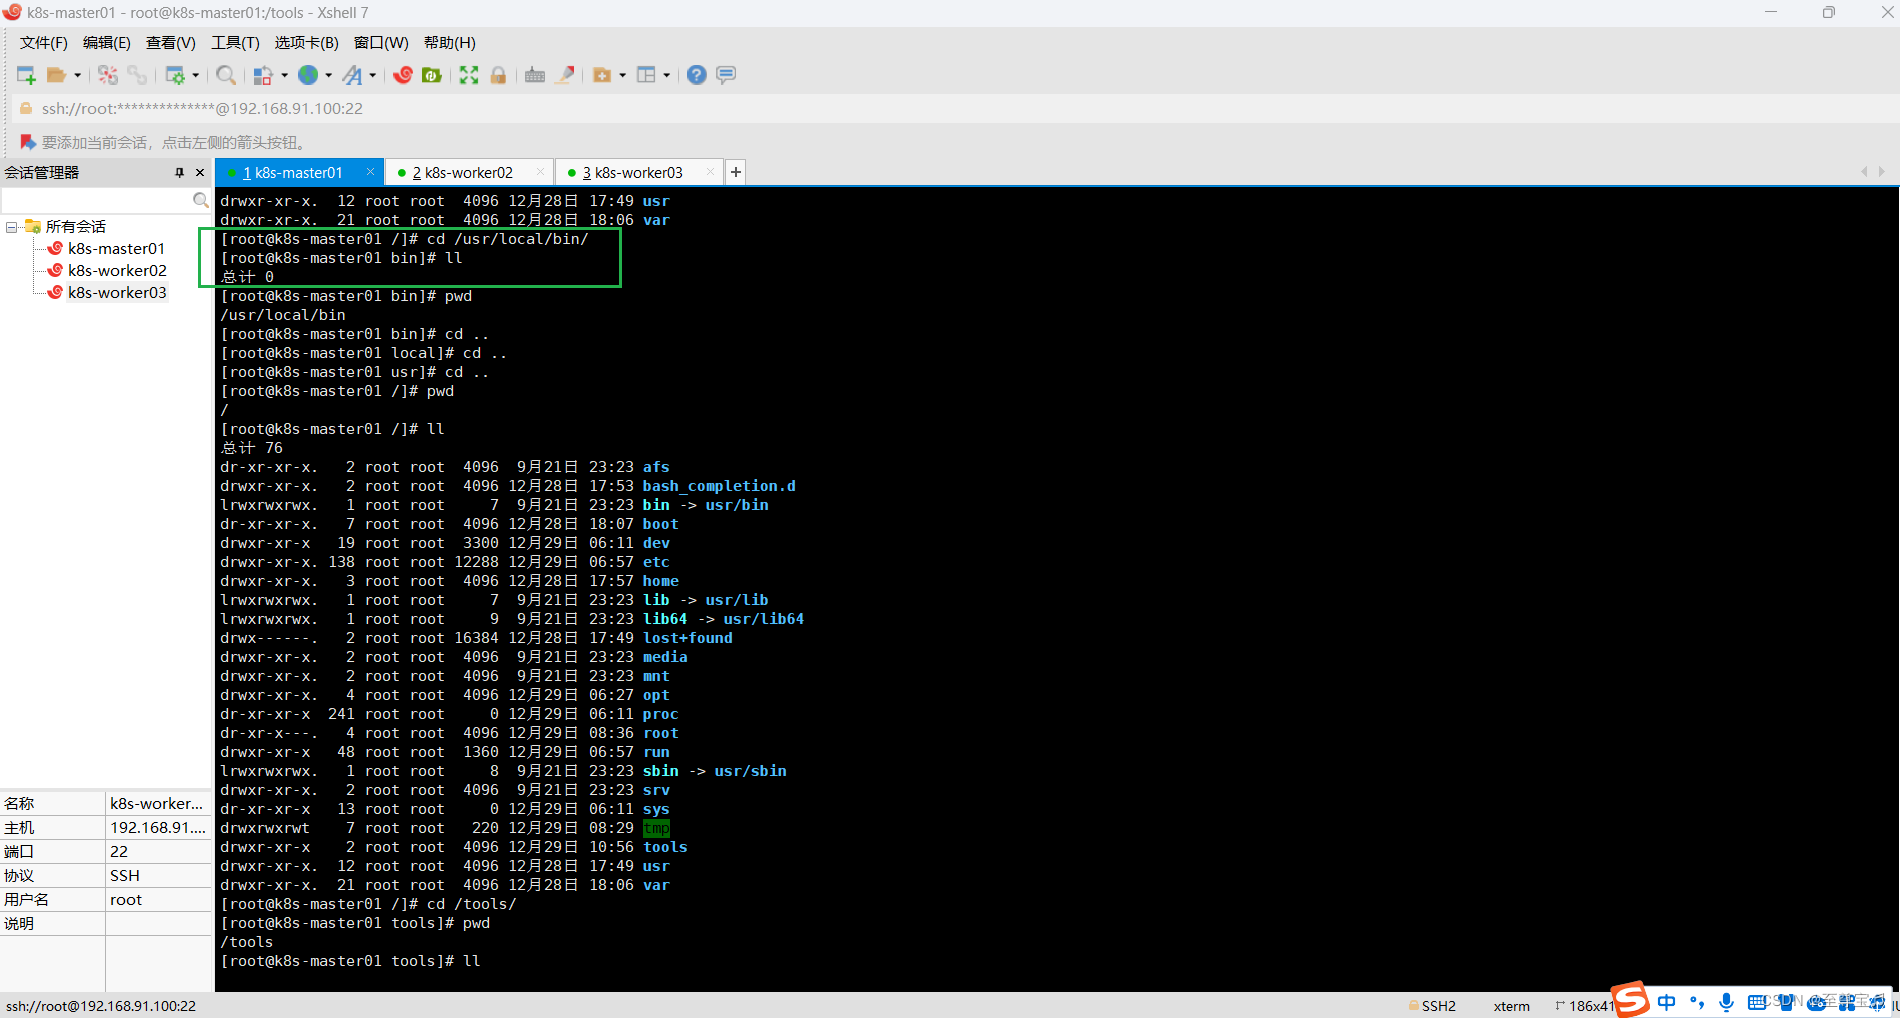
tar -zxvf cri-containerd-1.6.22-linux-amd64.tar.gz -C /usr/local/bin/
-------------------由于参考资料不完整--------------走的一段弯路start------------------记录一下-------------
赋予它们可执行权限,4=读,2=写,1=可执行,加一起就是他的权限。
chmod 0755 /usr/bin/containerd*
chmod 0755 /usr/bin/crictl
chmod 0755 /usr/bin/ctd-decoder
chmod 0755 /usr/bin/runc
chmod 0755 /usr/bin/ctr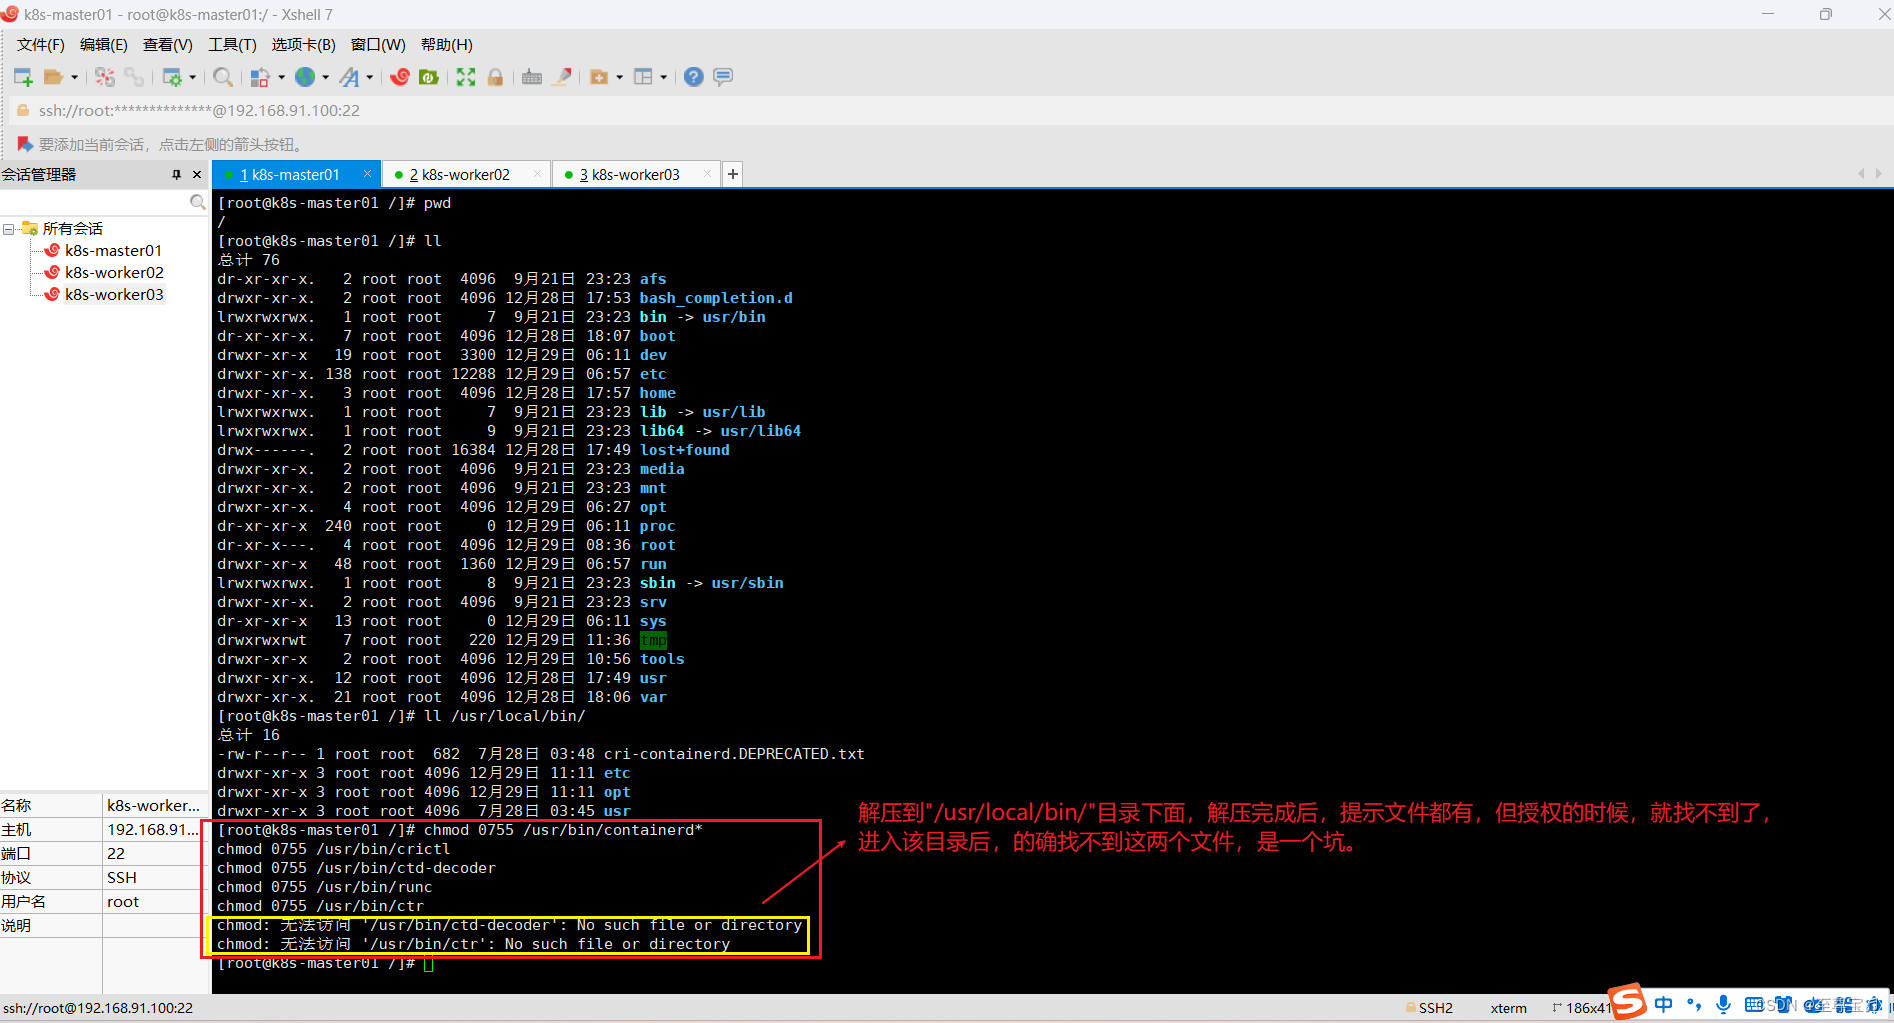
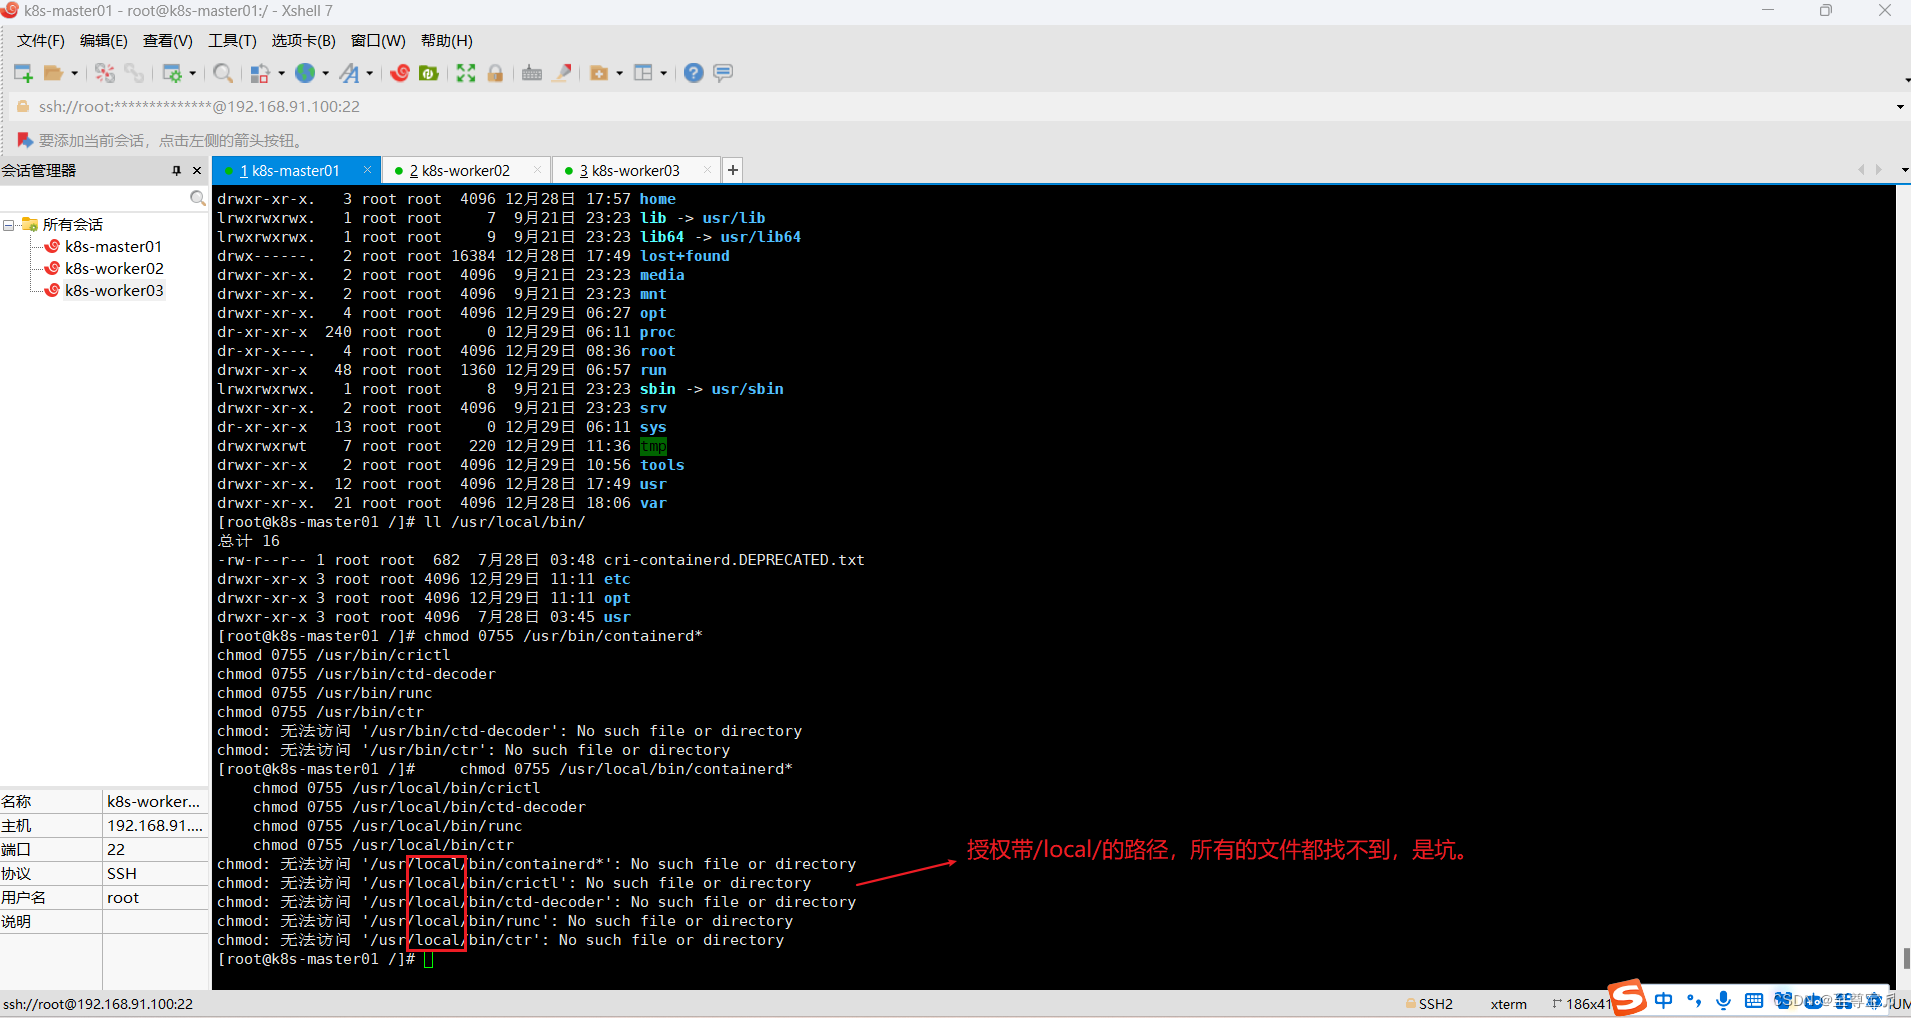
-----------------------------------------------------------弯路end---------------------------------------------------------
正确方法如下:
etc目录:主要为containerd服务管理配置文件及cni虚拟网卡配置文件;
opt目录:主要为gce环境中使用containerd配置文件及cni插件;
usr目录:主要为containerd运行时的二进制文件,包含runc;
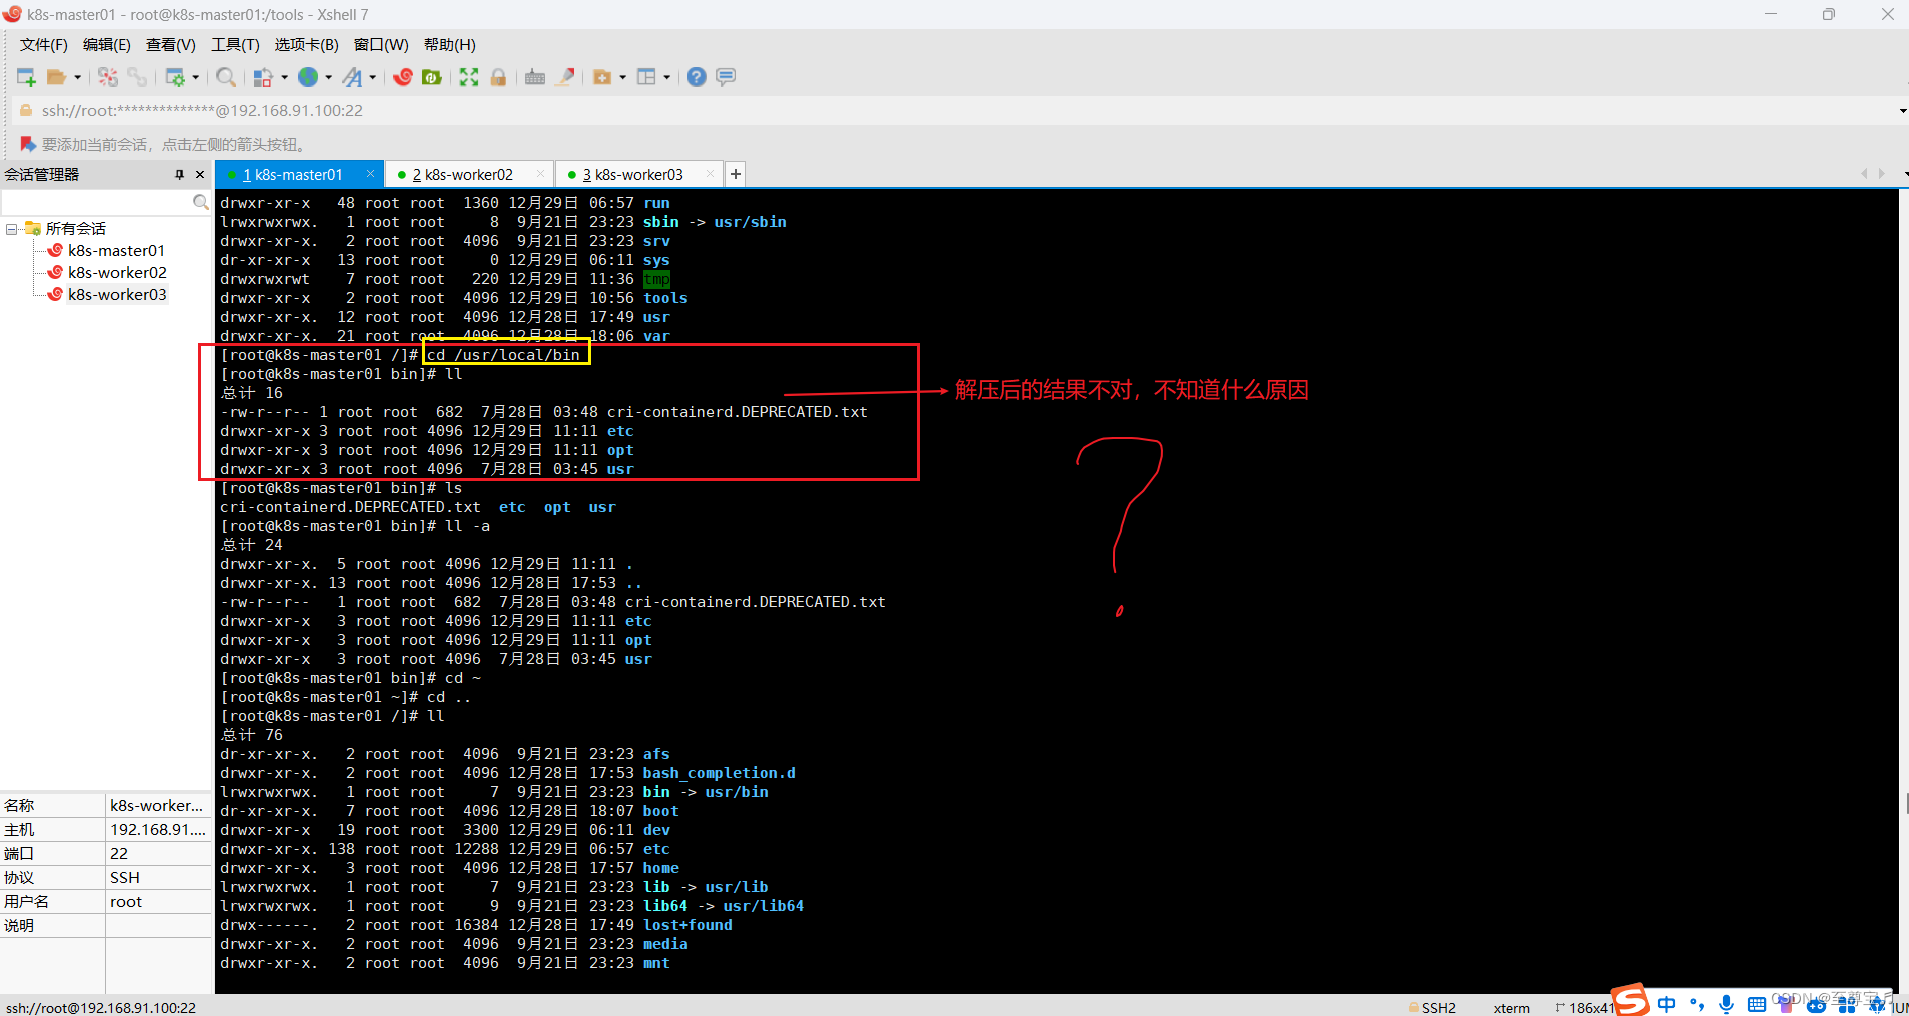
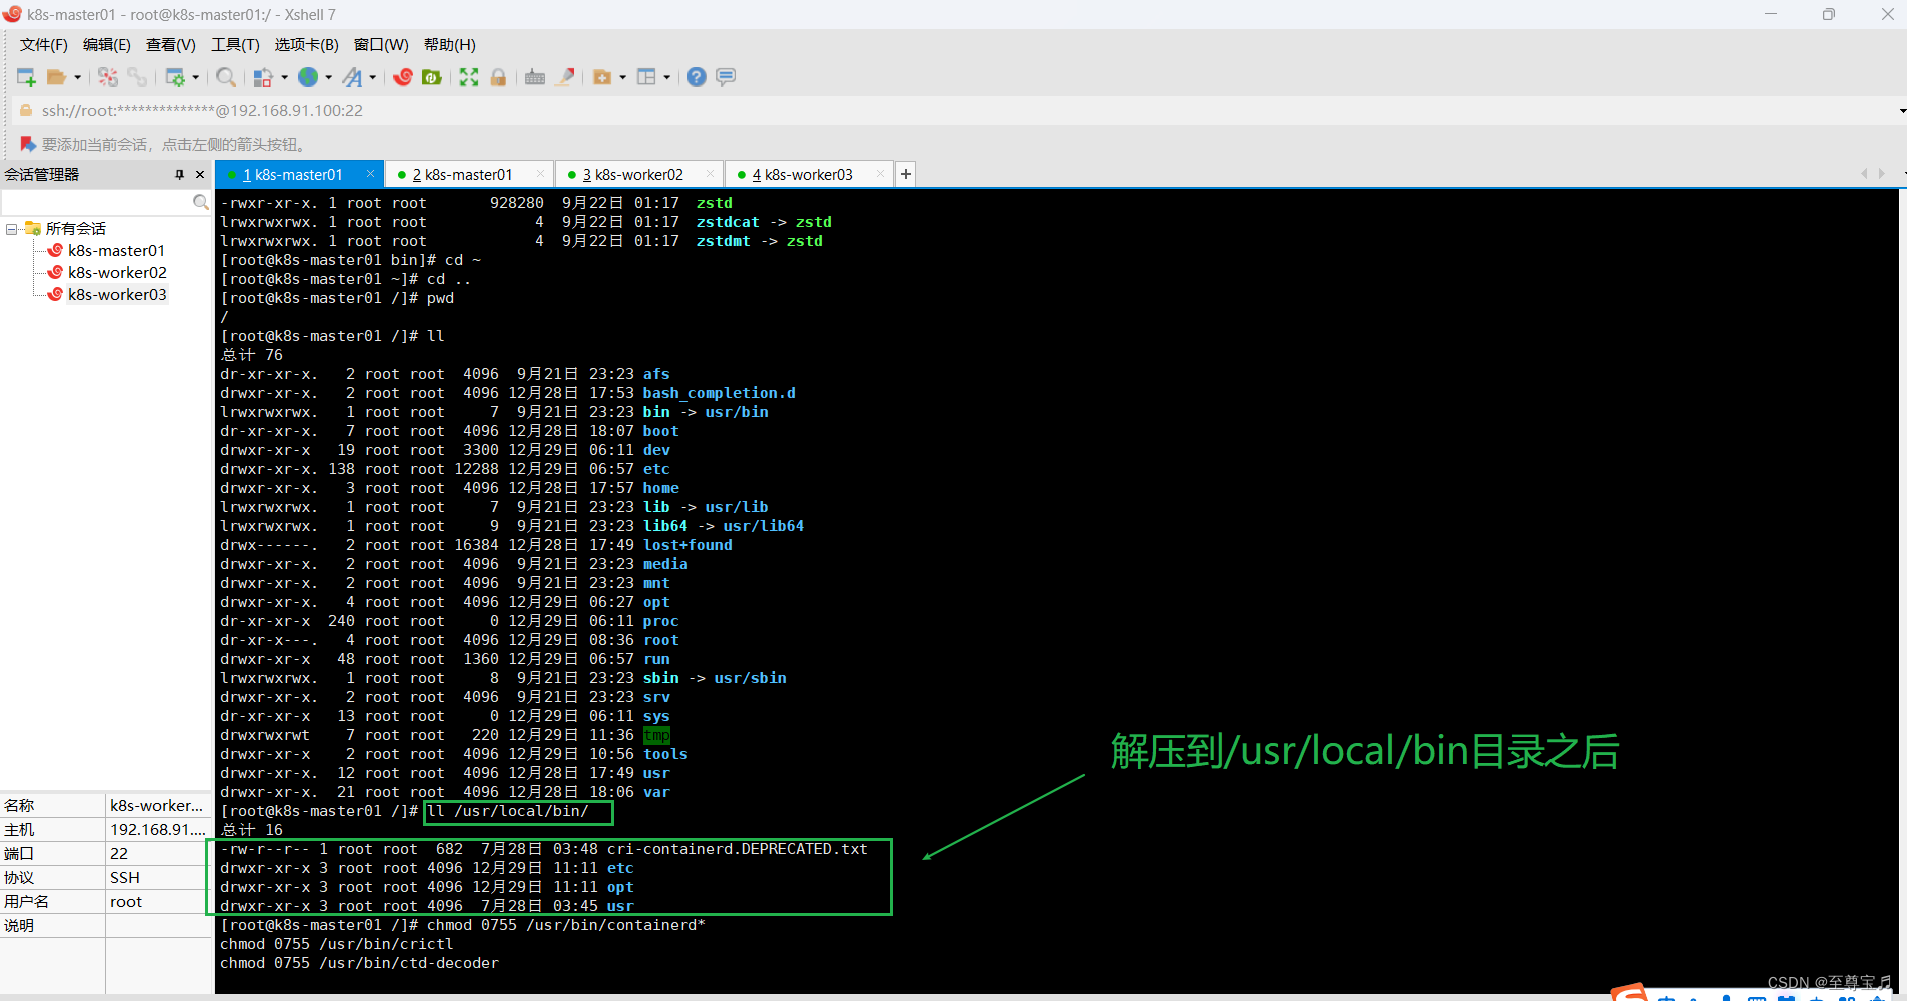
②拷贝二进制可执行文件到$PATH中;
[root@k8s-master01 /]# cd /usr/local/bin
[root@k8s-master01 bin]# ll
总计 16
-rw-r--r-- 1 root root 682 7月28日 03:48 cri-containerd.DEPRECATED.txt
drwxr-xr-x 3 root root 4096 12月29日 11:11 etc
drwxr-xr-x 3 root root 4096 12月29日 11:11 opt
drwxr-xr-x 3 root root 4096 7月28日 03:45 usr
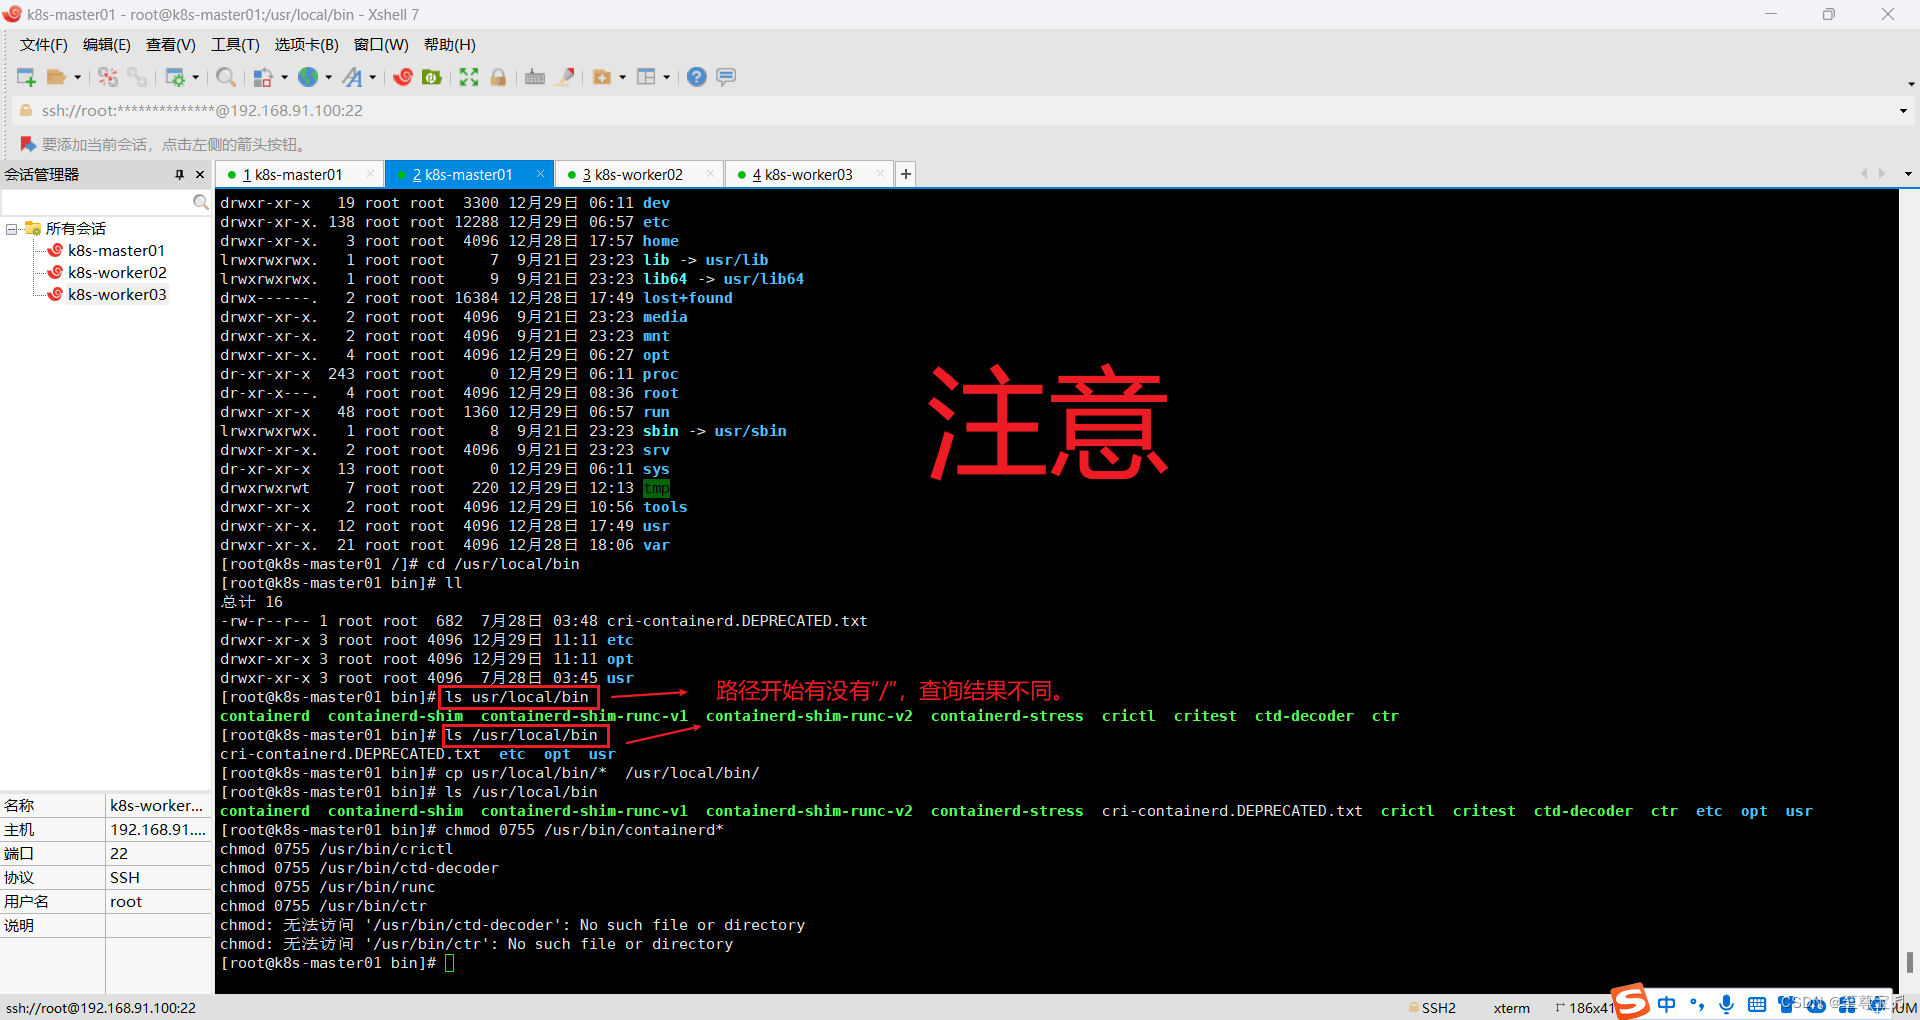
[root@k8s-master01 bin]# ls usr/local/bin
containerd containerd-shim containerd-shim-runc-v1 containerd-shim-runc-v2 containerd-stress crictl critest ctd-decoder ctr
[root@k8s-master01 bin]# ls /usr/local/bin
cri-containerd.DEPRECATED.txt etc opt usr
[root@k8s-master01 bin]# cp usr/local/bin/* /usr/local/bin/
[root@k8s-master01 bin]# ls /usr/local/bin
containerd containerd-shim containerd-shim-runc-v1 containerd-shim-runc-v2 containerd-stress cri-containerd.DEPRECATED.txt crictl critest ctd-decoder ctr etc opt usr
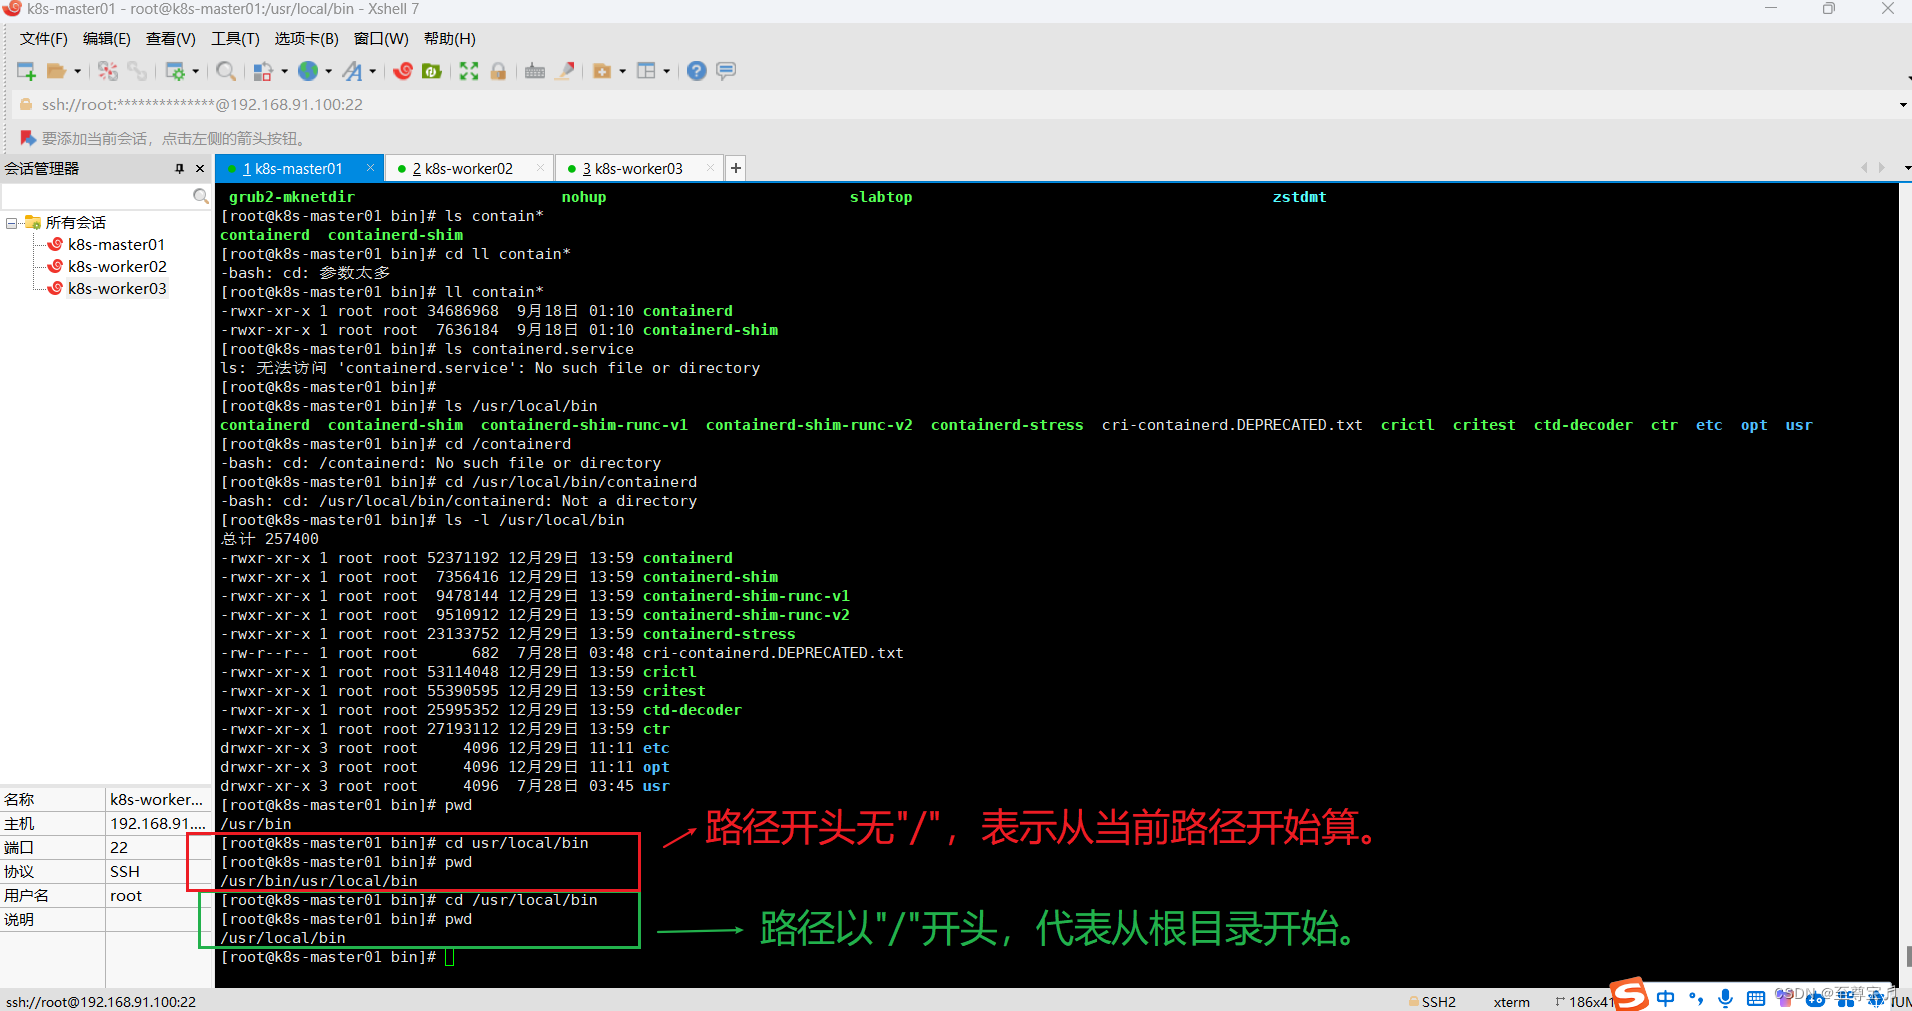
# 方法一:先进入根目录 cd /usr/local/bin   再执行下面的命令
cp usr/local/bin/*  /usr/local/bin/
# 方法二:在任意目录执行下面的命令,路径都是从根目录开始计算
cp /usr/local/bin/usr/local/bin/*  /usr/local/bin/
containerd 的安装包中一共有五个文件,通过上面的命令它们被安装到了 /usr/local/bin 目录中:
containerd:即容器的运行时,以 gRPC 协议的形式提供满足 OCI 标准的 API
containerd-release:containerd项目的发行版发布工具
containerd-stress:containerd压力测试工具
containerd-shim:这是每一个容器的运行时载体,我们在 docker 宿主机上看到的 shim 也正是代表着一个个通过调用 containerd 启动的 docker 容器。
ctr:它是一个简单的 CLI 接口,用作 containerd 本身的一些调试用途,投入生产使用时还是应该配合docker 或者 cri-containerd 部署。
赋予它们可执行权限,4=读,2=写,1=可执行,加一起就是他的权限。
正确命令如下:
chmod 0755 /usr/bin/containerd*
chmod 0755 /usr/bin/crictl
chmod 0755 /usr/local/bin/ctd-decoder
chmod 0755 /usr/bin/runc
chmod 0755 /usr/local/bin/ctr
③把上面解压的这个文件containerd.service,放到systemd的目录下:"/usr/lib/systemd/system/";
解压文件完整根路径如下:
"/usr/local/bin/etc/systemd/system/containerd.service"
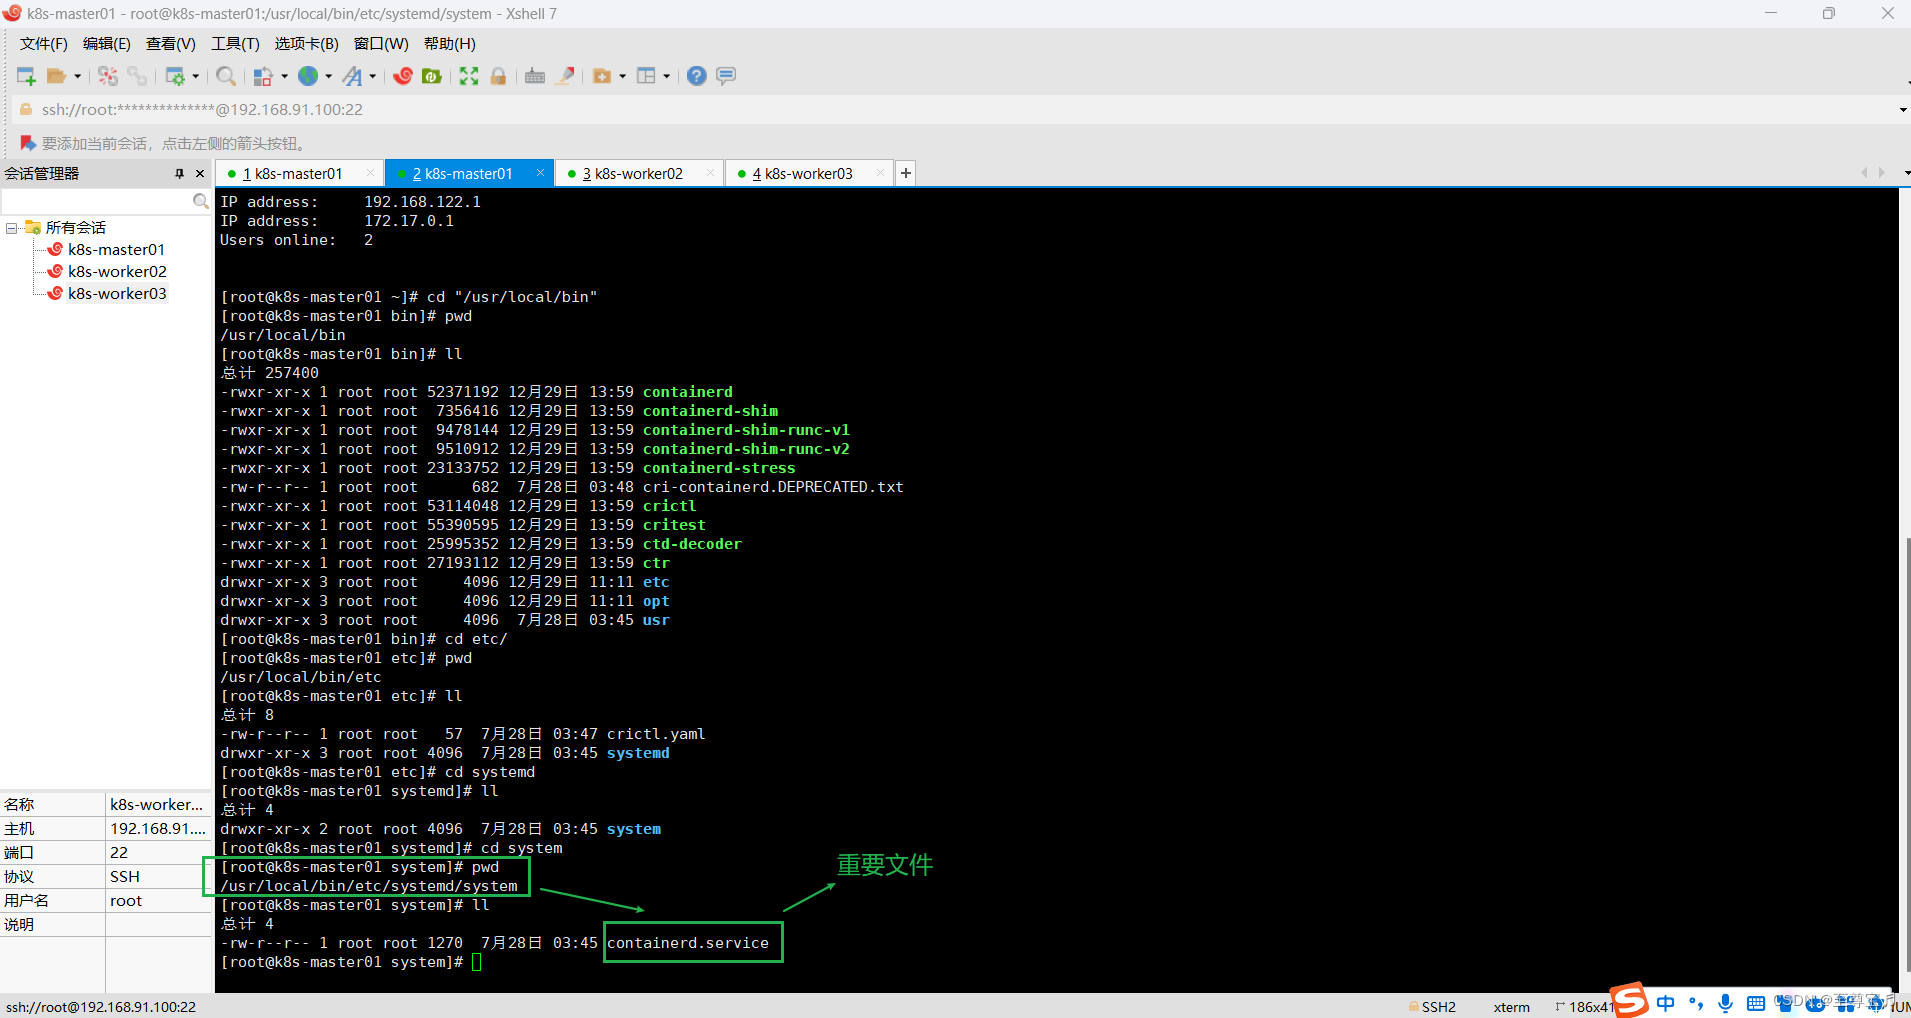
mv /usr/local/bin/etc/systemd/system/containerd.service /usr/lib/systemd/system/ 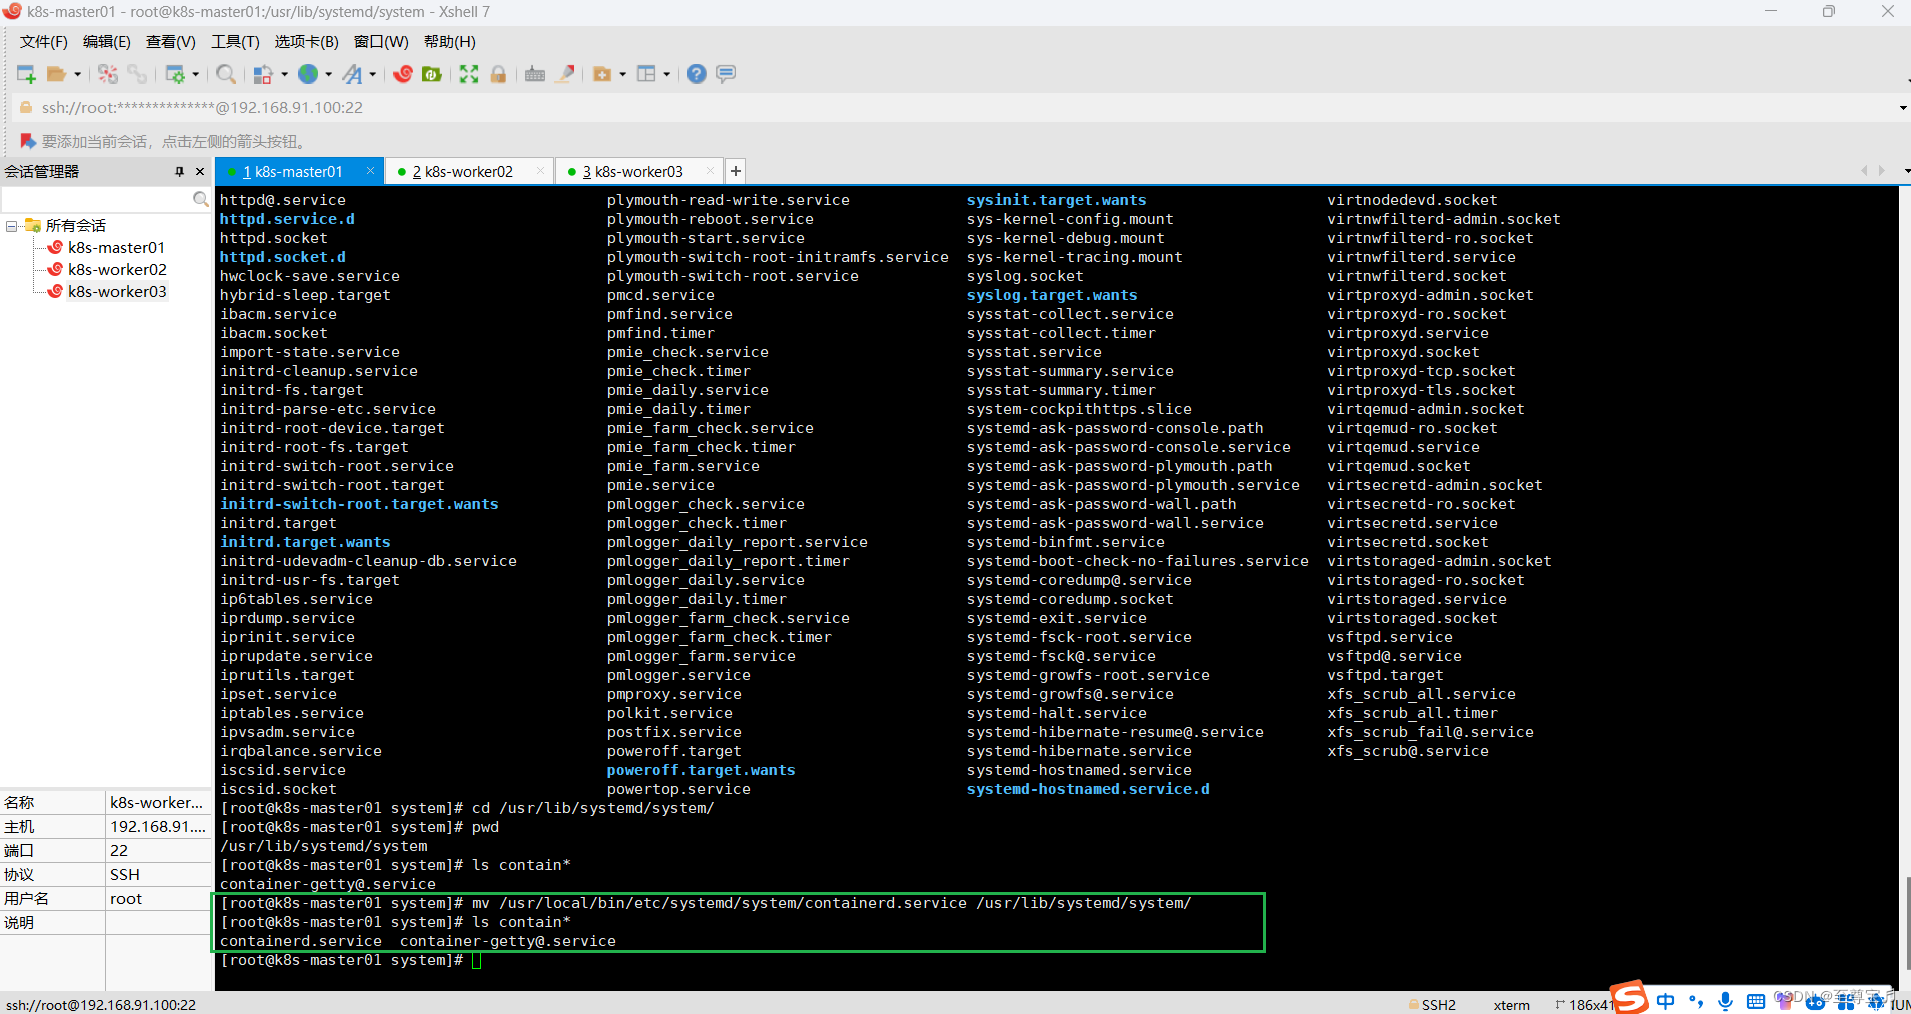
④给containerd.service赋予权限;
chmod 0755 /usr/lib/systemd/system/containerd.service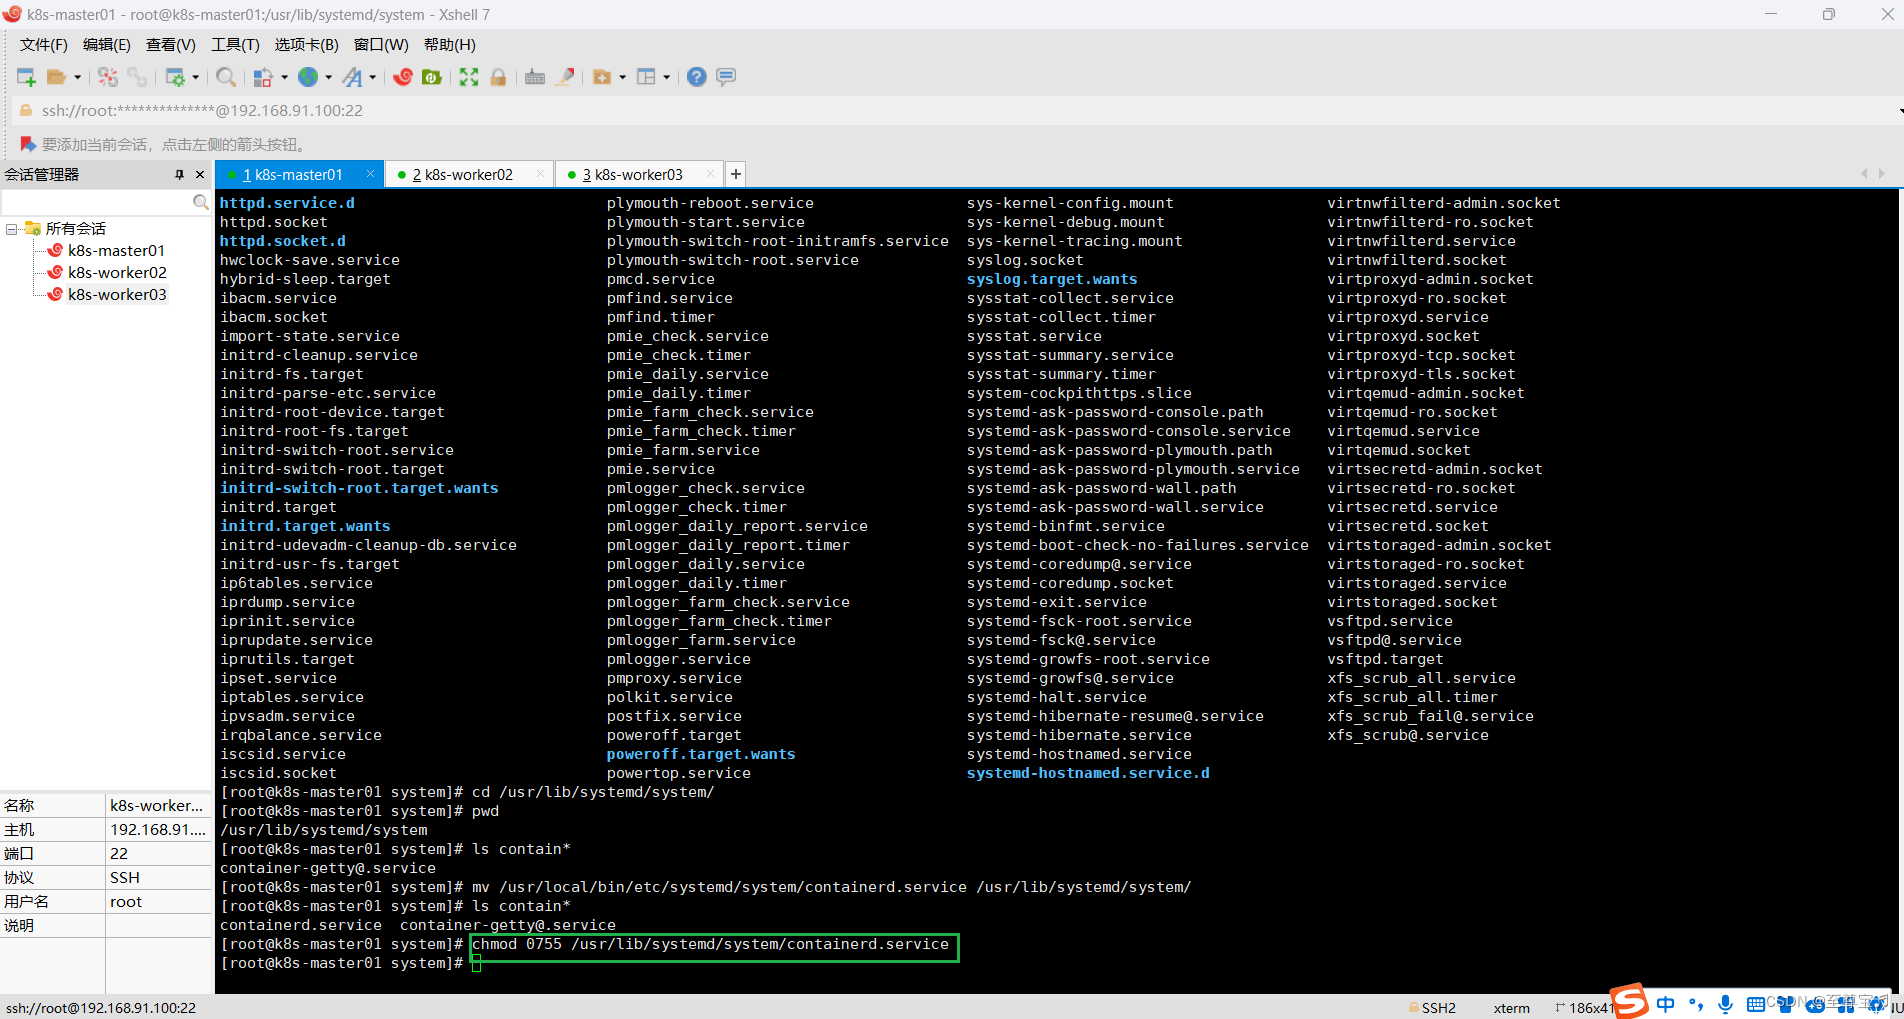
如果你不想每次使用crictl都带一行类似下面这样的参数,
crictl --image-endpoint unix:///var/run/containerd/containerd.sock
那么你就执行下面的命令:
cat >>/etc/crictl.yaml <<EOF
runtime-endpoint: unix:///var/run/containerd/containerd.sock
image-endpoint: unix:///var/run/containerd/containerd.sock
timeout: 10
debug: false
EOF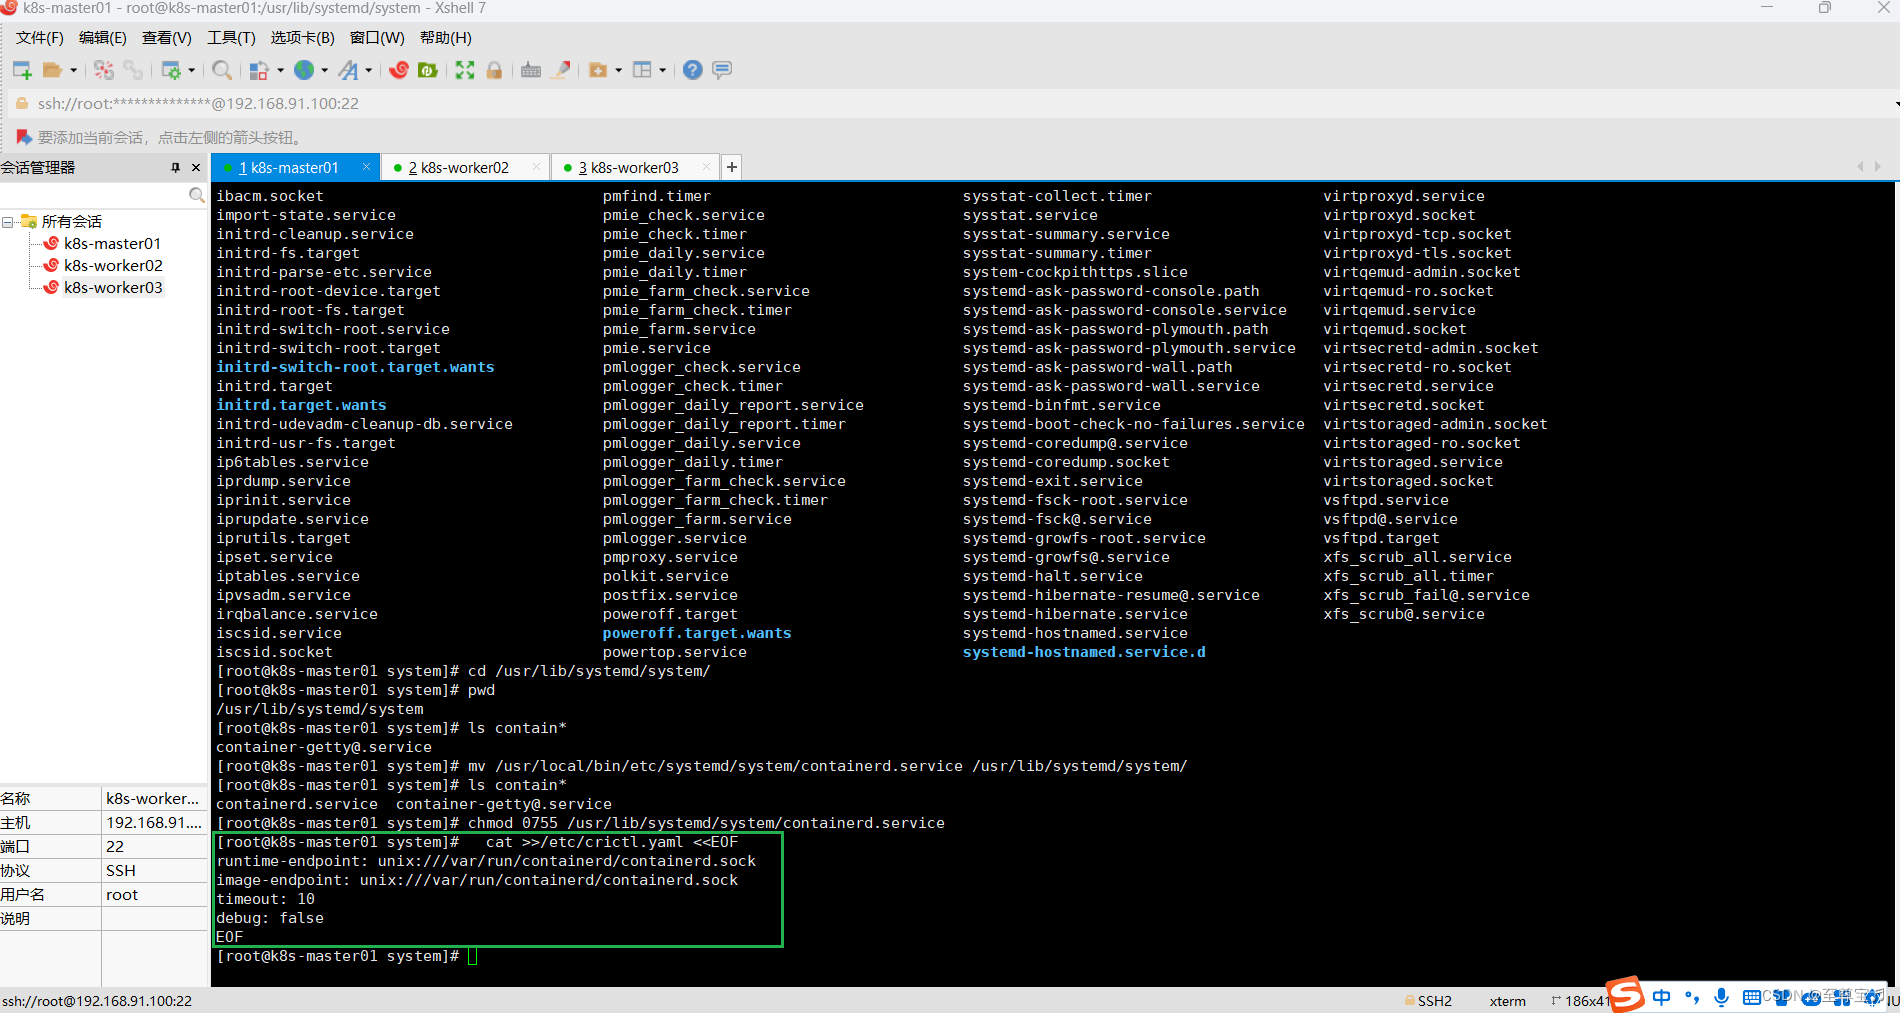
(4)master节点启动containerd;
a.查询containerd运行状态:
systemctl status containerdb.启动containerd命令:
systemctl daemon-reloadsystemctl enable containerdsystemctl start containerd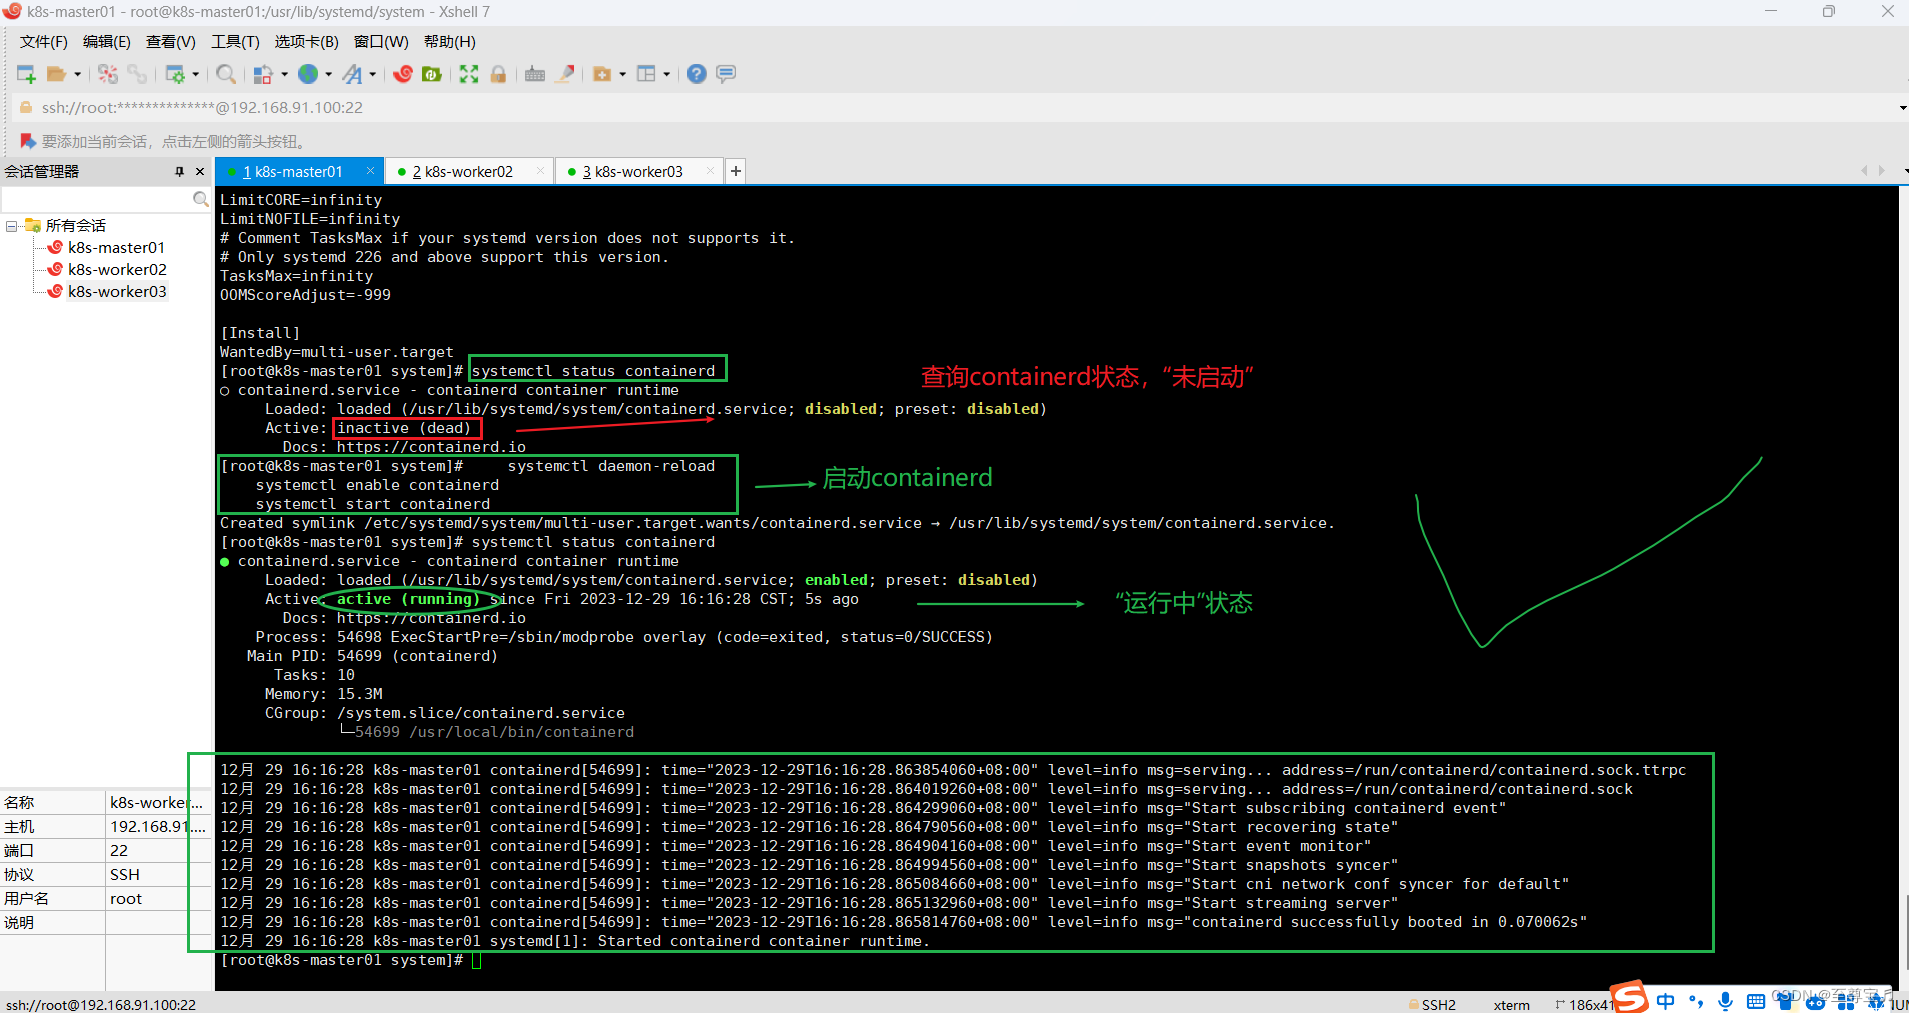
十五.主节点k8s-master01执行集群初始化;
# k8s集群初始化
kubeadm init --node-name=k8s-master01 \
--image-repository=registry.aliyuncs.com/google_containers \
--kubernetes-version v1.25.3 \
--cri-socket=unix:///var/run/cri-dockerd.sock \
--apiserver-advertise-address=192.168.91.100 \
--pod-network-cidr=10.244.0.0/16 \
--service-cidr=10.96.0.0/12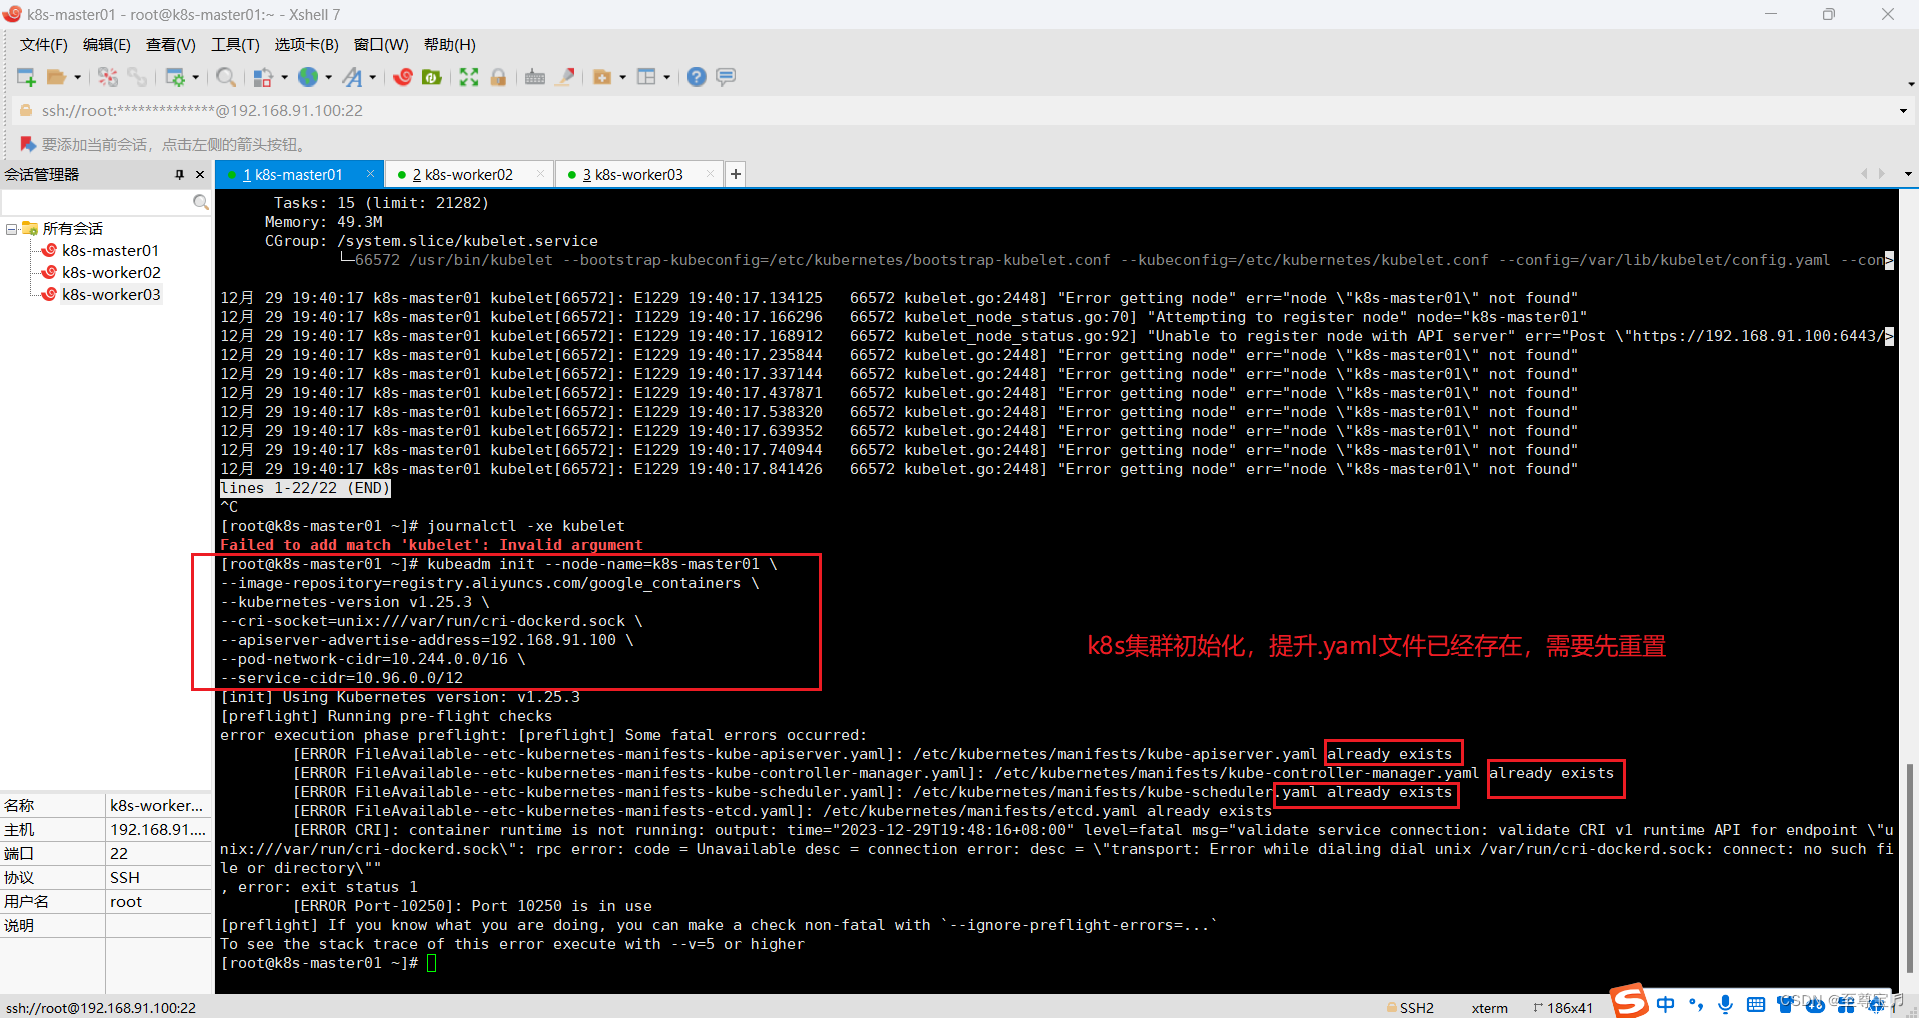
# 如果初始化失败,可以重置;
kubeadm reset --cri-socket unix:///var/run/cri-docker.sock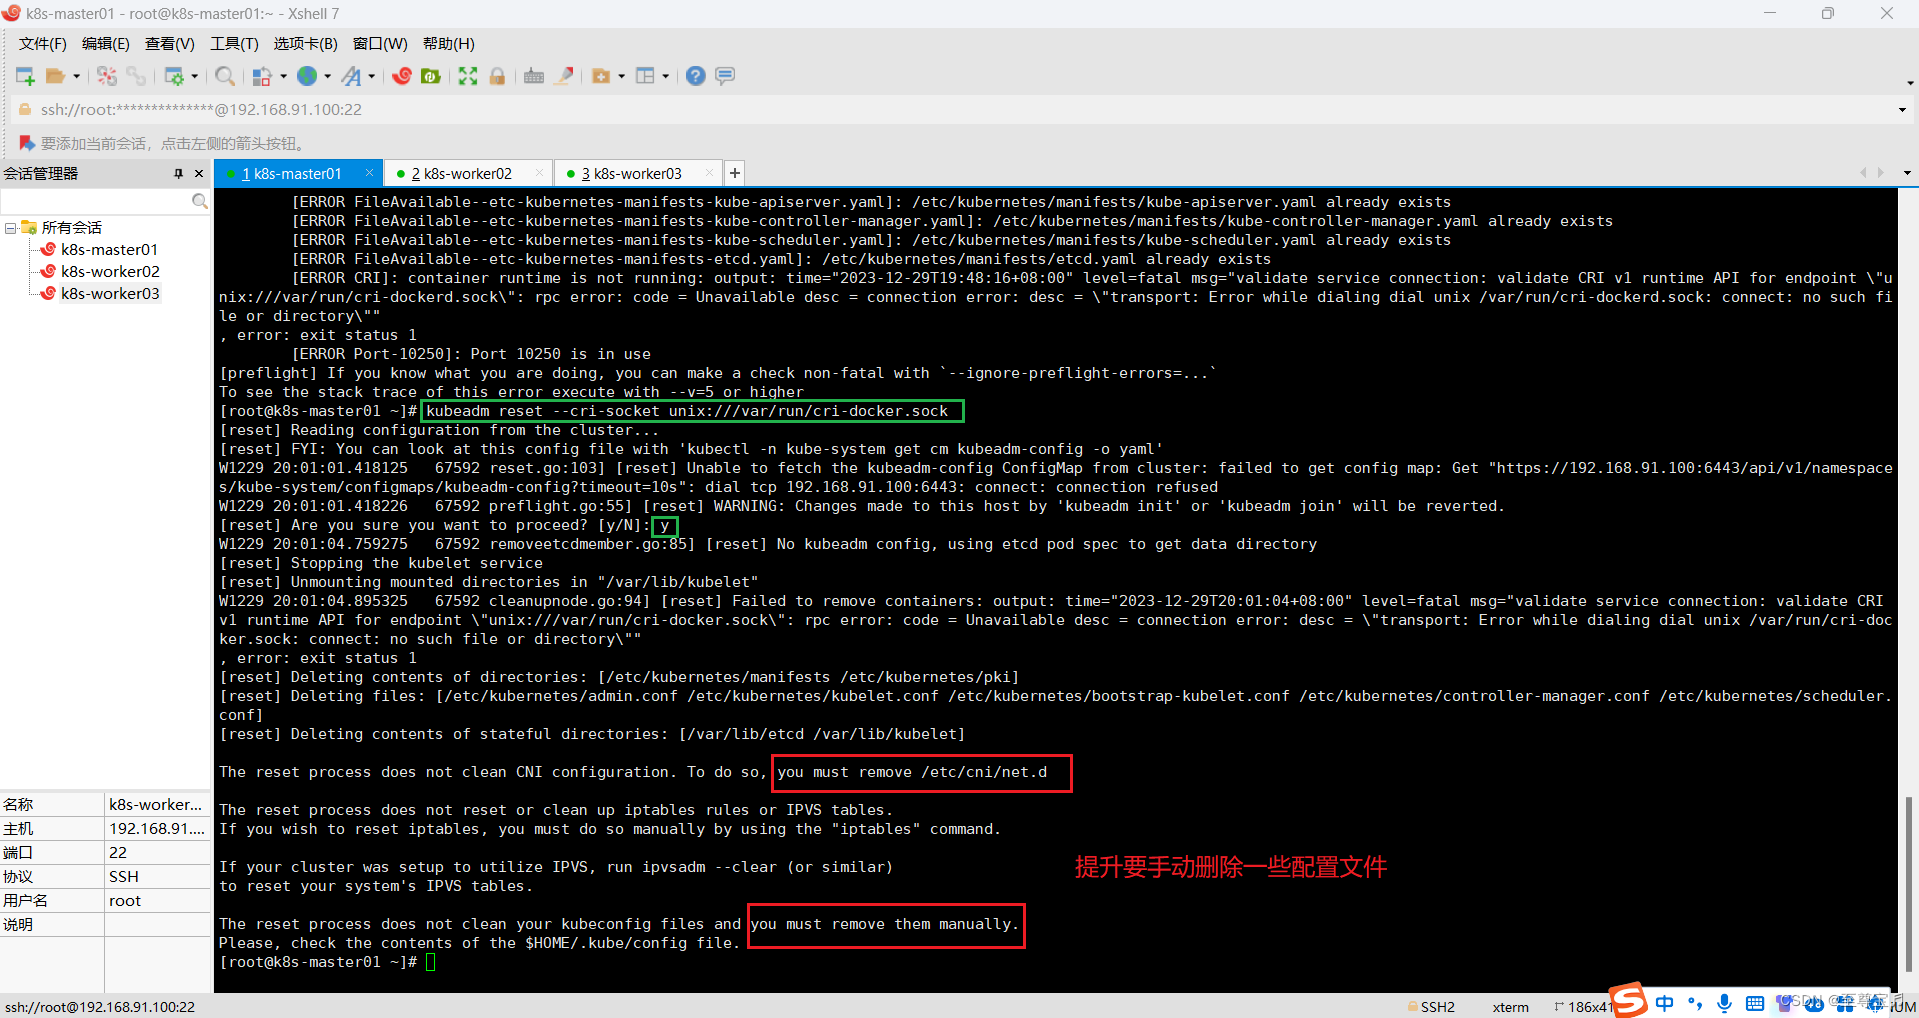
但是切换到这个目录,发现目录是空的。(未截图)
1.查看kubelet启动日志;
# 检查journal日志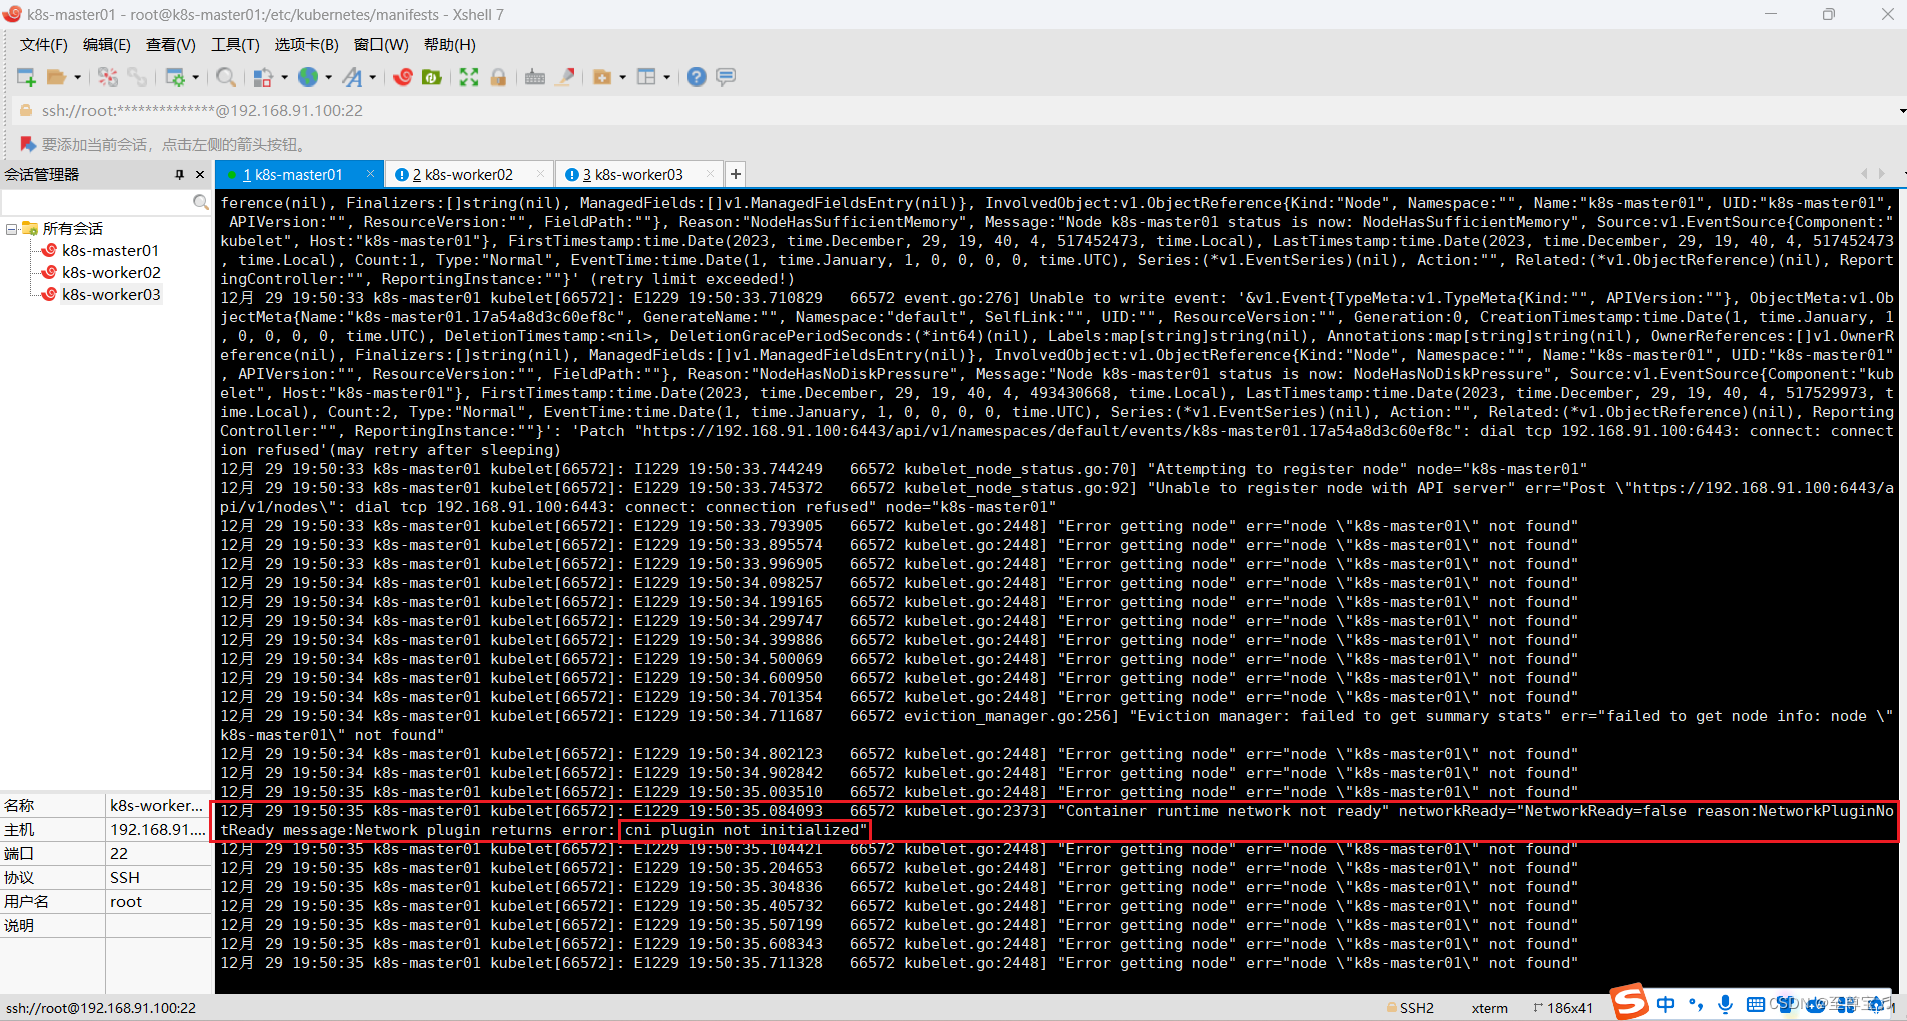
journalctl -u kubelet --no-pager报错现象:kubelet 日志报 network plugin is not ready: cni config uninitialized
解决方法:网络插件(flannel 或者 calico)没有安装或者安装失败。
2.安装部署网络插件(master节点上);
必须安装网络组件否则k8s各个节点都是Noready状态;
calico和flannel二选一(本次安装使用的是flannel网路插件)
在此处下载 kube-flannel.yml;
Releases · flannel-io/flannel · GitHubflannel is a network fabric for containers, designed for Kubernetes - Releases · flannel-io/flannel![]() https://github.com/flannel-io/flannel/releases
https://github.com/flannel-io/flannel/releases
直接apply: kubectl apply -f kube-flannel.yml
也可直接复制下面的命令:
cat >  kube-flannel.yml << EOF
---
kind: Namespace
apiVersion: v1
metadata:name: kube-flannellabels:k8s-app: flannelpod-security.kubernetes.io/enforce: privileged
---
kind: ClusterRole
apiVersion: rbac.authorization.k8s.io/v1
metadata:labels:k8s-app: flannelname: flannel
rules:
- apiGroups:- ""resources:- podsverbs:- get
- apiGroups:- ""resources:- nodesverbs:- get- list- watch
- apiGroups:- ""resources:- nodes/statusverbs:- patch
- apiGroups:- networking.k8s.ioresources:- clustercidrsverbs:- list- watch
---
kind: ClusterRoleBinding
apiVersion: rbac.authorization.k8s.io/v1
metadata:labels:k8s-app: flannelname: flannel
roleRef:apiGroup: rbac.authorization.k8s.iokind: ClusterRolename: flannel
subjects:
- kind: ServiceAccountname: flannelnamespace: kube-flannel
---
apiVersion: v1
kind: ServiceAccount
metadata:labels:k8s-app: flannelname: flannelnamespace: kube-flannel
---
kind: ConfigMap
apiVersion: v1
metadata:name: kube-flannel-cfgnamespace: kube-flannellabels:tier: nodek8s-app: flannelapp: flannel
data:cni-conf.json: |{"name": "cbr0","cniVersion": "0.3.1","plugins": [{"type": "flannel","delegate": {"hairpinMode": true,"isDefaultGateway": true}},{"type": "portmap","capabilities": {"portMappings": true}}]}net-conf.json: |{"Network": "10.244.0.0/16","Backend": {"Type": "vxlan"}}
---
apiVersion: apps/v1
kind: DaemonSet
metadata:name: kube-flannel-dsnamespace: kube-flannellabels:tier: nodeapp: flannelk8s-app: flannel
spec:selector:matchLabels:app: flanneltemplate:metadata:labels:tier: nodeapp: flannelspec:affinity:nodeAffinity:requiredDuringSchedulingIgnoredDuringExecution:nodeSelectorTerms:- matchExpressions:- key: kubernetes.io/osoperator: Invalues:- linuxhostNetwork: truepriorityClassName: system-node-criticaltolerations:- operator: Existseffect: NoScheduleserviceAccountName: flannelinitContainers:- name: install-cni-pluginimage: docker.io/flannel/flannel-cni-plugin:v1.2.0command:- cpargs:- -f- /flannel- /opt/cni/bin/flannelvolumeMounts:- name: cni-pluginmountPath: /opt/cni/bin- name: install-cniimage: docker.io/flannel/flannel:v0.22.3command:- cpargs:- -f- /etc/kube-flannel/cni-conf.json- /etc/cni/net.d/10-flannel.conflistvolumeMounts:- name: cnimountPath: /etc/cni/net.d- name: flannel-cfgmountPath: /etc/kube-flannel/containers:- name: kube-flannelimage: docker.io/flannel/flannel:v0.22.3command:- /opt/bin/flanneldargs:- --ip-masq- --kube-subnet-mgrresources:requests:cpu: "100m"memory: "50Mi"securityContext:privileged: falsecapabilities:add: ["NET_ADMIN", "NET_RAW"]env:- name: POD_NAMEvalueFrom:fieldRef:fieldPath: metadata.name- name: POD_NAMESPACEvalueFrom:fieldRef:fieldPath: metadata.namespace- name: EVENT_QUEUE_DEPTHvalue: "5000"volumeMounts:- name: runmountPath: /run/flannel- name: flannel-cfgmountPath: /etc/kube-flannel/- name: xtables-lockmountPath: /run/xtables.lockvolumes:- name: runhostPath:path: /run/flannel- name: cni-pluginhostPath:path: /opt/cni/bin- name: cnihostPath:path: /etc/cni/net.d- name: flannel-cfgconfigMap:name: kube-flannel-cfg- name: xtables-lockhostPath:path: /run/xtables.locktype: FileOrCreate
EOF
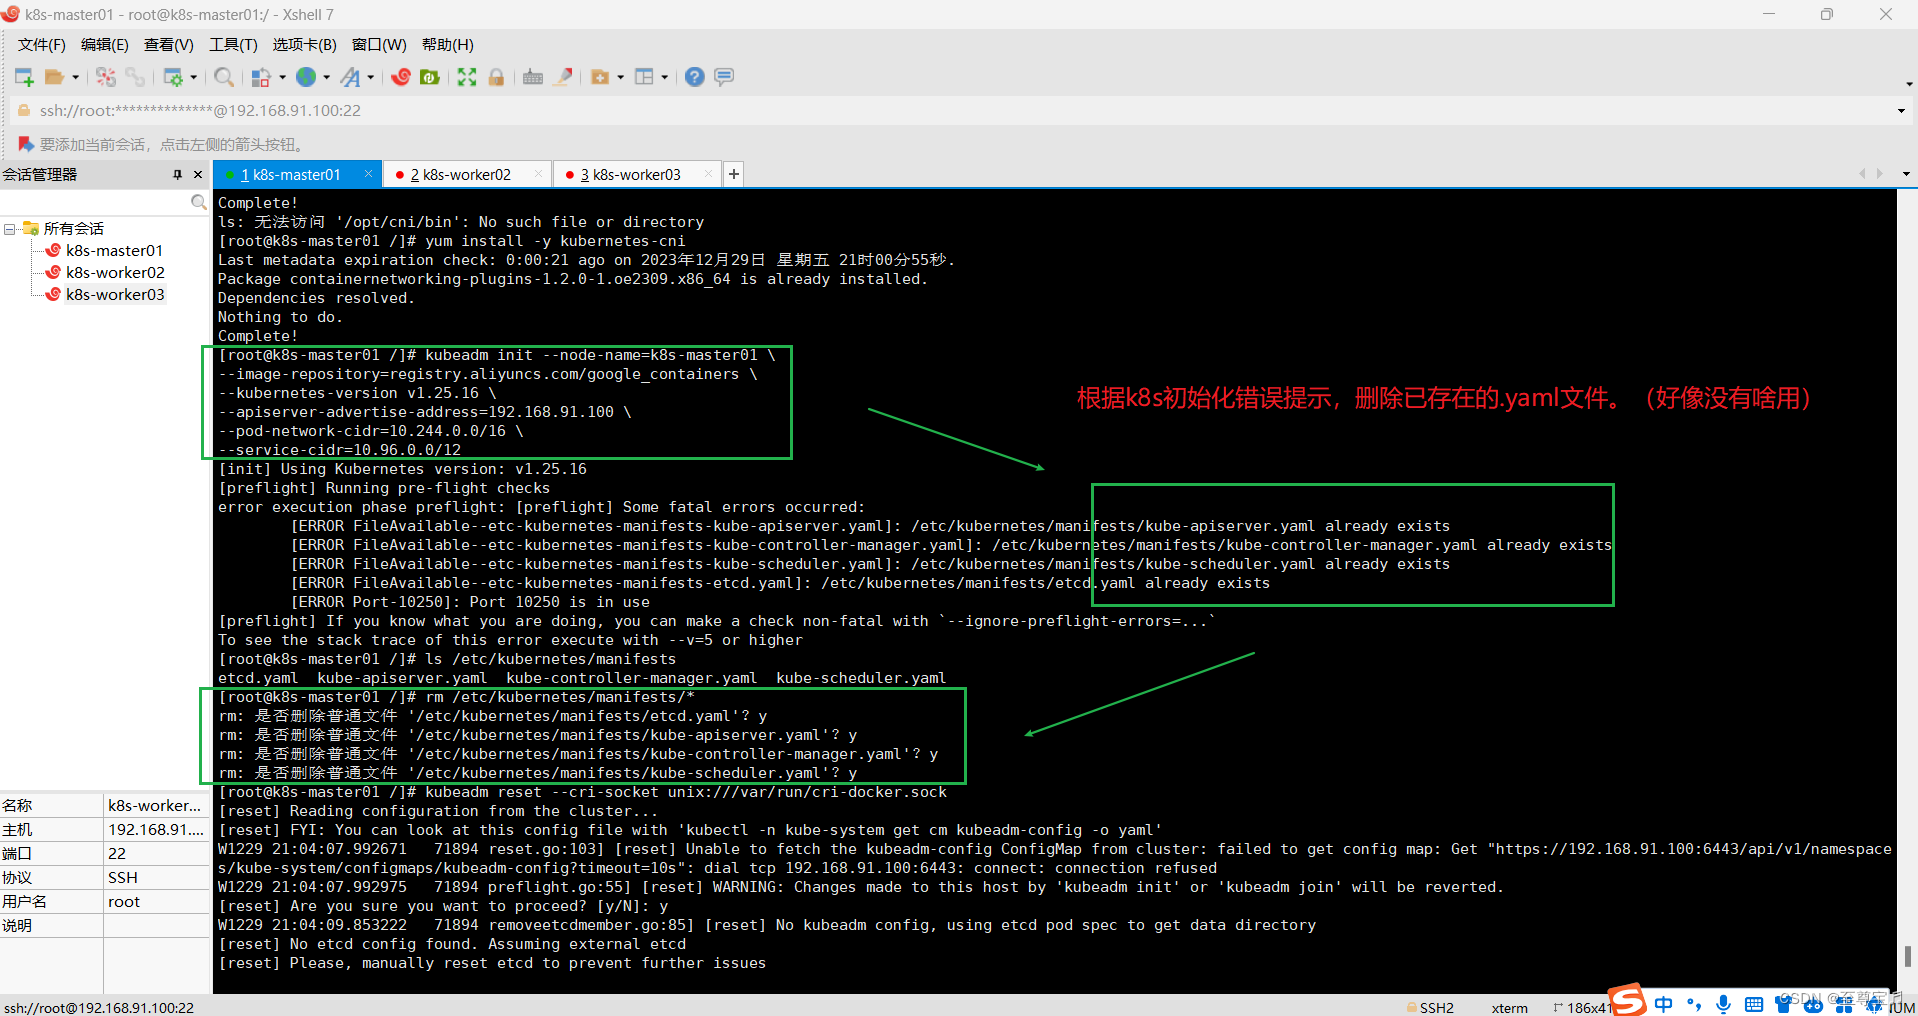
flannel 的pod启动正常后,如果节点还是Notready,需要安装kubernetes-cni
yum install -y kubernetes-cnils -lh /opt/cni/bin
3.检测主机环境是否达到集群的要求,可根据结果提示进行逐一排除故障;
kubeadm init --dry-run

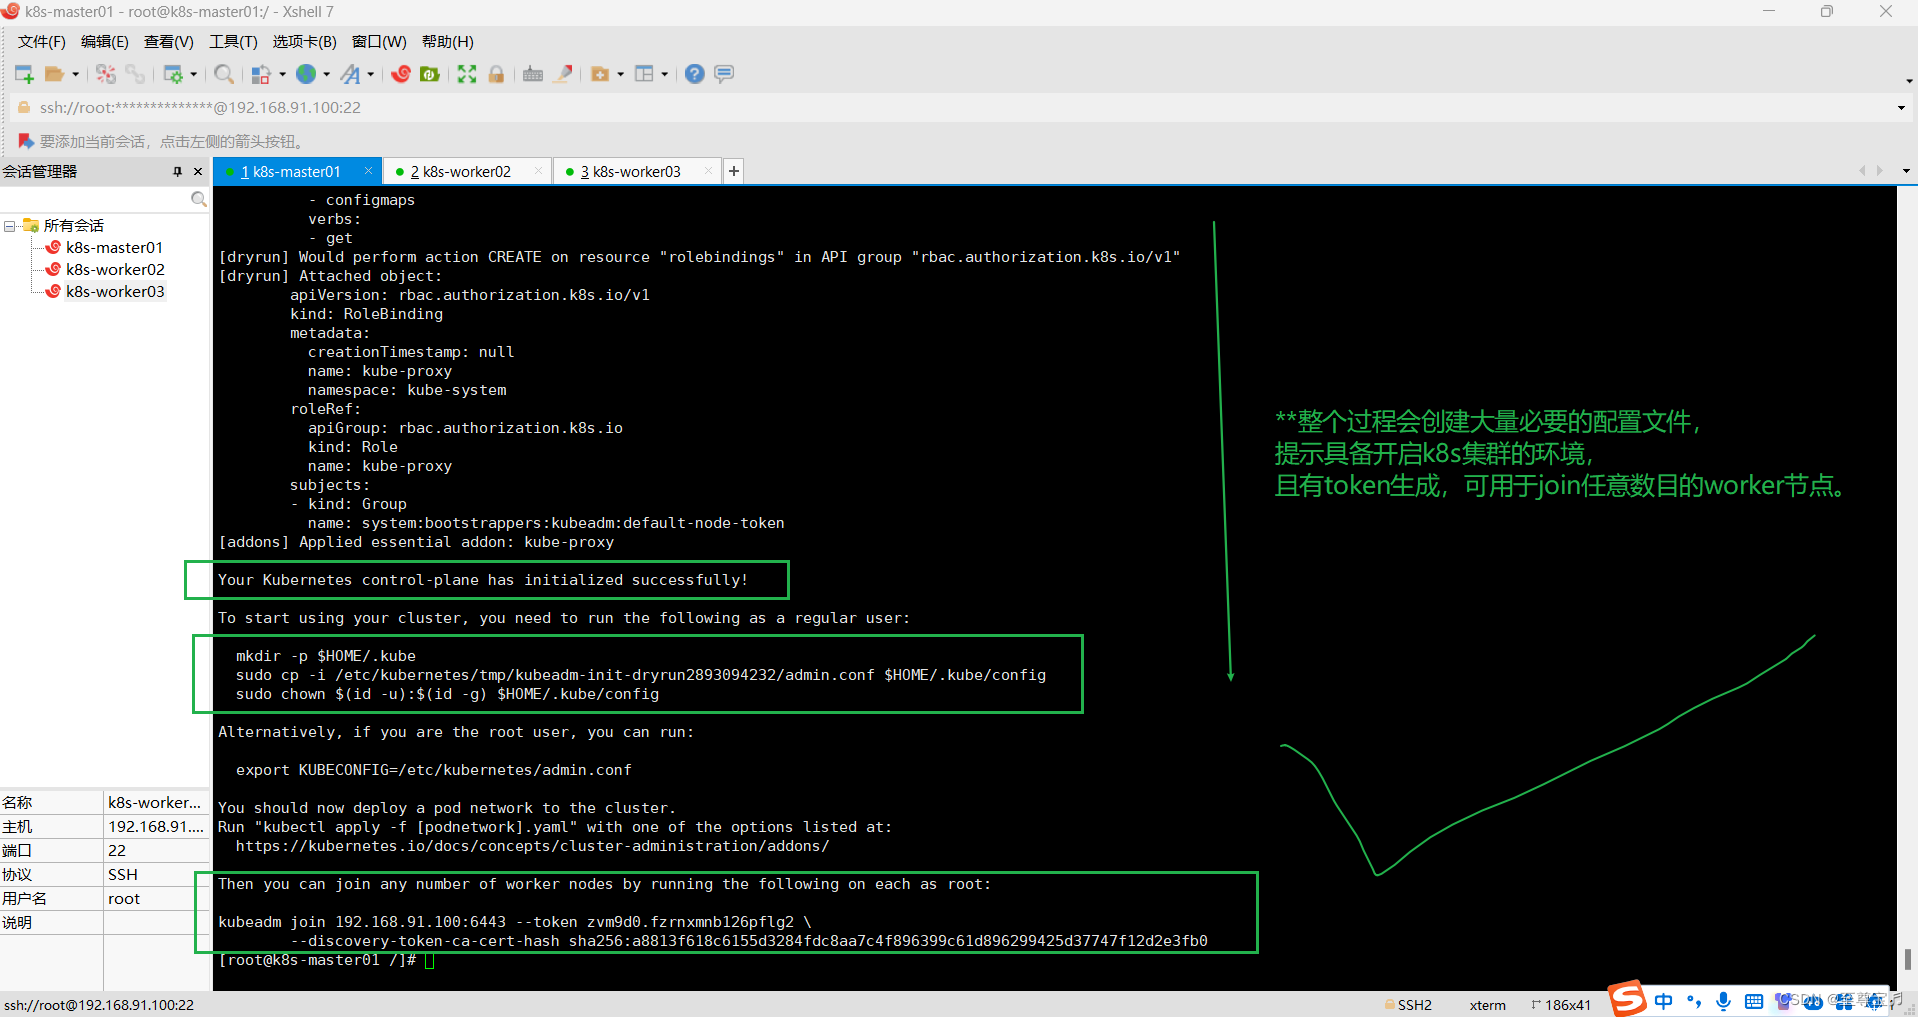
下面的输出结果很重要,根据提示操作,应该就可以启动k8s集群了;
Your Kubernetes control-plane has initialized successfully!To start using your cluster, you need to run the following as a regular user:mkdir -p $HOME/.kubesudo cp -i /etc/kubernetes/tmp/kubeadm-init-dryrun2893094232/admin.conf $HOME/.kube/configsudo chown $(id -u):$(id -g) $HOME/.kube/configAlternatively, if you are the root user, you can run:export KUBECONFIG=/etc/kubernetes/admin.confYou should now deploy a pod network to the cluster.
Run "kubectl apply -f [podnetwork].yaml" with one of the options listed at:https://kubernetes.io/docs/concepts/cluster-administration/addons/Then you can join any number of worker nodes by running the following on each as root:kubeadm join 192.168.91.100:6443 --token zvm9d0.fzrnxmnb126pflg2 \--discovery-token-ca-cert-hash sha256:a8813f618c6155d3284fdc8aa7c4f896399c61d896299425d37747f12d2e3fb0
记得保存好最后的 kubeadm join的信息node节点加入集群需要token!!!
不然要执行生成token;
kubeadm token create --print-join-command
#利用kubeadm命令重新生成token,node 节点加入集群需要token
#普通用户执行下面命令;每次启动自动加载$HOME/.kube/config下的密钥配置文件(K8S自动行为);
mkdir -p $HOME/.kube
sudo cp -i /etc/kubernetes/tmp/kubeadm-init-dryrun2893094232/admin.conf $HOME/.kube/config
sudo chown $(id -u):$(id -g) $HOME/.kube/config#命令的含义:Kubectl 是一个命令行接口,用于对 Kubernetes 集群运行命令。
#Kubectl 在 $HOME/.kube 目录中寻找一个名为 config 的文件。
#你可以通过设置环境变量 KUBECONFIG 或设置 --kubeconfig 参数指定其它 kubeconfig 文件
#当集群初始化成功后,要使 kubectl 适用于非 root 用户,则需要运行以下命令,这些命令也是 kubeadm init输出的一部分
#即创建.kube目录 -> 拷贝配置文件 -> 用户授权#当然,如果你是 root 用户,则可以直接添加环境变量:
执行  export KUBECONFIG=/etc/kubernetes/admin.confkubectl cluster-info
#查看一下是否成功,等待一会儿,同时可以发现像etc,controller,scheduler等组件都以pod的方式安装成功


cp -i /etc/kubernetes/tmp/kubeadm-init-dryrun2893094232/admin.conf /etc/kubernetes/admin.conf4.【kubectl get nodes】查看当前节点异常“The connection to the server 192.168.91.100:6443 was refused - did you specify the right host or port?”;
kubectl get nodes报错:The connection to the server 192.168.91.100:6443 was refused - did you specify the right host or port?
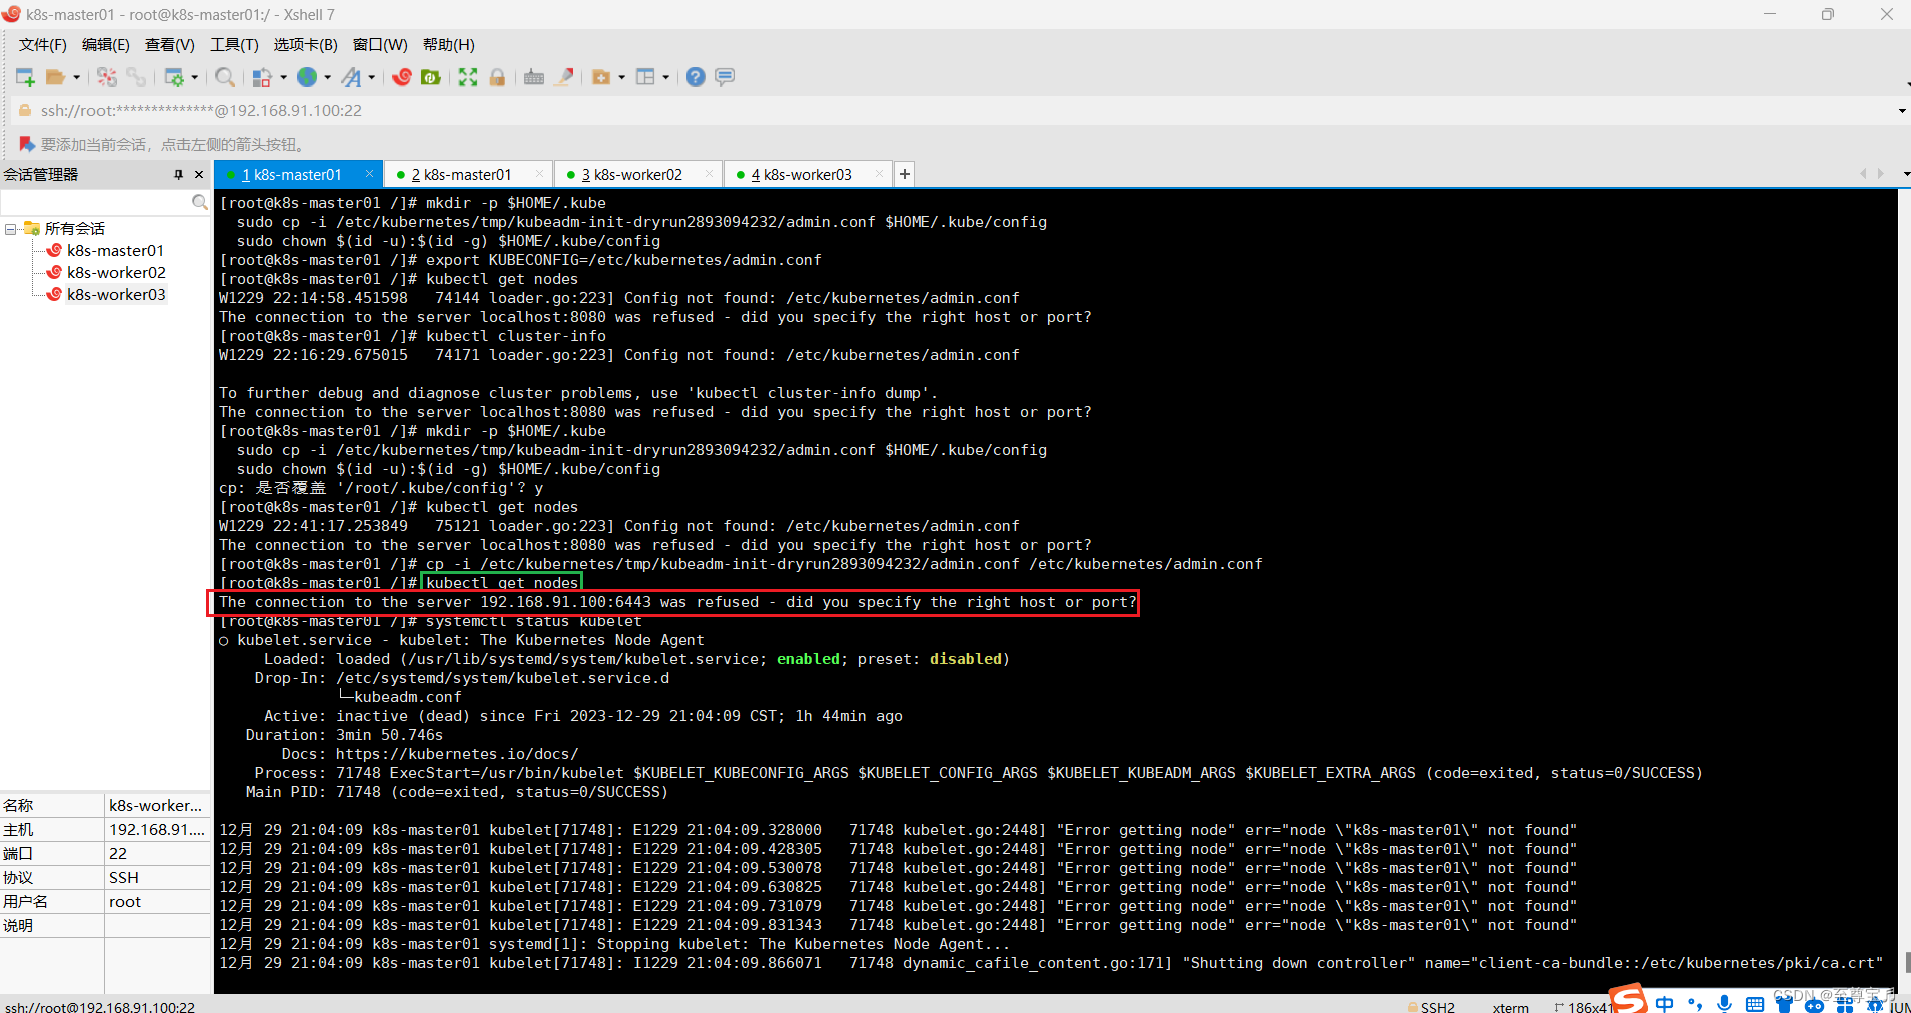
mkdir /etc/containerdcontainerd config default > /etc/containerd/config.toml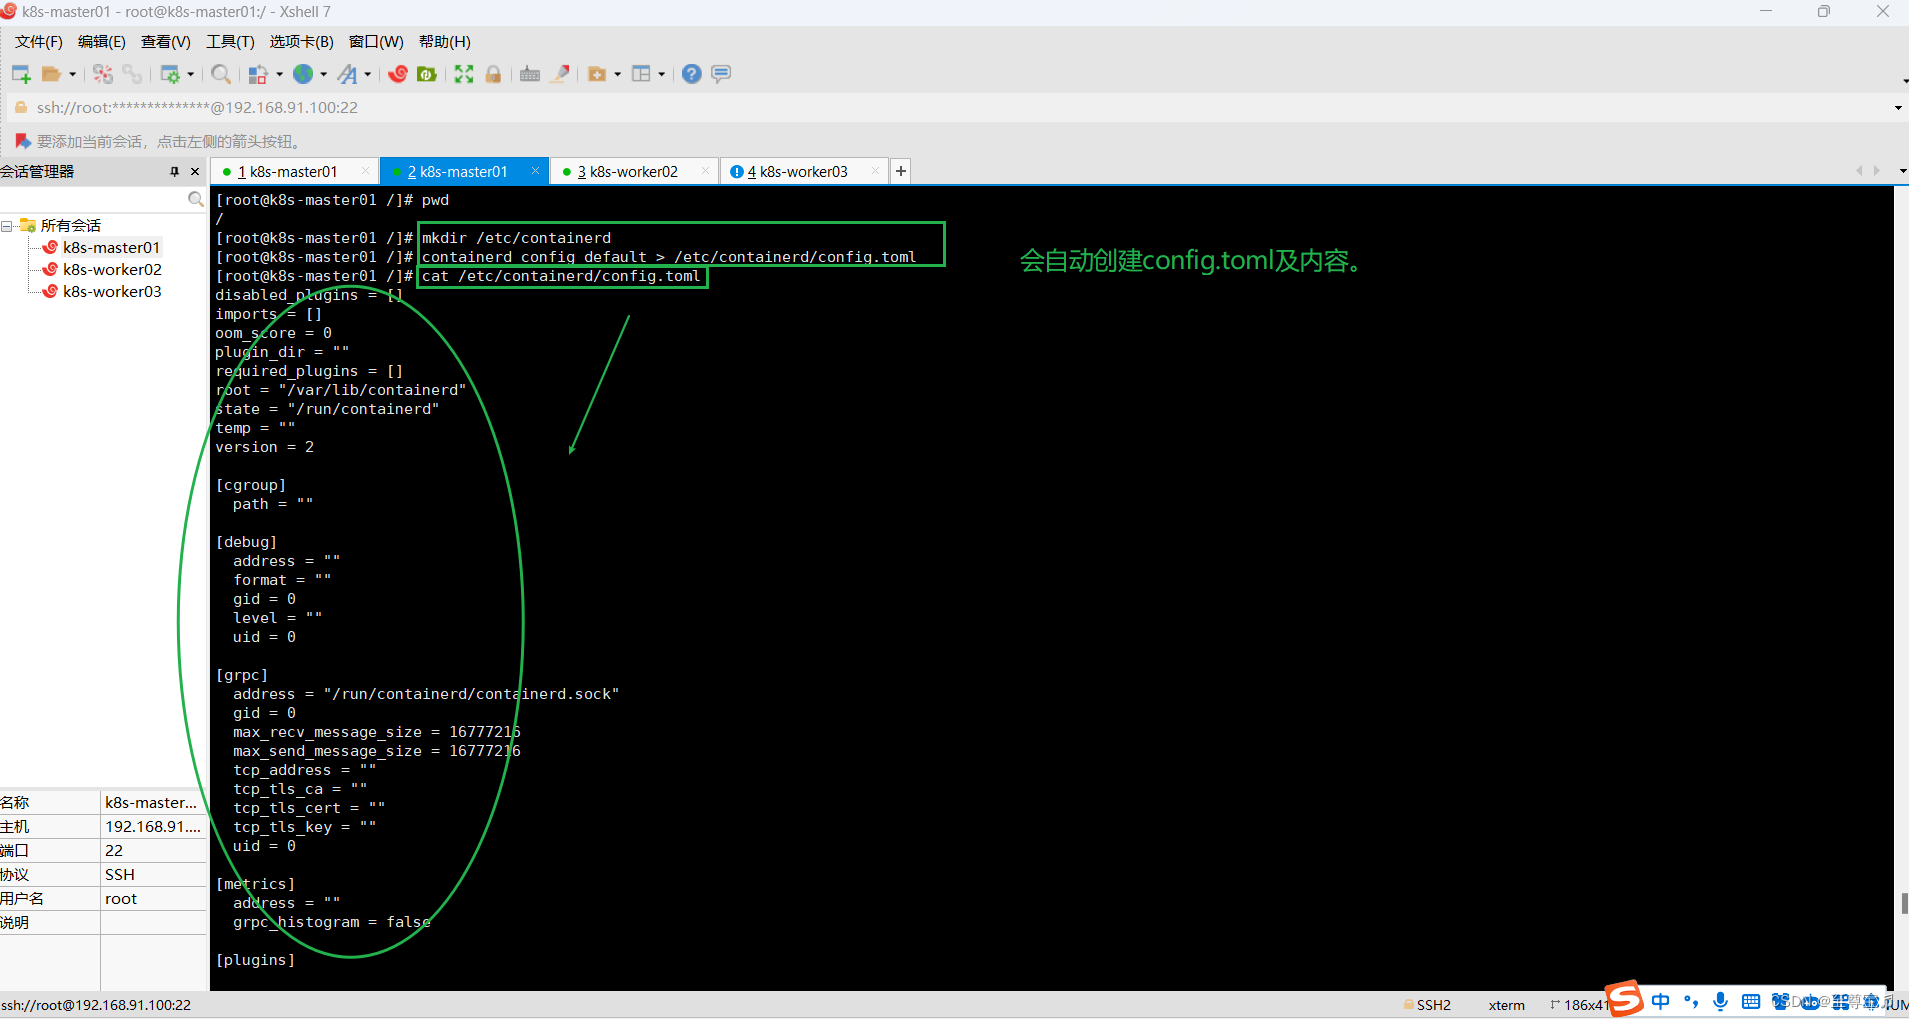
"/etc/containerd/config.toml"这个文件好像没啥用,还是删了。
rm -rf /etc/containerd/config.tomlsystemctl restart containerdKubeadm初始化依然报错:
“[ERROR CRI]: container runtime is not running:”
正确操作如下:
(1)确保下面命令执行且生效,"admin.conf......";
#普通用户执行下面命令;每次启动自动加载$HOME/.kube/config下的密钥配置文件(K8S自动行为);
mkdir -p $HOME/.kube
sudo cp -i /etc/kubernetes/tmp/kubeadm-init-dryrun2893094232/admin.conf $HOME/.kube/config
sudo chown $(id -u):$(id -g) $HOME/.kube/config#命令的含义:Kubectl 是一个命令行接口,用于对 Kubernetes 集群运行命令。
#Kubectl 在 $HOME/.kube 目录中寻找一个名为 config 的文件。
#你可以通过设置环境变量 KUBECONFIG 或设置 --kubeconfig 参数指定其它 kubeconfig 文件
#当集群初始化成功后,要使 kubectl 适用于非 root 用户,则需要运行以下命令,这些命令也是 kubeadm init输出的一部分
#即创建.kube目录 -> 拷贝配置文件 -> 用户授权#当然,如果你是 root 用户,则可以直接添加环境变量:
export KUBECONFIG=/etc/kubernetes/admin.confecho "KUBECONFIG=/etc/kubernetes/admin.conf" >>  ~/.bashrc && source  ~/.bashrc# 查看当前节点
kubectl get nodes
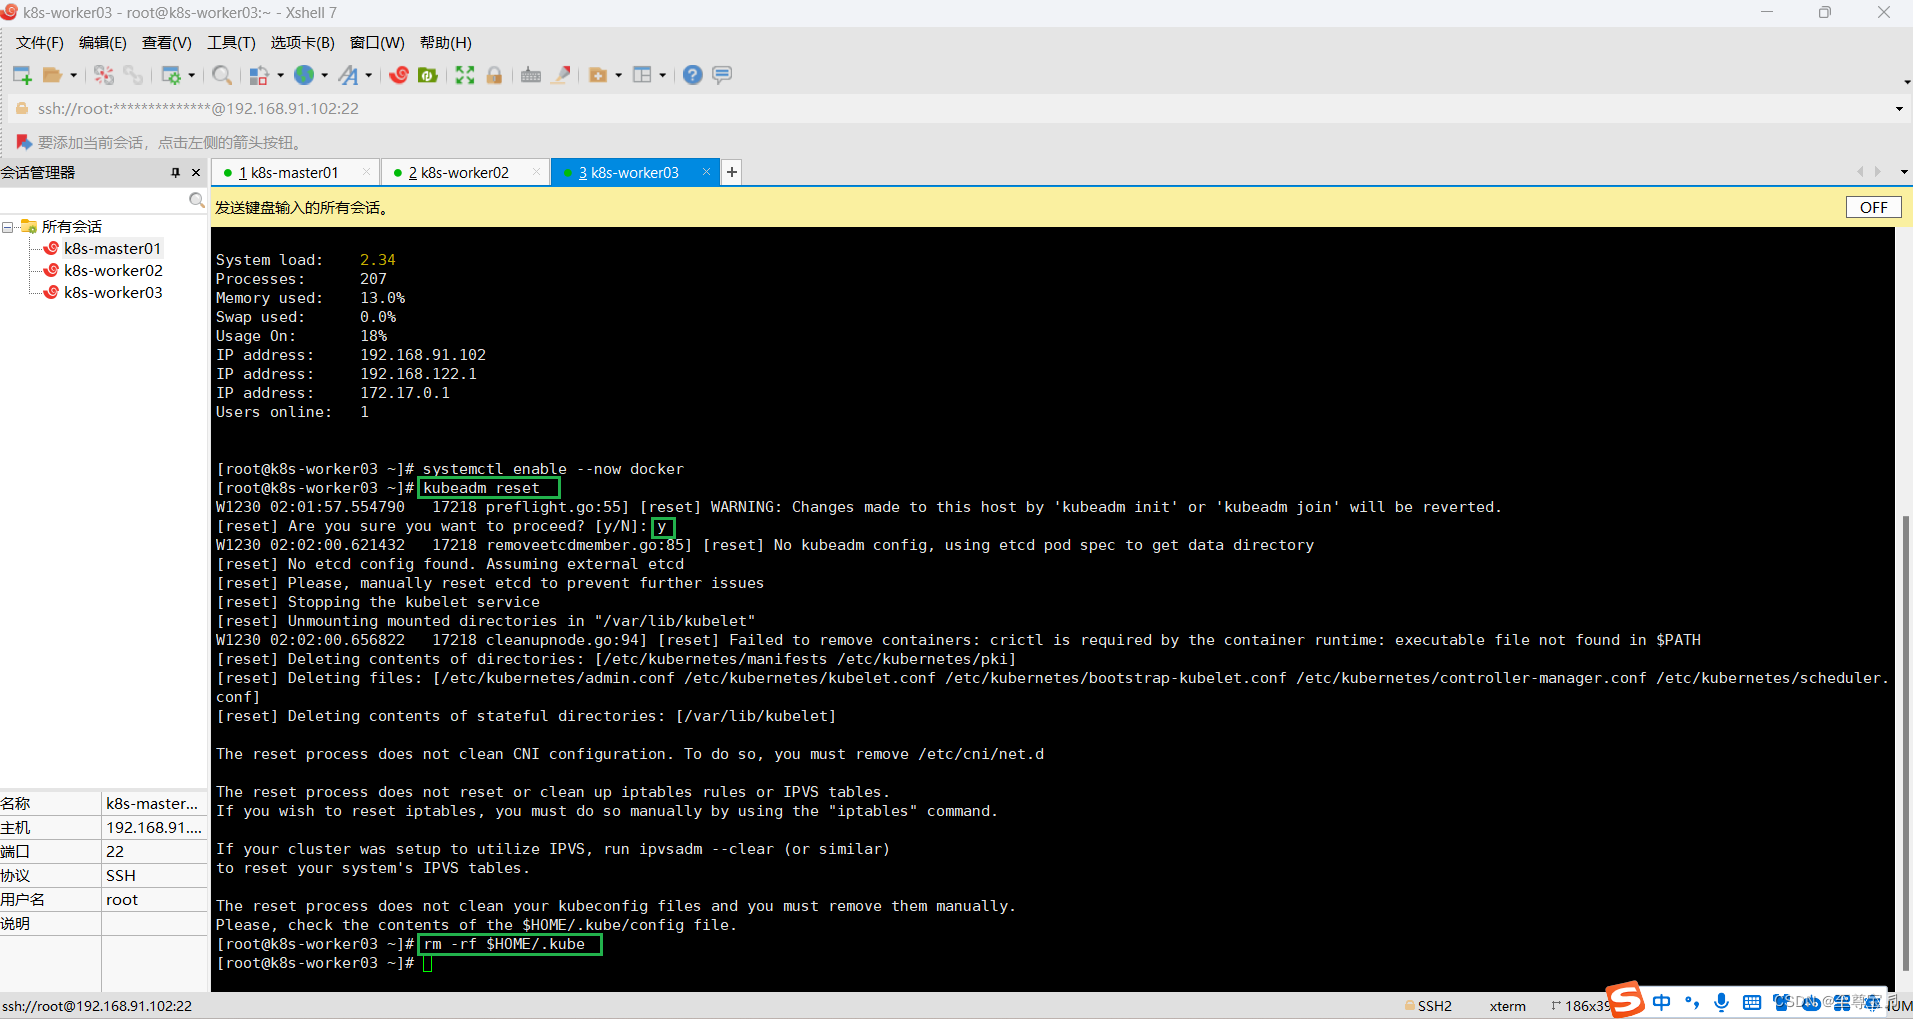
(2)所有主机重置k8s集群;
kubeadm reset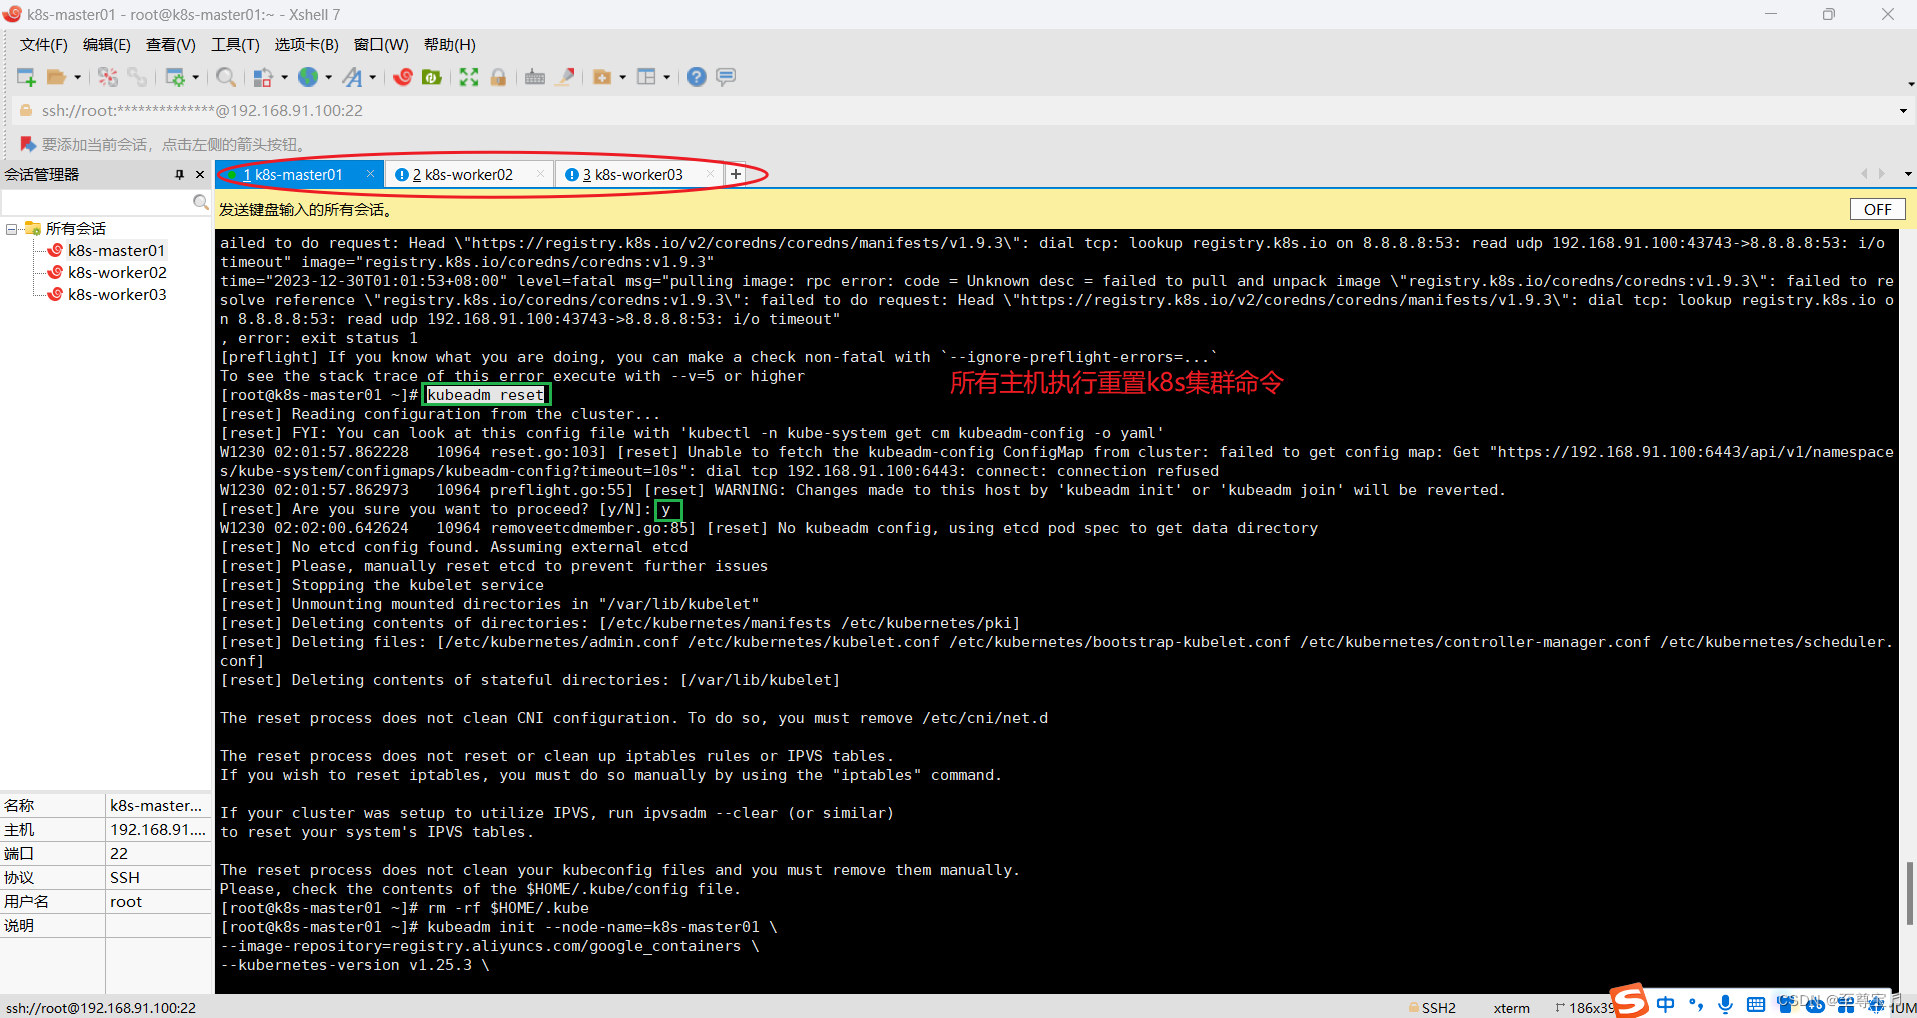
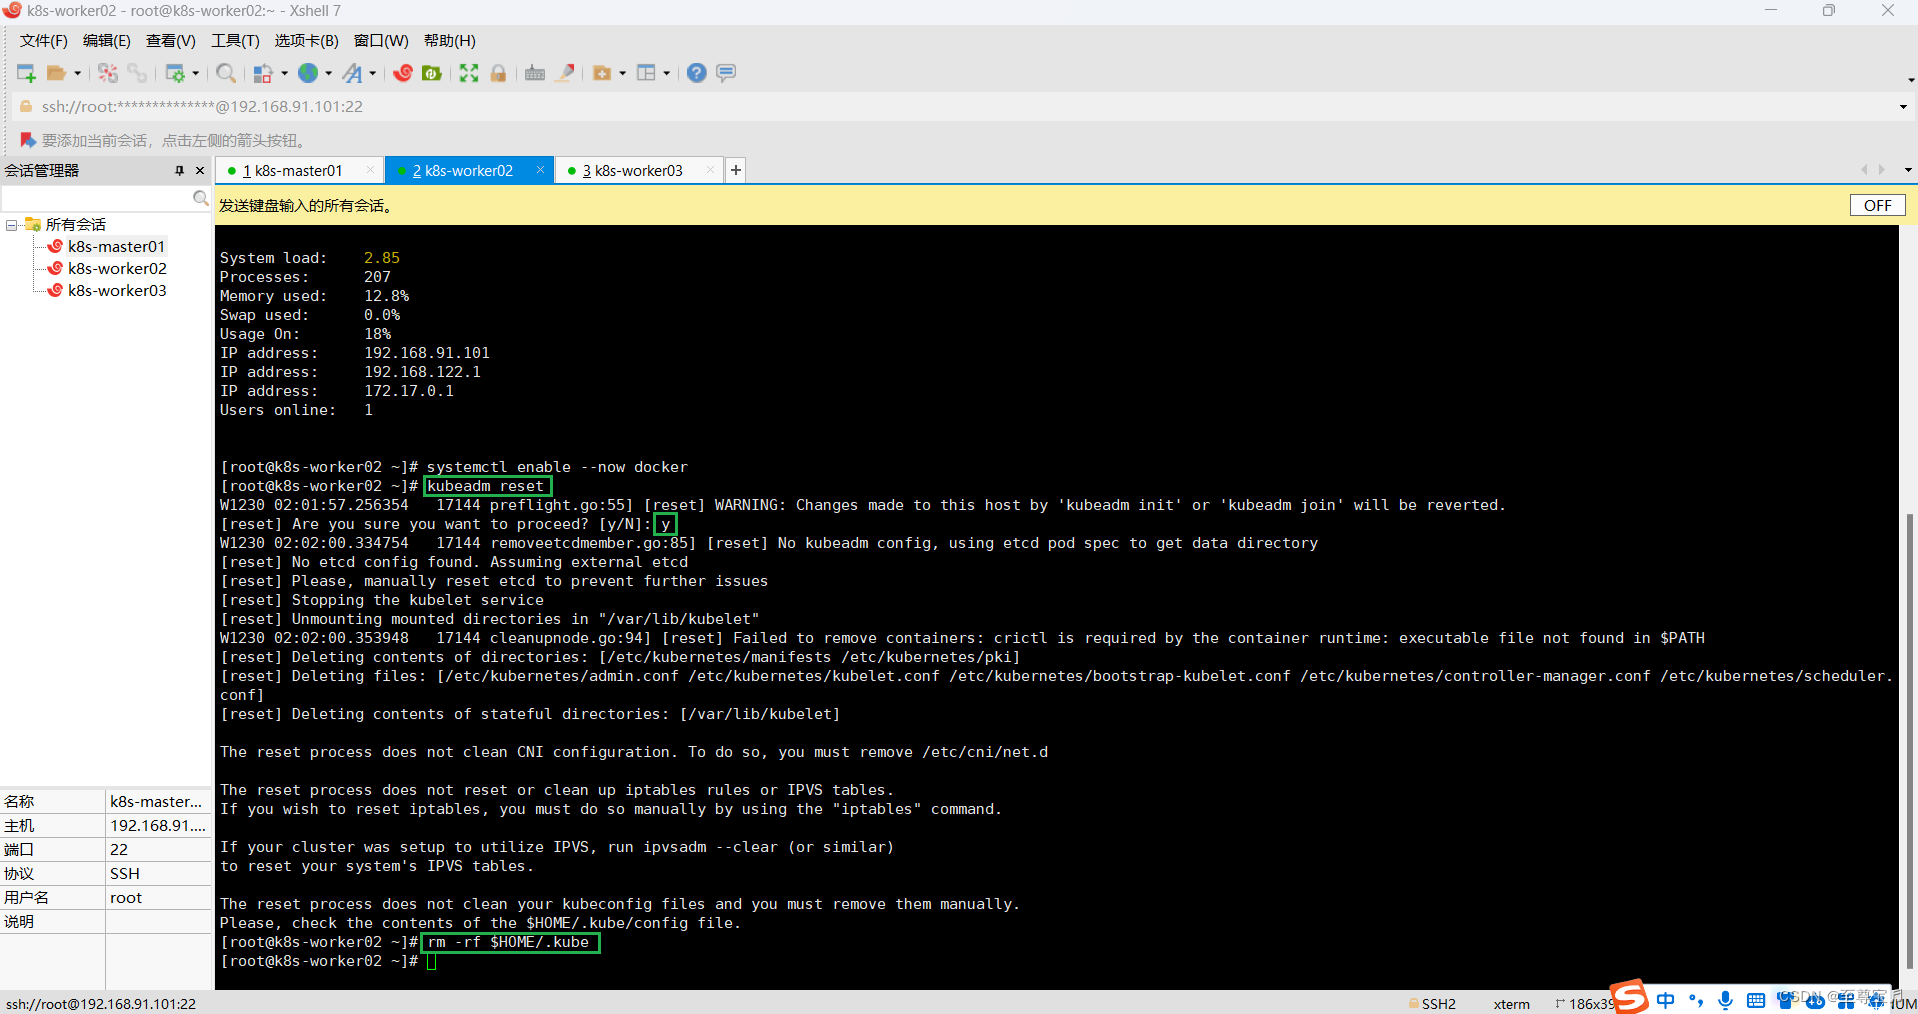
(3)所有主机删除$HOME/.kube;
rm -rf $HOME/.kube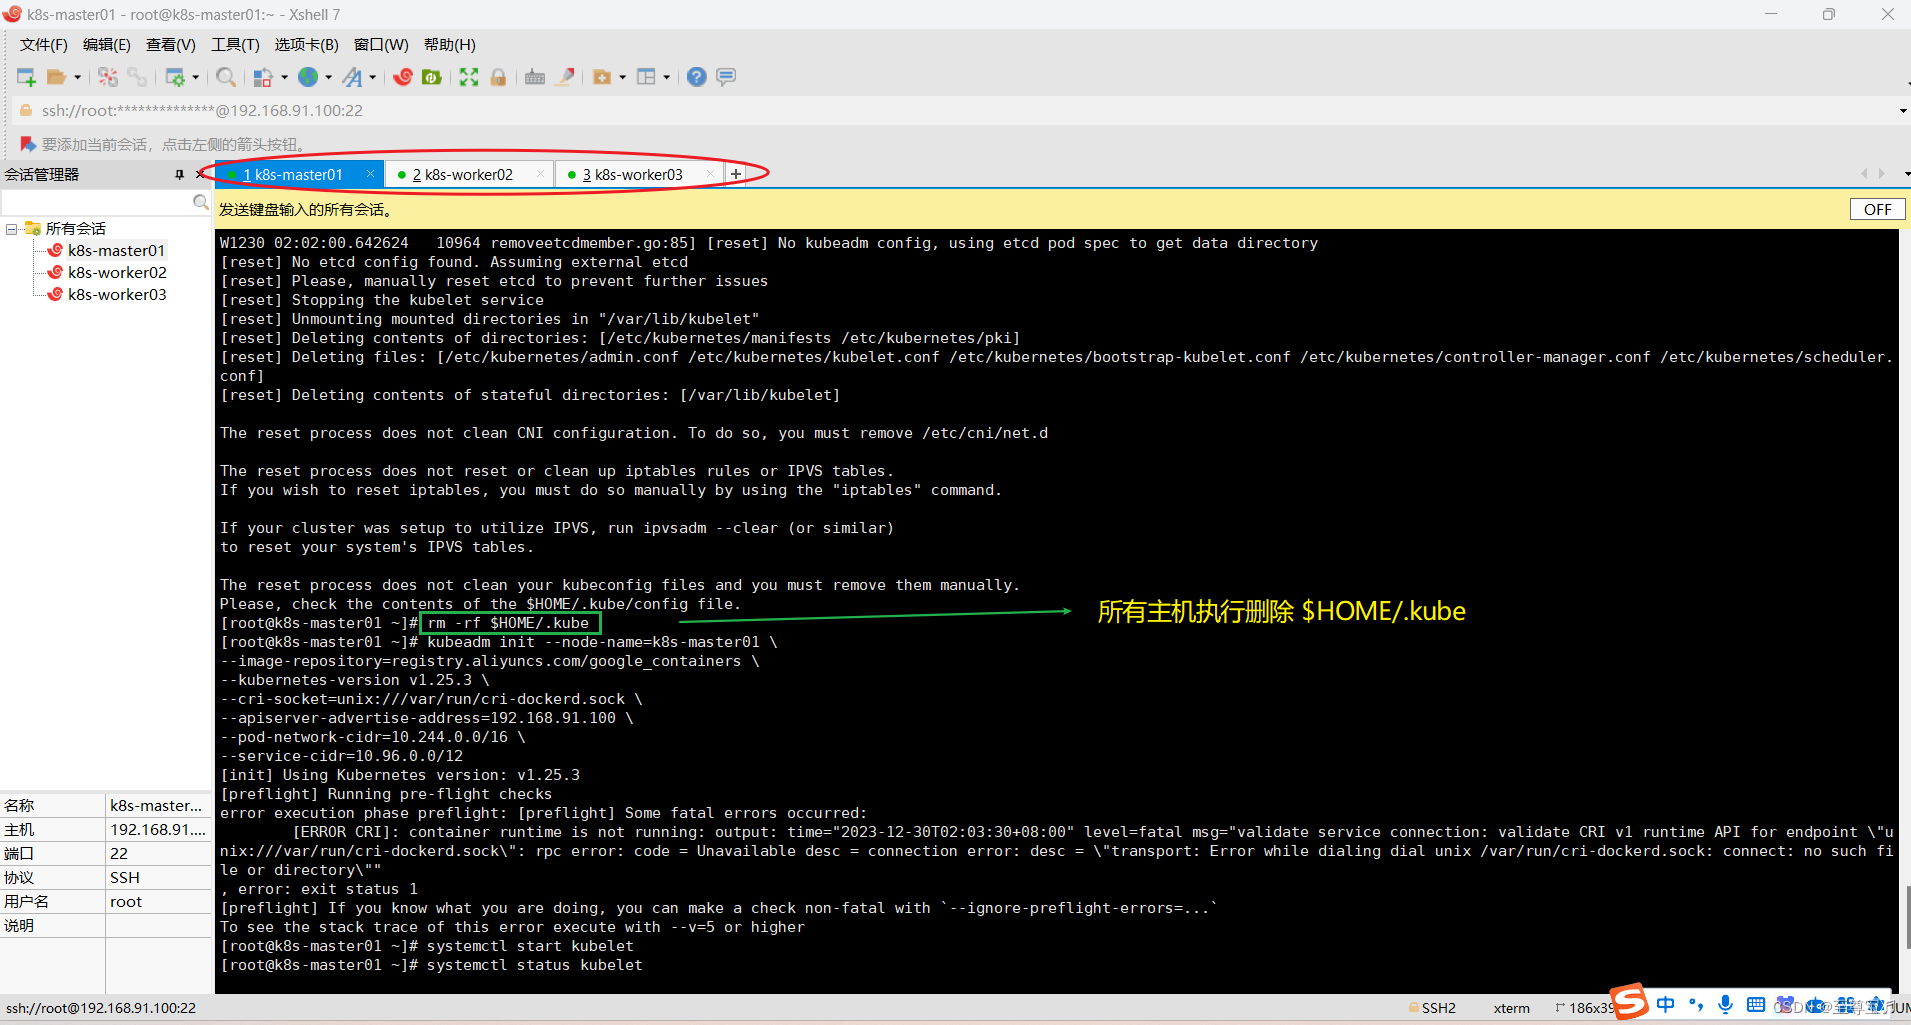
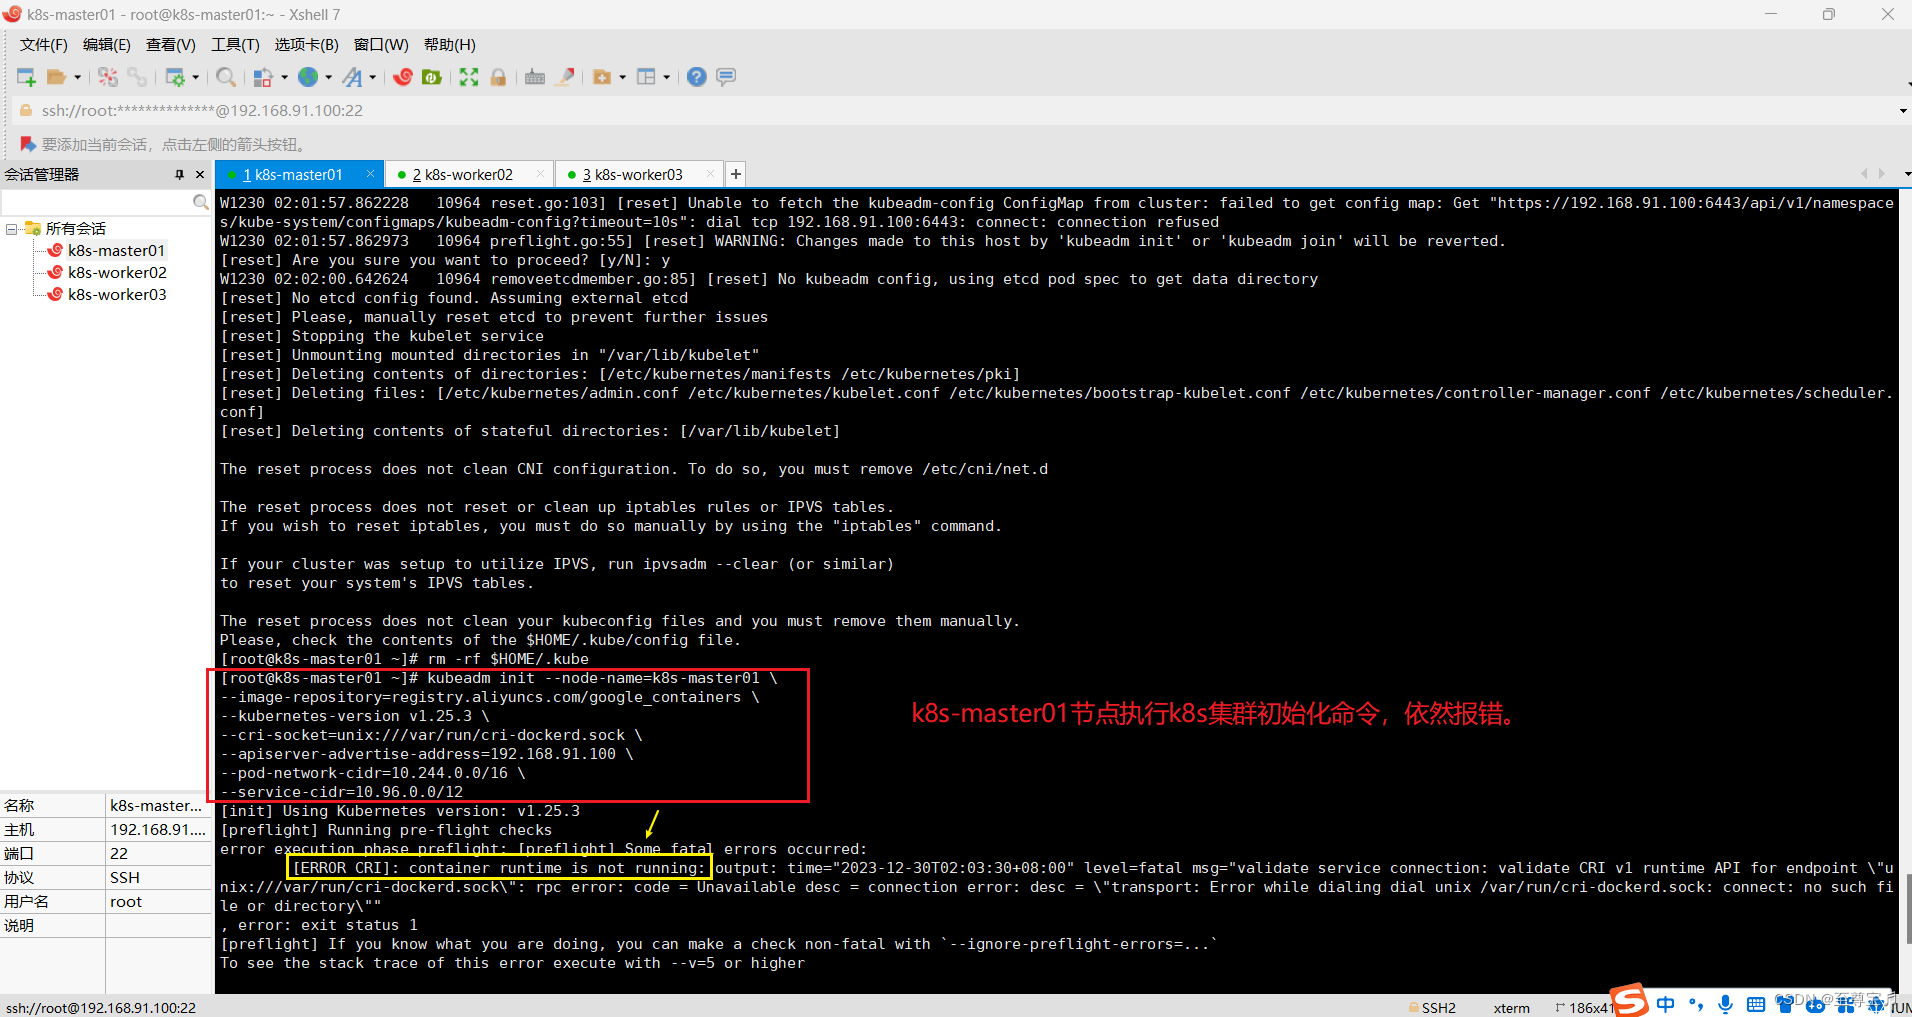

# master节点执行k8s集群初始化命令
# 使用docker容器
kubeadm init --node-name=k8s-master01 \
--image-repository=registry.aliyuncs.com/google_containers \
--kubernetes-version v1.25.3 \
--cri-socket=unix:///var/run/cri-dockerd.sock \
--apiserver-advertise-address=192.168.91.100 \
--pod-network-cidr=10.244.0.0/16 \
--service-cidr=10.96.0.0/12# 使用containerd作为容器,不再使用docker
kubeadm init --node-name=k8s-master01 \
--image-repository=registry.aliyuncs.com/google_containers \
--kubernetes-version v1.25.3 \
--apiserver-advertise-address=192.168.91.100 \
--pod-network-cidr=10.244.0.0/16 \
--service-cidr=10.96.0.0/12# 如果初始化失败,可以重置(所有主机)
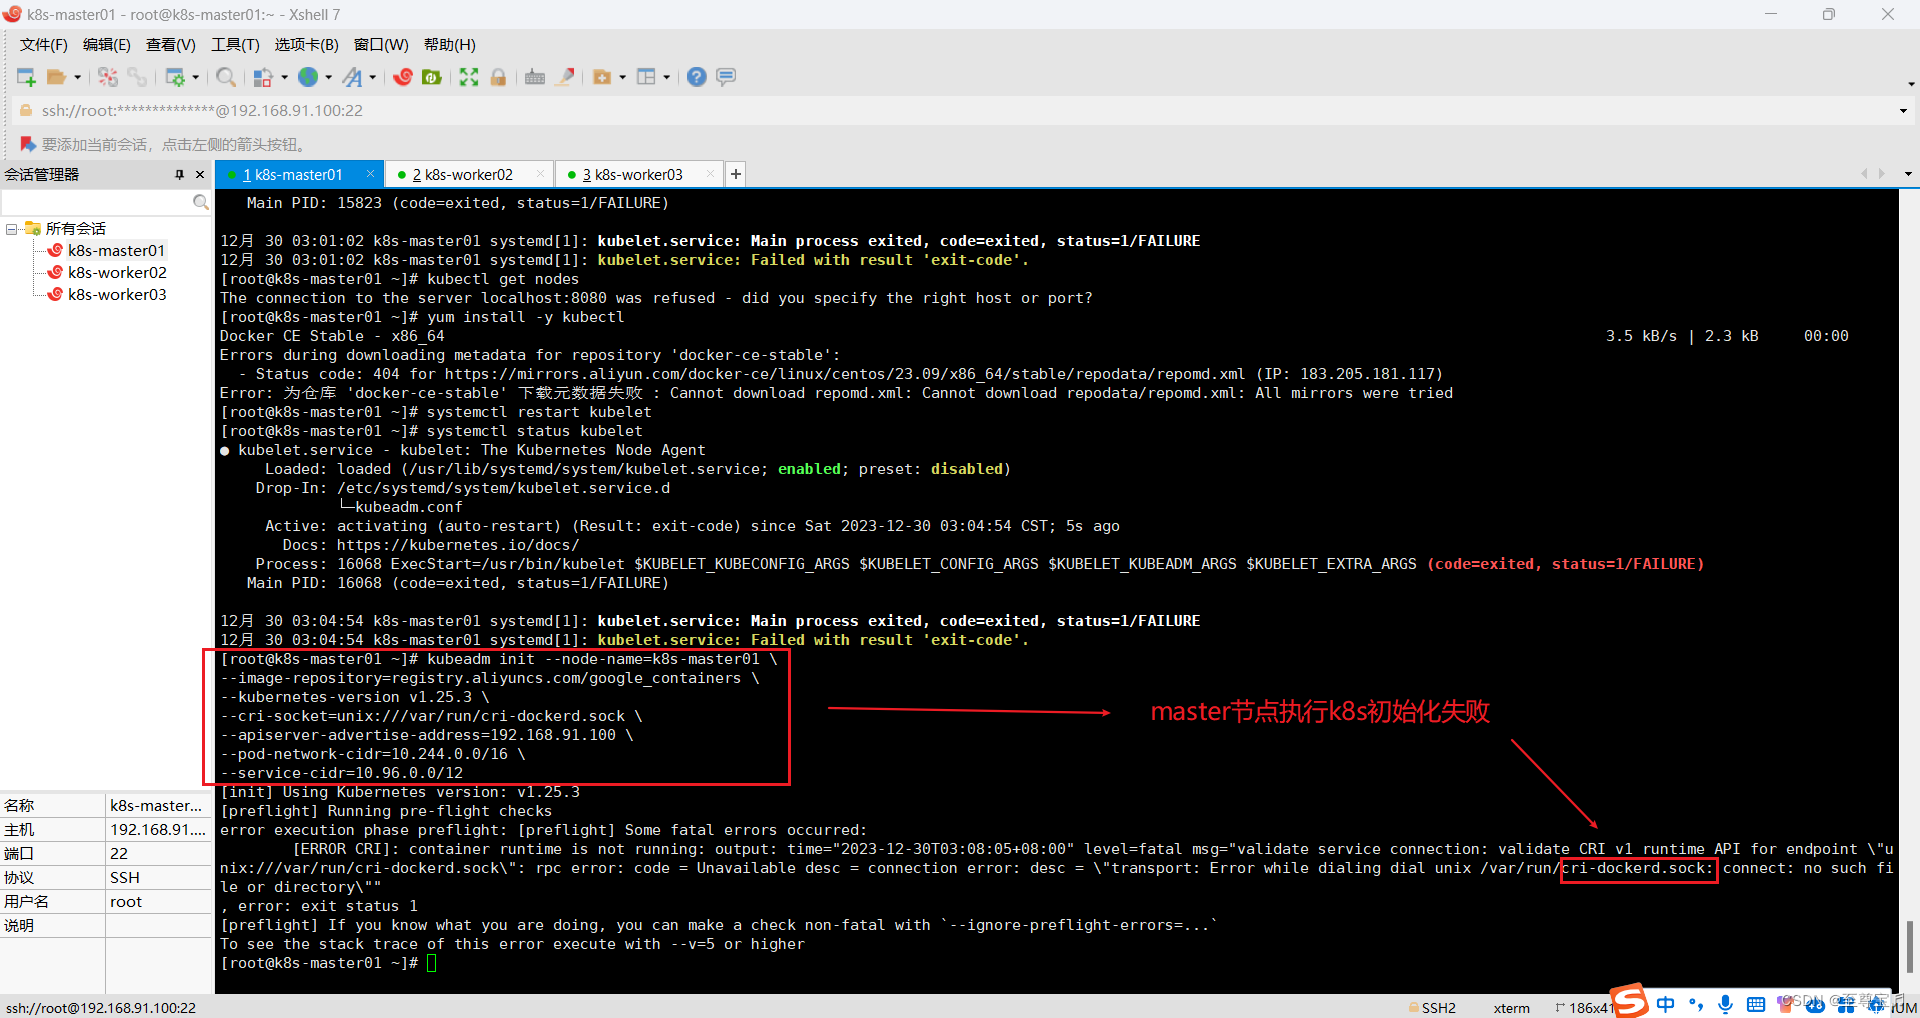
kubeadm reset (4)master节点执行 k8s初始化失败:The kubelet is not running;

# 如果初始化失败,必须重置(所有主机)
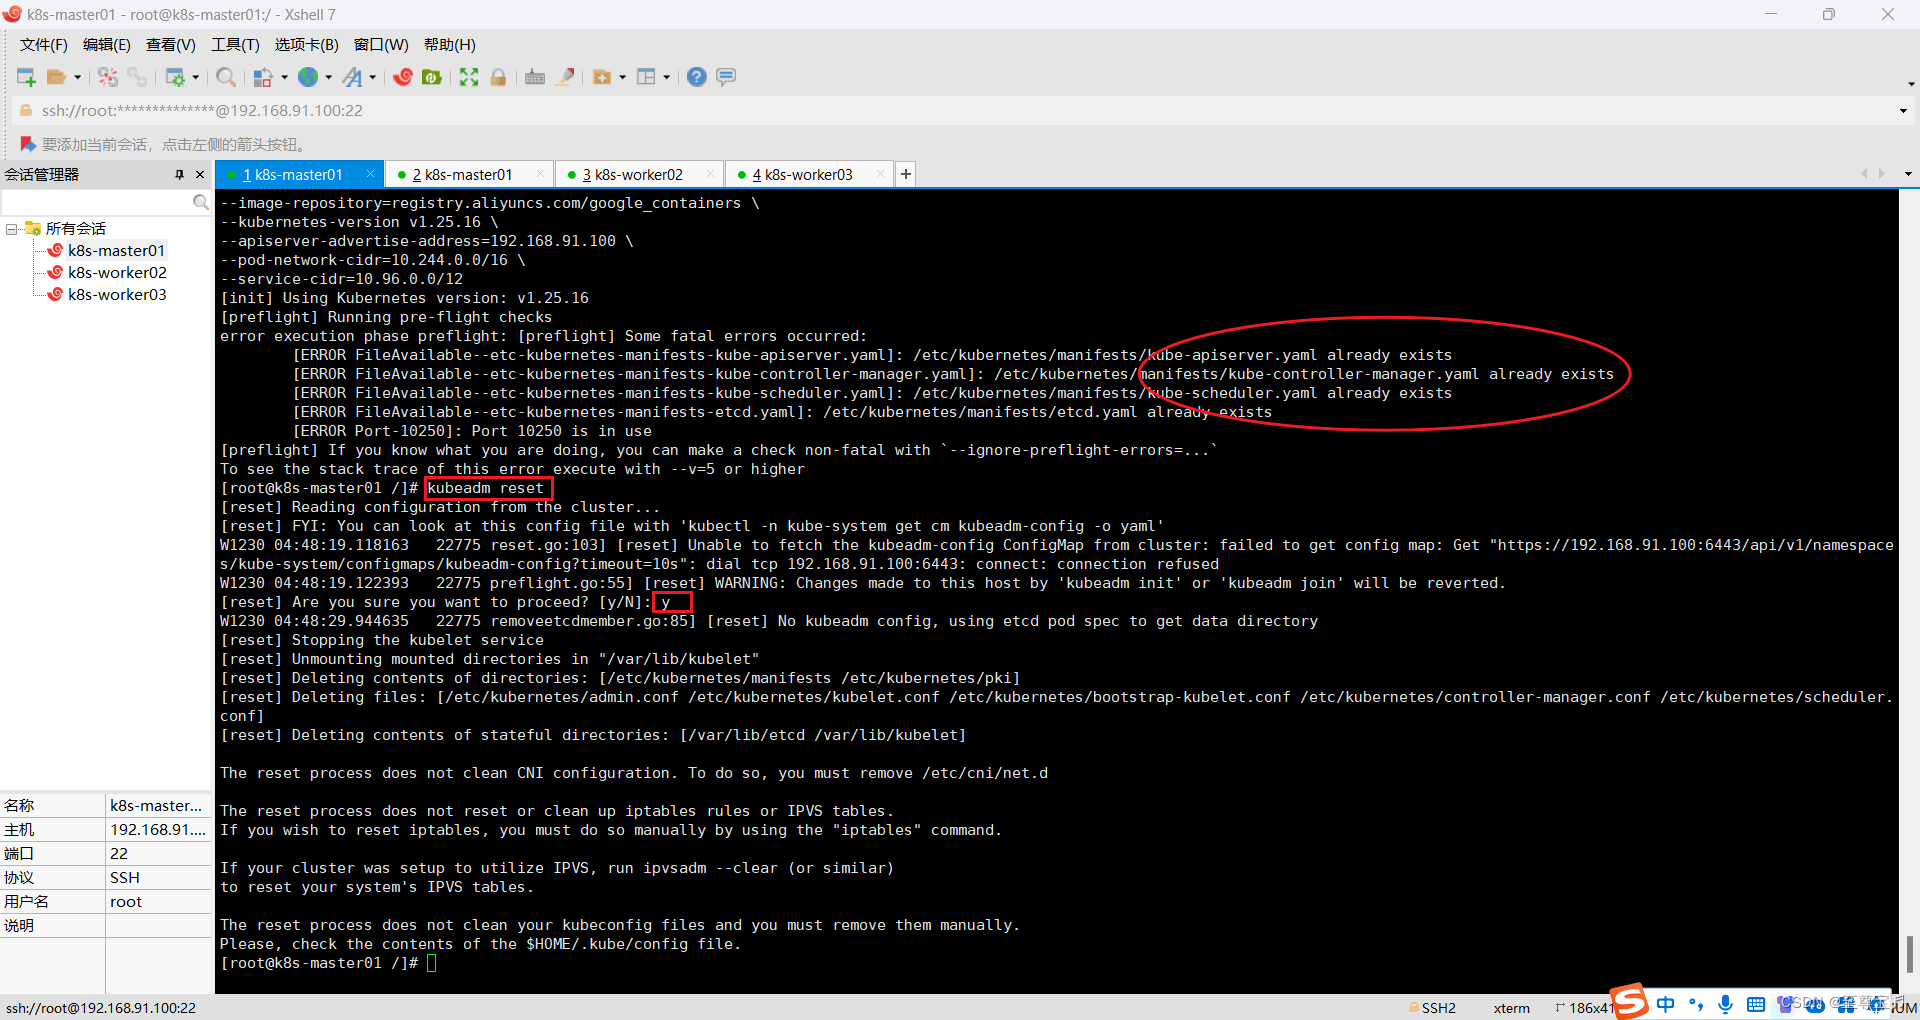
kubeadm reset 不重置,会提示.yaml配置文件已经存在,无法初始化;
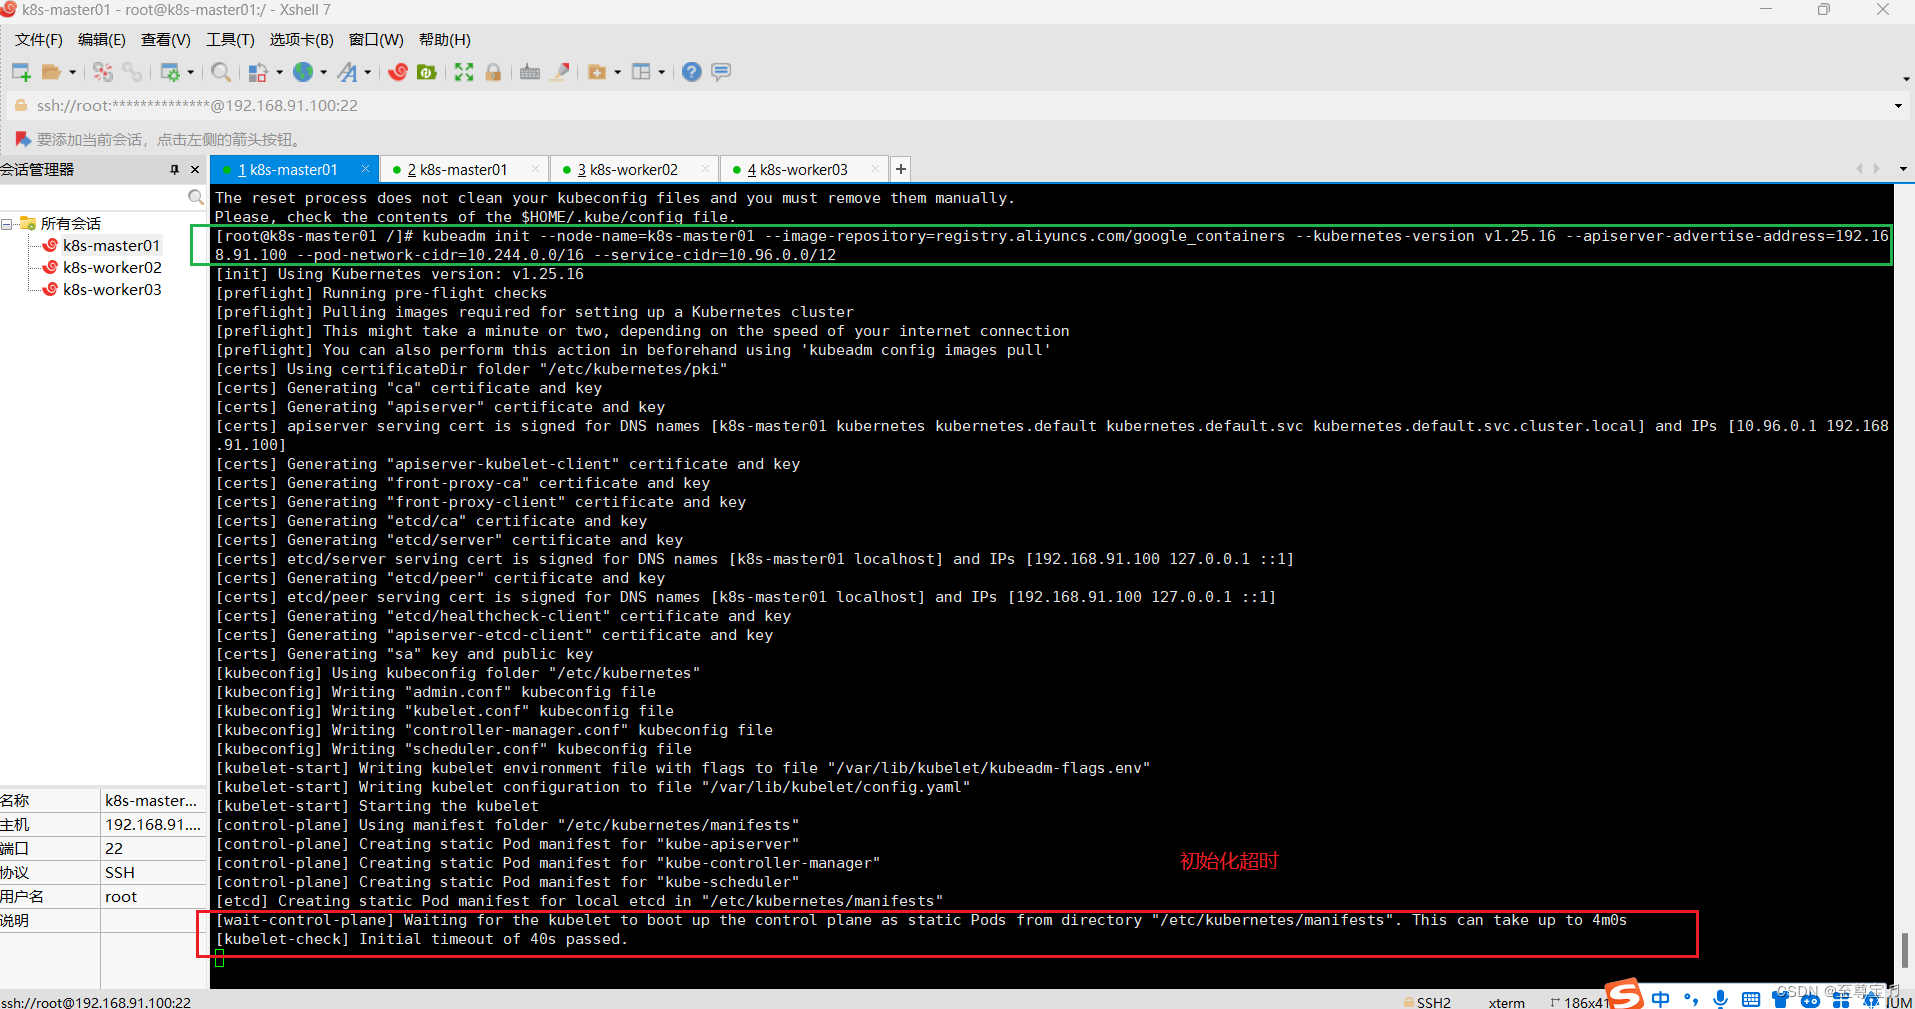
(5)重置后,k8s集群初始化提示超时,[kubelet-check] Initial timeout of 40s passed;

(6)修改/lib/systemd/system/kubelet.service;
this might take a minute or longer if the control plane images have to be pulled #1023(https://github.com/kubernetes/kubeadm/issues/1023), 尝试一下,没想到竟然成功了!方法就是修改/lib/systemd/system/kubelet.service,添加kubelet启动参数如下:
[Service]
ExecStart=/usr/bin/kubelet --kubeconfig=/etc/kubernetes/kubelet.conf --config=/var/lib/kubelet/config.yaml
…
然后,重启计算机,所有主机执行sudo kubeadm reset 后重新执行下面初始化命令;
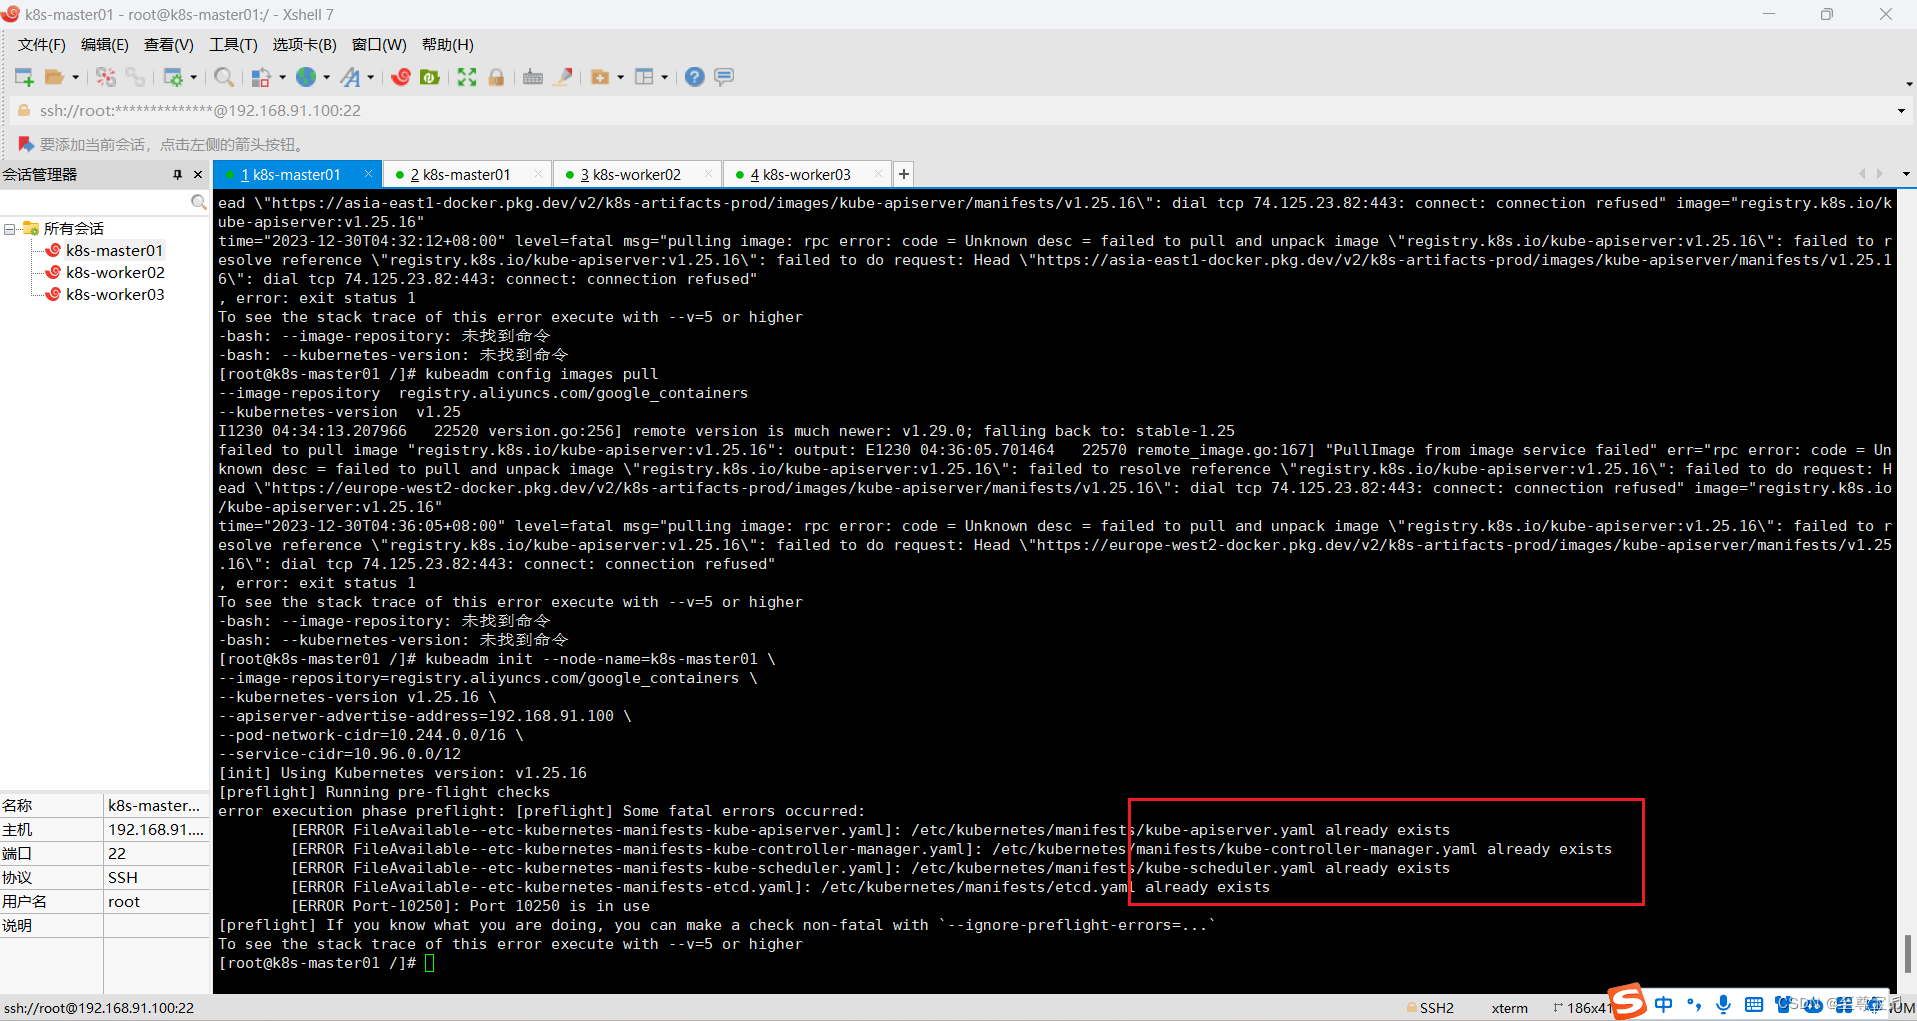
kubeadm init --node-name=k8s-master01 \
--image-repository=registry.aliyuncs.com/google_containers \
--kubernetes-version v1.25.16 \
--apiserver-advertise-address=192.168.91.100 \
--pod-network-cidr=10.244.0.0/16 \
--service-cidr=10.96.0.0/12
# 查看原来内容
cat /lib/systemd/system/kubelet.service
# 查阅"/etc/kubernetes/kubelet.conf"内容
cat /etc/kubernetes/kubelet.conf
# 修改/lib/systemd/system/kubelet.service内容
# [Service]
# ExecStart=/usr/bin/kubelet --kubeconfig=/etc/kubernetes/kubelet.conf --config=/var/lib/kubelet/config.yamlvim /lib/systemd/system/kubelet.service
然后,重启计算机,所有主机执行sudo kubeadm reset 后重新执行sudo kubeadm init。
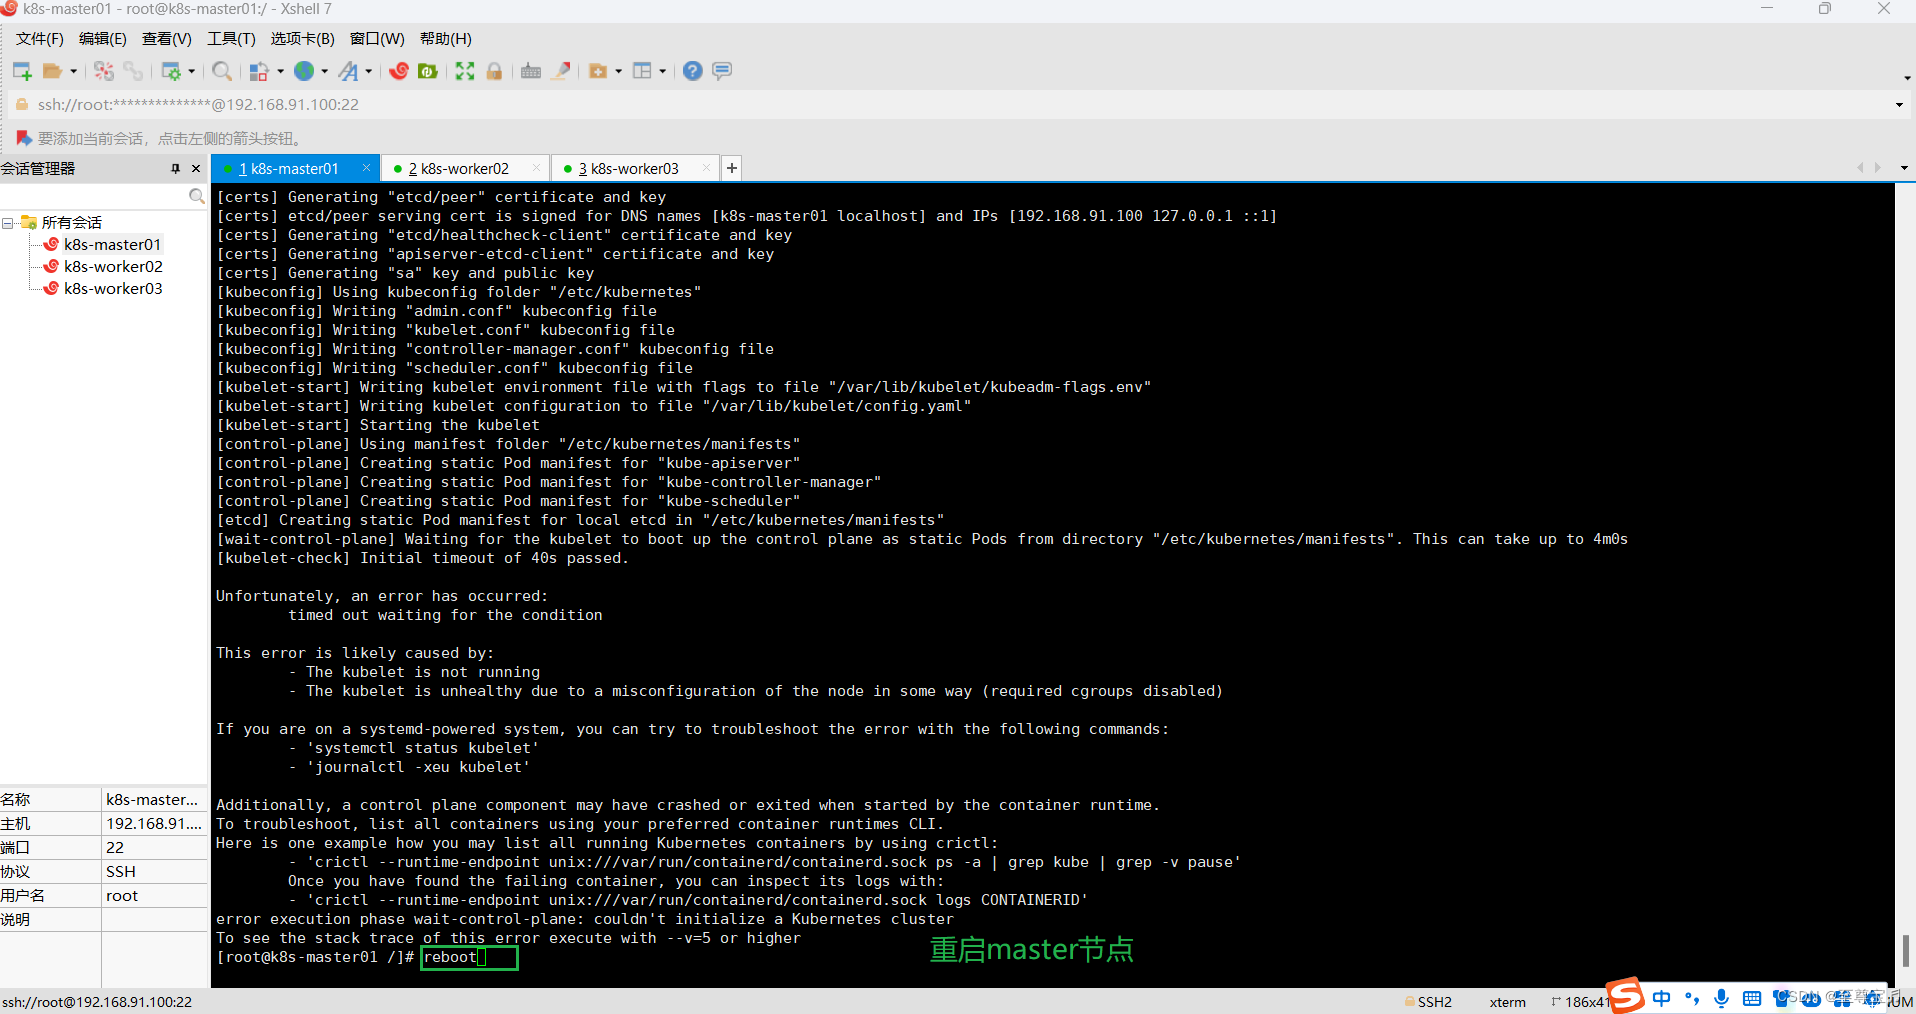
重启master节点后,k8s集群初始化仍然报错;

(7)所有主机修改镜像仓库和添加k8s阿里云YUM软件源;
# 修改镜像仓库
cat > /etc/docker/daemon.json << EOF
{"registry-mirrors": ["https://b9pmyelo.mirror.aliyuncs.com"]
}
EOF
# 添加k8s阿里云YUM软件源
cat > /etc/yum.repos.d/kubernetes.repo << EOF
[kubernetes]
name=Kubernetes
baseurl=https://mirrors.aliyun.com/kubernetes/yum/repos/kubernetes-el7-x86_64
enabled=1
gpgcheck=0
repo_gpgcheck=0
gpgkey=https://mirrors.aliyun.com/kubernetes/yum/doc/yum-key.gpg https://mirrors.aliyun.com/kubernetes/yum/doc/rpm-package-key.gpg
EOF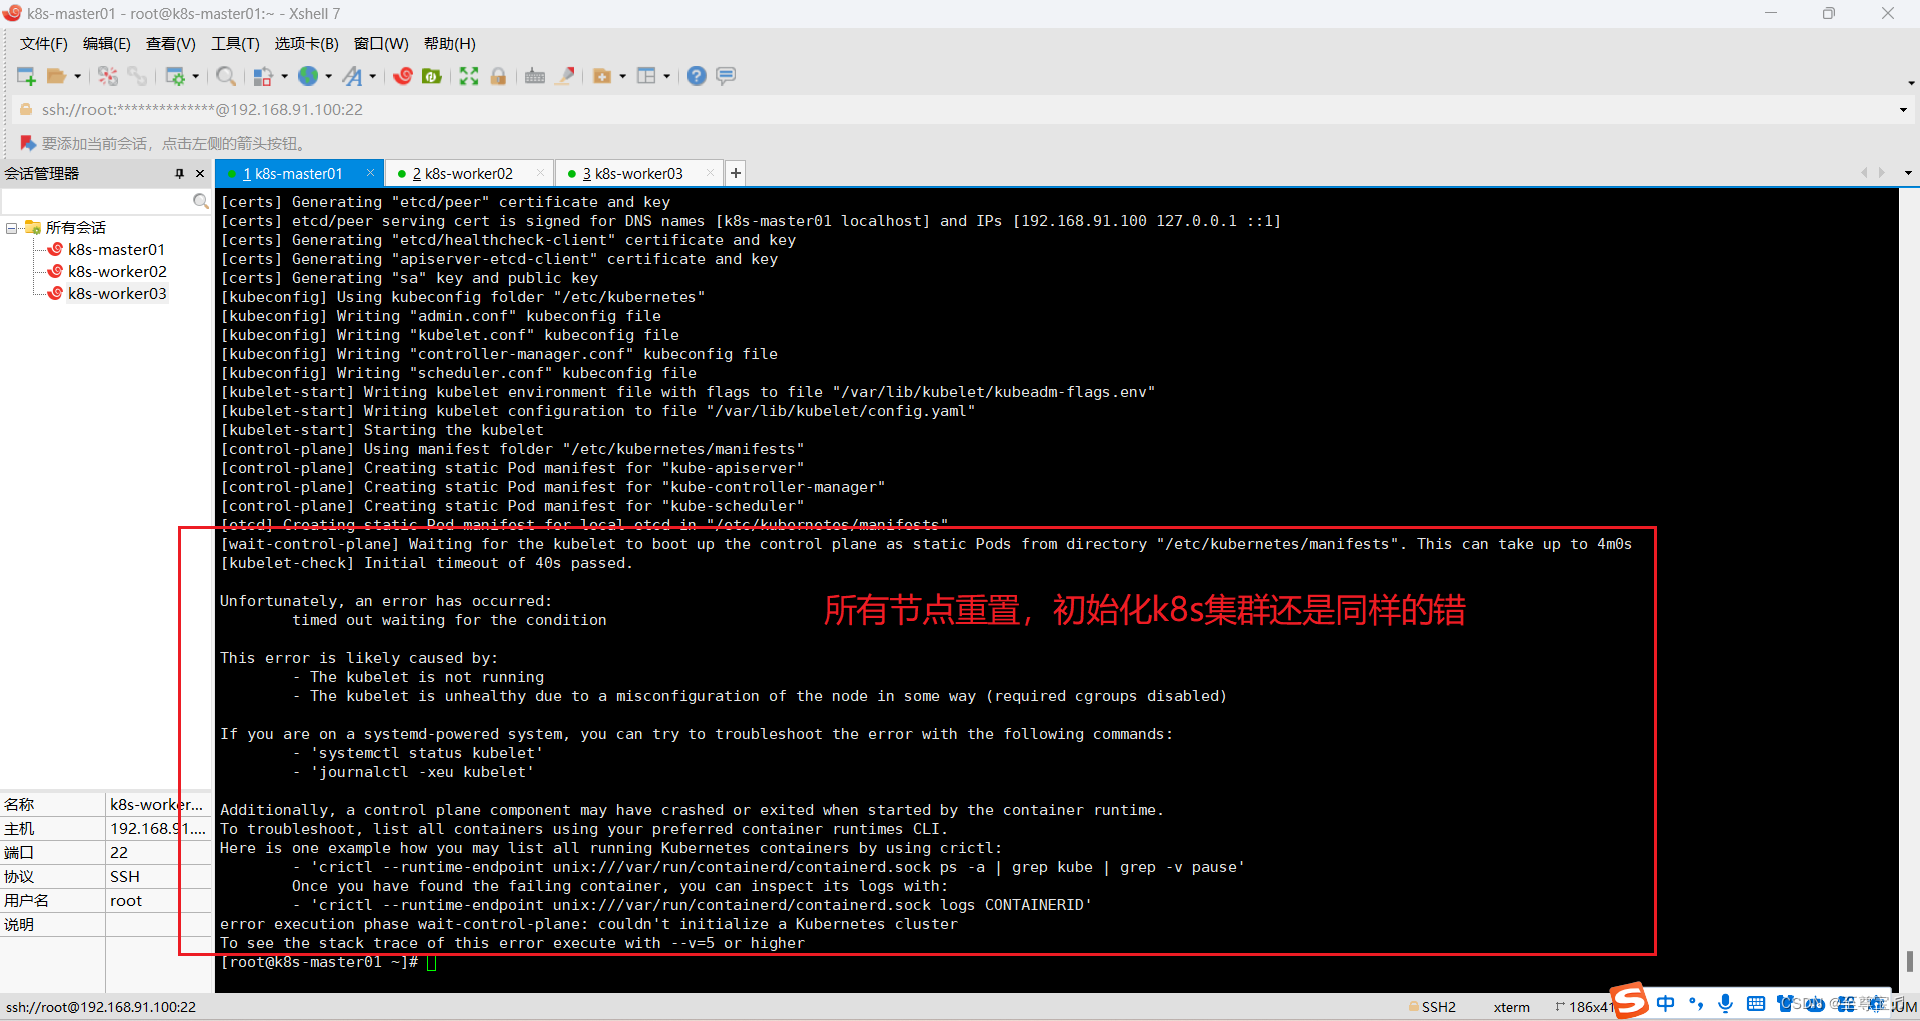
(8)所有主机修改/etc/docker/daemon.json内容,重启 docker;
vim /etc/docker/daemon.json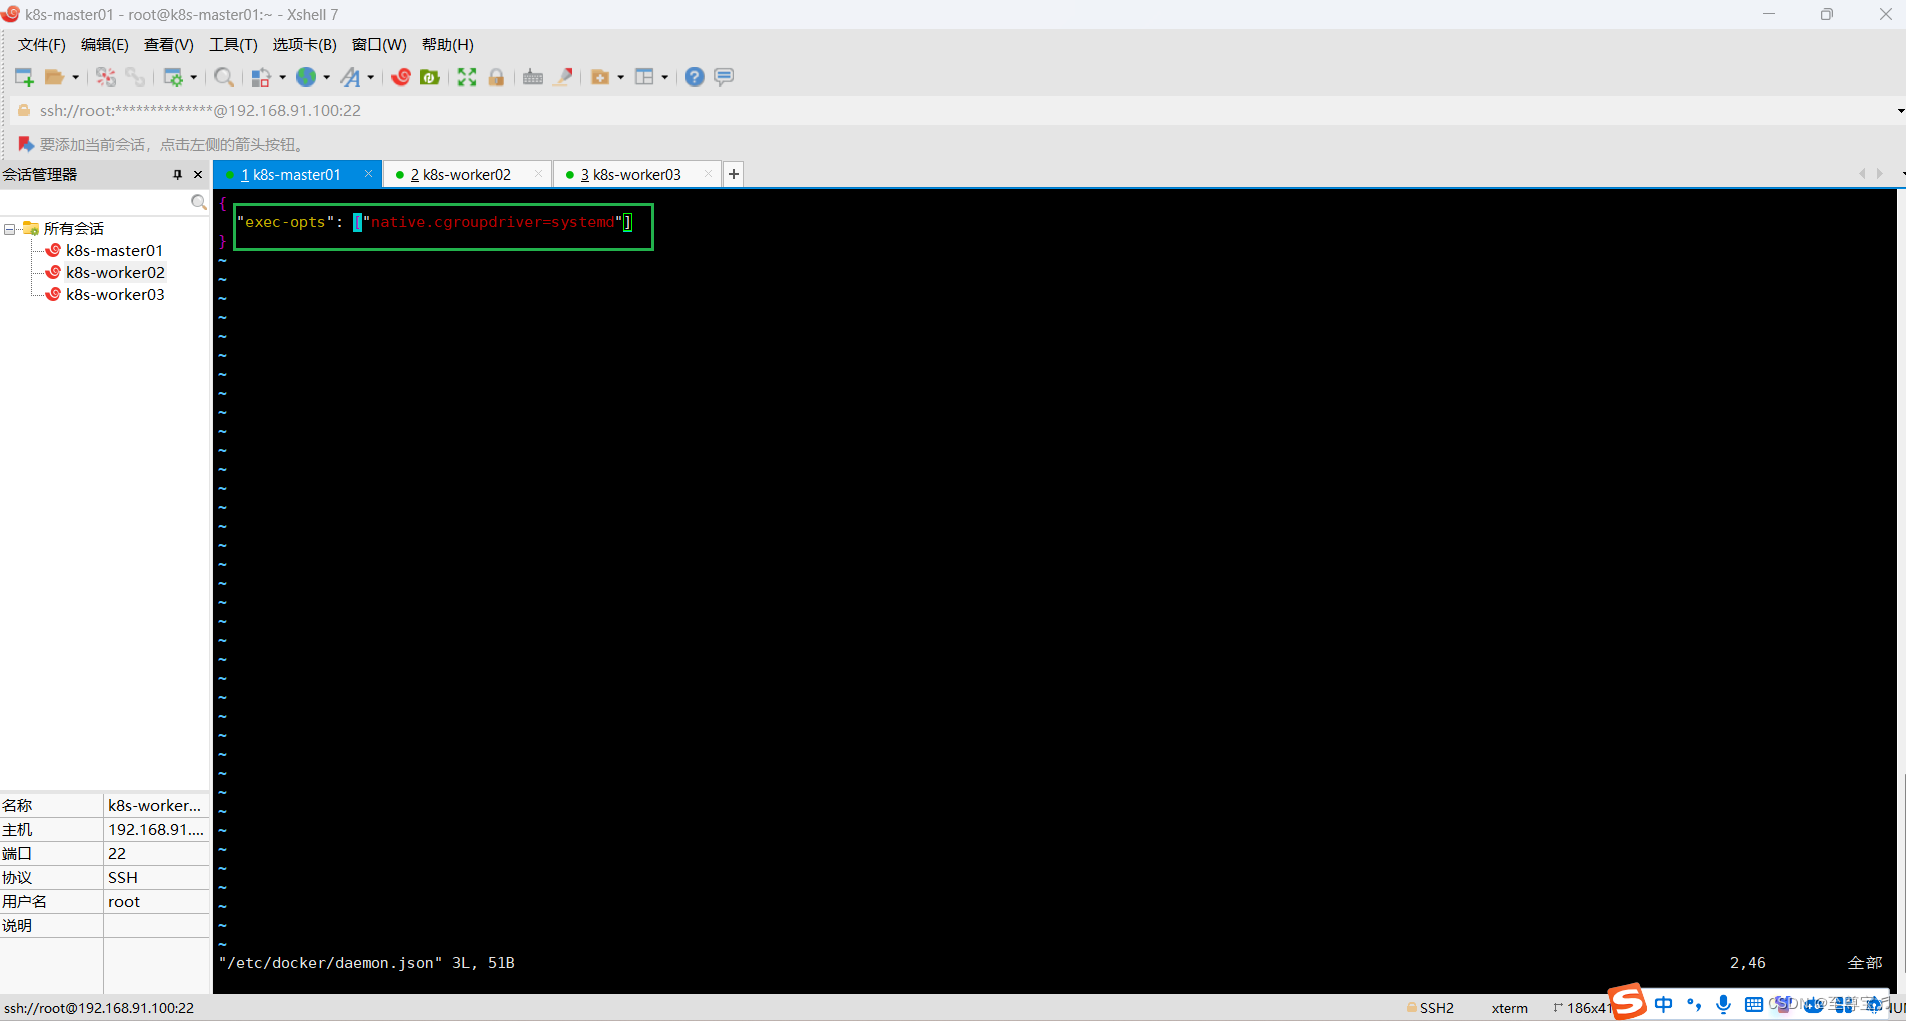
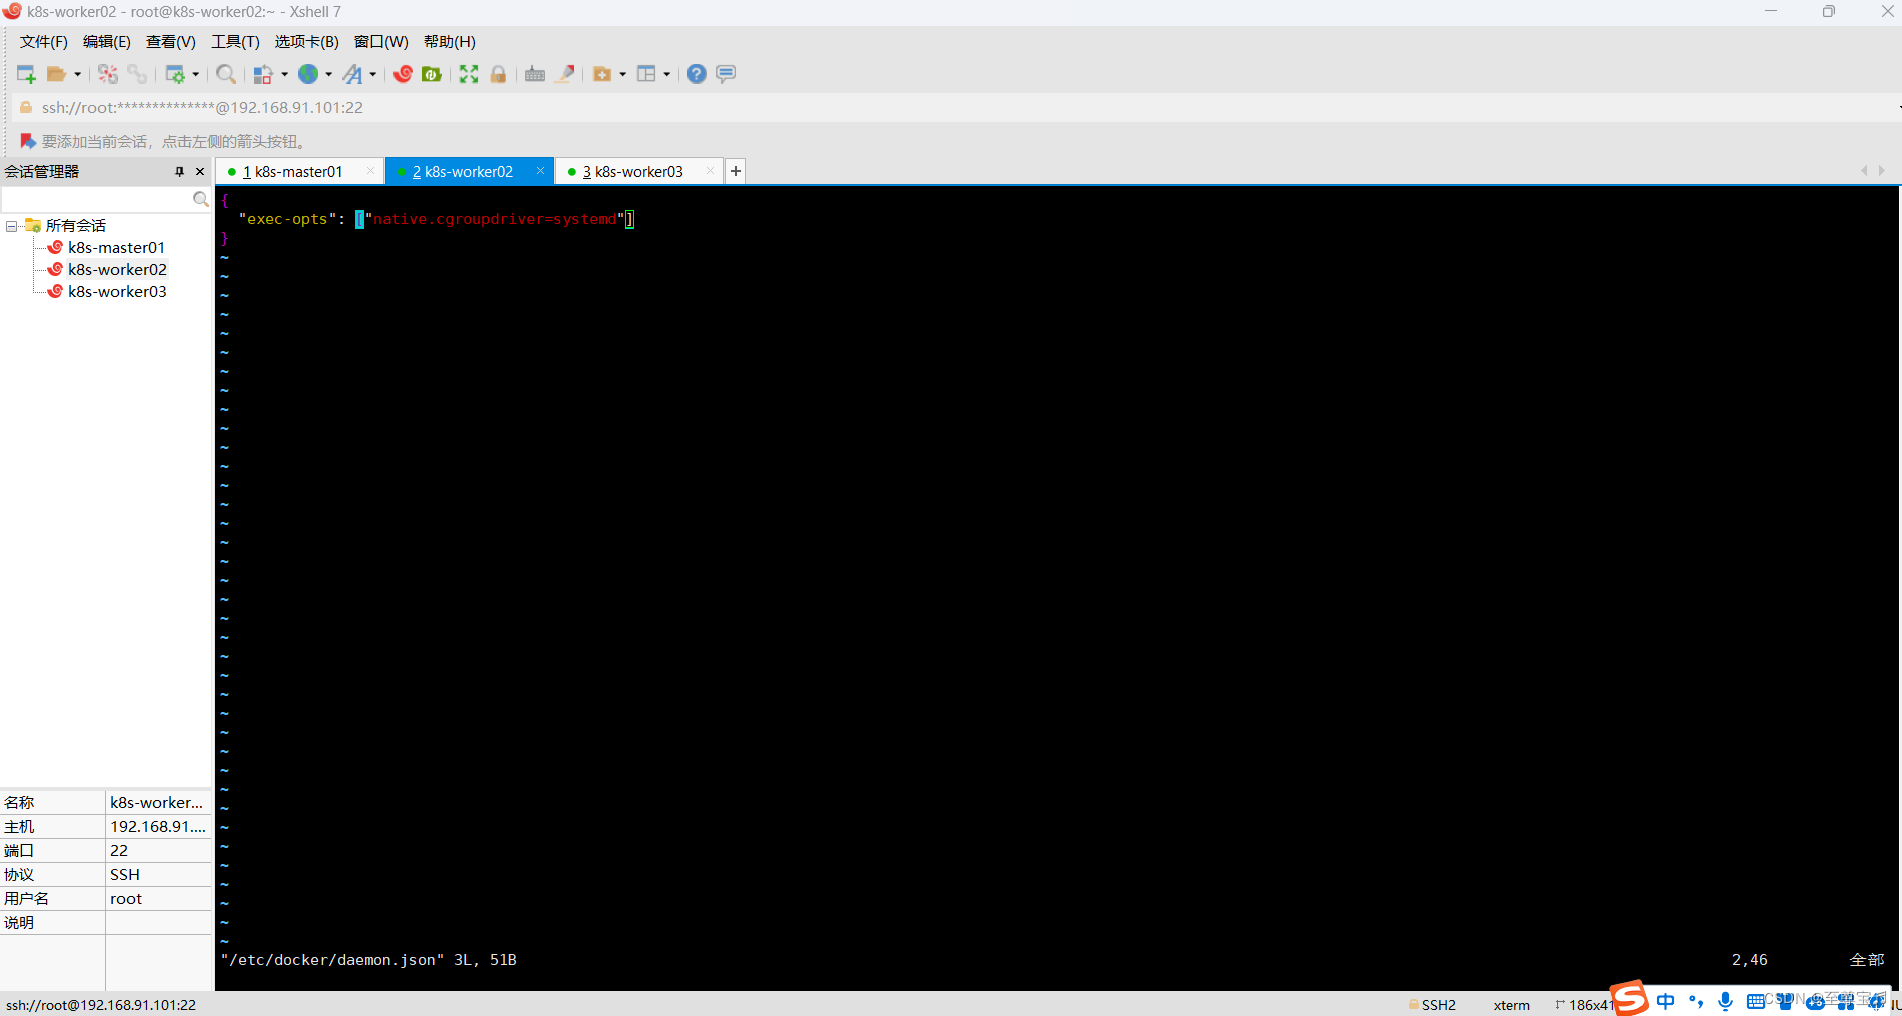
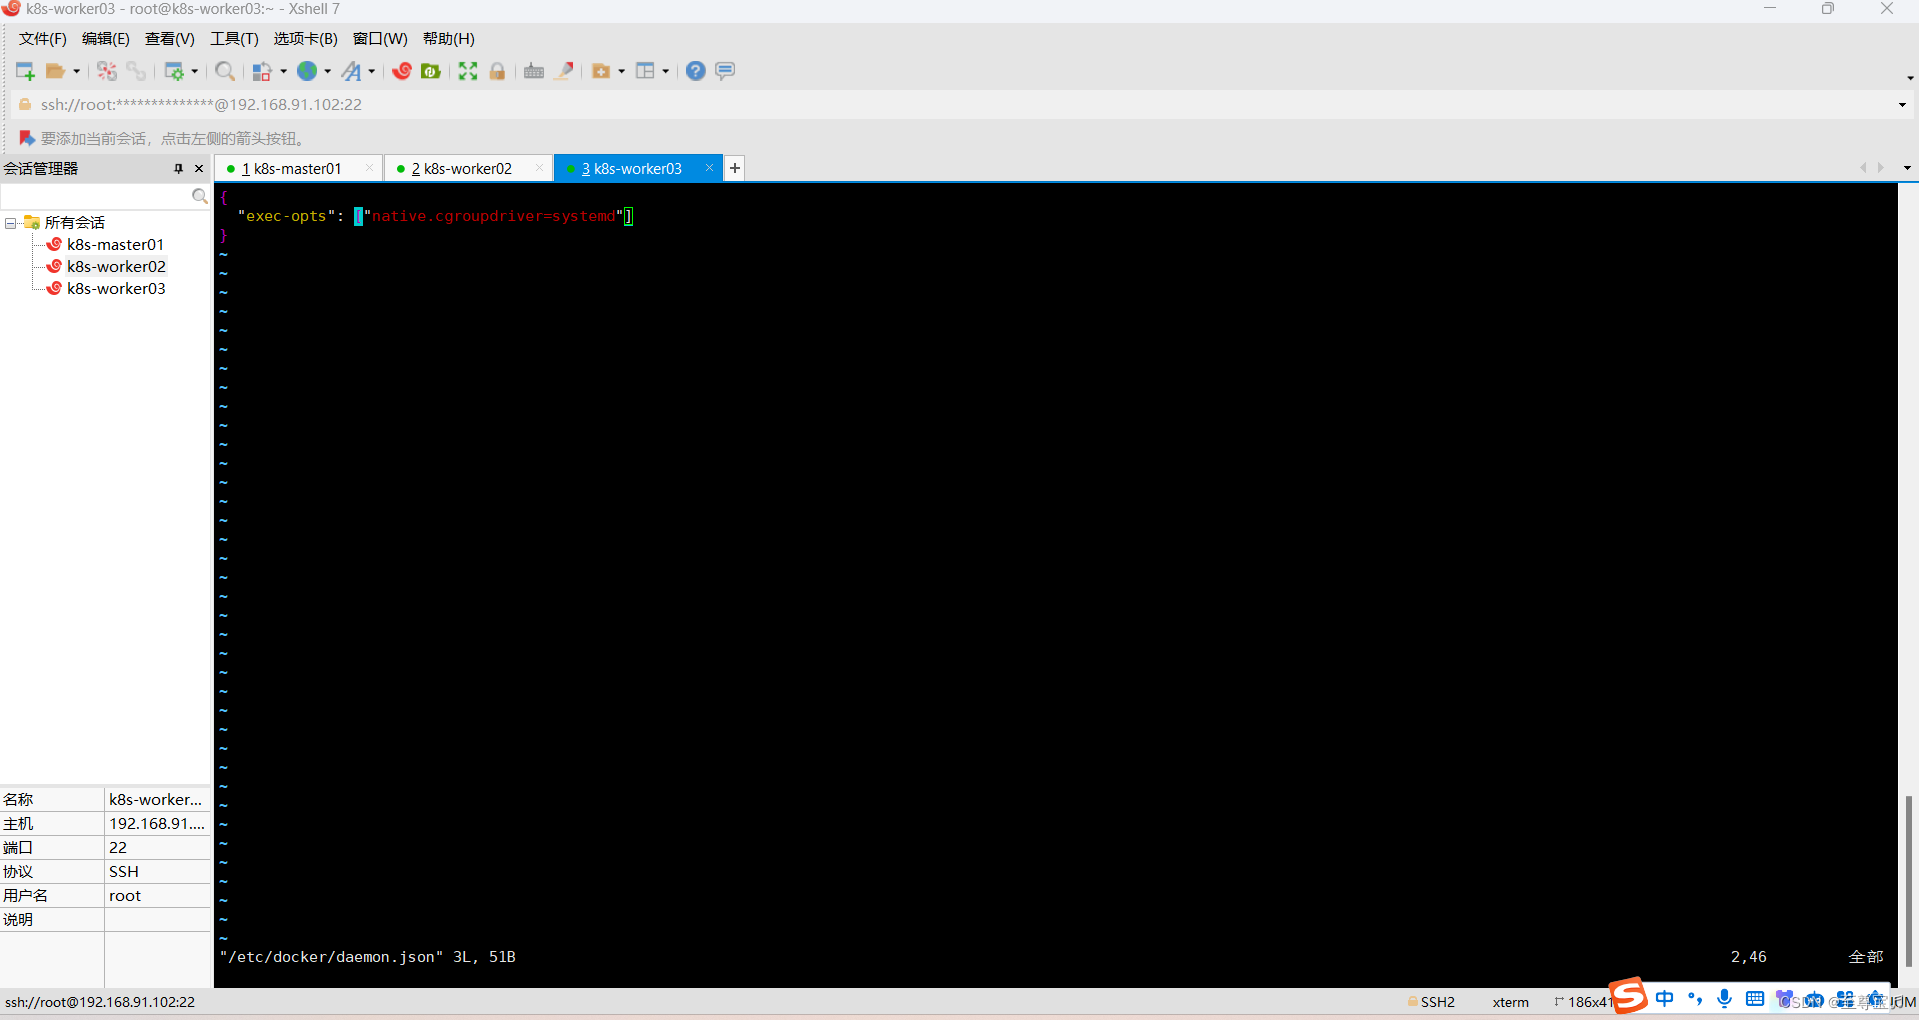
# 所有主机都重启docker
systemctl daemon-reload && systemctl restart docker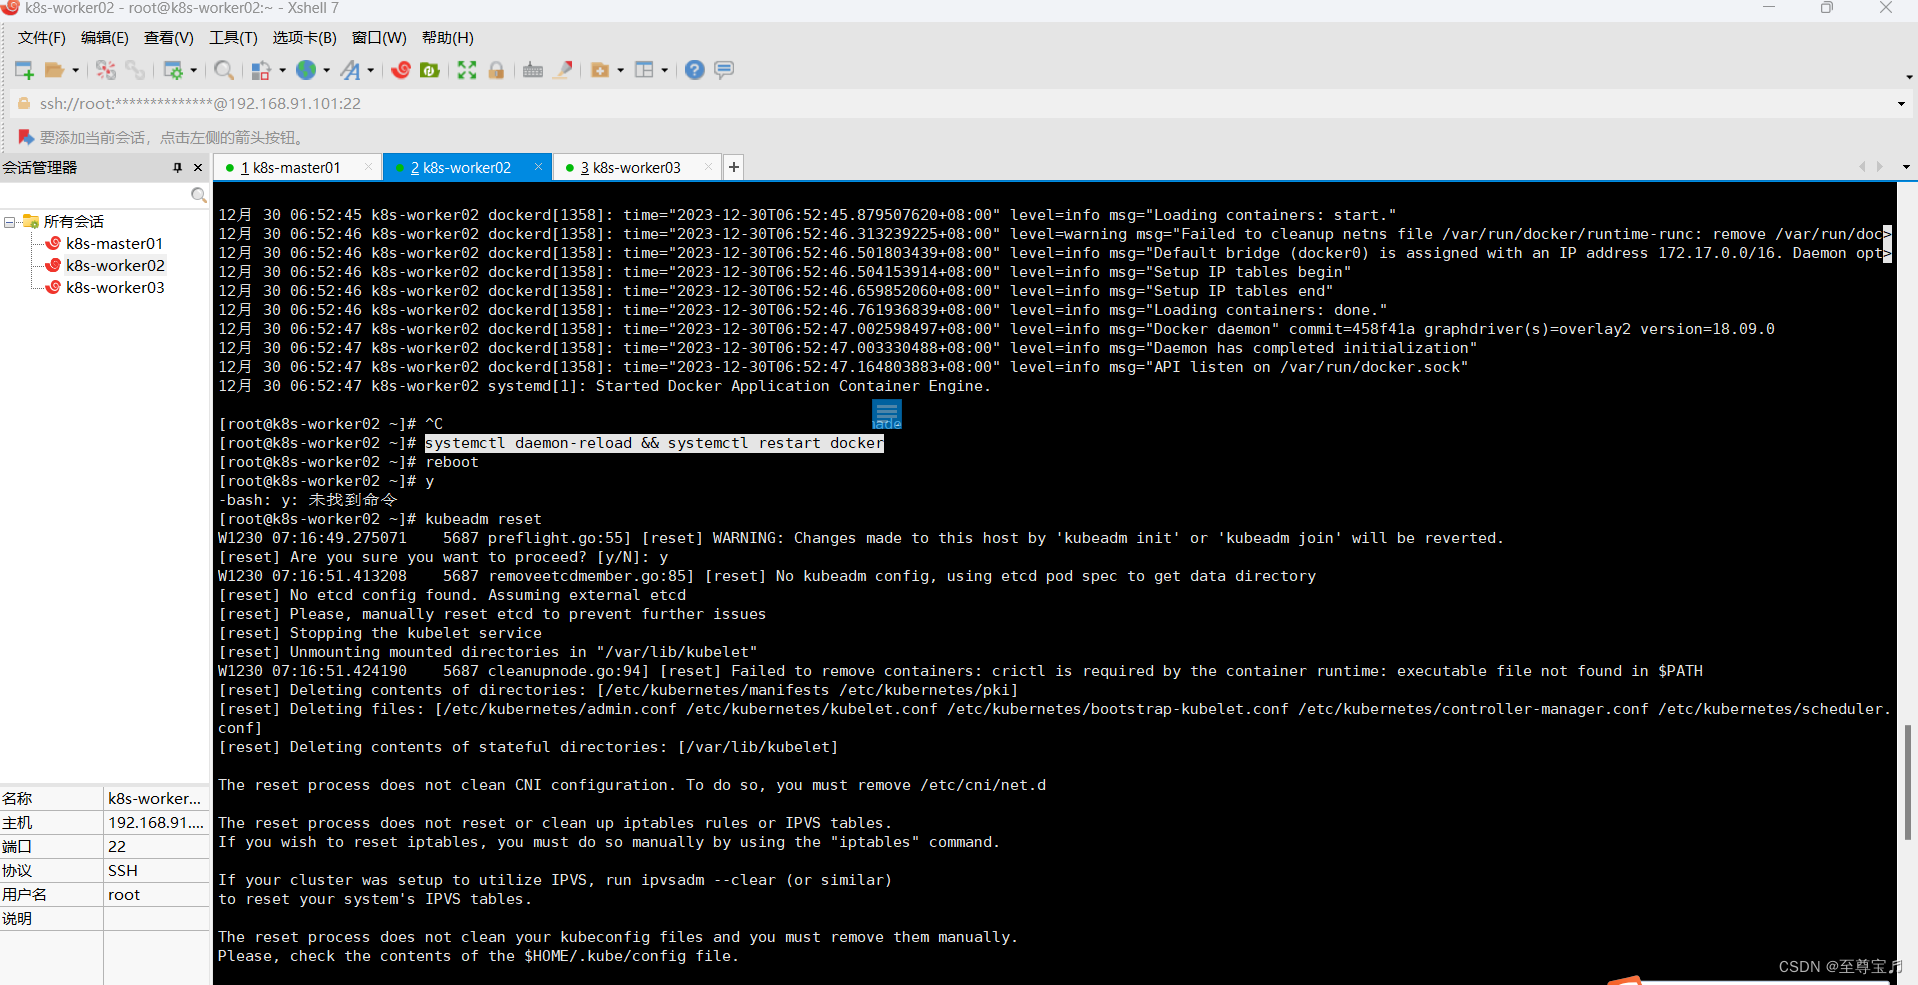
(9)主要错误信息跟踪:
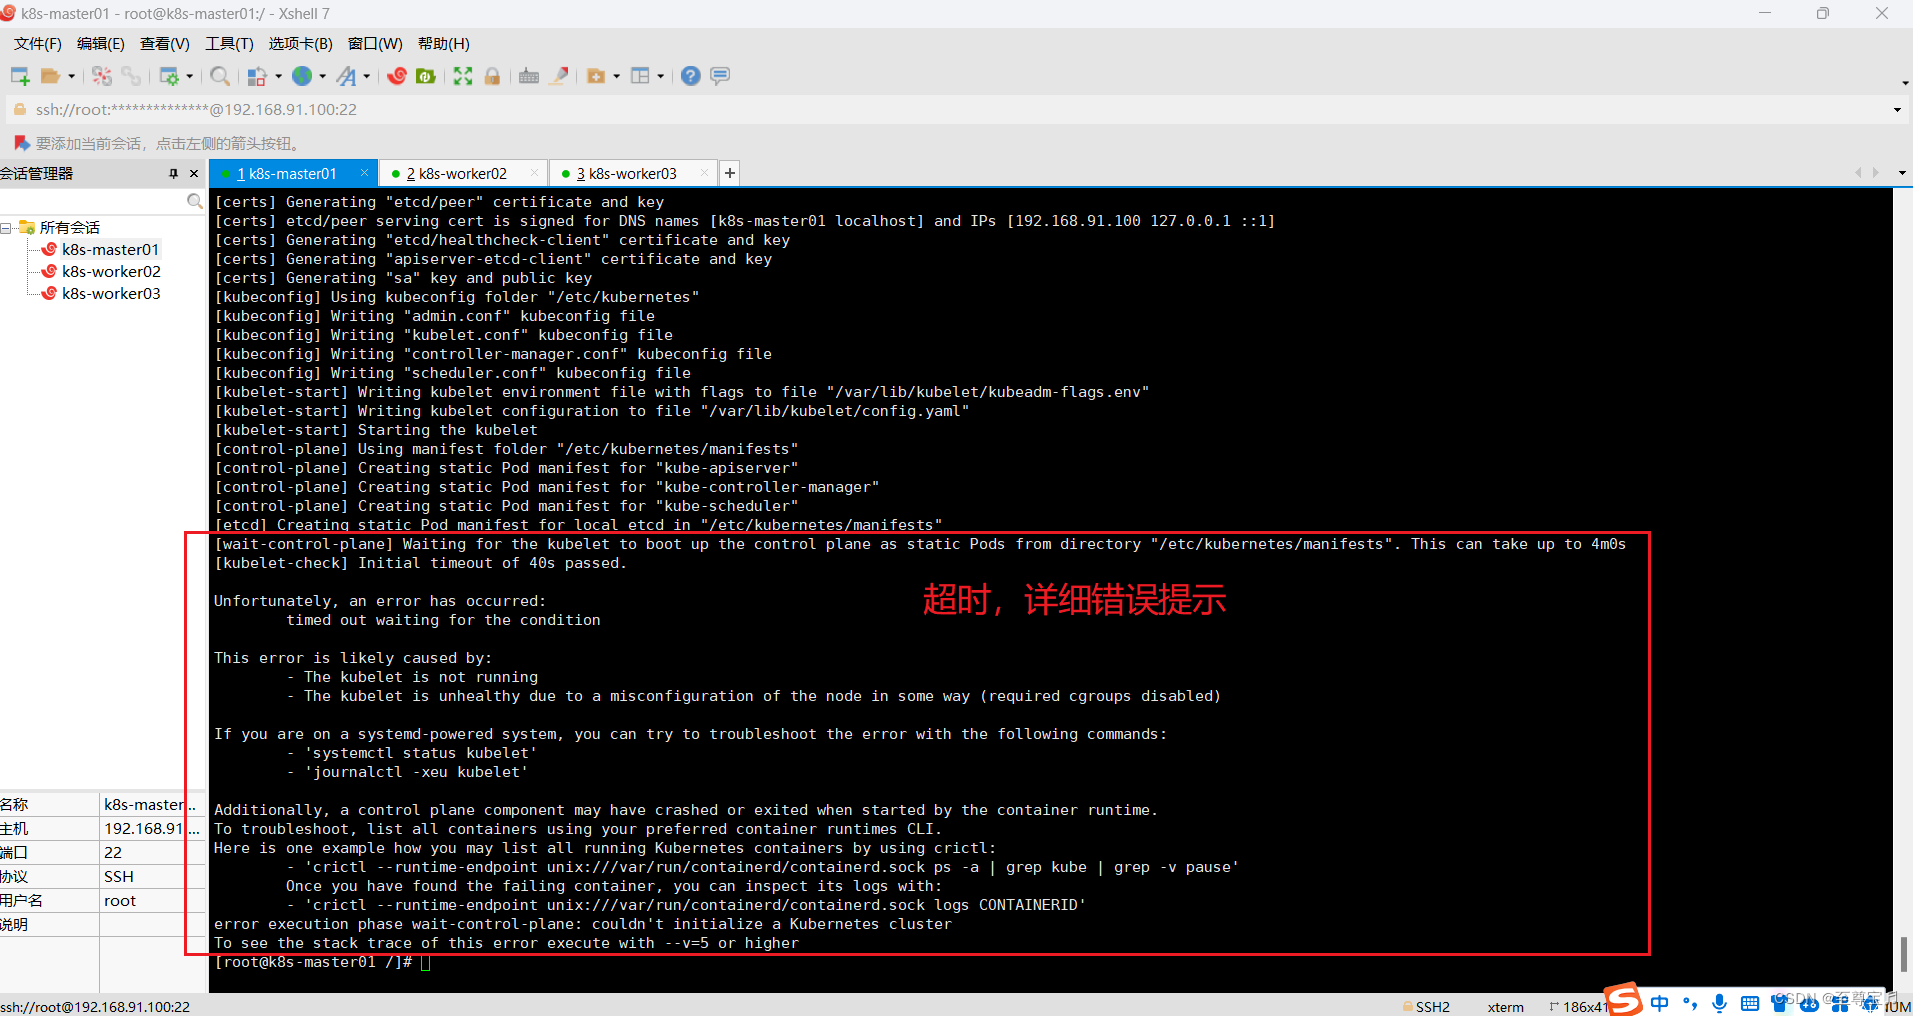
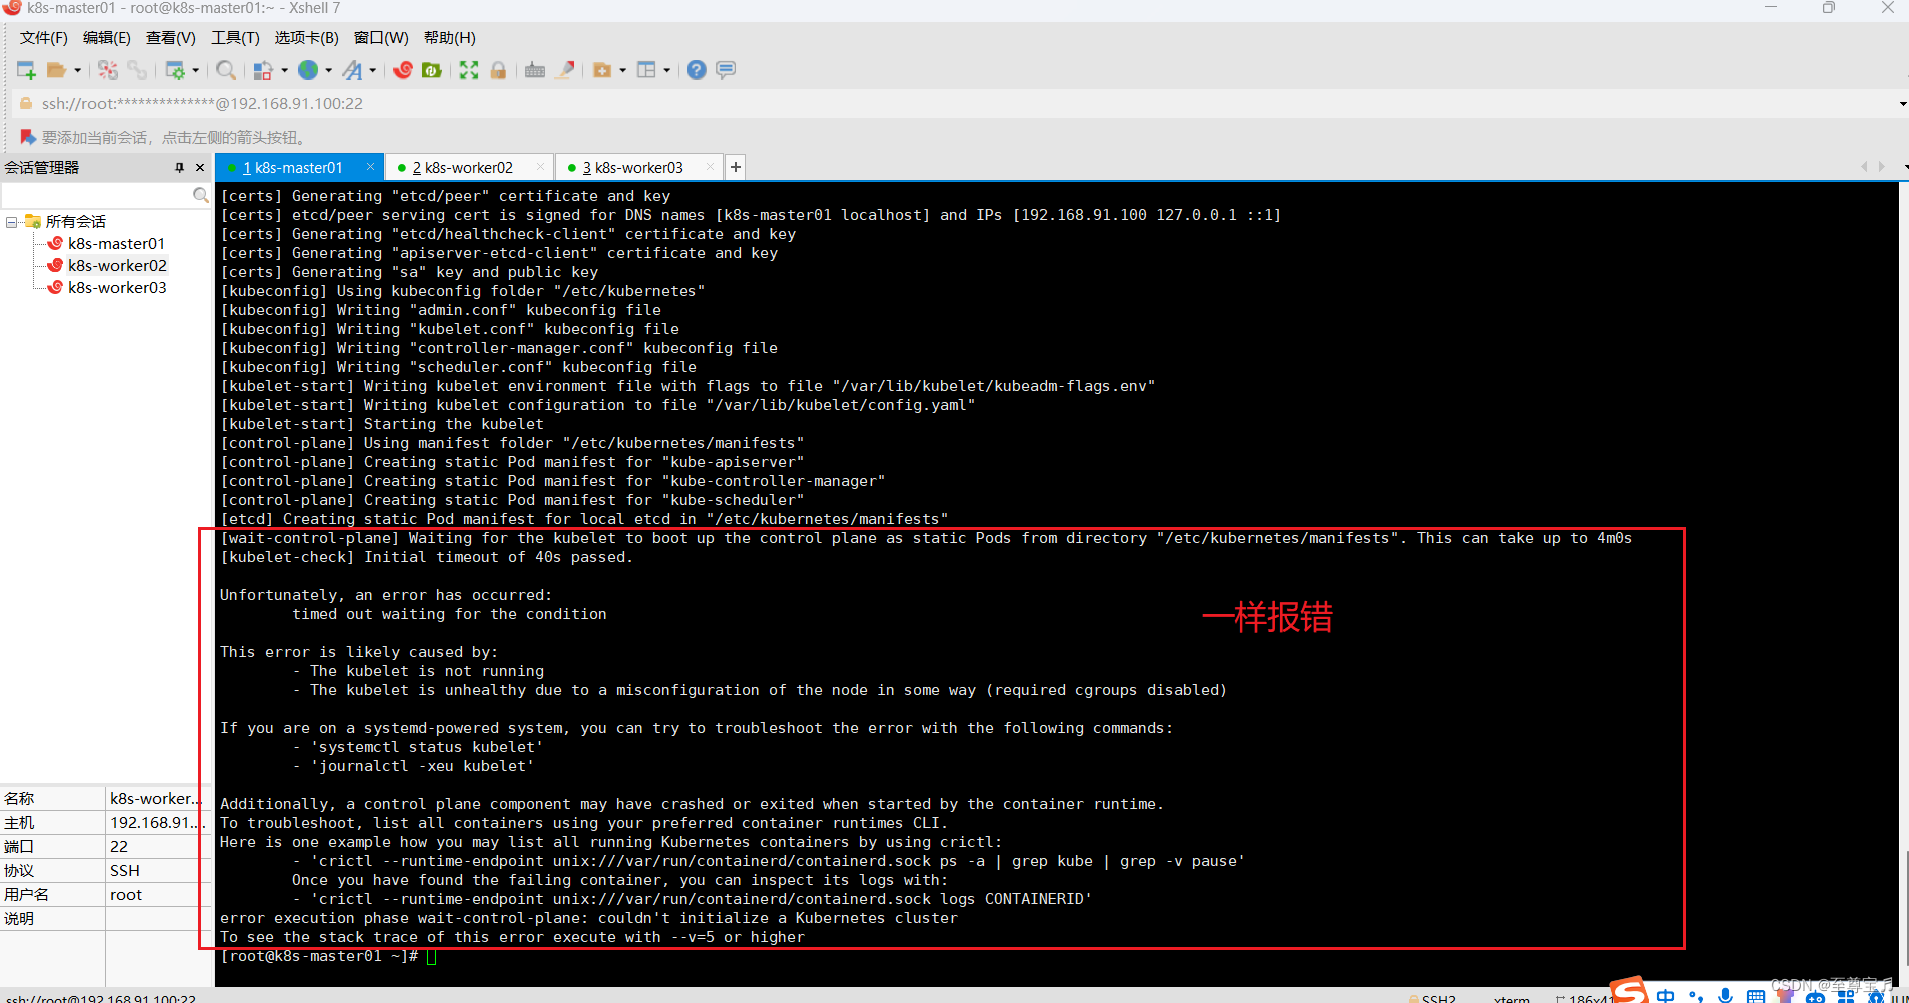
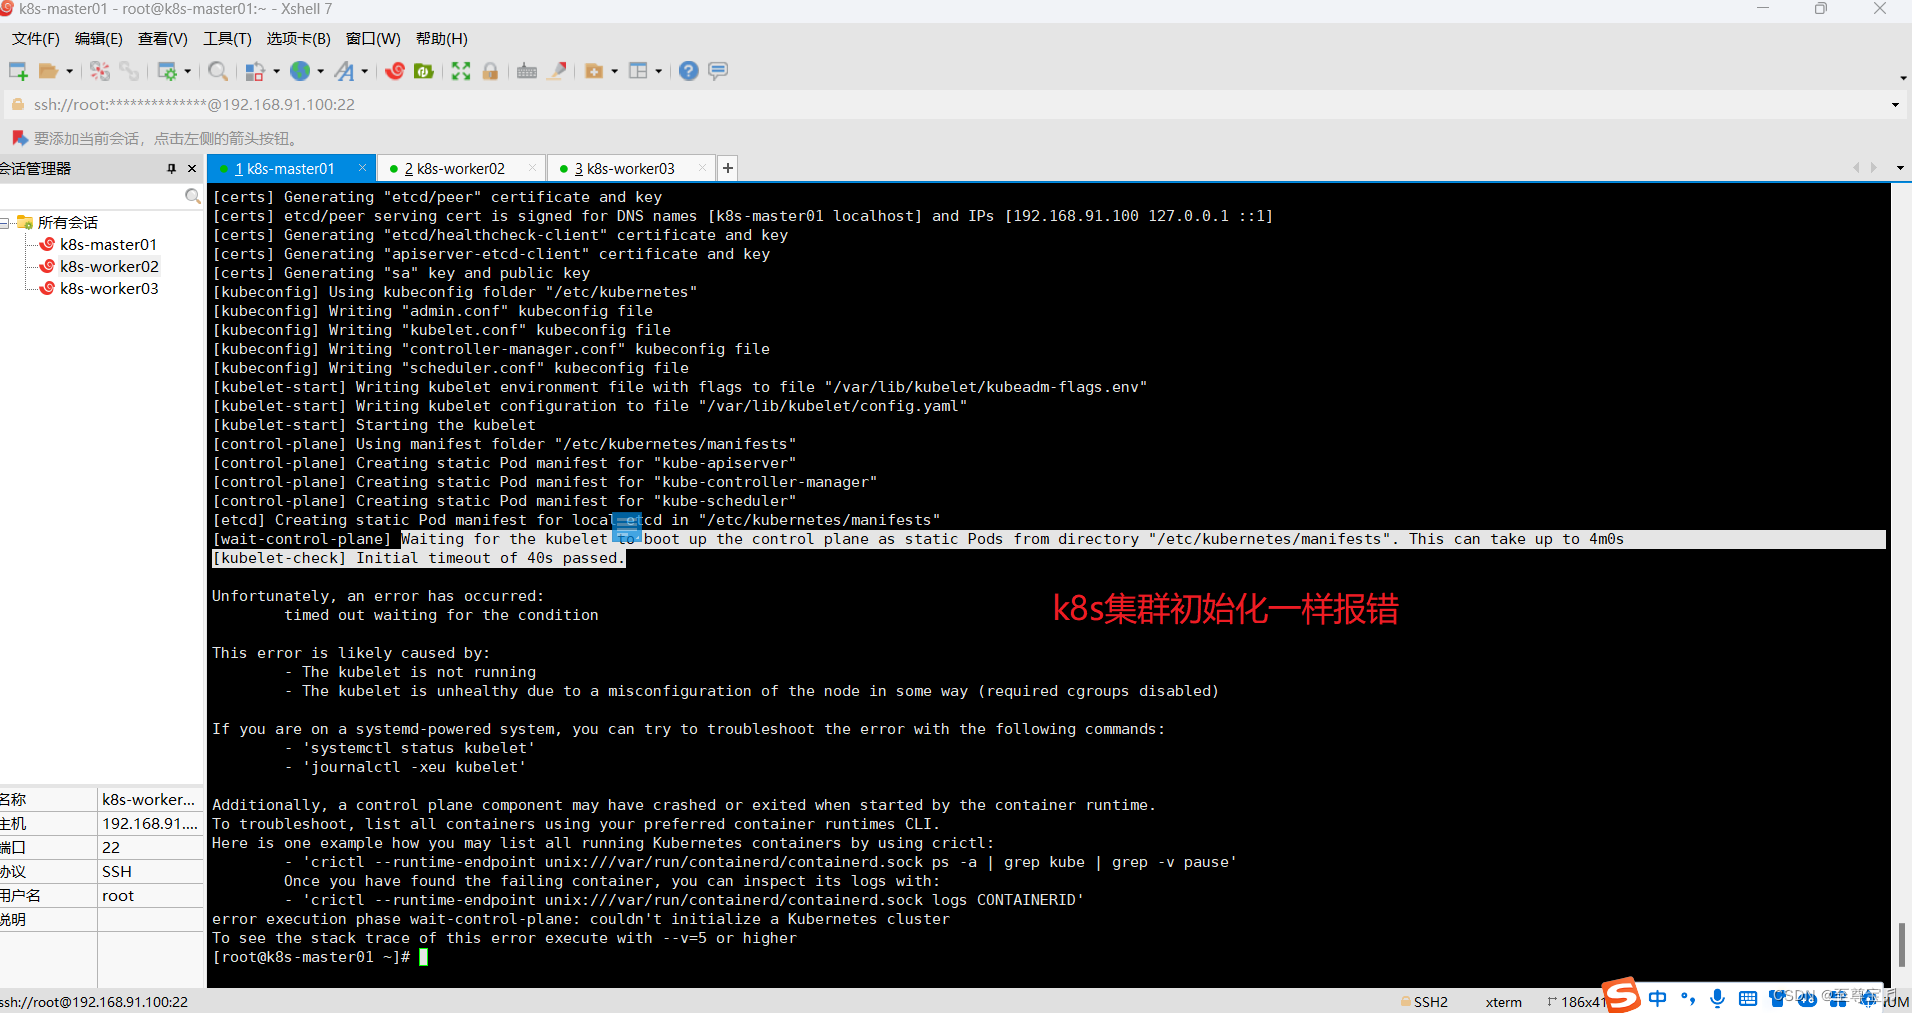
Unfortunately, an error has occurred:
timed out waiting for the condition
This error is likely caused by:
- The kubelet is not running
- The kubelet is unhealthy due to a misconfiguration of the node in some way (required cgroups disabled)
If you are on a systemd-powered system, you can try to troubleshoot the error with the following commands:
- 'systemctl status kubelet'
- 'journalctl -xeu kubelet'
# 查看日志
journalctl -xeu kubelet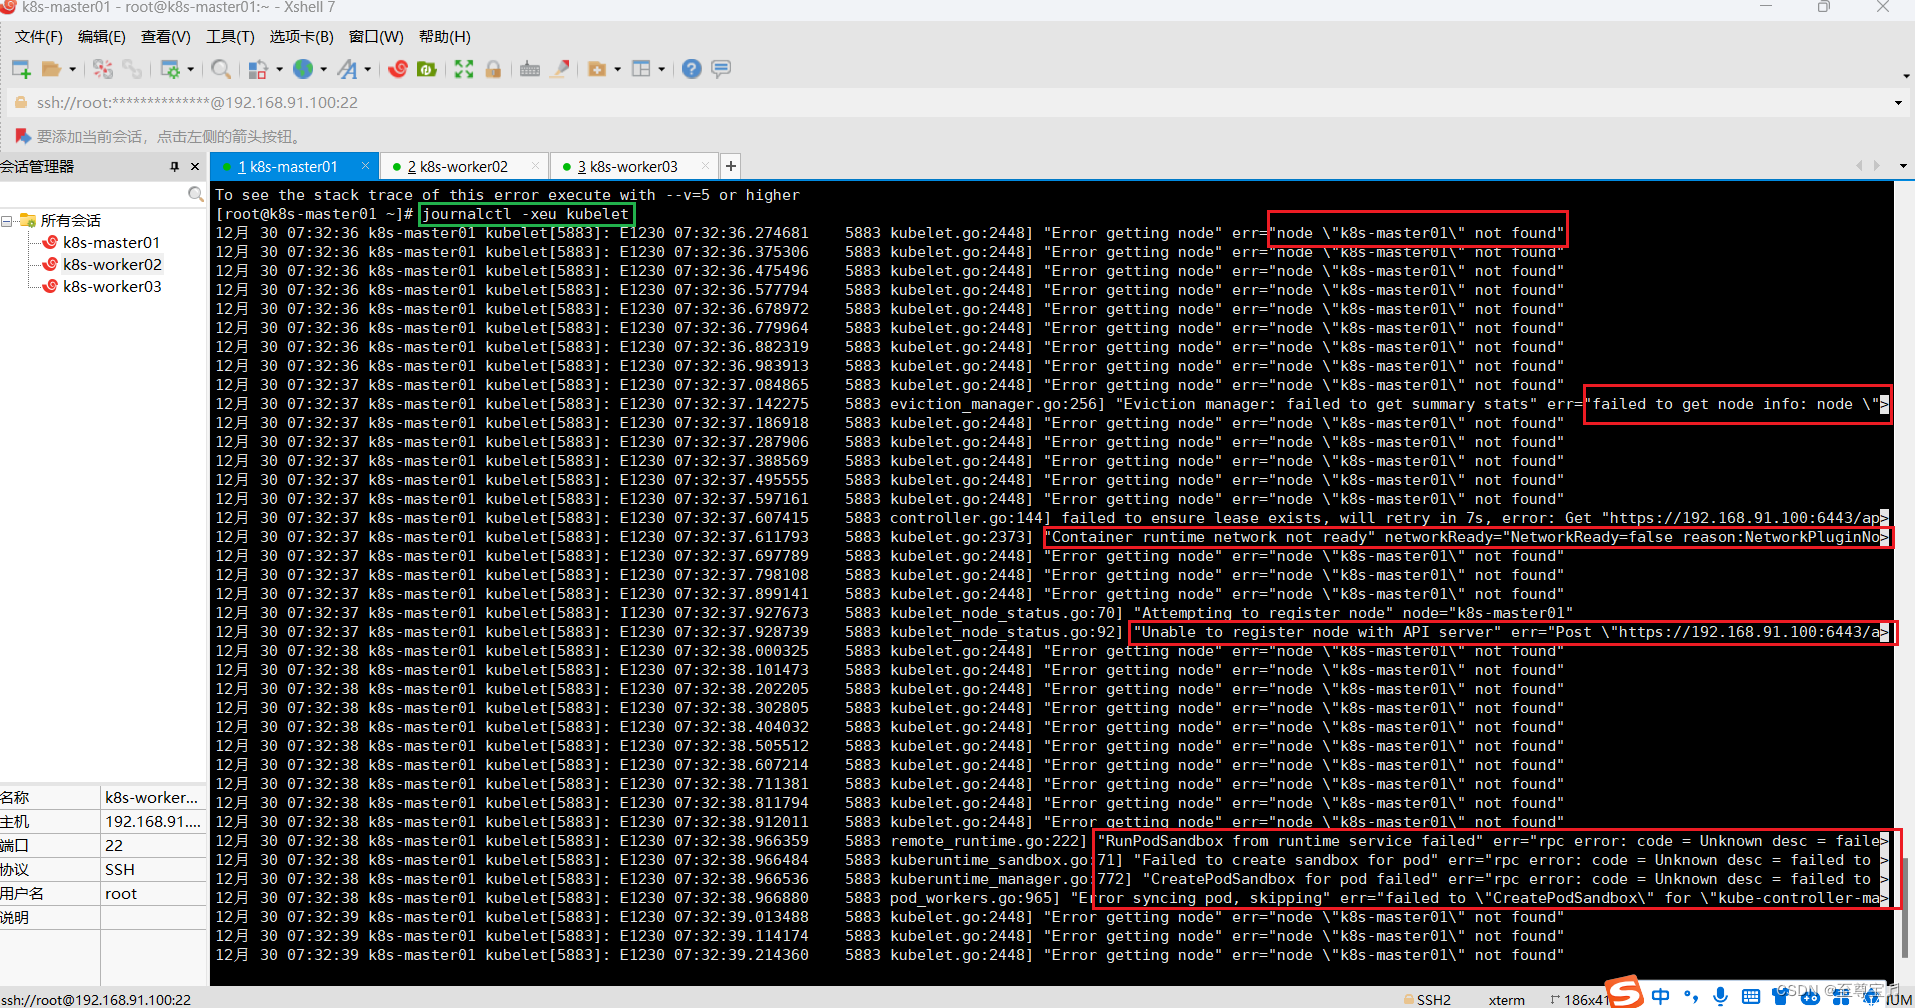
日志文件中的错误主要有四种:
①找不到节点;
12月 30 07:32:36 k8s-master01 kubelet[5883]: E1230 07:32:36.274681 5883 kubelet.go:2448] "Error getting node" err="node \"k8s-master01\" not found"②获取不到节点信息;
12月 30 07:32:37 k8s-master01 kubelet[5883]: E1230 07:32:37.142275 5883 eviction_manager.go:256] "Eviction manager: failed to get summary stats" err="failed to get node info: node \">③Unable to register node with API server;
12月 30 07:32:37 k8s-master01 kubelet[5883]: I1230 07:32:37.927673    5883 kubelet_node_status.go:70] "Attempting to register node" node="k8s-master01"
12月 30 07:32:37 k8s-master01 kubelet[5883]: E1230 07:32:37.928739    5883 kubelet_node_status.go:92] "Unable to register node with API server" err="Post \"https://192.168.91.100:6443/a>
④获取不到pause镜像;
12月 30 07:32:38 k8s-master01 kubelet[5883]: E1230 07:32:38.966359    5883 remote_runtime.go:222] "RunPodSandbox from runtime service failed" err="rpc error: code = Unknown desc = faile>
12月 30 07:32:38 k8s-master01 kubelet[5883]: E1230 07:32:38.966484    5883 kuberuntime_sandbox.go:71] "Failed to create sandbox for pod" err="rpc error: code = Unknown desc = failed to >
12月 30 07:32:38 k8s-master01 kubelet[5883]: E1230 07:32:38.966536    5883 kuberuntime_manager.go:772] "CreatePodSandbox for pod failed" err="rpc error: code = Unknown desc = failed to >
12月 30 07:32:38 k8s-master01 kubelet[5883]: E1230 07:32:38.966880    5883 pod_workers.go:965] "Error syncing pod, skipping" err="failed to \"CreatePodSandbox\" for \"kube-controller-ma>
(10)所有主机配置kubernetes源;
# 此操作会覆盖 /etc/yum.repos.d/kubernetes.repo 中现存的所有配置
cat <<EOF | sudo tee /etc/yum.repos.d/kubernetes.repo
[kubernetes]
name=Kubernetes
baseurl=https://pkgs.k8s.io/core:/stable:/v1.28/rpm/
enabled=1
gpgcheck=1
gpgkey=https://pkgs.k8s.io/core:/stable:/v1.28/rpm/repodata/repomd.xml.key
#exclude=kubelet kubeadm kubectl cri-tools kubernetes-cni
EOF
# 执行查看错误日志命令
journalctl -xeu kubelet
12月 30 08:36:39 k8s-master01 kubelet[9046]: E1230 08:36:39.877844    9046 controller.go:144] failed to ensure lease exists, will retry in 7s, error: Get "https://192.168.91.100:6443/ap>
12月 30 08:36:39 k8s-master01 kubelet[9046]: I1230 08:36:39.944114    9046 kubelet_node_status.go:70] "Attempting to register node" node="k8s-master01"
12月 30 08:36:39 k8s-master01 kubelet[9046]: E1230 08:36:39.944382 9046 kubelet_node_status.go:92] "Unable to register node with API server" err="Post \"https://192.168.91.100:6443/a>尝试网上的解决方案:添加pod-infra-container-image参数,但是添加该参数后仍然报错。
tee /etc/sysconfig/kubelet <<-EOF
KUBELET_EXTRA_ARGS="--pod-infra-container-image=registry.aliyuncs.com/google_containers/pause:3.8"
EOF
执行k8s集群初始化命令,还是一样的错误信息。

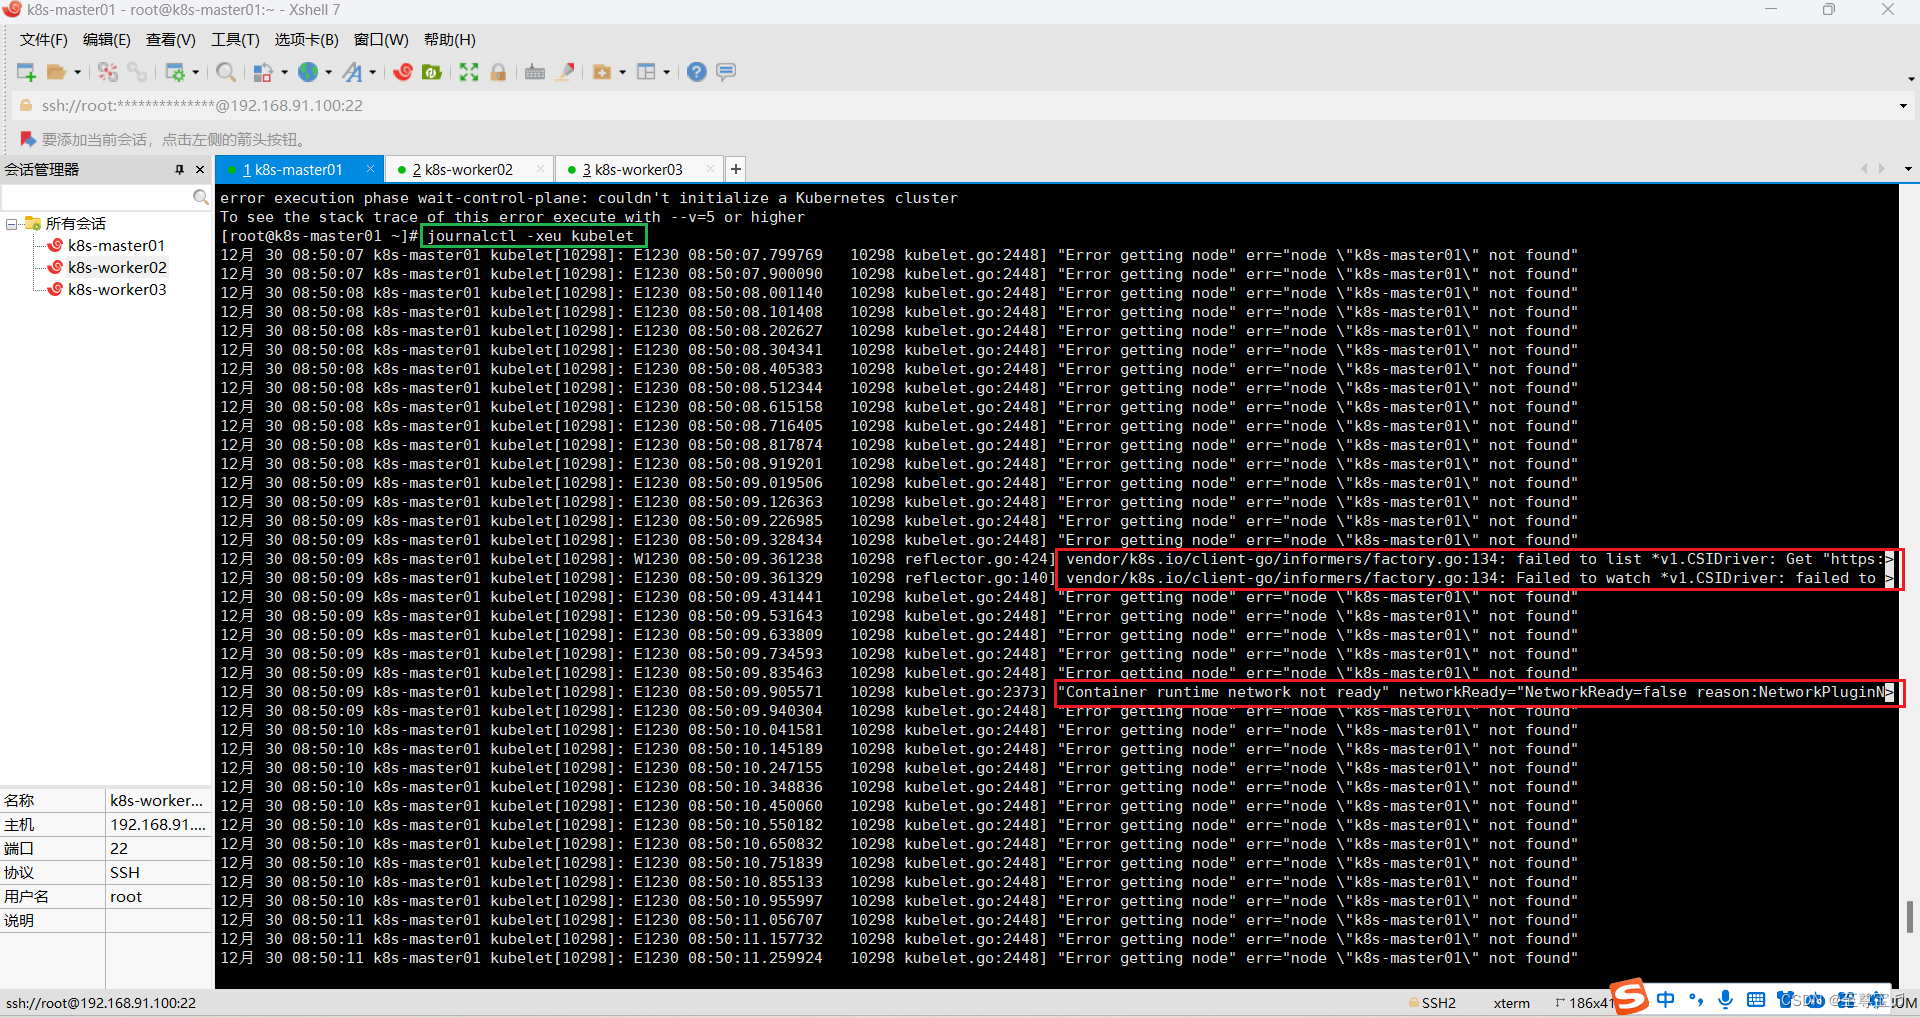
12月 30 08:57:30 k8s-master01 kubelet[10298]: E1230 08:57:30.116956 10298 kubelet.go:2373] "Container runtime network not ready" networkReady="NetworkReady=false reason:NetworkPluginN>Container runtime network not ready错误通常是由于网络配置不正确或网络插件未正确安装等原因引起的。通过检查网络插件、网络配置、重启kubelet服务、检查网络状态以及重启节点等步骤,我们可以解决这个问题。在解决问题之前,确保备份数据和配置,并确保有其他节点可以接管工作负载,以防止服务中断。
所有主机执行下面命令:
sysctl net.bridge.bridge-nf-call-iptables=1# 重启kubelet
systemctl restart kubelet# 查看kubelet状态
systemctl status kubelet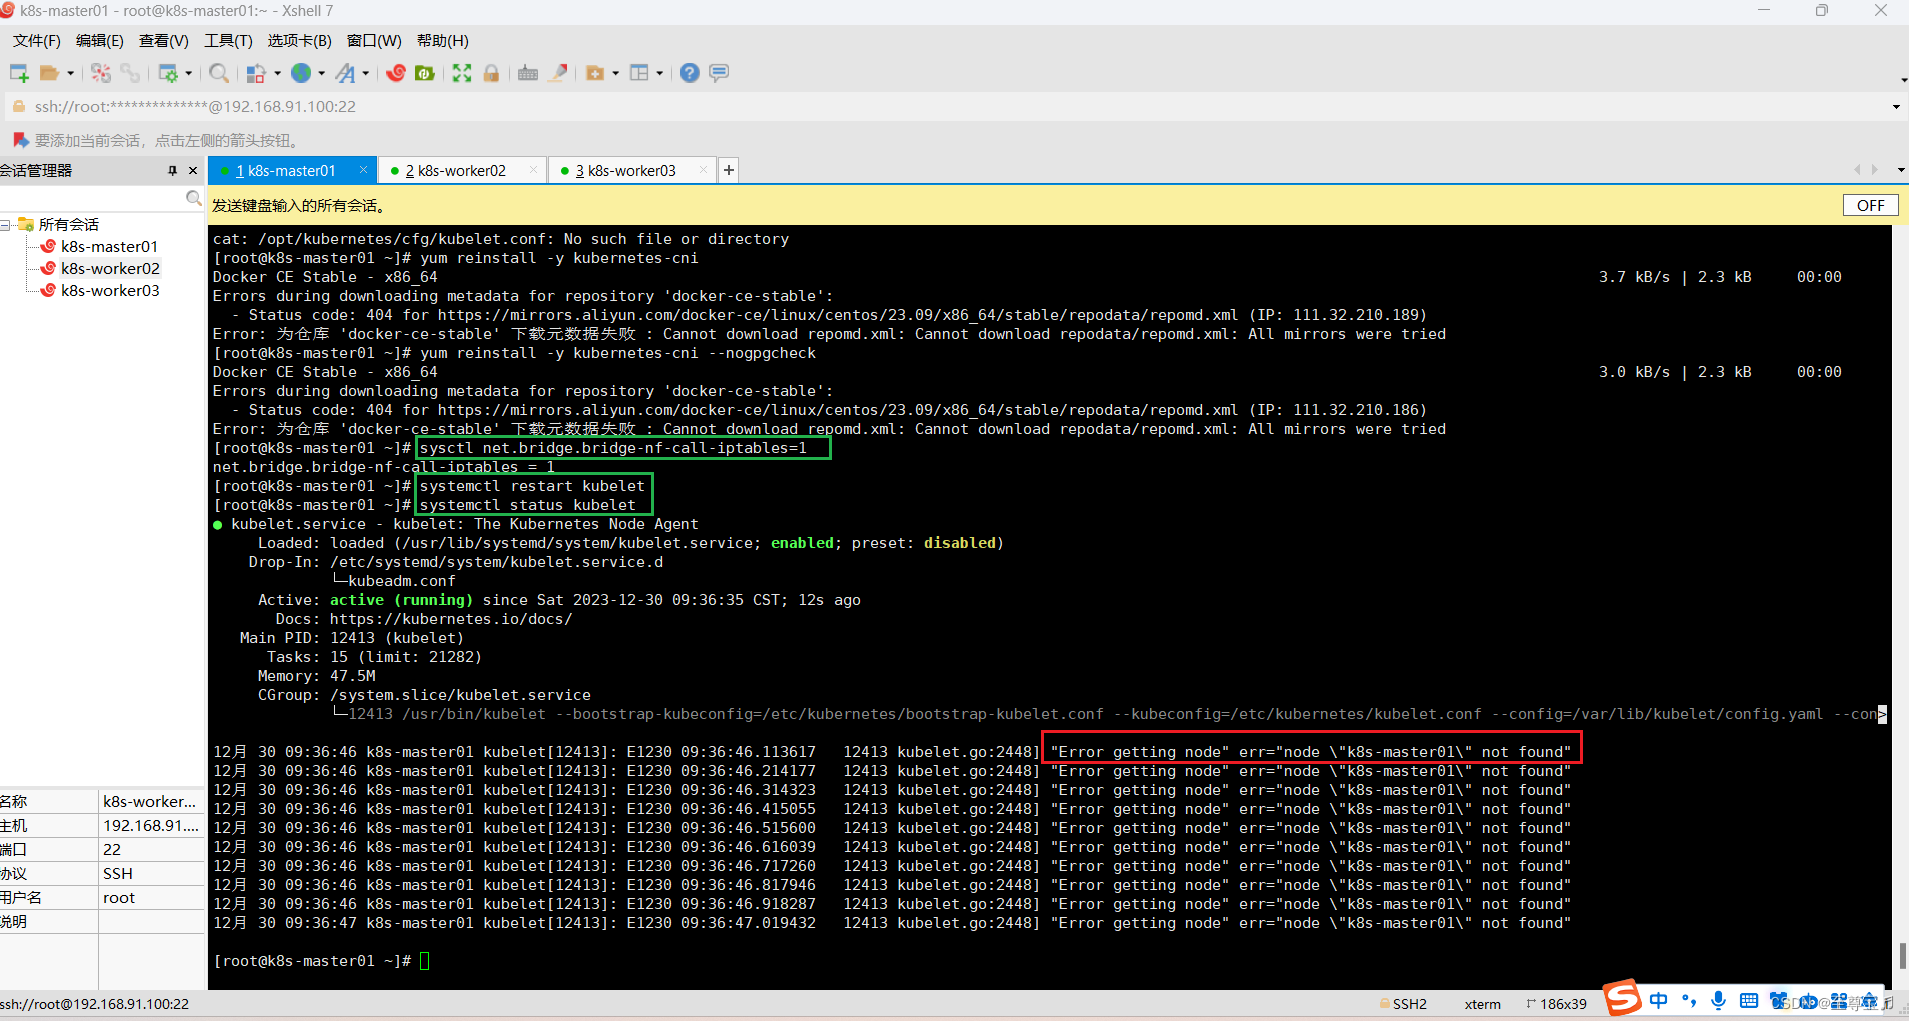
重置后,初始化还是报一样的错误。
master节点执行下面命令:
systemctl stop kubelet
docker stop $(docker ps -aq)
docker rm -f $(docker ps -aq)
systemctl stop docker
kubeadm reset
rm -rf $HOME/.kube /etc/kubernetes
rm -rf /var/lib/cni/ /etc/cni/ /var/lib/kubelet/*
iptables -F && iptables -t nat -F && iptables -t mangle -F && iptables -X
systemctl start docker
systemctl start kubelet#安装 calico 网络插件(没有高可用)
rm -f calico-3.13.1.yaml
wget -L https://kuboard.cn/install-script/calico/calico-3.13.1.yaml
kubectl apply -f calico-3.13.1.yaml
# 主节点master检测初始化环境
kubeadm init --dry-run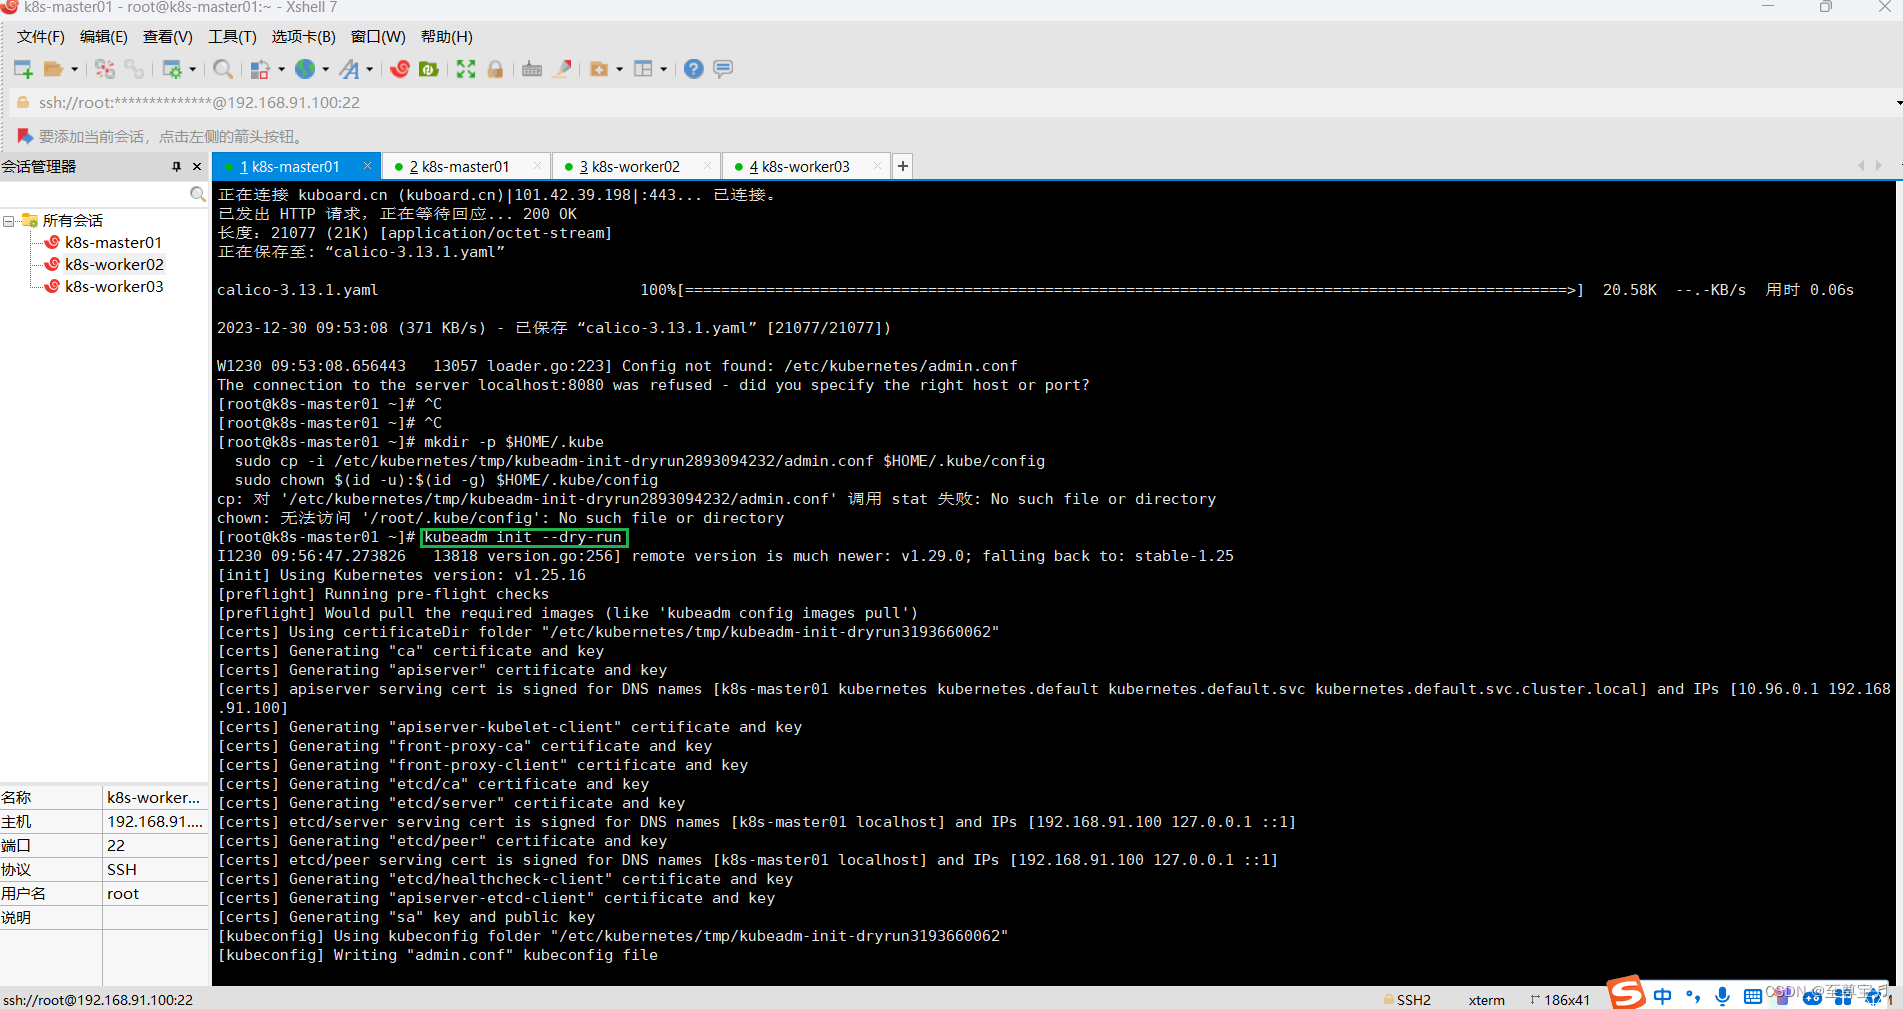
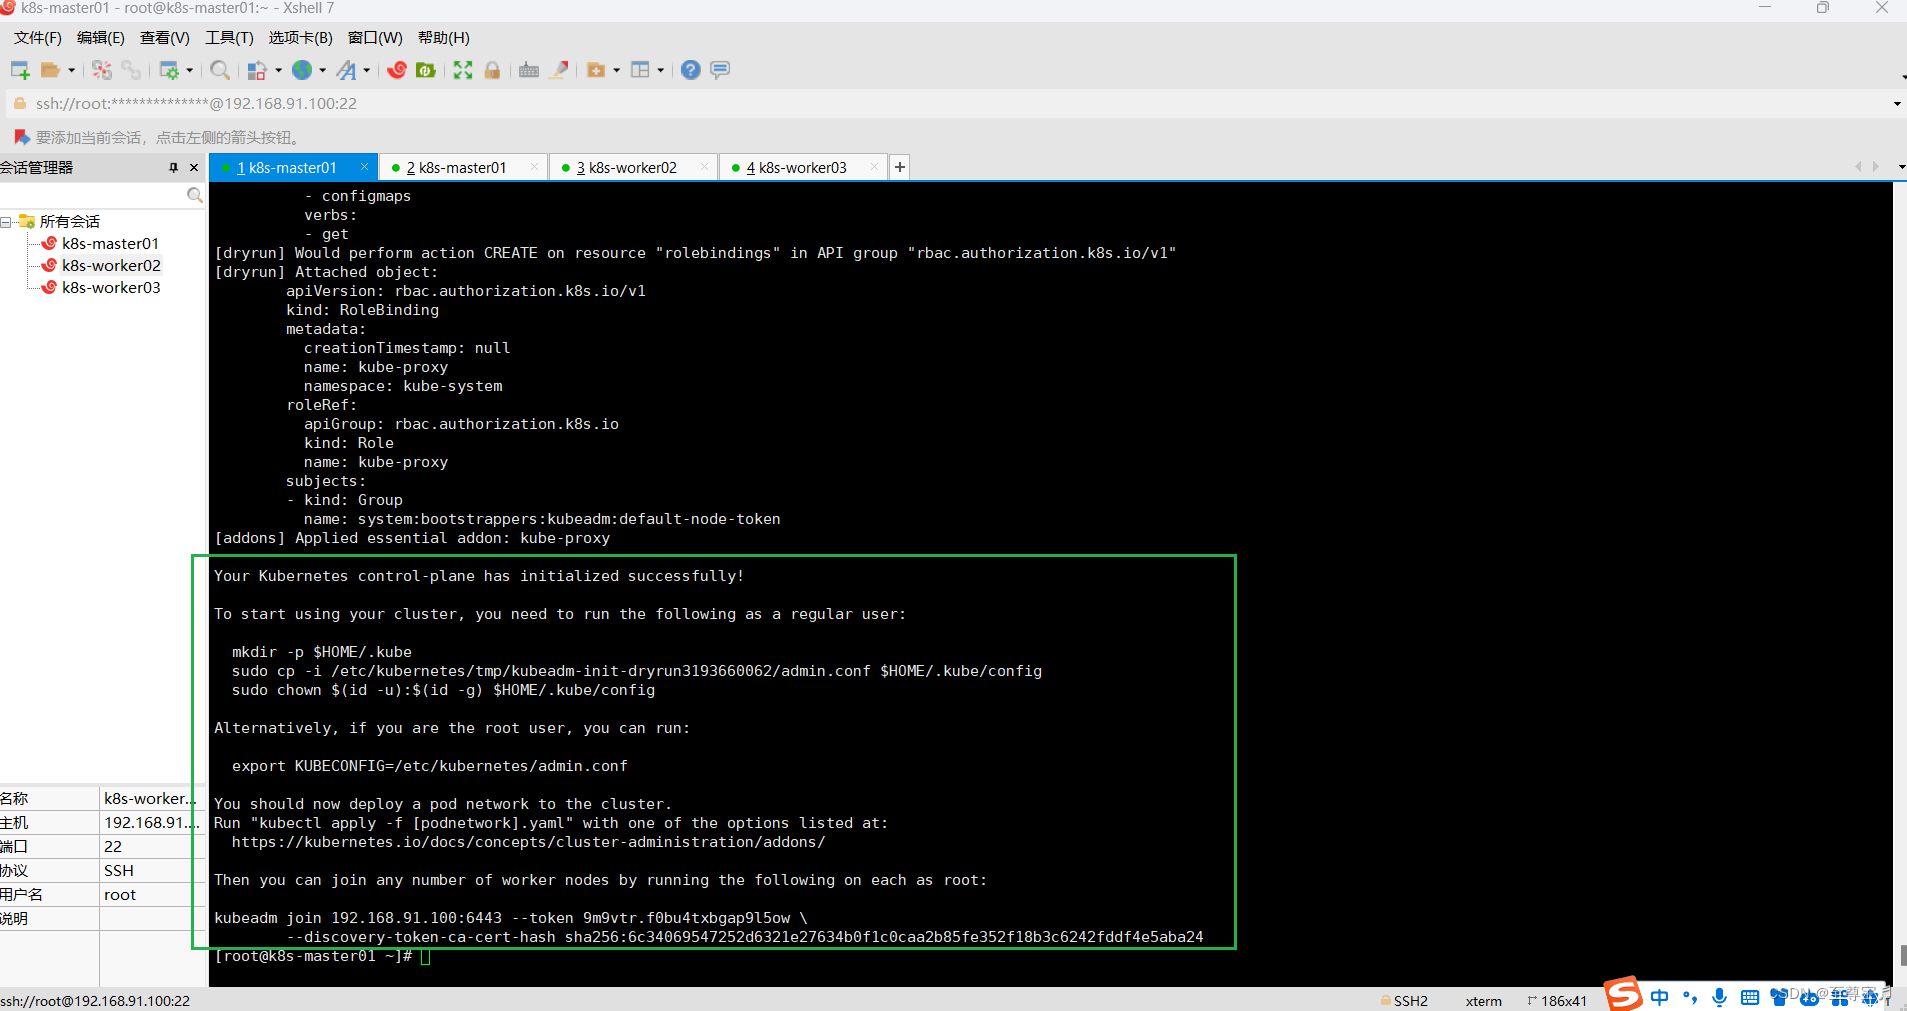
To start using your cluster, you need to run the following as a regular user:mkdir -p $HOME/.kubesudo cp -i /etc/kubernetes/tmp/kubeadm-init-dryrun3193660062/admin.conf $HOME/.kube/configsudo chown $(id -u):$(id -g) $HOME/.kube/configAlternatively, if you are the root user, you can run:export KUBECONFIG=/etc/kubernetes/admin.confYou should now deploy a pod network to the cluster.
Run "kubectl apply -f [podnetwork].yaml" with one of the options listed at:https://kubernetes.io/docs/concepts/cluster-administration/addons/Then you can join any number of worker nodes by running the following on each as root:kubeadm join 192.168.91.100:6443 --token 9m9vtr.f0bu4txbgap9l5ow \--discovery-token-ca-cert-hash sha256:6c34069547252d6321e27634b0f1c0caa2b85fe352f18b3c6242fddf4e5aba24mkdir -p $HOME/.kube
sudo cp -i /etc/kubernetes/tmp/kubeadm-init-dryrun3193660062/admin.conf $HOME/.kube/config
sudo chown $(id -u):$(id -g) $HOME/.kube/config
export KUBECONFIG=/etc/kubernetes/admin.conf
cp -i /etc/kubernetes/tmp/kubeadm-init-dryrun3193660062/admin.conf /etc/kubernetes/admin.conf
所有主机重置后,master节点初始化k8s集群,还是一样的错误。
十六.k8s集群初始化成功;
1.下面方法可以解决containerd运行状态报错的问题(仅master主节点);
(1)master节点先删除“/etc/containerd/config.toml”文件;
rm /etc/containerd/config.toml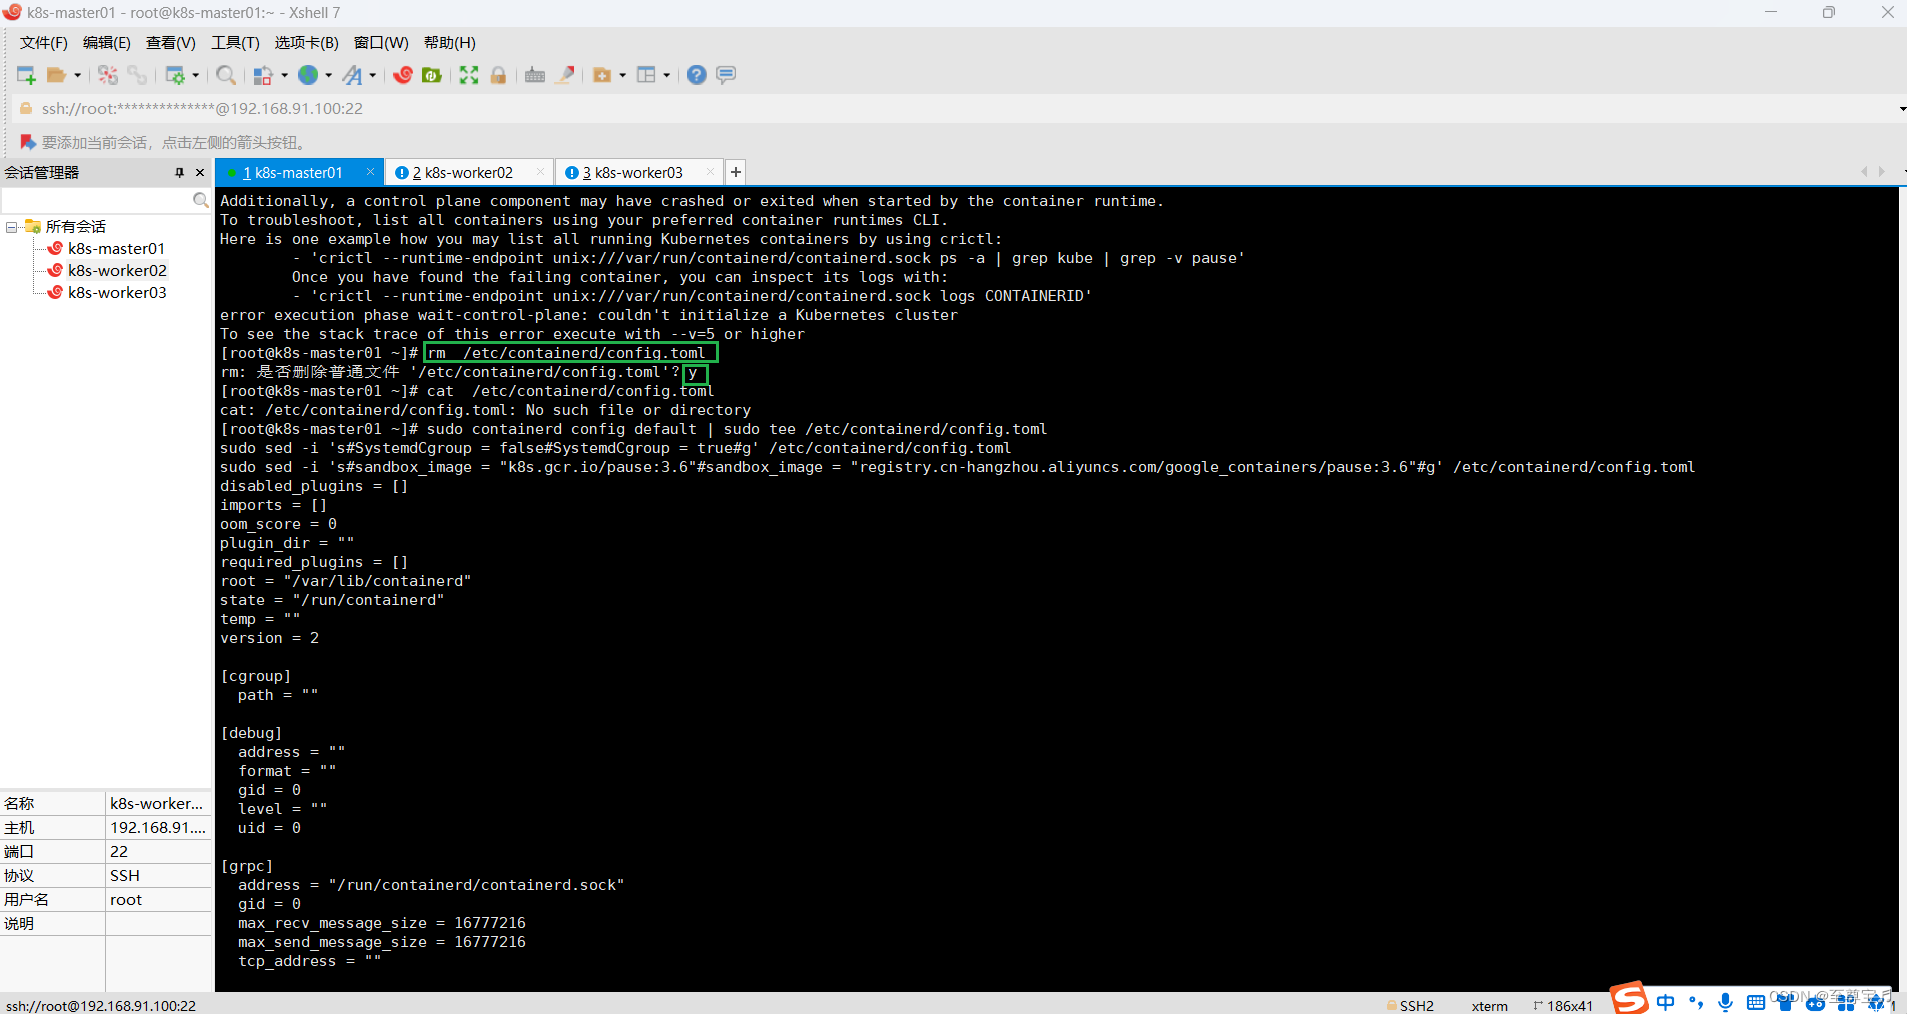
(2)master节点执行下面命令,重新生成“/etc/containerd/config.toml 文件”;
sudo containerd config default | sudo tee /etc/containerd/config.toml
sudo sed -i 's#SystemdCgroup = false#SystemdCgroup = true#g' /etc/containerd/config.toml
sudo sed -i 's#sandbox_image = "k8s.gcr.io/pause:3.6"#sandbox_image = "registry.cn-hangzhou.aliyuncs.com/google_containers/pause:3.6"#g' /etc/containerd/config.toml命令执行完之后,一定要检查一遍配置内容有没有改过来。

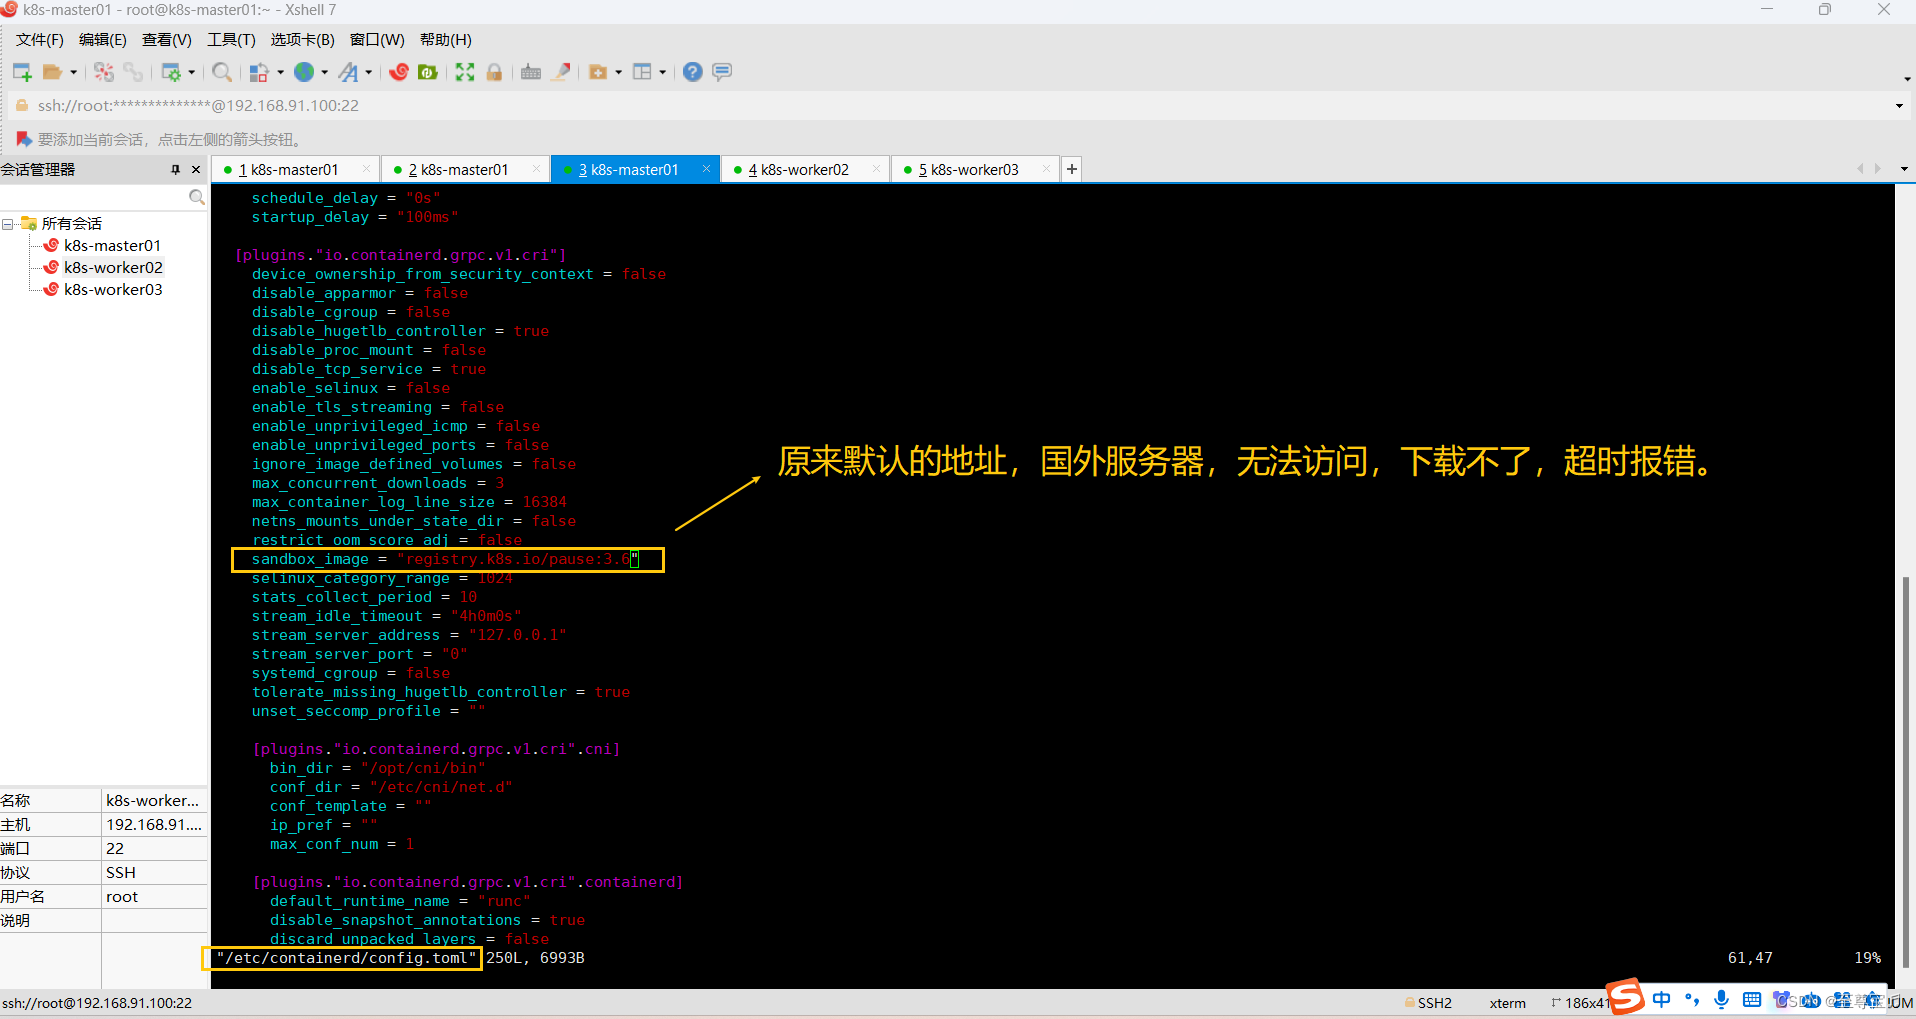
发现没改成功,手动修改:


(3)master节点重启containerd;
sudo systemctl restart containerd(4)master节点查看containerd状态;
systemctl status containerd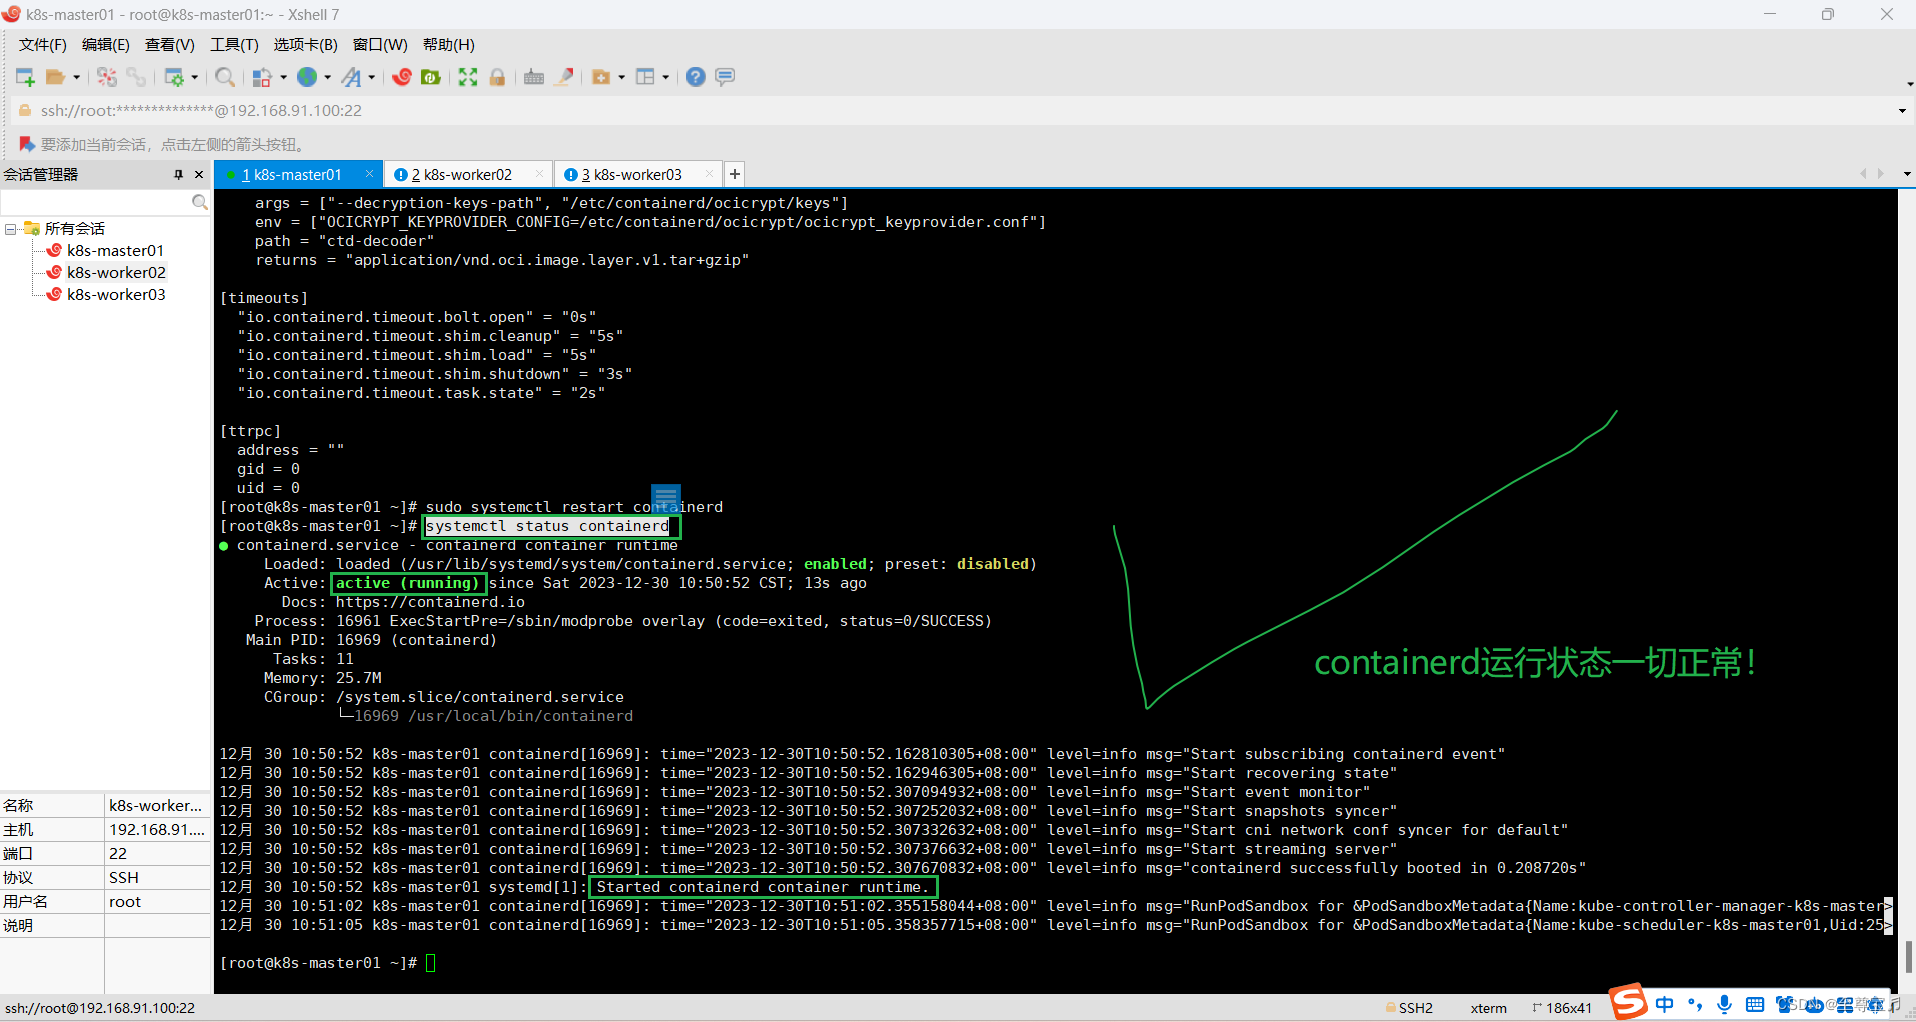

(5)所有主机重置初始化;
kubeadm reset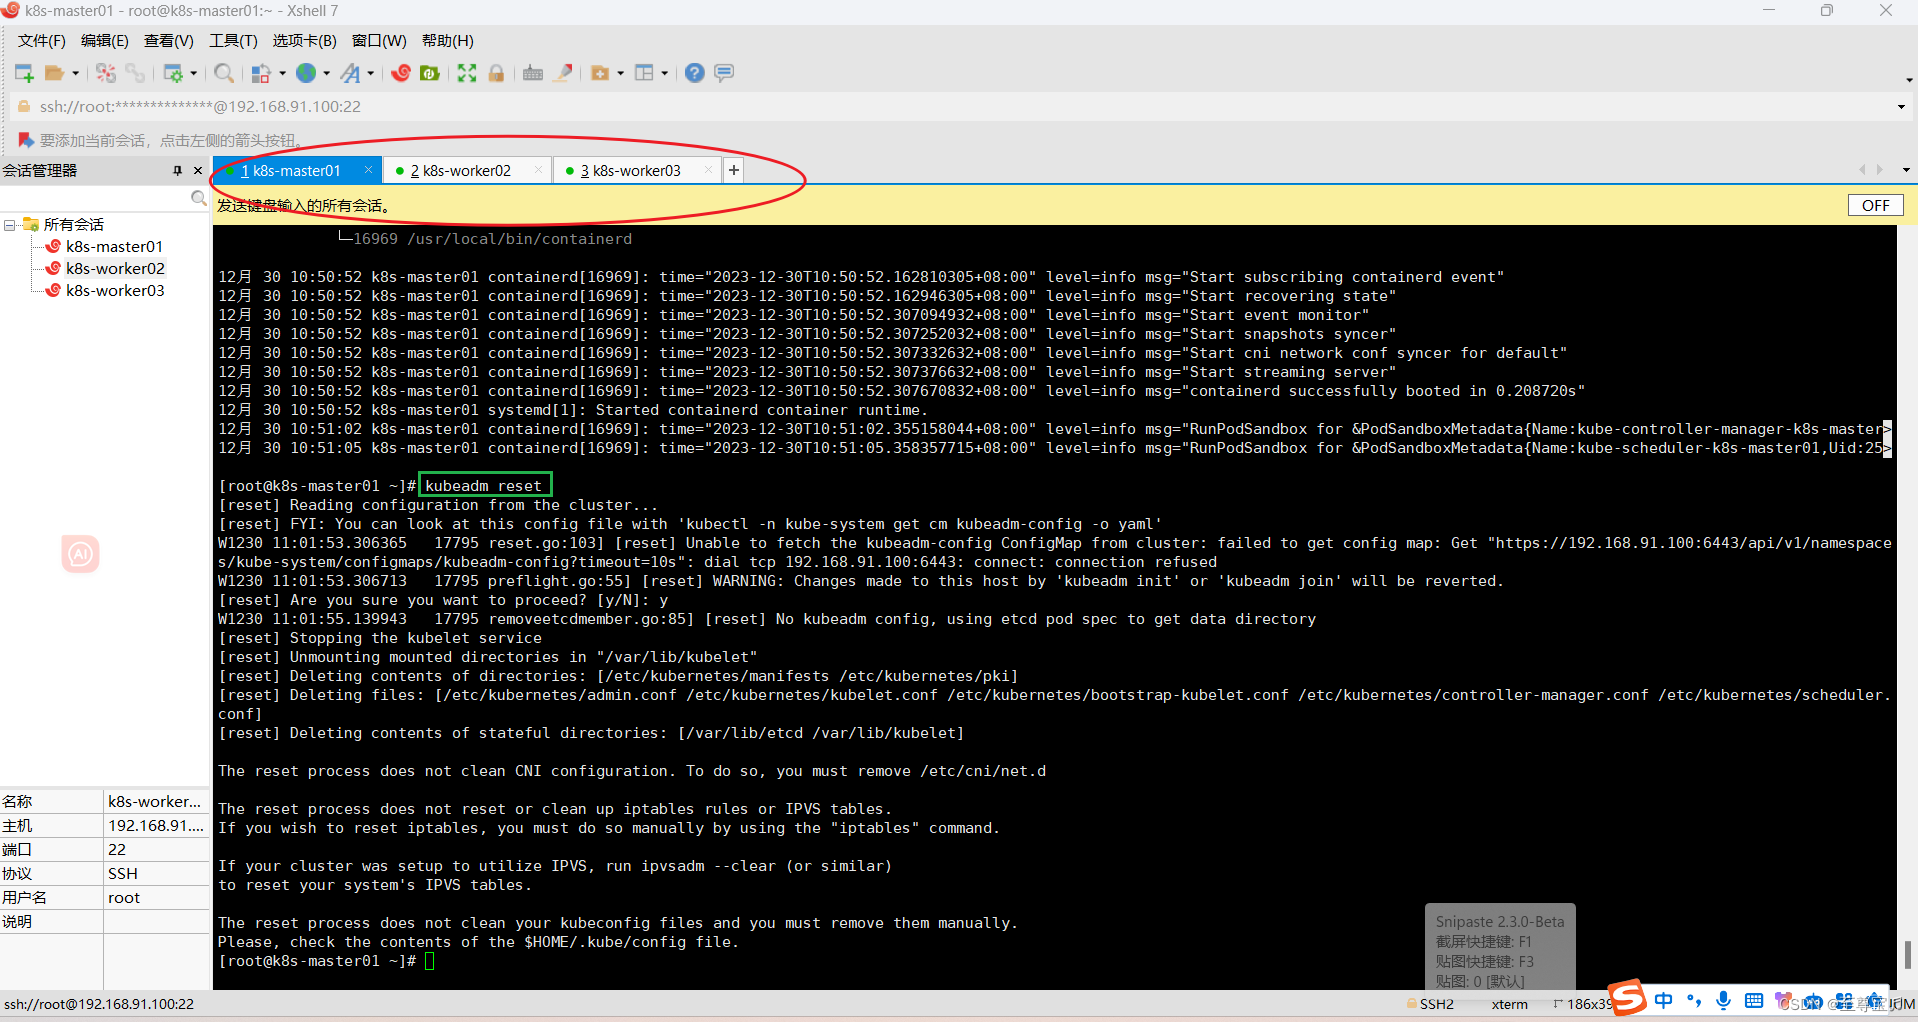
(6)在master节点执行k8s集群初始化命令;
# master节点执行k8s集群初始化命令(指定k8s版本如果不存在,系统会推荐最优接近版本)
# 1.使用docker容器
kubeadm init --node-name=k8s-master01 \
--image-repository=registry.aliyuncs.com/google_containers \
--kubernetes-version v1.25.3 \
--cri-socket=unix:///var/run/cri-dockerd.sock \
--apiserver-advertise-address=192.168.91.100 \
--pod-network-cidr=10.244.0.0/16 \
--service-cidr=10.96.0.0/12# 2.使用containerd作为容器,不再使用docker(本案例使用这个命令)
kubeadm init --node-name=k8s-master01 \
--image-repository registry.aliyuncs.com/google_containers \
--kubernetes-version v1.25.16 \
--apiserver-advertise-address=192.168.91.100 \
--pod-network-cidr=10.244.0.0/16 \
--service-cidr=10.96.0.0/12# 使用containerd作为容器,不再使用docker
kubeadm init --node-name=k8s-master01 \
--image-repository registry.aliyuncs.com/google_containers \
--kubernetes-version v1.25.16 \
--apiserver-advertise-address=192.168.91.100 \
--pod-network-cidr=10.244.0.0/16 \
--service-cidr=10.96.0.0/12
[root@k8s-master01 ~]# kubeadm init --node-name=k8s-master01 \
--image-repository registry.aliyuncs.com/google_containers \
--kubernetes-version v1.25.16 \
--apiserver-advertise-address=192.168.91.100 \
--pod-network-cidr=10.244.0.0/16 \
--service-cidr=10.96.0.0/12
[init] Using Kubernetes version: v1.25.16
[preflight] Running pre-flight checks
[preflight] Pulling images required for setting up a Kubernetes cluster
[preflight] This might take a minute or two, depending on the speed of your internet connection
[preflight] You can also perform this action in beforehand using 'kubeadm config images pull'
[certs] Using certificateDir folder "/etc/kubernetes/pki"
[certs] Generating "ca" certificate and key
[certs] Generating "apiserver" certificate and key
[certs] apiserver serving cert is signed for DNS names [k8s-master01 kubernetes kubernetes.default kubernetes.default.svc kubernetes.default.svc.cluster.local] and IPs [10.96.0.1 192.168.91.100]
[certs] Generating "apiserver-kubelet-client" certificate and key
[certs] Generating "front-proxy-ca" certificate and key
[certs] Generating "front-proxy-client" certificate and key
[certs] Generating "etcd/ca" certificate and key
[certs] Generating "etcd/server" certificate and key
[certs] etcd/server serving cert is signed for DNS names [k8s-master01 localhost] and IPs [192.168.91.100 127.0.0.1 ::1]
[certs] Generating "etcd/peer" certificate and key
[certs] etcd/peer serving cert is signed for DNS names [k8s-master01 localhost] and IPs [192.168.91.100 127.0.0.1 ::1]
[certs] Generating "etcd/healthcheck-client" certificate and key
[certs] Generating "apiserver-etcd-client" certificate and key
[certs] Generating "sa" key and public key
[kubeconfig] Using kubeconfig folder "/etc/kubernetes"
[kubeconfig] Writing "admin.conf" kubeconfig file
[kubeconfig] Writing "kubelet.conf" kubeconfig file
[kubeconfig] Writing "controller-manager.conf" kubeconfig file
[kubeconfig] Writing "scheduler.conf" kubeconfig file
[kubelet-start] Writing kubelet environment file with flags to file "/var/lib/kubelet/kubeadm-flags.env"
[kubelet-start] Writing kubelet configuration to file "/var/lib/kubelet/config.yaml"
[kubelet-start] Starting the kubelet
[control-plane] Using manifest folder "/etc/kubernetes/manifests"
[control-plane] Creating static Pod manifest for "kube-apiserver"
[control-plane] Creating static Pod manifest for "kube-controller-manager"
[control-plane] Creating static Pod manifest for "kube-scheduler"
[etcd] Creating static Pod manifest for local etcd in "/etc/kubernetes/manifests"
[wait-control-plane] Waiting for the kubelet to boot up the control plane as static Pods from directory "/etc/kubernetes/manifests". This can take up to 4m0s
[apiclient] All control plane components are healthy after 23.511845 seconds
[upload-config] Storing the configuration used in ConfigMap "kubeadm-config" in the "kube-system" Namespace
[kubelet] Creating a ConfigMap "kubelet-config" in namespace kube-system with the configuration for the kubelets in the cluster
[upload-certs] Skipping phase. Please see --upload-certs
[mark-control-plane] Marking the node k8s-master01 as control-plane by adding the labels: [node-role.kubernetes.io/control-plane node.kubernetes.io/exclude-from-external-load-balancers]
[mark-control-plane] Marking the node k8s-master01 as control-plane by adding the taints [node-role.kubernetes.io/control-plane:NoSchedule]
[bootstrap-token] Using token: 8m1501.pnhgjv7cbs7lg5m8
[bootstrap-token] Configuring bootstrap tokens, cluster-info ConfigMap, RBAC Roles
[bootstrap-token] Configured RBAC rules to allow Node Bootstrap tokens to get nodes
[bootstrap-token] Configured RBAC rules to allow Node Bootstrap tokens to post CSRs in order for nodes to get long term certificate credentials
[bootstrap-token] Configured RBAC rules to allow the csrapprover controller automatically approve CSRs from a Node Bootstrap Token
[bootstrap-token] Configured RBAC rules to allow certificate rotation for all node client certificates in the cluster
[bootstrap-token] Creating the "cluster-info" ConfigMap in the "kube-public" namespace
[kubelet-finalize] Updating "/etc/kubernetes/kubelet.conf" to point to a rotatable kubelet client certificate and key
[addons] Applied essential addon: CoreDNS
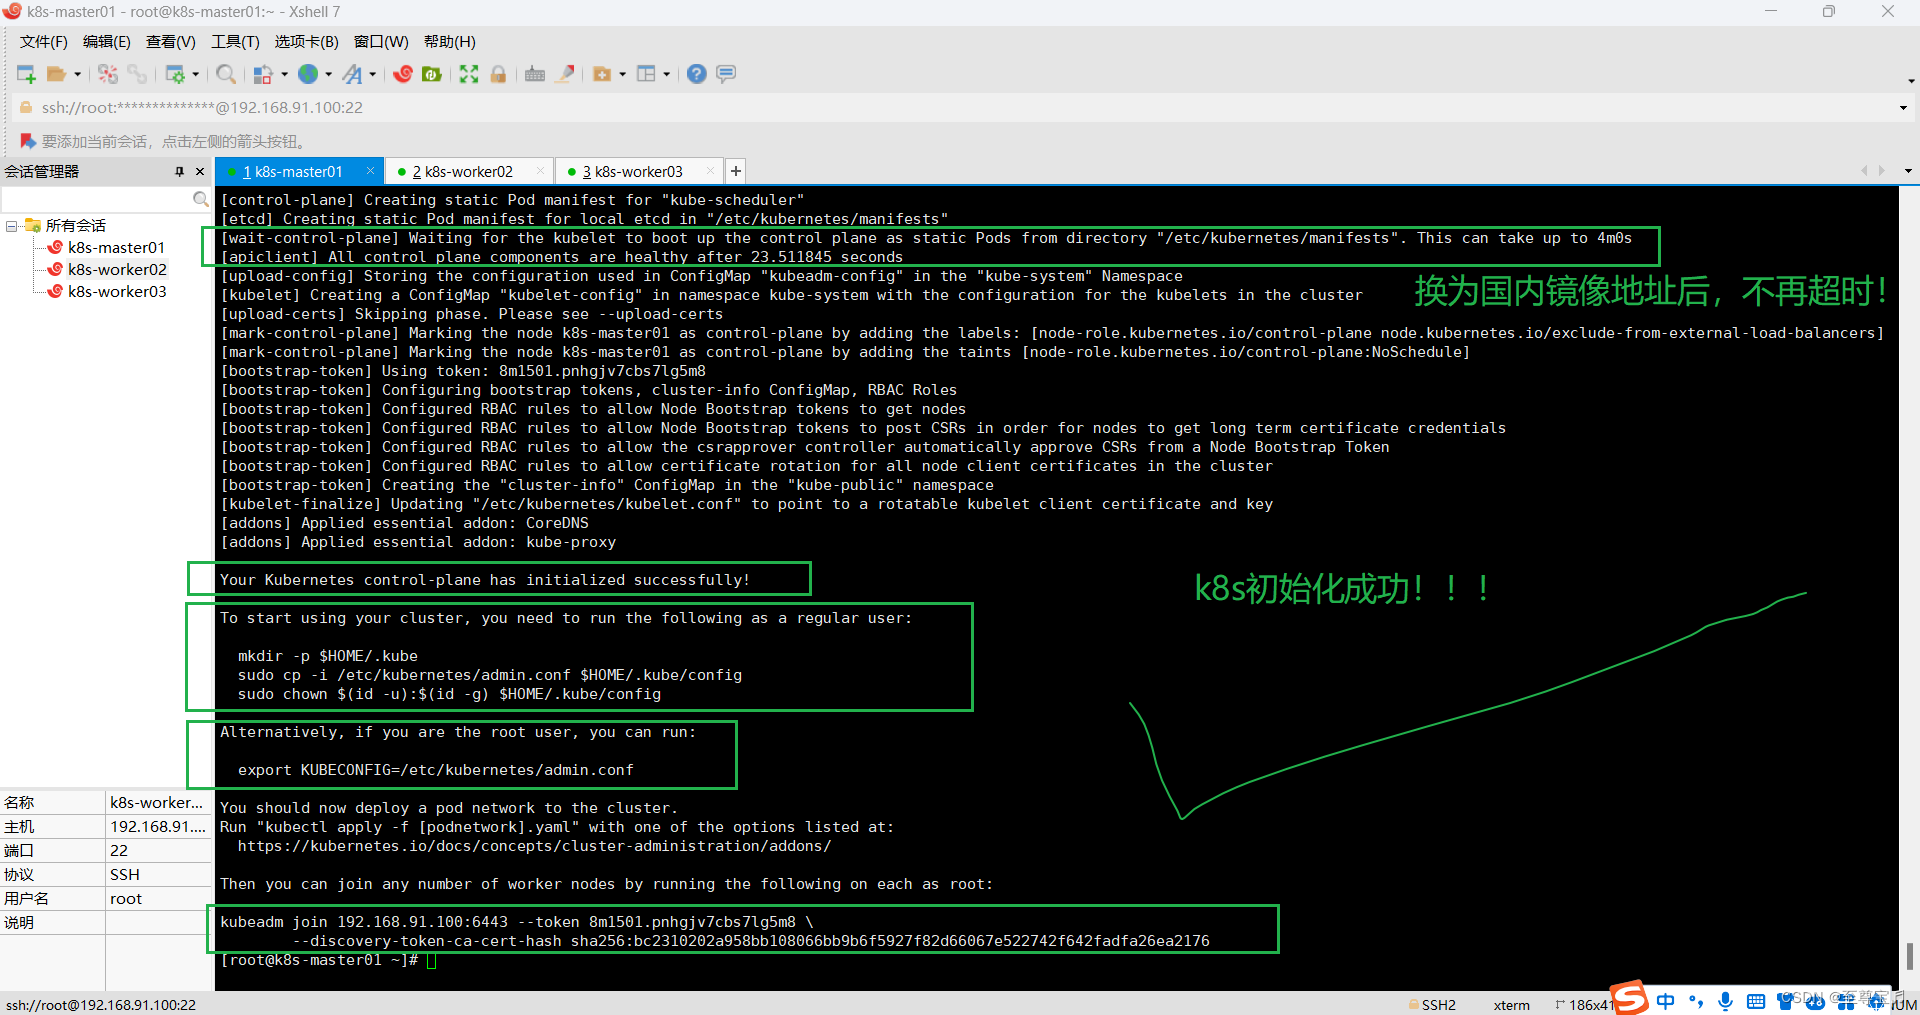
[addons] Applied essential addon: kube-proxyYour Kubernetes control-plane has initialized successfully!To start using your cluster, you need to run the following as a regular user:mkdir -p $HOME/.kubesudo cp -i /etc/kubernetes/admin.conf $HOME/.kube/configsudo chown $(id -u):$(id -g) $HOME/.kube/configAlternatively, if you are the root user, you can run:export KUBECONFIG=/etc/kubernetes/admin.confYou should now deploy a pod network to the cluster.
Run "kubectl apply -f [podnetwork].yaml" with one of the options listed at:https://kubernetes.io/docs/concepts/cluster-administration/addons/Then you can join any number of worker nodes by running the following on each as root:kubeadm join 192.168.91.100:6443 --token 8m1501.pnhgjv7cbs7lg5m8 \--discovery-token-ca-cert-hash sha256:bc2310202a958bb108066bb9b6f5927f82d66067e522742f642fadfa26ea2176
[root@k8s-master01 ~]#
k8s集群初始化终于成功了。
初始化过程说明:
- [preflight] kubeadm 执行初始化前的检查。
- [kubelet-start] 生成kubelet的配置文件”/var/lib/kubelet/config.yaml”
- [certificates] 生成相关的各种token和证书
- [kubeconfig] 生成 KubeConfig 文件,kubelet 需要这个文件与 Master 通信
- [control-plane] 安装 Master 组件,会从指定的 Registry 下载组件的 Docker 镜像。
- [bootstraptoken] 生成token记录下来,后边使用kubeadm join往集群中添加节点时会用到
- [addons] 安装附加组件 kube-proxy 和 kube-dns。 Kubernetes Master 初始化成功,提示如何配置常规用户使用kubectl访问集群。 提示如何安装 Pod 网络。 提示如何注册其他节点到 Cluster。
十七.master节点启动k8s集群;
1.master节点必要的环境配置;
# 普通用户操作
mkdir -p $HOME/.kube
sudo cp -i /etc/kubernetes/admin.conf $HOME/.kube/config
sudo chown $(id -u):$(id -g) $HOME/.kube/config# root用户配置环境变量
export KUBECONFIG=/etc/kubernetes/admin.conf# 使新配置环境变量生效
source /etc/profile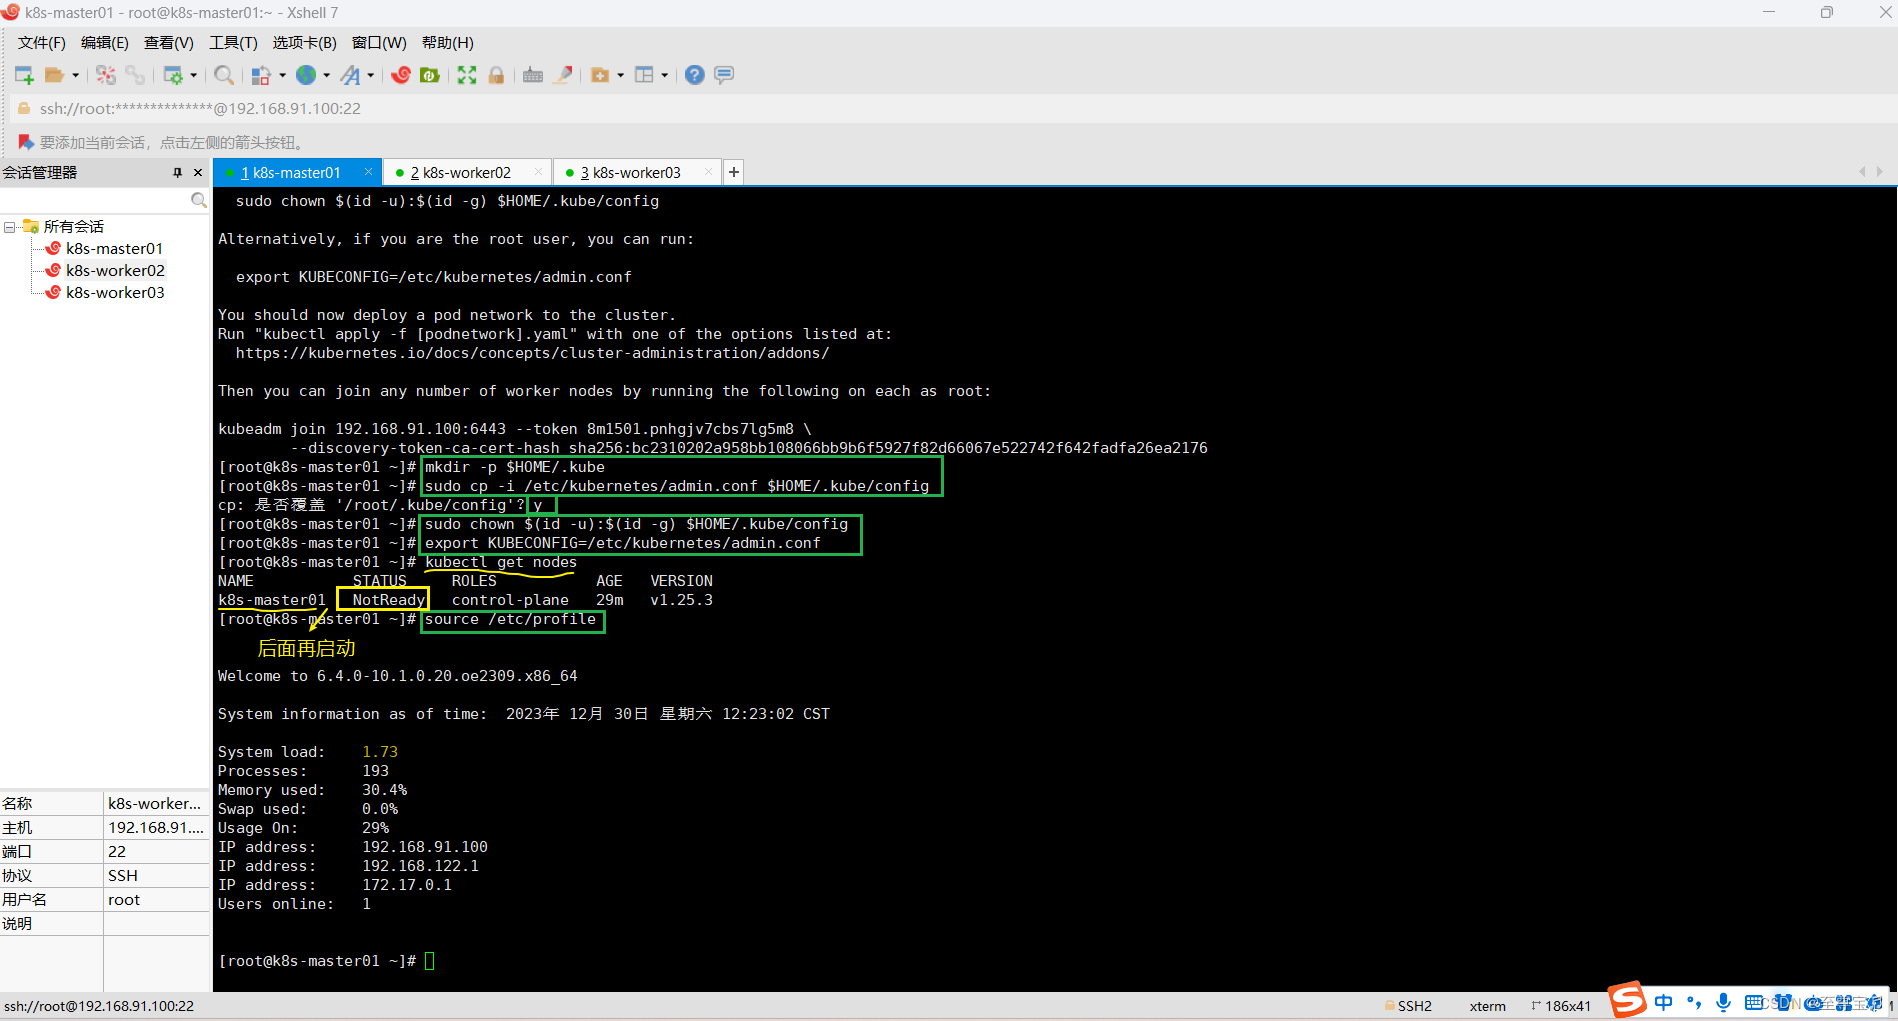
2.两个worker工作节点加入k8s集群;
worker02节点执行join到k8s集群的命令:
kubeadm join 192.168.91.100:6443 --token 8m1501.pnhgjv7cbs7lg5m8 \--discovery-token-ca-cert-hash sha256:bc2310202a958bb108066bb9b6f5927f82d66067e522742f642fadfa26ea2176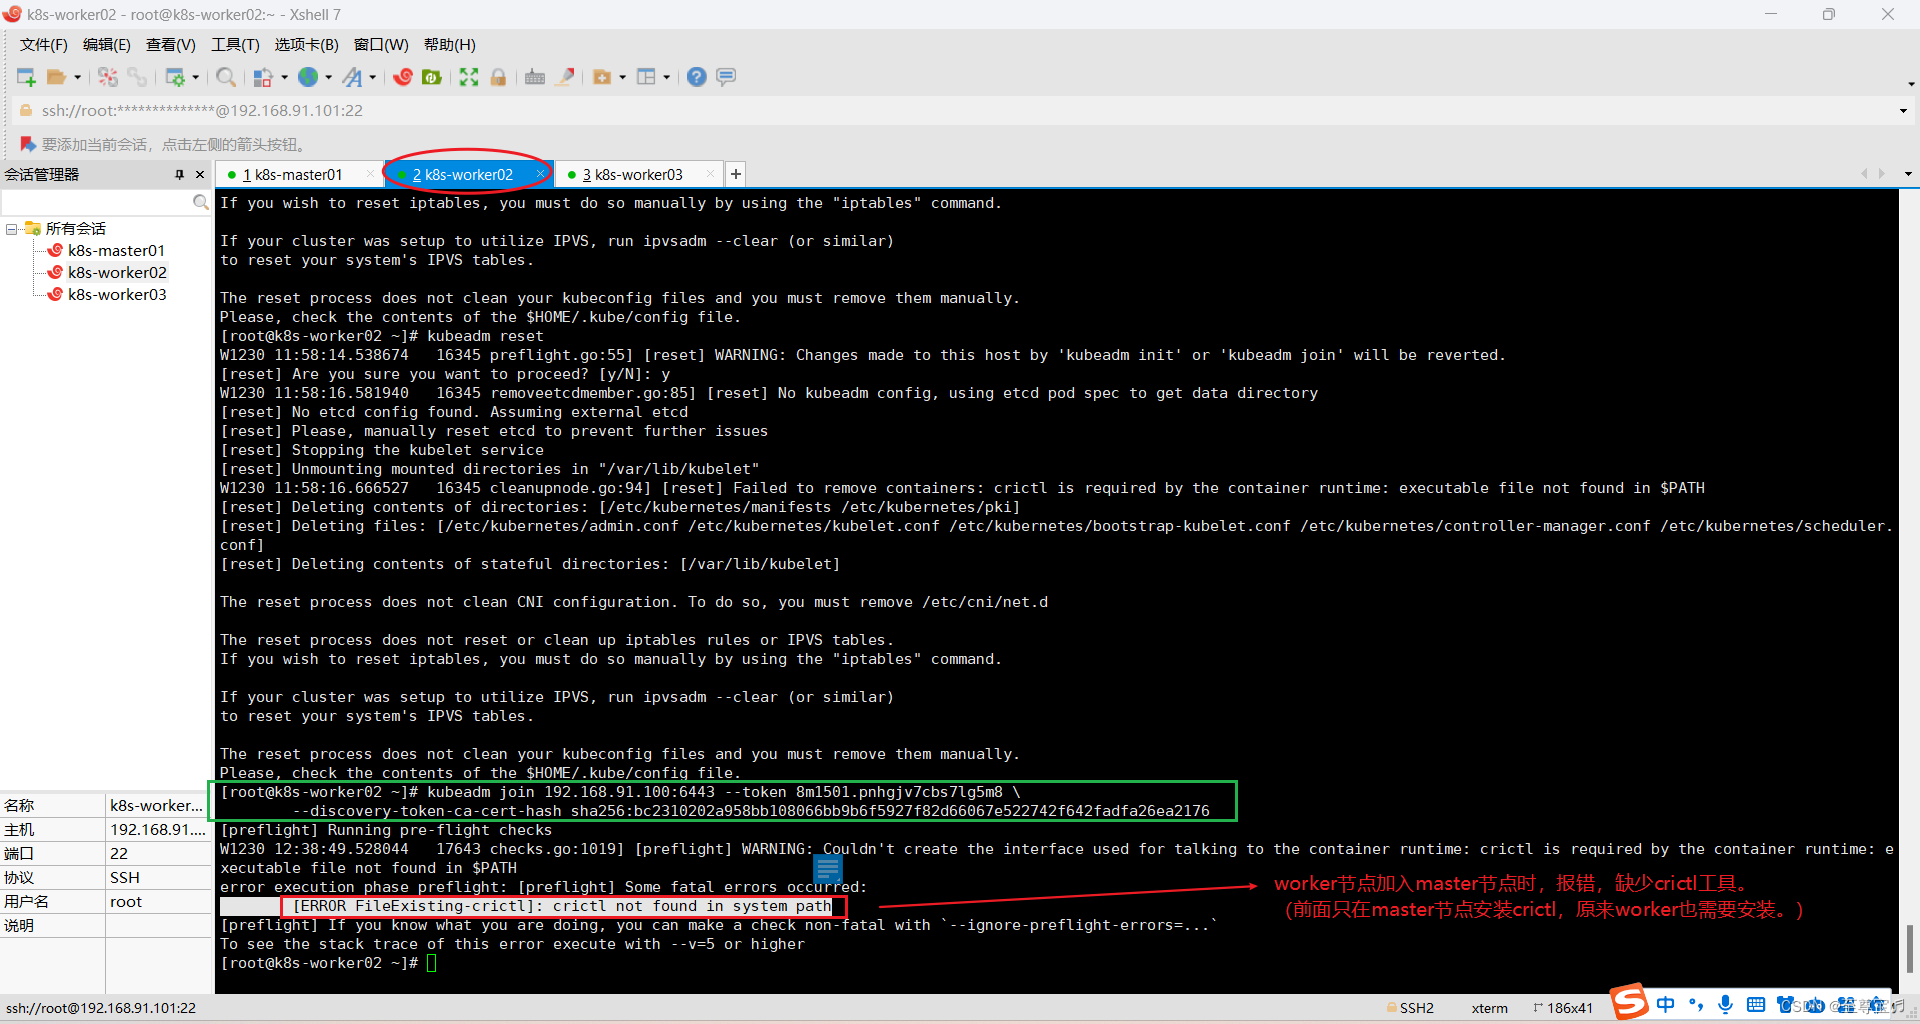
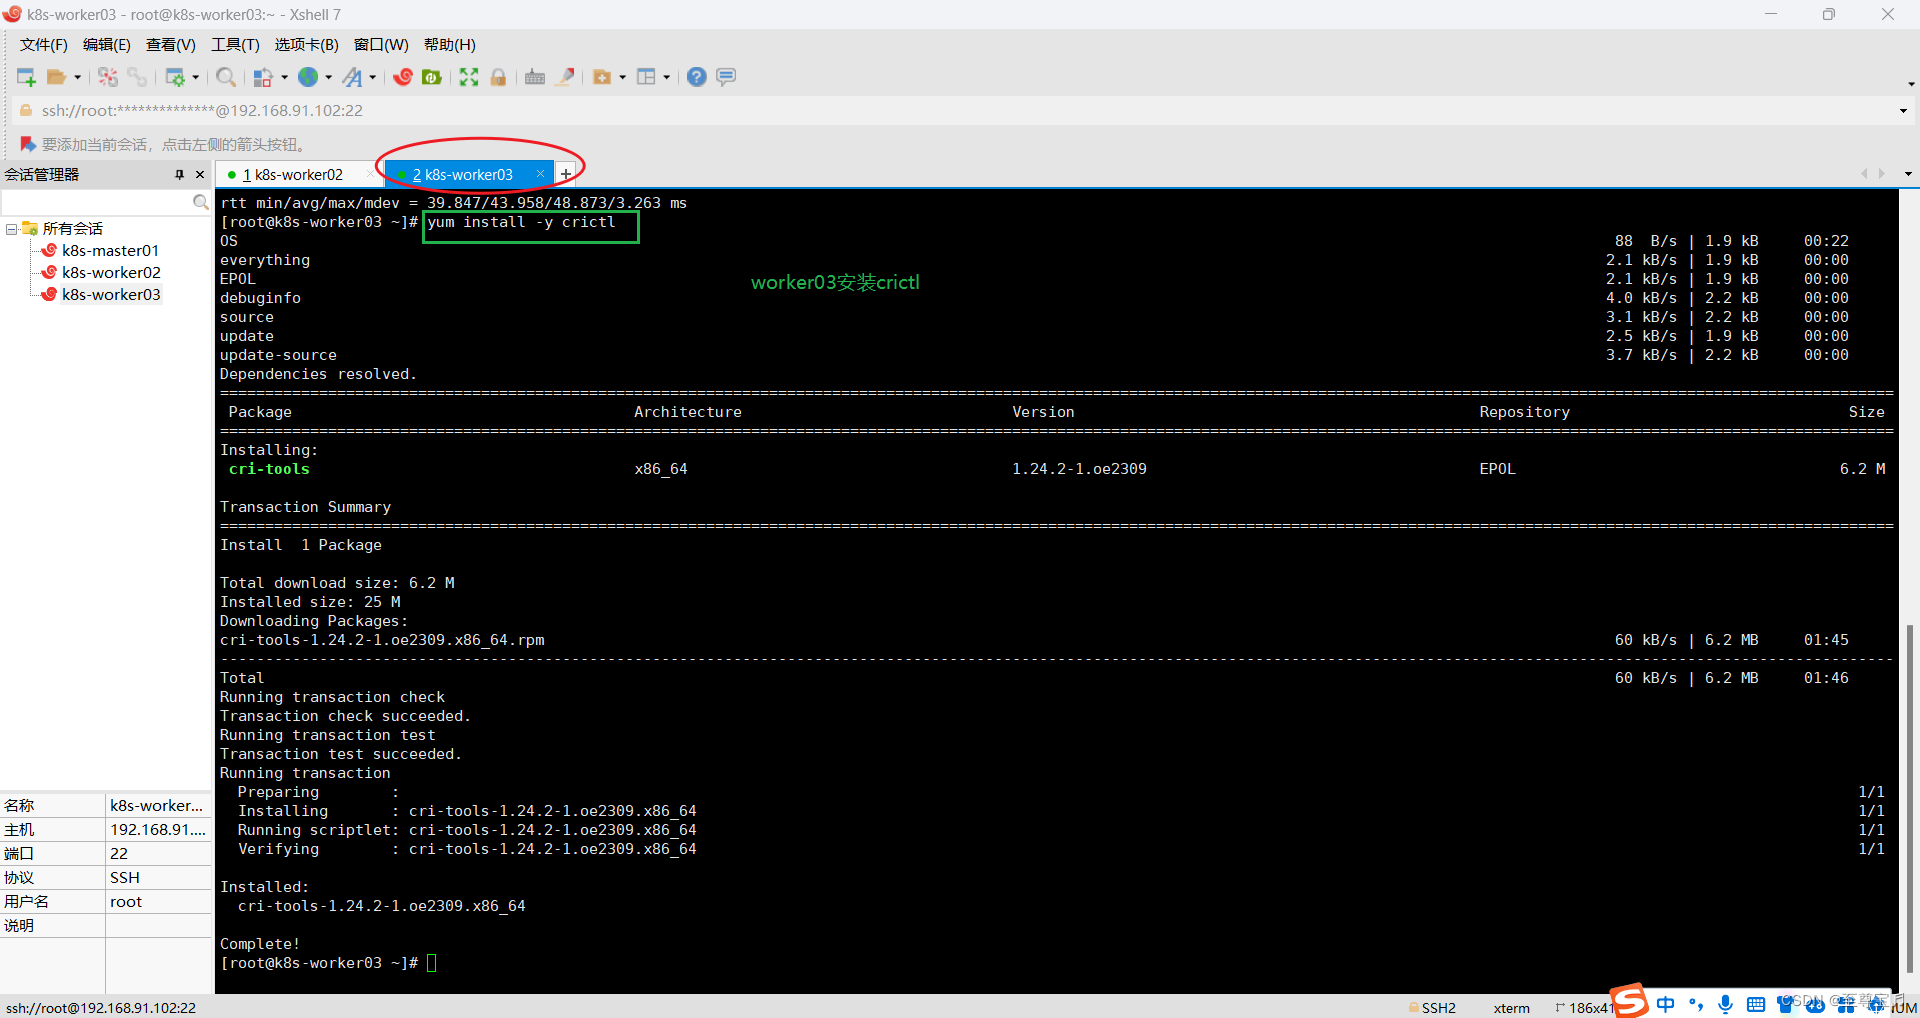
(1)所有woker节点(k8s-worker02和k8s-worker03)都要安装crictl;
k8s-worker02缺少crictl,执行安装命令:
yum install -y crictl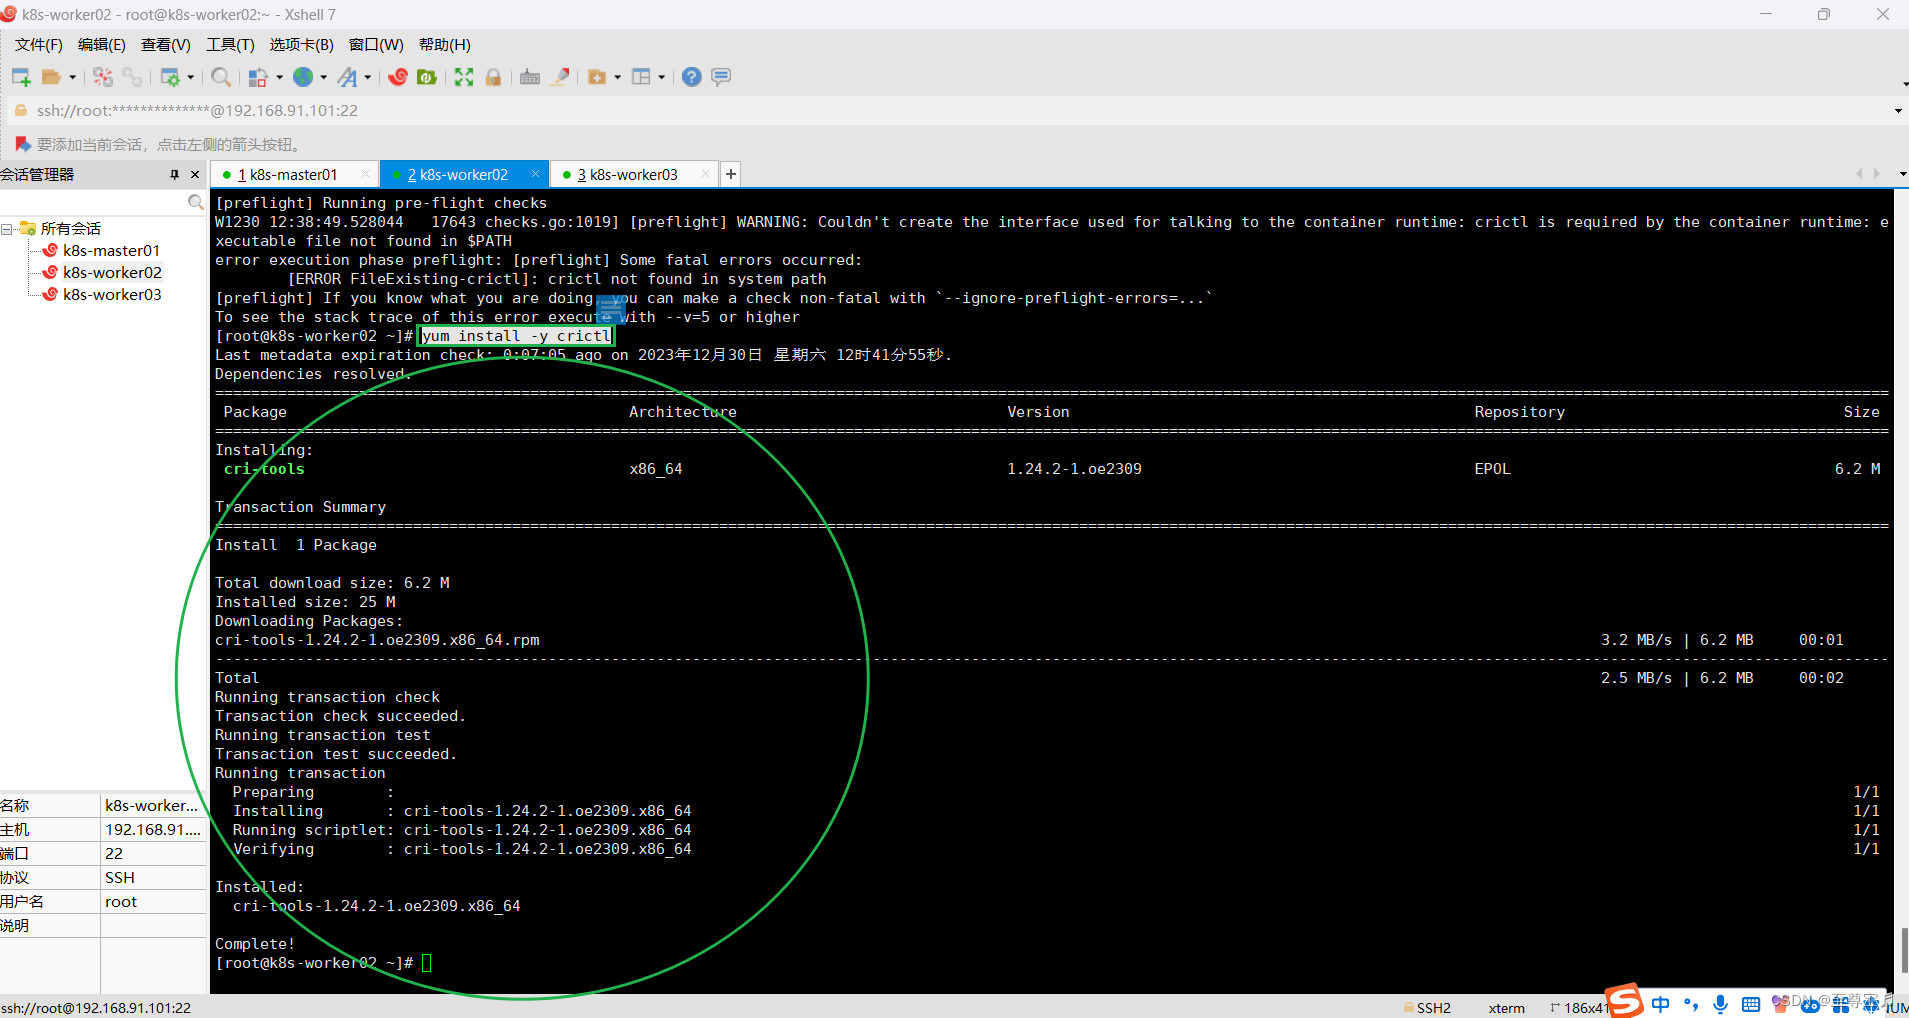
(2)所有worker节点都安装containerd;

# 全部worker节点查看containerd状态
systemctl status containerd
因为前面master节点安装过containerd,所以此处按照之前的方法,直接安装了。
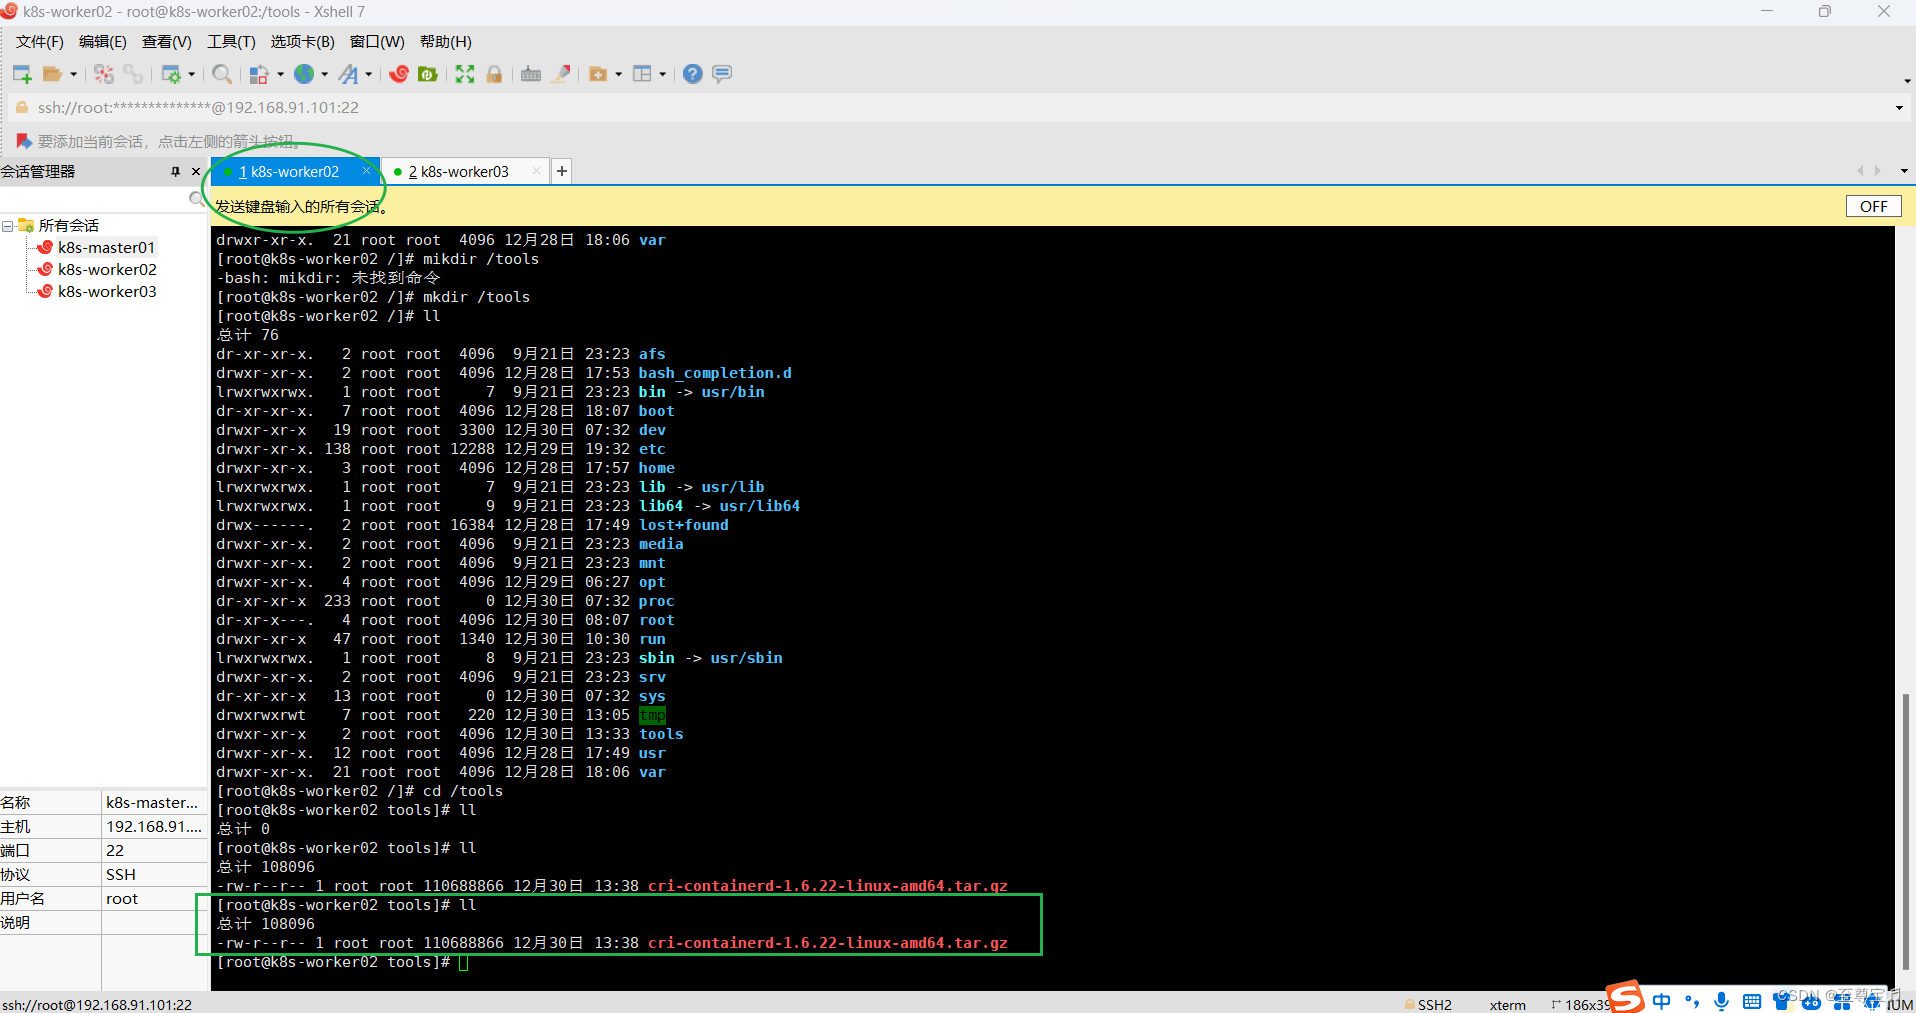
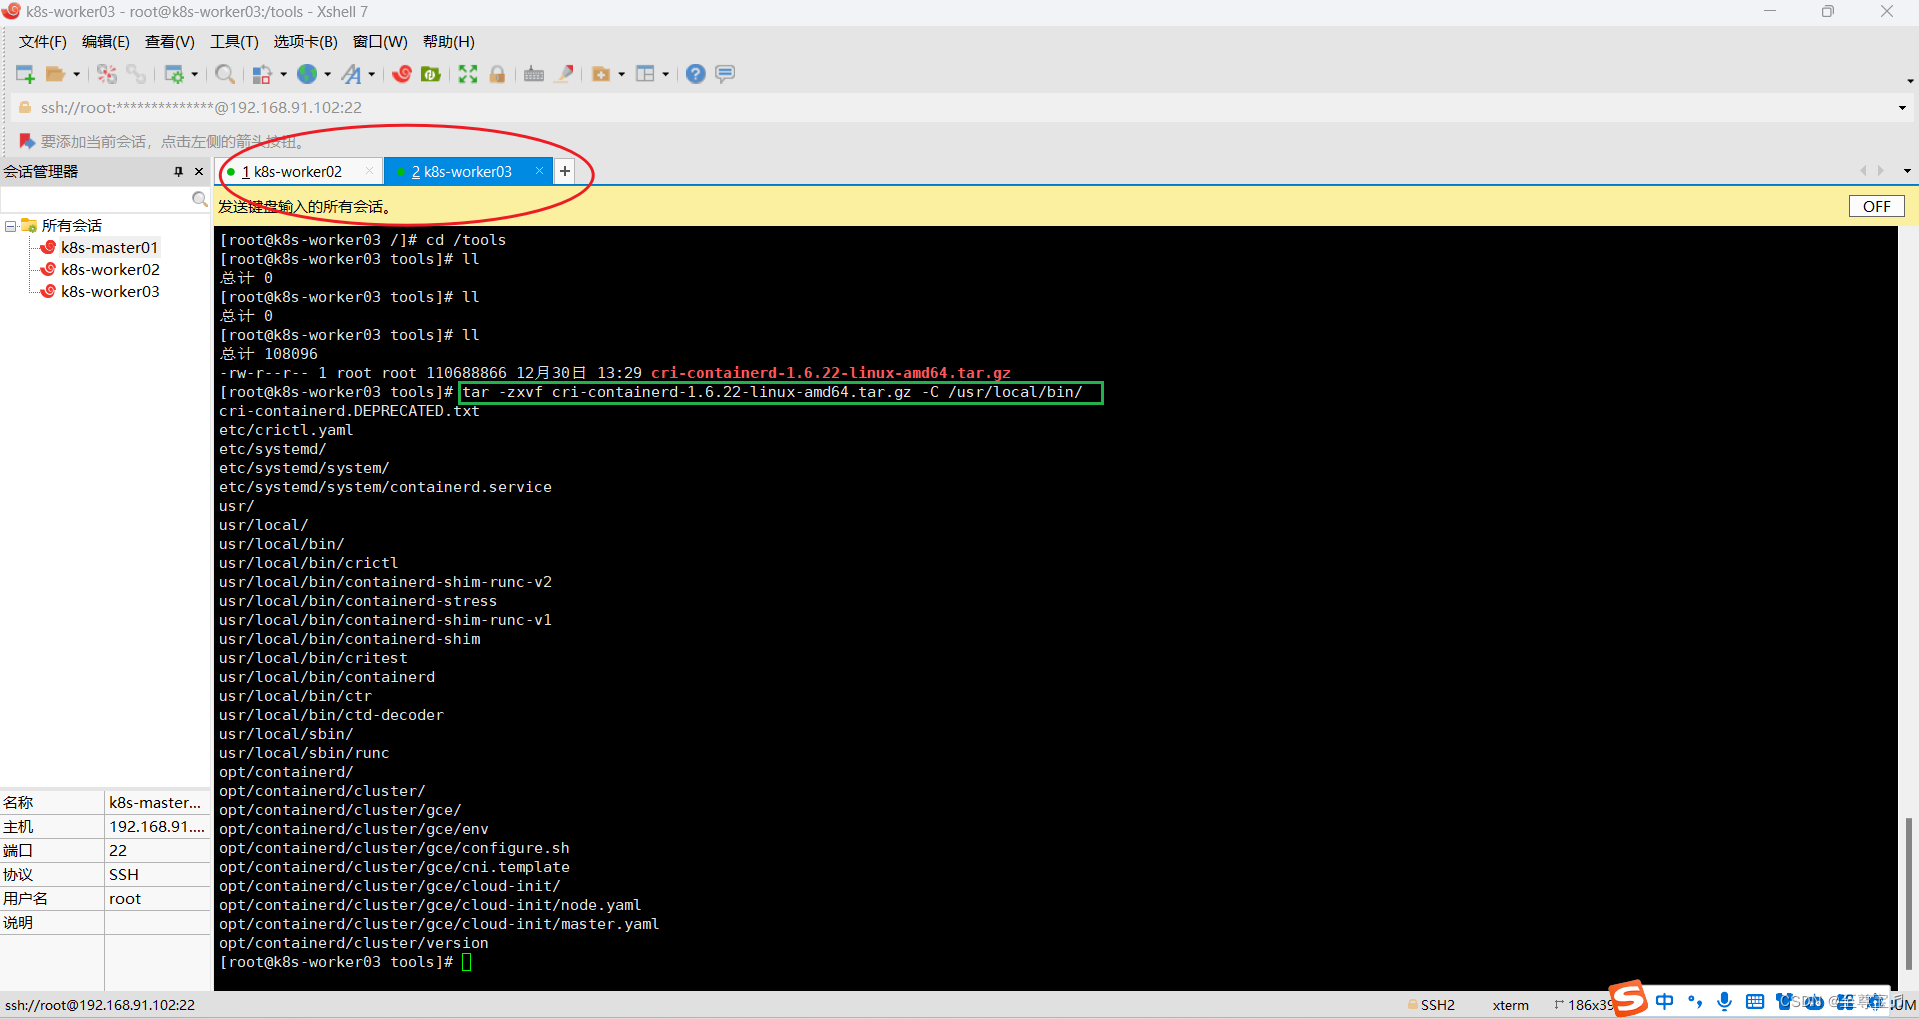
①所有worker节点上传,解压“cri-containerd-1.6.22-linux-amd64.tar.gz”;
# 在根目录创建"/tools"目录
mkdir /tools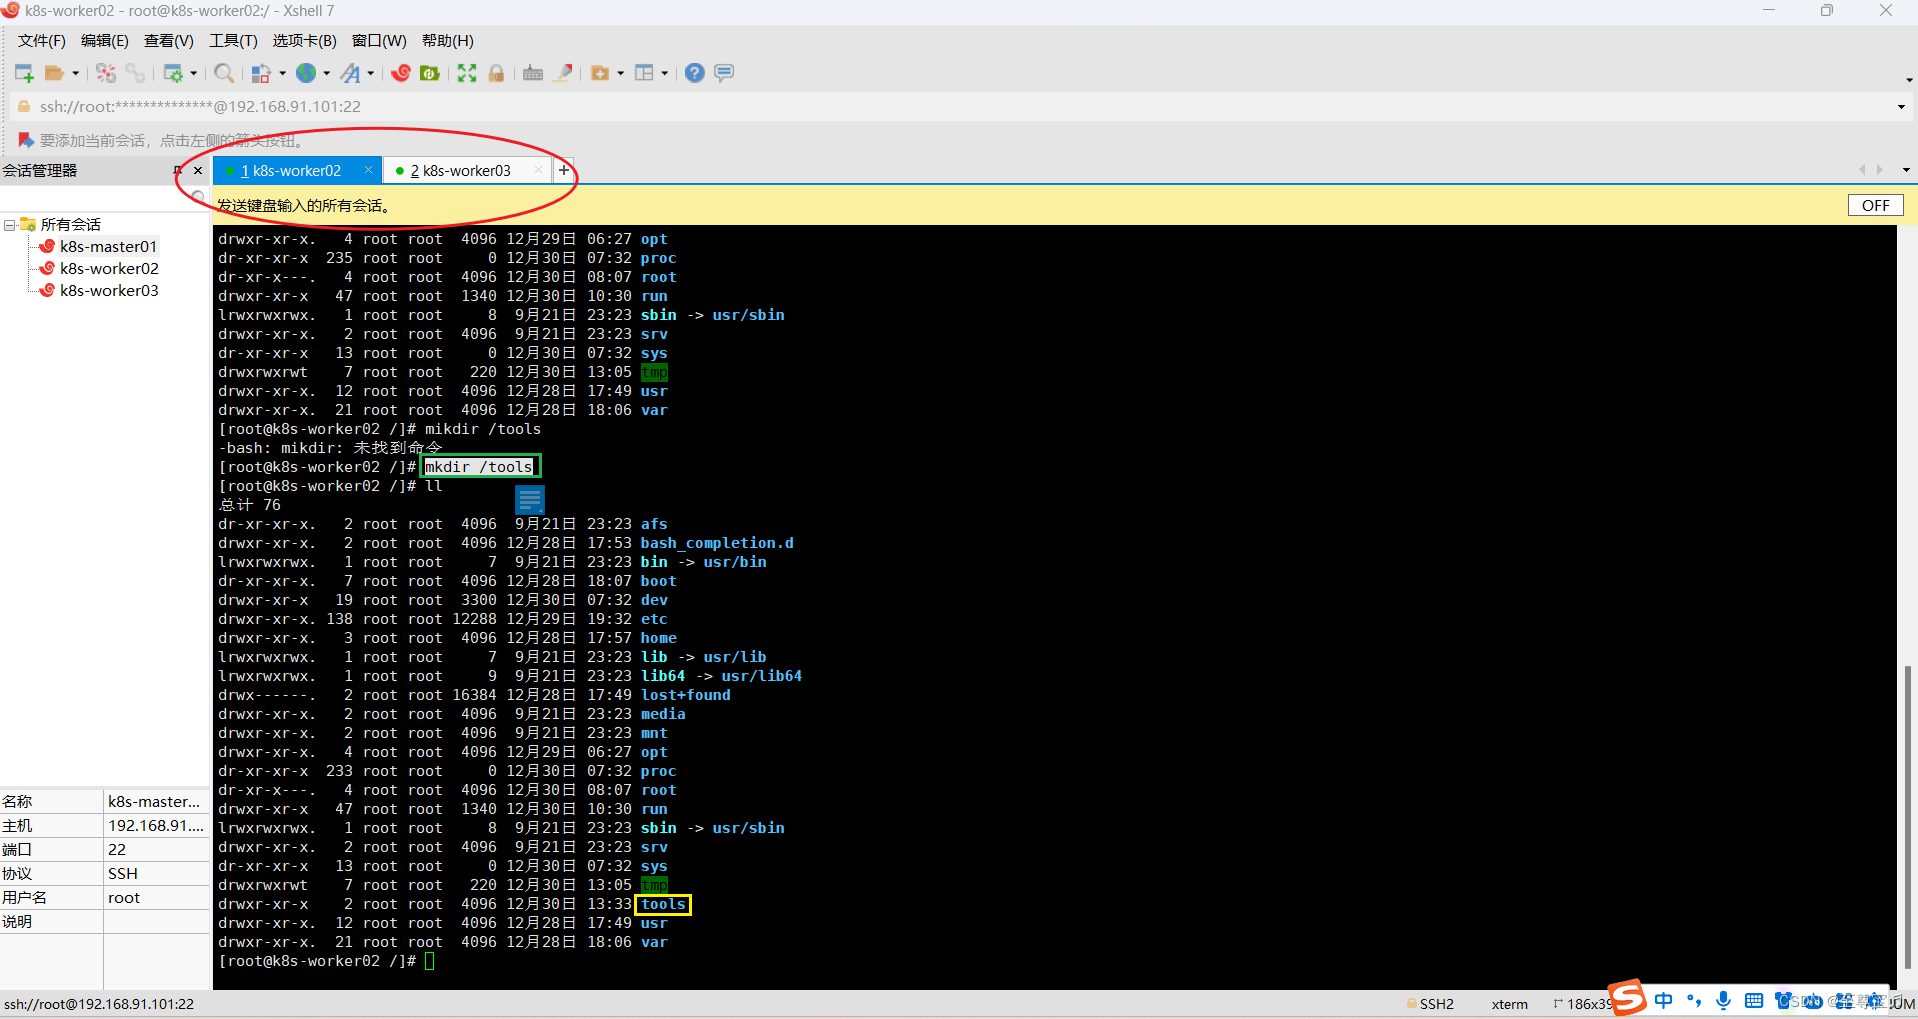
worker02和worker03要分别上传;


②两个worker节点都解压containerd压缩包到“/usr/local/bin/”;
tar -zxvf cri-containerd-1.6.22-linux-amd64.tar.gz -C /usr/local/bin/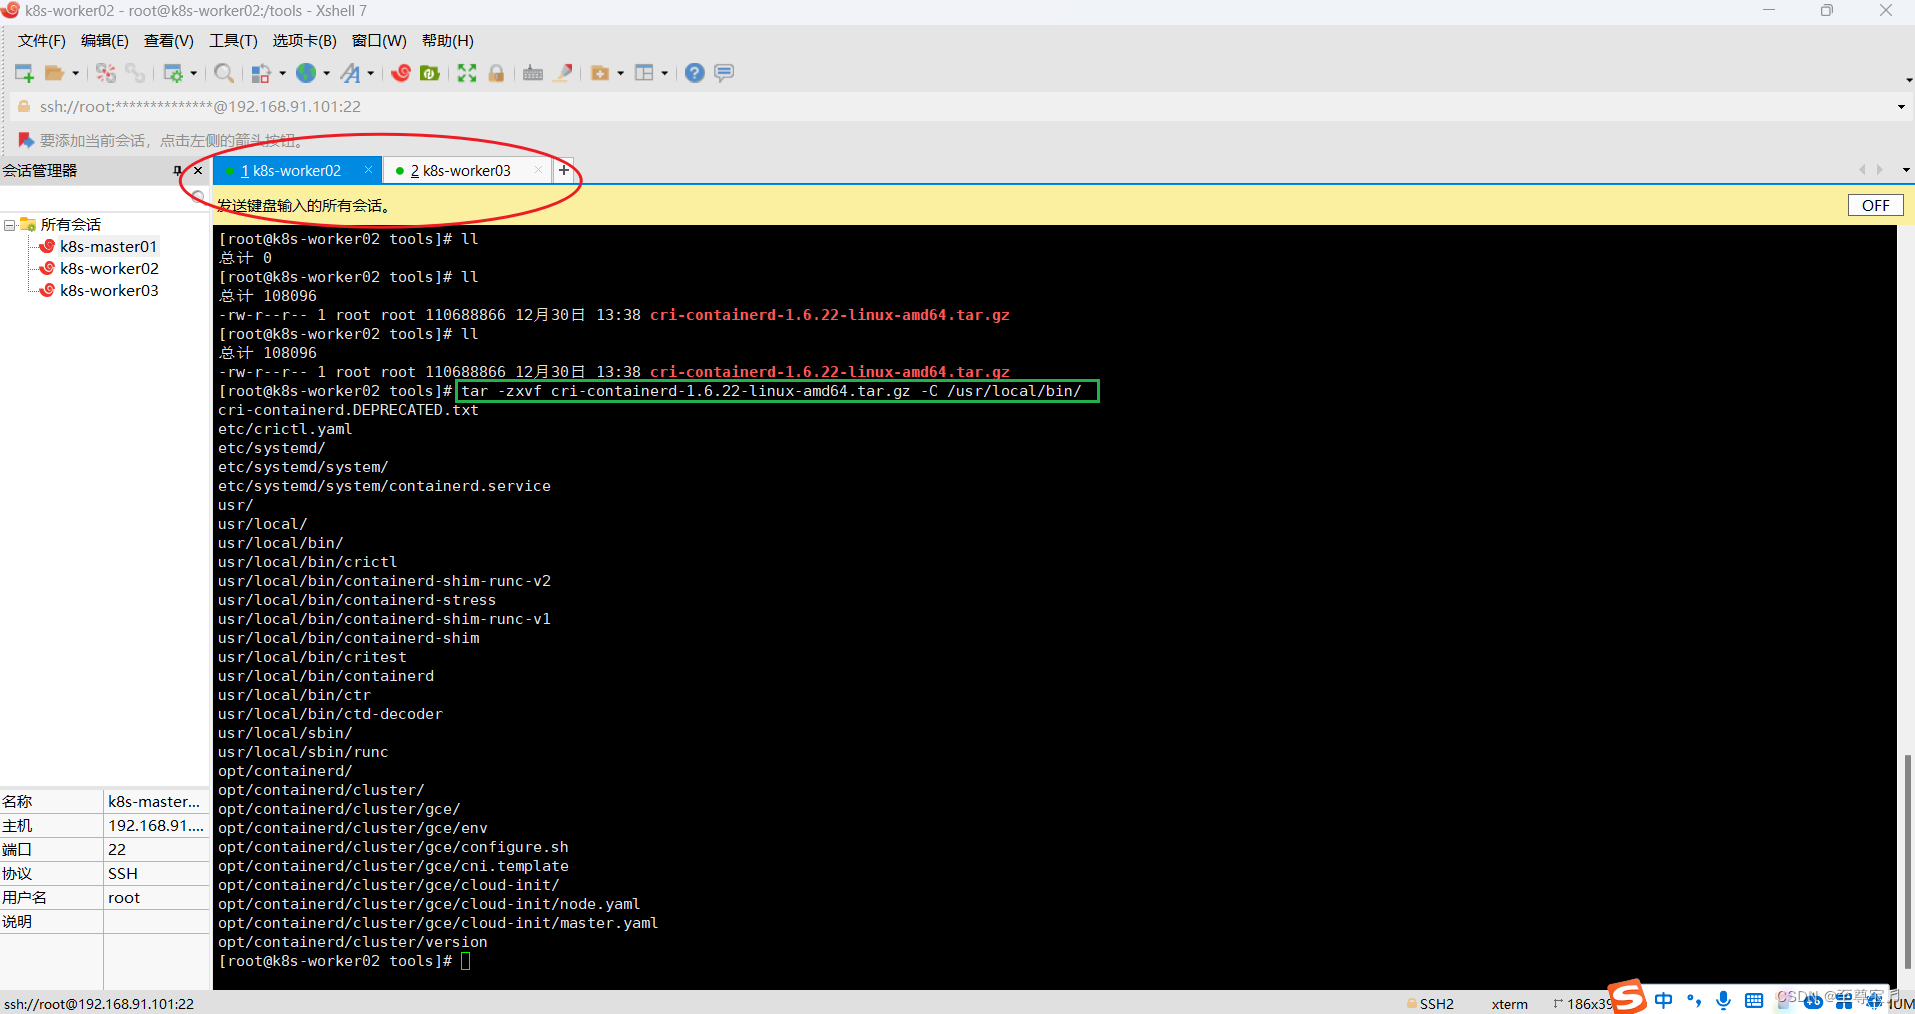
③两个worker节点均拷贝二进制可执行文件到$PATH中;
ll /usr/local/bin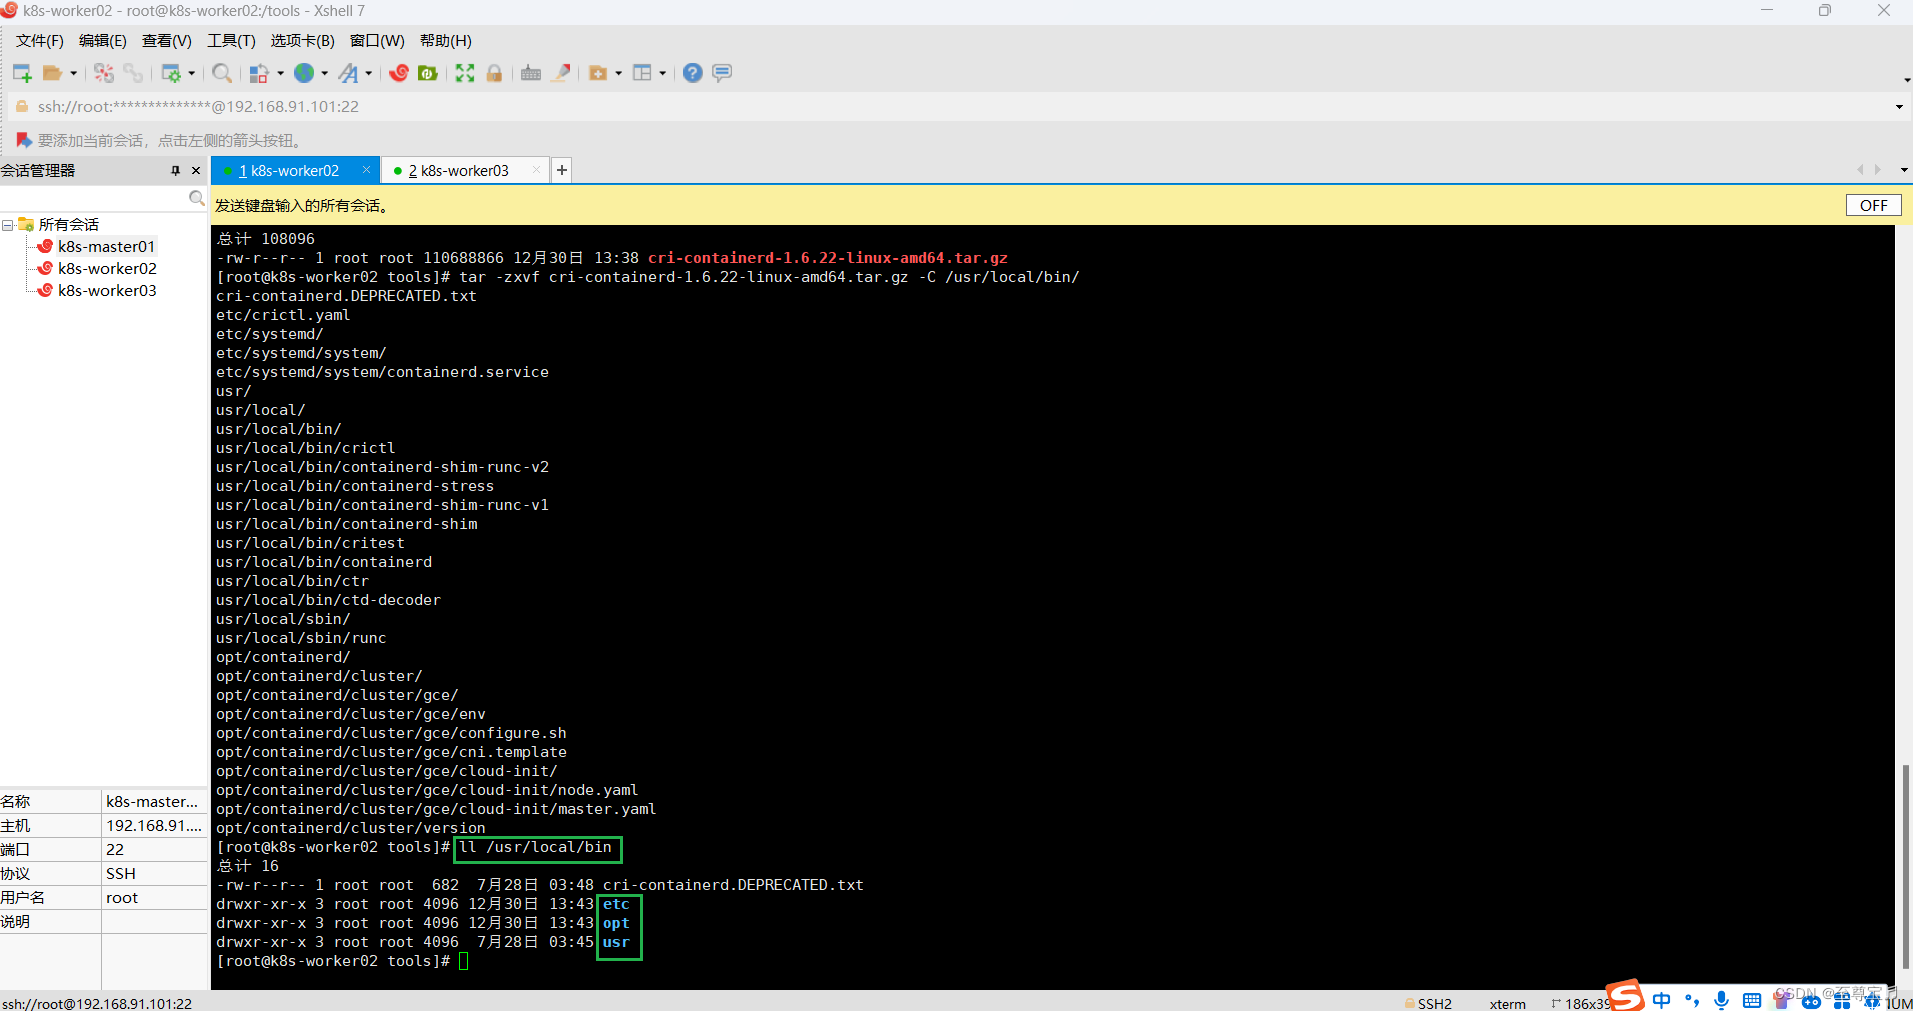
etc目录:主要为containerd服务管理配置文件及cni虚拟网卡配置文件;
opt目录:主要为gce环境中使用containerd配置文件及cni插件;
usr目录:主要为containerd运行时的二进制文件,包含runc;
# 在任意目录执行下面的命令,路径都是从根目录开始计算
cp /usr/local/bin/usr/local/bin/* /usr/local/bin/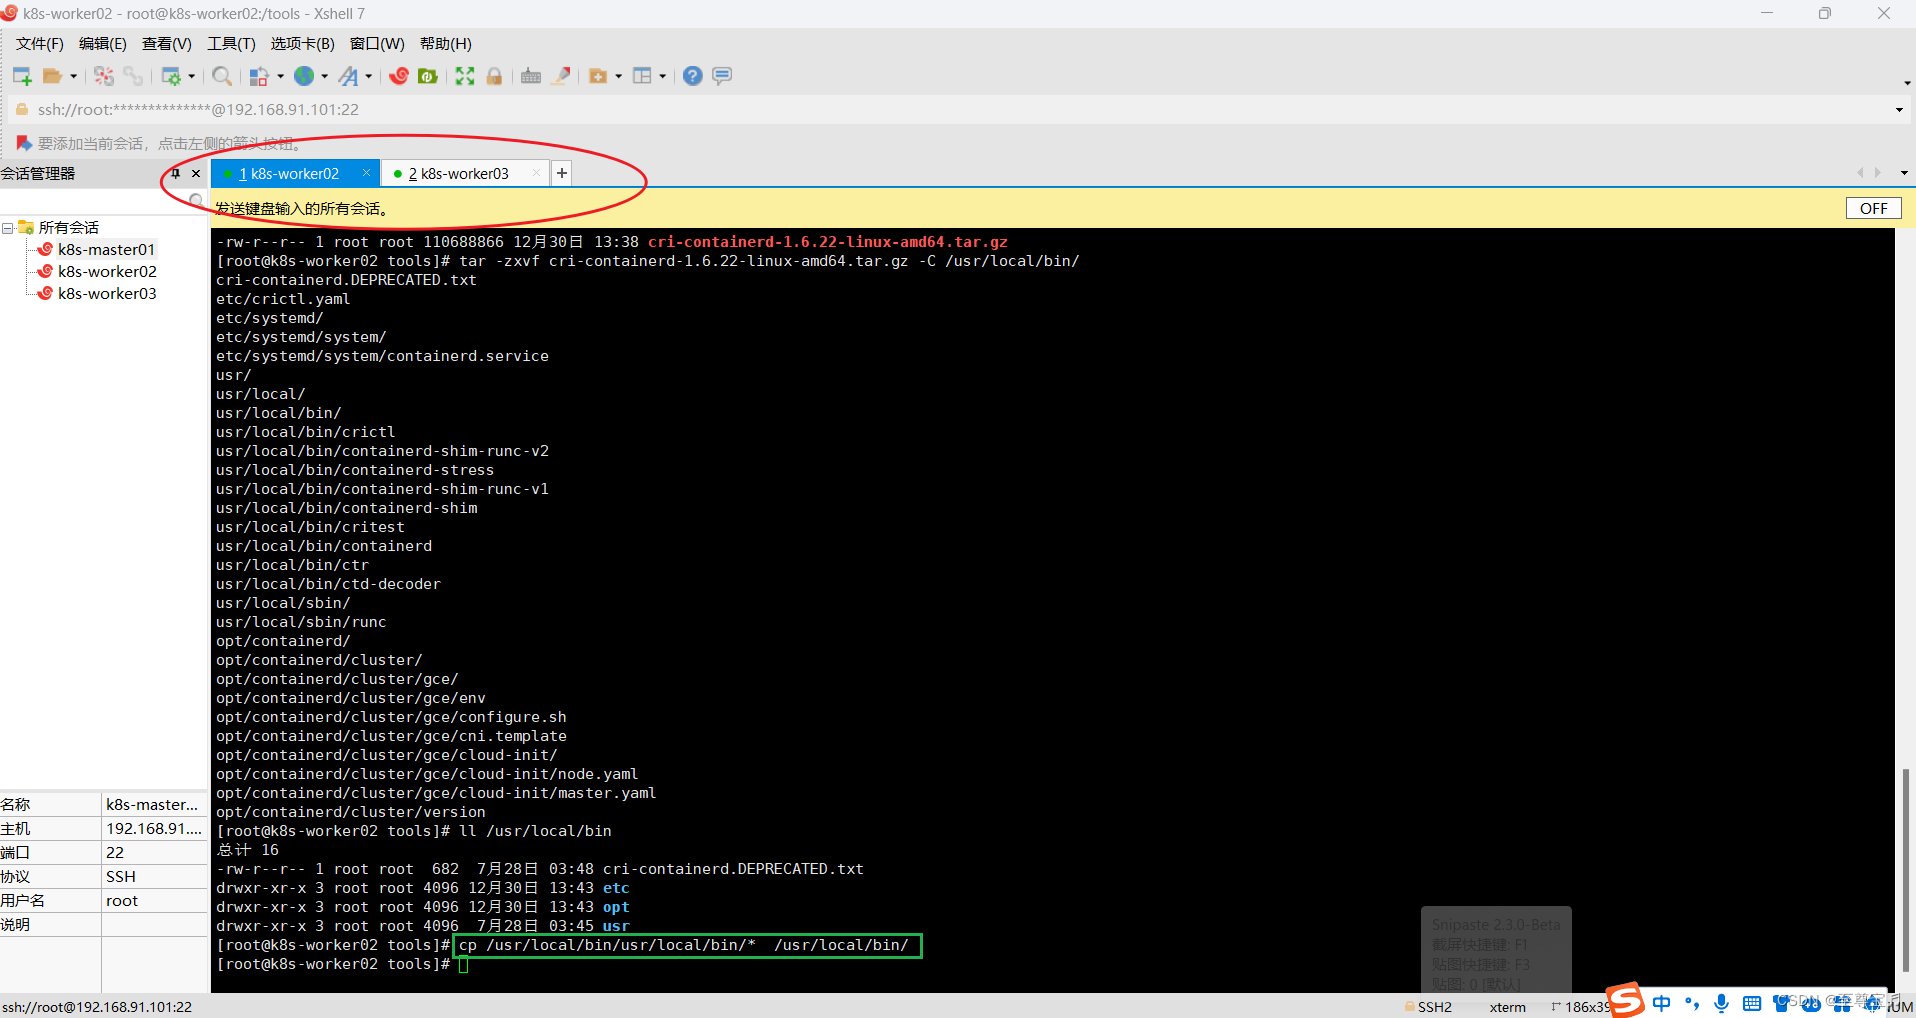
④两个worker节点均赋予关键文件可执行权限,4=读,2=写,1=可执行,加一起就是他的权限。
正确命令如下:
chmod 0755 /usr/bin/containerd*
chmod 0755 /usr/bin/crictl
chmod 0755 /usr/local/bin/ctd-decoder
chmod 0755 /usr/bin/runc
chmod 0755 /usr/local/bin/ctr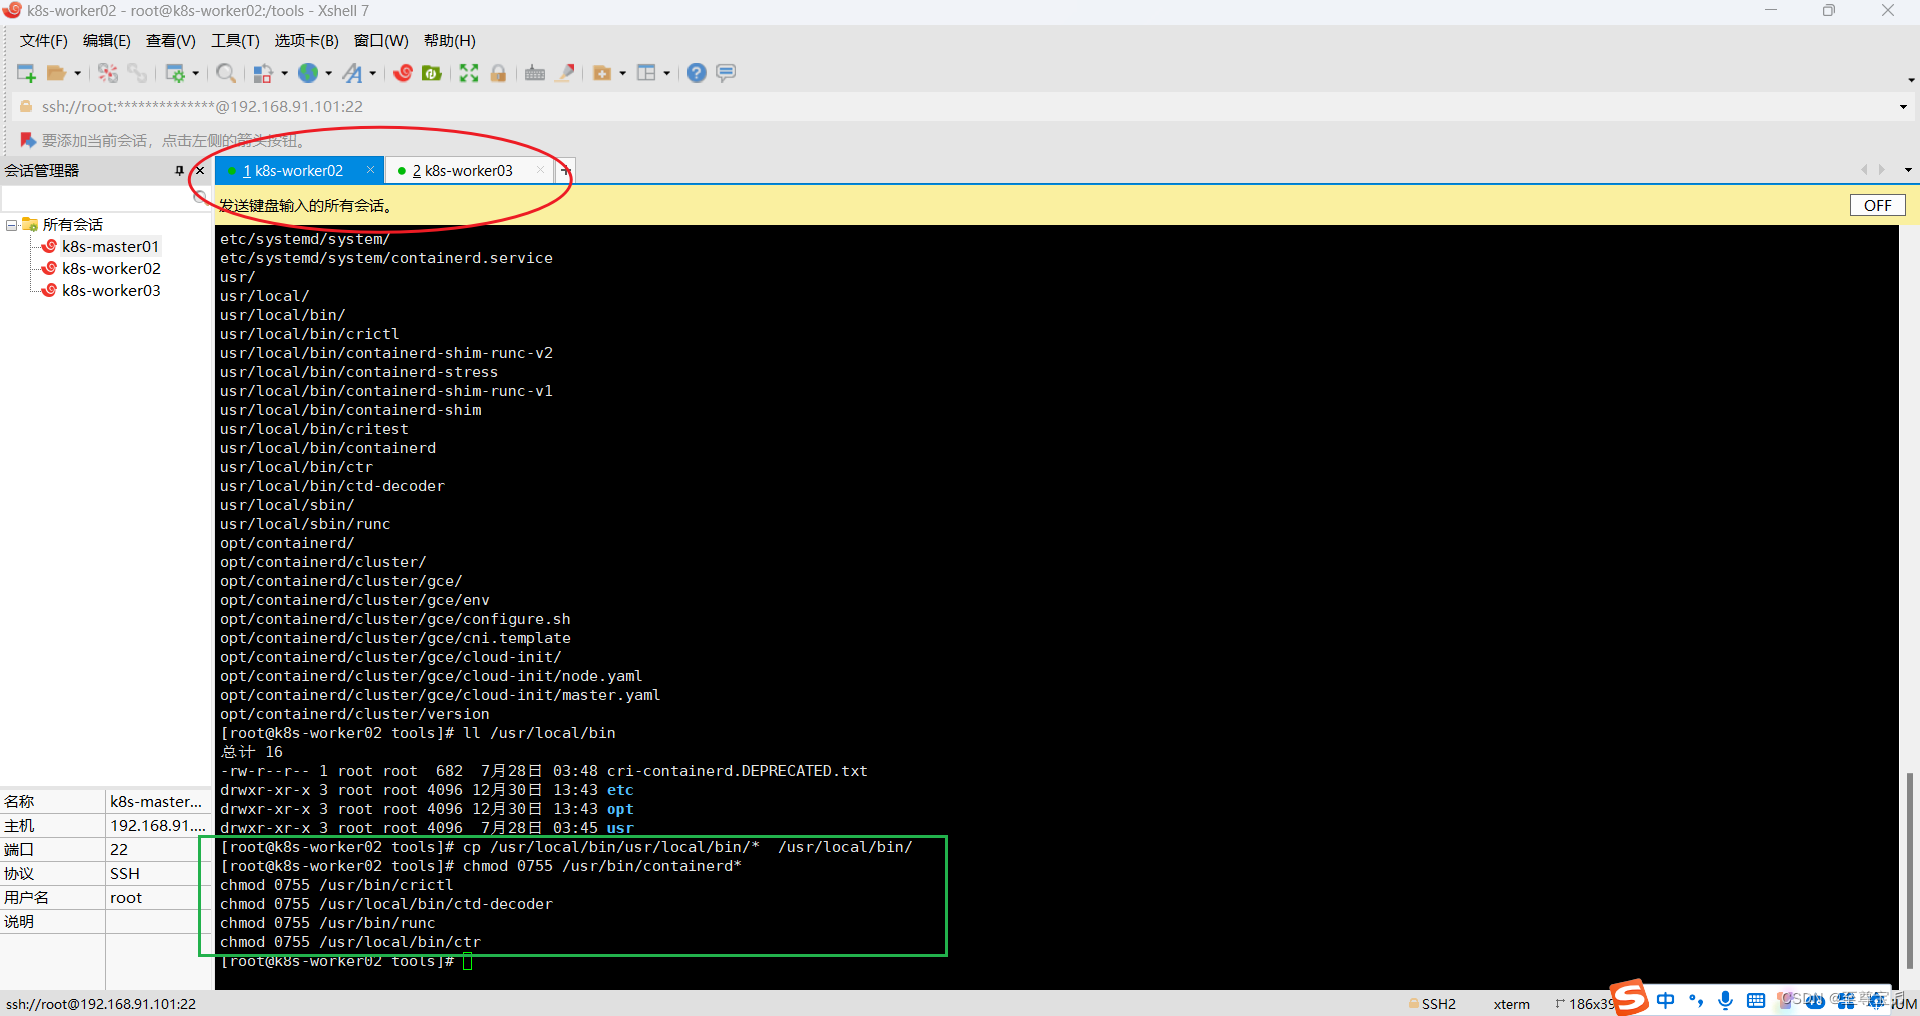
⑤两个worker节点,把上面解压的这个文件"/usr/local/bin/etc/systemd/system/containerd.service",放到systemd的目录下:"/usr/lib/systemd/system/";
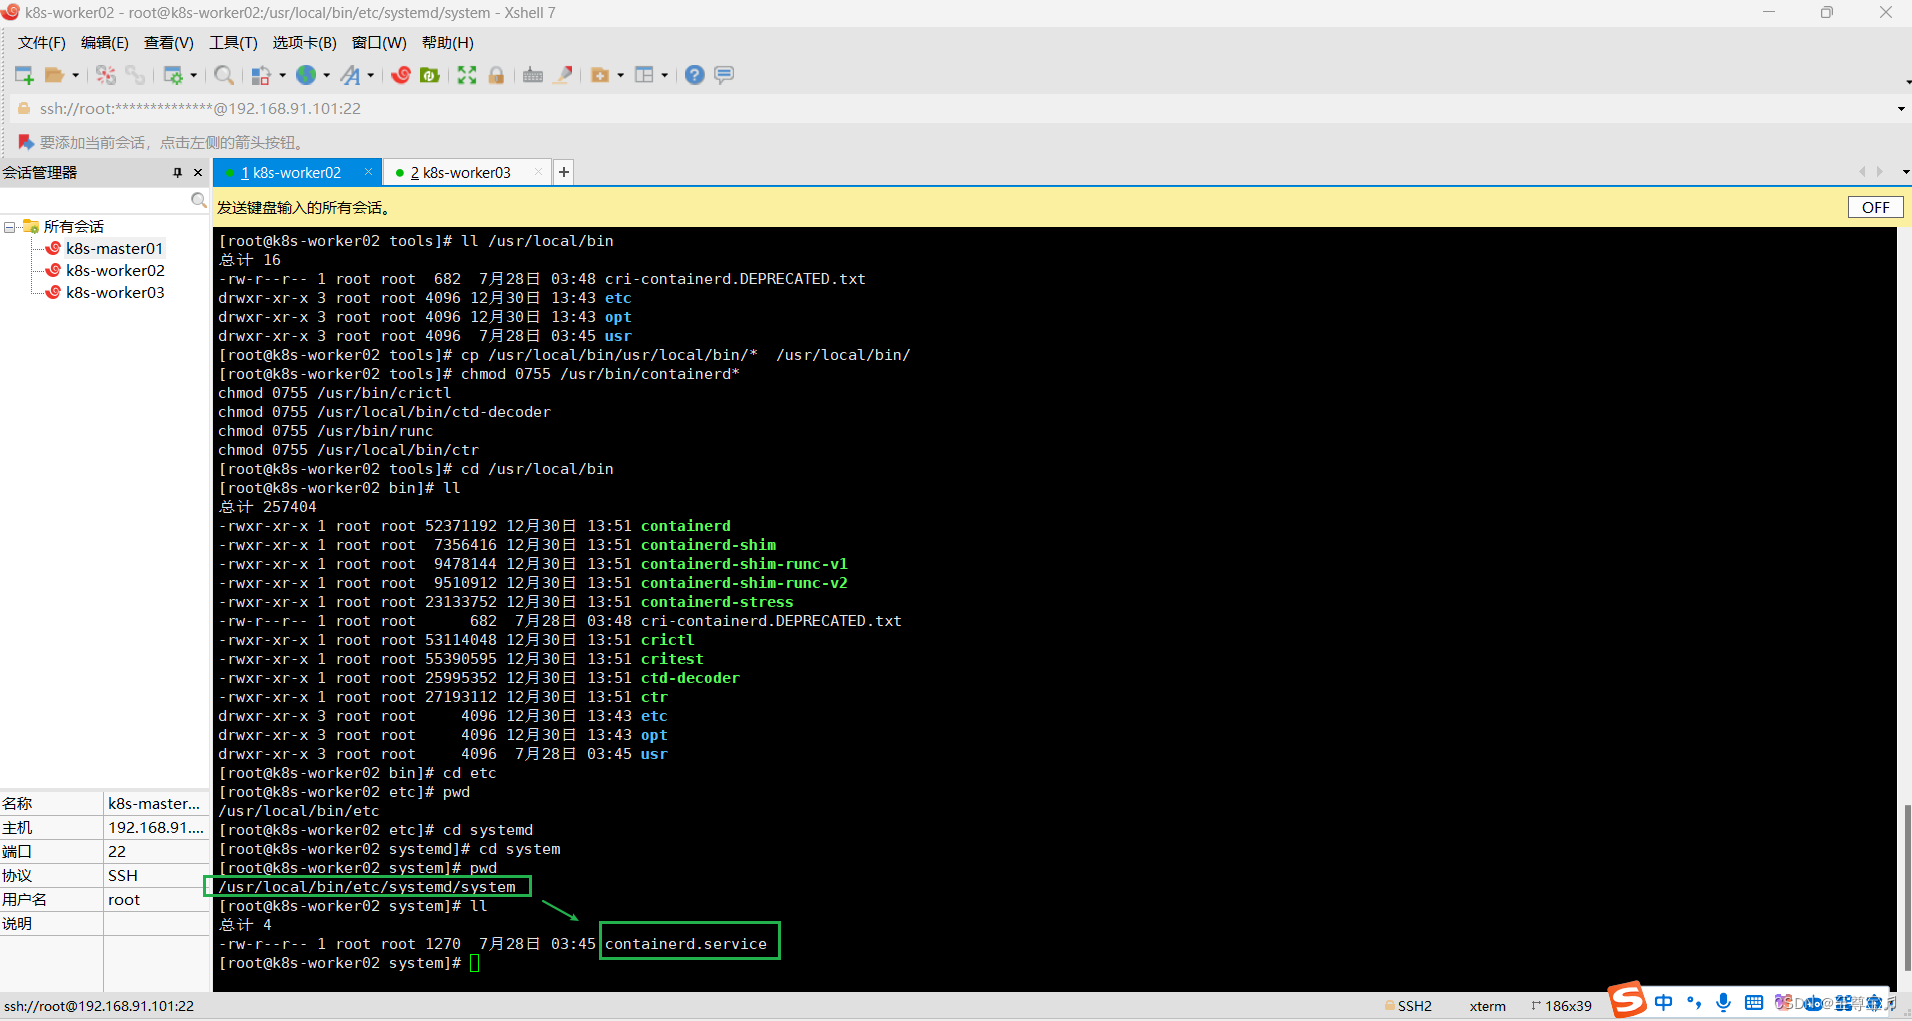
mv /usr/local/bin/etc/systemd/system/containerd.service /usr/lib/systemd/system/ 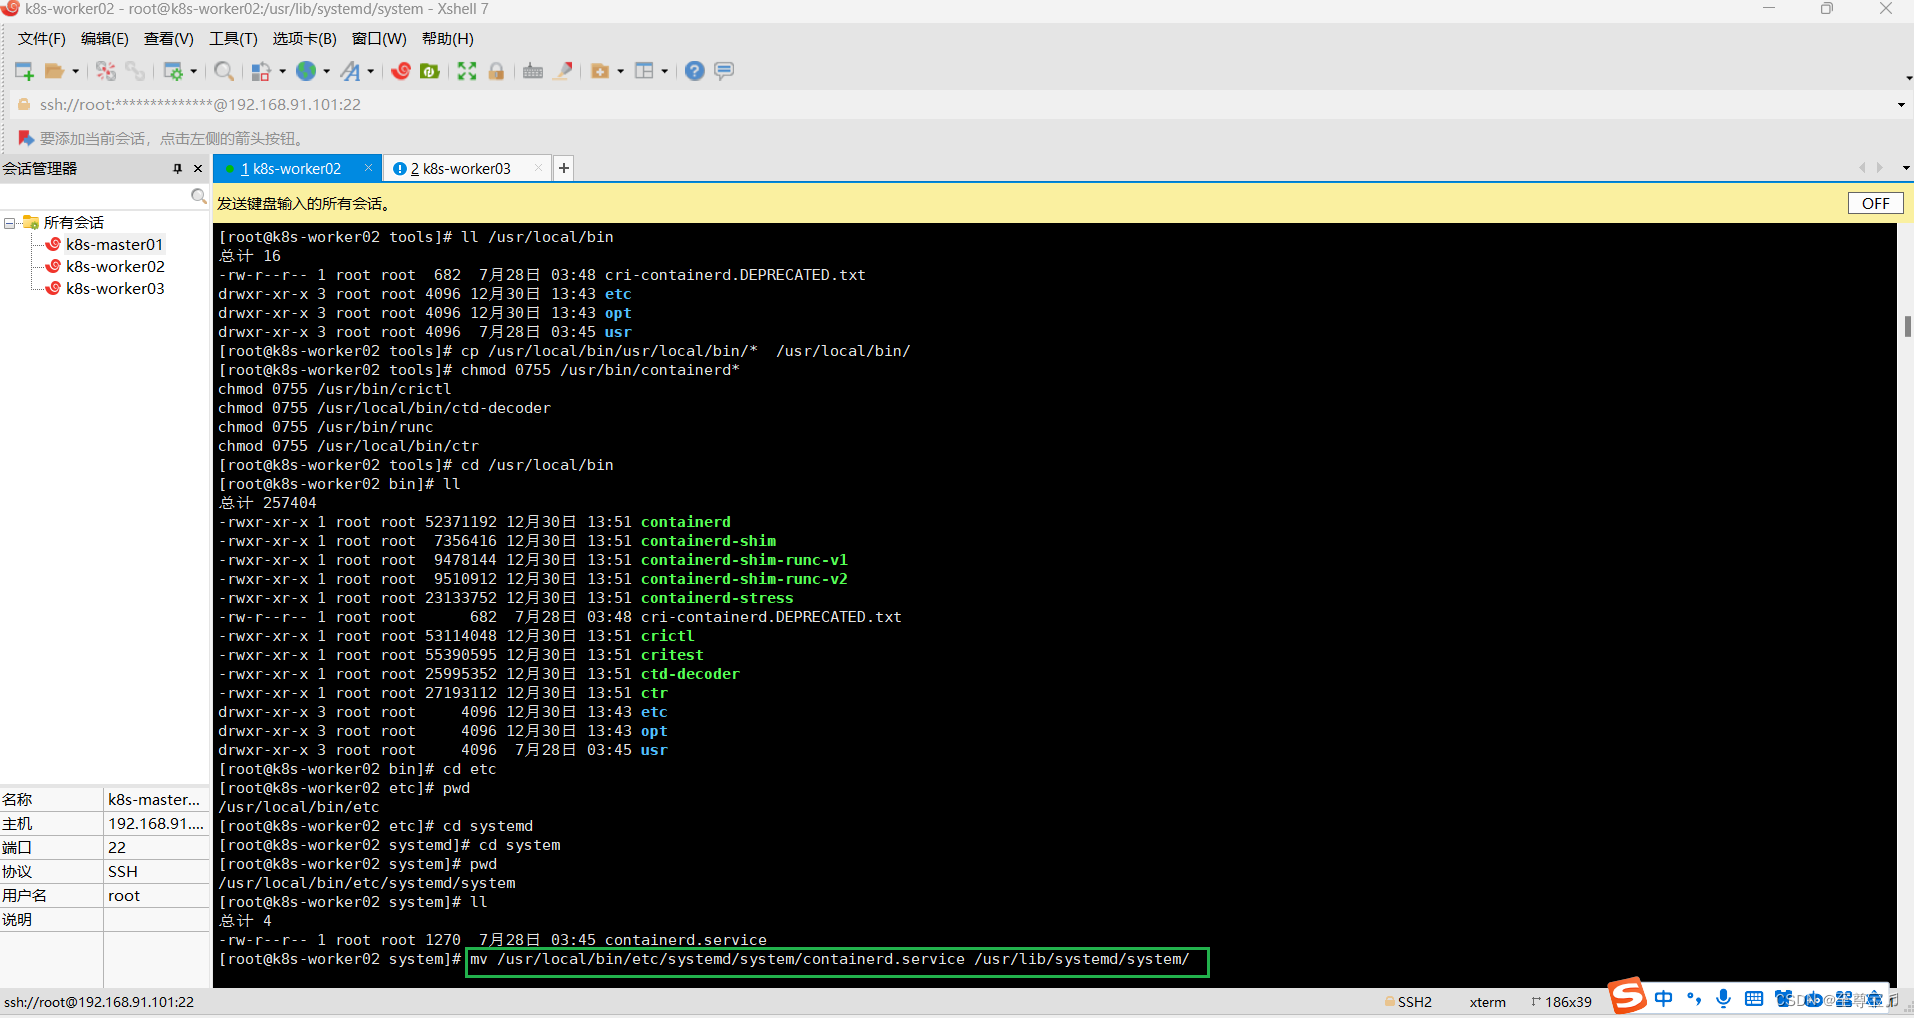
cd /usr/lib/systemd/system/pwdll contain*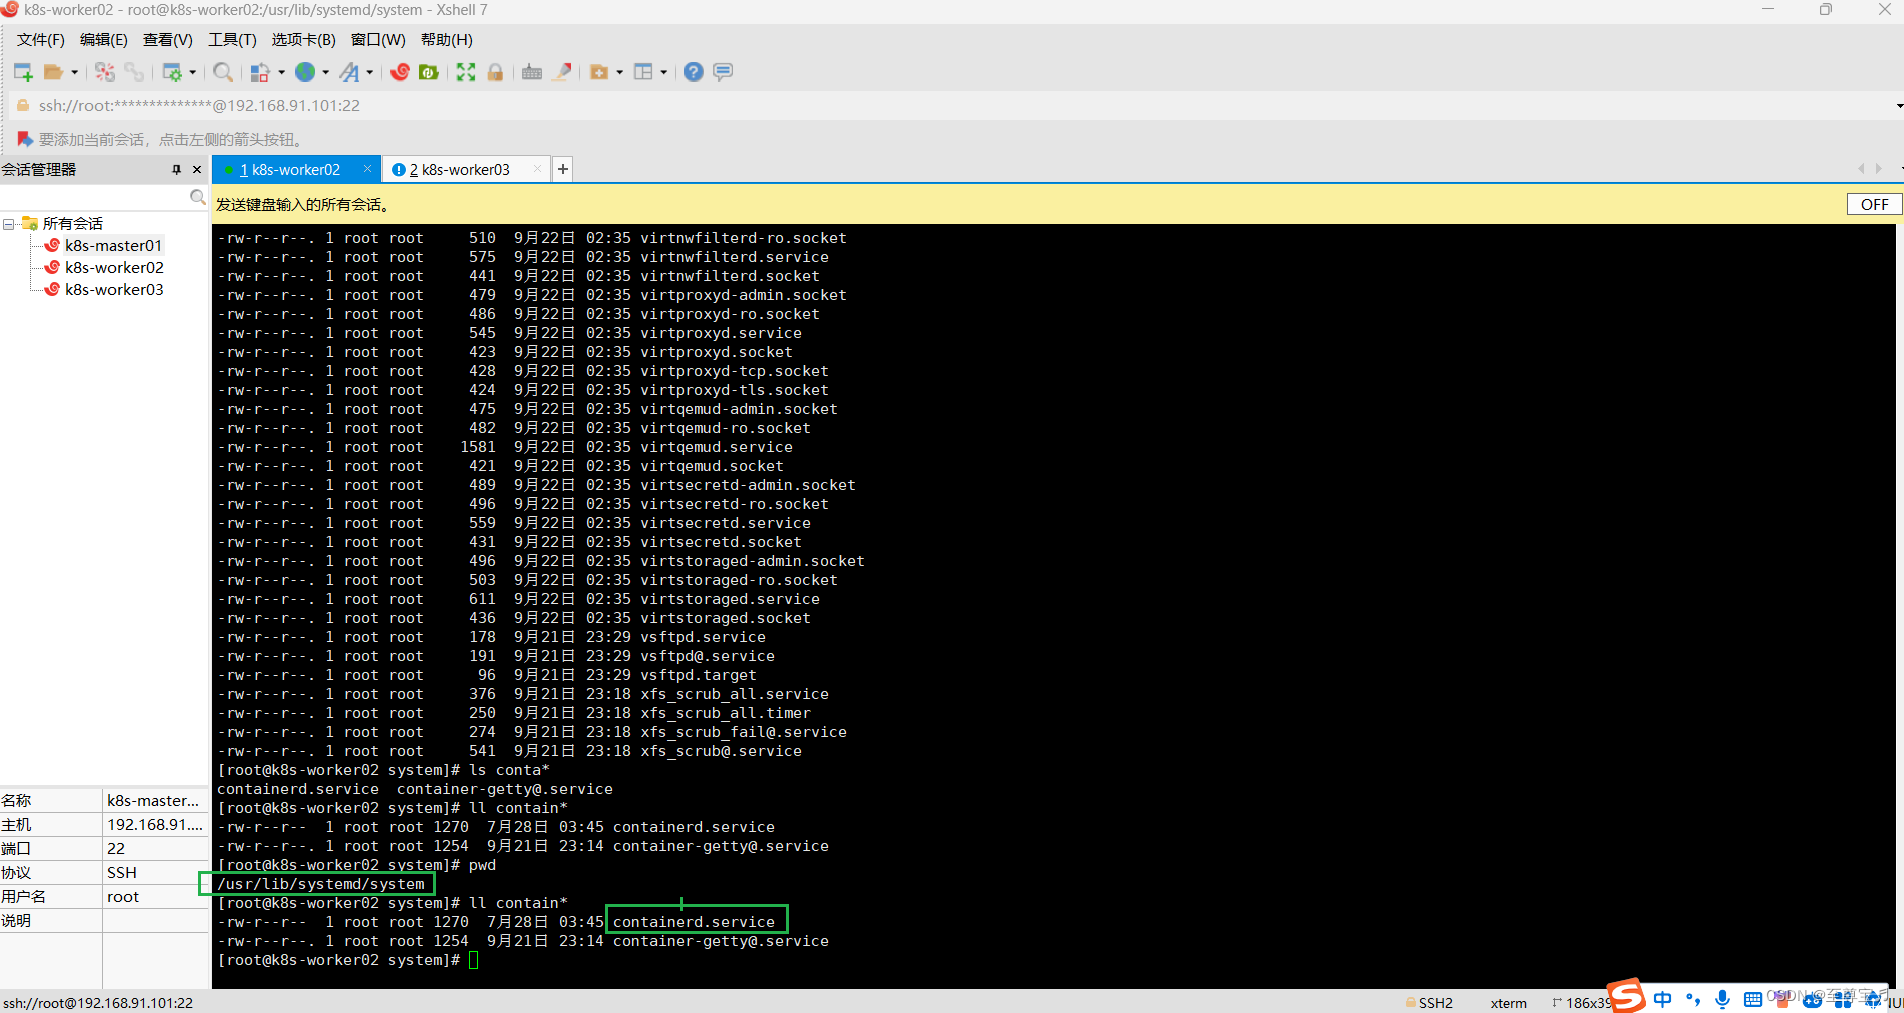
⑥两个worker节点均给containerd.service赋予权限;
chmod 0755 /usr/lib/systemd/system/containerd.service
⑦两个worker节点均给crictl配置参数;
如果你不想每次使用crictl都带一行类似下面这样的参数,
crictl --image-endpoint unix:///var/run/containerd/containerd.sock
那么你就执行下面的命令:
cat >>/etc/crictl.yaml <<EOF
runtime-endpoint: unix:///var/run/containerd/containerd.sock
image-endpoint: unix:///var/run/containerd/containerd.sock
timeout: 10
debug: false
EOF
⑧两个worker节点均启动containerd;
a.启动containerd命令:
systemctl daemon-reloadsystemctl enable containerdsystemctl start containerdb.查询containerd运行状态:
systemctl status containerd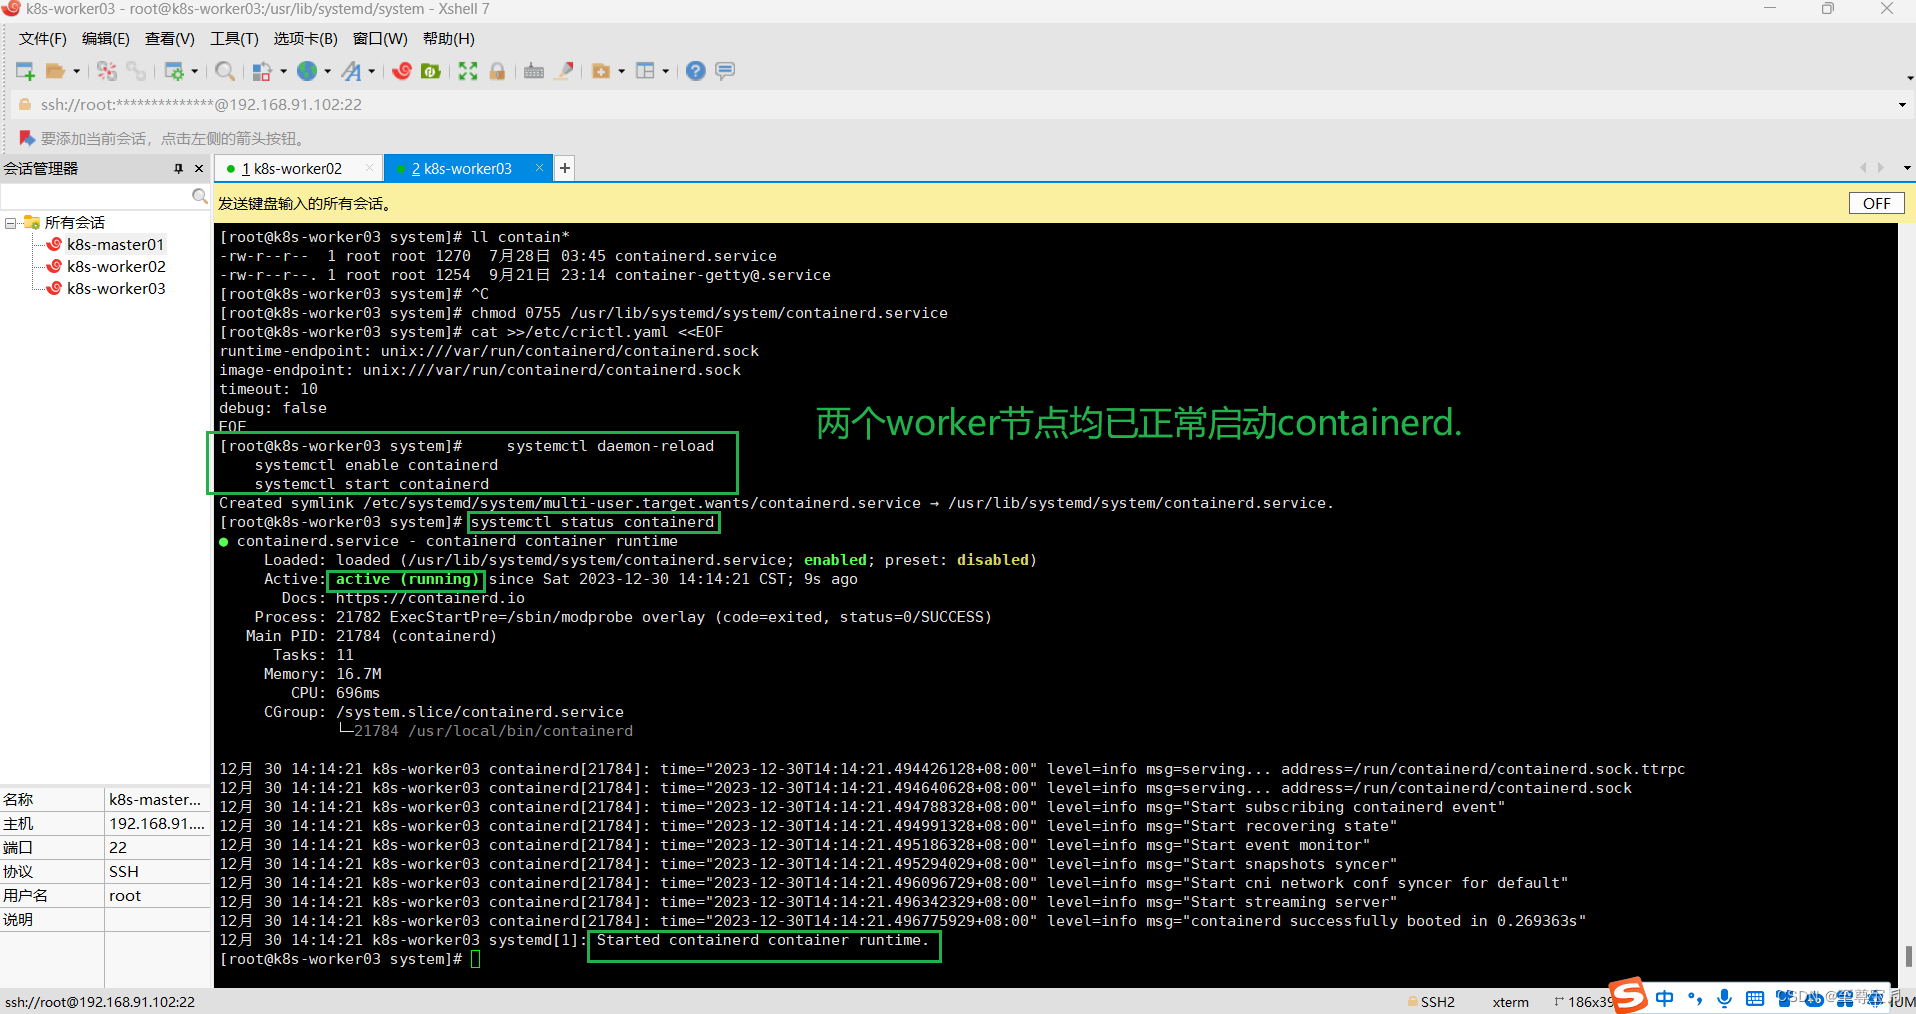
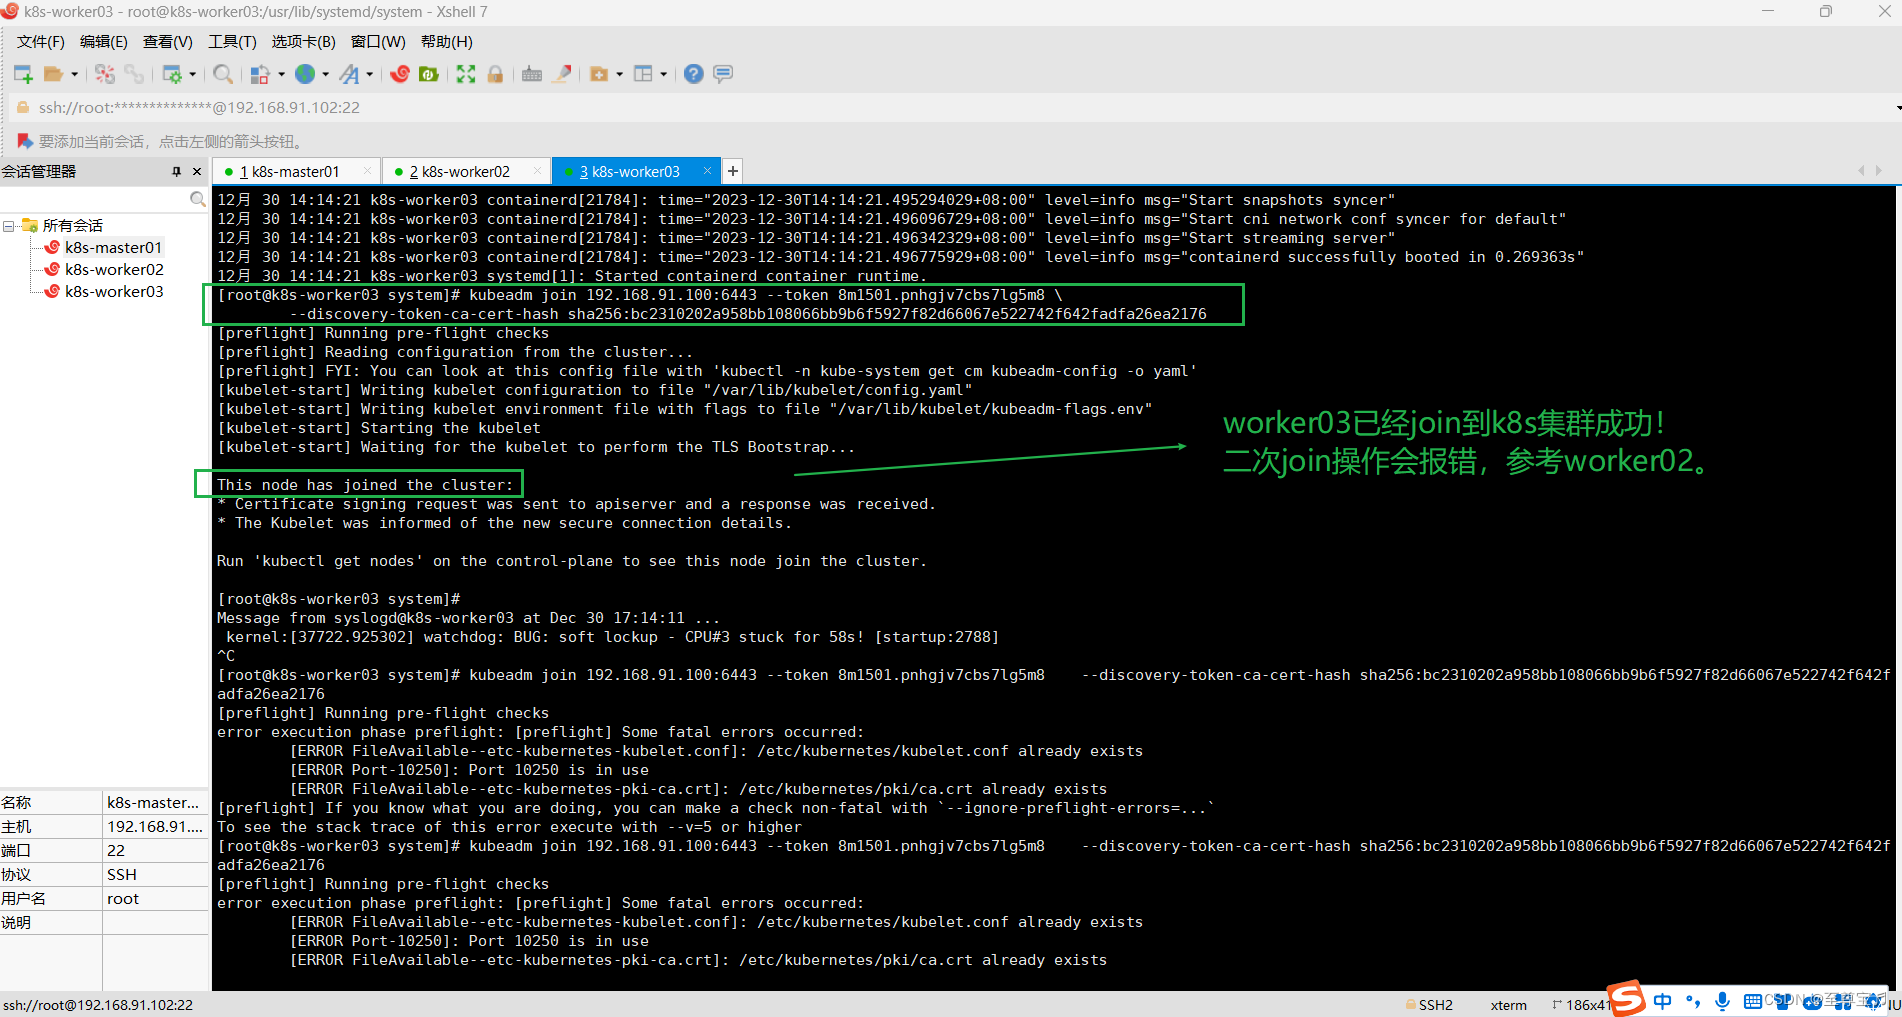
(3)两个worker节点再次加入k8s集群;
kubeadm join 192.168.91.100:6443 --token 8m1501.pnhgjv7cbs7lg5m8 \--discovery-token-ca-cert-hash sha256:bc2310202a958bb108066bb9b6f5927f82d66067e522742f642fadfa26ea2176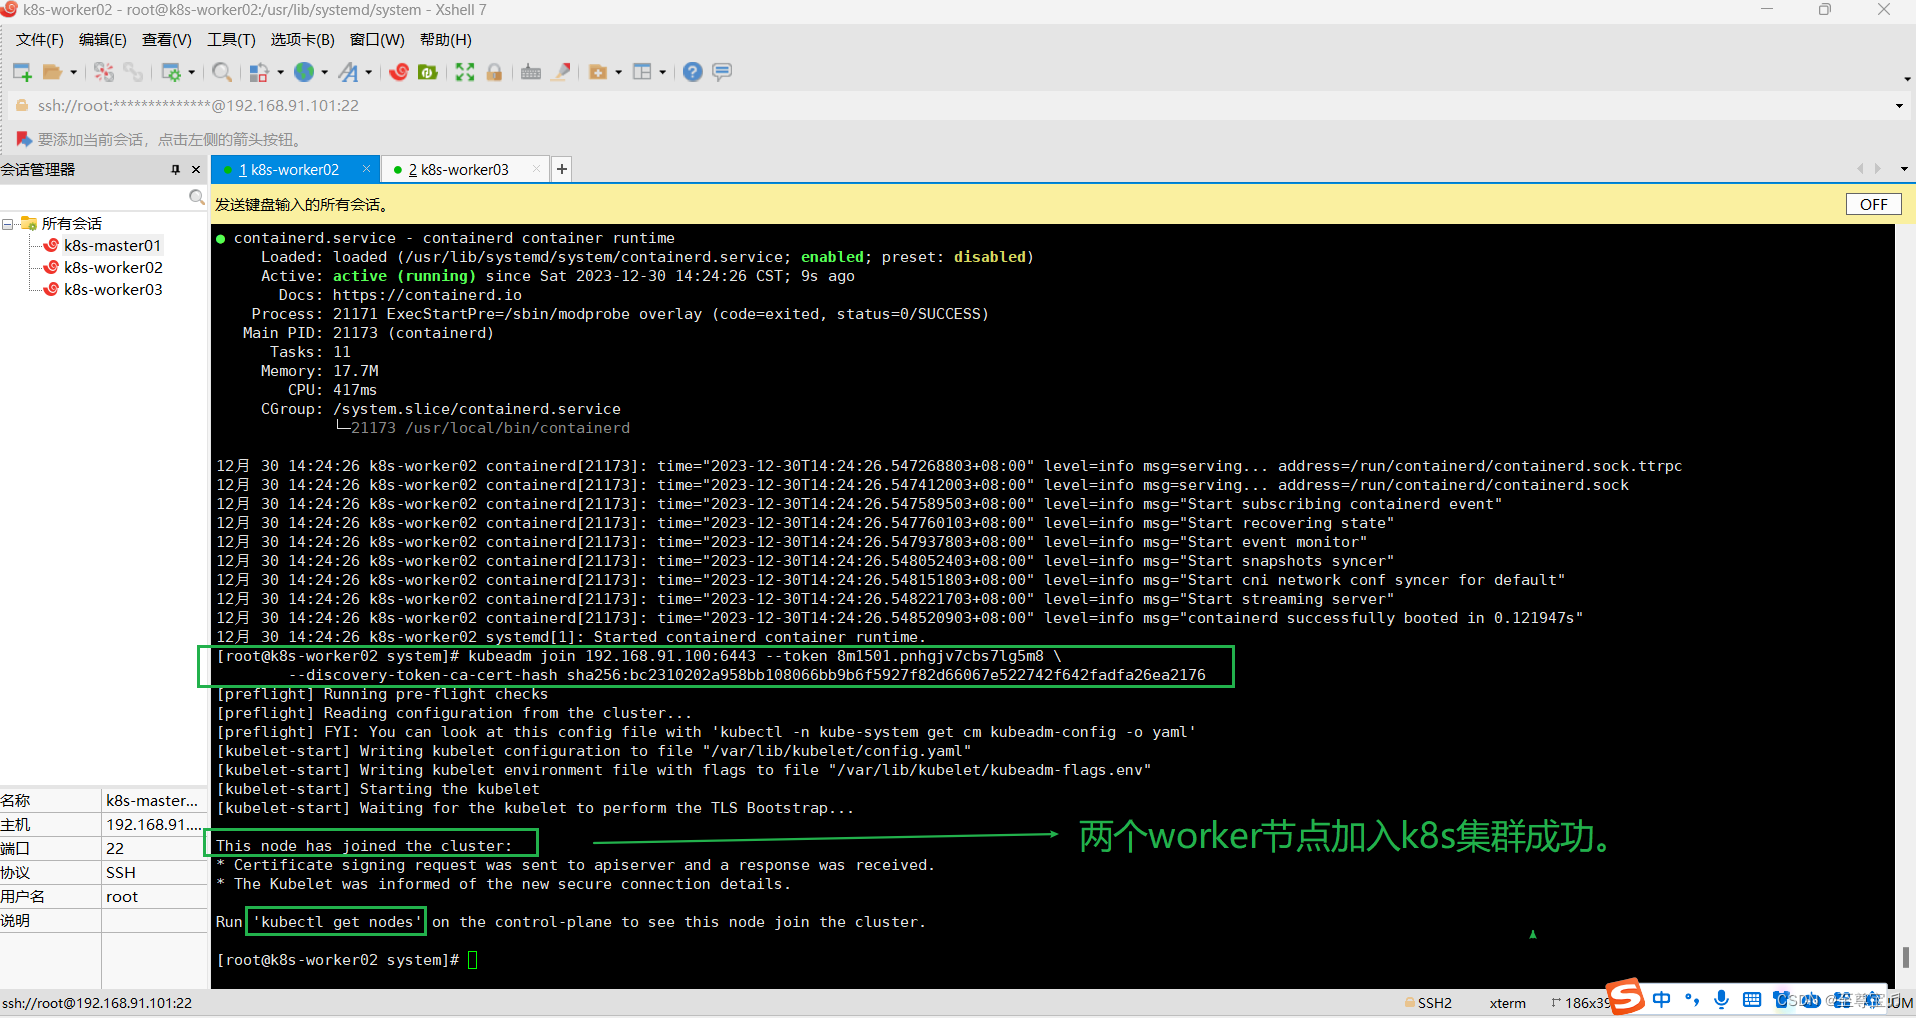
(4)在master节点查看k8s集群中的所有节点工作状态;
kubectl get nodes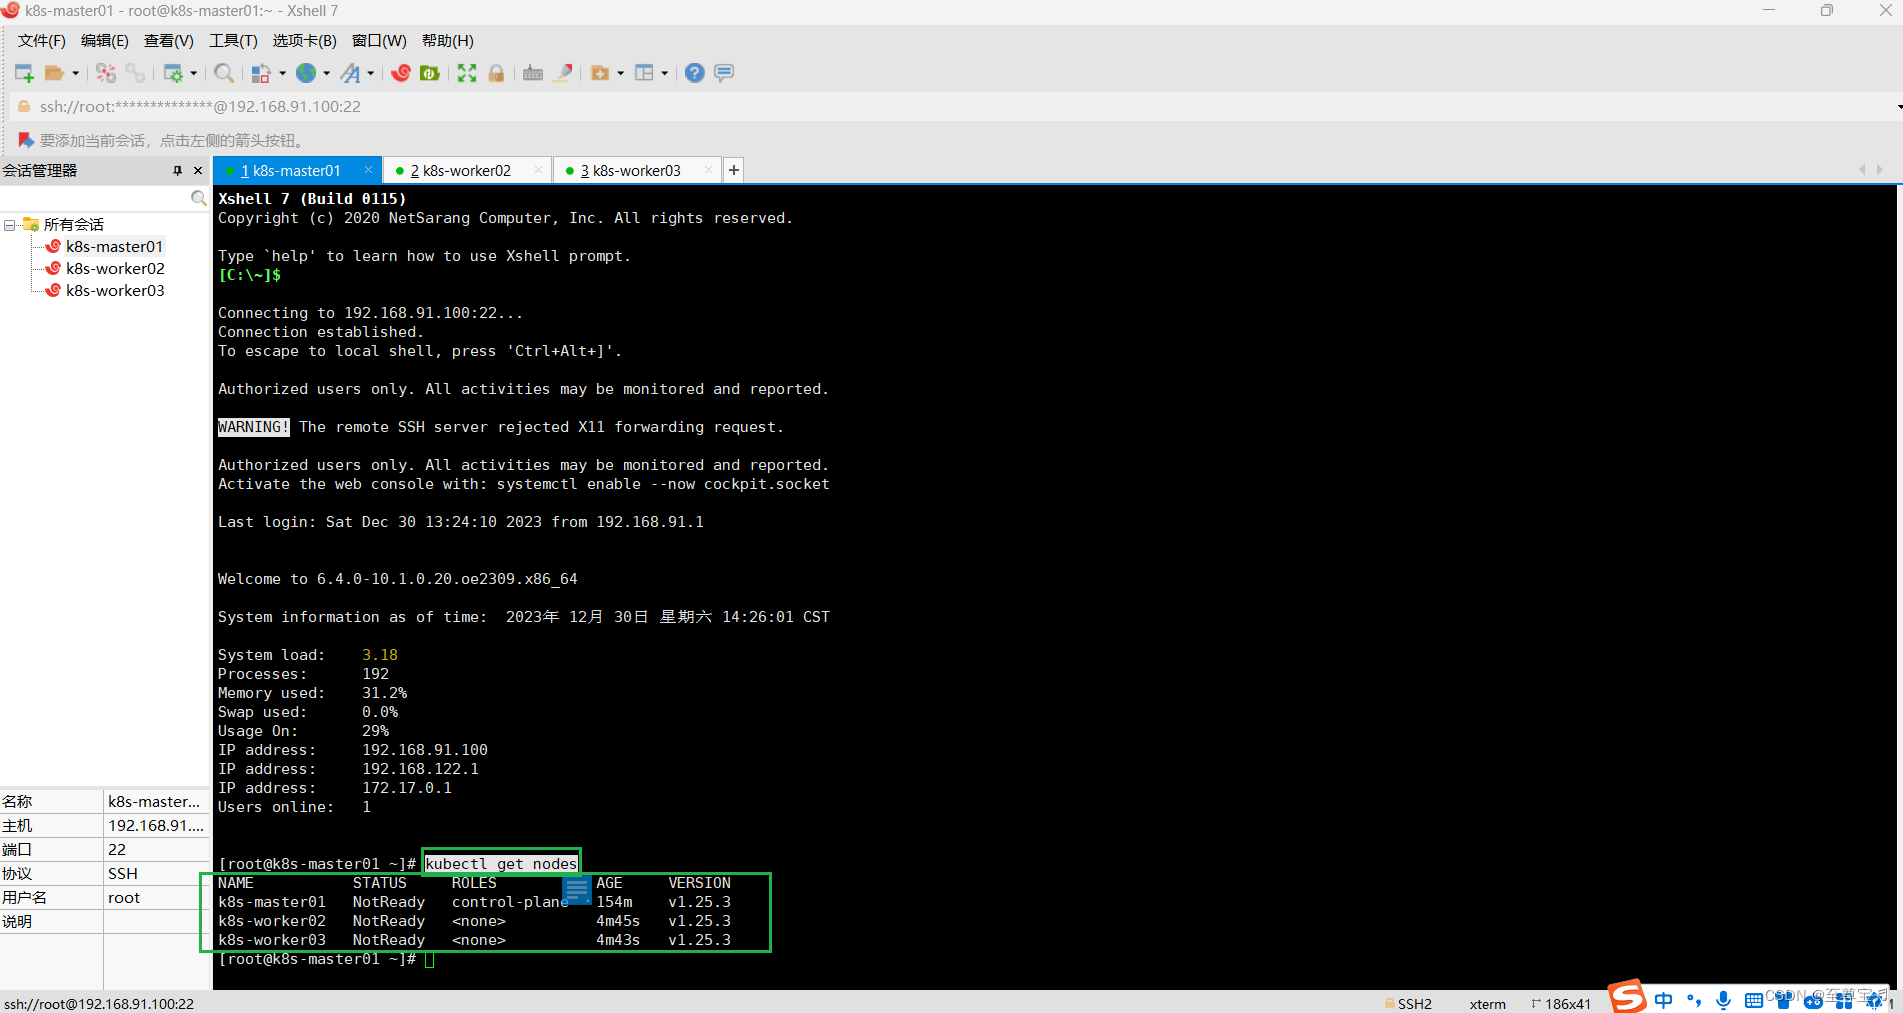
3.在master节点使用k8s集群网络插件calico;
(1)master节点下载calico.yaml;
wget https://docs.projectcalico.org/v3.19/manifests/calico.yaml

(2)master节点修改配置calico.yaml;
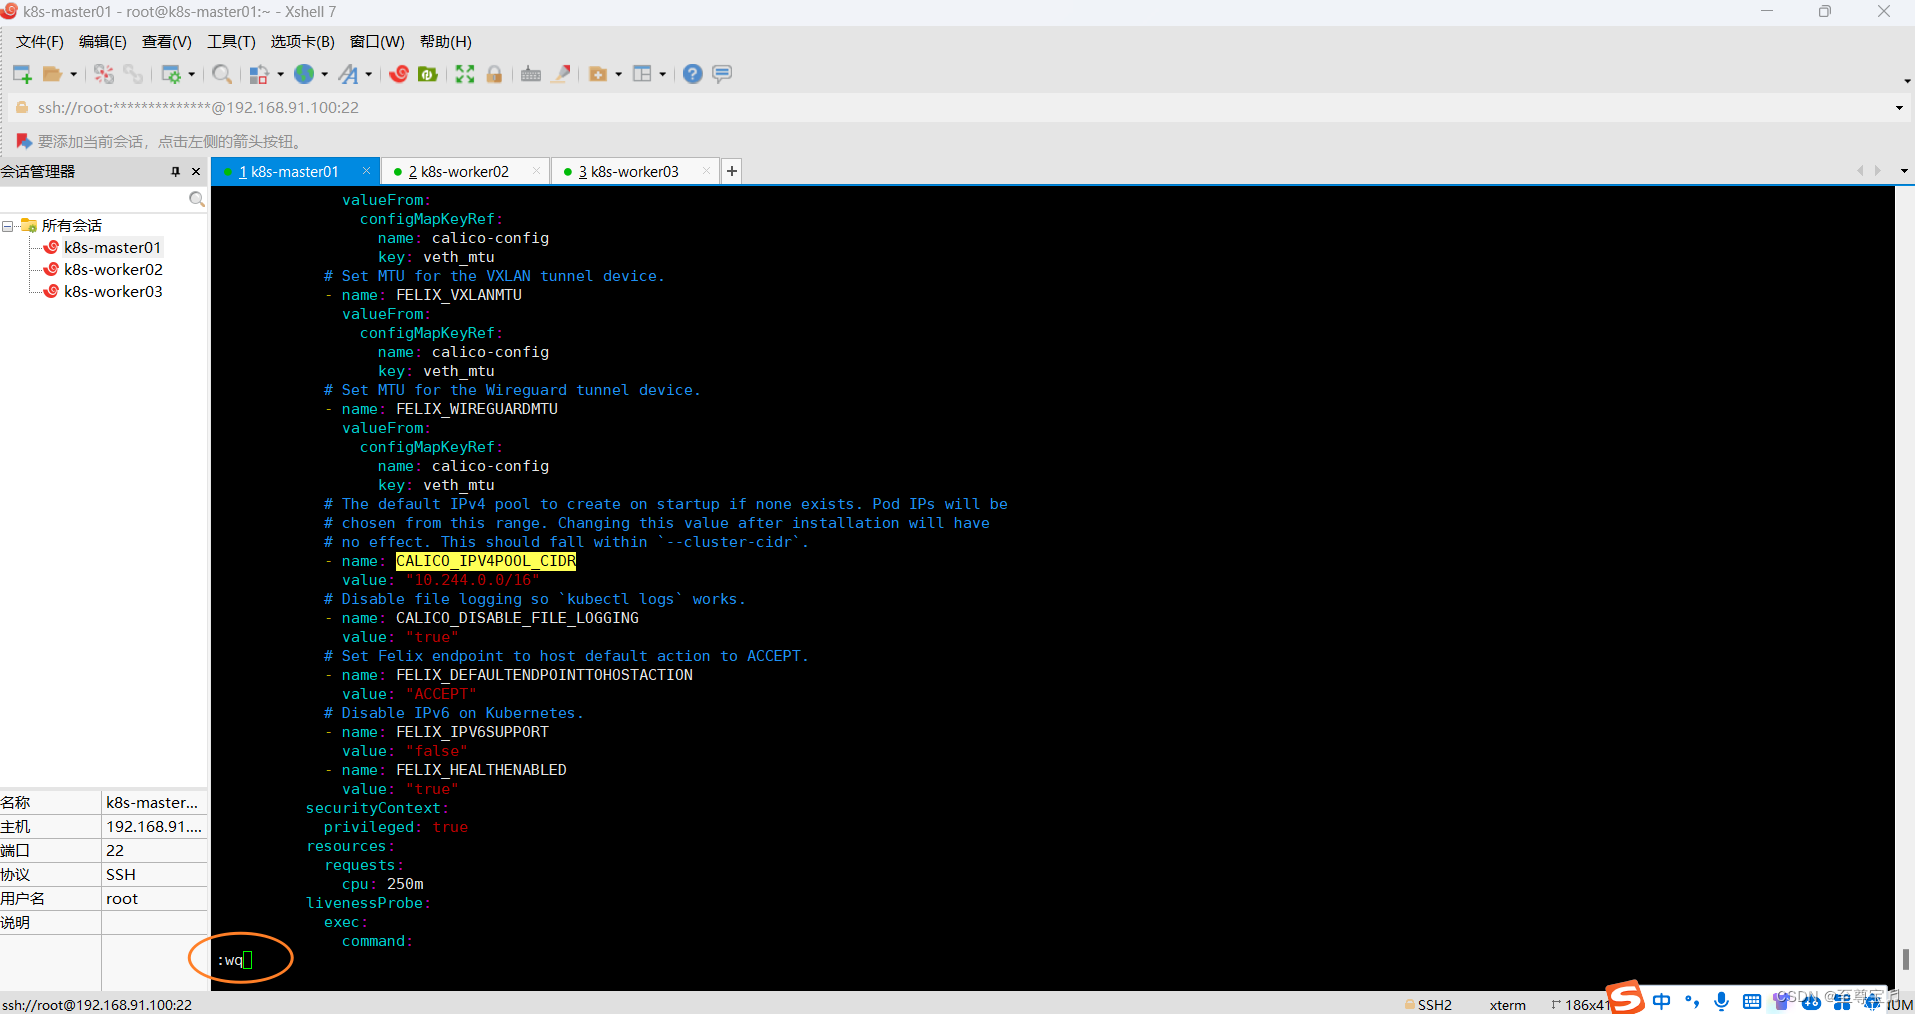
vim calico.yaml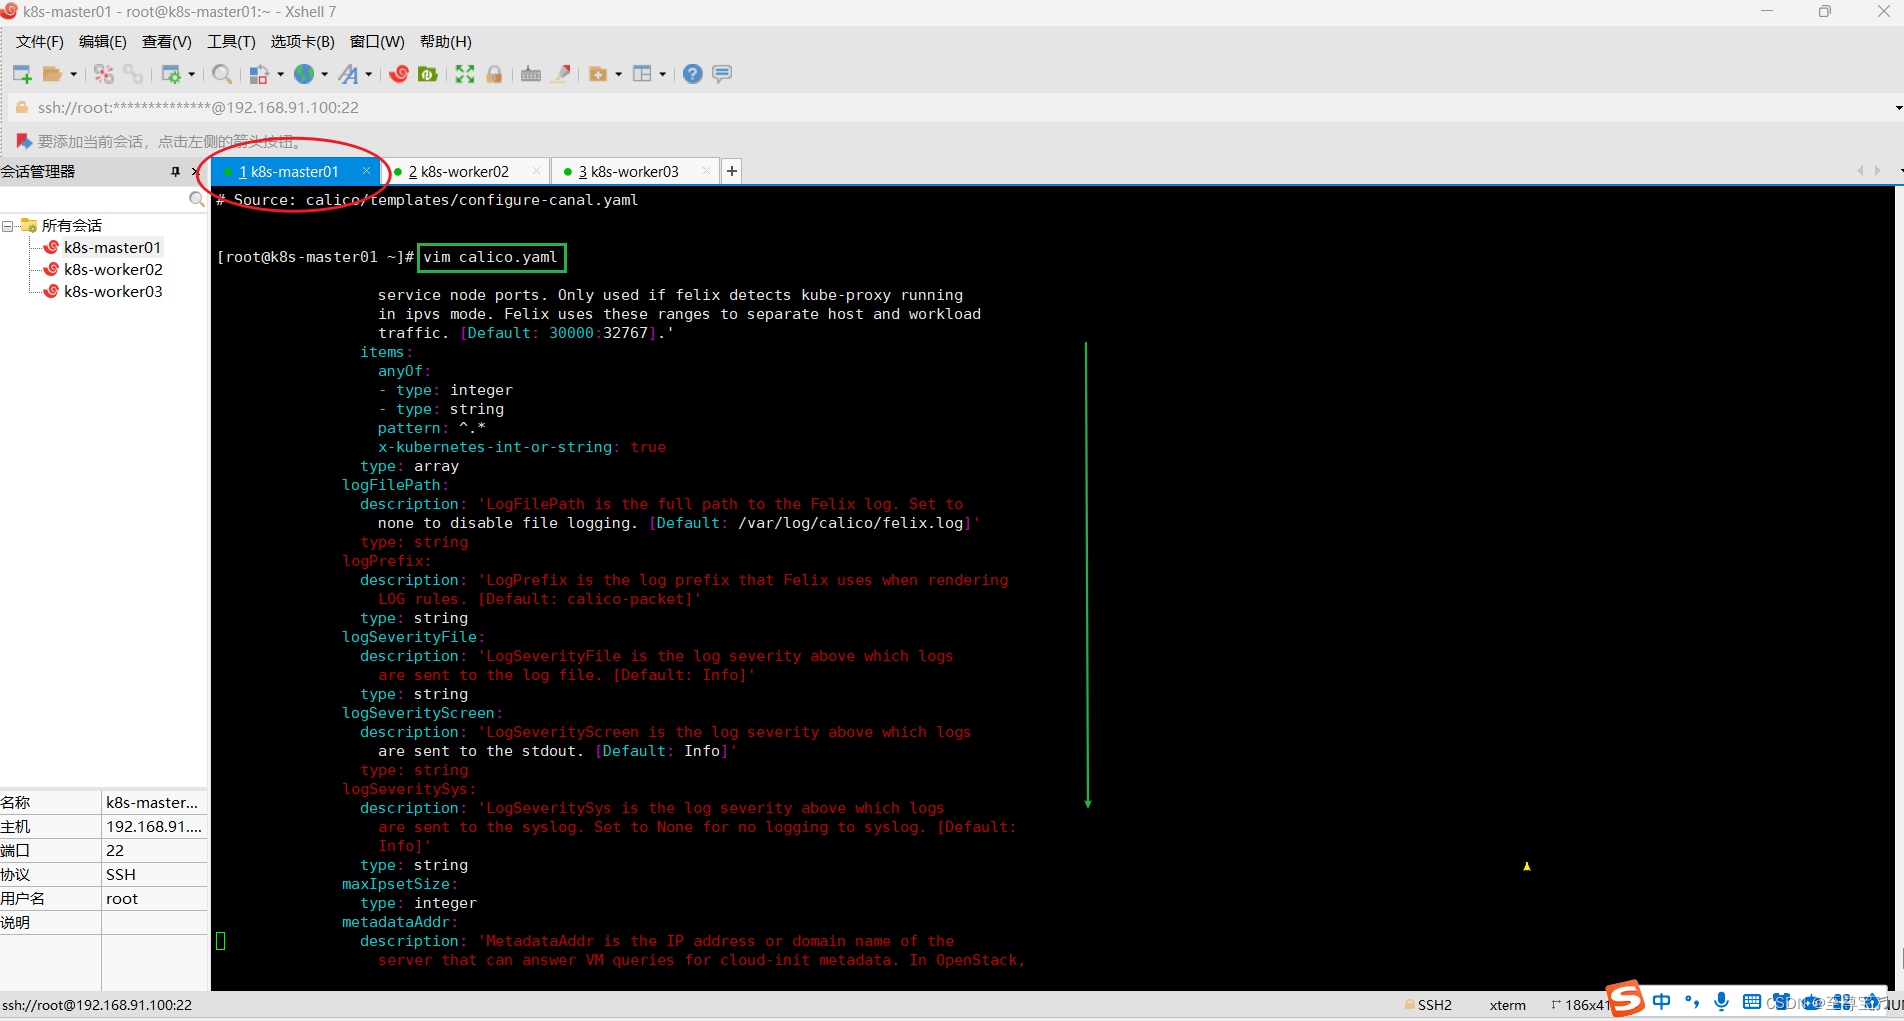
①.在xshell界面,“编辑”---->“查找”;
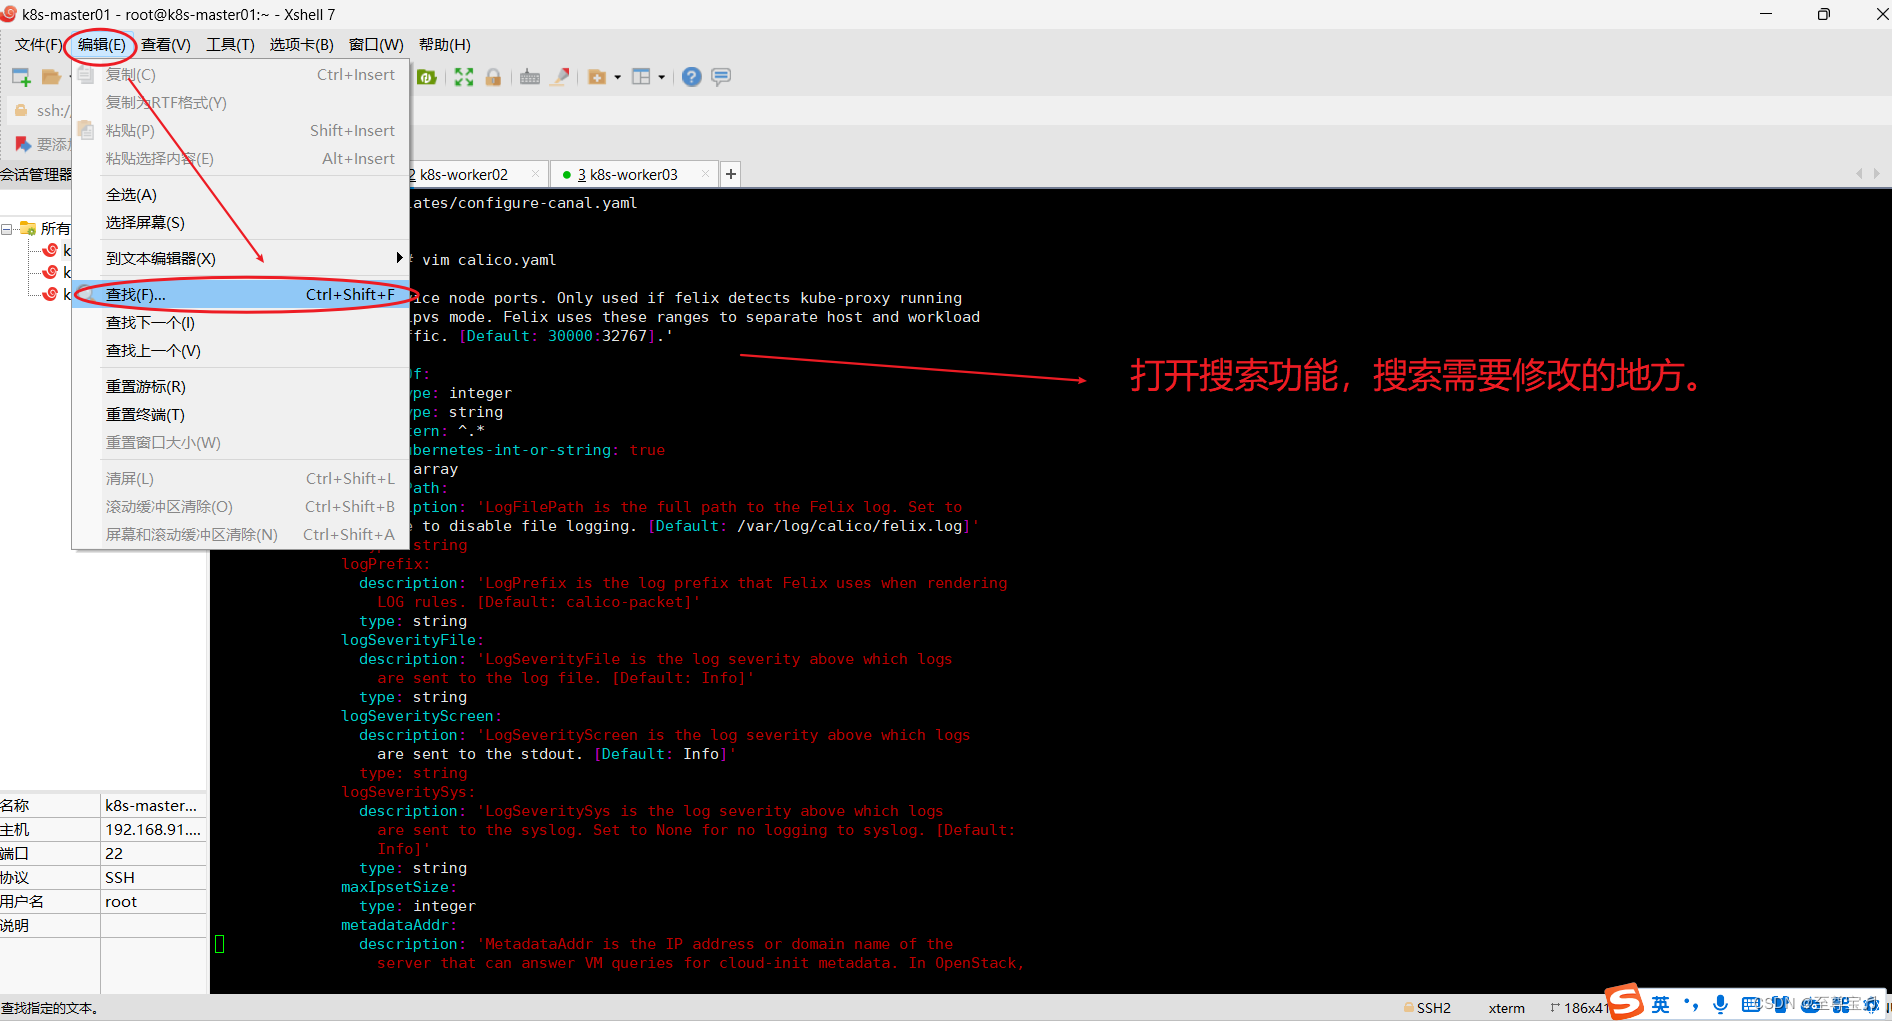
尝试后,发现在vim模式,这个搜索模式没法用。
②.在vim模式下,按下Esc键,确保处于正常模式,输入:/并加上要查找的关键字,然后按Enter键,比如":/CALICO_IPV4POOL_CIDR";
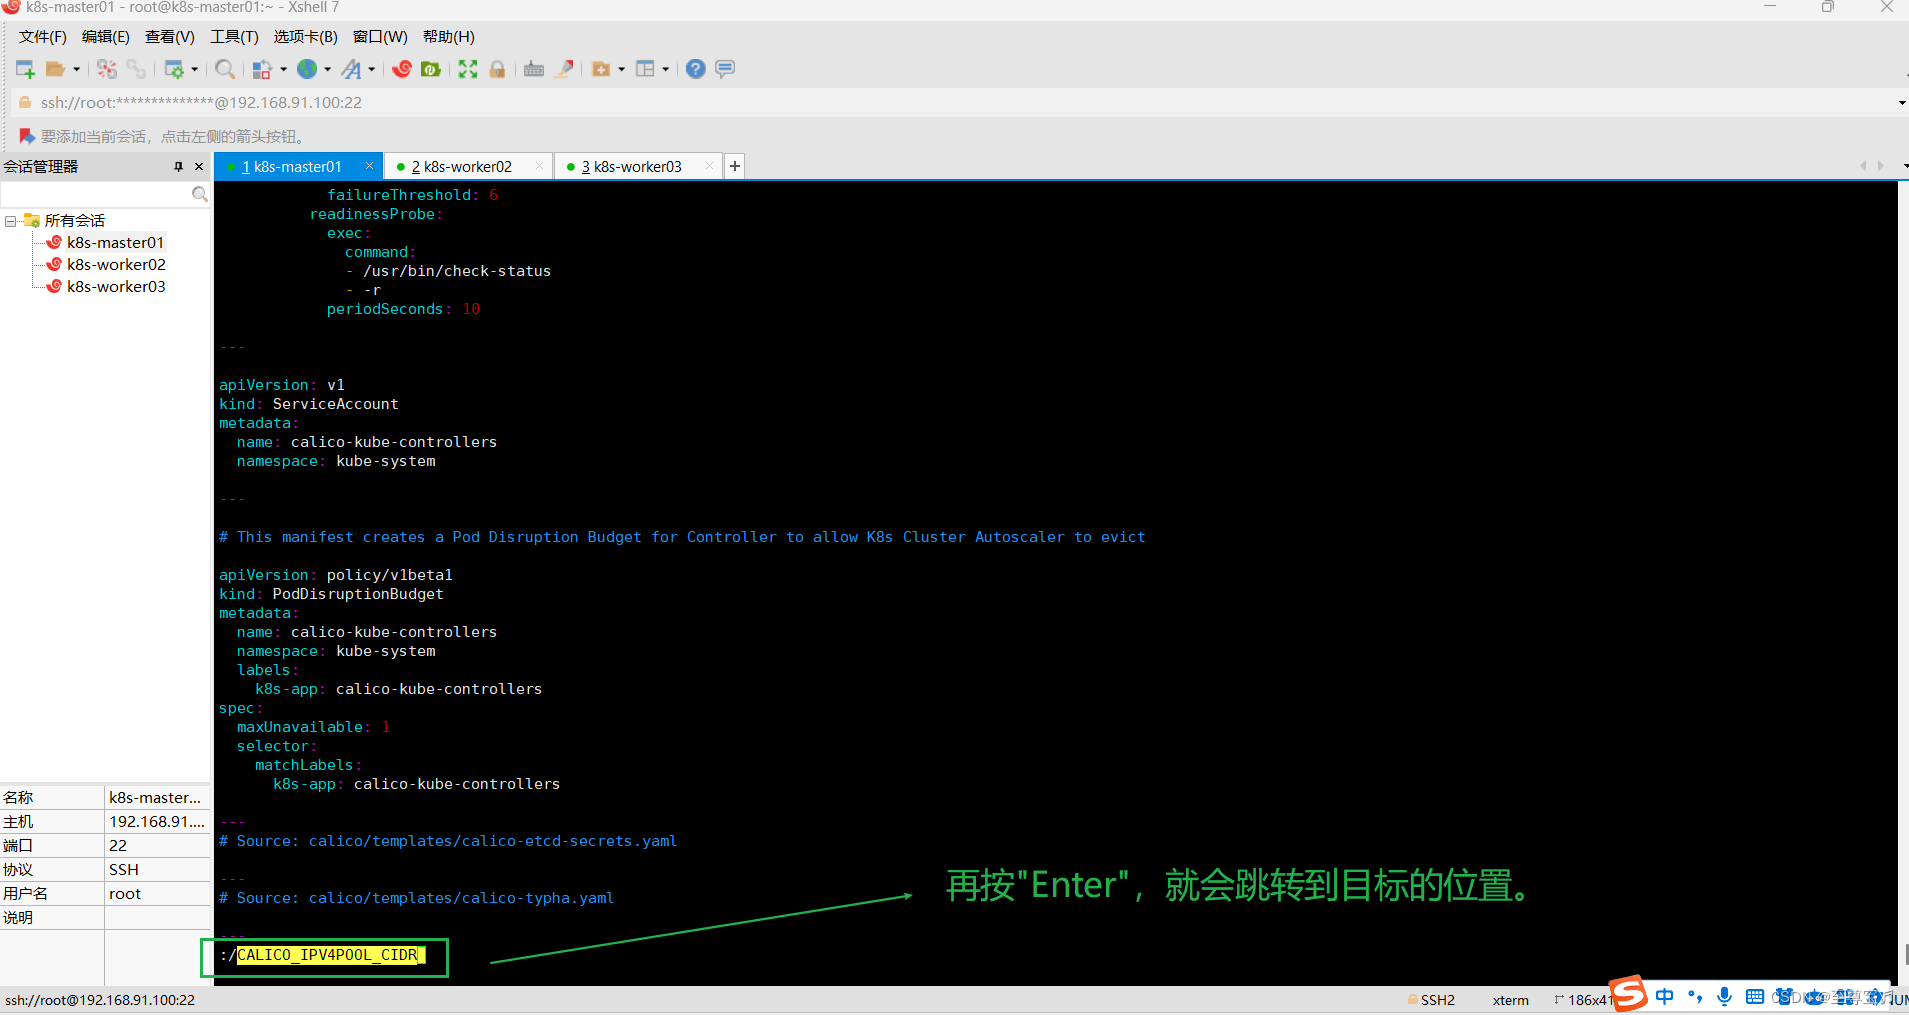
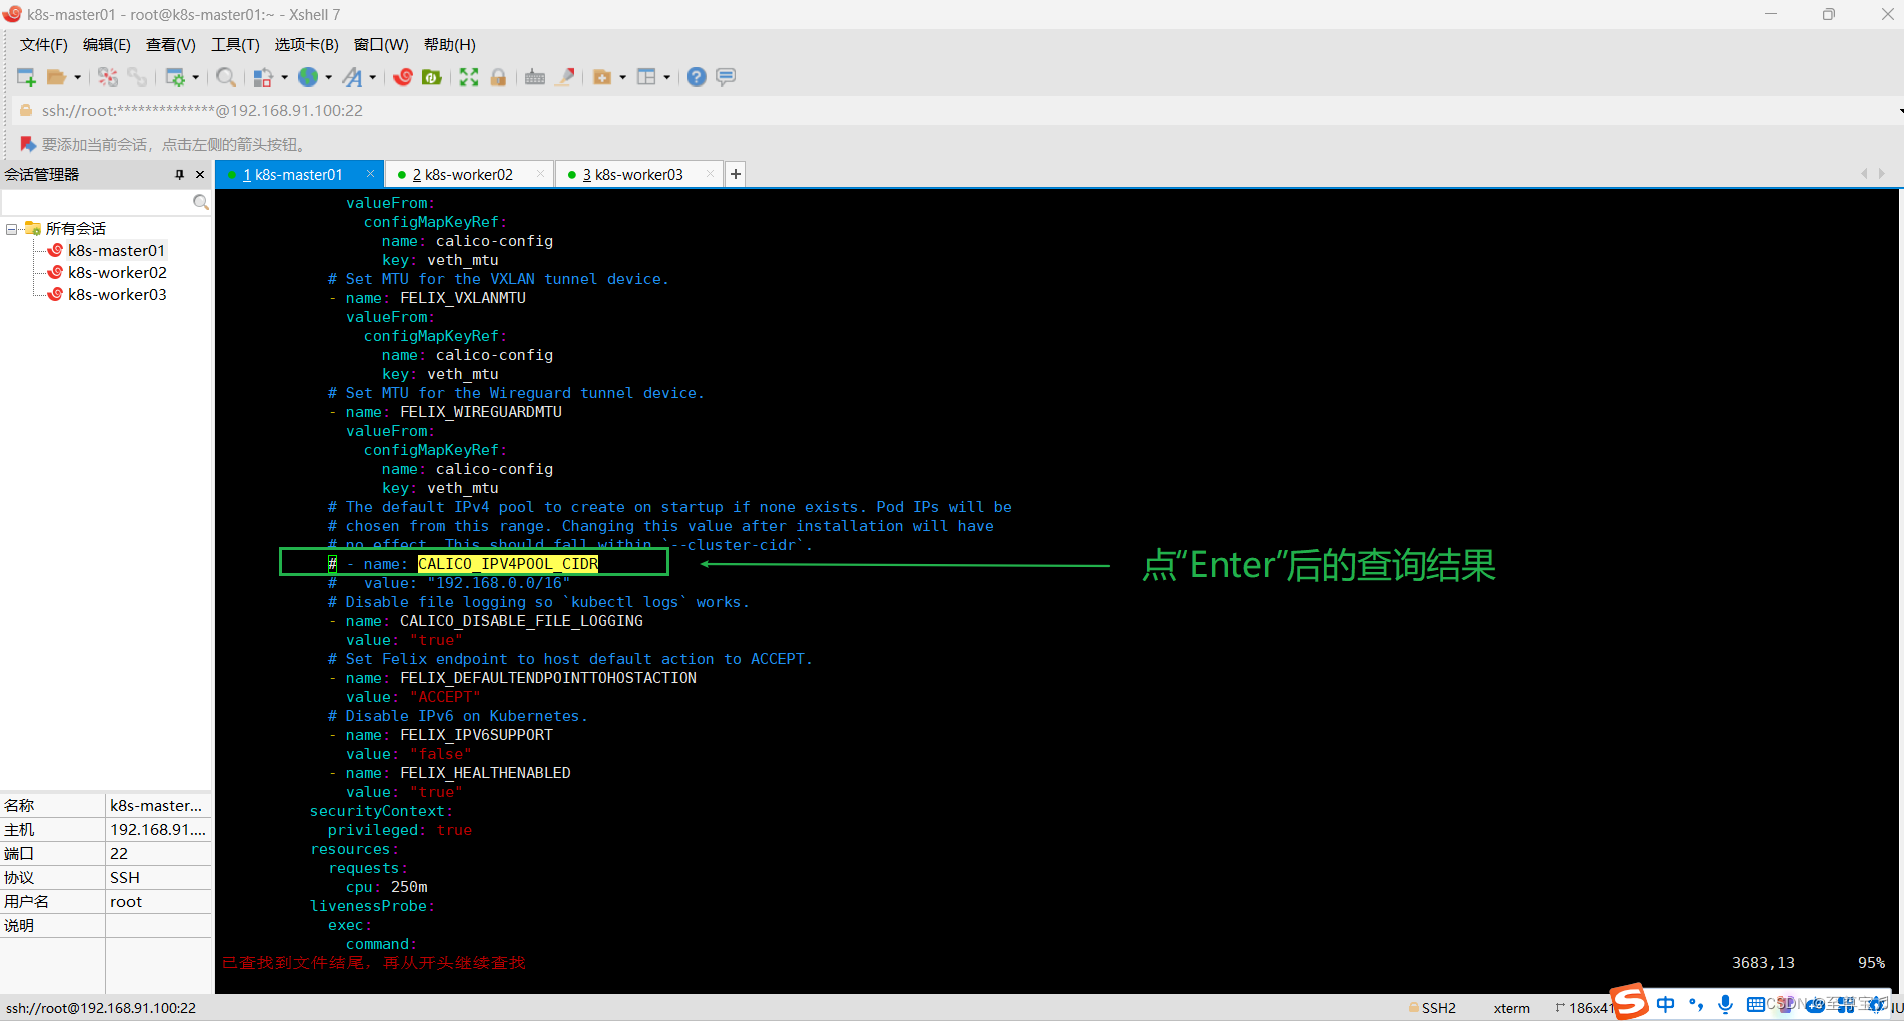
Vim会自动将光标移到第一次出现该关键字的位置;
按n键向前导航或N键向后查找;
按i进入可编辑模式,方向键+修改内容;
若要退出查找模式,可以按下Esc键返回正常模式。
本案例需要修改下面两行配置;
原来是:
# - name: CALICO_IPV4POOL_CIDR
# value: "192.168.0.0/16"
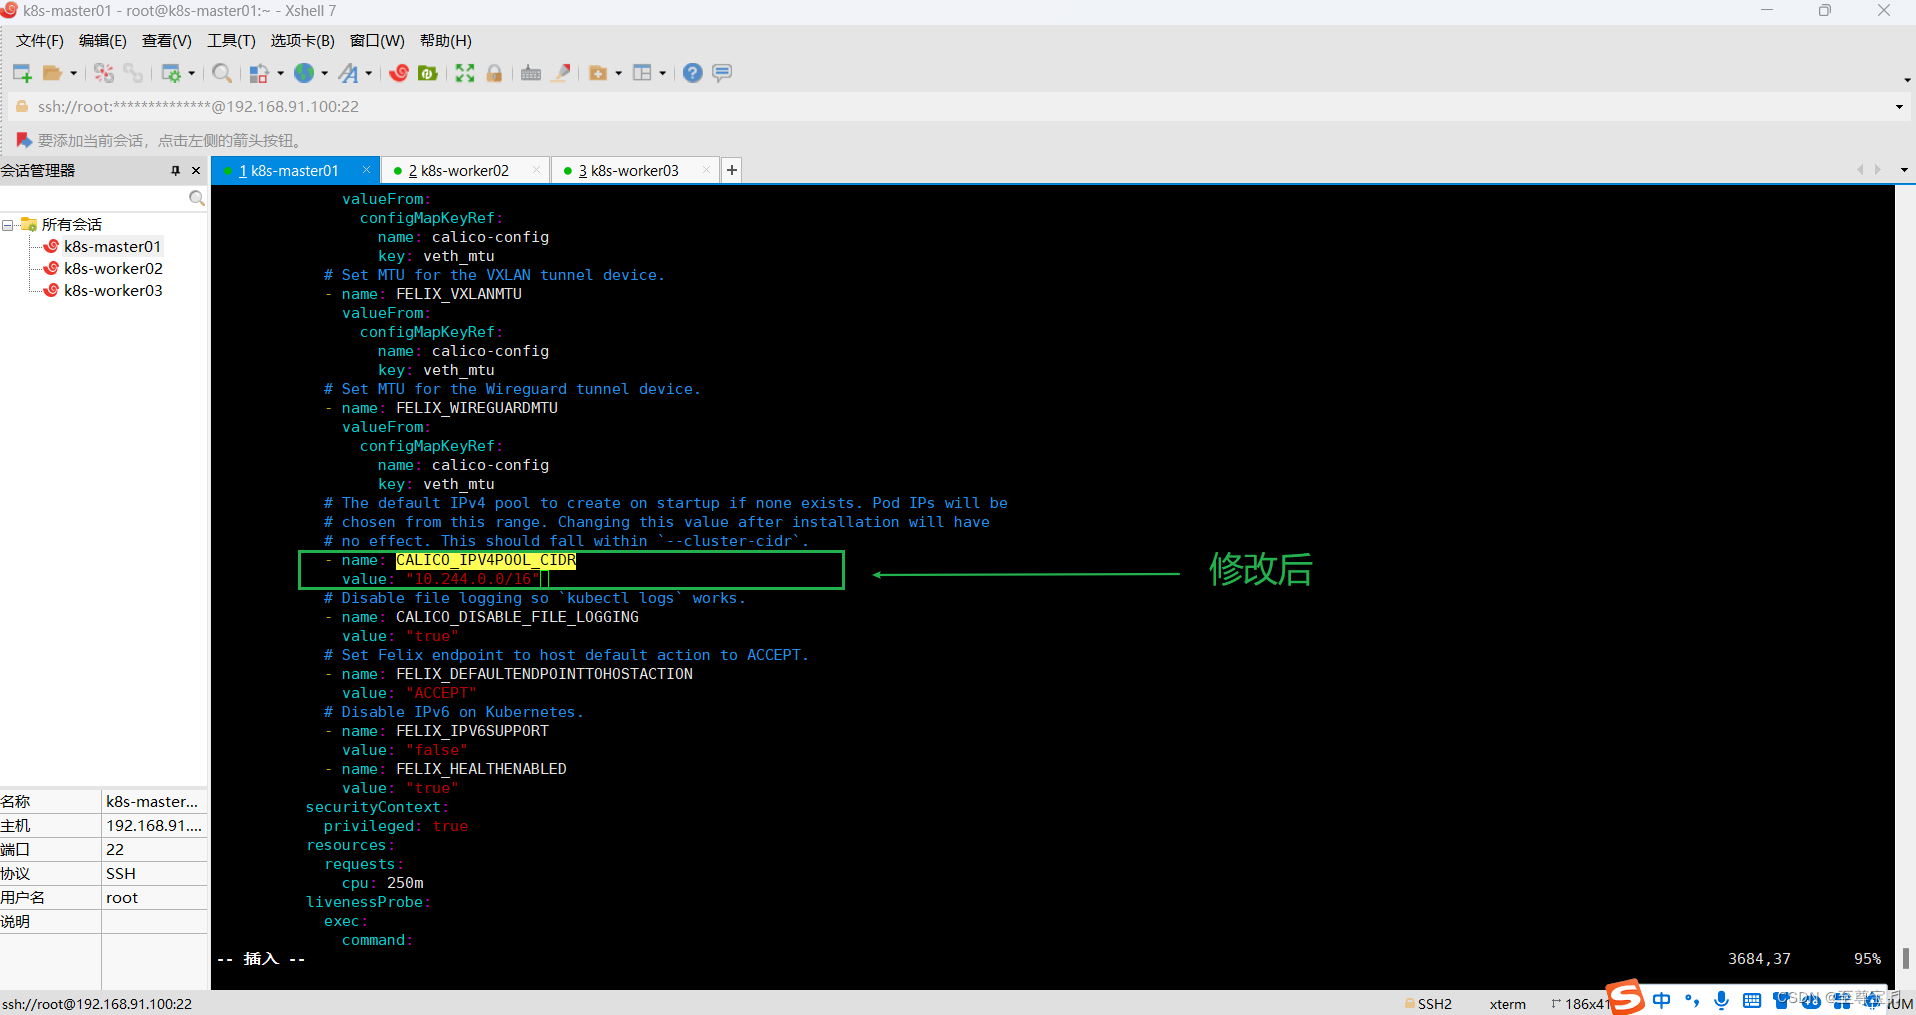
修改后:
- name: CALICO_IPV4POOL_CIDRvalue: "10.244.0.0/16"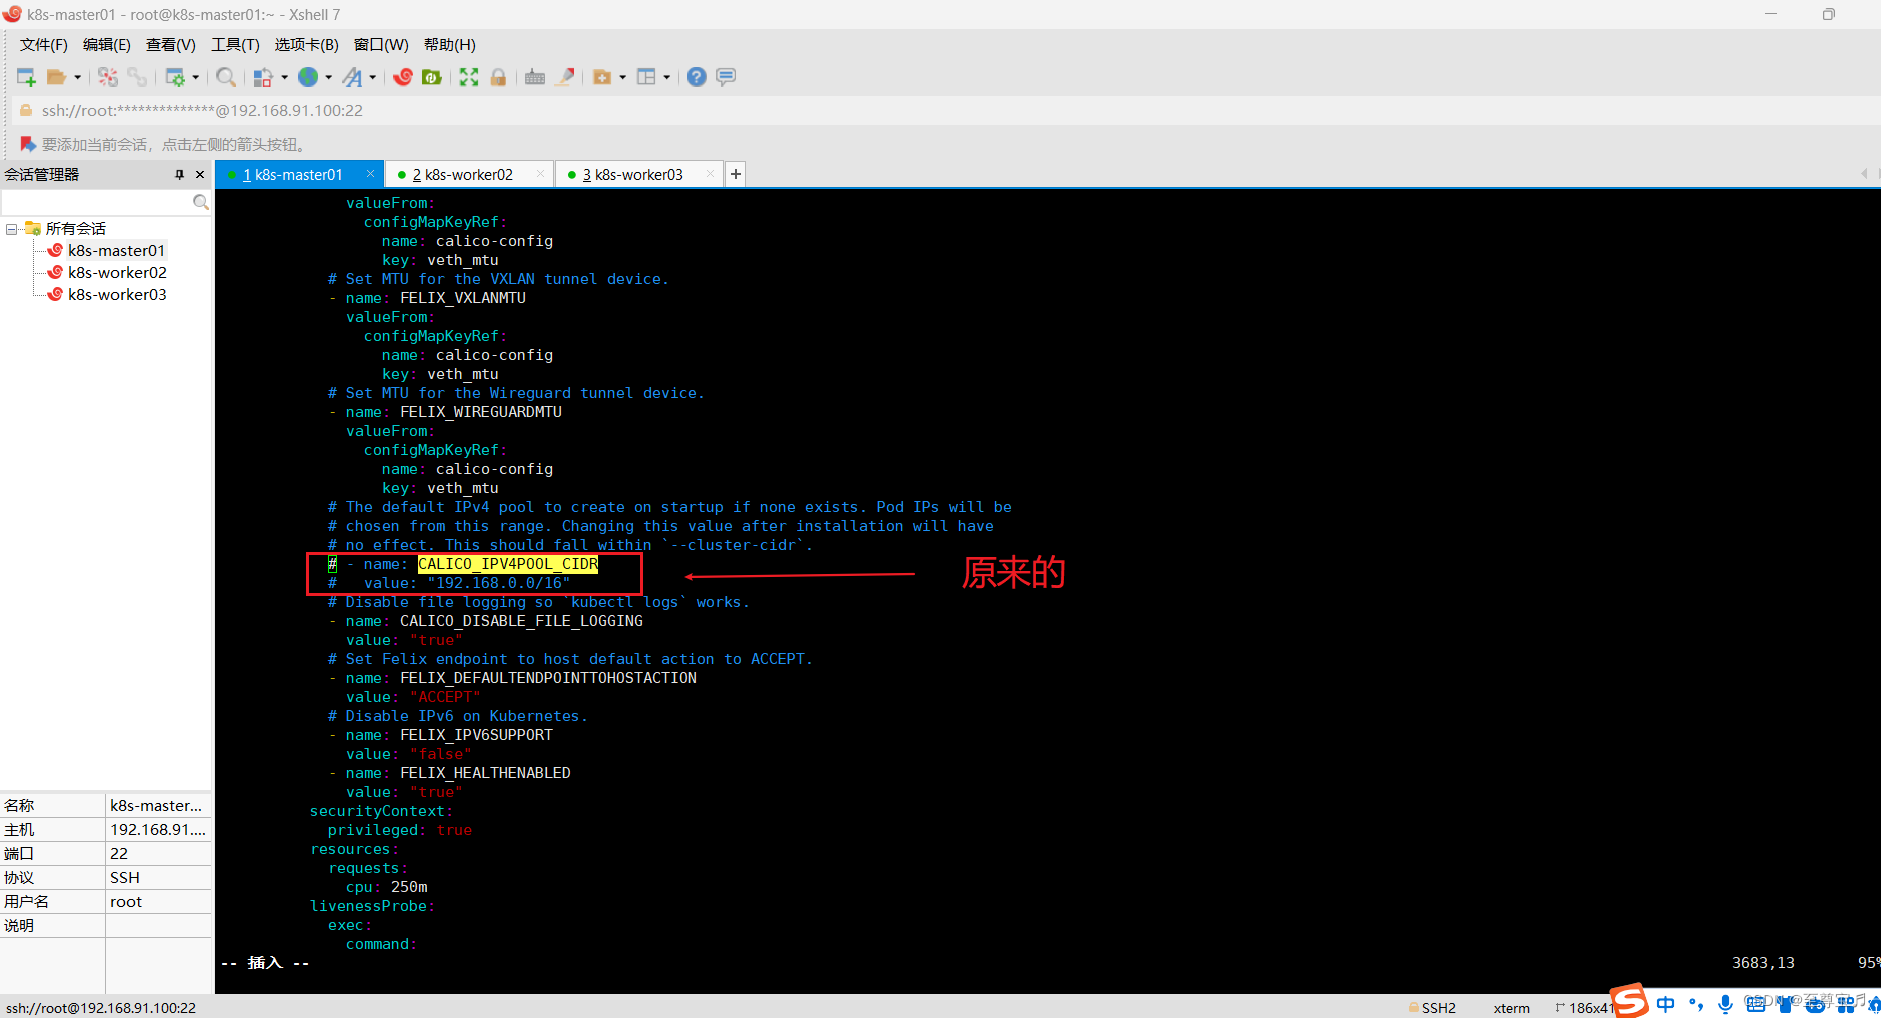
(3)master节点执行命令:kubectl create -f calico.yaml
kubectl create -f calico.yaml# 报错如下:
error: resource mapping not found for name: "calico-kube-controllers" namespace: "kube-system" from "calico.yaml": no matches for kind "PodDisruptionBudget" in version "policy/v1beta1"
ensure CRDs are installed first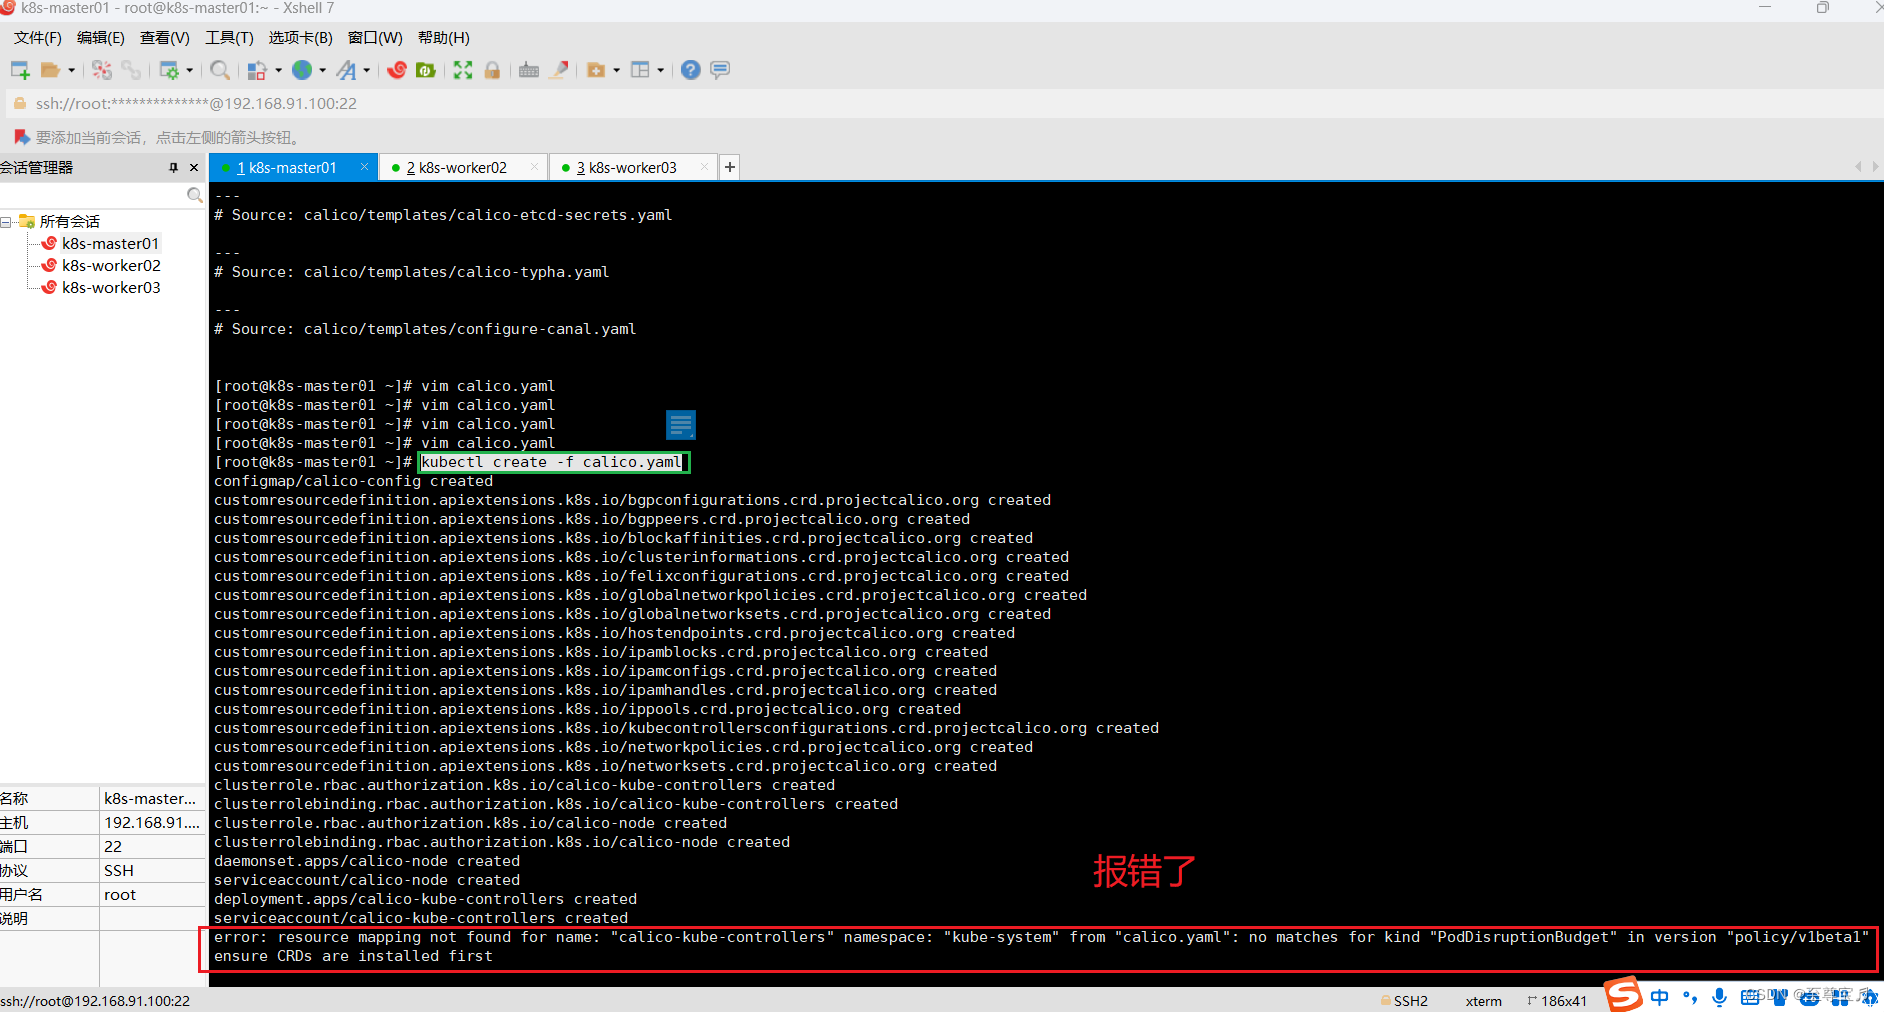
4.根据网上资料,应该是k8s不支持当前calico版本的原因;
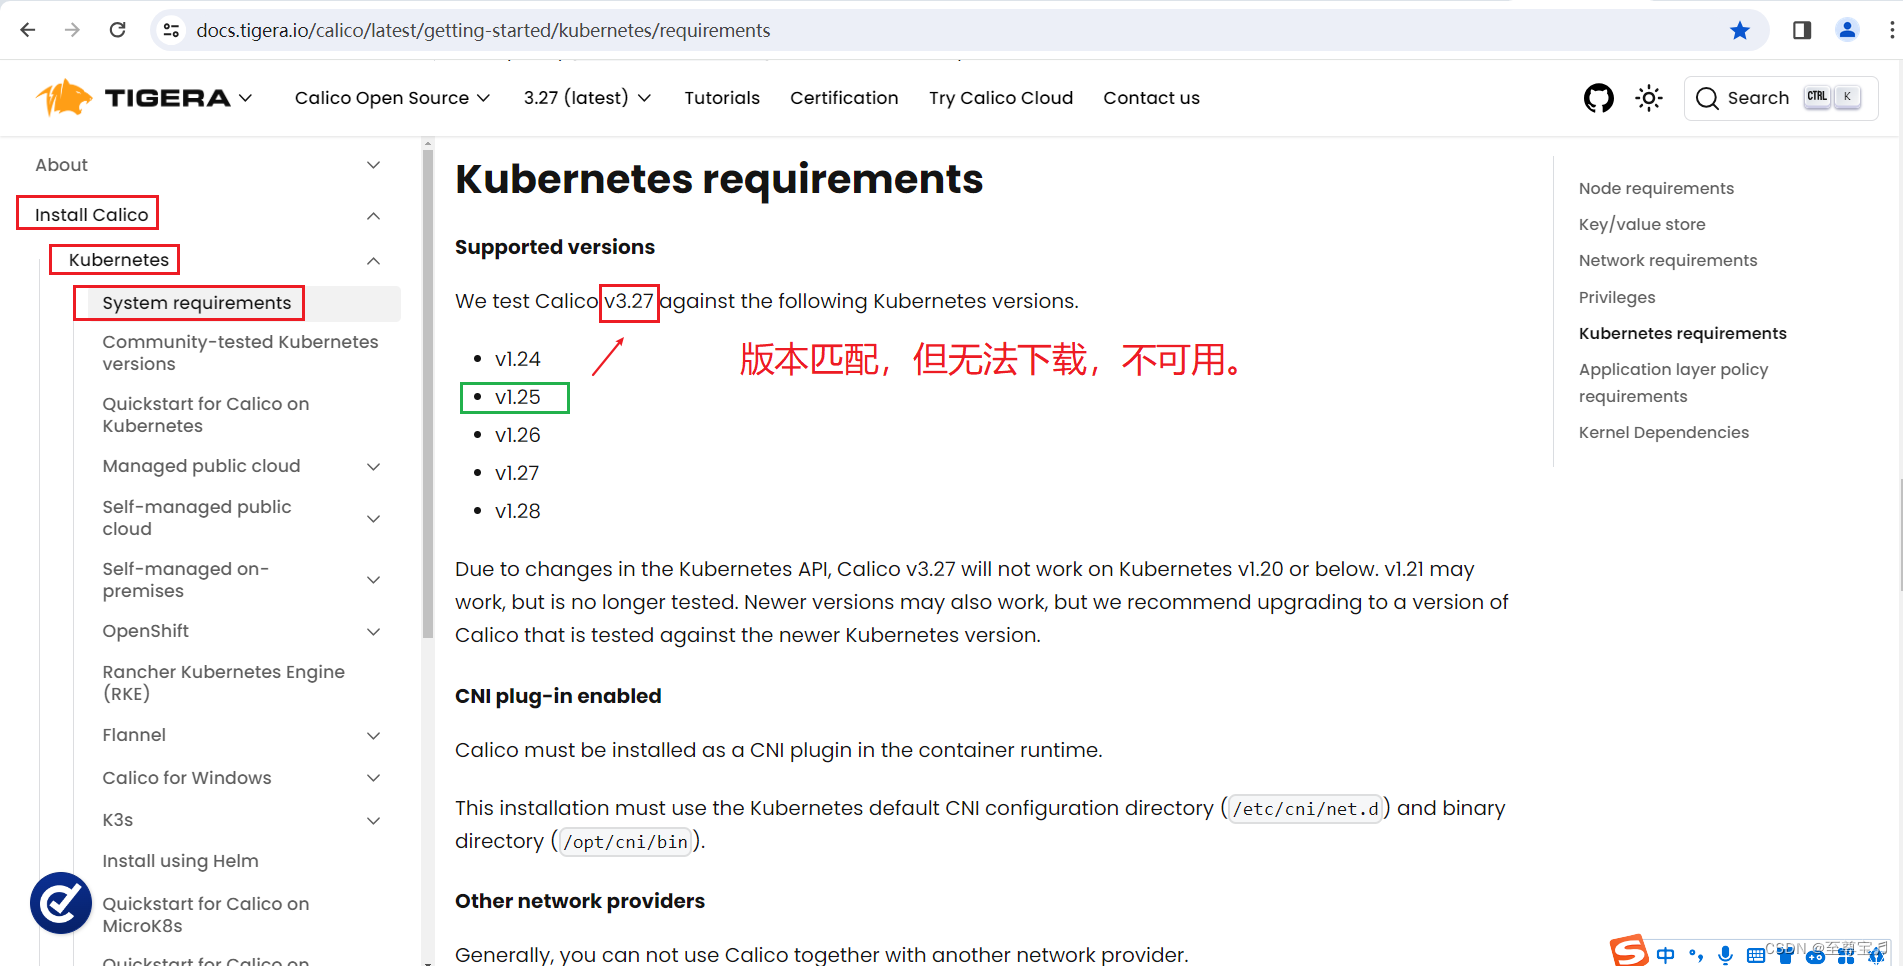
可以在在官网查看版本是否兼容。
Documentation archive | Calico DocumentationLinks to all versions of product documentation for Calico, Calico Enterprise, and Calico Cloud.![]() https://docs.tigera.io/archiveSystem requirements | Calico DocumentationReview requirements before installing Calico to ensure success.
https://docs.tigera.io/archiveSystem requirements | Calico DocumentationReview requirements before installing Calico to ensure success.![]() https://docs.tigera.io/calico/latest/getting-started/kubernetes/requirements
https://docs.tigera.io/calico/latest/getting-started/kubernetes/requirements
(1)master节点下载calico.yaml;(v3.26)(v3.27)均无法下载,不可用。
wget https://docs.projectcalico.org/v3.26/manifests/calico.yaml
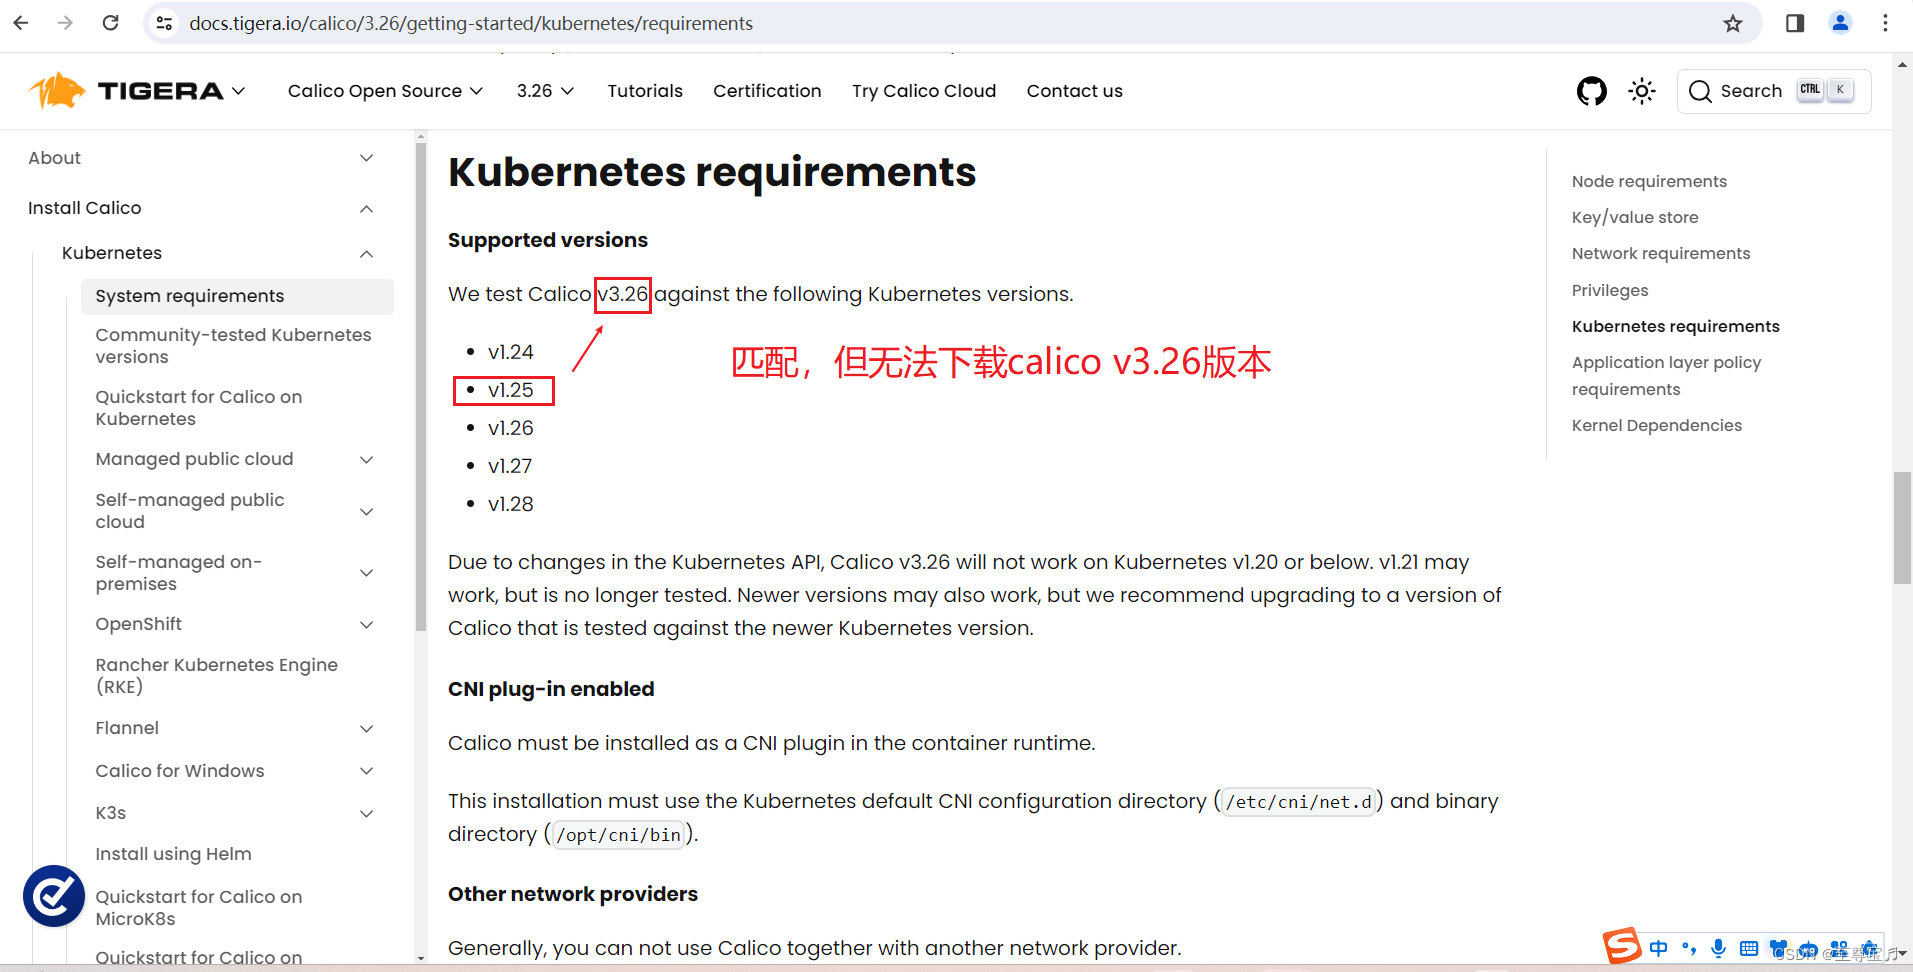
wget https://docs.projectcalico.org/v3.27/manifests/calico.yaml
calico v3.25版本匹配,也可以下载,可使用;
wget https://docs.projectcalico.org/v3.25/manifests/calico.yaml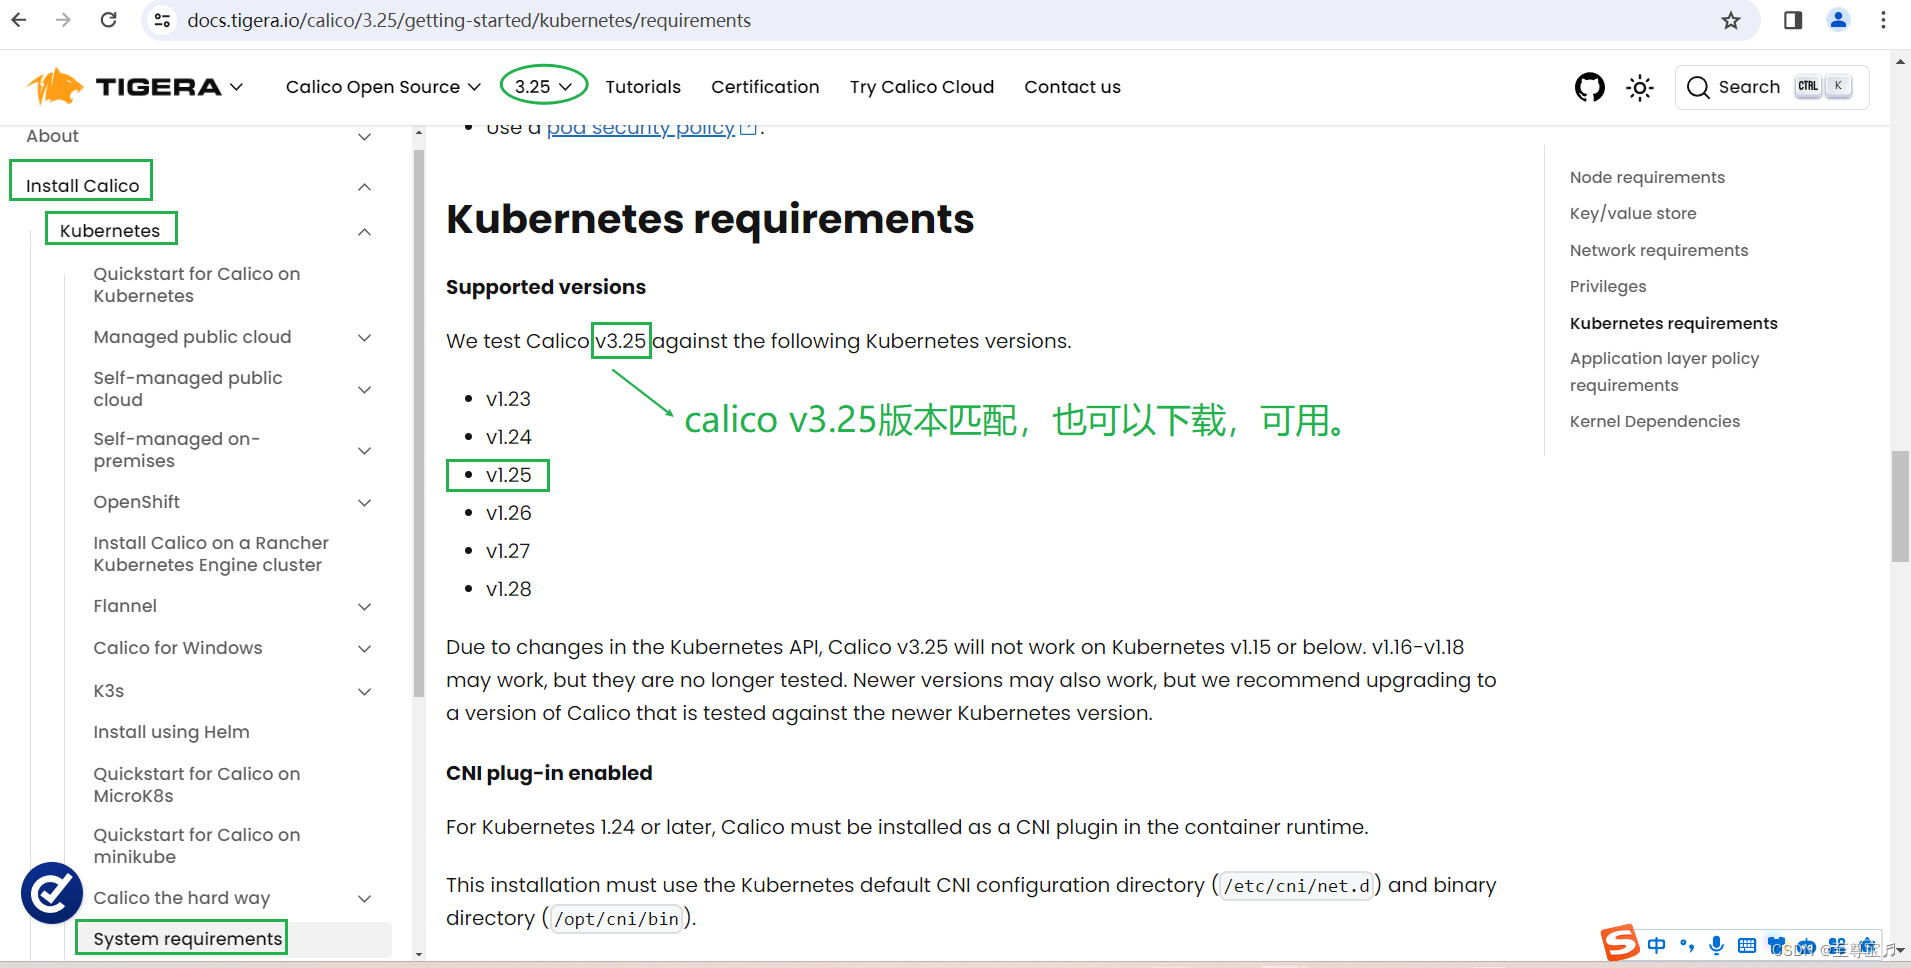

(2)master节点修改配置calico.yaml;
vim calico.yaml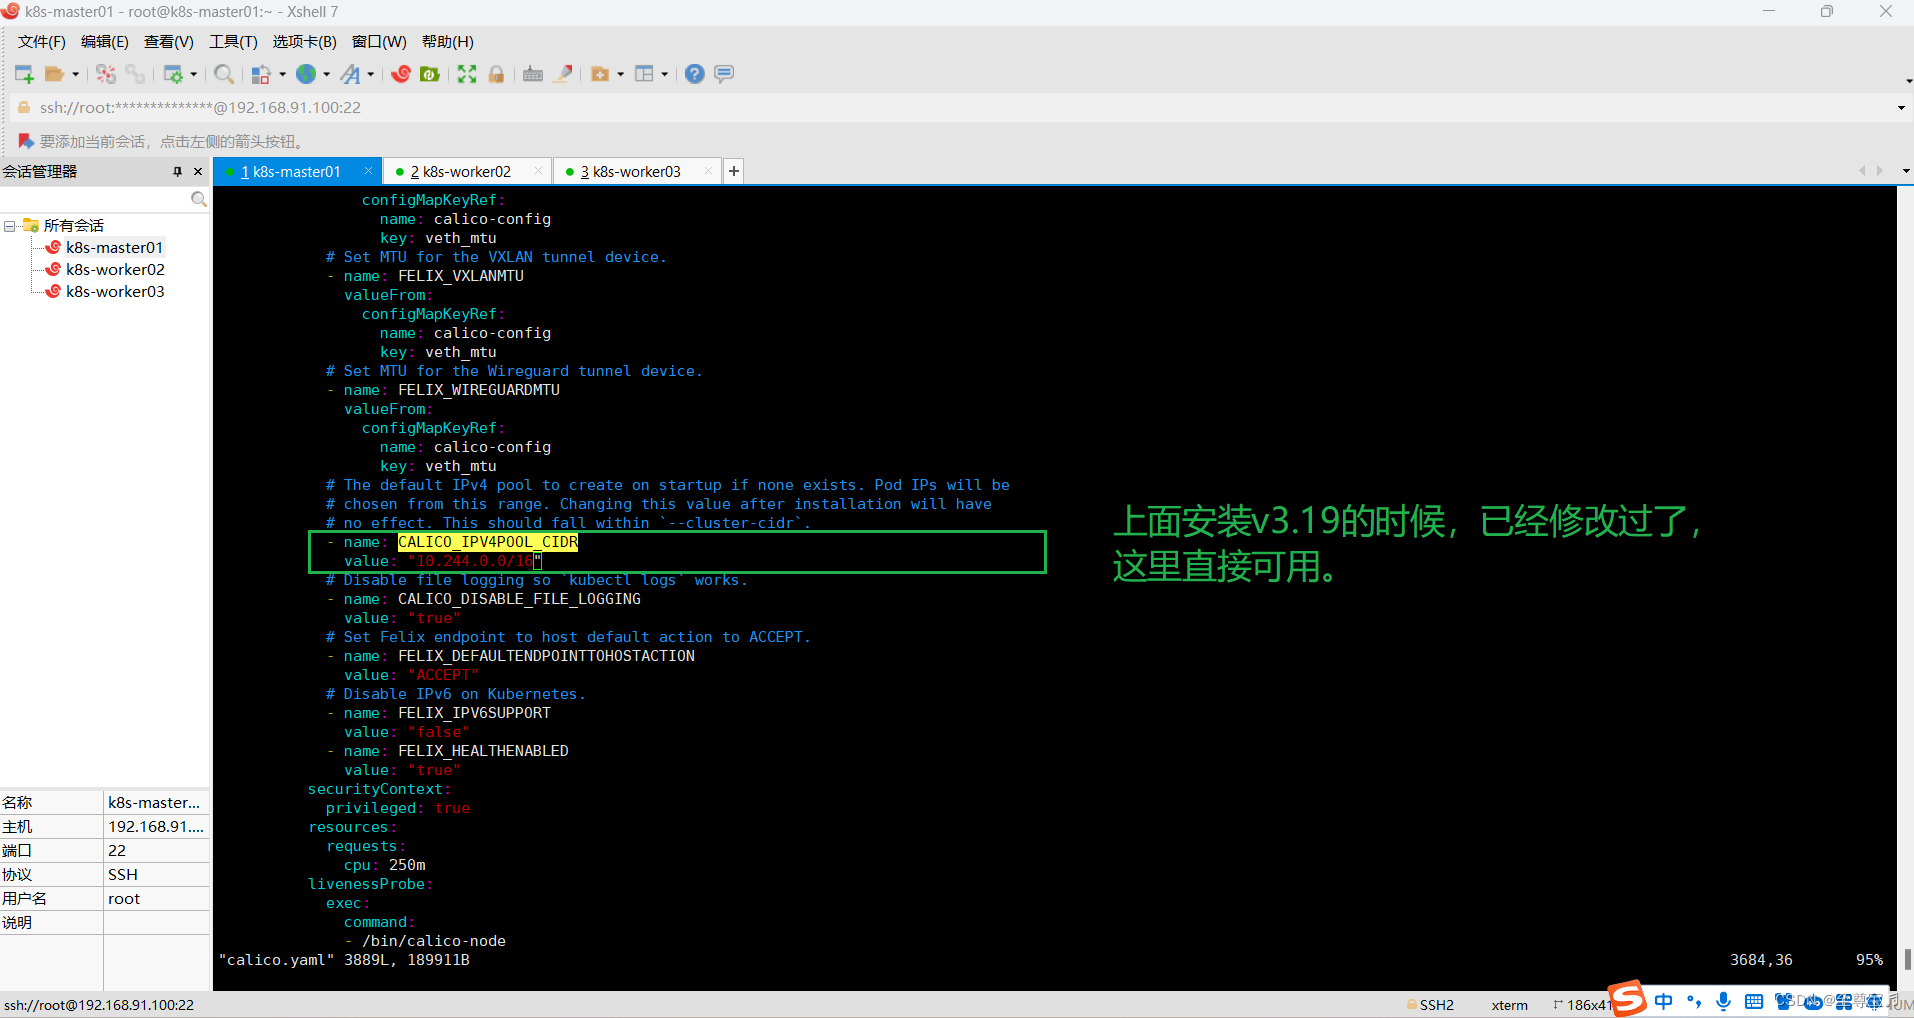
(3)master节点执行命令:kubectl create -f calico.yaml
kubectl create -f calico.yaml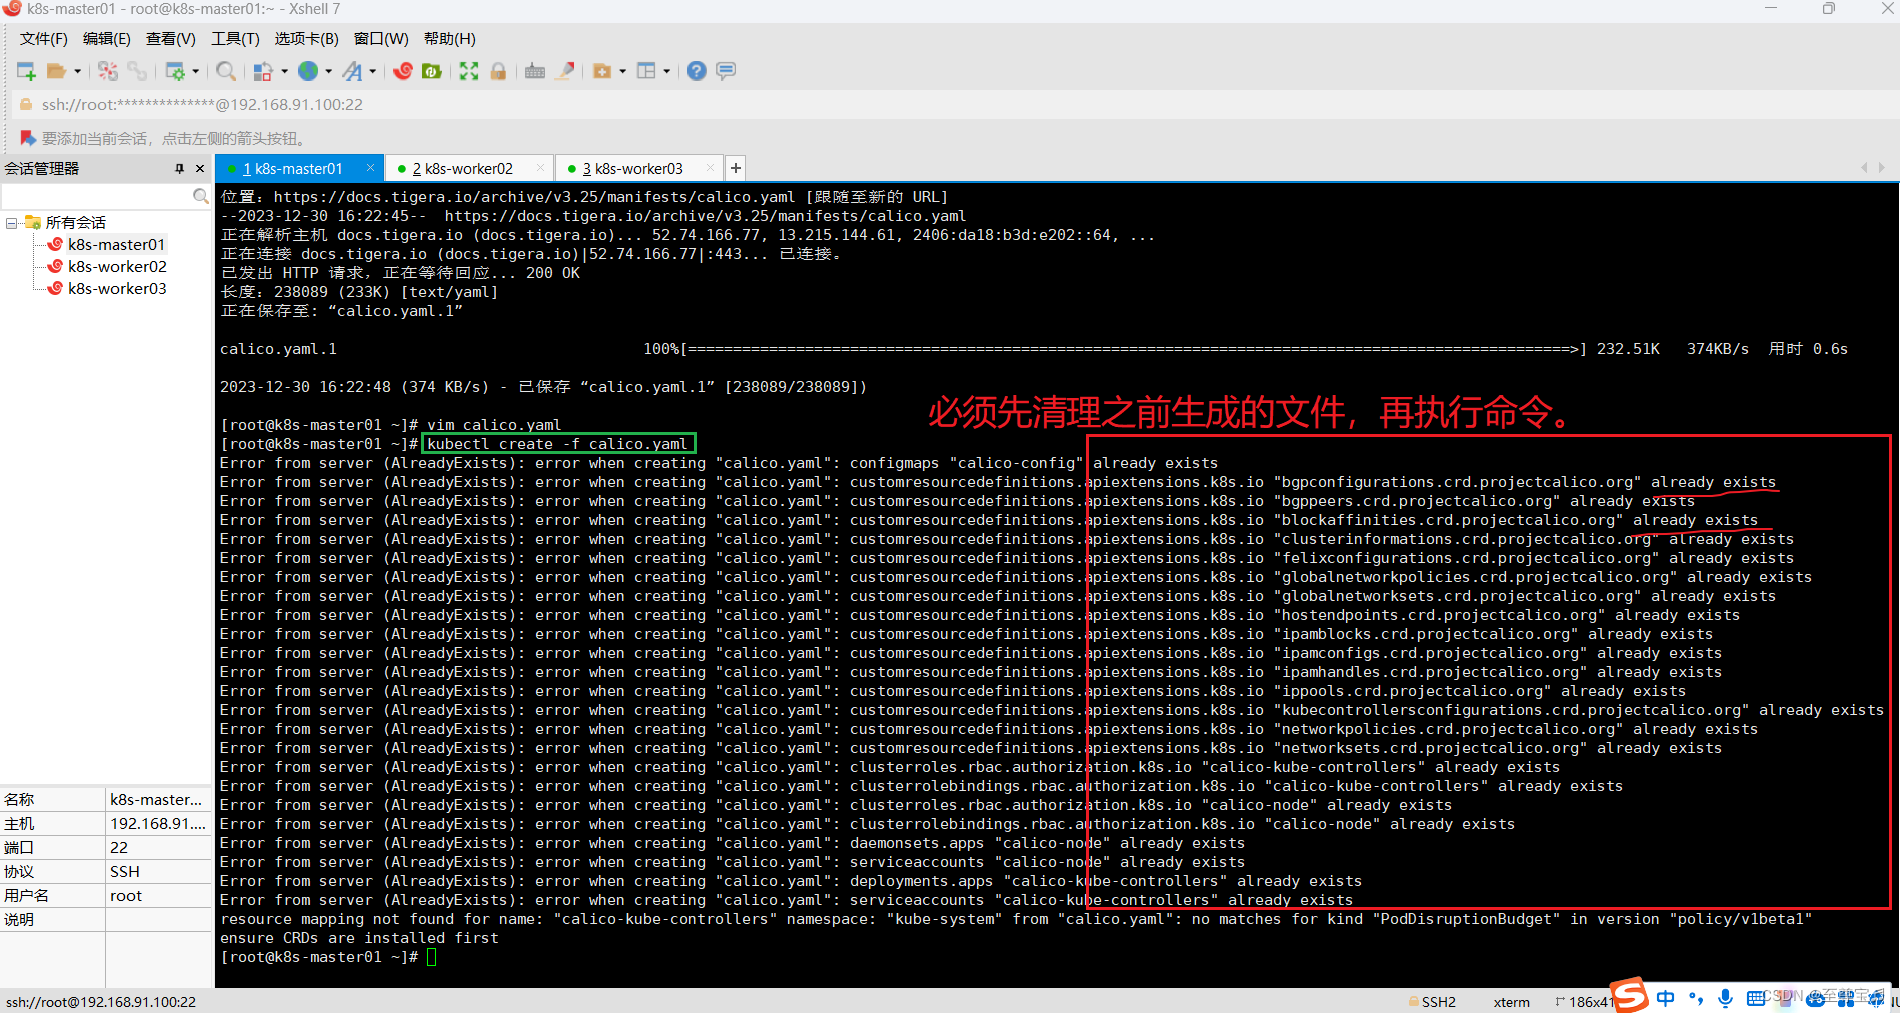
更新现有资源:如果你要更新已经存在的资源,可以使用 kubectl apply 命令。确保将更新的配置保存到 YAML 文件中,并使用以下命令执行更新:
kubectl apply -f calico.yaml
5.在master节点查看多个节点运行状态"kubectl get pods -n kube-system";
kubectl get pods -n kube-system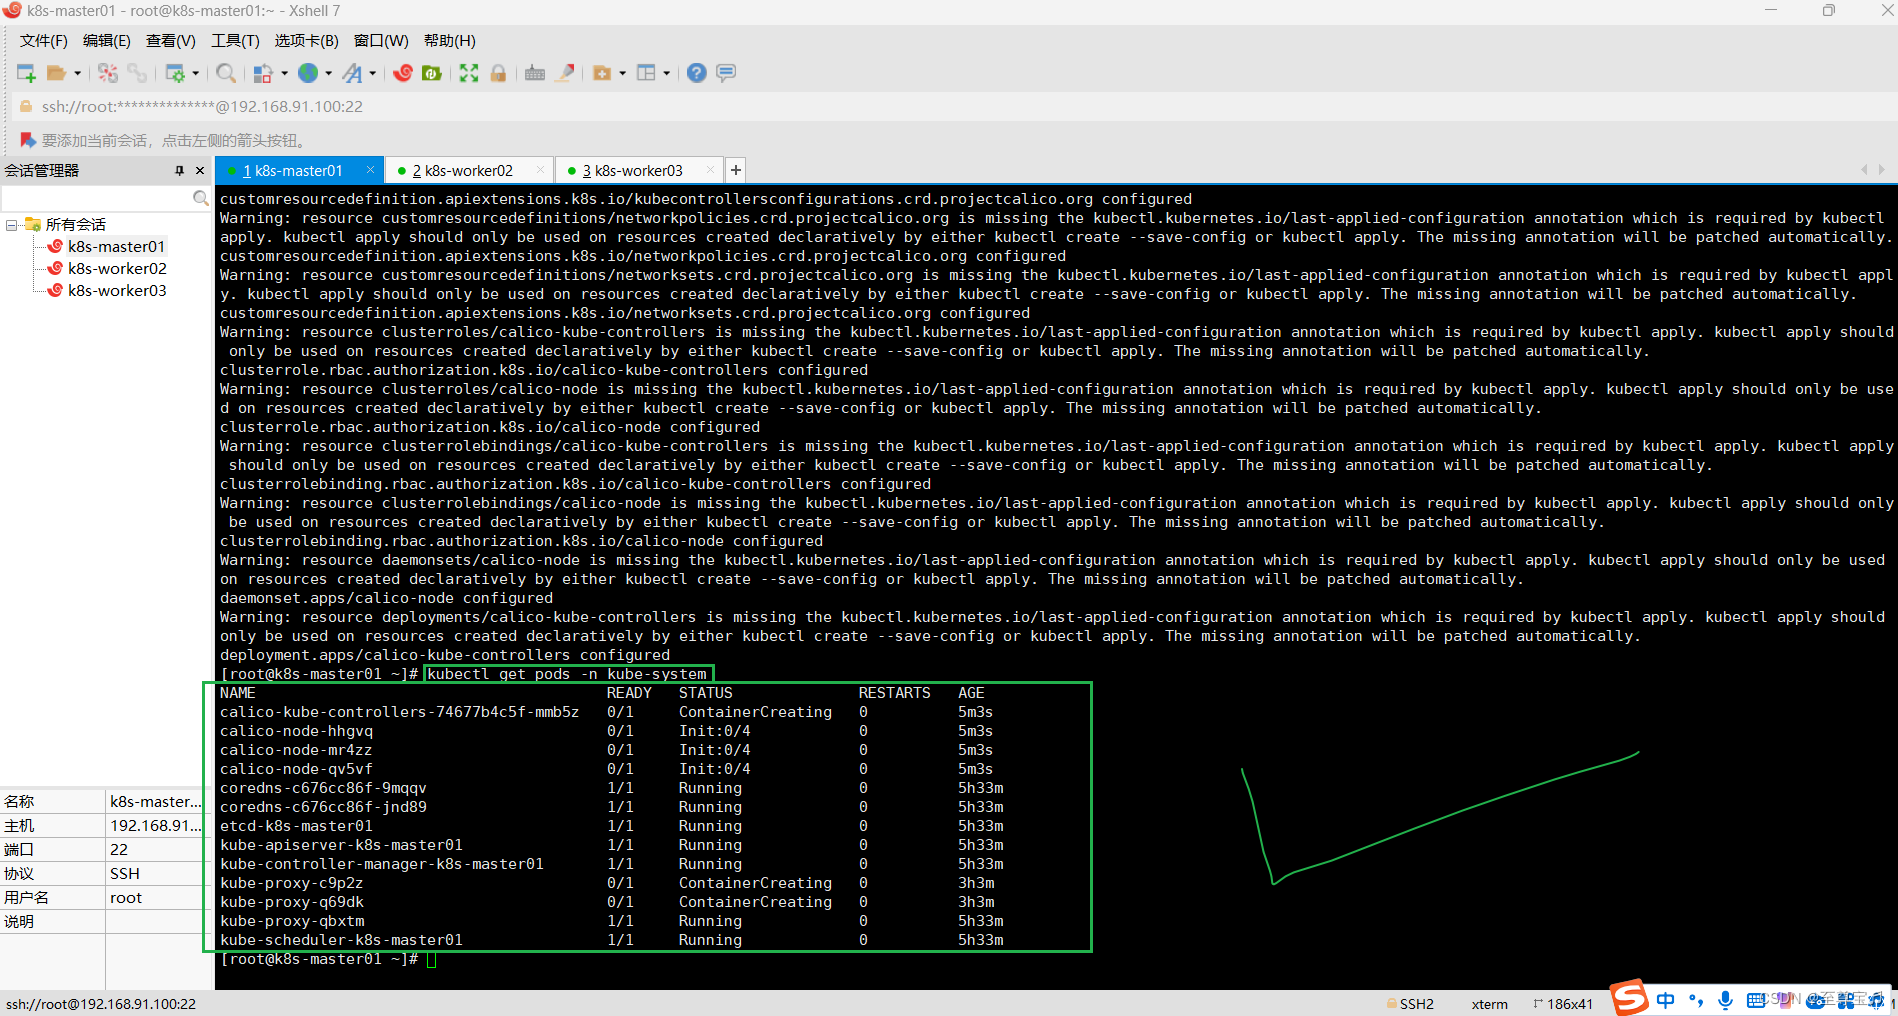
kubectl get nodes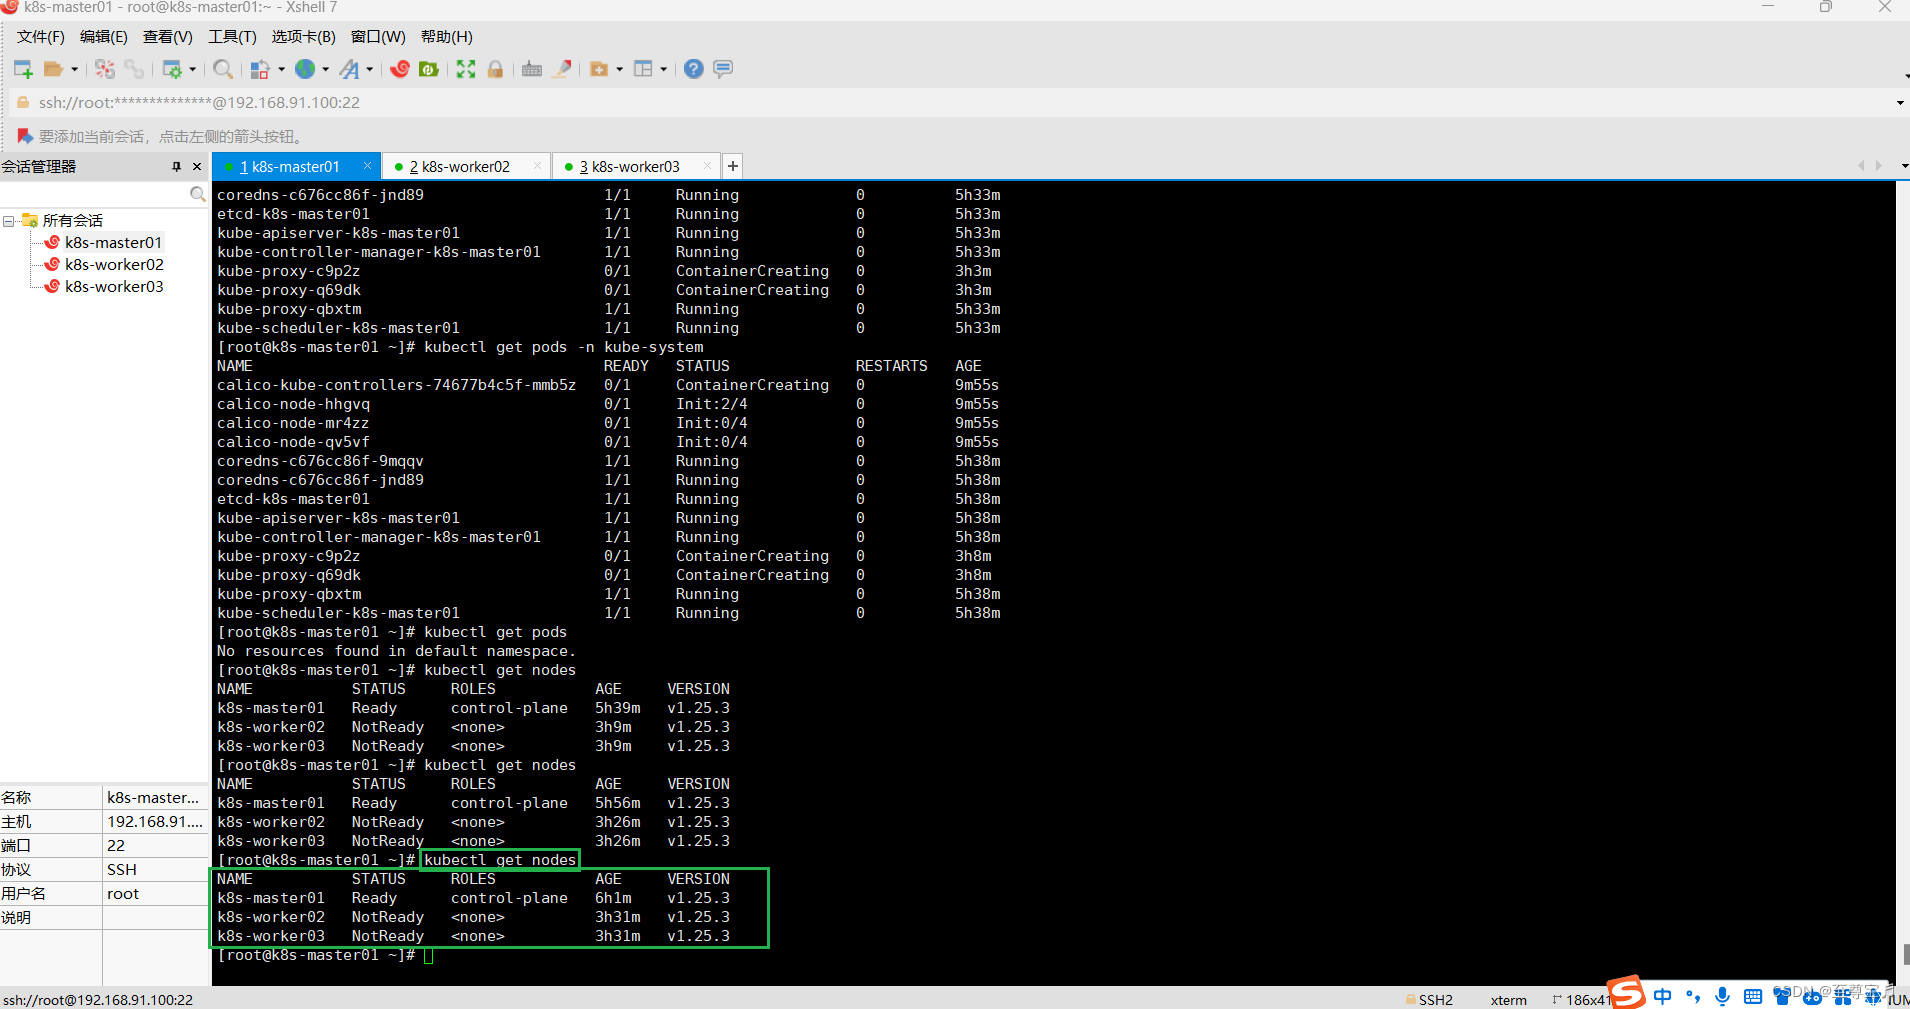
6.worker节点join到master节点;
kubeadm join 192.168.91.100:6443 --token 8m1501.pnhgjv7cbs7lg5m8 \--discovery-token-ca-cert-hash sha256:bc2310202a958bb108066bb9b6f5927f82d66067e522742f642fadfa26ea2176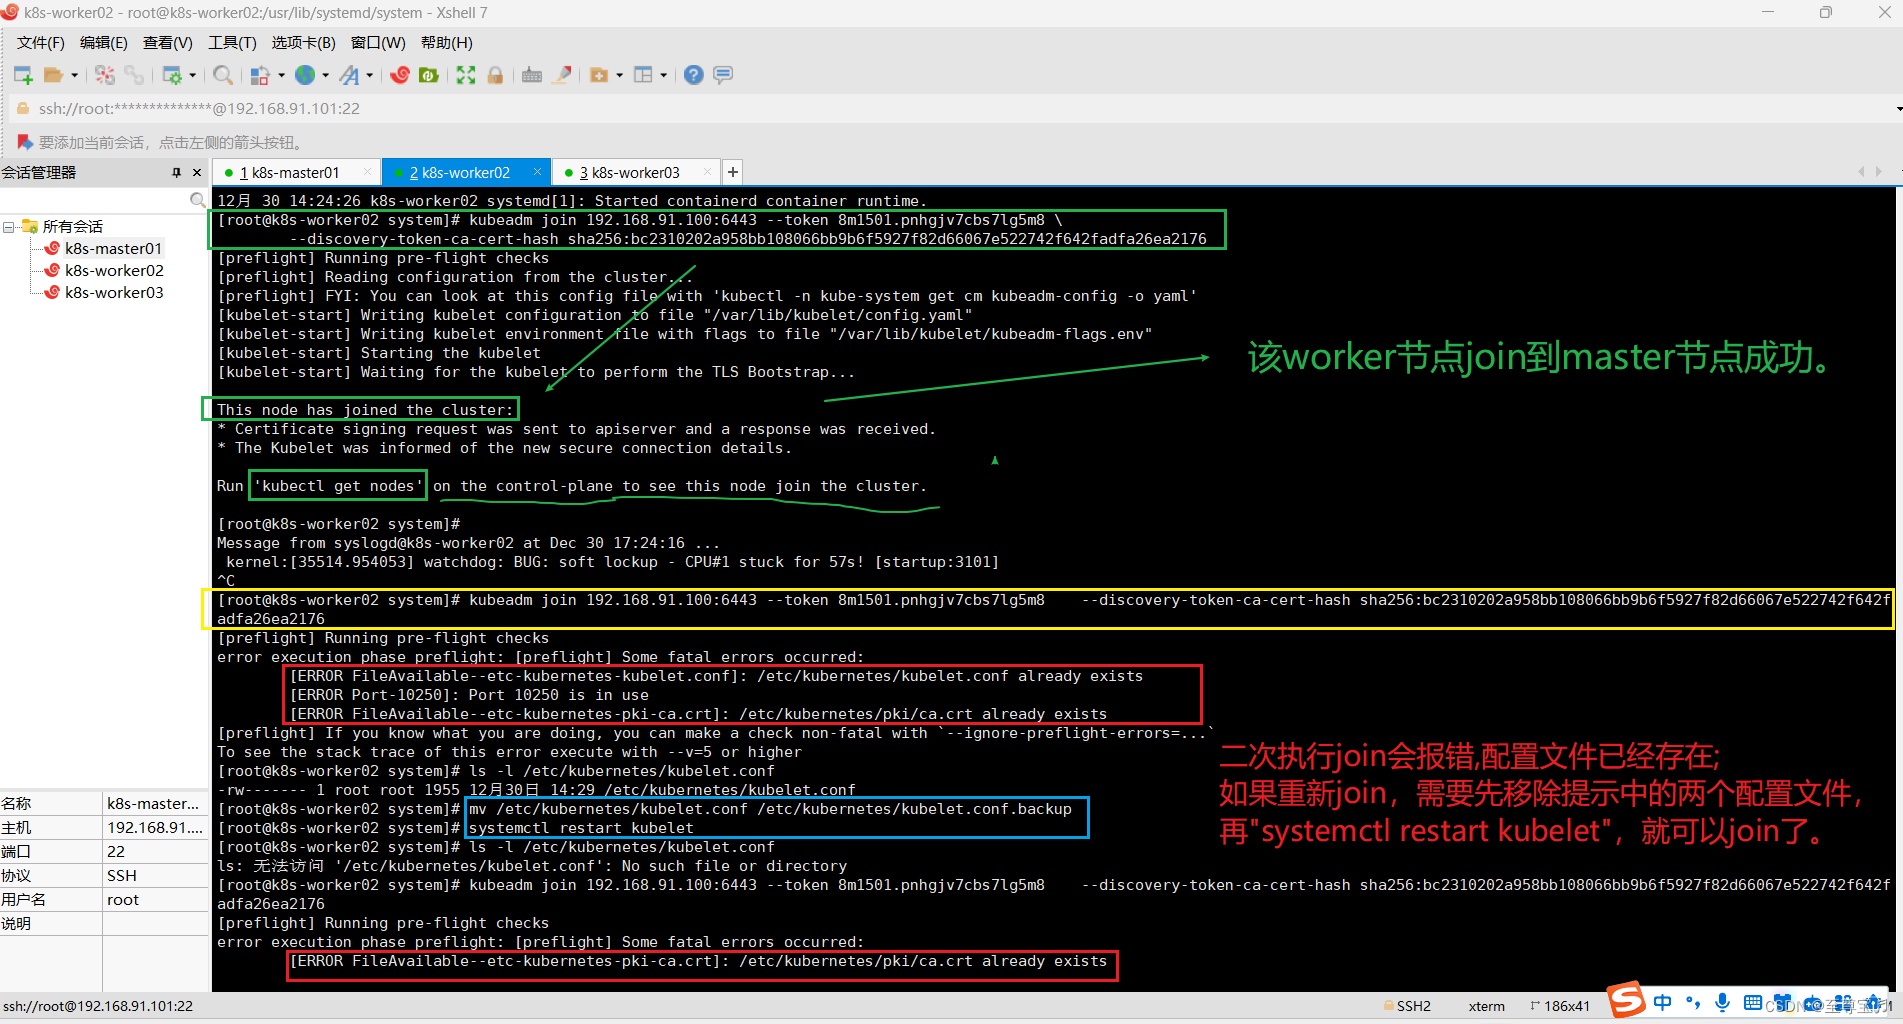

7.worker节点"NotReady"的问题;
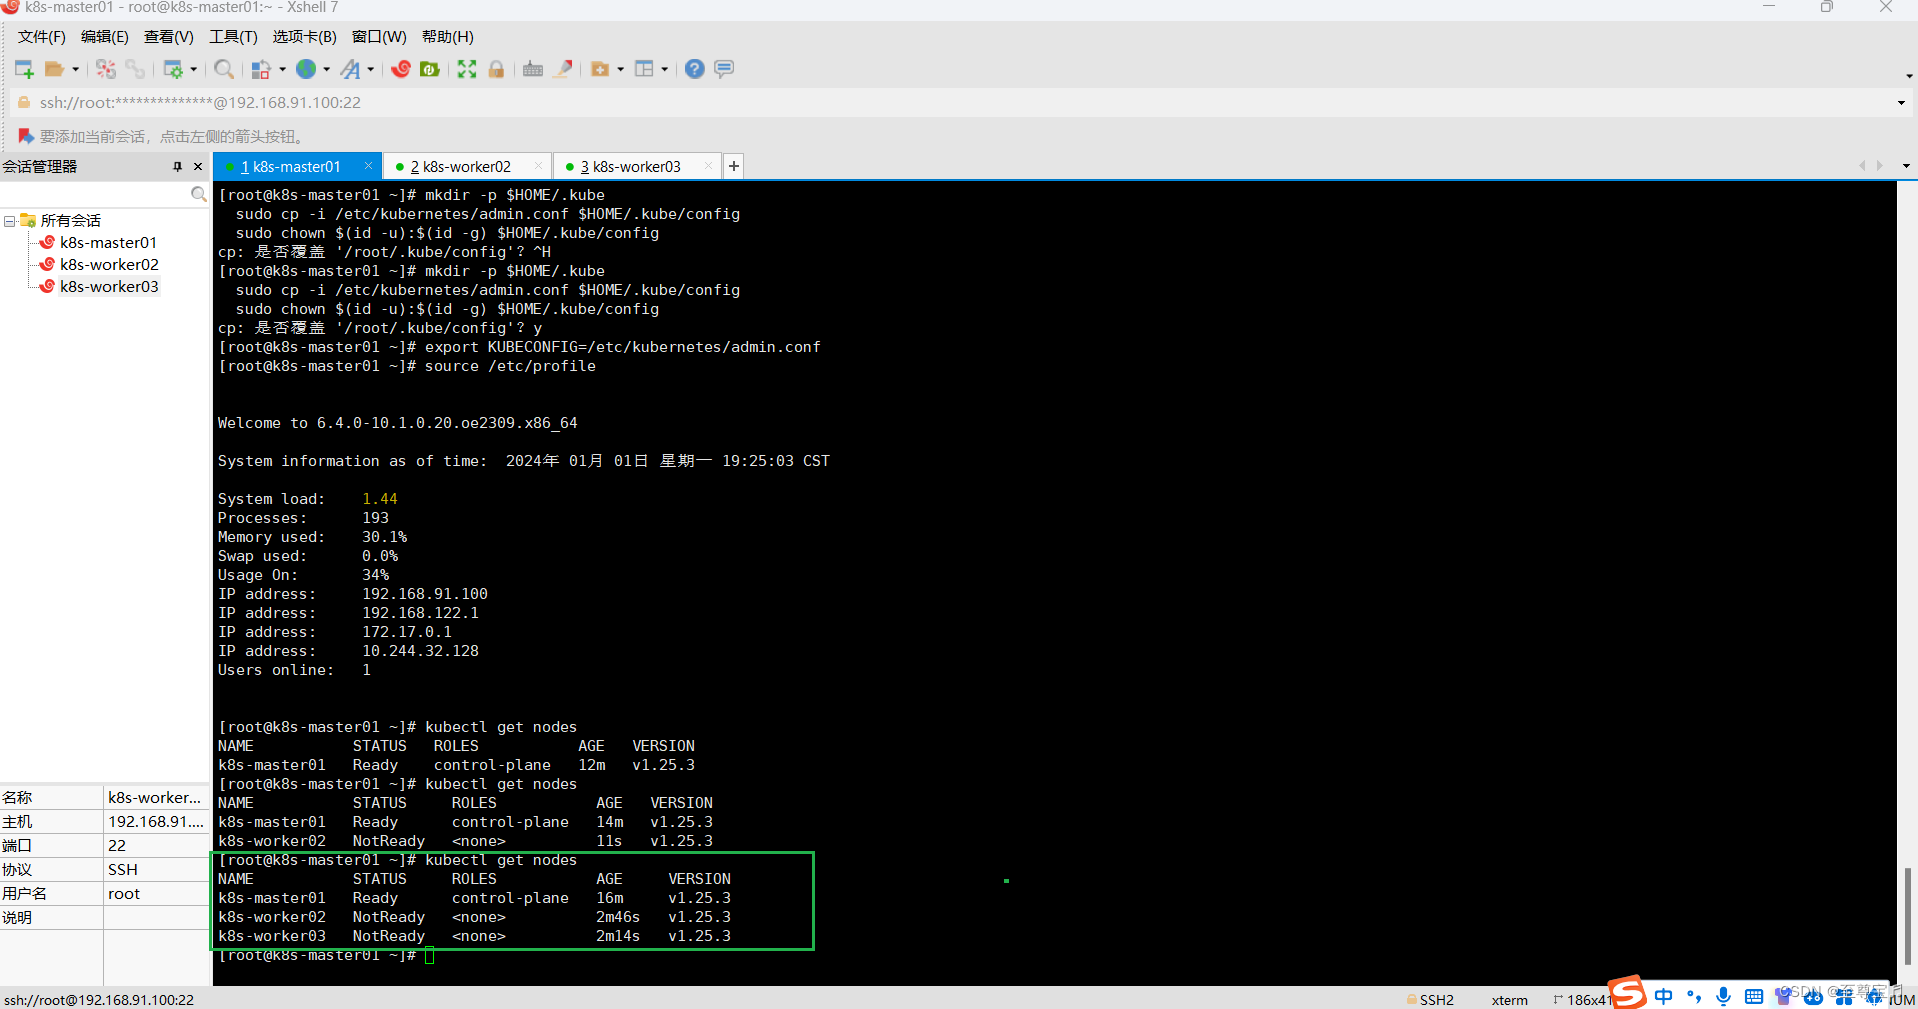
(1)在master节点执行"kubectl get nodes";
[root@k8s-master01 ~]# kubectl get nodes
NAME STATUS ROLES AGE VERSION
k8s-master01 Ready control-plane 2d6h v1.25.3
k8s-worker02 NotReady <none> 2d4h v1.25.3
k8s-worker03 NotReady <none> 2d4h v1.25.3
参考calico官方安装文档;
Quickstart for Calico on Kubernetes | Calico DocumentationInstall Calico on a single-host Kubernetes cluster for testing or development in under 15 minutes.![]() https://docs.tigera.io/calico/3.25/getting-started/kubernetes/quickstart
https://docs.tigera.io/calico/3.25/getting-started/kubernetes/quickstart
(2)所有主机重置k8s;
kubeadm reset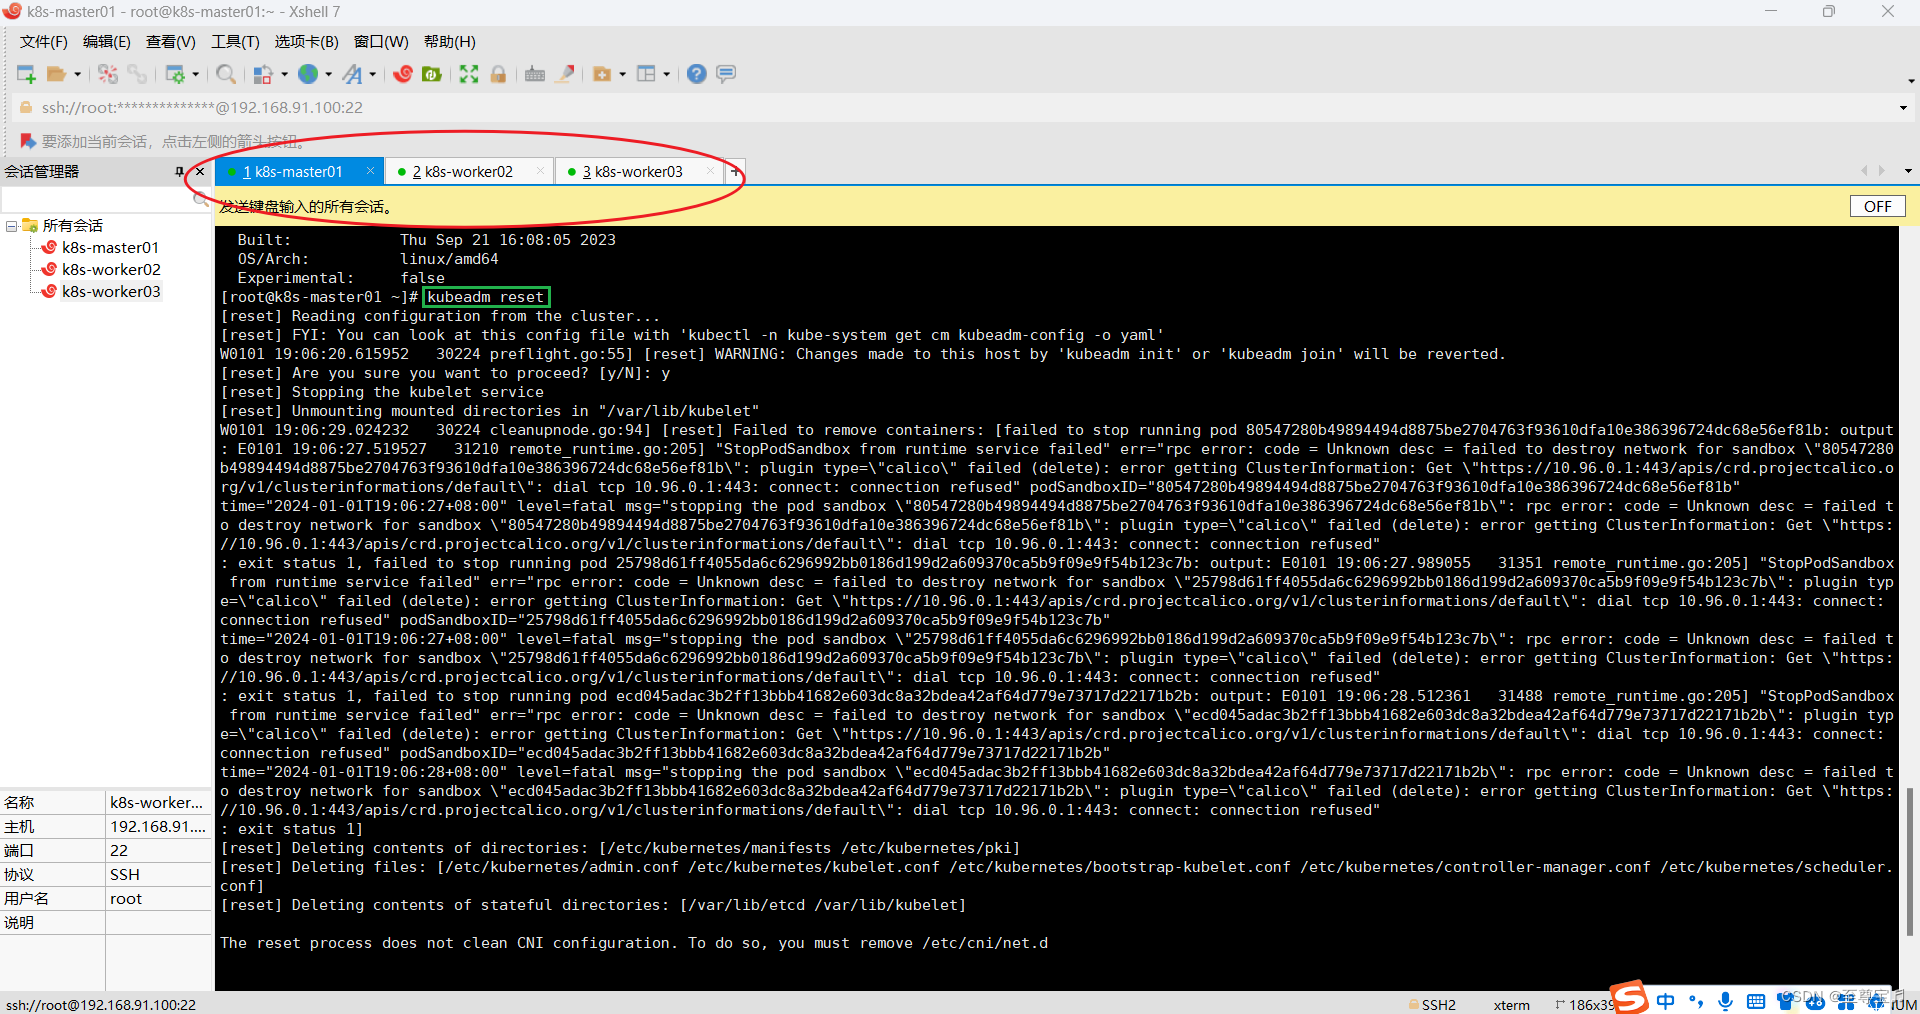
(3)master节点重新初始化;
# master节点执行
kubeadm init --node-name=k8s-master01 \
--image-repository registry.aliyuncs.com/google_containers \
--kubernetes-version v1.25.16 \
--apiserver-advertise-address=192.168.91.100 \
--pod-network-cidr=10.244.0.0/16 \
--service-cidr=10.96.0.0/12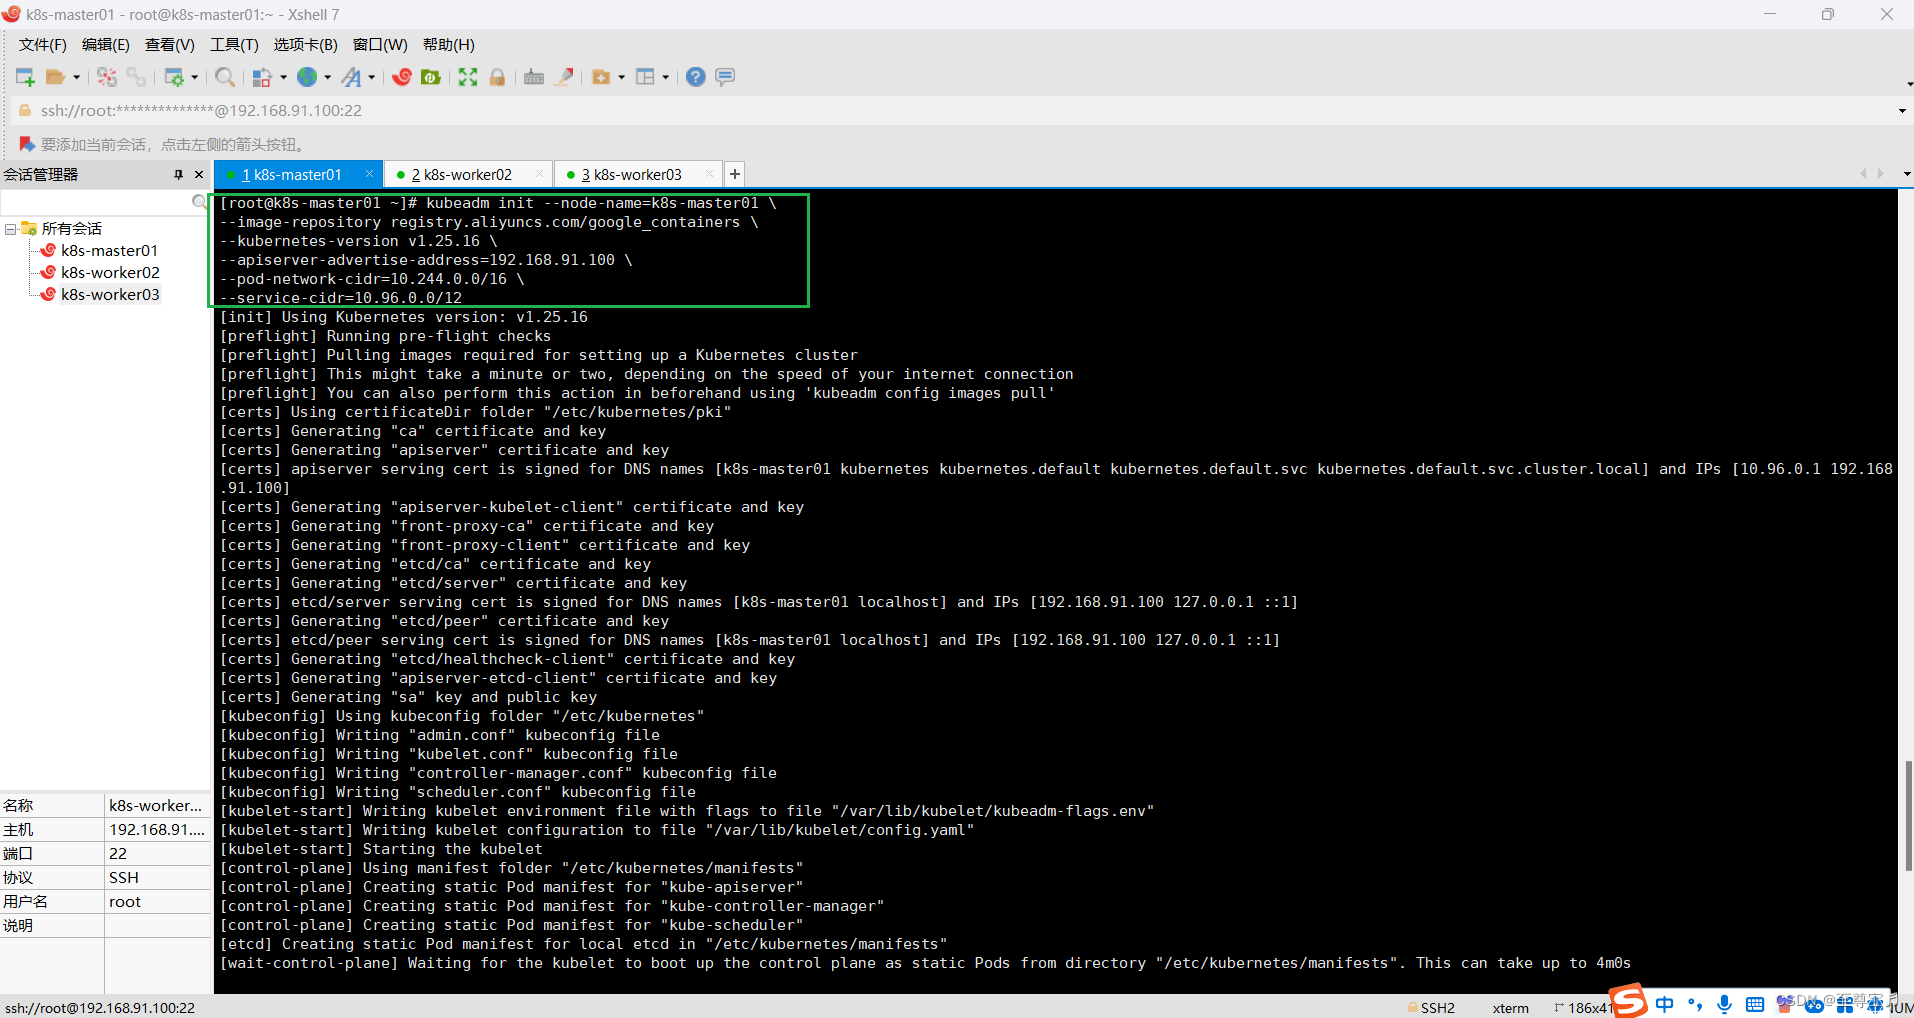
[root@k8s-master01 ~]# kubeadm init --node-name=k8s-master01 \
--image-repository registry.aliyuncs.com/google_containers \
--kubernetes-version v1.25.16 \
--apiserver-advertise-address=192.168.91.100 \
--pod-network-cidr=10.244.0.0/16 \
--service-cidr=10.96.0.0/12
[init] Using Kubernetes version: v1.25.16
[preflight] Running pre-flight checks
[preflight] Pulling images required for setting up a Kubernetes cluster
[preflight] This might take a minute or two, depending on the speed of your internet connection
[preflight] You can also perform this action in beforehand using 'kubeadm config images pull'
[certs] Using certificateDir folder "/etc/kubernetes/pki"
[certs] Generating "ca" certificate and key
[certs] Generating "apiserver" certificate and key
[certs] apiserver serving cert is signed for DNS names [k8s-master01 kubernetes kubernetes.default kubernetes.default.svc kubernetes.default.svc.cluster.local] and IPs [10.96.0.1 192.168.91.100]
[certs] Generating "apiserver-kubelet-client" certificate and key
[certs] Generating "front-proxy-ca" certificate and key
[certs] Generating "front-proxy-client" certificate and key
[certs] Generating "etcd/ca" certificate and key
[certs] Generating "etcd/server" certificate and key
[certs] etcd/server serving cert is signed for DNS names [k8s-master01 localhost] and IPs [192.168.91.100 127.0.0.1 ::1]
[certs] Generating "etcd/peer" certificate and key
[certs] etcd/peer serving cert is signed for DNS names [k8s-master01 localhost] and IPs [192.168.91.100 127.0.0.1 ::1]
[certs] Generating "etcd/healthcheck-client" certificate and key
[certs] Generating "apiserver-etcd-client" certificate and key
[certs] Generating "sa" key and public key
[kubeconfig] Using kubeconfig folder "/etc/kubernetes"
[kubeconfig] Writing "admin.conf" kubeconfig file
[kubeconfig] Writing "kubelet.conf" kubeconfig file
[kubeconfig] Writing "controller-manager.conf" kubeconfig file
[kubeconfig] Writing "scheduler.conf" kubeconfig file
[kubelet-start] Writing kubelet environment file with flags to file "/var/lib/kubelet/kubeadm-flags.env"
[kubelet-start] Writing kubelet configuration to file "/var/lib/kubelet/config.yaml"
[kubelet-start] Starting the kubelet
[control-plane] Using manifest folder "/etc/kubernetes/manifests"
[control-plane] Creating static Pod manifest for "kube-apiserver"
[control-plane] Creating static Pod manifest for "kube-controller-manager"
[control-plane] Creating static Pod manifest for "kube-scheduler"
[etcd] Creating static Pod manifest for local etcd in "/etc/kubernetes/manifests"
[wait-control-plane] Waiting for the kubelet to boot up the control plane as static Pods from directory "/etc/kubernetes/manifests". This can take up to 4m0s
[apiclient] All control plane components are healthy after 7.505709 seconds
[upload-config] Storing the configuration used in ConfigMap "kubeadm-config" in the "kube-system" Namespace
[kubelet] Creating a ConfigMap "kubelet-config" in namespace kube-system with the configuration for the kubelets in the cluster
[upload-certs] Skipping phase. Please see --upload-certs
[mark-control-plane] Marking the node k8s-master01 as control-plane by adding the labels: [node-role.kubernetes.io/control-plane node.kubernetes.io/exclude-from-external-load-balancers]
[mark-control-plane] Marking the node k8s-master01 as control-plane by adding the taints [node-role.kubernetes.io/control-plane:NoSchedule]
[bootstrap-token] Using token: zxa6xc.q8wtvtez4zkhmusi
[bootstrap-token] Configuring bootstrap tokens, cluster-info ConfigMap, RBAC Roles
[bootstrap-token] Configured RBAC rules to allow Node Bootstrap tokens to get nodes
[bootstrap-token] Configured RBAC rules to allow Node Bootstrap tokens to post CSRs in order for nodes to get long term certificate credentials
[bootstrap-token] Configured RBAC rules to allow the csrapprover controller automatically approve CSRs from a Node Bootstrap Token
[bootstrap-token] Configured RBAC rules to allow certificate rotation for all node client certificates in the cluster
[bootstrap-token] Creating the "cluster-info" ConfigMap in the "kube-public" namespace
[kubelet-finalize] Updating "/etc/kubernetes/kubelet.conf" to point to a rotatable kubelet client certificate and key
[addons] Applied essential addon: CoreDNS
[addons] Applied essential addon: kube-proxyYour Kubernetes control-plane has initialized successfully!To start using your cluster, you need to run the following as a regular user:mkdir -p $HOME/.kubesudo cp -i /etc/kubernetes/admin.conf $HOME/.kube/configsudo chown $(id -u):$(id -g) $HOME/.kube/configAlternatively, if you are the root user, you can run:export KUBECONFIG=/etc/kubernetes/admin.confYou should now deploy a pod network to the cluster.
Run "kubectl apply -f [podnetwork].yaml" with one of the options listed at:https://kubernetes.io/docs/concepts/cluster-administration/addons/Then you can join any number of worker nodes by running the following on each as root:kubeadm join 192.168.91.100:6443 --token zxa6xc.q8wtvtez4zkhmusi \--discovery-token-ca-cert-hash sha256:63826f6a9e565823d6c455c281914a58b24eaca7a04b59af5b17fdd13b976633
[root@k8s-master01 ~]#
(4)master节点执行下面命令;
# 普通用户操作
mkdir -p $HOME/.kube
sudo cp -i /etc/kubernetes/admin.conf $HOME/.kube/config
sudo chown $(id -u):$(id -g) $HOME/.kube/config
# root用户配置环境变量
export KUBECONFIG=/etc/kubernetes/admin.conf# 使新配置环境变量生效
source /etc/profile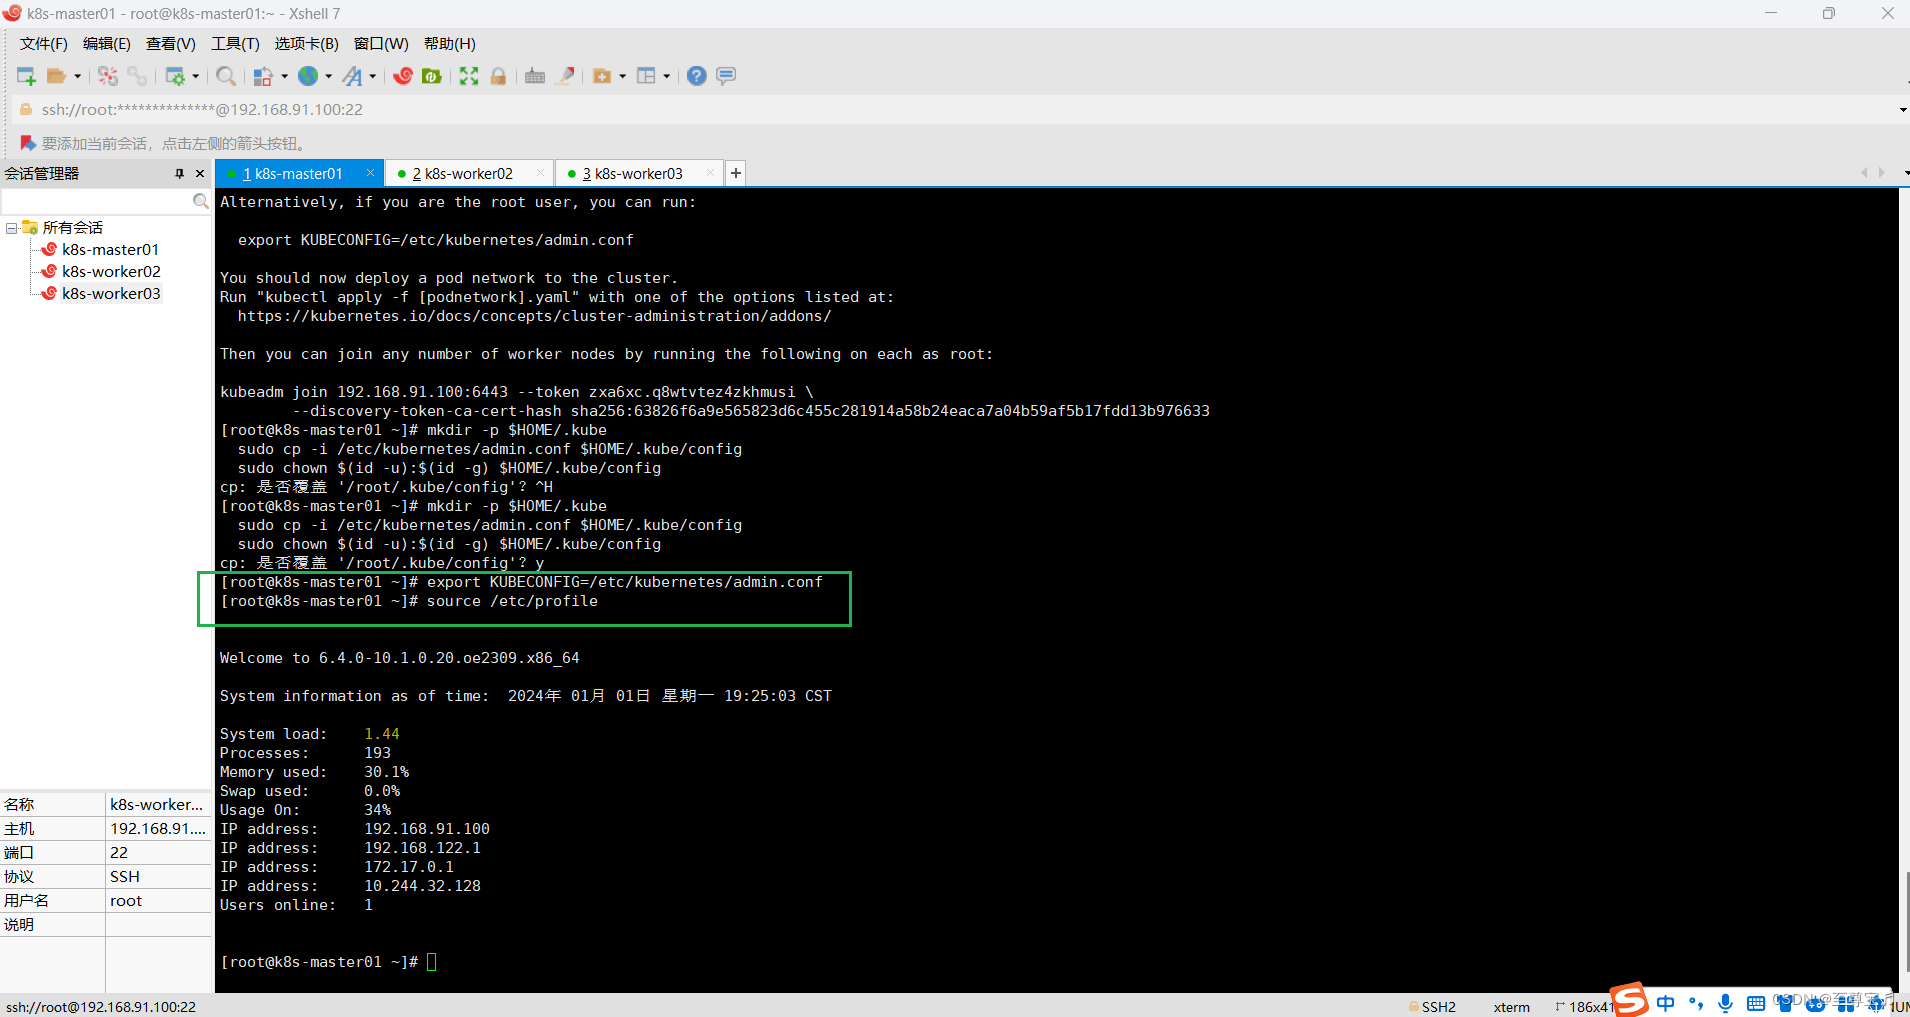
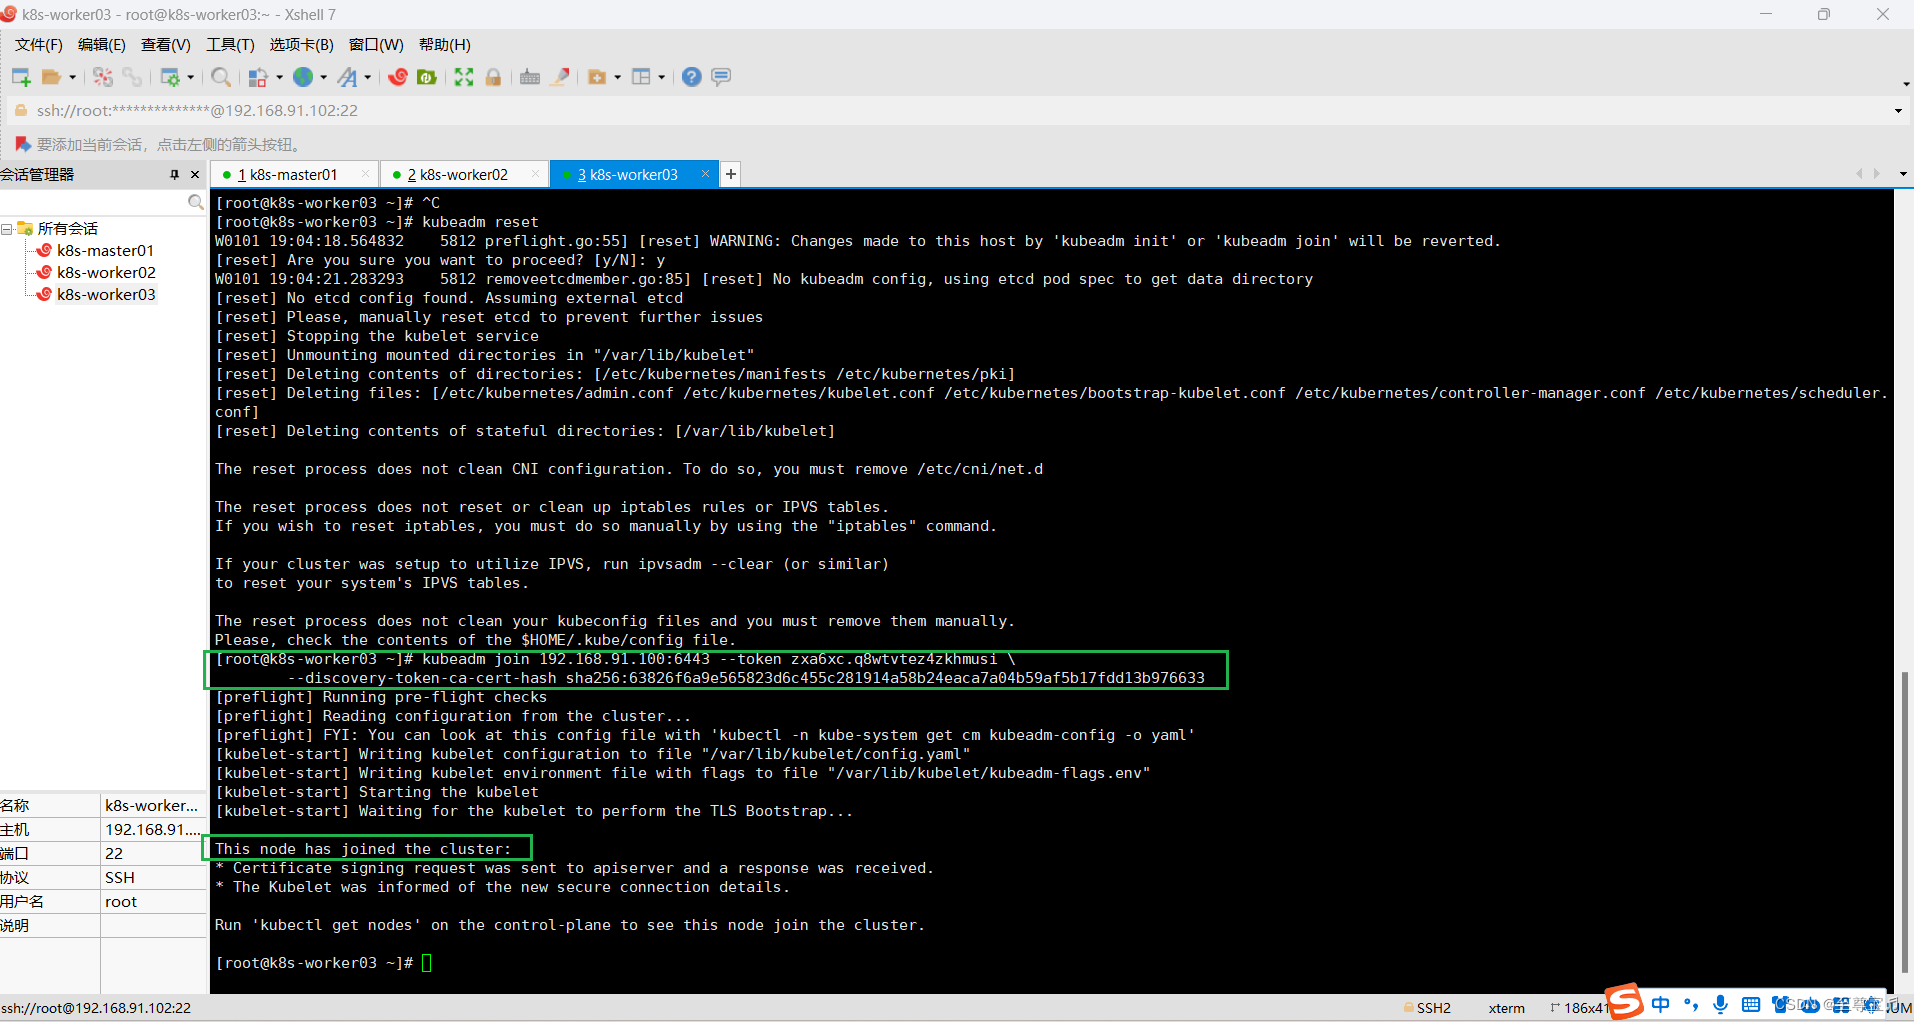
(5)两个worker节点join到master节点;
kubeadm join 192.168.91.100:6443 --token zxa6xc.q8wtvtez4zkhmusi \--discovery-token-ca-cert-hash sha256:63826f6a9e565823d6c455c281914a58b24eaca7a04b59af5b17fdd13b976633
在master节点执行"kubectl get nodes";
(6)master节点安装calico v3.25.2;
Quickstart for Calico on Kubernetes | Calico DocumentationInstall Calico on a single-host Kubernetes cluster for testing or development in under 15 minutes.![]() https://docs.tigera.io/calico/3.25/getting-started/kubernetes/quickstart
https://docs.tigera.io/calico/3.25/getting-started/kubernetes/quickstart
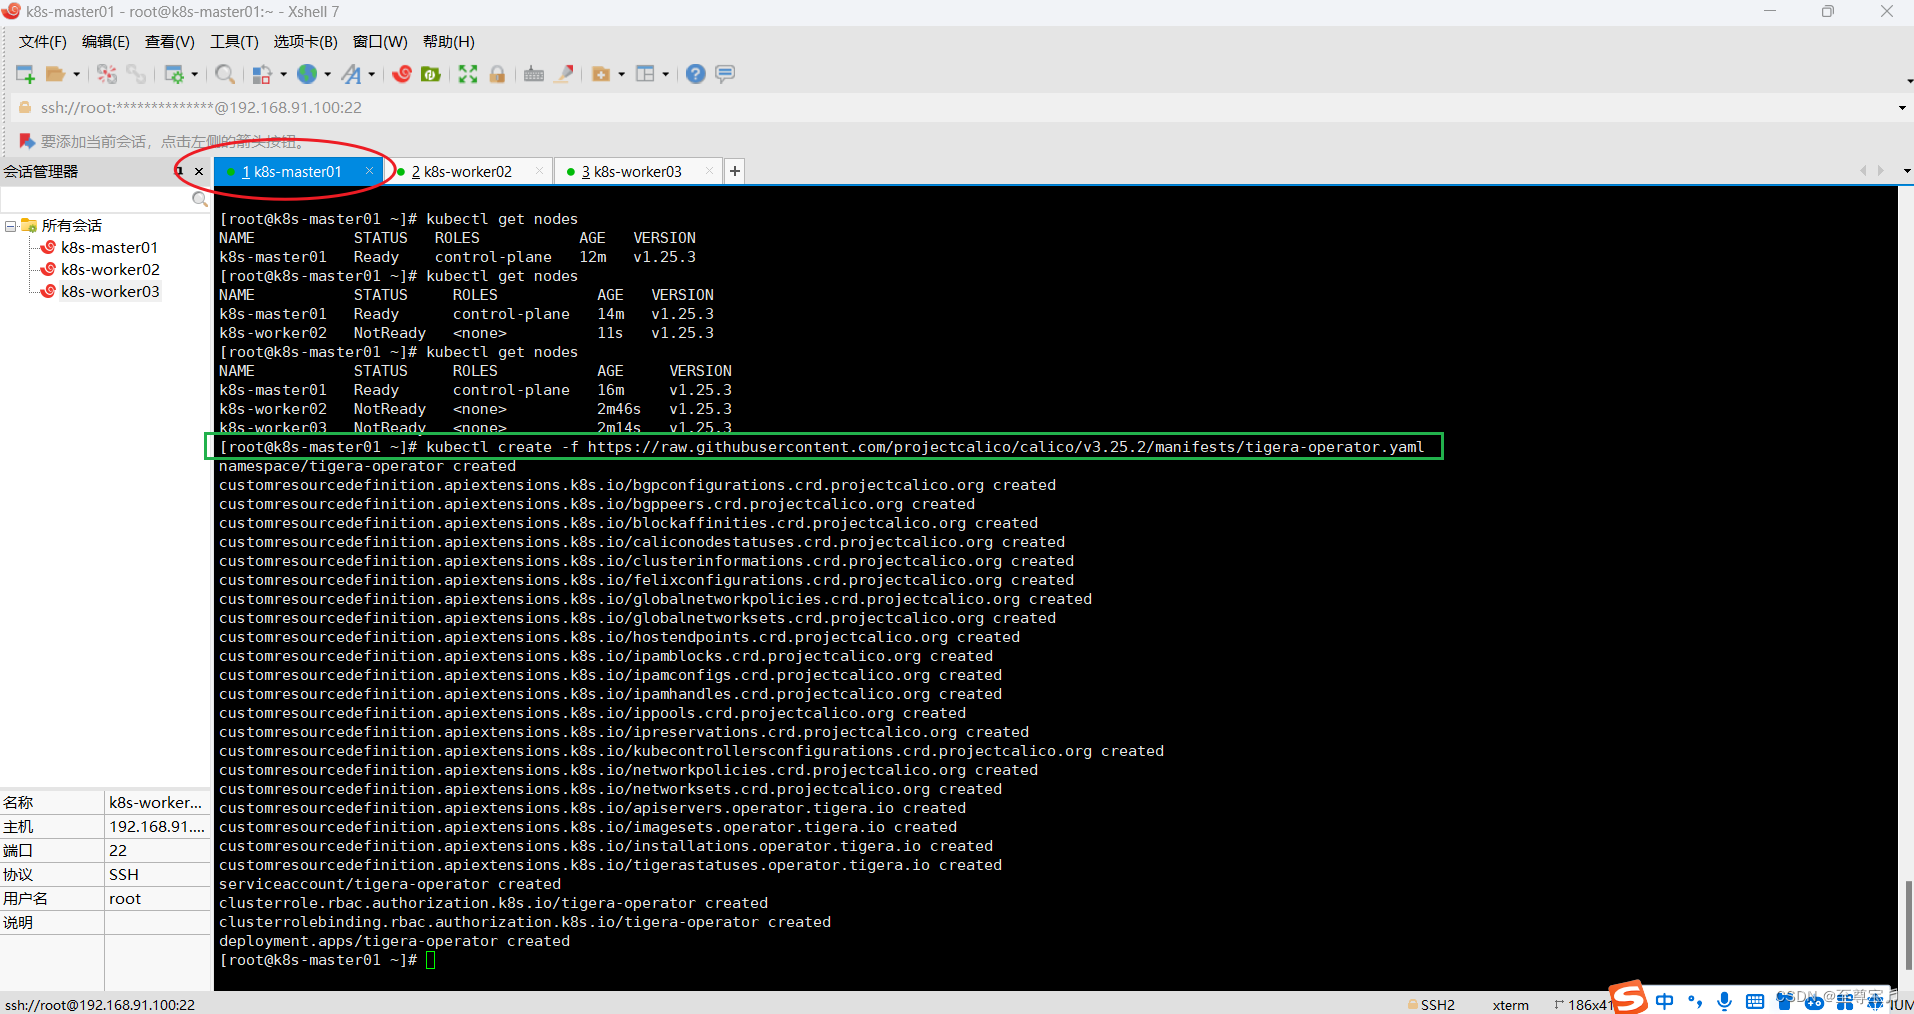
①执行下面命令,生成tigera-operator.yaml;
kubectl create -f https://raw.githubusercontent.com/projectcalico/calico/v3.25.2/manifests/tigera-operator.yamlQuickstart for Calico on Kubernetes | Calico DocumentationInstall Calico on a single-host Kubernetes cluster for testing or development in under 15 minutes.![]() https://docs.tigera.io/calico/3.25/getting-started/kubernetes/quickstart
https://docs.tigera.io/calico/3.25/getting-started/kubernetes/quickstart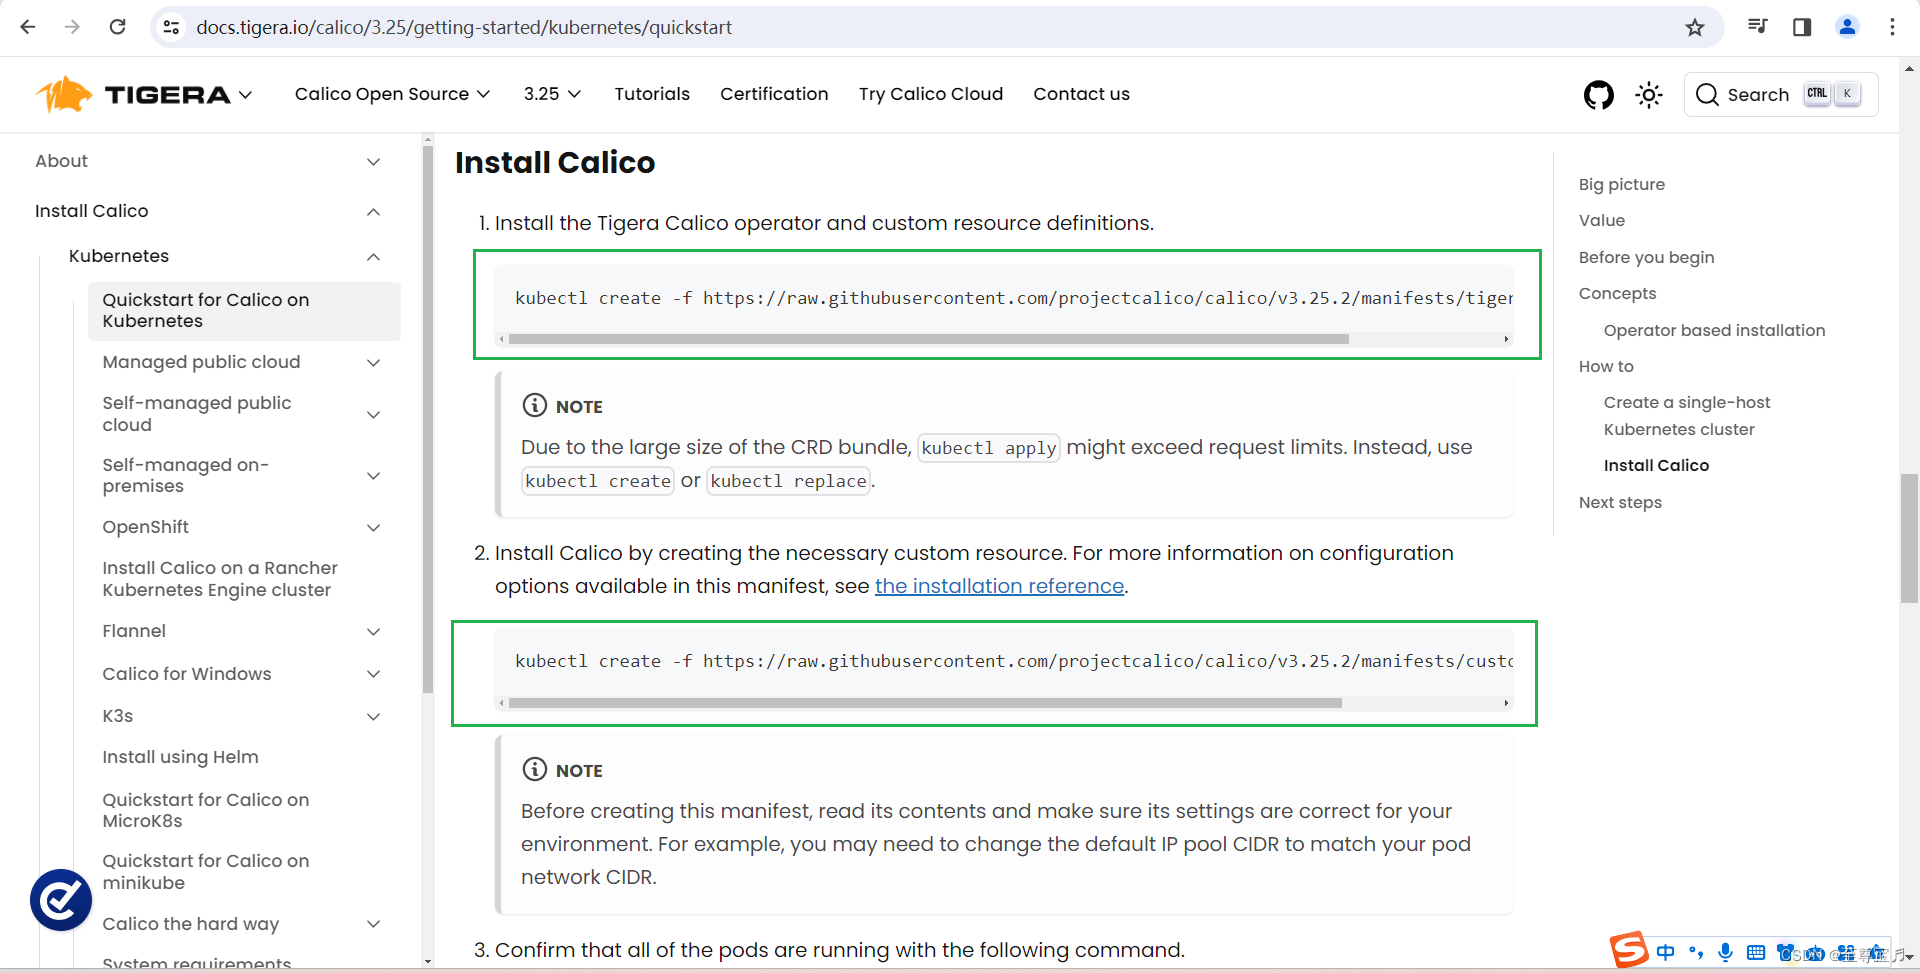
②重点注意下面命令,与calico官方文档执行有些不同;
wget https://raw.githubusercontent.com/projectcalico/calico/v3.25.2/manifests/custom-resources.yaml
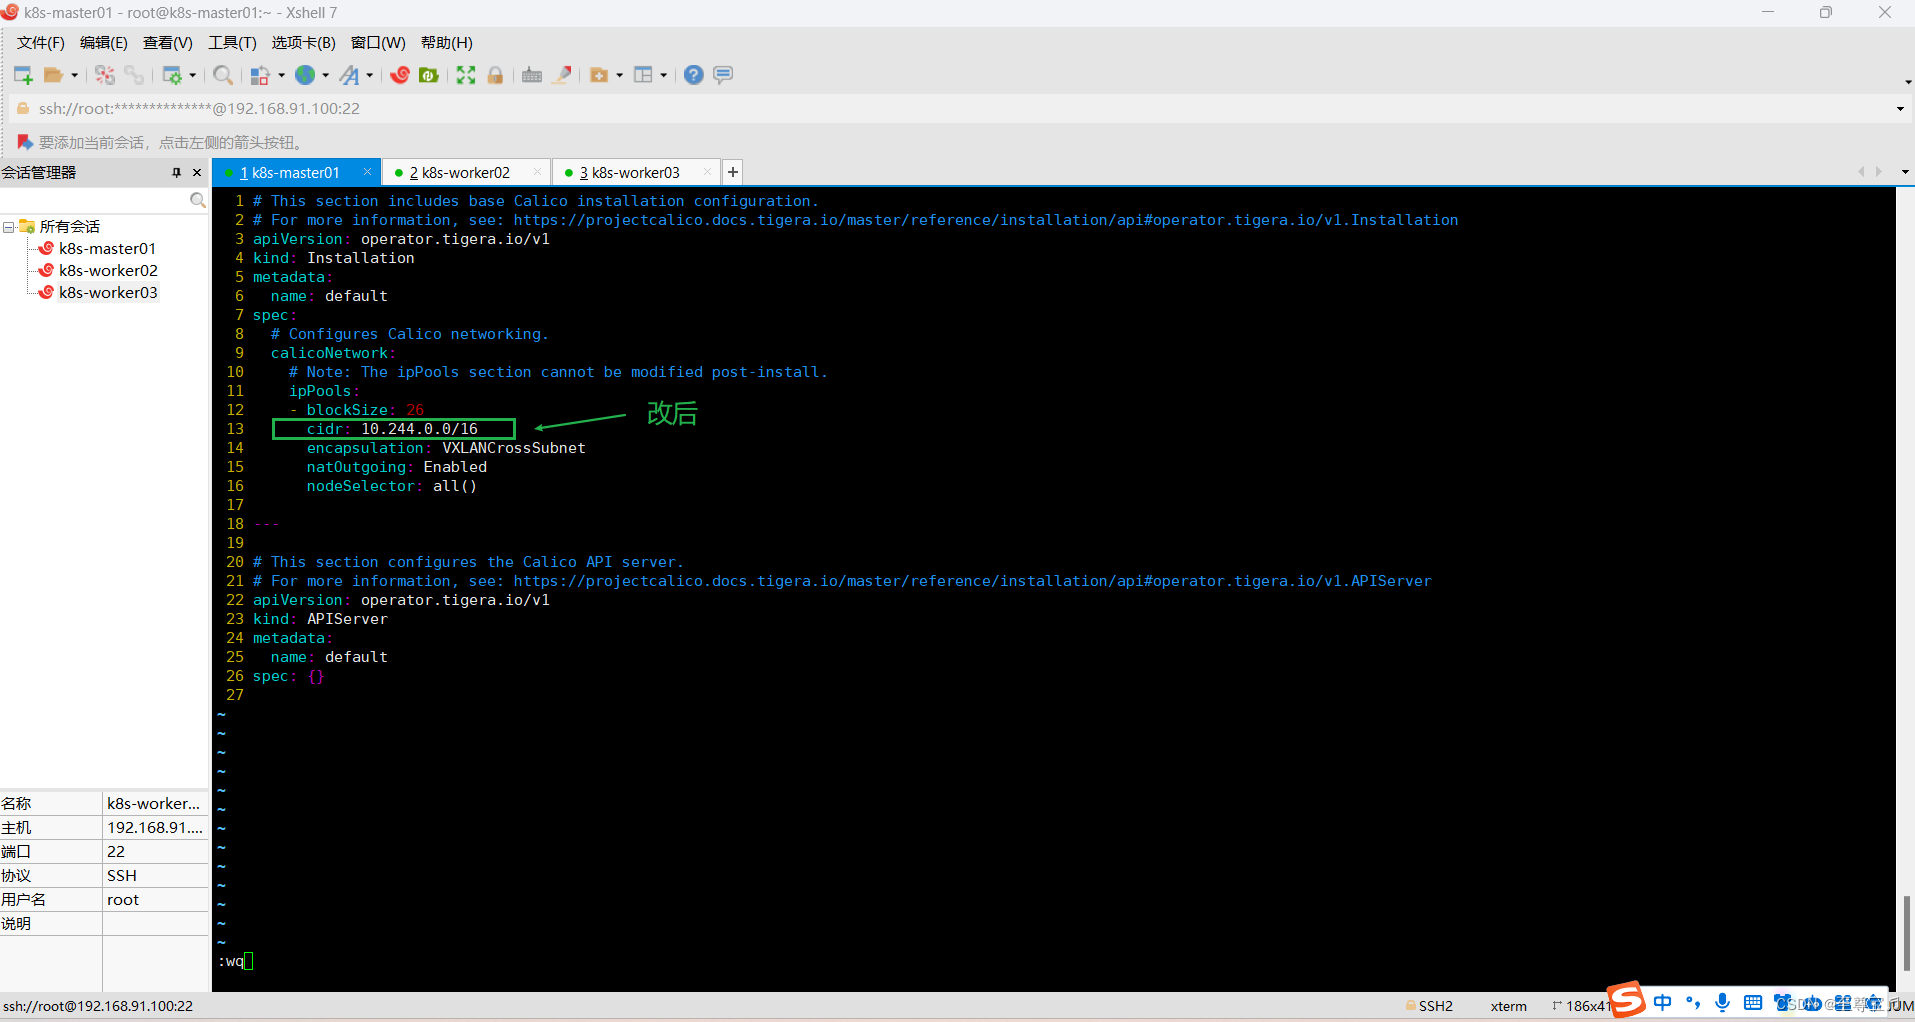
③编辑custom-resources.yaml文件内容;
vim custom-resources.yaml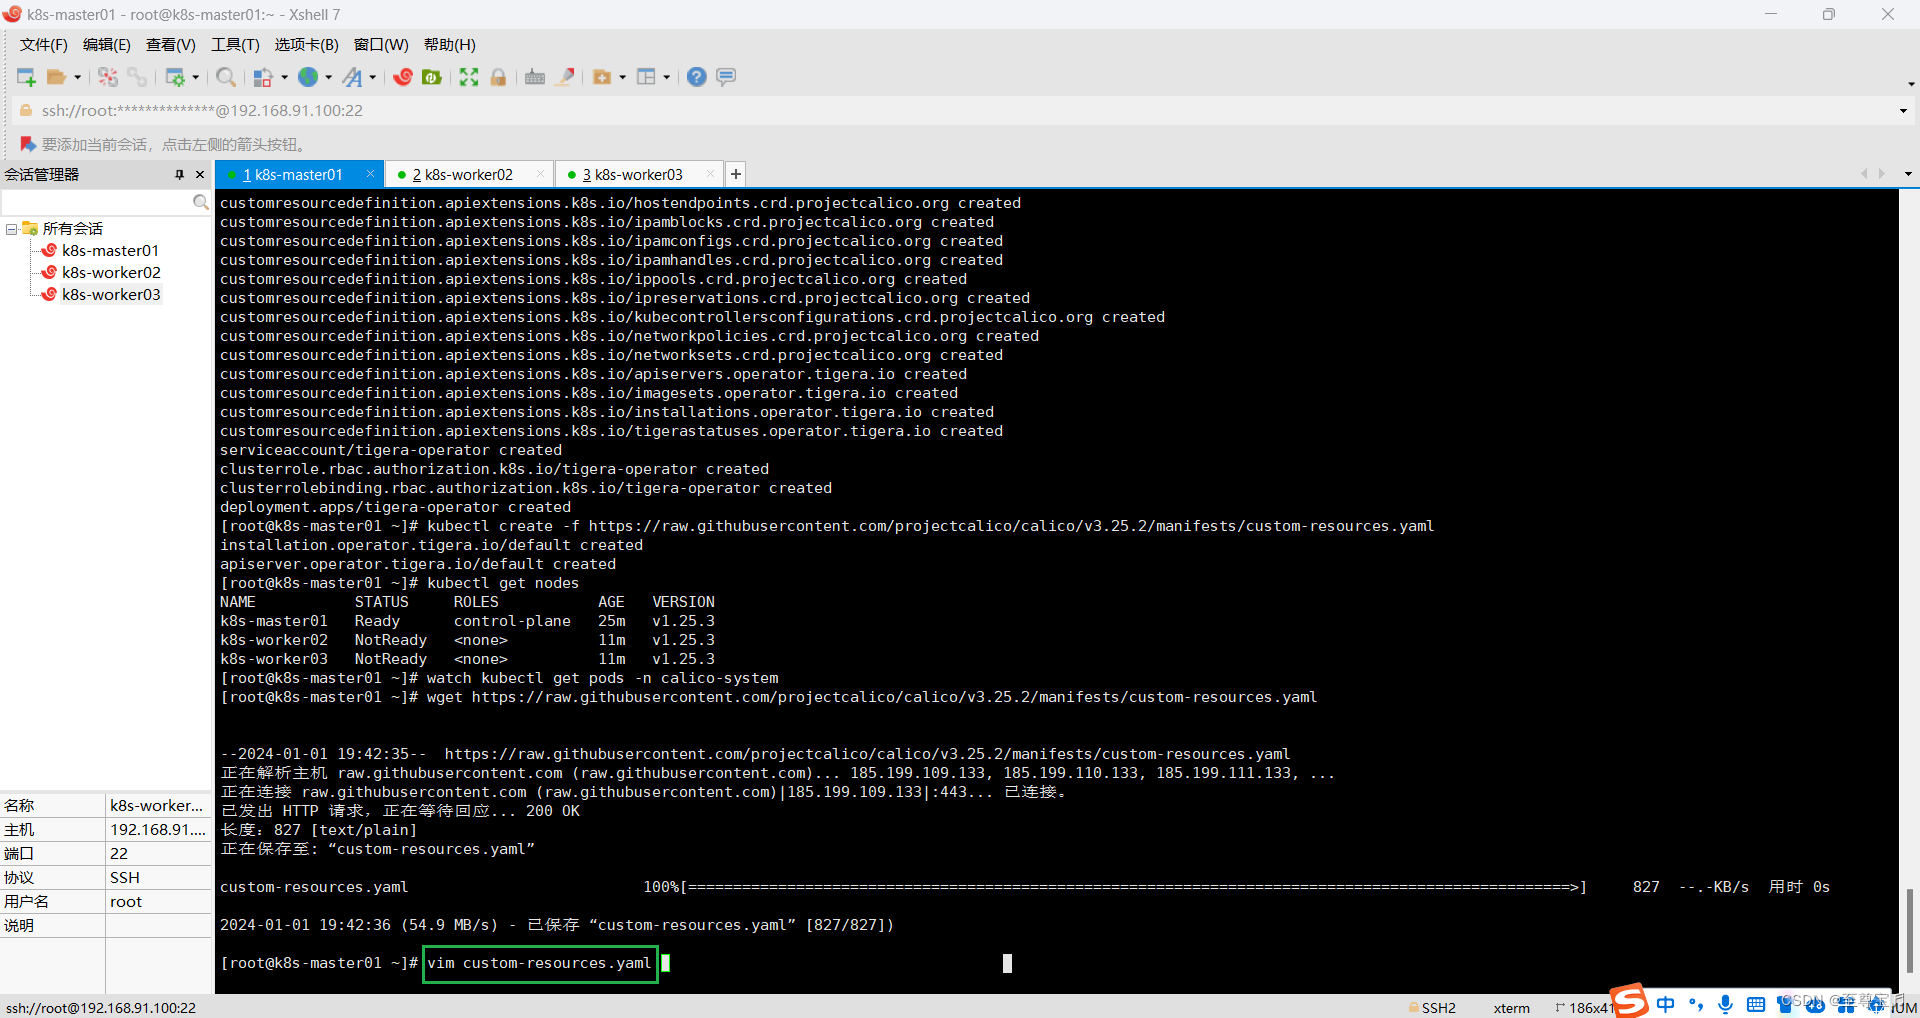
显示行号:进入vim模式,按"Esc",再按":",输入"set nu",再点"Enter"。

点"i"进入可编辑模式,修改cidr值,再依次点"Esc"、":wq",点击"Enter"保存退出。
④执行编辑后的custom-resources.yaml文件;
kubectl create -f custom-resources.yamlkubectl get ns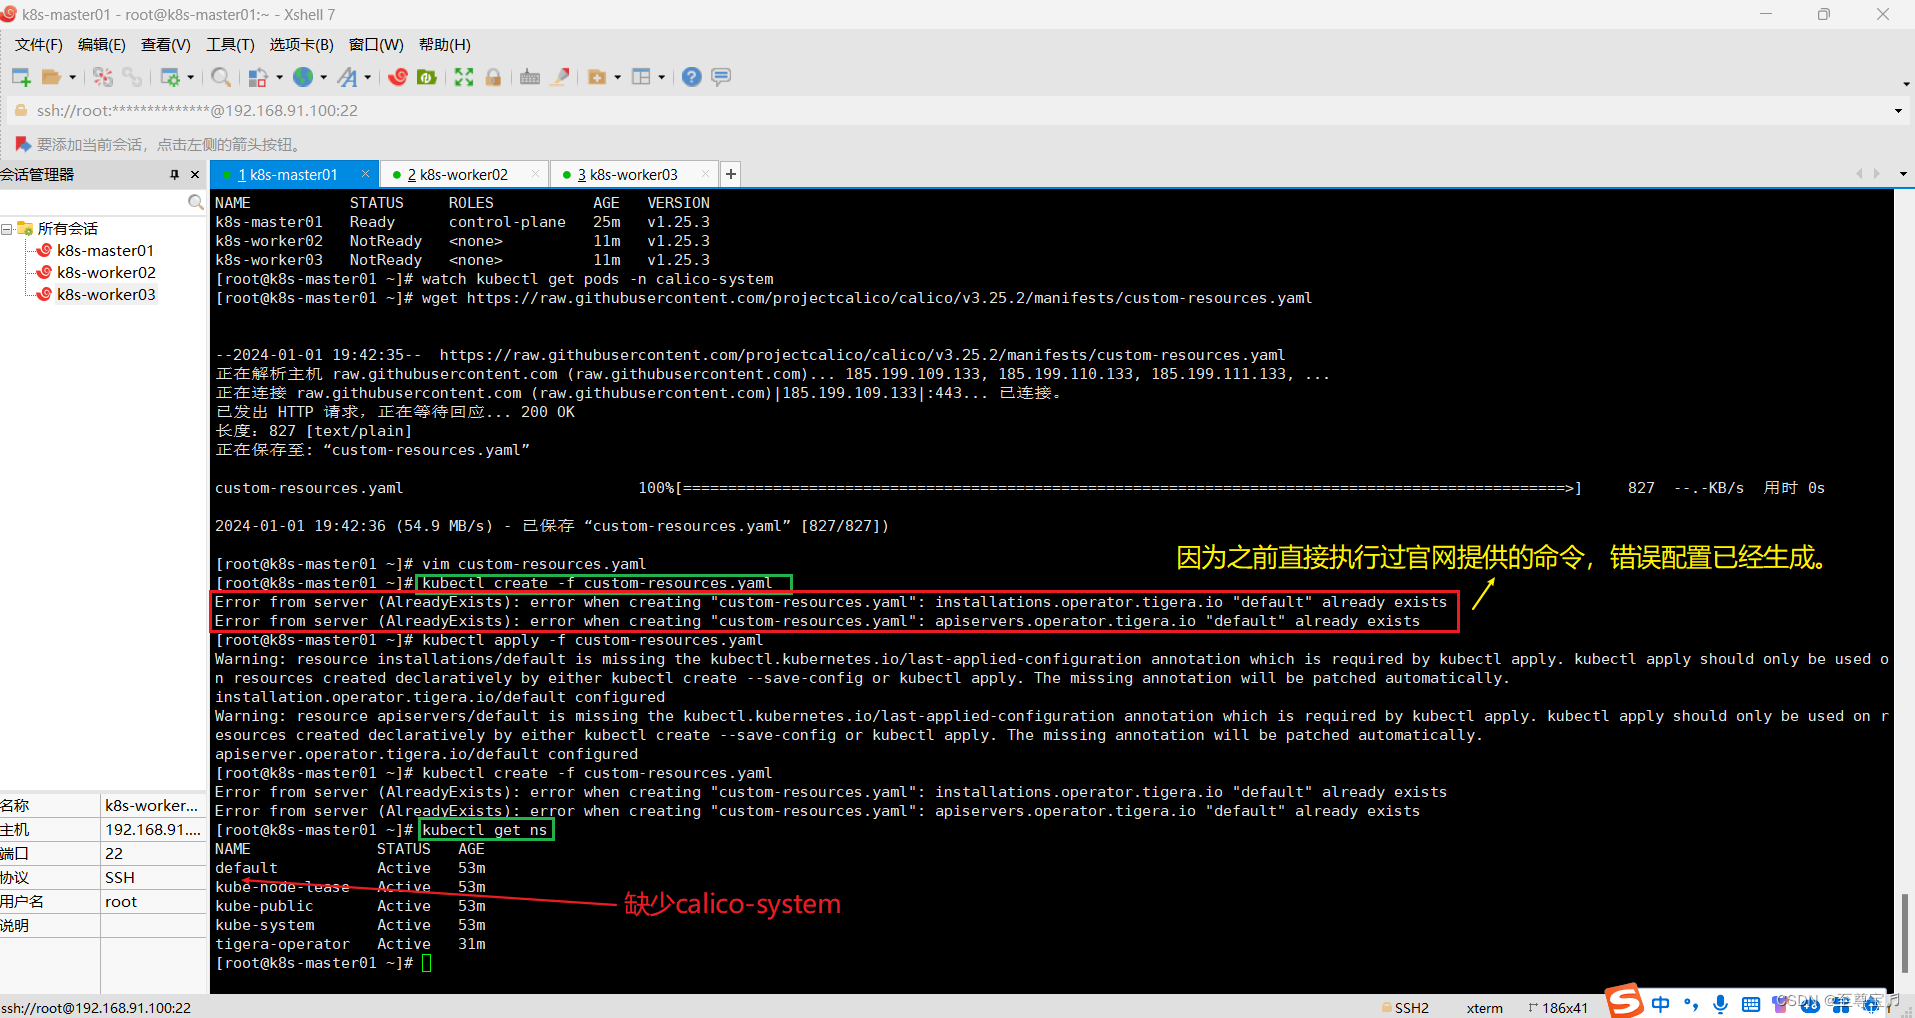

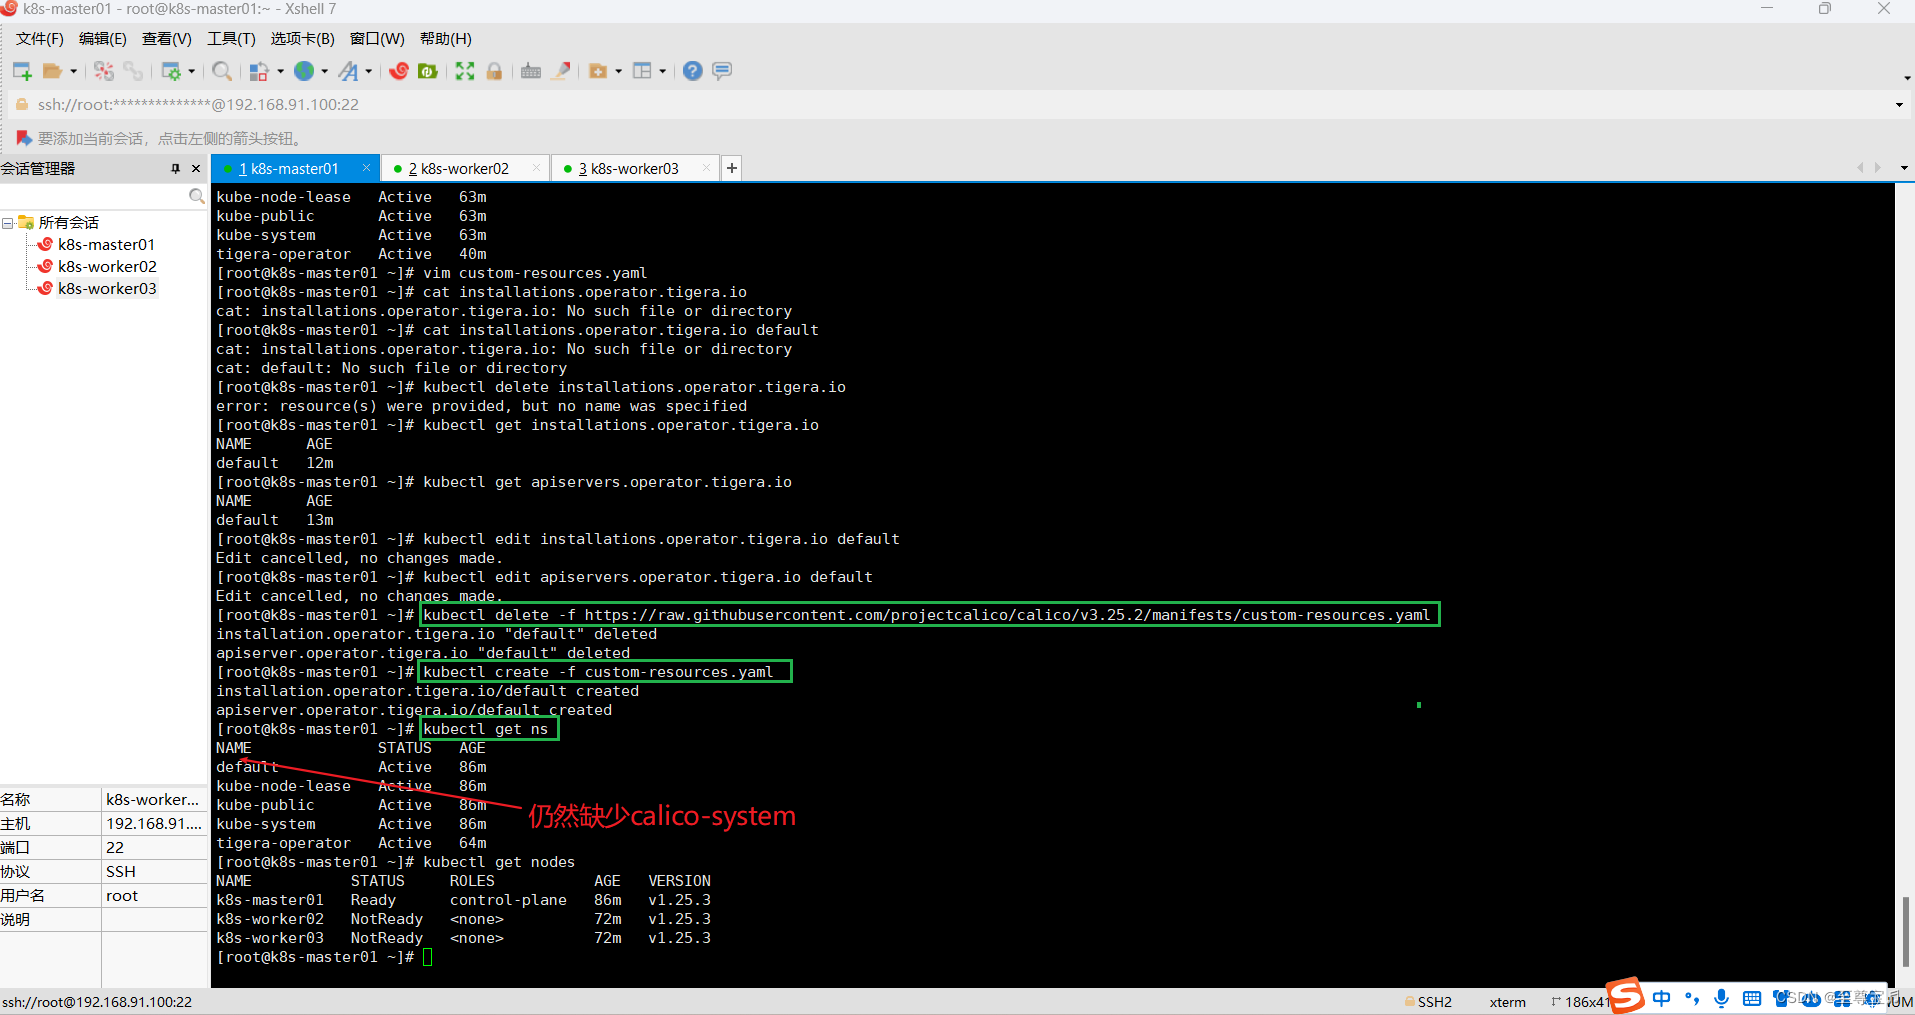
⑤删除已经存在的"custom-resources.yaml",消除上面的错误;
kubectl delete -f https://raw.githubusercontent.com/projectcalico/calico/v3.25.2/manifests/custom-resources.yaml重新执行命令:
kubectl create -f custom-resources.yamlkubectl get ns
(7)kubernetes YUM源准备,所有集群主机均需操作;
# 谷歌YUM源
cat <<EOF > /etc/yum.repos.d/kubernetes.repo
[kubernetes]
name=Kubernetes
baseurl=https://packages.cloud.google.com/yum/repos/kubernetes-el7-x86_64
enabled=1
gpgcheck=1
repo_gpgcheck=1
gpgkey=https://packages.cloud.google.com/yum/doc/yum-key.gpghttps://packages.cloud.google.com/yum/doc/rpm-package-key.gpg
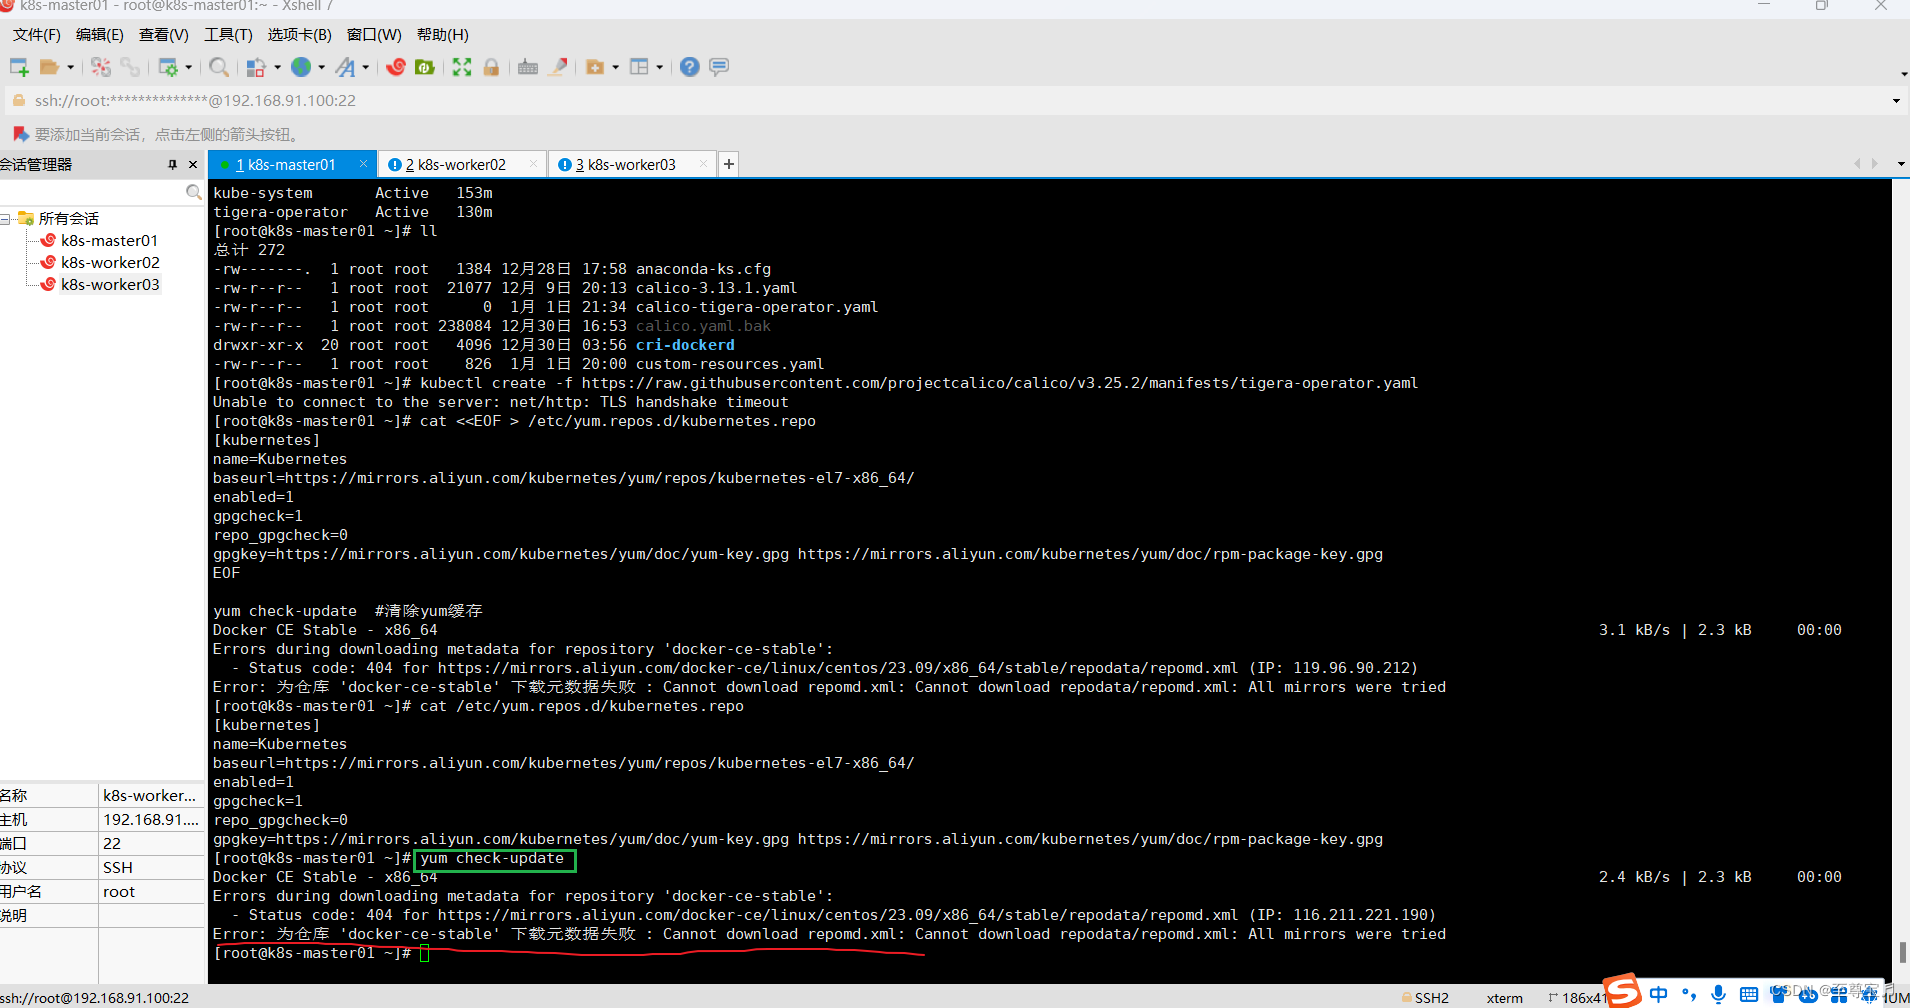
EOFyum check-update #清除yum缓存
此处使用阿里云,修改下边的"gpgcheck=0, repo_gpgcheck=0"跳过验证;
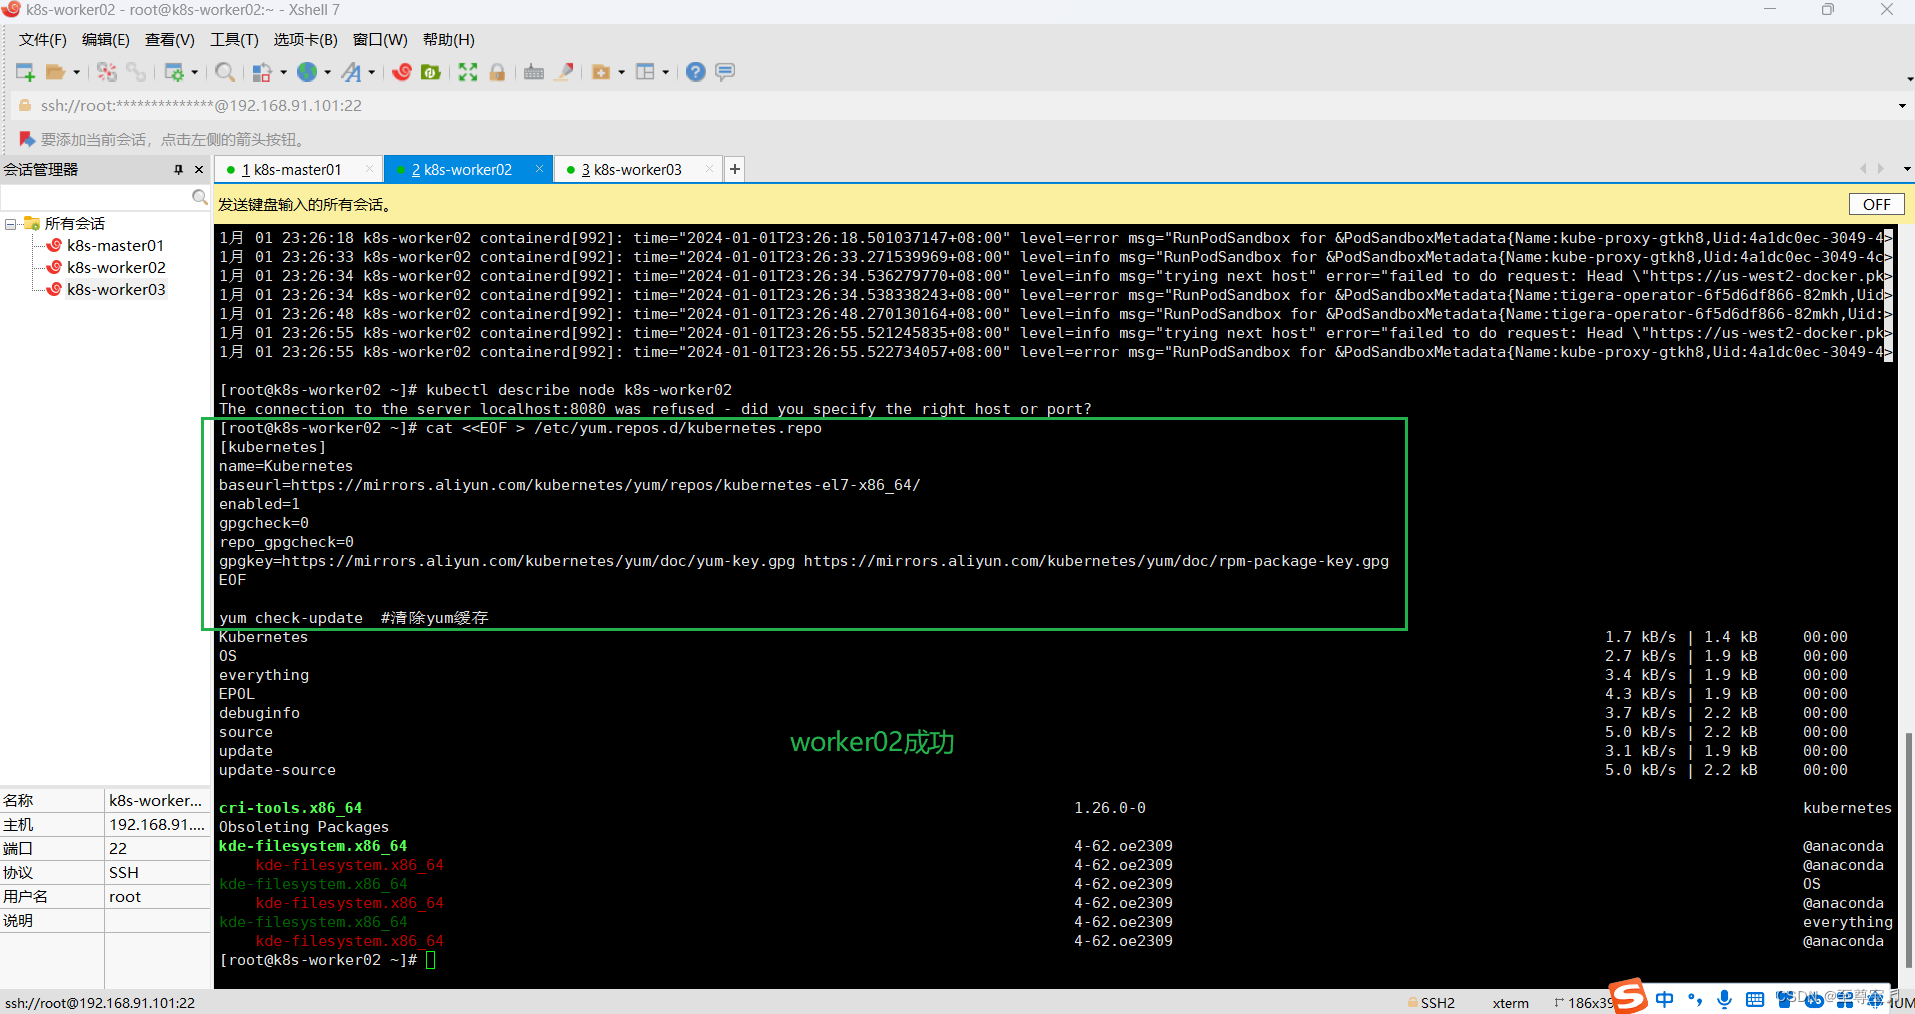
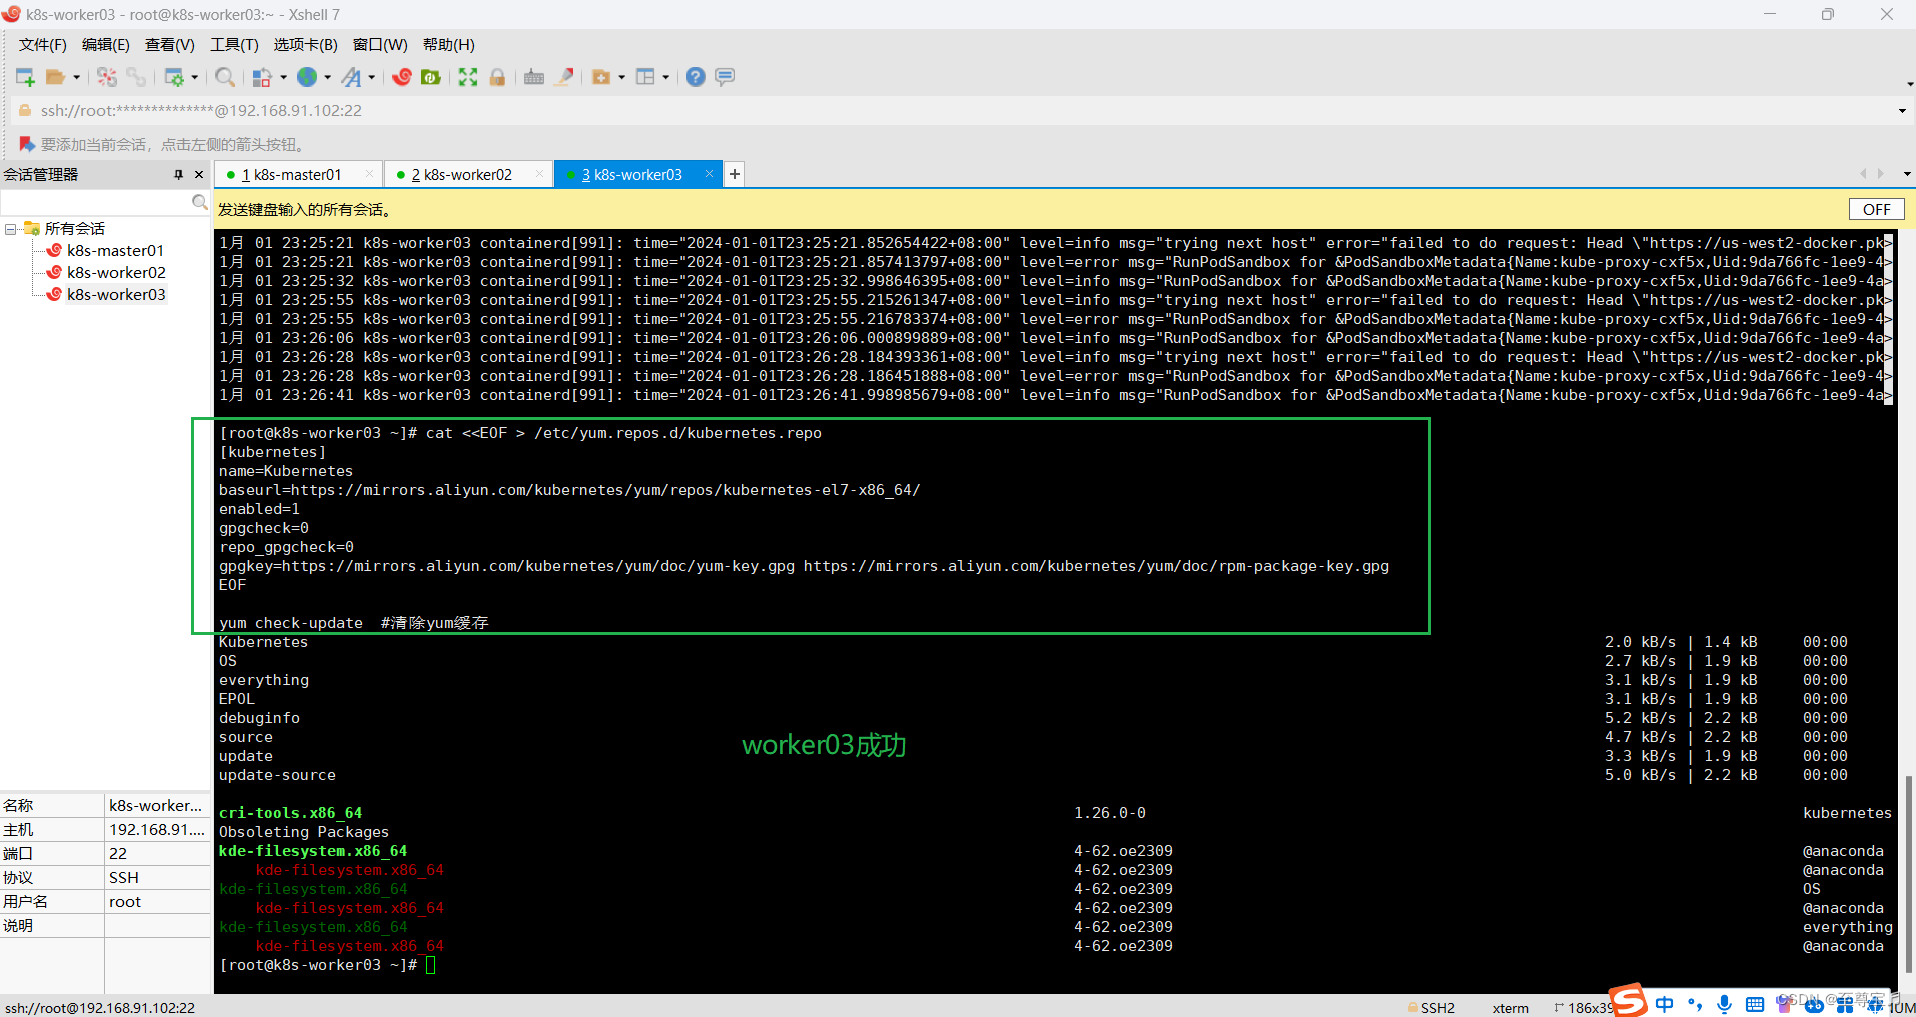
# 阿里云:
cat <<EOF > /etc/yum.repos.d/kubernetes.repo
[kubernetes]
name=Kubernetes
baseurl=https://mirrors.aliyun.com/kubernetes/yum/repos/kubernetes-el7-x86_64/
enabled=1
gpgcheck=0
repo_gpgcheck=0
gpgkey=https://mirrors.aliyun.com/kubernetes/yum/doc/yum-key.gpg https://mirrors.aliyun.com/kubernetes/yum/doc/rpm-package-key.gpg
EOFyum check-update #清除yum缓存
# 华为云:具体见:https://www.huaweicloud.com/zhishi/Kubernetes.html
cat <<EOF > /etc/yum.repos.d/kubernetes.repo
[kubernetes]
name=Kubernetes
baseurl=https://repo.huaweicloud.com/kubernetes/yum/repos/kubernetes-el7-$basearch
enabled=1
gpgcheck=1
repo_gpgcheck=1
gpgkey=https://repo.huaweicloud.com/kubernetes/yum/doc/yum-key.gpg https://repo.huaweicloud.com/kubernetes/yum/doc/rpm-package-key.gpg
EOFyum check-update #清除yum缓存

master节点执行“yum check-update #清除yum缓存”报错;
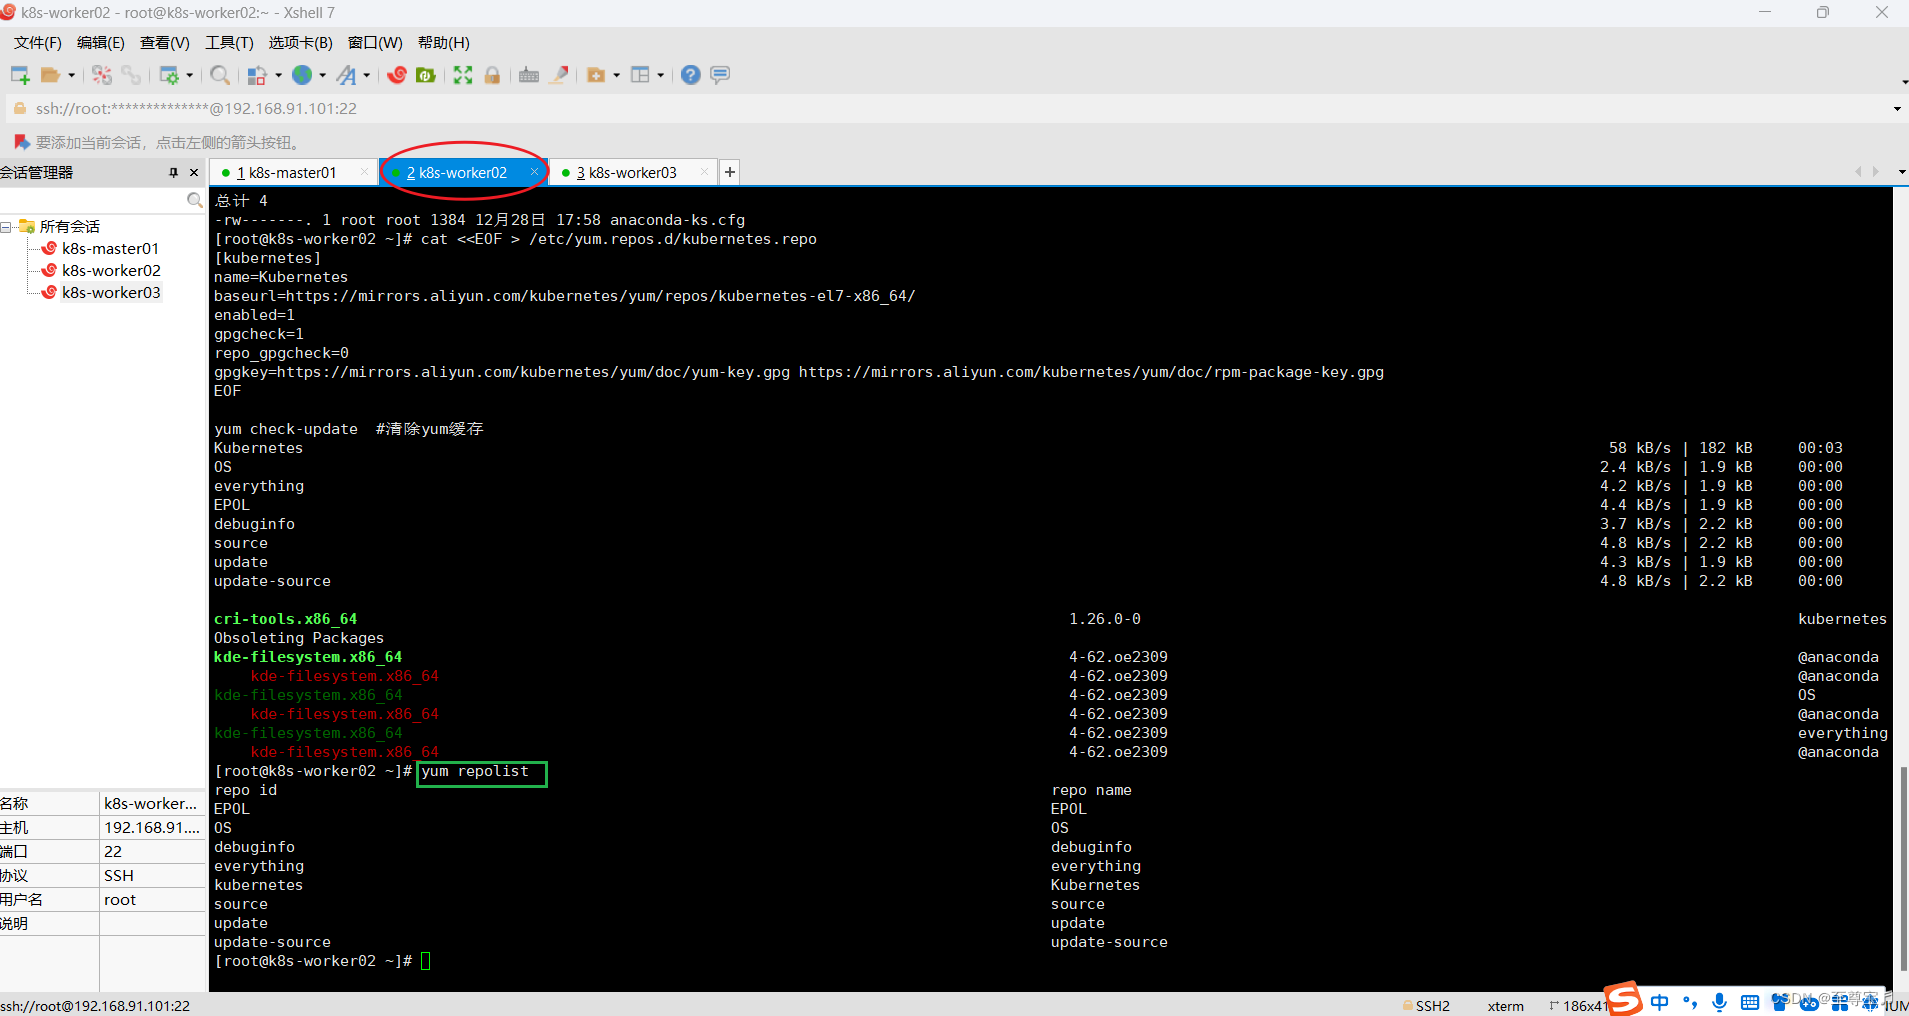
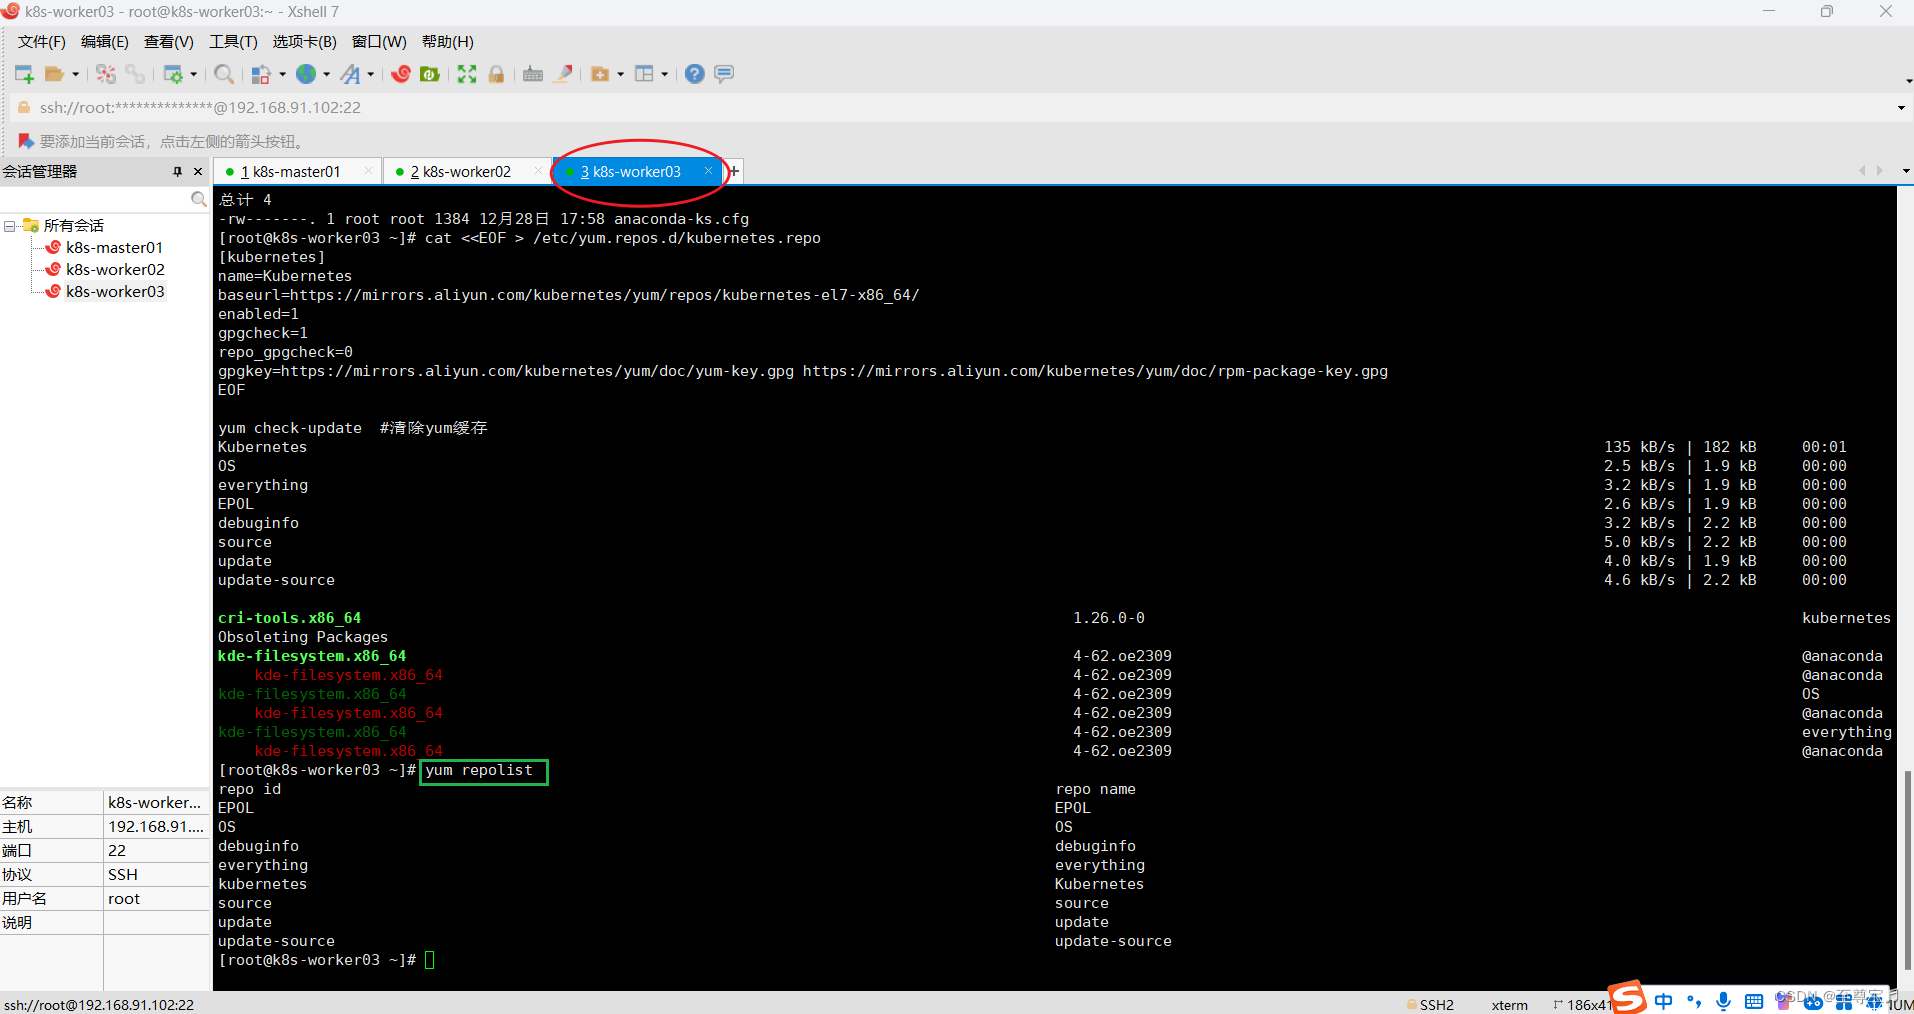
# 执行完成之后, 所有节点均需要刷新yum源
yum repolist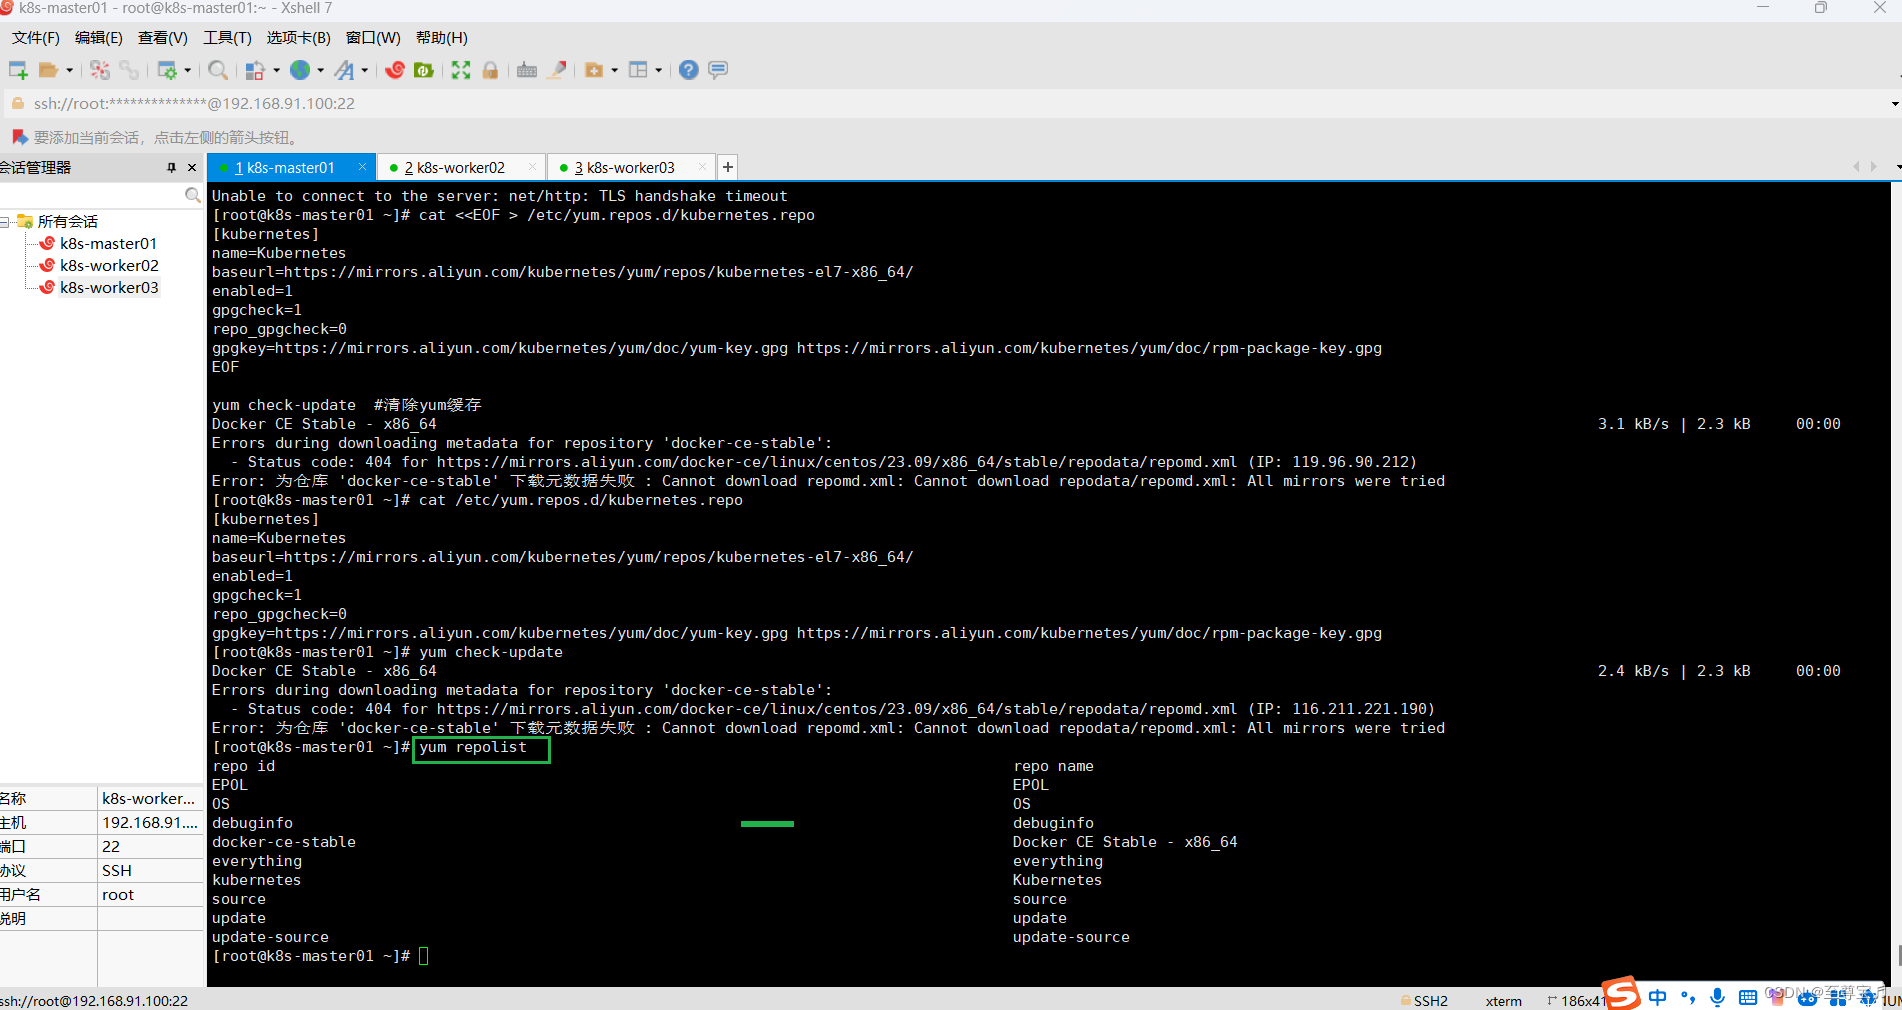
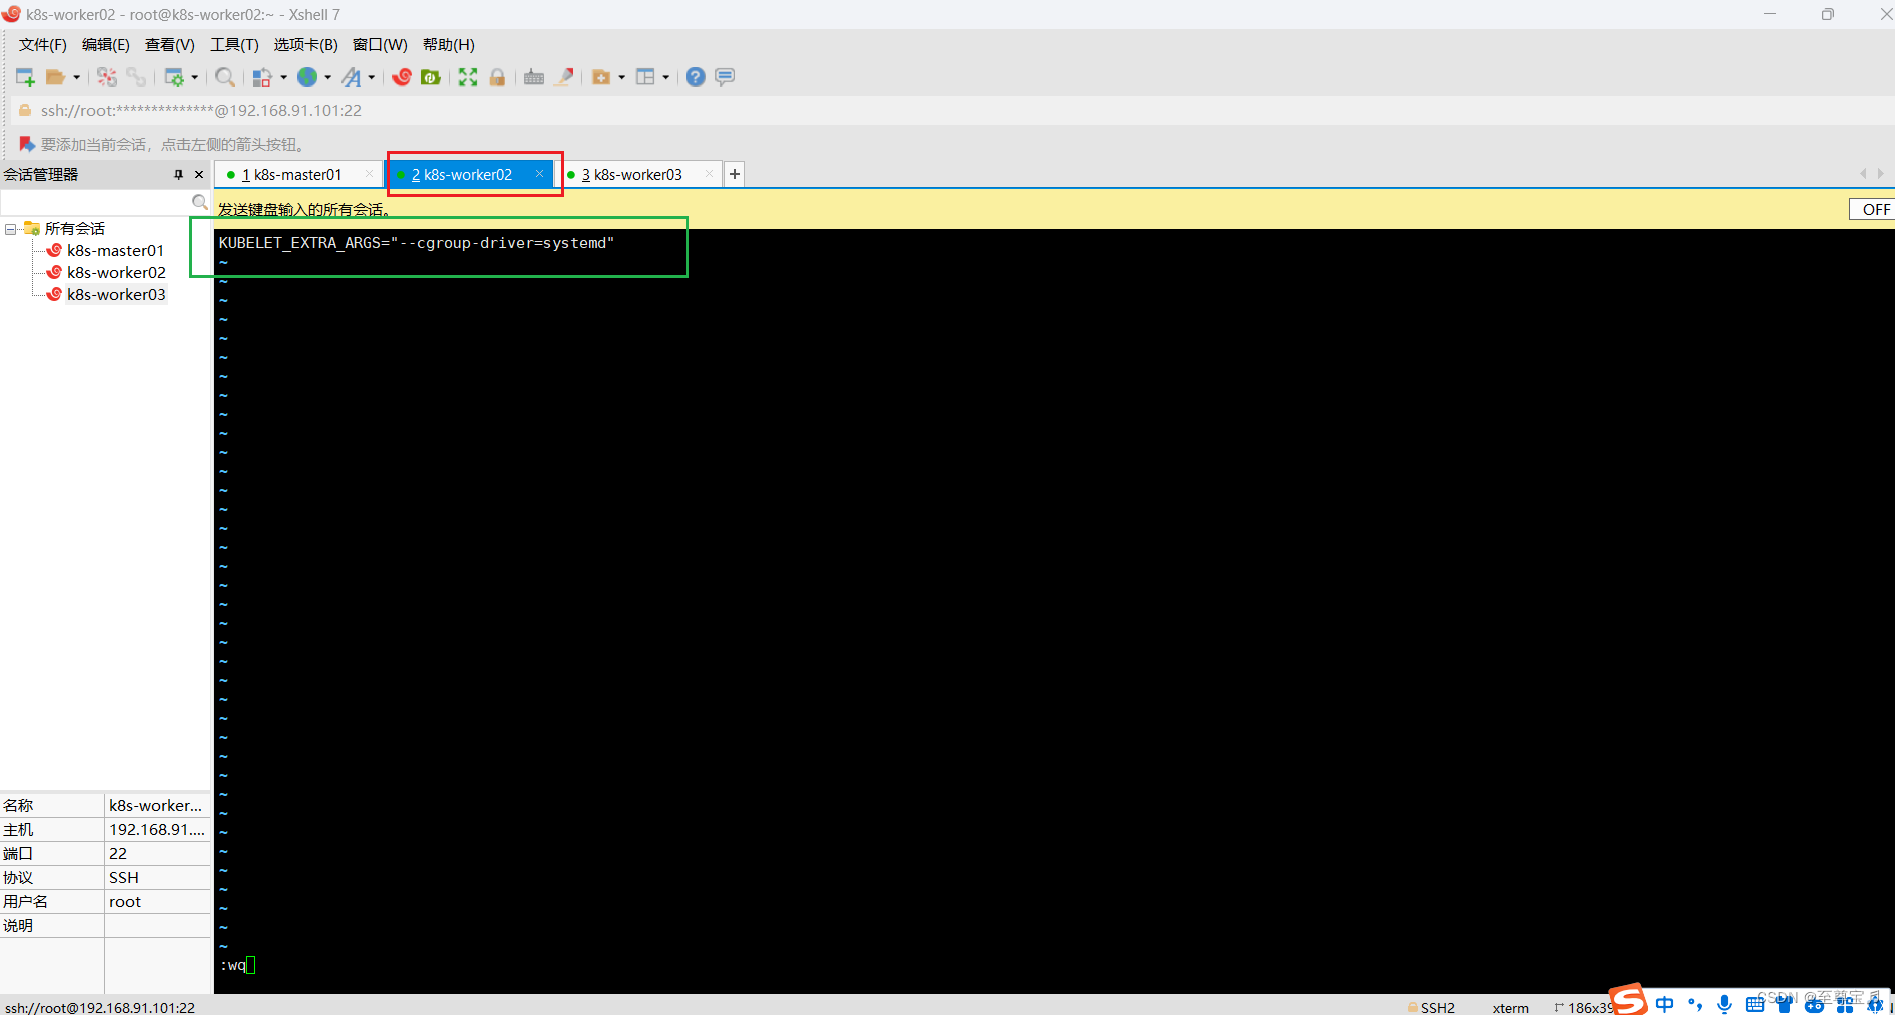
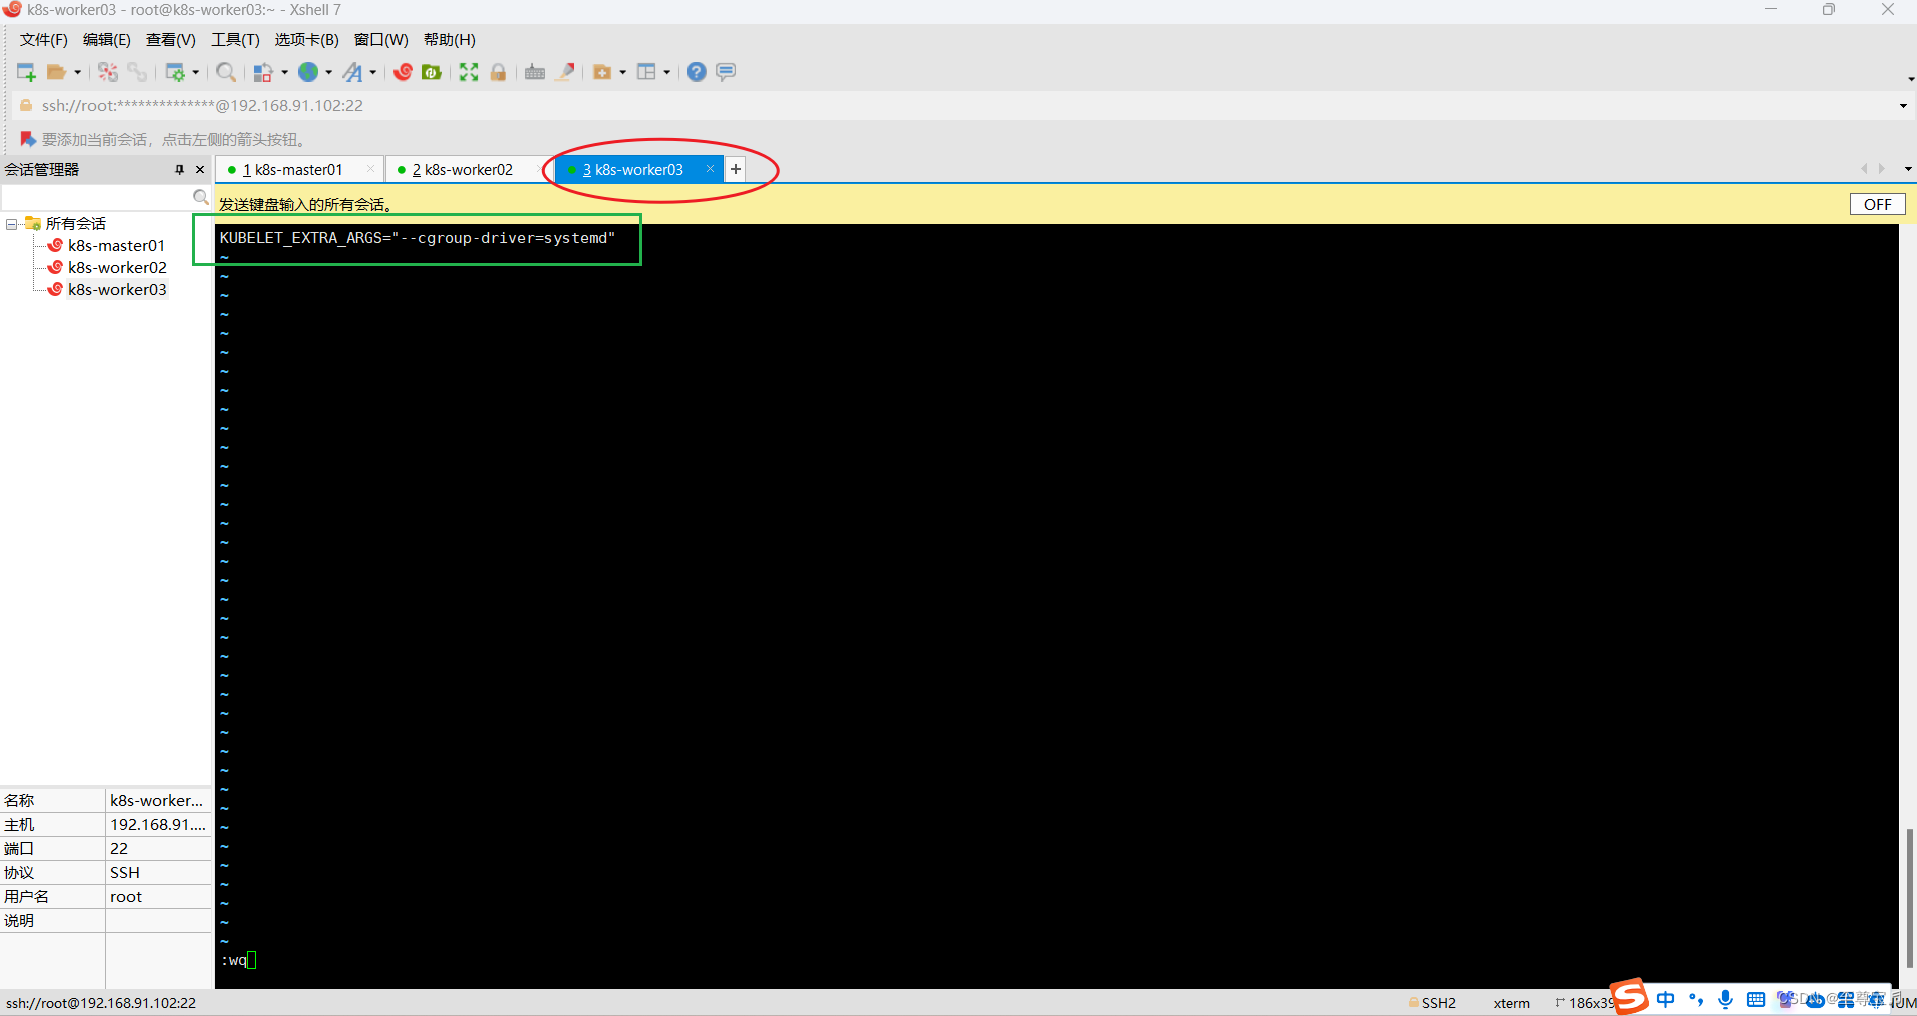
(8)所有主机执行"vim /etc/sysconfig/kubelet";
vim /etc/sysconfig/kubelet所有主机的内容设置为:
KUBELET_EXTRA_ARGS="--cgroup-driver=systemd"
所有主机设置kubelet开机自启;
systemctl enable kubelet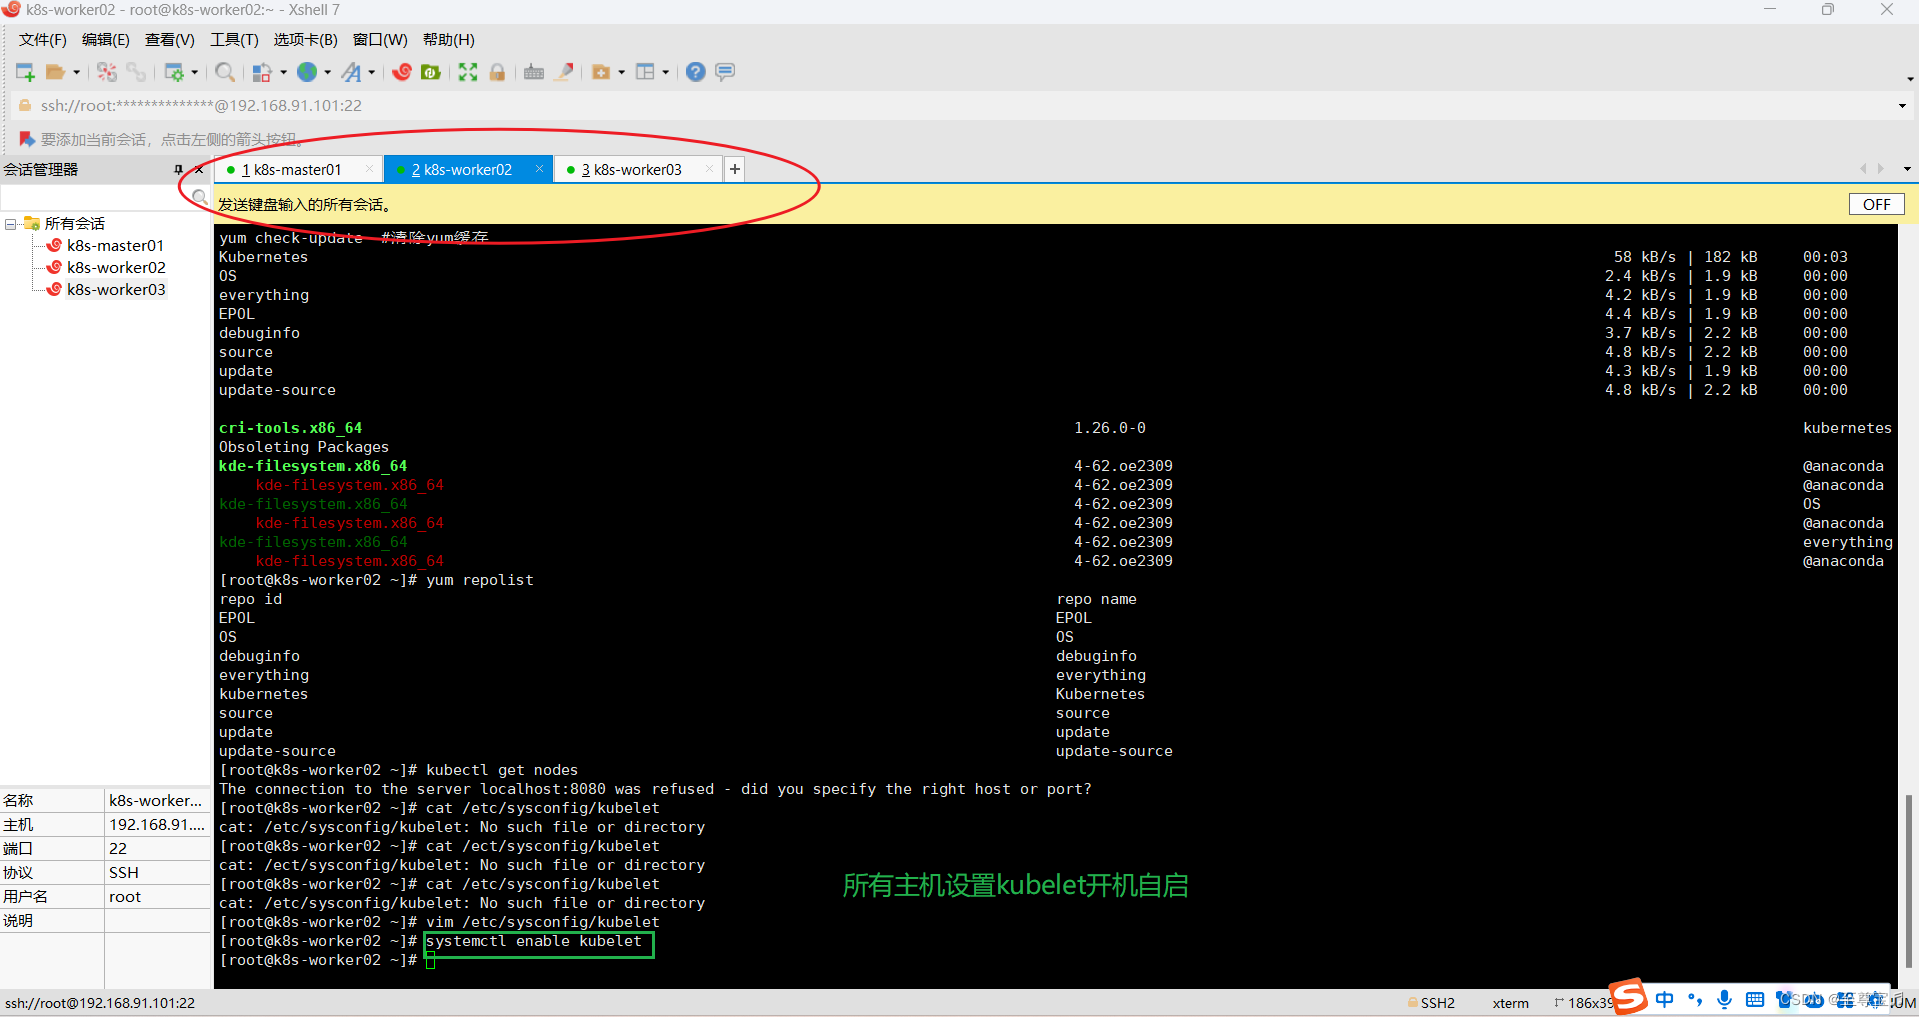
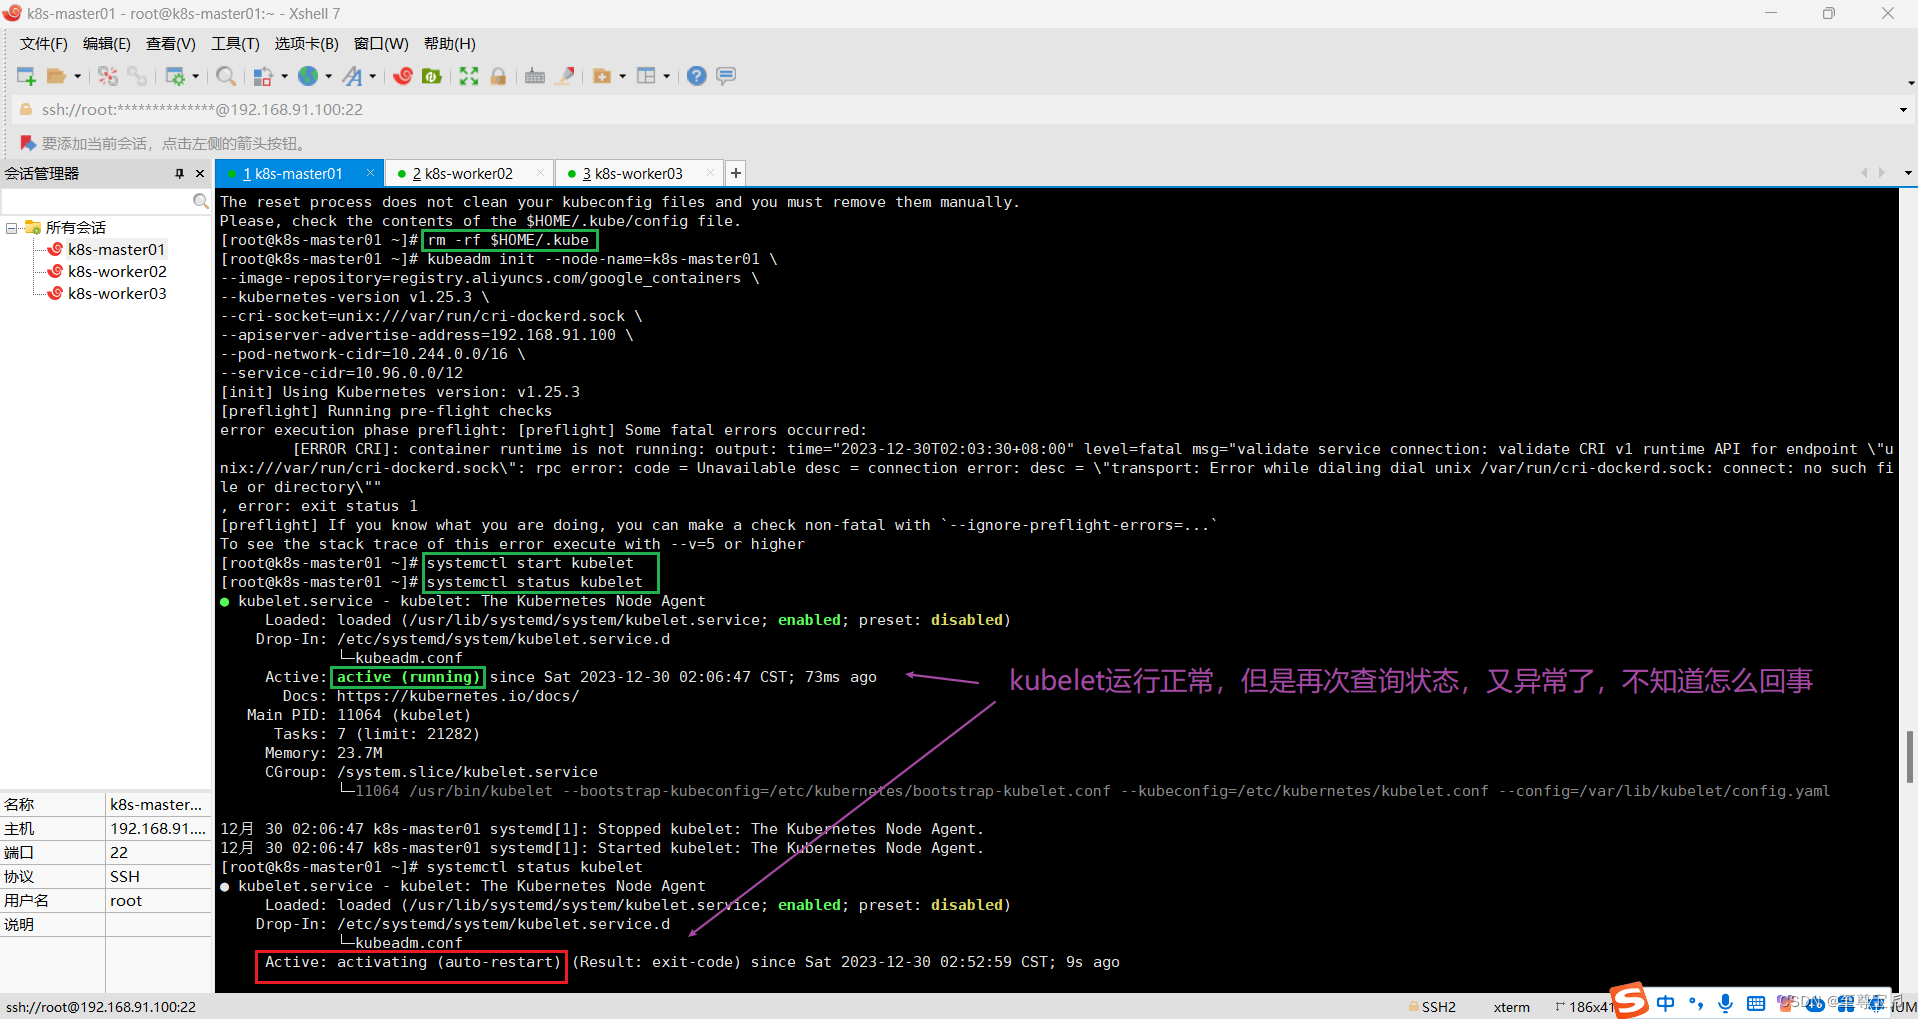
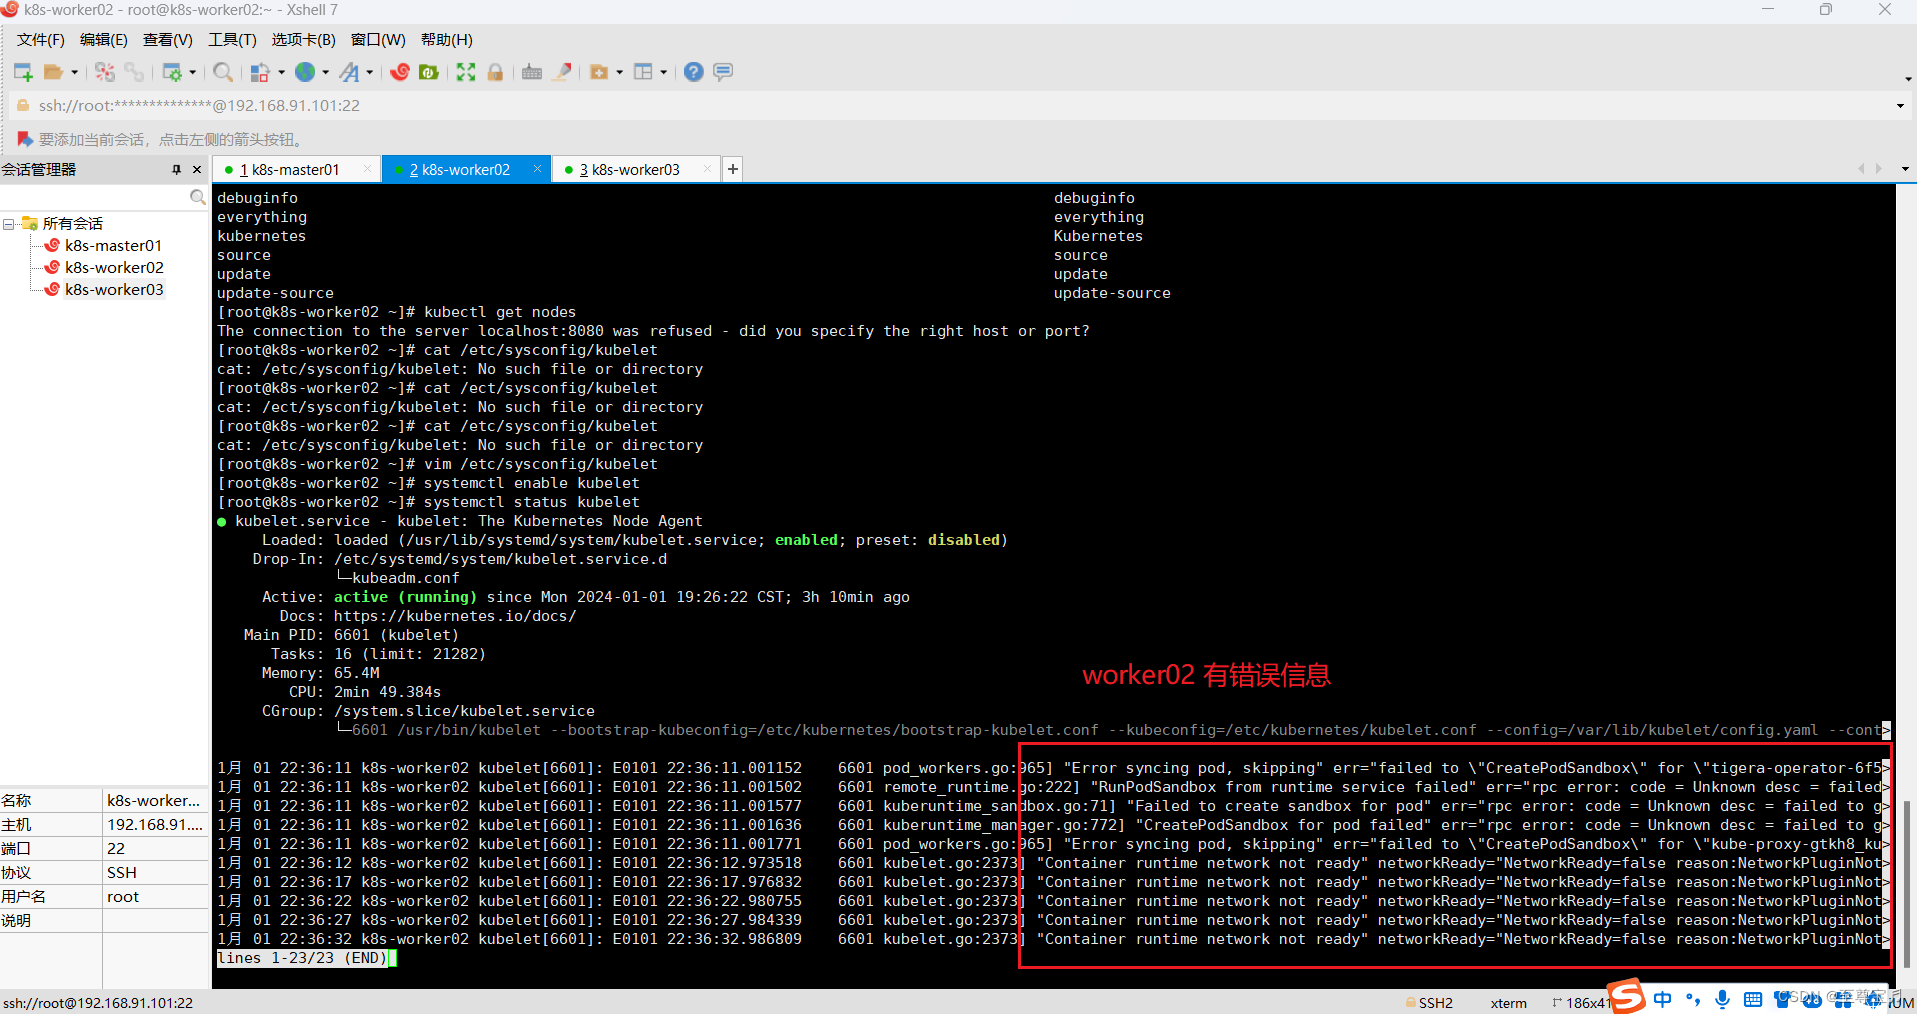
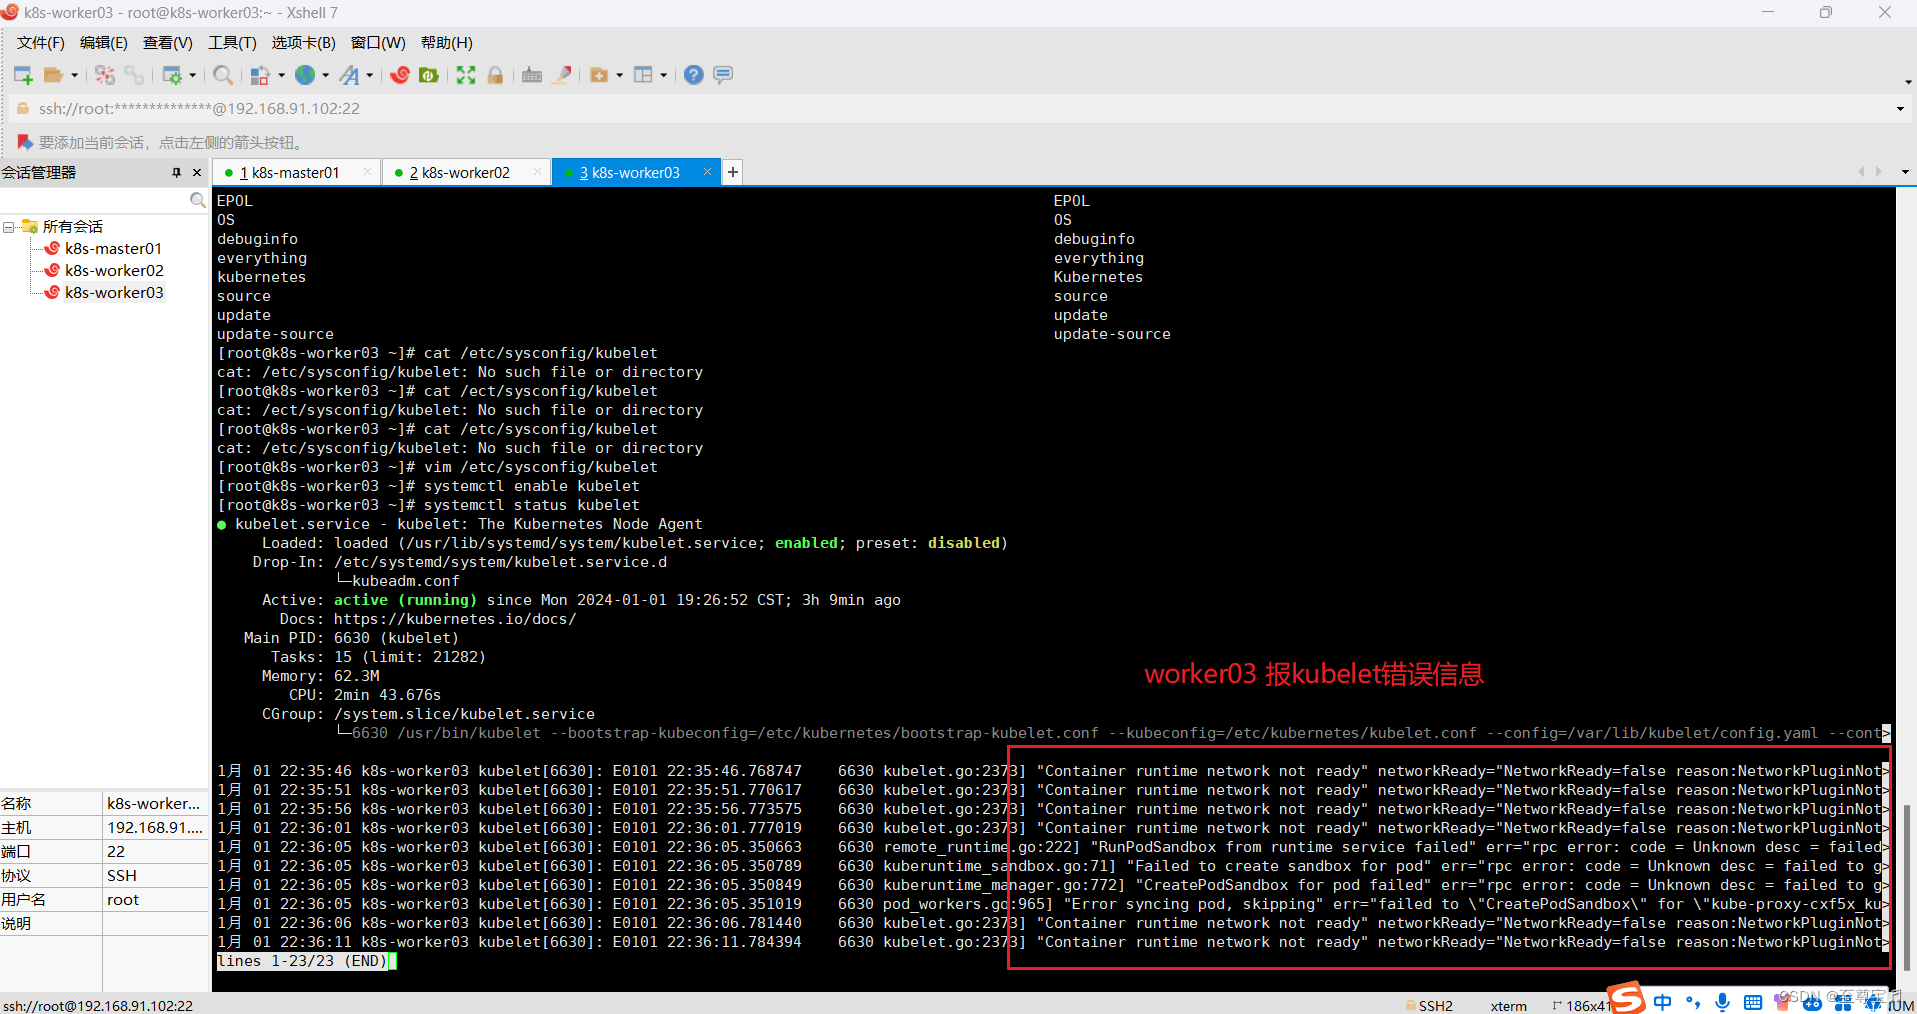
(9)三台主机的kubelet运行中报错;
systemctl status kubelet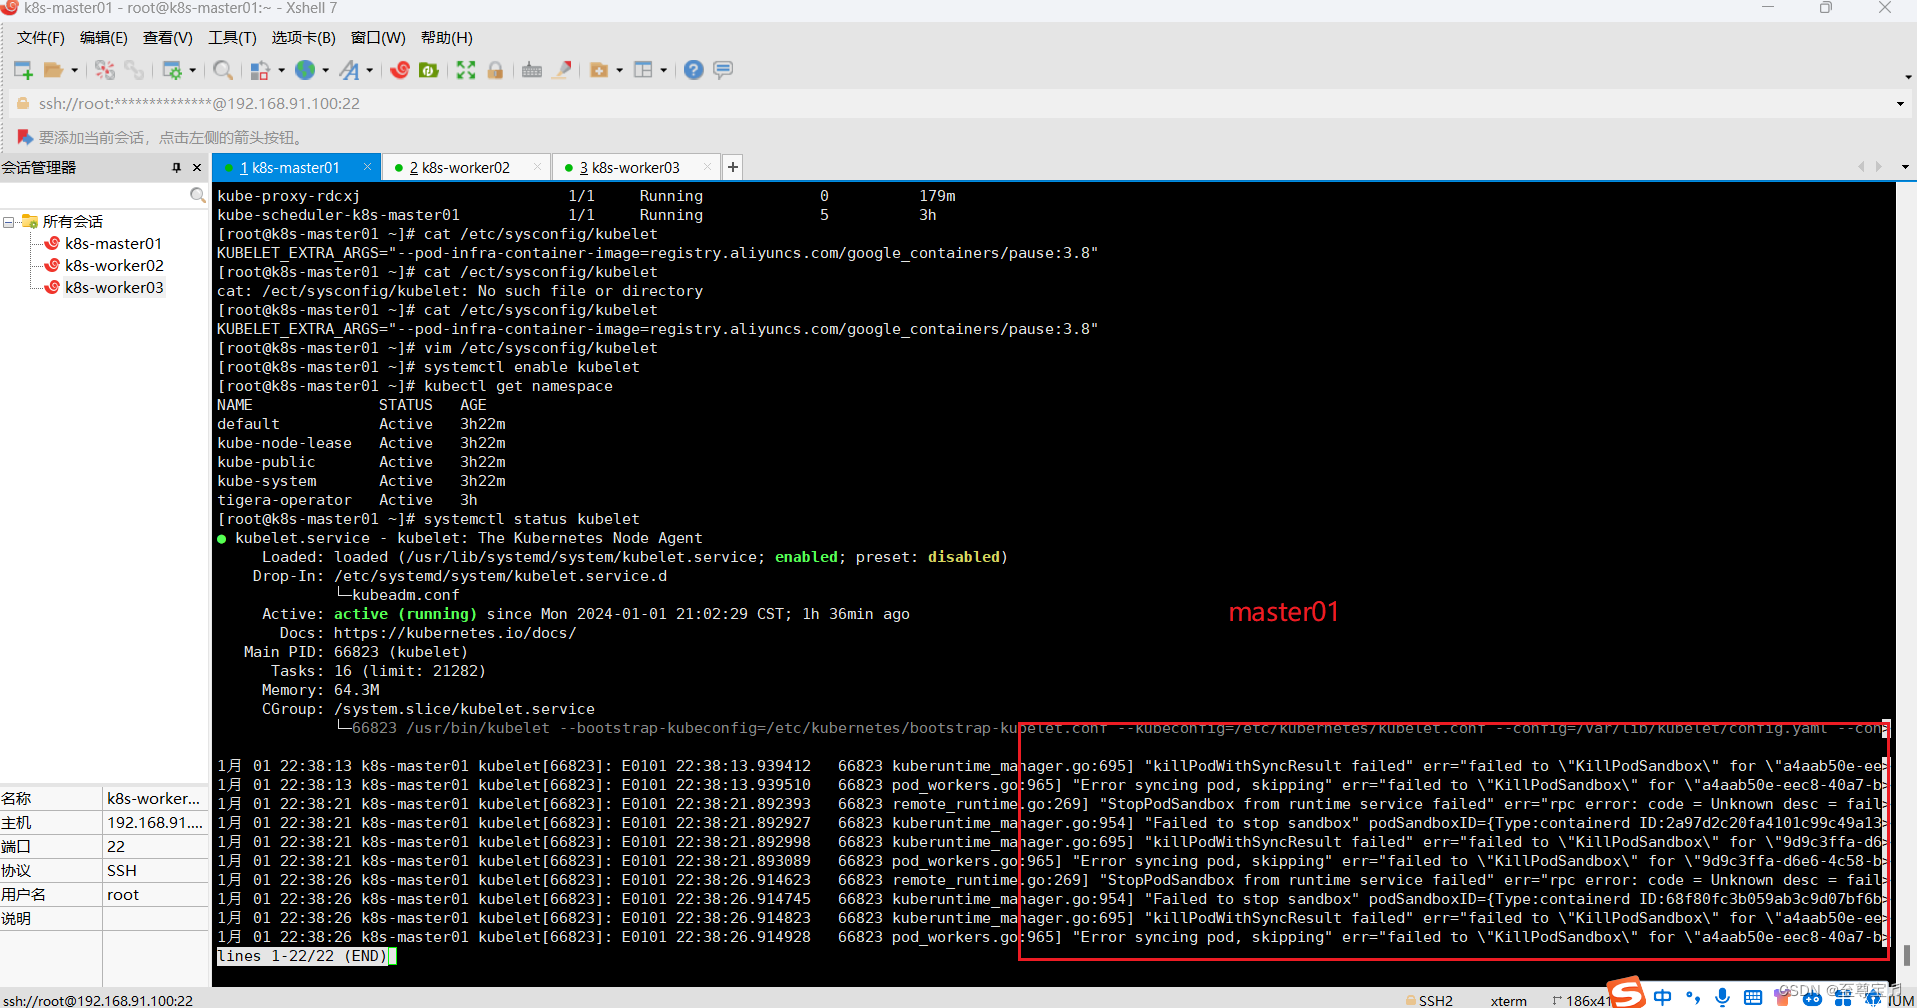
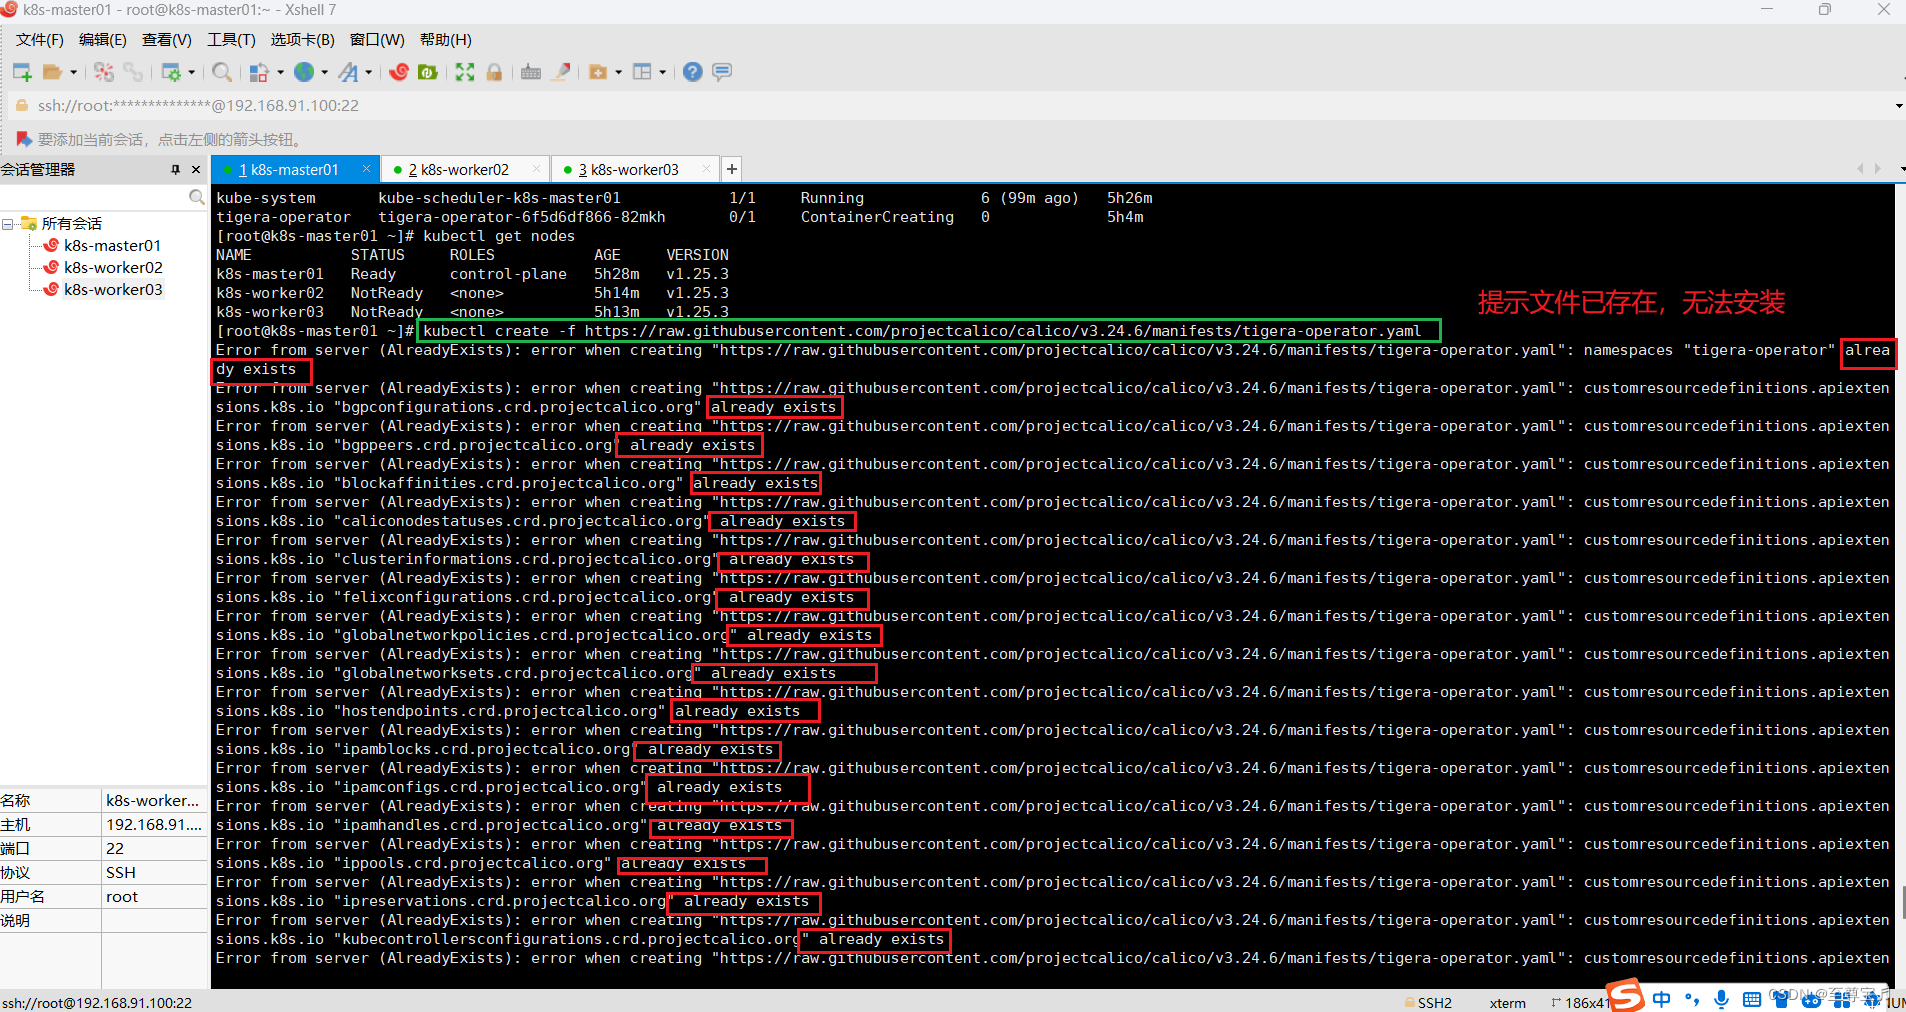
(10)master节点删除calico v3.25.2,安装calico v3.24.6;
直接安装calico v3.24.6会提示一堆文件已经存在,所以必须先删除v3.25.2版本,再安装v3.24.6;
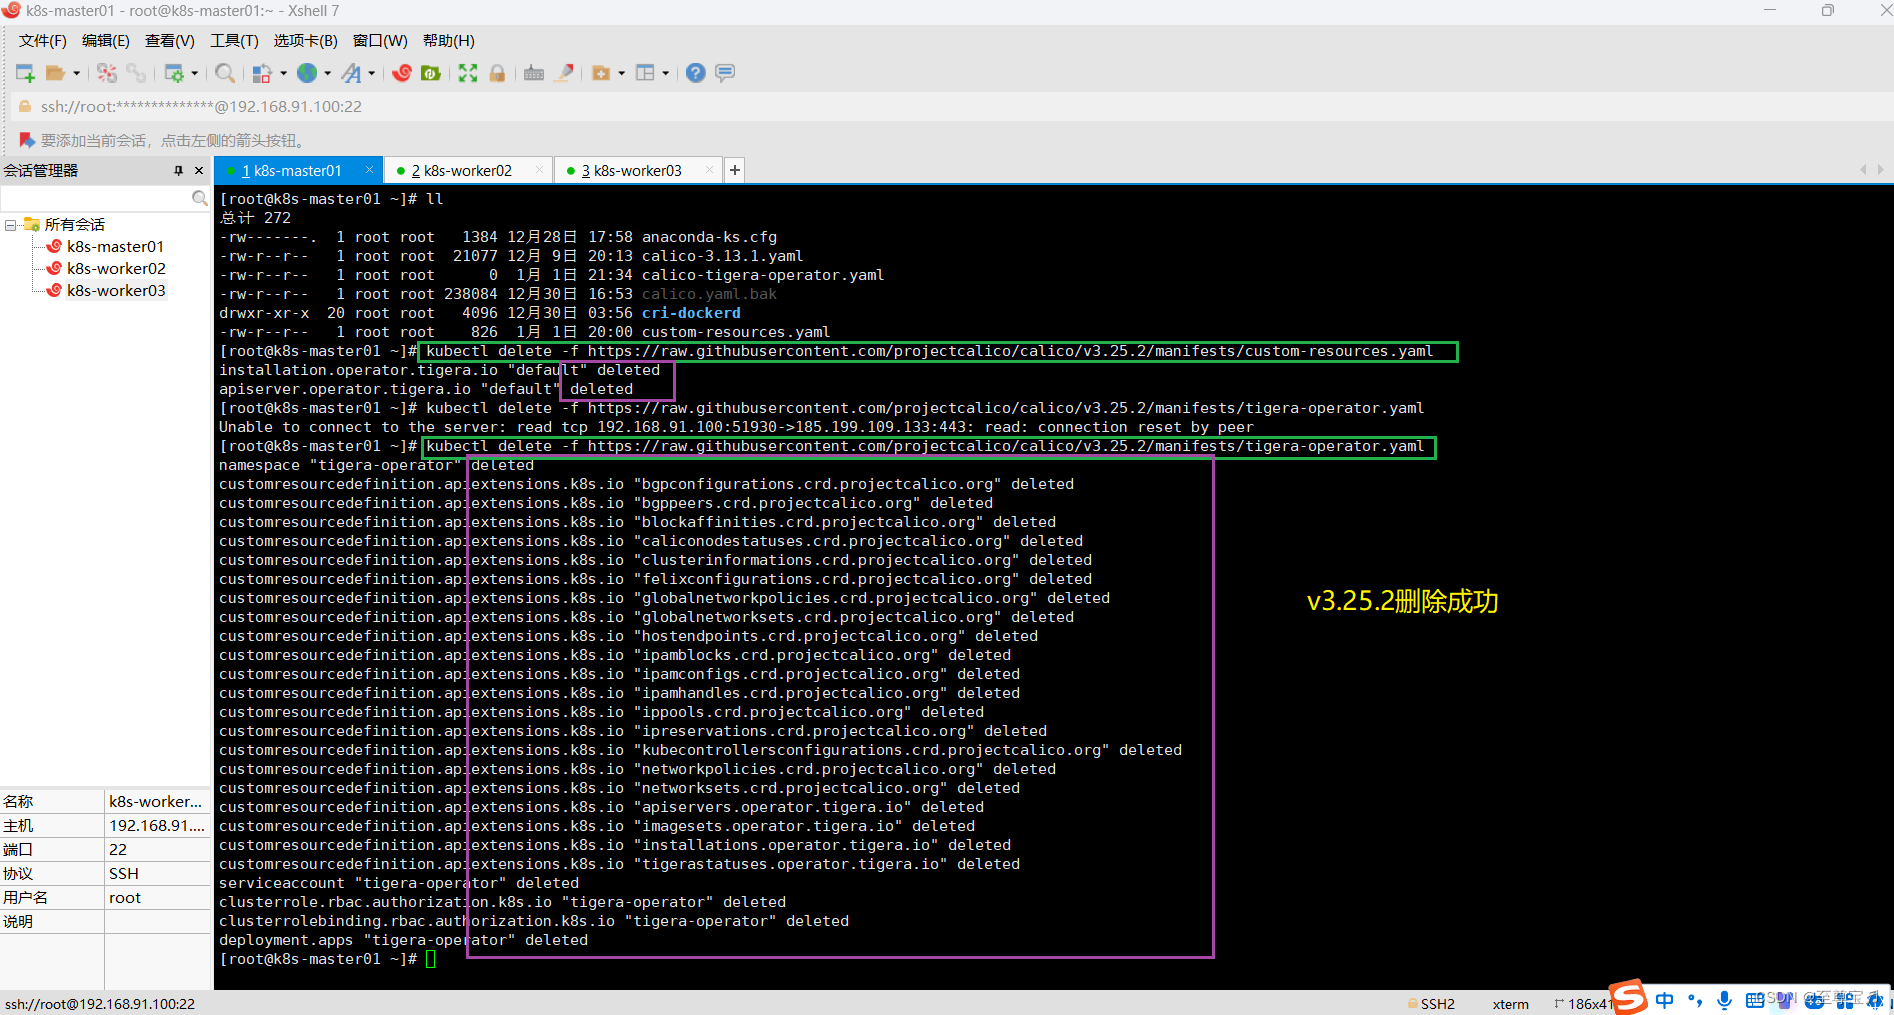
# 卸载calico v3.25.2 的custom-resources.yaml
kubectl delete -f https://raw.githubusercontent.com/projectcalico/calico/v3.25.2/manifests/custom-resources.yaml# 卸载calico v3.25.2 的tigera-operator.yaml
kubectl delete -f https://raw.githubusercontent.com/projectcalico/calico/v3.25.2/manifests/tigera-operator.yaml如果删除失败,有可能是网络问题,重新删除即可。
安装calico v3.24.6;
# 下载 tigera-operator.yaml
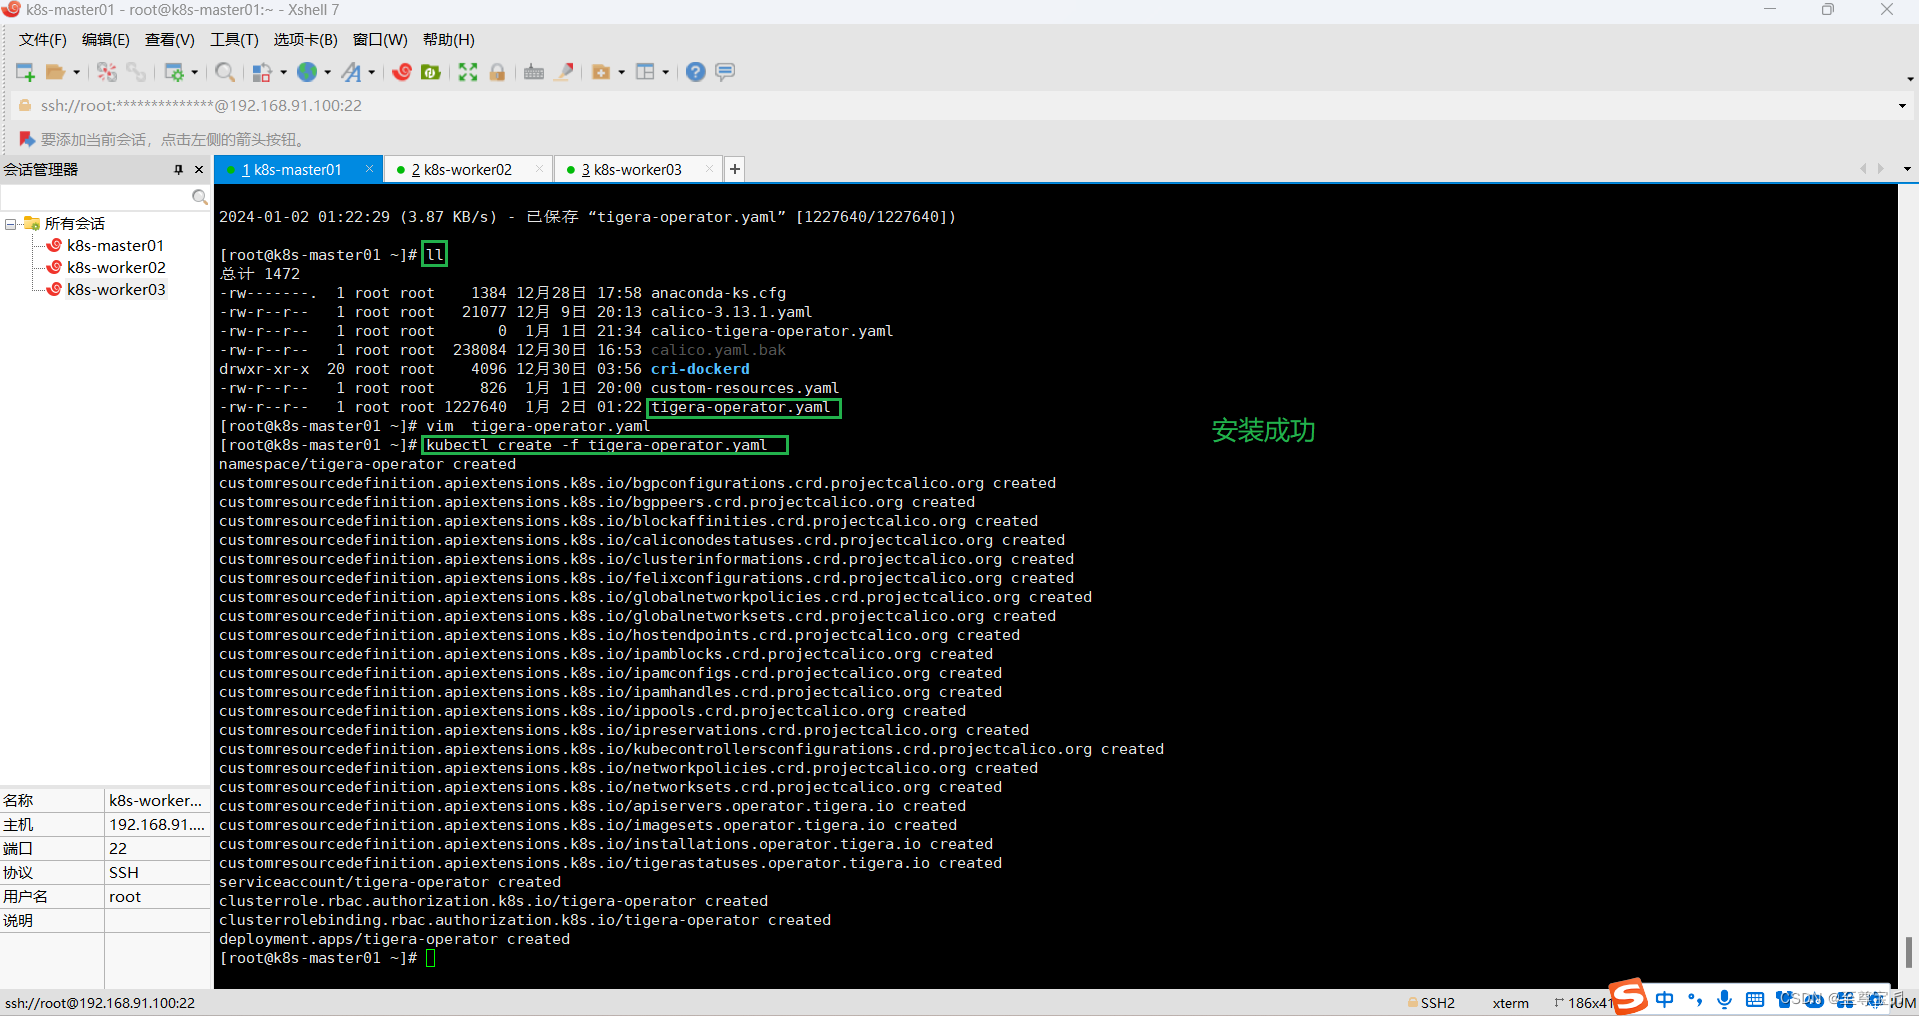
wget https://raw.githubusercontent.com/projectcalico/calico/v3.24.6/manifests/tigera-operator.yaml# 安装 tigera-operator.yaml
kubectl create -f tigera-operator.yaml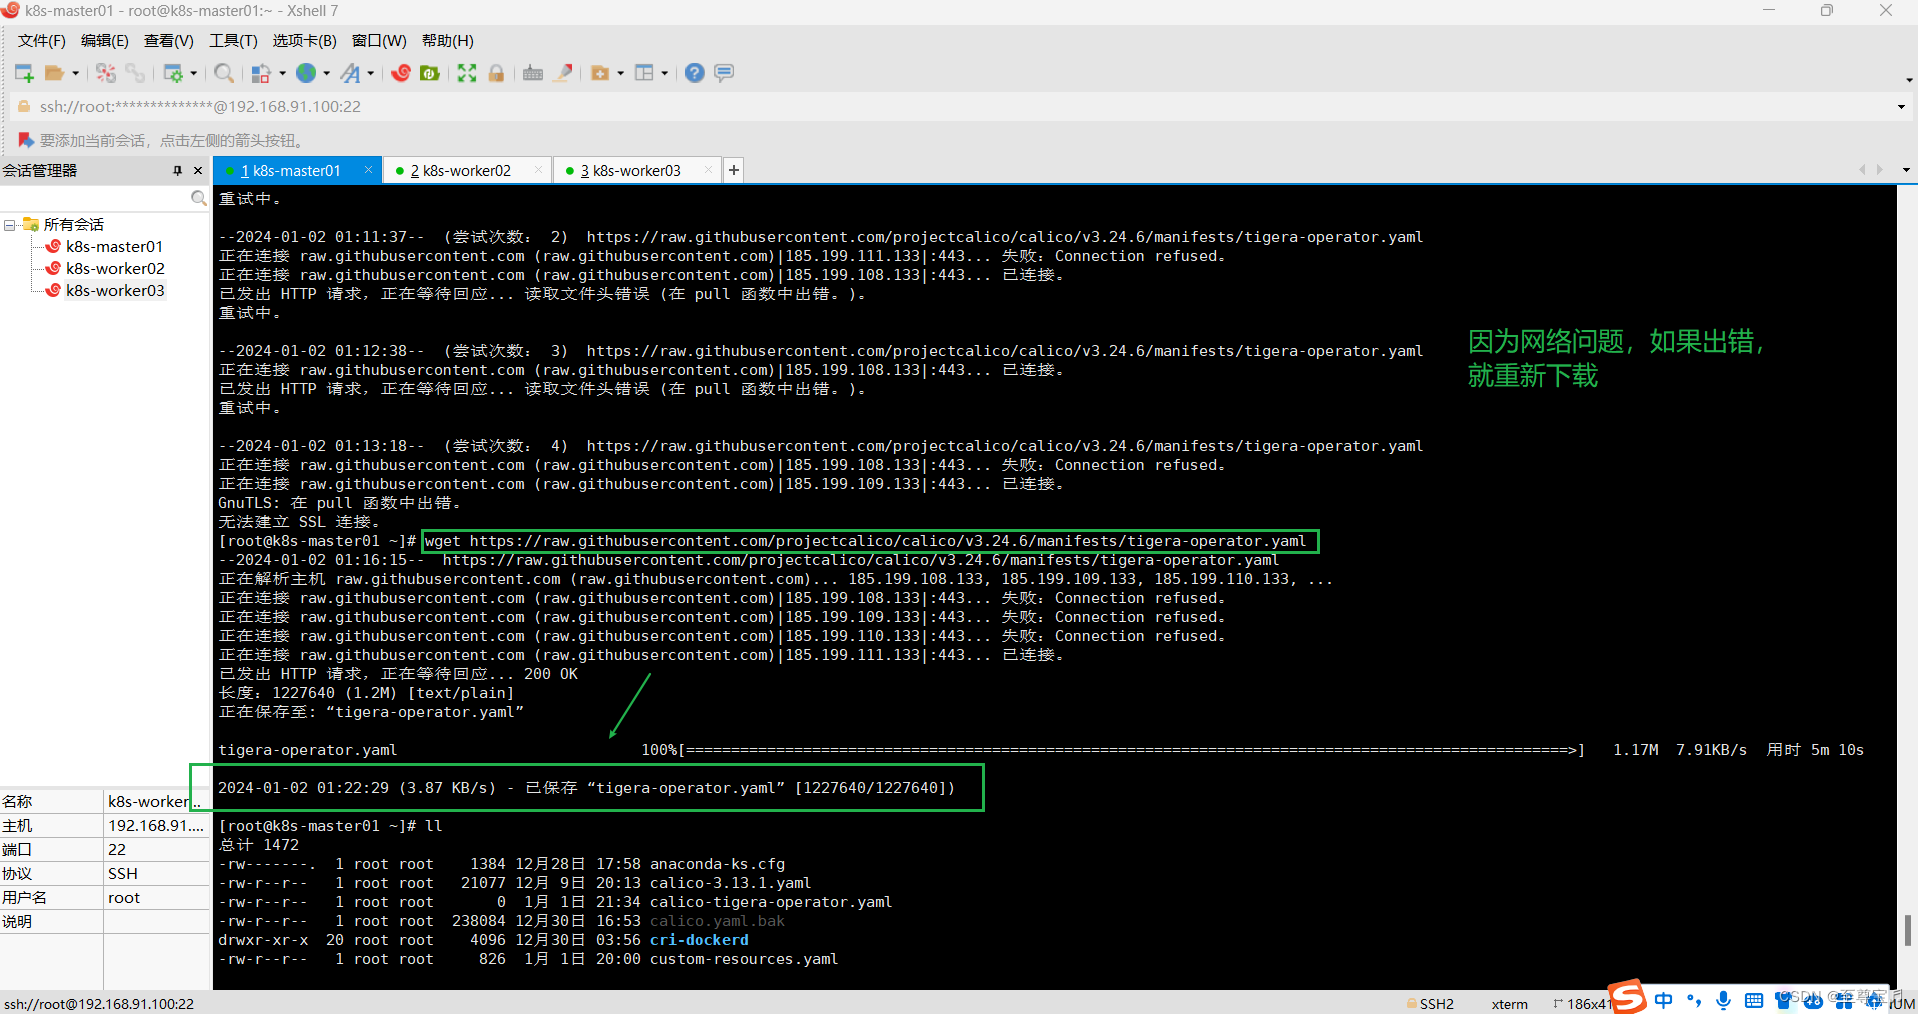
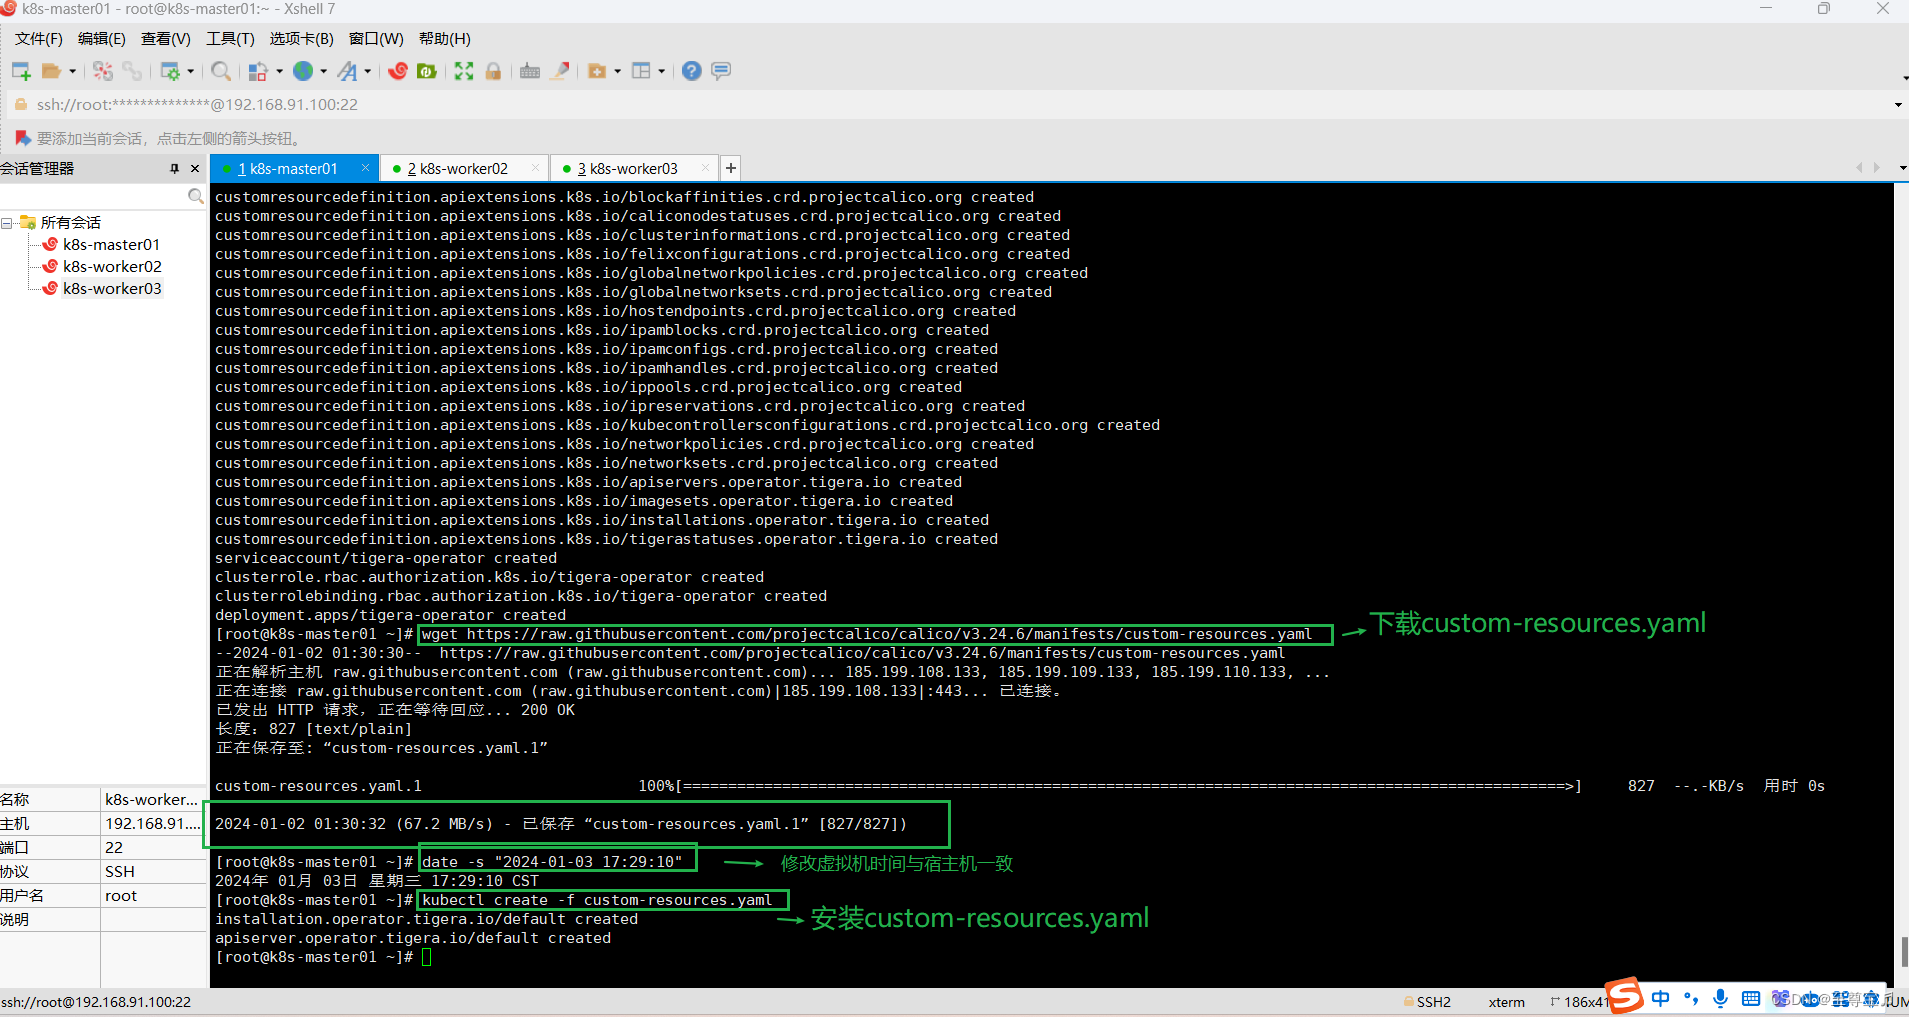
# 下载calico v3.24.6 的custom-resources.yaml
wget https://raw.githubusercontent.com/projectcalico/calico/v3.24.6/manifests/custom-resources.yaml# 安装calico v3.24.6 的custom-resources.yaml
kubectl create -f custom-resources.yaml
(11)master节点执行 vim /etc/containerd/config.toml ,修改sandbox_iamge的行如下所示:
sandbox_image = "registry.aliyuncs.com/google_containers/pause:3.8"下图中只改了版本号;(感觉两个地址差不多)
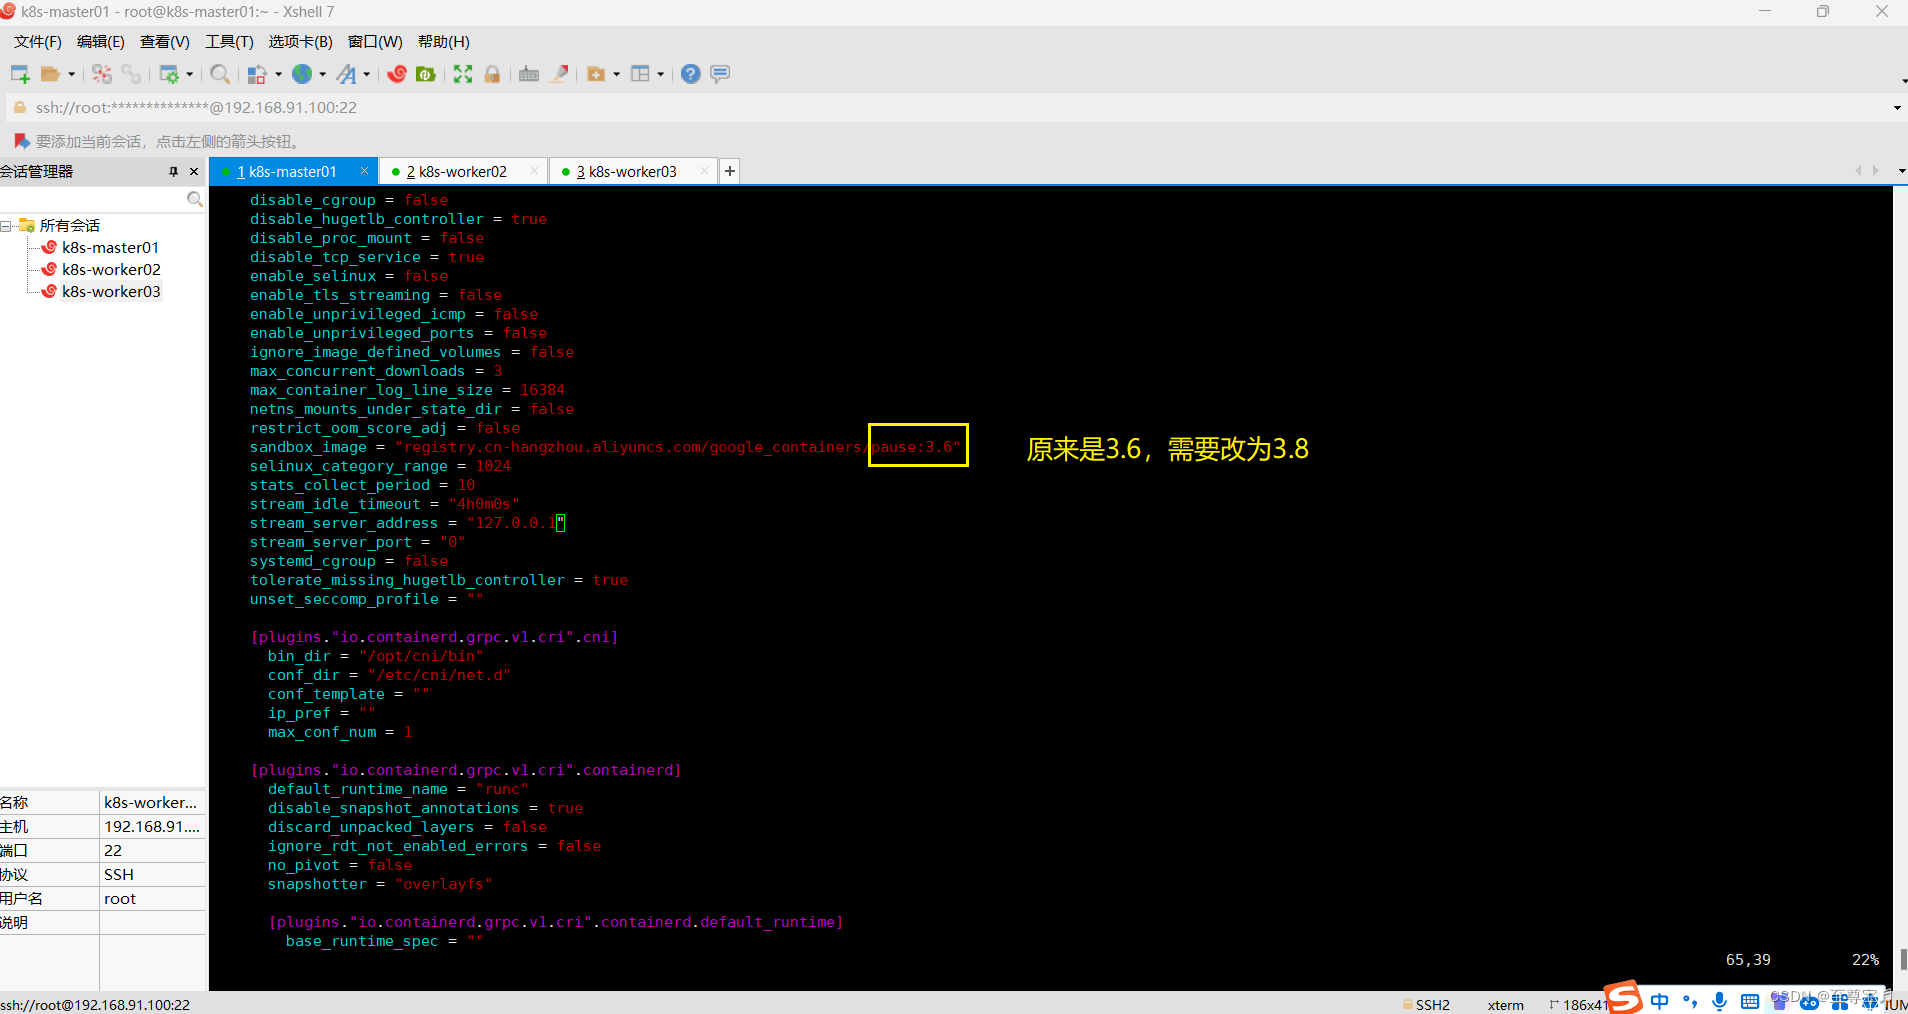
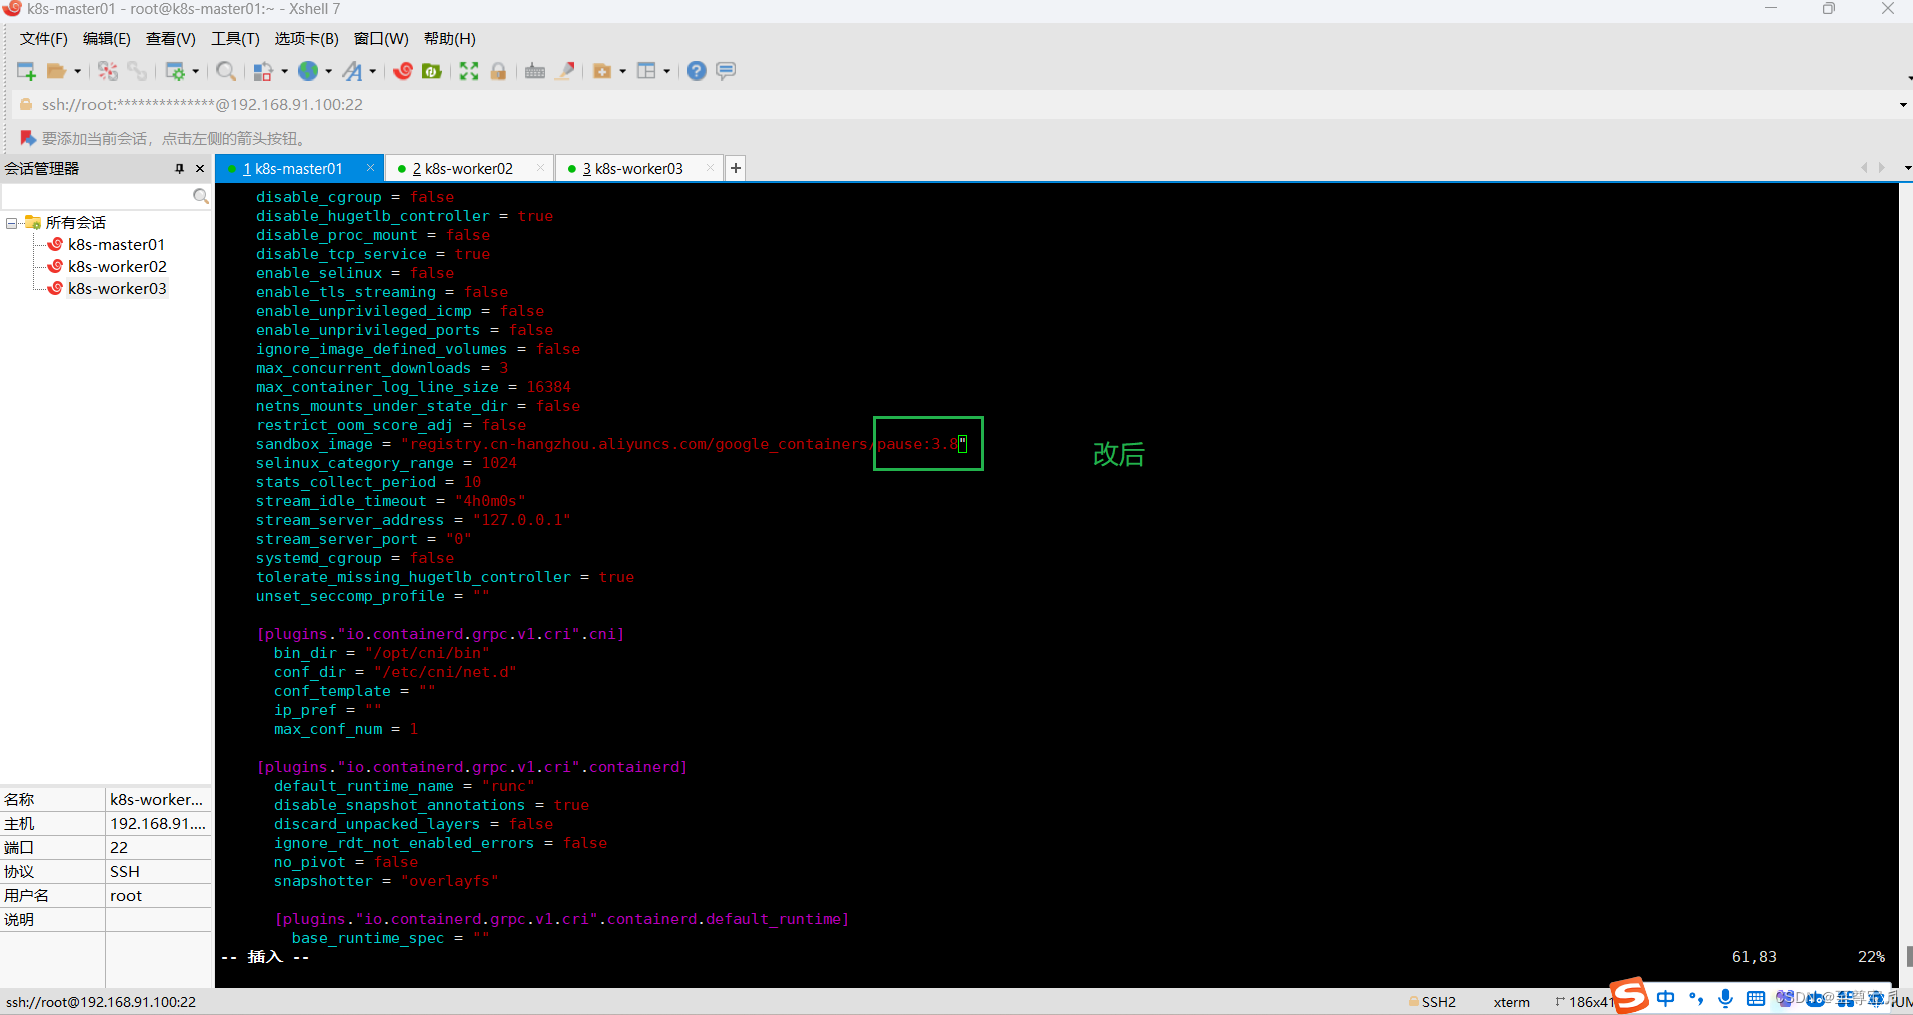
改完之后,执行:systemctl restart containerd 重启containerd;
systemctl restart containerd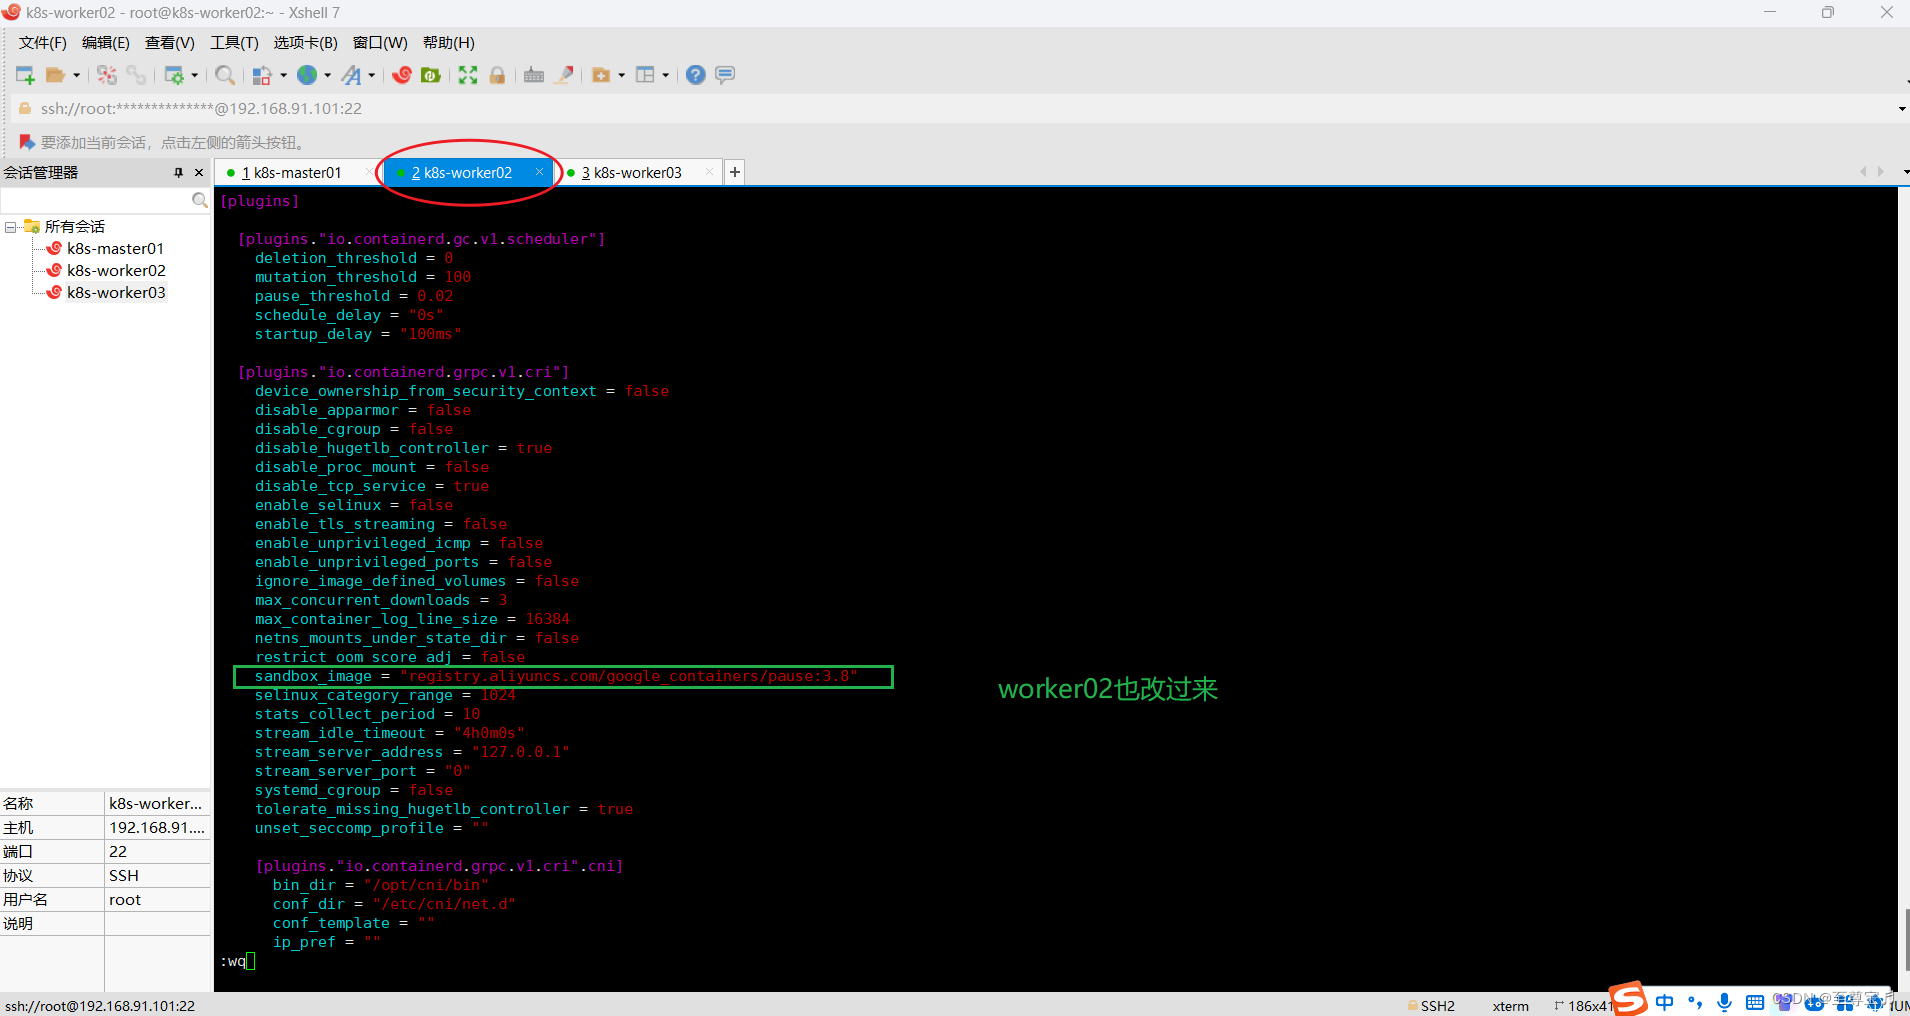

(12)"kubectl get nodes"命令,所有节点状态为"NotReady"的解决方法;
kubectl get nodes问题截图如下:
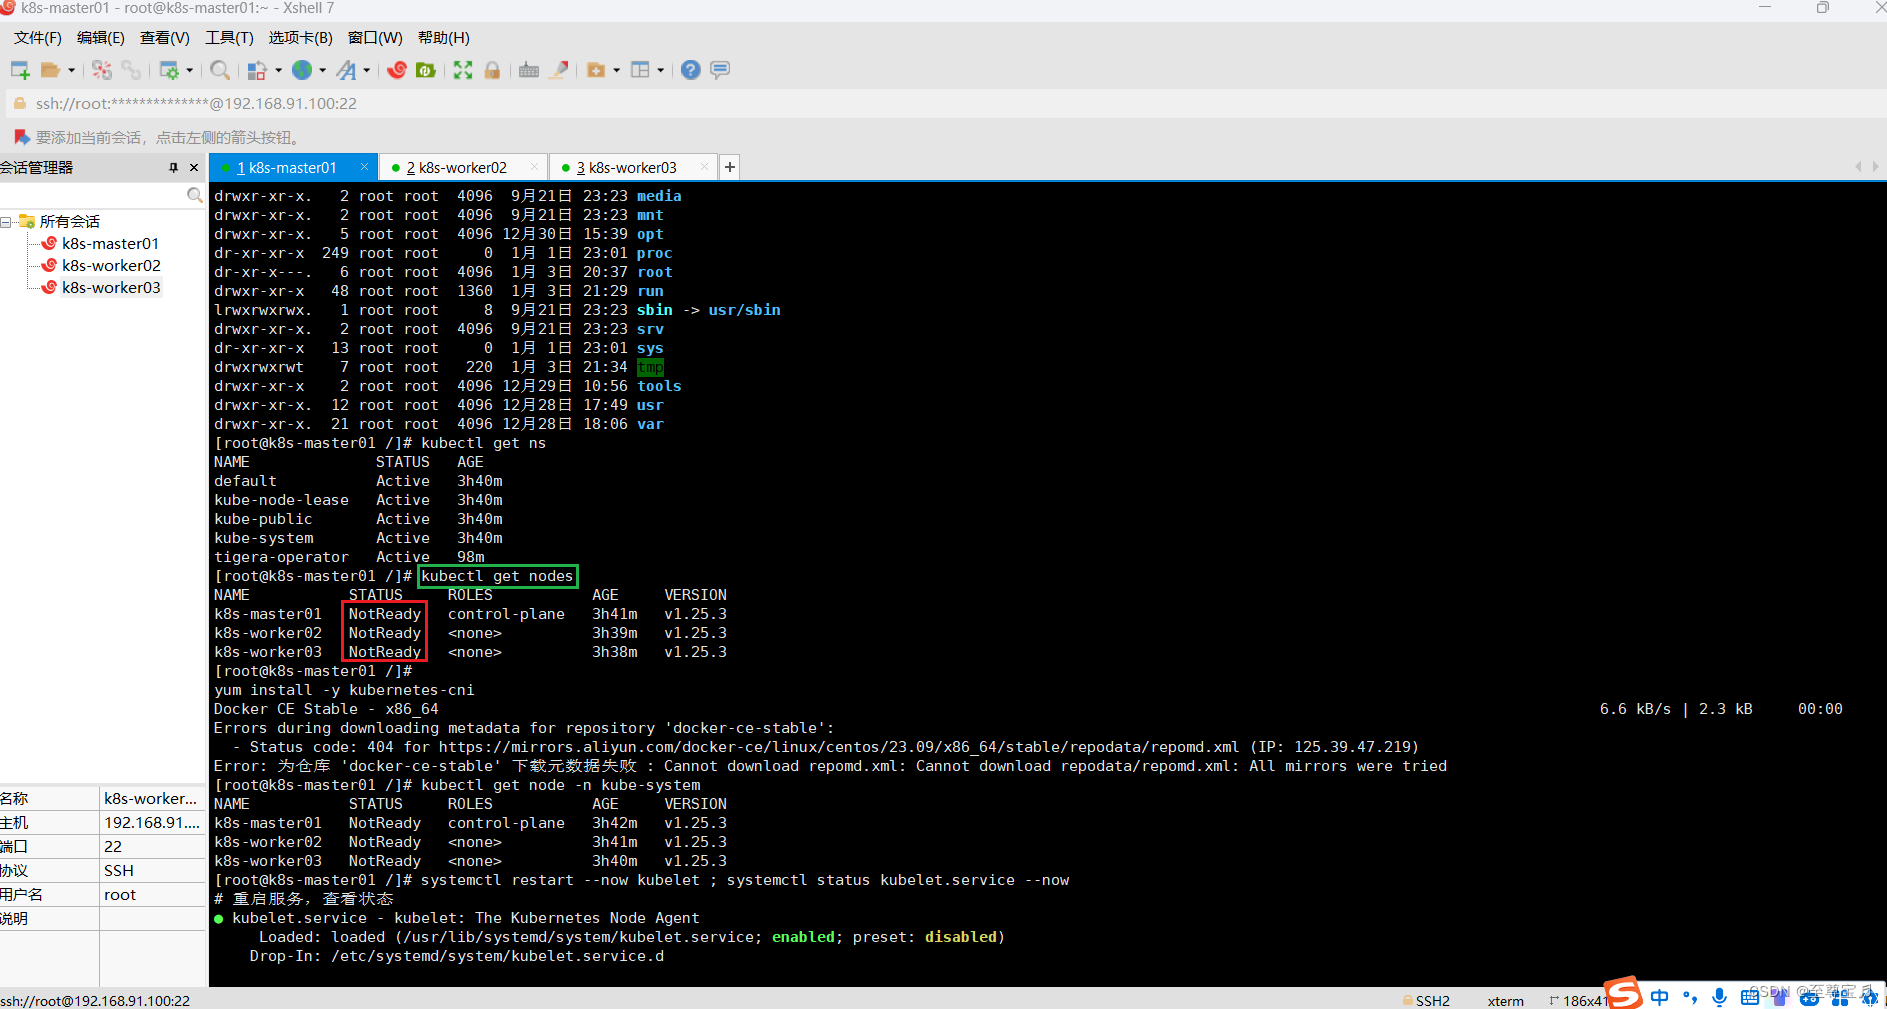
# 重启服务,查看状态
systemctl restart --now kubelet ; systemctl status kubelet.service --now# 查看kubelet日志
journalctl -f -u kubelet 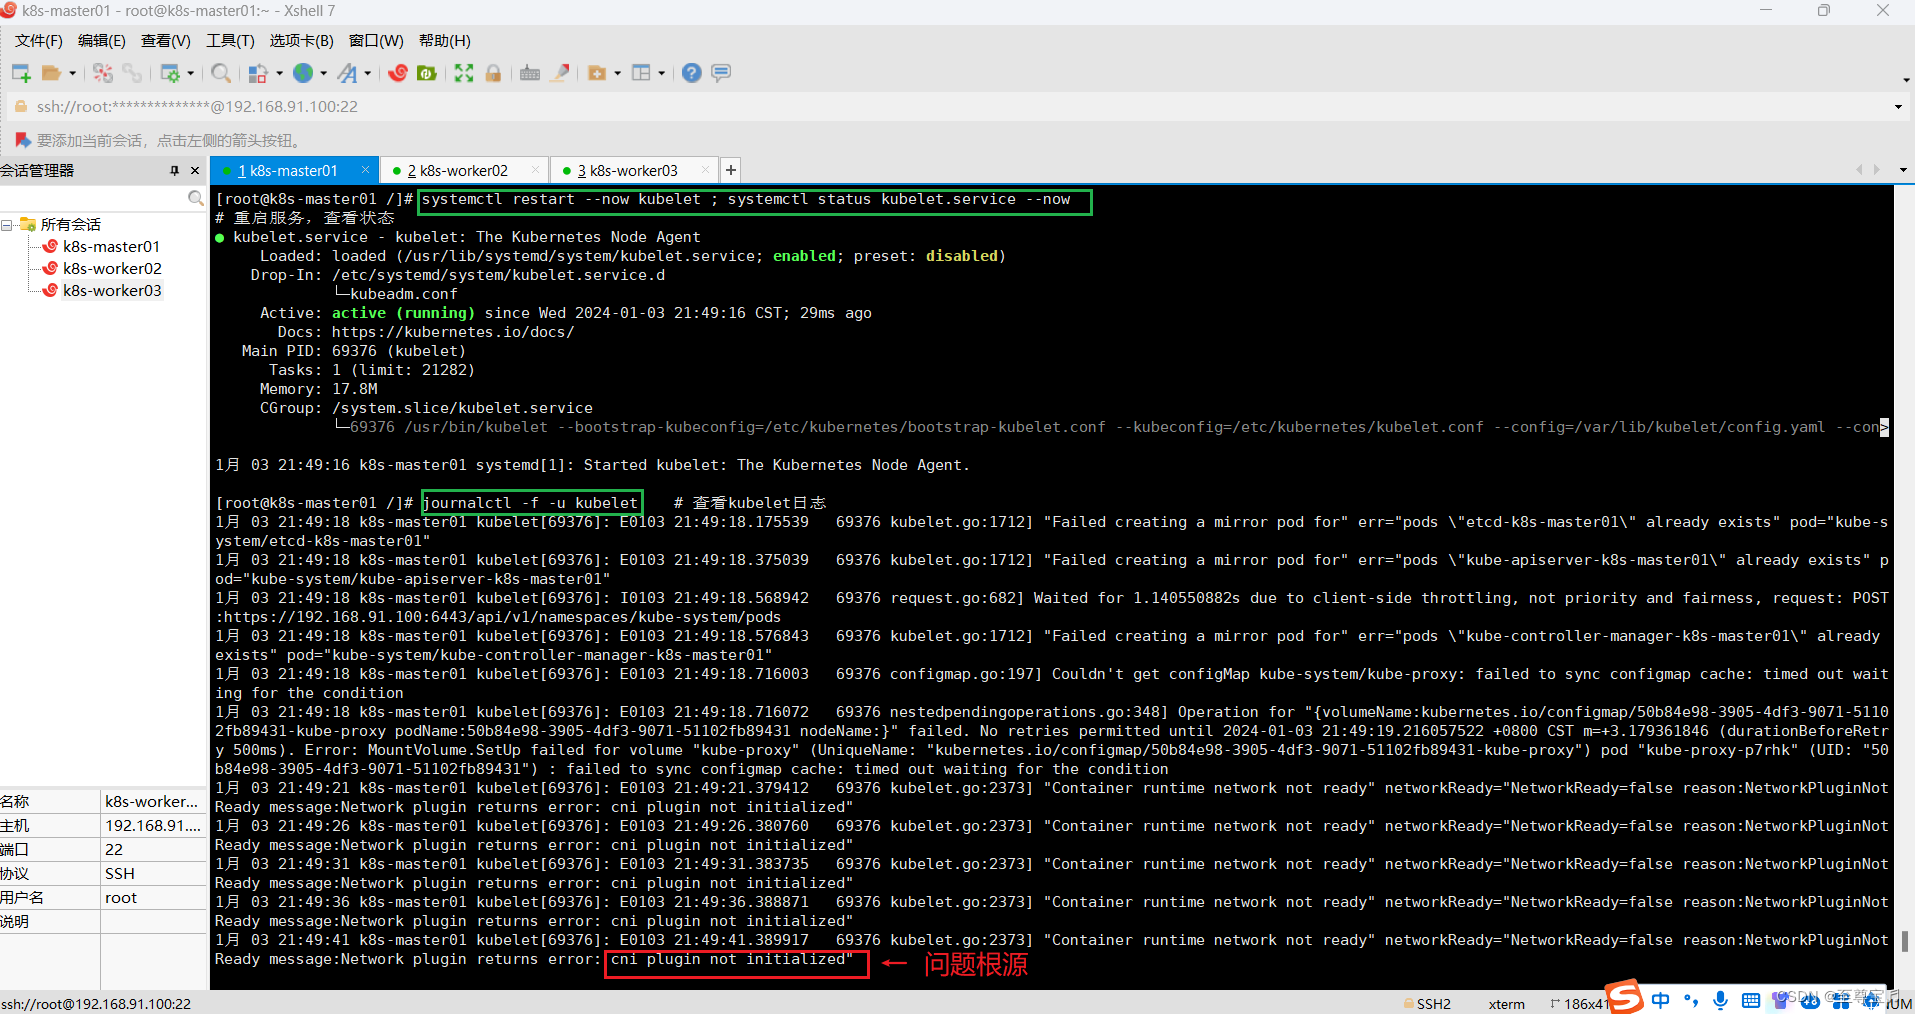
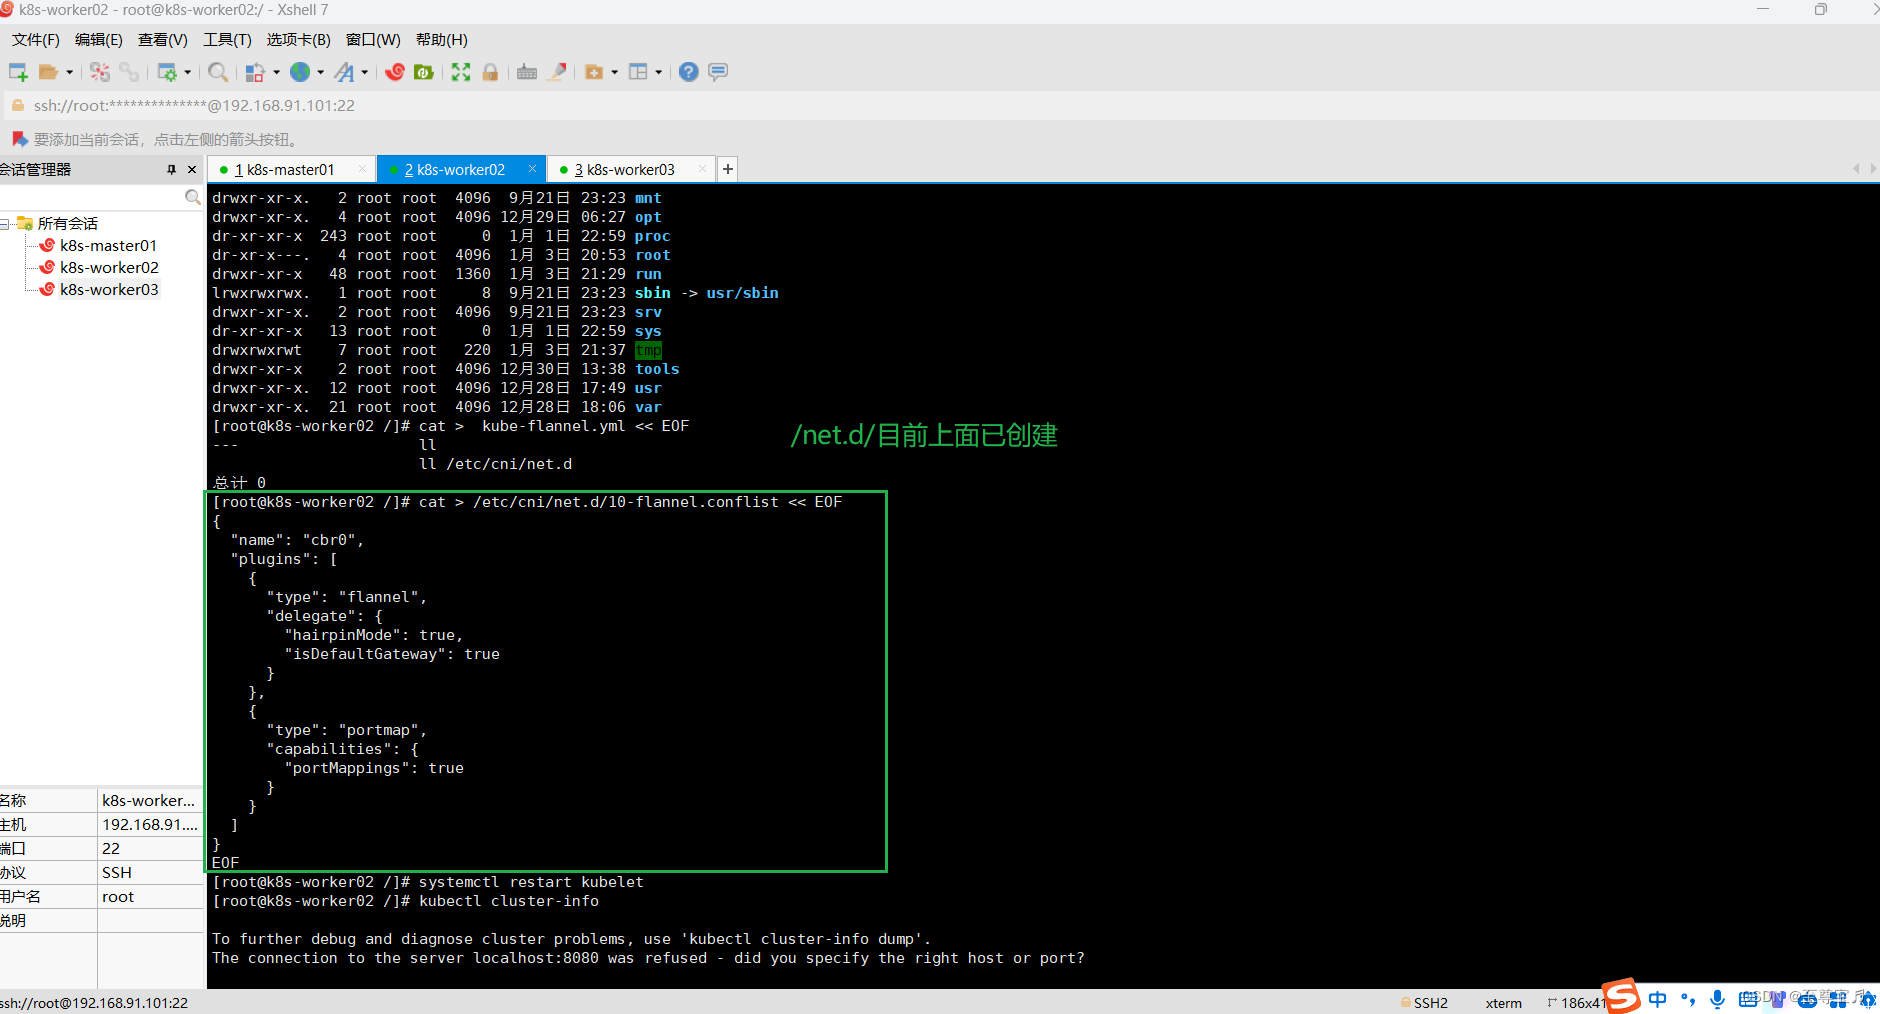
在NotReady的节点,执行下面命令,状态就可变为Ready;
# 创建目录
mkdir -p /etc/cni/net.d# 保存文件,写入内容
cat > /etc/cni/net.d/10-flannel.conflist << EOF
{"name": "cbr0","plugins": [{"type": "flannel","delegate": {"hairpinMode": true,"isDefaultGateway": true}},{"type": "portmap","capabilities": {"portMappings": true}}]
}
EOF
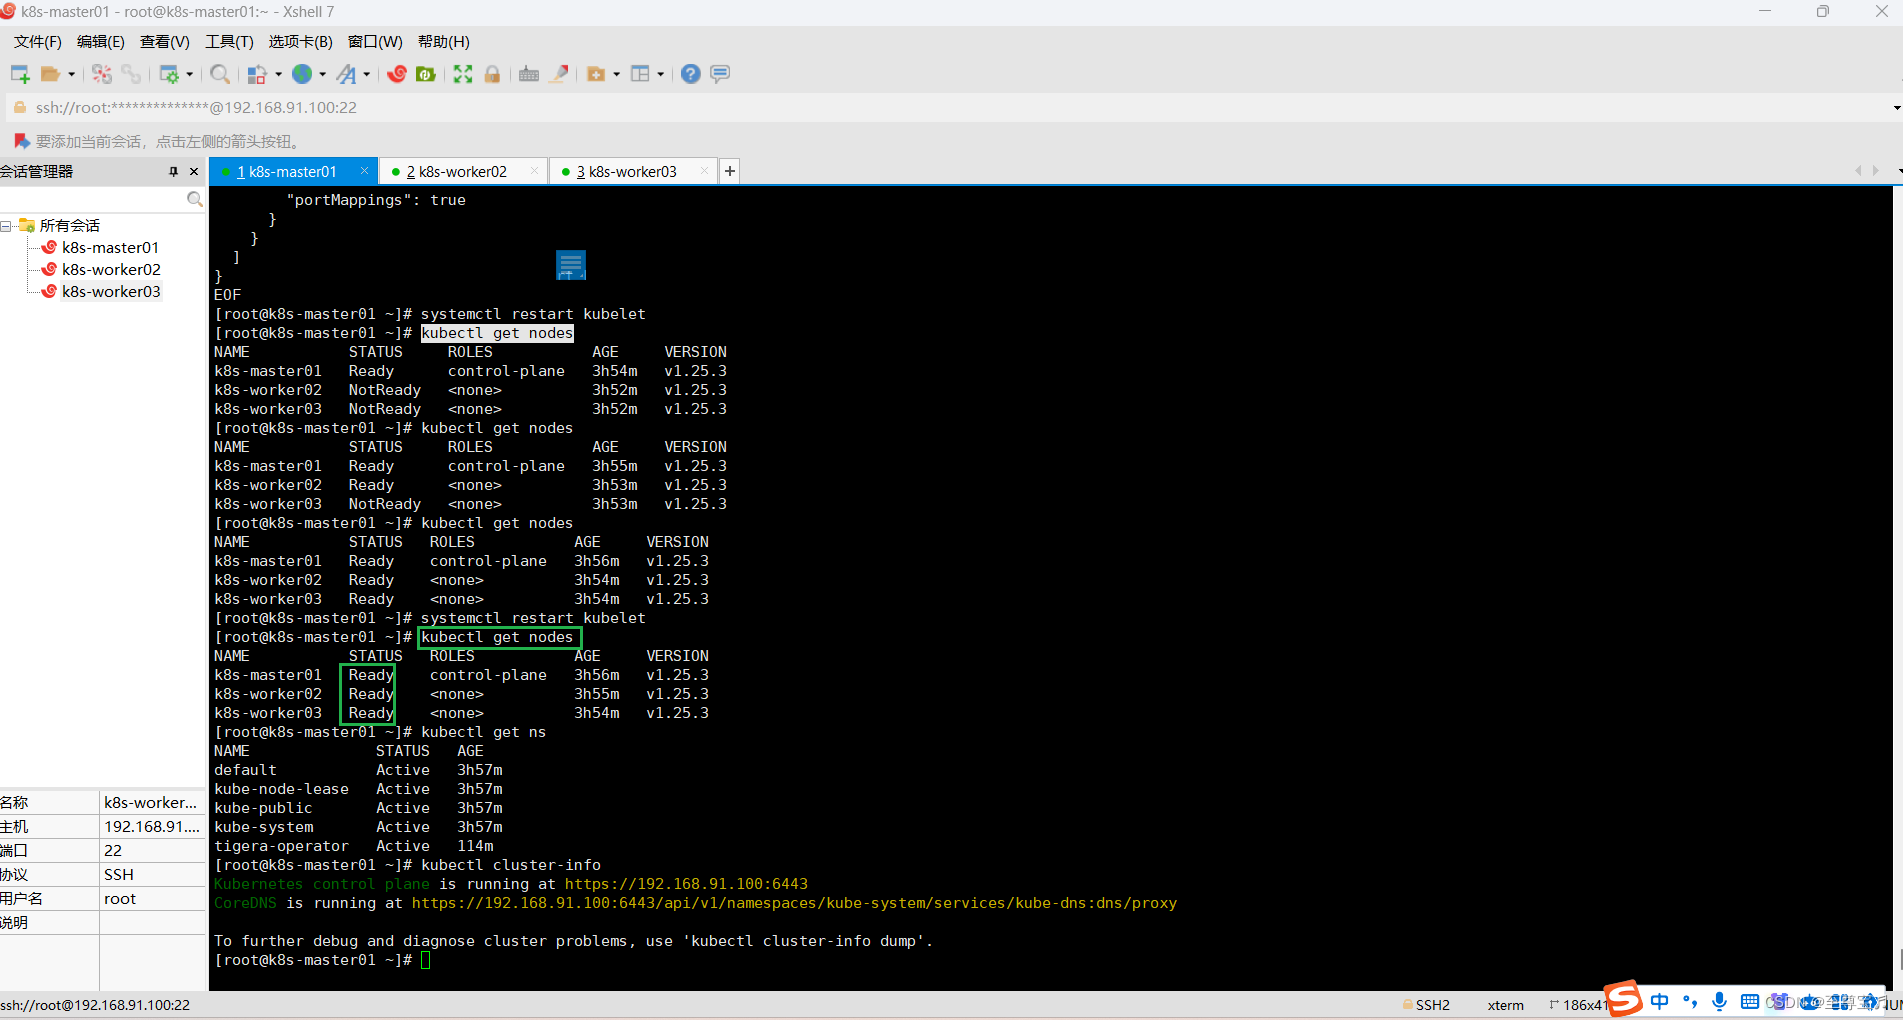
# 重启kubelet
systemctl restart kubelet
# 查看节点状态
kubectl get nodes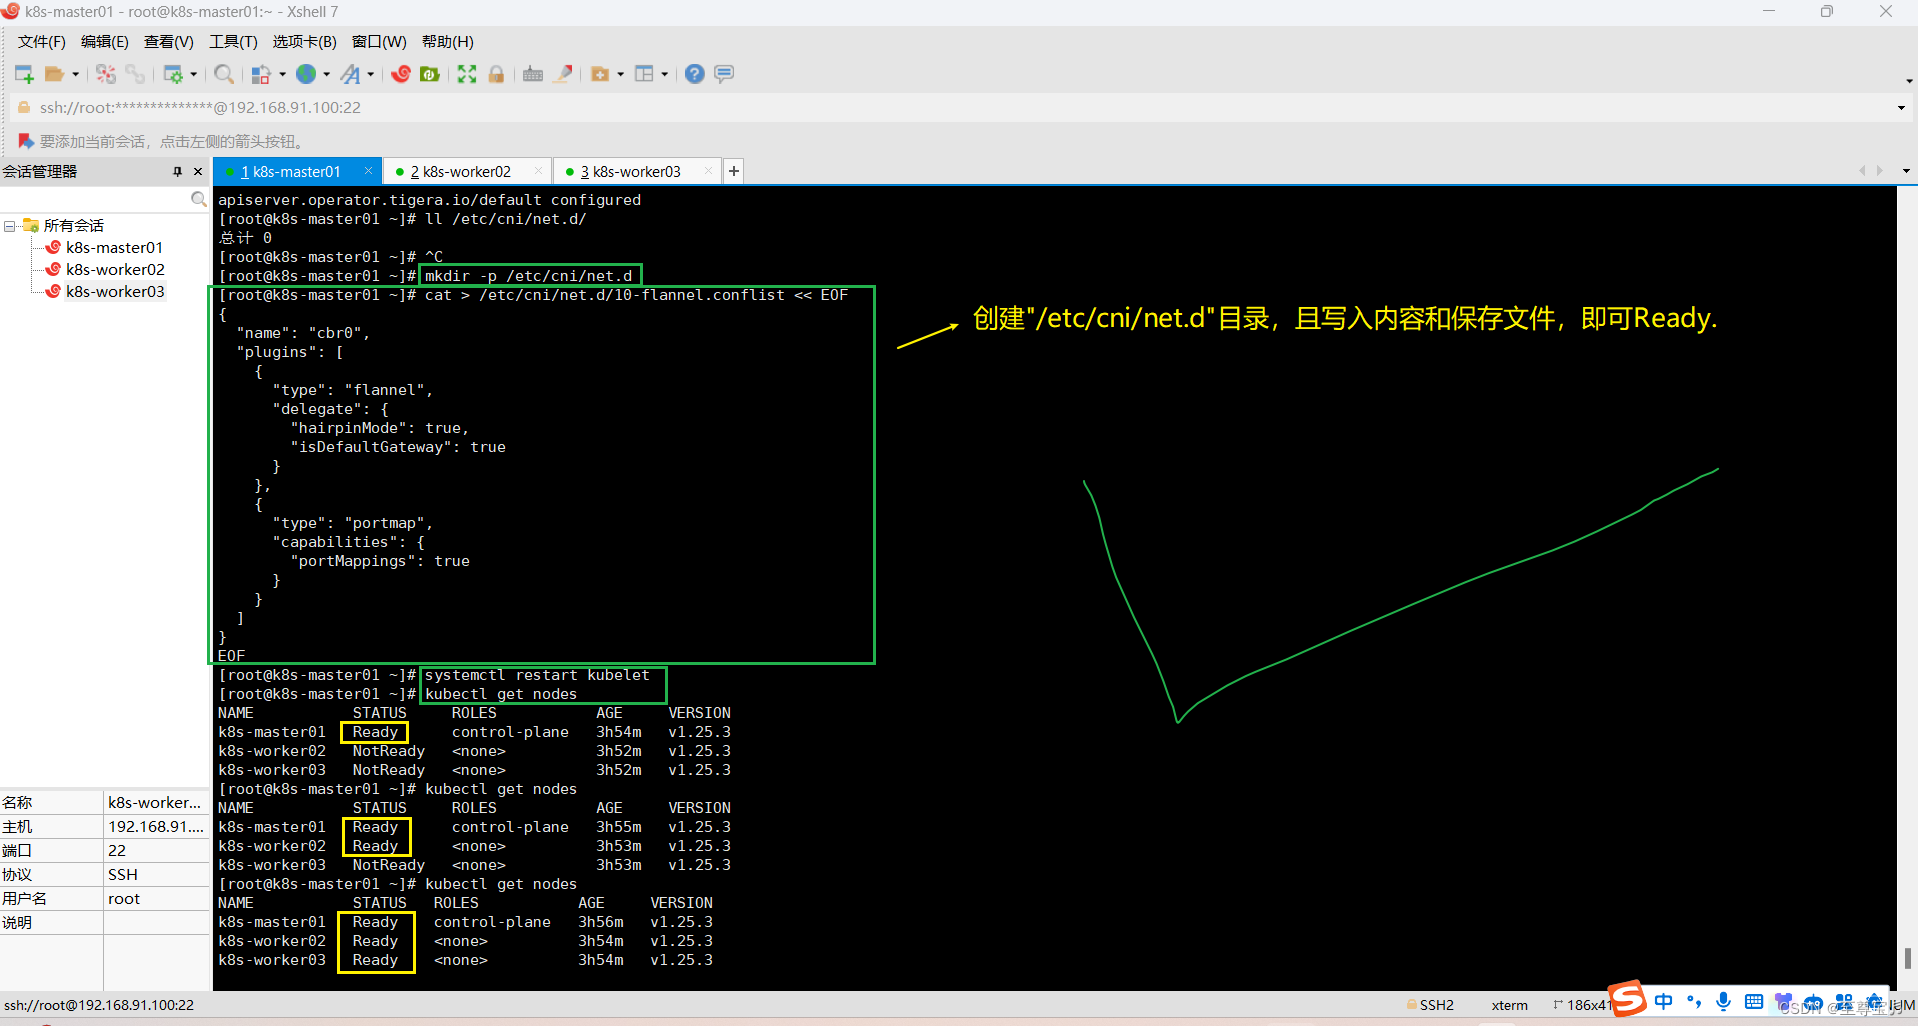


![【C++入门到精通】function包装器 | bind() 函数 C++11 [ C++入门 ]](https://img-blog.csdnimg.cn/direct/2b8dd8add78842b5aadcc661e9255f47.png#pic_center)


![[足式机器人]Part2 Dr. CAN学习笔记-Ch01自动控制原理](https://img-blog.csdnimg.cn/direct/0d4633f990284b3195ec45cf02c2c0eb.png#pic_center)
![[蓝桥杯2020国赛]答疑](https://img-blog.csdnimg.cn/direct/0ba53a20a5ef4cebb65802205af25599.png)