在这个信息爆炸的时代,我们渴望获取最新的天气信息,以便更好地规划我们的生活。而作为程序员的我们,又怎能错过用技术手段打造一款个性化、便捷的天气预报App呢?在本篇博客中,我将带你踏上一场奇妙的编程之旅,使用Flutter框架开发一款支持多端的天气预报App。
前言
作为一名小白,你可能对Flutter框架还不够了解,那么让我简单地为你解释一下。Flutter是一款由Google推出的开源UI工具包,可用于构建跨平台的移动应用。这意味着你可以使用同一套代码,同时在iOS和Android等多个平台上运行你的应用。而且,Flutter具有炫酷的界面效果和良好的性能,让开发者能够更轻松地创建漂亮且流畅的应用。
最近想搞私域,欢迎各位大佬光临😀😀😀!

准备工作
在启程前,我们需要搭建好我们的开发环境。这可能有些复杂,特别是当你想要搭建一款 Android、Windows 等多端应用时,除了安装我们所必须的 Flutter 与 IDEA,还需要安装 Android Studio、Visual Studio 等中可以将软件编译到各种平台的编译环境。这些环境的官方文档中有详细的安装教程,简单明了,小白也能轻松上手。
现在,让我们创建一个新的Flutter项目。我比较习惯使用 IDEA,这需要你安装 Flutter 与 Dart 插件才能使用;这里我新建了一个 weather_app 的 flutter 项目,并勾选了所有的平台。
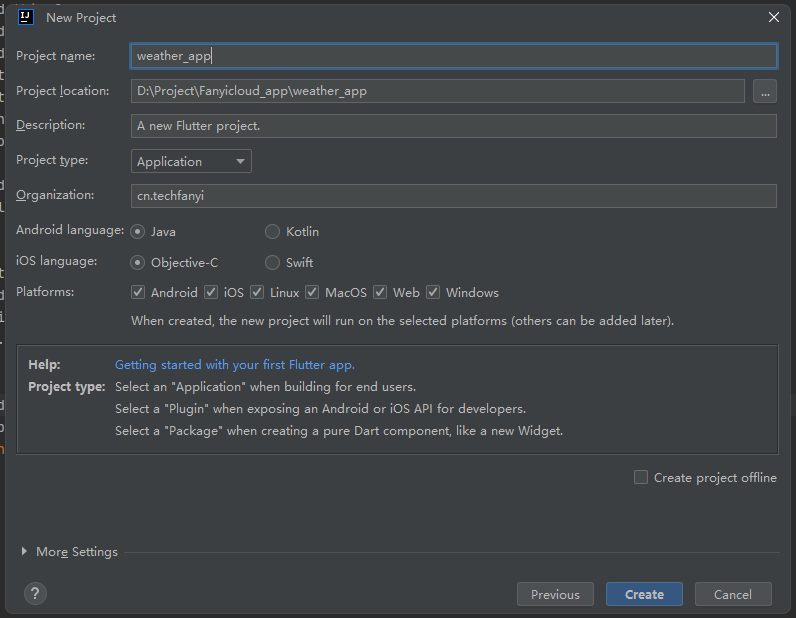
点击 “create”,这样,我们就成功创建了一个名为weather_app的Flutter项目。简单编写一点代码,选择 Windows 环境,点击运行:
import 'package:flutter/material.dart';void main() {runApp(MyApp());
}class MyApp extends StatelessWidget {@overrideWidget build(BuildContext context) {return MaterialApp(home: Scaffold(appBar: AppBar(title: Text('Weather App'),),body: Center(child: Text('Hello, Weather!'),),),);}
}
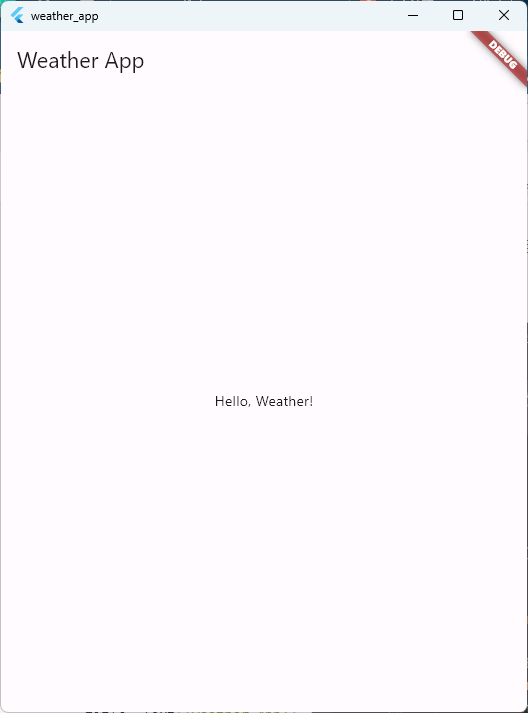
运行成功,前期工作准备成功,开始进行下一部分的工作。
UI 设计
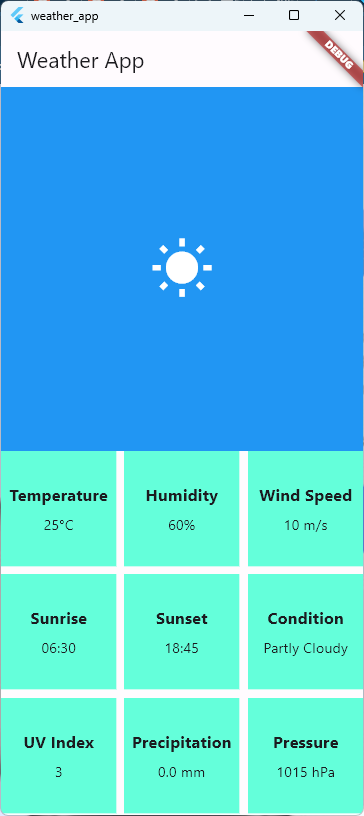
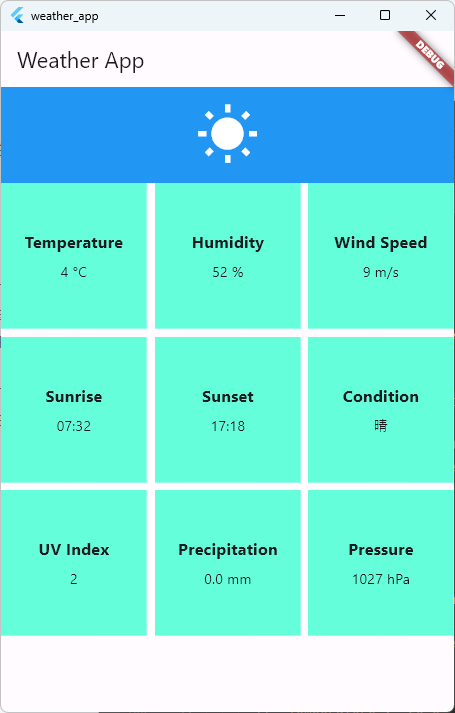
对于第一版的 weather_app,浅浅的画了一个草图,把界面简单分成两个部分,上半部分是今日天气的一些信息,比如天气的logo(是晴天就显示太阳,多云就显示云朵,下雨就显示下雨的图标),温度,风向等,下半部分是一个九宫格,每一个格子用来显示今日的气候的各种信息,包括紫外线、风速、日出时间、日落时间等。
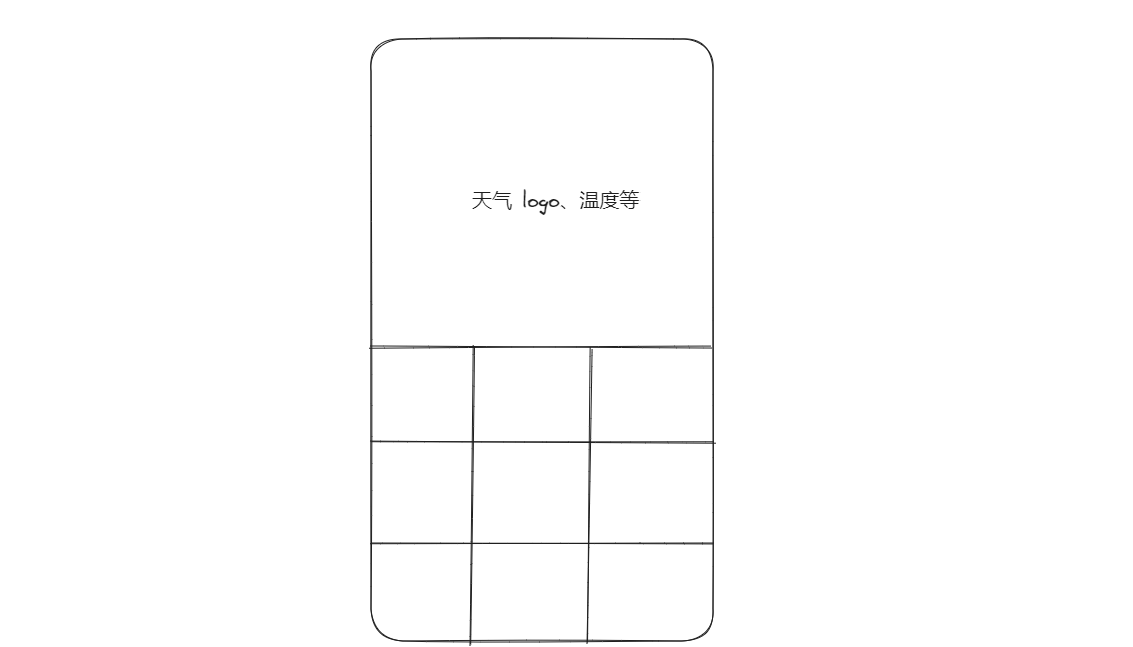
上半部分,就先用一个 Icon 代替,本期就简单设置一下布局,下期再来处理相关逻辑。下半部分,就使用网格布局来进行布局,使用 crossAxisCount: 3,将每行的网格数设置为三个。
由于我们暂时还没有进行网络请求,也就没有数据,所以我们前期就瞎编了几个数据,对此我们可以使用了GridView.builder来构建九宫格。每个网格项将显示气象信息的标题和值。
对于每个网格,使用 WeatherGridItem 用于展示九宫格中的每个网格项。我们使用Container来包裹每个网格项,并设置背景色和样式。
简单编写一下代码,就像下面一样,完成了最初的代码的布局。
import 'package:flutter/material.dart';void main() {runApp(MyApp());
}class MyApp extends StatelessWidget {Widget build(BuildContext context) {return MaterialApp(home: MyWeatherApp(),);}
}class MyWeatherApp extends StatelessWidget {// 模拟今日天气的数据final List<Map<String, dynamic>> weatherData = [{'title': 'Temperature', 'value': '25°C'},{'title': 'Humidity', 'value': '60%'},{'title': 'Wind Speed', 'value': '10 m/s'},{'title': 'Sunrise', 'value': '06:30'},{'title': 'Sunset', 'value': '18:45'},{'title': 'Condition', 'value': 'Partly Cloudy'},{'title': 'UV Index', 'value': '3'},{'title': 'Precipitation', 'value': '0.0 mm'},{'title': 'Pressure', 'value': '1015 hPa'},];Widget build(BuildContext context) {return Scaffold(appBar: AppBar(title: Text('Weather App'),),body: Column(children: [// 今日天气的logo与三行三列的网格位于同一页面Expanded(child: Column(crossAxisAlignment: CrossAxisAlignment.stretch,children: [// 今日天气的logoExpanded(child: WeatherLogo(),),// 三行三列的网格Expanded(child: MyWeatherGridView(weatherData: weatherData),),],),),],),);}
}class WeatherLogo extends StatelessWidget {Widget build(BuildContext context) {return Container(padding: EdgeInsets.all(16.0),color: Colors.blue,child: Center(child: Icon(Icons.wb_sunny, // 用于表示天气的图标,可以根据实际需求替换size: 64.0,color: Colors.white,),),);}
}class MyWeatherGridView extends StatelessWidget {final List<Map<String, dynamic>> weatherData;MyWeatherGridView({required this.weatherData});Widget build(BuildContext context) {return GridView.builder(gridDelegate: SliverGridDelegateWithFixedCrossAxisCount(crossAxisCount: 3,crossAxisSpacing: 8.0,mainAxisSpacing: 8.0,),itemCount: weatherData.length,itemBuilder: (BuildContext context, int index) {final Map<String, dynamic> item = weatherData[index];return WeatherGridItem(title: item['title'],value: item['value'],);},);}
}class WeatherGridItem extends StatelessWidget {final String title;final String value;WeatherGridItem({required this.title, required this.value});Widget build(BuildContext context) {return Container(color: Colors.tealAccent,child: Column(mainAxisAlignment: MainAxisAlignment.center,children: [Text(title,style: TextStyle(fontSize: 16,fontWeight: FontWeight.bold,),),SizedBox(height: 8.0),Text(value,style: TextStyle(fontSize: 14),),],),);}
}运行一下,在 Windows 下编译后的界面如下所示。
获取天气数据
获取 API 及请求内容简易分析
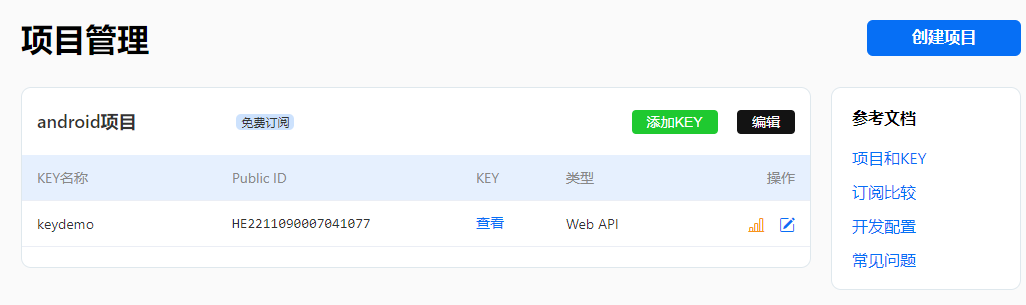
为了获取天气信息,我们可以使用一些开放的天气API。在这里,我们选择使用和风天气提供的免费API。首先,你需要在其官网上注册一个账号,然后创建一个项目,便可以获得我们的免费 API。
有了API密钥后,我们查看一下文档,和风天气的 API 的请求使用如下:
https://api.qweather.com/v7/weather/now?location=xxx&key=xxx
\___/   \______________/\______________/\__________________/
scheme        host   (port)   path        query parameters - scheme: https
- host: api.qweather.com
- port: 443 (在和风天气开发服务中,所有端口均为443)
- path: /v7/weather/7d?
- query parameters: location=xxx&key=xxx (在和风天气开发服务中,多个参数使用&分割)
输入到浏览器中可见如下请求内容:
{"code": "200","updateTime": "2024-01-16T16:35+08:00","fxLink": "https://www.qweather.com/weather/beijing-101010100.html","daily": [{"fxDate": "2024-01-16","sunrise": "07:33","sunset": "17:16","moonrise": "10:37","moonset": "22:53","moonPhase": "峨眉月","moonPhaseIcon": "801","tempMax": "3","tempMin": "-4","iconDay": "101","textDay": "多云","iconNight": "151","textNight": "多云","wind360Day": "180","windDirDay": "南风","windScaleDay": "1-3","windSpeedDay": "3","wind360Night": "180","windDirNight": "南风","windScaleNight": "1-3","windSpeedNight": "3","humidity": "77","precip": "0.0","pressure": "1019","vis": "15","cloud": "8","uvIndex": "2"},{"fxDate": "2024-01-17","sunrise": "07:33","sunset": "17:17","moonrise": "11:01","moonset": "","moonPhase": "峨眉月","moonPhaseIcon": "801","tempMax": "1","tempMin": "-4","iconDay": "104","textDay": "阴","iconNight": "151","textNight": "多云","wind360Day": "0","windDirDay": "北风","windScaleDay": "1-3","windSpeedDay": "3","wind360Night": "45","windDirNight": "东北风","windScaleNight": "1-3","windSpeedNight": "3","humidity": "65","precip": "0.0","pressure": "1024","vis": "24","cloud": "0","uvIndex": "1"},{"fxDate": "2024-01-18","sunrise": "07:32","sunset": "17:18","moonrise": "11:28","moonset": "00:06","moonPhase": "上弦月","moonPhaseIcon": "802","tempMax": "4","tempMin": "-5","iconDay": "100","textDay": "晴","iconNight": "151","textNight": "多云","wind360Day": "180","windDirDay": "南风","windScaleDay": "1-3","windSpeedDay": "3","wind360Night": "135","windDirNight": "东南风","windScaleNight": "1-3","windSpeedNight": "3","humidity": "40","precip": "0.0","pressure": "1028","vis": "25","cloud": "5","uvIndex": "2"}],"refer": {"sources": ["QWeather"],"license": ["CC BY-SA 4.0"]}
}
可以见到,这个天气API响应提供了详细的未来几天天气状况信息。每天包括日出、日落、月升、月落时间,以及最高温度、最低温度、白天和夜晚的天气图标、描述、风向、风力等多项指标。
以下是对API响应中关键字段的简要分析:
| 字段 | 描述 |
|---|---|
| code | API请求的状态码,“200” 表示请求成功。 |
| updateTime | 天气数据的更新时间,使用ISO 8601格式表示(2024-01-16T16:35+08:00)。 |
| fxLink | 提供了一个链接,可能是一个网页链接,用户可以通过该链接获取更多关于天气的信息。 |
| daily | 包含未来几天天气信息的数组。每个元素都包含了一个日期(fxDate)的天气信息。 |
| refer | 提供了一些参考信息,包括数据来源(sources)和许可证信息(license)。 |
对于每一天的天气信息:
| 字段 | 描述 |
|---|---|
| fxDate | 预测的日期。 |
| sunrise/sunset | 分别表示日出和日落时间。 |
| moonrise/moonset | 分别表示月升和月落时间。 |
| moonPhase | 表示月相,如"峨眉月"和"上弦月"。 |
| tempMax/tempMin | 表示最高和最低温度。 |
| iconDay/iconNight | 表示白天和夜晚的天气图标代码。 |
| textDay/textNight | 表示白天和夜晚的天气描述文本。 |
| wind360Day/wind360Night | 表示白天和夜晚的风向角度。 |
| windDirDay/windDirNight | 表示白天和夜晚的风向。 |
| windScaleDay/windScaleNight | 表示白天和夜晚的风力等级。 |
| windSpeedDay/windSpeedNight | 表示白天和夜晚的风速。 |
| humidity | 表示湿度。 |
| precip | 表示降水量。 |
| pressure | 表示气压。 |
| vis | 表示能见度。 |
| cloud | 表示云层覆盖百分比。 |
| uvIndex | 表示紫外线指数。 |
http 请求
在 Dart 中,我们可以使用http包来发起网络请求。在pubspec.yaml文件中添加以下依赖:
dependencies:http: ^1.1.2
然后,在终端运行flutter pub get以安装新的依赖。
接下来,我们来简单编写一个 getWeatherData() 函数来获取天气数据。在lib/main.dart文件中:
Future<String> getWeatherData() async {final response = await http.get('https://devapi.qweather.com/v7/weather/3d?location=101010100&key=e3873af4851d49ae'); // 这里的 key 是瞎编的😀if (response.statusCode == 200) {return json.decode(response.body).toString();} else {throw Exception('Failed to load weather data');}}
这段代码是一个用于异步获取天气数据的函数。我们来逐步分析其逻辑:
首先,getWeatherData 函数返回一个 Future<String>,表明它将异步返回一个字符串结果。使用 async 关键字标识该函数为异步函数。
在函数体内,通过 http.get 方法发起GET请求,使用 await 关键字等待异步请求的完成。
接着,通过检查响应状态码是否为200,判断请求是否成功。如果成功,则返回请求后的字符串内容。如果响应状态码不是200,函数会抛出异常,提示 ‘Failed to load weather data’。
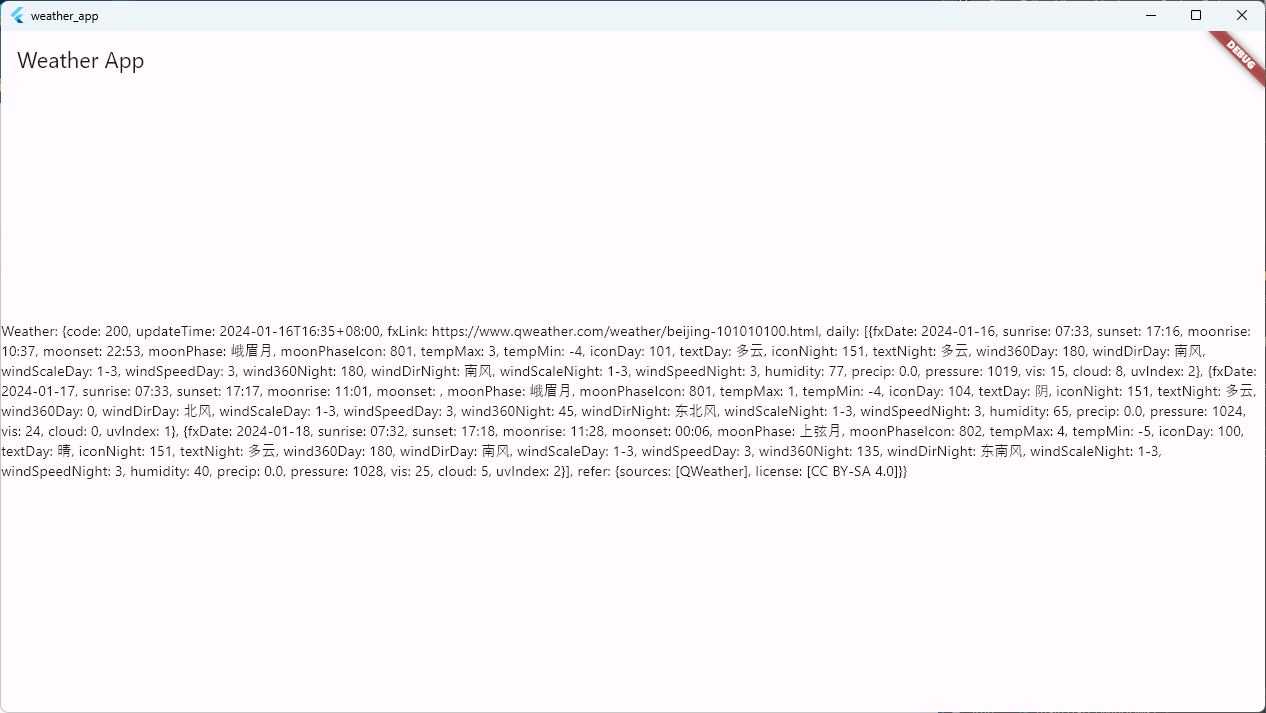
把请求后的内容返回到我们的布局中,可以看到我们请求成功了。
解析请求后数据
由于我这里使用的是免费的 API,只能显示三天的气候,所以就不单独写一个函数了,这里就直接获取 getWeatherData() 中请求的内容并存储到变量中,然后就用最简单原始的方法获取了三天里九宫格中所需要的气候信息。
Future<void> _changeWeatherData() async {try {Map<String, dynamic> weatherData = await getWeatherData();setState(() {// 'Temperature': '25°C',// 'Humidity': '60%',// 'Wind Speed': '10 m/s',// 'Sunrise': '06:30',// 'Sunset': '18:45',// 'Condition': 'Partly Cloudy',// 'UV Index': '3',// 'Precipitation': '0.0 mm',// 'Pressure': '1015 hPa',weatherDay1['Temperature'] = weatherData["daily"][0]["tempMax"] + " °C";weatherDay1['Humidity'] = weatherData["daily"][0]["humidity"] + " %";weatherDay1['Wind Speed'] = weatherData["daily"][0]["windSpeedDay"] + " m/s";weatherDay1['Sunrise'] = weatherData["daily"][0]["sunrise"];weatherDay1['Sunset'] = weatherData["daily"][0]["sunset"];weatherDay1['Condition'] = weatherData["daily"][0]["textDay"];weatherDay1['UV Index'] = weatherData["daily"][0]["uvIndex"];weatherDay1['Precipitation'] = weatherData["daily"][0]["precip"] + " mm";weatherDay1['Pressure'] = weatherData["daily"][0]["pressure"] + " hPa";weatherDay2['Temperature'] = weatherData["daily"][1]["tempMax"] + " °C";weatherDay2['Humidity'] = weatherData["daily"][1]["humidity"] + " %";weatherDay2['Wind Speed'] = weatherData["daily"][1]["windSpeedDay"] + " m/s";weatherDay2['Sunrise'] = weatherData["daily"][1]["sunrise"];weatherDay2['Sunset'] = weatherData["daily"][1]["sunset"];weatherDay2['Condition'] = weatherData["daily"][1]["textDay"];weatherDay2['UV Index'] = weatherData["daily"][1]["uvIndex"];weatherDay2['Precipitation'] = weatherData["daily"][1]["precip"] + " mm";weatherDay2['Pressure'] = weatherData["daily"][1]["pressure"] + " hPa";weatherDay3['Temperature'] = weatherData["daily"][2]["tempMax"] + " °C";weatherDay3['Humidity'] = weatherData["daily"][2]["humidity"] + " %";weatherDay3['Wind Speed'] = weatherData["daily"][2]["windSpeedDay"] + " m/s";weatherDay3['Sunrise'] = weatherData["daily"][2]["sunrise"];weatherDay3['Sunset'] = weatherData["daily"][2]["sunset"];weatherDay3['Condition'] = weatherData["daily"][2]["textDay"];weatherDay3['UV Index'] = weatherData["daily"][2]["uvIndex"];weatherDay3['Precipitation'] = weatherData["daily"][2]["precip"] + " mm";weatherDay3['Pressure'] = weatherData["daily"][2]["pressure"] + " hPa";});
更新数据
只是请求数据还不行,要想让我们的数据能够在请求后显示,我们需要将我们的 StatelessWidget 修改为 StatefulWidget,并在 initState 时就更新我们的数据,否则数据就还是我们更新前的数据,或者需要我们触发函数手动更新。
void initState() {super.initState();// 在 initState 中调用异步函数_changeWeatherData();}
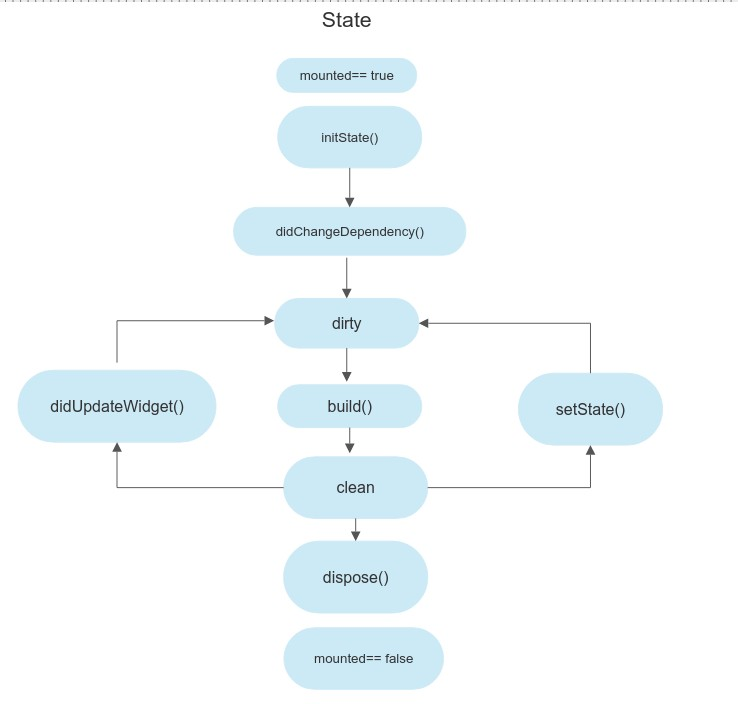
运行后如下:
天气图标和更多信息
由于和风天气设计了一套完整的天气图标以及对应的请求码,所以这个以及其它部分留到下期再聊。
结语
通过这篇博客,我们一起完成了一个简单而又实用的天气预报App。在这个过程中,你学到了如何使用Flutter框架构建跨平台的移动应用,如何通过网络请求获取实时的天气数据,并展示在界面上。同时,你还学到了如何使用一些Flutter插件来美化你的App,使用户体验更加出色。
希望这次编程之旅让你感受到了编程的乐趣,并激发了你对移动应用开发的兴趣。天气预报App只是冰山一角,Flutter有着更广阔的应用领域,等待你去探索和发现。加油,各位程序员,迎接更多奇妙的编程之旅吧!
附完整代码
import 'package:http/http.dart' as http;
import 'dart:convert';
import 'dart:core';
import 'package:flutter/material.dart';void main() {runApp(MyApp());
}class MyApp extends StatelessWidget {Widget build(BuildContext context) {return MaterialApp(home: MyWeatherApp(),);}
}class MyWeatherApp extends StatefulWidget {_MyWeatherAppState createState() => _MyWeatherAppState();
}class _MyWeatherAppState extends State<MyWeatherApp> {Map<String, dynamic> weatherDay1 = {'Temperature': '25°C','Humidity': '60%','Wind Speed': '10 m/s','Sunrise': '06:30','Sunset': '18:45','Condition': 'Partly Cloudy','UV Index': '3','Precipitation': '0.0 mm','Pressure': '1015 hPa',};Map<String, dynamic> weatherDay2 = {'Temperature': '25°C','Humidity': '60%','Wind Speed': '10 m/s','Sunrise': '06:30','Sunset': '18:45','Condition': 'Partly Cloudy','UV Index': '3','Precipitation': '0.0 mm','Pressure': '1015 hPa',};Map<String, dynamic> weatherDay3 = {'Temperature': '25°C','Humidity': '60%','Wind Speed': '10 m/s','Sunrise': '06:30','Sunset': '18:45','Condition': 'Partly Cloudy','UV Index': '3','Precipitation': '0.0 mm','Pressure': '1015 hPa',};var weatherCondition_1 = "Sunny";var weatherCondition_2 = "Sunny";var weatherCondition_3 = "Sunny";void initState() {super.initState();// 在 initState 中调用异步函数_changeWeatherData();}Future<Map<String, dynamic>> getWeatherData() async {String url = 'https://devapi.qweather.com/v7/weather/3d?location=101010100&key=e3873af48512430a92cec332815d49ae';Uri uri = Uri.parse(url);var response = await http.get(uri);if (response.statusCode == 200) {return json.decode(response.body);} else {throw Exception('Failed to load weather data');}}Future<void> _changeWeatherData() async {try {Map<String, dynamic> weatherData = await getWeatherData();setState(() {// 'Temperature': '25°C',// 'Humidity': '60%',// 'Wind Speed': '10 m/s',// 'Sunrise': '06:30',// 'Sunset': '18:45',// 'Condition': 'Partly Cloudy',// 'UV Index': '3',// 'Precipitation': '0.0 mm',// 'Pressure': '1015 hPa',weatherDay1['Temperature'] = weatherData["daily"][0]["tempMax"] + " °C";weatherDay1['Humidity'] = weatherData["daily"][0]["humidity"] + " %";weatherDay1['Wind Speed'] = weatherData["daily"][0]["windSpeedDay"] + " m/s";weatherDay1['Sunrise'] = weatherData["daily"][0]["sunrise"];weatherDay1['Sunset'] = weatherData["daily"][0]["sunset"];weatherDay1['Condition'] = weatherData["daily"][0]["textDay"];weatherDay1['UV Index'] = weatherData["daily"][0]["uvIndex"];weatherDay1['Precipitation'] = weatherData["daily"][0]["precip"] + " mm";weatherDay1['Pressure'] = weatherData["daily"][0]["pressure"] + " hPa";weatherDay2['Temperature'] = weatherData["daily"][1]["tempMax"] + " °C";weatherDay2['Humidity'] = weatherData["daily"][1]["humidity"] + " %";weatherDay2['Wind Speed'] = weatherData["daily"][1]["windSpeedDay"] + " m/s";weatherDay2['Sunrise'] = weatherData["daily"][1]["sunrise"];weatherDay2['Sunset'] = weatherData["daily"][1]["sunset"];weatherDay2['Condition'] = weatherData["daily"][1]["textDay"];weatherDay2['UV Index'] = weatherData["daily"][1]["uvIndex"];weatherDay2['Precipitation'] = weatherData["daily"][1]["precip"] + " mm";weatherDay2['Pressure'] = weatherData["daily"][1]["pressure"] + " hPa";weatherDay3['Temperature'] = weatherData["daily"][2]["tempMax"] + " °C";weatherDay3['Humidity'] = weatherData["daily"][2]["humidity"] + " %";weatherDay3['Wind Speed'] = weatherData["daily"][2]["windSpeedDay"] + " m/s";weatherDay3['Sunrise'] = weatherData["daily"][2]["sunrise"];weatherDay3['Sunset'] = weatherData["daily"][2]["sunset"];weatherDay3['Condition'] = weatherData["daily"][2]["textDay"];weatherDay3['UV Index'] = weatherData["daily"][2]["uvIndex"];weatherDay3['Precipitation'] = weatherData["daily"][2]["precip"] + " mm";weatherDay3['Pressure'] = weatherData["daily"][2]["pressure"] + " hPa";});// print(weatherDay1.toString());// print(weatherDay1.runtimeType);} catch (error) {print('Error fetching weather data: $error');// 处理异常,显示错误信息}}Widget build(BuildContext context) {return Scaffold(appBar: AppBar(title: Text('Weather App'),),body: SingleChildScrollView(child: Column(children: [// 今日天气的logoWeatherLogo(weatherConditions: weatherCondition_1),// 三行三列的网格MyWeatherGridView(weatherData: weatherDay1),],),),);}
}class WeatherLogo extends StatelessWidget {final String weatherConditions;WeatherLogo({required this.weatherConditions});Widget build(BuildContext context) {return Container(padding: EdgeInsets.all(16.0),color: Colors.blue,child: Center(child: Icon(Icons.wb_sunny, // 用于表示天气的图标,可以根据实际需求替换size: 64.0,color: Colors.white,),),);}
}class MyWeatherGridView extends StatelessWidget {final Map<String, dynamic> weatherData;MyWeatherGridView({required this.weatherData});Widget build(BuildContext context) {return GridView.builder(physics: NeverScrollableScrollPhysics(), // 阻止网格滚动shrinkWrap: true, // 使网格在垂直方向上根据内容大小收缩gridDelegate: SliverGridDelegateWithFixedCrossAxisCount(crossAxisCount: 3,crossAxisSpacing: 8.0,mainAxisSpacing: 8.0,),itemCount: 9,itemBuilder: (BuildContext context, int index) {// 'Temperature': '25°C',// 'Humidity': '60%',// 'Wind Speed': '10 m/s',// 'Sunrise': '06:30',// 'Sunset': '18:45',// 'Condition': 'Partly Cloudy',// 'UV Index': '3',// 'Precipitation': '0.0 mm',// 'Pressure': '1015 hPa',String key = weatherData.keys.elementAt(index);String value = weatherData.values.elementAt(index);return WeatherGridItem(title: key,value: value,);},);}
}class WeatherGridItem extends StatelessWidget {// final Map<String, dynamic> item;final String title;final String value;WeatherGridItem({required this.title, required this.value});// WeatherGridItem({required this.item});Widget build(BuildContext context) {return Container(color: Colors.tealAccent,child: Column(mainAxisAlignment: MainAxisAlignment.center,children: [Text(title,style: TextStyle(fontSize: 16,fontWeight: FontWeight.bold,),),SizedBox(height: 8.0),Text(value,style: TextStyle(fontSize: 14),),],),);}
}| 作者信息 作者 : 繁依Fanyi CSDN: https://techfanyi.blog.csdn.net 掘金:https://juejin.cn/user/4154386571867191 |


![[BSidesCF 2019]Pick Tac Toe](https://img-blog.csdnimg.cn/img_convert/21382a046e3270a2b76b020cb6532a3c.png)