欧拉镜像下载安装
iso镜像官网下载地址
选择最小化安装,标准模式
换华为镜像源
更换华为镜像站,加速下载:
sed -i "s#http://repo.openeuler.org#https://mirrors.huaweicloud.com/openeuler#g" /etc/yum.repos.d/openEuler.repo
sed -i 's#EPOL/$basearch#EPOL/main/$basearch#g' /etc/yum.repos.d/openEuler.repo
更新缓存:
yum clear all
yum makecache
安装 GNOME
参考:官方安装文档
GNOME是运行在类Unix操作系统中最常用桌面环境。是一个功能完善、操作简单、界面友好,集使用和开发为一身的桌面环境,是GNU计划的正式桌面。
从用户的角度看,GNOME是一个集成桌面环境和应用程序的套件。从开发者的角度看,它是一个应用程序开发框架(由数目众多的实用函数库组成)。即使用户不运行GNOME桌面环境,用GNOME编写的应用程序也可以正常运行。
GNOME既包含文件管理器、应用商店、文本编辑器等基础软件,也包含系统采样分析、系统日志、软件工程IDE、web浏览器、简洁虚拟机监视器、开发者文档浏览器等高级应用和工具。
1.下载openEuler ISO镜像并安装系统,更新软件源(需要配置Everything源,以及EPOL源,上面已经配置了,下面命令是在最小化安装系统的情况下安装GNOME)
sudo dnf update
2.安装字库
sudo dnf install dejavu-fonts liberation-fonts gnu-*-fonts google-*-fonts
3.安装Xorg
sudo dnf install xorg-x11-apps xorg-x11-drivers xorg-x11-drv-ati \xorg-x11-drv-dummy xorg-x11-drv-evdev xorg-x11-drv-fbdev xorg-x11-drv-intel \xorg-x11-drv-libinput xorg-x11-drv-nouveau xorg-x11-drv-qxl \xorg-x11-drv-synaptics-legacy xorg-x11-drv-v4l xorg-x11-drv-vesa \xorg-x11-drv-vmware xorg-x11-drv-wacom xorg-x11-fonts xorg-x11-fonts-others \xorg-x11-font-utils xorg-x11-server xorg-x11-server-utils xorg-x11-server-Xephyr \xorg-x11-server-Xspice xorg-x11-util-macros xorg-x11-utils xorg-x11-xauth \xorg-x11-xbitmaps xorg-x11-xinit xorg-x11-xkb-utils
4.安装GNOME及组件
sudo dnf install adwaita-icon-theme atk atkmm at-spi2-atk at-spi2-core baobab \abattis-cantarell-fonts cheese clutter clutter-gst3 clutter-gtk cogl dconf \dconf-editor devhelp eog epiphany evince evolution-data-server file-roller folks \gcab gcr gdk-pixbuf2 gdm gedit geocode-glib gfbgraph gjs glib2 glibmm24 \glib-networking gmime30 gnome-autoar gnome-backgrounds gnome-bluetooth \gnome-builder gnome-calculator gnome-calendar gnome-characters \gnome-clocks gnome-color-manager gnome-contacts gnome-control-center \gnome-desktop3 gnome-disk-utility gnome-font-viewer gnome-getting-started-docs \gnome-initial-setup gnome-keyring gnome-logs gnome-menus gnome-music \gnome-online-accounts gnome-online-miners gnome-photos gnome-remote-desktop \gnome-screenshot gnome-session gnome-settings-daemon gnome-shell \gnome-shell-extensions gnome-software gnome-system-monitor gnome-terminal \gnome-tour gnome-user-docs gnome-user-share gnome-video-effects \gnome-weather gobject-introspection gom grilo grilo-plugins \gsettings-desktop-schemas gsound gspell gssdp gtk3 gtk4 gtk-doc gtkmm30 \gtksourceview4 gtk-vnc2 gupnp gupnp-av gupnp-dlna gvfs json-glib libchamplain \libdazzle libgdata libgee libgnomekbd libgsf libgtop2 libgweather libgxps libhandy \libmediaart libnma libnotify libpeas librsvg2 libsecret libsigc++20 libsoup \mm-common mutter nautilus orca pango pangomm libphodav python3-pyatspi \python3-gobject rest rygel simple-scan sushi sysprof tepl totem totem-pl-parser \tracker3 tracker3-miners vala vte291 yelp yelp-tools \yelp-xsl zenity
5.启动gdm显示管理器
sudo systemctl enable gdm
6.设置系统默认以图形界面登录
sudo systemctl set-default graphical.target
7.重启验证
sudo reboot
安装EasyConnect
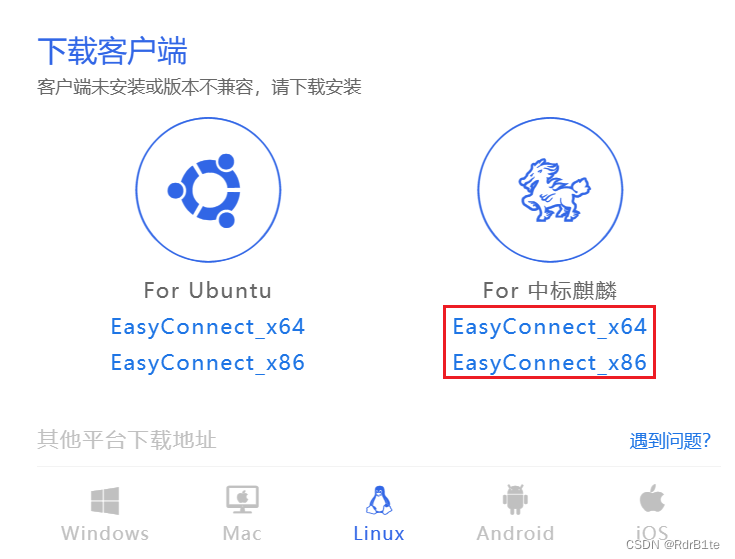
访问EasyConnect,进入客户端下载页面,选择中标麒麟,根据系统架构下载对应的rpm包:
打开EasyConnect无响应
进入EasyConnect安装目录:/usr/share/sangfor/EasyConnect/,手动运行./EasyConnect,看对应的错误提示信息:
ERROR:Gtk-Message: Failed to load module “canberra-gtk-module”
yum install libcanberra-*
不知道缺哪个组件,全部安装了就好了
ERROR:segmentation fault
将下面这个压缩包解压后,将里面的三个so文件拷贝到EasyConnect的安装目录/usr/share/sangfor/EasyConnect/:
压缩包下载链接:下载地址
启动成功
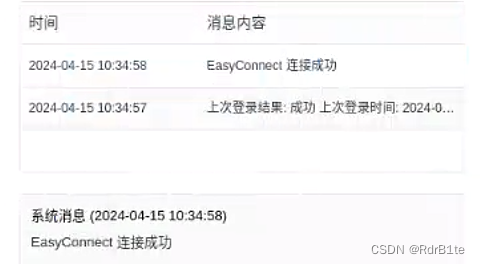
重新启动EasyConnect,连接成功:




![NL2SQL进阶系列(4):ConvAI、DIN-SQL、C3-浙大、DAIL-SQL-阿里等16个业界开源应用实践详解[Text2SQL]](https://img-blog.csdnimg.cn/img_convert/c755bc6fa0a346df73f0c8898900dec2.jpeg)
