Django第三方功能的使用
- Django REST framework
- 前言
- 1、Django--Restframework--coreapi版文档
- BUG:AssertionError: `coreapi` must be installed for schema support.
- How to run Django with Uvicorn webserver?
- 2、序列化类 Serializer的使用
- 模型序列化类 ModelSerializer的使用
- 序列化的嵌套使用
- 验证码的生成和使用
- 站内搜索引擎
- 步骤(注意:有特殊要求)
- Celery异步任务和定时任务
- 异步任务
- 定时任务
Django REST framework
前言
django-rest-framework官网
PYPI: djangorestframework
Django REST framework API 指南
参考博客
1、Django–Restframework–coreapi版文档
安装包
pip3 install djangorestframework
pip3 install markdown       # Markdown support for the browsable API.
pip3 install django-filter
pip3 install Pygments
pip3 install coreapi
pip3 install PyYAML项目url下设置文档路由
from rest_framework.documentation import include_docs_urls
urlpatterns = [path('admin/', admin.site.urls),path('docs/', include_docs_urls(title='My API Title')),
]项目settings
REST_FRAMEWORK = {# Use Django's standard `django.contrib.auth` permissions,# or allow read-only access for unauthenticated users.# 'DEFAULT_PERMISSION_CLASSES': [#     'rest_framework.permissions.DjangoModelPermissionsOrAnonReadOnly'  # 适用于添加身份验证和权限以后。# ]'DEFAULT_SCHEMA_CLASS': 'rest_framework.schemas.AutoSchema' # (推荐) 因为新版的restframework需要指定默认schema# 或者 'DEFAULT_SCHEMA_CLASS': 'rest_framework.schemas.coreapi.AutoSchema'
}
BUG:AssertionError: coreapi must be installed for schema support.
解决办法:主要问题是urllib3的版本,降低版本
pip install urllib3==1.26.15
How to run Django with Uvicorn webserver?
问题:使用Uvicorn 运行的时候显示静态文件丢失
解决办法:
 settings.py
STATIC_ROOT = os.path.join(BASE_DIR, 'static', )项目 urls.py
from django.conf.urls.static import static
from django.conf import settingsurlpatterns = [.
.....] + static(settings.STATIC_URL, document_root=settings.STATIC_ROOT)
Then run below command but static directory must existpython manage.py collectstatic --noinput   # 收集静态文件
--noinput 参数的作用是执行收集静态文件的命令时不会询问任何输入,一般用于自动化脚本或者不需要交互式输入的场景
启动uvicorn
uvicorn your_project.asgi:application --reload --host 0.0.0.0 --port 8000
2、序列化类 Serializer的使用
serializers.py
import asynciofrom django.contrib.auth.models import Group, User
from rest_framework import serializersclass UserSerializer(serializers.HyperlinkedModelSerializer):class Meta:model = Userfields = ['url', 'username', 'email', 'groups']class GroupSerializer(serializers.HyperlinkedModelSerializer):class Meta:model = Groupfields = ['url', 'name']from .models import PersonInfo, VocationnameList = PersonInfo.objects.values('name').all()
NAME_CHOICES = [item['name'] for item in nameList]class MySerializer(serializers.Serializer):id = serializers.IntegerField(read_only=True)job = serializers.CharField(max_length=20)title = serializers.CharField(max_length=20)payment = serializers.IntegerField()name = serializers.PrimaryKeyRelatedField(queryset=NAME_CHOICES)  # models的外键字段def create(self, validated_data):return Vocation.objects.create(**validated_data)def update(self, instance, validated_data):return instance.update(**validated_data)
views.py
from django.contrib.auth.models import Group, User
from rest_framework import permissions, viewsetsfrom .serializers import GroupSerializer, UserSerializerclass UserViewSet(viewsets.ModelViewSet):"""API endpoint that allows users to be viewed or edited."""queryset = User.objects.all().order_by('-date_joined')serializer_class = UserSerializer# permission_classes = [permissions.IsAuthenticated]class GroupViewSet(viewsets.ModelViewSet):"""API endpoint that allows groups to be viewed or edited."""queryset = Group.objects.all().order_by('name')serializer_class = GroupSerializer# permission_classes = [permissions.IsAuthenticated]from channels.db import database_sync_to_async
from .models import PersonInfo, Vocation
from .serializers import MySerializer
from rest_framework.views import APIView
from rest_framework.response import Response
from rest_framework import status
from rest_framework.pagination import PageNumberPagination
from rest_framework.decorators import api_view@api_view(['GET', 'POST'])
def vocationDef(request):if request.method == 'GET':q = Vocation.objects.all()pg = PageNumberPagination()p = pg.paginate_queryset(queryset=q, request=request)serializer = MySerializer(instance=p, many=True)return Response(serializer.data)elif request.method == 'POST':data = request.dataid = data['name']data['name'] = PersonInfo.objects.filter(id=id).first()instance = Vocation.objects.filter(id=data.get('id', 0))if instance:MySerializer().update(instance, data)else:MySerializer().create(data)return Response('Done', status=status.HTTP_201_CREATED)class VocationClass(APIView):def get(self, request):q = Vocation.objects.all()pg = PageNumberPagination()p = pg.paginate_queryset(queryset=q, request=request, view=self)serializer = MySerializer(instance=p, many=True)return Response(serializer.data)def post(self, request):data = request.dataid = data['name']data['name'] = PersonInfo.objects.filter(id=id).first()instance = Vocation.objects.filter(id=data.get('id', 0))if instance:MySerializer().update(instance, data)else:MySerializer().create(data)return Response('Done', status=status.HTTP_201_CREATED)
模型序列化类 ModelSerializer的使用
serializers.py
from rest_framework import serializers
class VocationSerializer(serializers.ModelSerializer):class Meta:model = Vocationfields = ('id', 'job', 'title', 'payment', 'name')
views.py
from django.contrib.auth.models import Group, User
from rest_framework import permissions, viewsetsfrom .serializers import GroupSerializer, UserSerializerclass UserViewSet(viewsets.ModelViewSet):"""API endpoint that allows users to be viewed or edited."""queryset = User.objects.all().order_by('-date_joined')serializer_class = UserSerializer# permission_classes = [permissions.IsAuthenticated]class GroupViewSet(viewsets.ModelViewSet):"""API endpoint that allows groups to be viewed or edited."""queryset = Group.objects.all().order_by('name')serializer_class = GroupSerializer# permission_classes = [permissions.IsAuthenticated]from channels.db import database_sync_to_async
from .models import PersonInfo, Vocation
from .serializers import MySerializer, VocationSerializer
from rest_framework.views import APIView
from rest_framework.response import Response
from rest_framework import status
from rest_framework.pagination import PageNumberPagination
from rest_framework.decorators import api_view@api_view(['GET', 'POST'])
def vocationDef(request):if request.method == 'GET':q = Vocation.objects.all()pg = PageNumberPagination()p = pg.paginate_queryset(queryset=q, request=request)serializer = VocationSerializer(instance=p, many=True)return Response(serializer.data)elif request.method == 'POST':id = request.data.get('id', 0)operation = Vocation.objects.filter(id=id).first()serializer = VocationSerializer(data=request.data)if serializer.is_valid():if operation:data = request.dataid = data['name']data['name'] = PersonInfo.objects.filter(id=id).first()serializer.update(operation, data)else:serializer.save()return Response(serializer.data)return Response(serializer.errors, status=status.HTTP_404_NOT_FOUND)class VocationClass(APIView):def get(self, request):q = Vocation.objects.all()pg = PageNumberPagination()p = pg.paginate_queryset(queryset=q, request=request, view=self)serializer = VocationSerializer(instance=p, many=True)return Response(serializer.data)def post(self, request):id = request.data.get('id', 0)operation = Vocation.objects.filter(id=id).first()serializer = VocationSerializer(data=request.data)if serializer.is_valid():if operation:data = request.dataid = data['name']data['name'] = PersonInfo.objects.filter(id=id).first()serializer.update(operation, data)else:serializer.save()return Response(serializer.data)return Response(serializer.errors, status=status.HTTP_404_NOT_FOUND)
序列化的嵌套使用
模型之间存在数据关系才能进行数据嵌套
class PersonInfoSerializer(serializers.ModelSerializer):class Meta:model = PersonInfofields = '__all__'class VocationSerializer(serializers.ModelSerializer):name = PersonInfoSerializer()class Meta:model = Vocationfields = ('id', 'job', 'title', 'payment', 'name')def create(self, validated_data):print('vad', validated_data)name = validated_data.get('name', '')id = name.get('id', 0)p = PersonInfo.objects.filter(id=id).first()if not p:p = PersonInfo.objects.create(**name)data = validated_datadata['name'] = pv = Vocation.objects.create(**data)return vdef update(self, instance, validated_data):print('vad', validated_data)name = validated_data.get('name', '')id = name.get('id', 0)p = PersonInfo.objects.filter(id=id).first()if p:PersonInfo.objects.filter(id=id).update(**name)data = validated_datadata['name'] = pid = validated_data.get('id', '')v = Vocation.objects.filter(id=id).update(**data)return v
from django.contrib.auth.models import Group, User
from rest_framework import permissions, viewsetsfrom .serializers import GroupSerializer, UserSerializerclass UserViewSet(viewsets.ModelViewSet):"""API endpoint that allows users to be viewed or edited."""queryset = User.objects.all().order_by('-date_joined')serializer_class = UserSerializer# permission_classes = [permissions.IsAuthenticated]class GroupViewSet(viewsets.ModelViewSet):"""API endpoint that allows groups to be viewed or edited."""queryset = Group.objects.all().order_by('name')serializer_class = GroupSerializer# permission_classes = [permissions.IsAuthenticated]from channels.db import database_sync_to_async
from .models import PersonInfo, Vocation
from .serializers import MySerializer, VocationSerializer
from rest_framework.views import APIView
from rest_framework.response import Response
from rest_framework import status
from rest_framework.pagination import PageNumberPagination
from rest_framework.decorators import api_view@api_view(['GET', 'POST'])
def vocationDef(request):if request.method == 'GET':q = Vocation.objects.all()pg = PageNumberPagination()p = pg.paginate_queryset(queryset=q, request=request)serializer = VocationSerializer(instance=p, many=True)return Response(serializer.data)elif request.method == 'POST':id = request.data.get('id', 0)operation = Vocation.objects.filter(id=id).first()serializer = VocationSerializer(data=request.data)if serializer.is_valid():if operation:serializer.update(operation, request.data)else:serializer.save()return Response(serializer.data)return Response(serializer.errors, status=status.HTTP_404_NOT_FOUND)class VocationClass(APIView):def get(self, request):q = Vocation.objects.all()pg = PageNumberPagination()p = pg.paginate_queryset(queryset=q, request=request, view=self)serializer = VocationSerializer(instance=p, many=True)return Response(serializer.data)def post(self, request):id = request.data.get('id', 0)operation = Vocation.objects.filter(id=id).first()serializer = VocationSerializer(data=request.data)if serializer.is_valid():if operation:serializer.update(operation, request.data)else:serializer.save()return Response(serializer.data)return Response(serializer.errors, status=status.HTTP_404_NOT_FOUND)
验证码的生成和使用
PYPI:django-simple-captcha
pip3 install django-simple-captcha==0.5.20
settings.py
INSTALLED_APPS = ['django.contrib.admin','django.contrib.auth','django.contrib.contenttypes','django.contrib.sessions','django.contrib.messages','django.contrib.staticfiles','rest_framework',# 添加验证码功能'captcha',
]# Django Simple Captcha的基本配置
# 设置验证码的显示顺序
# 一个验证码识别包含文本输入框、隐藏域和验证码图片
# CAPTCHA_OUTPUT_FORMAT是设置三者的显示顺序
CAPTCHA_OUTPUT_FORMAT = '%(text_field)s %(hidden_field)s %(image)s'
# 设置图片噪点
CAPTCHA_NOISE_FUNCTIONS = ( # 设置样式'captcha.helpers.noise_null',# 设置干扰线'captcha.helpers.noise_arcs',# 设置干扰点'captcha.helpers.noise_dots',)
# 图片大小
CAPTCHA_IMAGE_SIZE = (100, 25)
# 设置图片背景颜色
CAPTCHA_BACKGROUND_COLOR = '#ffffff'
# 图片中的文字为随机英文字母
# CAPTCHA_CHALLENGE_FUNCT = 'captcha.helpers.random_char_challenge'
# 图片中的文字为英文单词
# CAPTCHA_CHALLENGE_FUNCT = 'captcha.helpers.word_challenge'
# 图片中的文字为数字表达式
CAPTCHA_CHALLENGE_FUNCT = 'captcha.helpers.math_challenge'
# 设置字符个数
CAPTCHA_LENGTH = 4
# 设置超时(minutes)
CAPTCHA_TIMEOUT = 1
生成数据表
python manage.py migrate
forms.py
from django import forms
from captcha.fields import CaptchaFieldclass CaptchaTestForm(forms.Form):username = forms.CharField(label='用户名')password = forms.CharField(label='密码', widget=forms.PasswordInput)captcha = CaptchaField()
项目urls
from django.contrib import admin
from django.urls import path, include
from django.conf.urls.static import static
from django.conf import settings
from rest_framework.documentation import include_docs_urlsurlpatterns = [path('admin/', admin.site.urls),path('docs/', include_docs_urls(title='My API Title')),path('api-auth/', include('rest_framework.urls')),path('api/', include('apiwx.urls')),path('captcha/', include('captcha.urls')),   # 添加验证码路由
] + static(settings.STATIC_URL, document_root=settings.STATIC_ROOT)
应用urls
from django.urls import include, path
from rest_framework import routersfrom . import viewsrouter = routers.DefaultRouter()
router.register(r'users', views.UserViewSet)
router.register(r'groups', views.GroupViewSet)# Wire up our API using automatic URL routing.
# Additionally, we include login URLs for the browsable API.
urlpatterns = [path('', include(router.urls)),path('func/', views.vocationDef),path('class/', views.VocationClass.as_view()),path('login/', views.loginView, name='login'),path('ajax_val/', views.ajax_val, name='ajax_val'),
]
views.pyfrom django.shortcuts import render
from django.contrib.auth.models import User
from django.contrib.auth import login, authenticate
from .forms import CaptchaTestForm
# 用户登录
def loginView(request):if request.method == 'POST':form = CaptchaTestForm(request.POST)# 验证表单数据if form.is_valid():u = form.cleaned_data['username']p = form.cleaned_data['password']if User.objects.filter(username=u):user = authenticate(username=u, password=p)if user:if user.is_active:login(request, user)tips = '登录成功'else:tips = '账号密码错误,请重新输入'else:tips = '用户不存在,请注册'else:form = CaptchaTestForm()return render(request, 'user.html', locals())# ajax接口,实现动态验证验证码
from django.http import JsonResponse
from captcha.models import CaptchaStore
def ajax_val(request):if request.is_ajax():# 用户输入的验证码结果r = request.GET['response']# 隐藏域的value值h = request.GET['hashkey']cs = CaptchaStore.objects.filter(response=r, hashkey=h)# 若存在cs,则验证成功,否则验证失败if cs:json_data = {'status':1}else:json_data = {'status':0}return JsonResponse(json_data)else:json_data = {'status':0}return JsonResponse(json_data)
html
<!DOCTYPE html>
<html lang="en"><head><meta charset="UTF-8" /><title>Django</title><script src="http://apps.bdimg.com/libs/jquery/2.1.1/jquery.min.js"></script><link rel="stylesheet" href="https://unpkg.com/mobi.css/dist/mobi.min.css"></head><body><div class="flex-center"><div class="container"><div class="flex-center"><div class="unit-1-2 unit-1-on-mobile"><h1>MyDjango Verification</h1>{% if tips %}<div>{{ tips }}</div>{% endif %}<form class="form" action="" method="post">{% csrf_token %}<div>用户名:{{ form.username }}</div><div>密 码:{{ form.password }}</div><div>验证码:{{ form.captcha }}</div><button type="submit" class="btn btn-primary btn-block">确定</button></form></div></div></div></div><script>$(function(){$('.captcha').click(function(){console.log('click');$.getJSON("/captcha/refresh/",function(result){$('.captcha').attr('src', result['image_url']);$('#id_captcha_0').val(result['key'])});});$('#id_captcha_1').blur(function(){json_data={'response':$('#id_captcha_1').val(),'hashkey':$('#id_captcha_0').val()}$.getJSON('/ajax_val', json_data, function(data){$('#captcha_status').remove()if(data['status']){$('#id_captcha_1').after('<span id="captcha_status">*验证码正确</span>')}else{$('#id_captcha_1').after('<span id="captcha_status">*验证码错误</span>')}});});})</script></body>
</html>
站内搜索引擎
django-haystack 是专门提供搜索功能的DJango第三方应用,支持solr,elasticserch,whoosh,xapian多种搜索引擎,配合中文自然语言处理库jieba分词,可以实现全文搜索系统
pip3 install django-haystack
pip3 install whoosh
pip3 install jieba
步骤(注意:有特殊要求)
- 在项目应用中添加 search_indexes.py和whoosh_cn_backend.py
- 在项目的根目录创建文件夹 static和templates,static存放CSS样式文件,templates存放search.html和搜索引擎文件product_text.txt(文件的命名方式有具体的要求,下面会说明)
- search_indexes.py : 定义模型的索引类,使模型的数据能被搜索引擎搜索
- whoosh_cn_backend.py:自定义搜索引擎文件,由于Whoosh不支持中文搜索,重新定义搜索引擎文件,将jieba分词器添加到搜索引擎中,使其具有中文搜索功能
- product_text.txt:搜索引擎的索引模板文件,模板文件命名以及路径有固定格式,如:templates/search/indexes/项目应用的名称/模型名称(小写)_text.txt
INSTALLED_APPS = ['django.contrib.admin','django.contrib.auth','django.contrib.contenttypes','django.contrib.sessions','django.contrib.messages','django.contrib.staticfiles','rest_framework',# 添加验证码功能'captcha',# 配置haystack'haystack',
]# 配置haystack
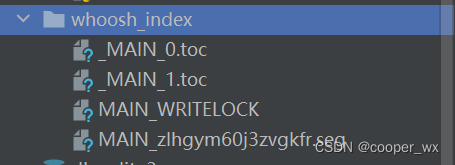
HAYSTACK_CONNECTIONS = {'default': {# 设置搜索引擎,文件是apiwx(应用)的whoosh_cn_backend.py'ENGINE': 'apiwx.whoosh_cn_backend.WhooshEngine','PATH': str(BASE_DIR / 'whoosh_index'),'INCLUDE_SPELLING': True,},
}
# 设置每页显示的数据量
HAYSTACK_SEARCH_RESULTS_PER_PAGE = 4
# 当数据库改变时,会自动更新索引,非常方便
HAYSTACK_SIGNAL_PROCESSOR = 'haystack.signals.RealtimeSignalProcessor'
whoosh_cn_backend.py
# encoding: utf-8
# 文件来自haystack包,路径为Python\Lib\site-packages\haystack\backends\whoosh_backend.py
# 导入from jieba.analyse import ChineseAnalyzer包,添加中文搜索功能
# 将schema_fields[field_class.index_fieldname] = TEXT....的内容修改为:schema_fields[field_class.index_fieldname] = TEXT(stored=True, analyzer=ChineseAnalyzer(),field_boost=field_class.boost, sortable=True)from haystack.backends.whoosh_backend import *
from jieba.analyse import ChineseAnalyzerclass MyWhooshSearchBackend(WhooshSearchBackend):def build_schema(self, fields):schema_fields = {ID: WHOOSH_ID(stored=True, unique=True),DJANGO_CT: WHOOSH_ID(stored=True),DJANGO_ID: WHOOSH_ID(stored=True),}# Grab the number of keys that are hard-coded into Haystack.# We'll use this to (possibly) fail slightly more gracefully later.initial_key_count = len(schema_fields)content_field_name = ''for field_name, field_class in fields.items():if field_class.is_multivalued:if field_class.indexed is False:schema_fields[field_class.index_fieldname] = IDLIST(stored=True, field_boost=field_class.boost)else:schema_fields[field_class.index_fieldname] = KEYWORD(stored=True, commas=True, scorable=True, field_boost=field_class.boost)elif field_class.field_type in ['date', 'datetime']:schema_fields[field_class.index_fieldname] = DATETIME(stored=field_class.stored, sortable=True)elif field_class.field_type == 'integer':schema_fields[field_class.index_fieldname] = NUMERIC(stored=field_class.stored, numtype=int, field_boost=field_class.boost)elif field_class.field_type == 'float':schema_fields[field_class.index_fieldname] = NUMERIC(stored=field_class.stored, numtype=float, field_boost=field_class.boost)elif field_class.field_type == 'boolean':# Field boost isn't supported on BOOLEAN as of 1.8.2.schema_fields[field_class.index_fieldname] = BOOLEAN(stored=field_class.stored)elif field_class.field_type == 'ngram':schema_fields[field_class.index_fieldname] = NGRAM(minsize=3, maxsize=15, stored=field_class.stored, field_boost=field_class.boost)elif field_class.field_type == 'edge_ngram':schema_fields[field_class.index_fieldname] = NGRAMWORDS(minsize=2, maxsize=15, at='start', stored=field_class.stored, field_boost=field_class.boost)else:schema_fields[field_class.index_fieldname] = TEXT(stored=True, analyzer=ChineseAnalyzer(),field_boost=field_class.boost, sortable=True)if field_class.document is True:content_field_name = field_class.index_fieldnameschema_fields[field_class.index_fieldname].spelling = True# Fail more gracefully than relying on the backend to die if no fields# are found.if len(schema_fields) <= initial_key_count:raise SearchBackendError("No fields were found in any search_indexes. Please correct this before attempting to search.")return (content_field_name, Schema(**schema_fields))# 重新定义搜索引擎
class WhooshEngine(BaseEngine):# 将搜索引擎指向自定义的MyWhooshSearchBackendbackend = MyWhooshSearchBackendquery = WhooshSearchQuery
models.py
class Product(models.Model):id = models.AutoField('序号', primary_key=True)name = models.CharField('名称', max_length=50)weight = models.CharField('重量', max_length=20)describe = models.CharField('描述', max_length=500)# 设置返回值def __str__(self):return self.name
search_indexes.py
from haystack import indexes
from .models import Product
# 类名必须为模型名+Index
# 比如模型Product,则索引类为ProductIndex
class ProductIndex(indexes.SearchIndex, indexes.Indexable):text = indexes.CharField(document=True, use_template=True)# 设置模型def get_model(self):return Product# 设置查询范围def index_queryset(self, using=None):return self.get_model().objects.all()
# 定义索引类的文件名必须是 search_indexes.py, 不得修改文件名
# 模型的索引类的类名格式必须为 “模型名+Index”, 每个模型对应一个索引类,如果模型为Product,则对应的索引类为ProductIndex
# 字段text 设置document=True,表示搜索引擎以此字段的内容作为索引
# use_template=True 表示使用索引模板文件,可以理解为在模板中设置模型的查询字段,如设置Product的name字段,就可以通过name字段检索Product数据
# 类函数get_model是将索引类和模型进行绑定,index_queryset用于设置索引的查询范围
templates/search/indexes/项目应用的名称/模型名称(小写)_text.txt
索引模板文件{{ object.name }}
{{ object.describe }}# 对模型的name和describe 字段建立索引,当搜索引擎进行搜索的时候,Django根搜索条件对这两个字段进行全文搜索匹配,然后将结果排序返回
python manage.py rebuild_index 创建索引文件
views.py
from django.core.paginator import *
from django.shortcuts import render
from django.conf import settings
from .models import *
from haystack.generic_views import SearchView
# 视图以通用视图实现
class MySearchView(SearchView):# 模版文件template_name = 'search.html'def get(self, request, *args, **kwargs):if not self.request.GET.get('q', ''):product = Product.objects.all().order_by('id')per = settings.HAYSTACK_SEARCH_RESULTS_PER_PAGEp = Paginator(product, per)try:num = int(self.request.GET.get('page', 1))page_obj = p.page(num)except PageNotAnInteger:# 如果参数page不是整型,则返回第1页数据page_obj = p.page(1)except EmptyPage:# 访问页数大于总页数,则返回最后1页的数据page_obj = p.page(p.num_pages)return render(request, self.template_name, locals())else:return super().get(*args, request, *args, **kwargs)
Celery异步任务和定时任务
pip3 install celery   安装Celery框架实现异步任务和定时任务的调度控制
pip3 install redis  实现python和redis数据库的连接
pip3 install django-celery-results  基于Celery封装的异步任务功能
pip3 install django-celery-beat 基于Celery封装的定时任务功能
pip3 install eventlet   python的协程并发库,这是celery实现异步并发运行的模式之一
settings 中配置异步功能
INSTALLED_APPS = ['django.contrib.admin','django.contrib.auth','django.contrib.contenttypes','django.contrib.sessions','django.contrib.messages','django.contrib.staticfiles',# 添加异步任务功能'django_celery_results',# 添加定时任务功能'django_celery_beat',
]# 设置存储Celery任务队列的Redis数据库
CELERY_BROKER_URL = 'redis://127.0.0.1:6379/0'
CELERY_ACCEPT_CONTENT = ['json']
CELERY_TASK_SERIALIZER = 'json'
# 设置存储Celery任务结果的数据库
CELERY_RESULT_BACKEND = 'django-db'# 设置定时任务相关配置
CELERY_ENABLE_UTC = False
CELERY_BEAT_SCHEDULER = 'django_celery_beat.schedulers:DatabaseScheduler'
modles.py
from django.db import models# Create your models here.
class PersonInfo(models.Model):name = models.CharField(max_length=20)age = models.IntegerField()hireDate = models.DateField()def __str__(self):return self.name
数据迁移
python manage.py makemigrations
python manage.py migrate
项目下创建celery.py  (settings同目录)
创建celery框架的实例化对象
import os
from celery import Celery
# 获取settings的配置信息
os.environ.setdefault("DJANGO_SETTINGS_MODULE", "web2.settings")
# 定义celery对象,并将项目配置信息加载到对象中
# Celery的参数一般以项目名命名
app = Celery('web2')
app.config_from_object('django.conf:settings', namespace='CELERY')
app.autodiscover_tasks()项目下的 __init__.py
将celery实例化对象和django 绑定
# django运行的时候自动加载celery实例化对象
from .celery import app as celery_app
__all__ = ['celery_app']
异步任务
应用下创建task.py
开发异步任务
from celery import shared_task
from .models import PersonInfo
import time# 带参数的异步任务
@shared_task
def updateDate(id, kwargs):try:PersonInfo.objects.filter(id=id).update(**kwargs)return "Done"except Exception as e:print('error', e)return 'Fail'
开发视图,并在urls中添加路由地址
views.py
from django.http import HttpResponse
from .task import updateDate
def tasksyn(request):id = request.GET.get('id', 1)kwarg = dict(name='mike', age=19, hireDate='2024-04-13')updateDate.delay(id, kwarg)return HttpResponse('hello celery')
先启动django
uvicorn web2(项目名).asgi:application --reload --host 0.0.0.0 --port 8000
再启动异步任务
celery -A projectName worker -l info -P eventlet
定时任务
from celery import shared_task
from .models import PersonInfo
import time# 带参数的异步任务
@shared_task
def updateDate(id, kwargs):try:PersonInfo.objects.filter(id=id).update(**kwargs)return "Done"except Exception as e:print('error', e)return 'Fail'# 定时任务
@shared_task
def timing():now = time.strftime("%H:%M:%S")with open('output.txt', 'a') as f:f.write('The time is ' + now)f.write('\n')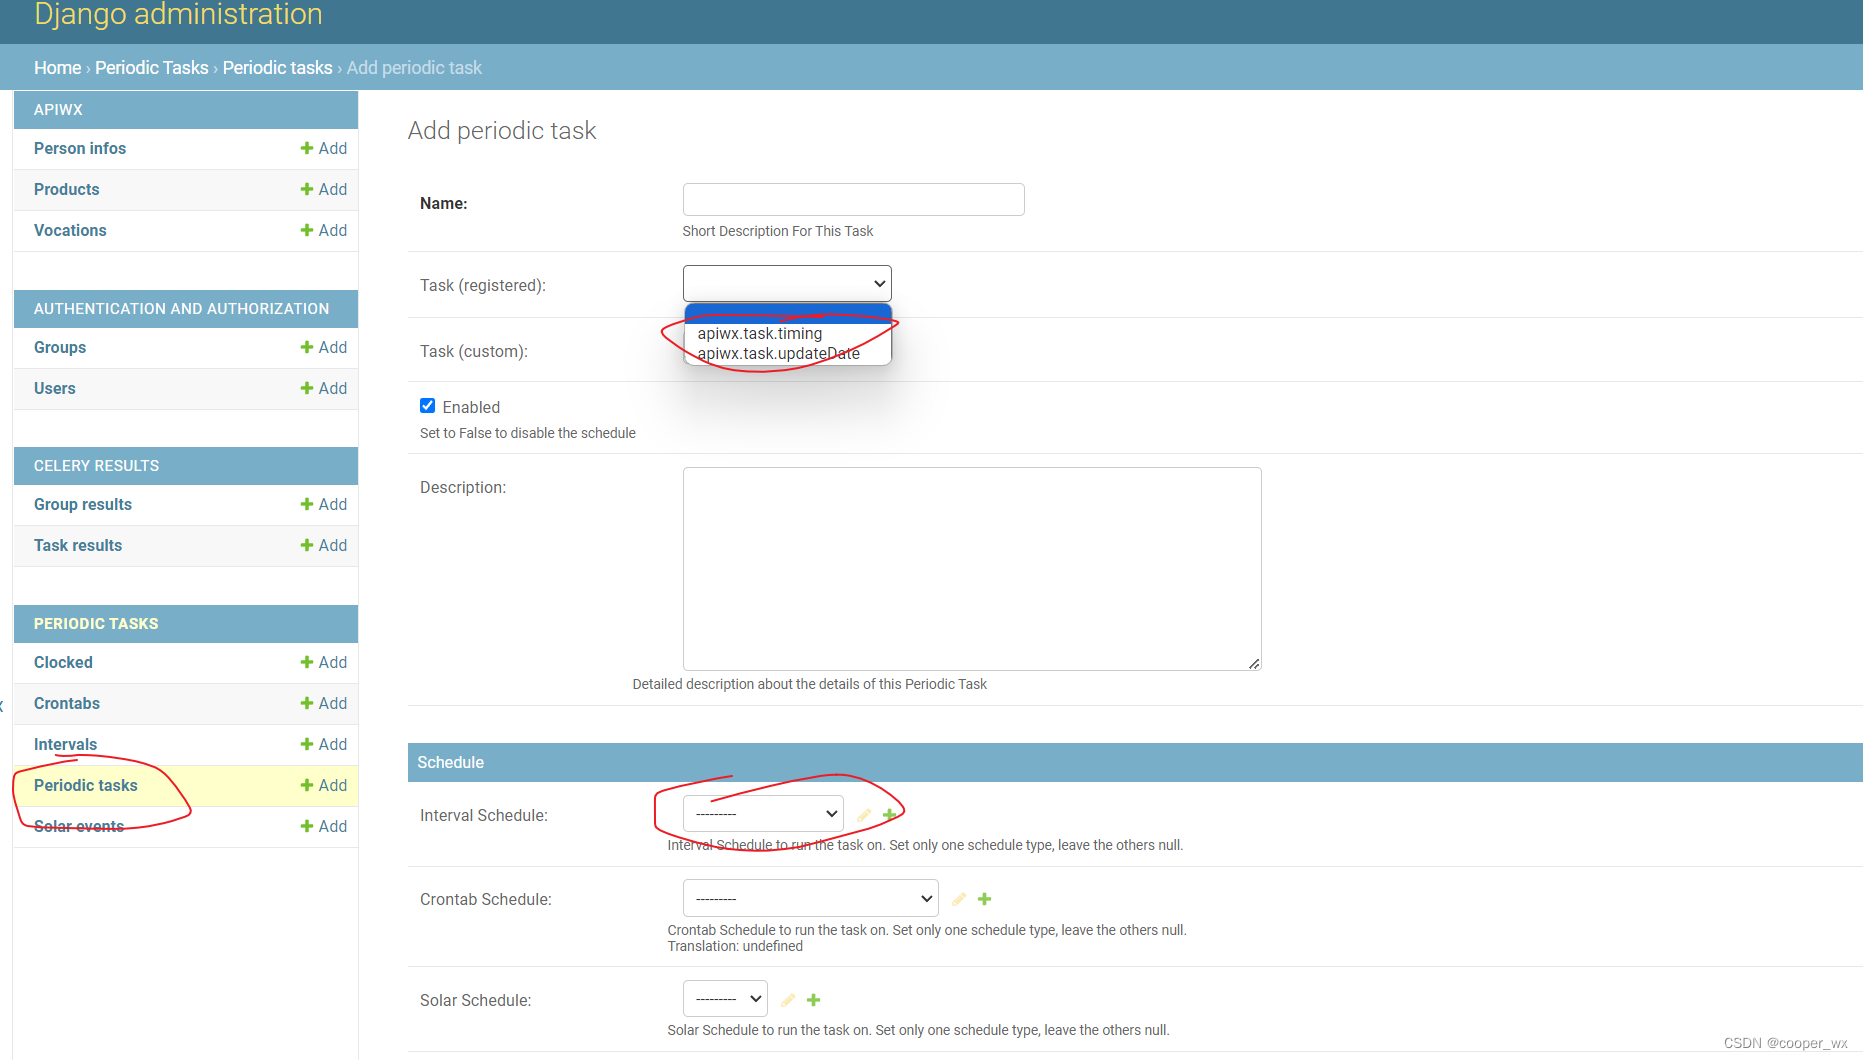
进入后台,设置定时任务,
Name:给定时任务取名,任意
Task(registered):task.py 开发的定时任务
Interval Schedule:设置时间间隔
PS:如果任务带参数,可在Add periodic task 中设置Arguments 或者 Keyword argument
先启动django
uvicorn web2(项目名).asgi:application --reload --host 0.0.0.0 --port 8000
再启动异步任务
celery -A projectName worker -l info -P eventlet
再启动定时任务
celery -A projectName beat -l info -S django


![[大模型]Qwen-7B-hat Transformers 部署调用](https://img-blog.csdnimg.cn/direct/f2b5108b8f8e4ff3894d7c9a53fcf574.png#pic_center)