实现web端与uniapp微信小程序端音视频互动
利用声网实现音视频互动
开通声网服务
-
注册声网账号
-
进入Console
-
成功登录控制台后,按照以下步骤创建一个声网项目:
-
展开控制台左上角下拉框,点击创建项目按钮。

-
在弹出的对话框内,依次选择项目类型,输入项目名称,选择场景标签和鉴权机制。其中鉴权机制推荐选择安全模式(APPID + Token),调试模式的安全性较低。

-
创建好项目之后可以获取APP ID,Token,和Channel。临时Token有效期为24小时


-
web端
技术栈:vite+vue3+vue-router+pinia
组件库:element plus
开发环境准备:
- Windows 或 macOS 计算机,需满足以下要求:
- 下载声网 Web SDK 支持的浏览器。声网强烈推荐使用最新稳定版 Google Chrome 浏览器。
- 具备物理音视频采集设备。
- 可连接到互联网。如果你的网络环境部署了防火墙,请参考应用企业防火墙限制以正常使用声网服务。
- 搭载 2.2 GHz Intel 第二代 i3/i5/i7 处理器或同等性能的其他处理器。
- 安装 Node.js 及 npm。
- 有效的声网账户和声网项目,并且从声网控制台获取以下信息:
- App ID:声网随机生成的字符串,用于识别你的 App。
- 临时 Token:你的 App 客户端加入频道时会使用 Token 对用户进行鉴权。临时 Token 的有效期为 24 小时。
- 频道名称:用于标识频道的字符串。
项目开发
-
项目初始化
使用vite创建vue3项目,
npm create vite@latest集成webSDK,
npm install agora-rtc-sdk-ng@latest安装vue-router,
npm install vue-router@4在src下创建router.js;//router.js import { createRouter, createWebHistory } from 'vue-router';const routes = [{path: '/',name: 'Home',component: () => import("@/views/home/home.vue")},{path: '/video',name: 'Video',component: () => import("@/views/video/video.vue")},];const router = createRouter({history: createWebHistory(),routes });export default router;安装Element Plus ,
npm install element-plus --save,并且设置组件自动导入,具体可以看官方文档安装Pinia,
npm install pinia在main.js中初始化pinia,并在主目录创建store目录,创建options.js文件
//mian.js
import { createSSRApp } from 'vue'
import * as Pinia from 'pinia';
export function createApp() {const app = createSSRApp(App)app.use(Pinia.createPinia());return {app,Pinia}
}
//options.js import { defineStore } from "pinia"; import {reactive} from "vue";export const useOptionsStore = defineStore('options',() => {const options = reactive({appId: "Your APPID",token: "Your token",})return {options} })在main.js中引入所有安装的内容:
import { createApp } from 'vue'; import router from "./router"; import { createPinia } from 'pinia'; import ElementPlus from 'element-plus' import 'element-plus/dist/index.css' import App from './App.vue';const app = createApp(App) app.use(router) app.use(ElementPlus)app.use(createPinia()) app.mount('#app') -
编写home.vue
使用el-form el-form-item el-input 对用户的输入进行校验,校验通过后携带用户输入的参数进入到视频通话页面
<template><div class="content"><el-form:model="form"label-width="auto"style="max-width: 600px":rules="rules"ref="ruleFormRef"><el-form-item label="房间号" prop="channel"><el-input v-model="form.channel" placeholder="请输入房间号"></el-input></el-form-item><el-form-item label="用户名" prop="uid"><el-input v-model="form.uid" placeholder="请输入用户名"></el-input></el-form-item><el-form-item><el-button type="primary" @click="joinChannel" style="width: 100%">加入房间</el-button></el-form-item></el-form></div>
</template>
<script setup>
import { reactive, ref } from "vue";
import { useRouter } from "vue-router";const router = useRouter();const form = reactive({channel: "",uid: "",
});const ruleFormRef = ref(null);const rules = reactive({channel: [{ required: true, message: "请输入房间号", trigger: "blur" }],uid: [{ required: true, message: "请输入用户名", trigger: "blur" }],
});const joinChannel = async () => {await ruleFormRef.value.validate();router.push({name: "Video",query: { channel: form.channel, uid: form.uid },});
};
</script>
<style scoped>
.content {display: flex;flex-direction: column;
}
</style>
-
编写video.vue
- 实现视频通话的步骤大致为:初始化客户端对象并创建本地客户端 -> 订阅远端流 -> 加入频道 -> 创建并发布本地音视频轨道-> (通话) ->退出关闭本地流
-
初始化客户端对象并创建本地客户端
导入声网组件,
import AgoraRTC from "agora-rtc-sdk-ng";初始化客户端对象,
let client = AgoraRTC.createClient({ mode: "rtc", codec: "h264" });注意:与微信小程序通信codec为h264。与其他端使用的是vp8。并且此client不能写成响应式数据,要保证全局使用的本地客户端对象为唯一的。要保证客户端对象可以在最一开始就可以进行初始化,并且可以全局使用,所以都写入setup中。
import AgoraRTC from "agora-rtc-sdk-ng";
let client = AgoraRTC.createClient({ mode: "rtc", codec: "h264" });
-
订阅远端流
当远端流发布到频道时,会触发
user-published事件,需要通过client.on监听该事件并在回调中订阅新加入的远端流。当远端用户取消发布流或退出频道时,触发user-unpublished事件,关闭及移除对应的流。为了用户能够在进入页面的时候及时监听到远端流,所以将监听事件放入onMounted中。在
handleUserPublished函数中编写远端用户加入事件,远端用户加入事件中需要做的事情是通过调用client.subscribe(远端加入的用户user对象,连接方式)方法获取到远端用户对象和连接方式(分为video,audio),区别不同的连接方式,调用包含在user中不同的方法。如果是video,就先需要在先创建dom,将user的视频放入到dom中,并且该dom要有宽高。如果是audio则不用。在
handleUserUnpublished函数中编写远端用户退出事件,就将remoteUserRef的值置为null,使其不再显示页面上。
<template><!-- 使用ref获取dom -->远程用户:<divclass="remote-user"ref="remoteUserRef"></div>
</template>
import AgoraRTC from "agora-rtc-sdk-ng";import {ref} from "vue";let client = AgoraRTC.createClient({ mode: "rtc", codec: "h264" });const remoteUserRef = ref(null)const handleUserPublished = async (user, mediaType) => {await client.subscribe(user, mediaType);// 如果是视频轨道,则添加到远程用户列表if (mediaType === "video") {user.videoTrack.play(remoteUserRef.value);}// 如果是音频轨道,直接播放if (mediaType === "audio") {user.audioTrack.play();}};const handleUserUnpublished = () => {// 移除远程用户remoteUserRef.value = null;};onMounted(async () => {// 监听远程用户发布事件client.on("user-published", handleUserPublished);client.on("user-unpublished", handleUserUnpublished);});
.remote-user {width: 640px;height: 480px;}
-
加入频道
调用
client.join(appId, channel, token, uid)方法加入一个 RTC 频道,需要在该方法中传入 app ID 、用户 ID、Token、频道名称。appId,token都可以通过pinia取出,channel和uid通过路由参数取出。
client.join是一个异步方法,返回一个promise,使用async,await。import { useOptionsStore } from "../store/options"; import { useRoute } from "vue-router"; const route = useRoute(); const store = useOptionsStore();const {options} = store;const { uid , channel} = route.queryconst joinChannel = async () => {await client.join(options.appId,channel,options.token,uid); };onMounted(async () => {// 监听远程用户发布事件client.on("user-published", handleUserPublished);client.on("user-unpublished", handleUserUnpublished);await joinChannel(); }); -
创建并发布本地音视频轨道
调用 AgoraRTC.createMicrophoneAudioTrack() 通过麦克风采集的音频创建本地音频轨道对象,调用 AgoraRTC.createCameraVideoTrack()通过摄像头采集的视频创建本地视频轨道对象;然后调用 client.publish 方法,将这些本地音视频轨道对象当作参数即可将音视频发布到频道中。并且创建一个容器用于播放本地视频轨道。
<template><divclass="local-player"ref="localPlayerRef"></div>
...
</template>
import { ref , reactive} from "vue";...const localUser = reactive({videoTrack: null,audioTrack: null,});const localPlayerRef = ref(null);const createTrack = async () => {localUser.audioTrack = await AgoraRTC.createMicrophoneAudioTrack();localUser.videoTrack = await AgoraRTC.createCameraVideoTrack();await client.publish([localUser.audioTrack, localUser.videoTrack]);localUser.videoTrack.play(localPlayerRef.value);}onMounted(async () => {// 监听远程用户发布事件client.on("user-published", handleUserPublished);client.on("user-unpublished", handleUserUnpublished);await joinChannel();await createTrack();});
.local-player {width: 640px;height: 480px;}</style>
- 离开频道
const leaveChannel = async () => {localUser.audioTrack && localUser.audioTrack.close();localUser.videoTrack && localUser.videoTrack.close();// 离开频道if (client) {await client.leave();client = null;}// 返回首页localPlayerRef.value = null;remoteUserRef.value = null;router.push({ name: "Home" });
};onBeforeUnmount(() => {leaveChannel();
});
整体代码:
<template><!-- 创建本地视频容器 start--><div>本地用户: <divclass="local-player"ref="localPlayerRef"></div></div><!-- 创建本地视频容器 end --><!-- 使用 v-for 循环遍历所有远程用户并为每个用户创建一个视频容器 --><div>远程用户:<divclass="remote-user"ref="remoteUserRef"></div></div></div><button @click="leaveChannel" style="margin-top: 20px; display: block">退出</button></template>
import {ref,onMounted,onBeforeUnmount,} from "vue";import AgoraRTC from "agora-rtc-sdk-ng";import { useOptionsStore } from "@/store/options";import { useRouter, useRoute } from "vue-router";const router = useRouter();const route = useRoute();const localUser = reactive({videoTrack: null,audioTrack: null,});let client = AgoraRTC.createClient({ mode: "rtc", codec: "h264" });const localPlayerRef = ref(null);const remoteUserRef = ref(null);const store = useOptionsStore();const { options } = store;onBeforeUnmount(() => {leaveChannel();});const joinChannel = async () => {await client.join(options.appId,channel,options.token,uid);};const createTrack = () => {// 创建并发布本地音频和视频轨道localUser.audioTrack = await AgoraRTC.createMicrophoneAudioTrack();localUser.videoTrack = await AgoraRTC.createCameraVideoTrack();await client.publish([localUser.audioTrack, localUser.videoTrack]);localUser.videoTrack.play(localPlayerRef.value);}const leaveChannel = async () => {localUser.audioTrack && localUser.audioTrack.close();localUser.videoTrack && localUser.videoTrack.close();// 离开频道if (client) {await client.leave();client = null;}// 返回首页localPlayerRef.value = null;remoteUserRef.value = null;router.push({ name: "Home" });};const handleUserPublished = async (user, mediaType) => {await client.subscribe(user, mediaType);if (user.uid !== localUser.uid &&!remoteUsers.value.some((remoteUser) => remoteUser.uid === user.uid)) {remoteUsers.value.push(user);}// 如果是视频轨道,则添加到远程用户列表if (mediaType === "video") {nextTick(() => {const remoteUserRef = remoteUserRefMap.value[`remote_Ref_${user.uid}`];if (remoteUserRef) {user.videoTrack.play(remoteUserRef);}});}// 如果是音频轨道,直接播放if (mediaType === "audio") {user.audioTrack.play();}};const handleUserUnpublished = (user) => {// 移除远程用户remoteUsers.value = remoteUsers.value.filter((remoteUser) => remoteUser.uid !== user.uid);};onMounted(async () => {// 监听远程用户发布事件client.on("user-published", handleUserPublished);client.on("user-unpublished", handleUserUnpublished);await joinChannel();await createTrack();});
.local-player,.remote-user {width: 640px;height: 480px;}
uniapp小程序端
技术栈:uniapp+vue3+pinia
组件库:uni ui
开发环境准备:
- 下载并安装最新版的微信开发者工具。
- 一个经过企业认证的微信小程序账号。在调试小程序 Demo 过程中,需要使用 live-pusher 和 live-player 组件。只有特定行业的认证企业账号才可以使用这两个组件。具体组件见微信官方文档
- 微信小程序账号需要在微信公众平台进行配置。
- 参考开通服务在控制台创建项目、获取 App ID 和临时 Token,并开启小程序服务。
- 一台安装有微信 App 的移动设备。
Console开启小程序服务
第一次使用微信小程序时,需要参考如下步骤开通服务:
- 登录声网控制台,点击左侧导航栏的全部产品,选择实时互动 RTC,进入实时互动 RTC 页面。
- 在实时互动 RTC 页面,切换到功能配置页签。

微信小程序配置
- 获取小程序组件权限
在微信公众平台的小程序开发选项中,切换到接口设置页签,打开实时播放音视频流和实时录制音视频流的开关。

- 配置服务器域名
在小程序的开发设置里,将如下域名配到服务器域名里。
request 合法域名区域填入以 https 开头的域名;
https://uap-ap-web-1.agora.iohttps://uap-ap-web-2.agoraio.cnhttps://uap-ap-web-3.agora.iohttps://uap-ap-web-4.agoraio.cnhttps://report-ad.agoralab.cohttps://rest-argus-ad.agoralab.cohttps://uni-webcollector.agora.io
socket 合法域名区域点入以 wss 开头的域名。
wss://miniapp.agoraio.cn

项目开发
-
初始化项目
HBuilder X 可视化(推荐)或者cli脚手架创建uniapp项目。 具体创建方式
创建项目后,需要集成小程序SDK。有两种方式:
-
第一种:下载小程序SDK 并解压。
将解压出来的JS文件复制到项目中主目录的static下,在主目录下创建一个utils,创建一个sdk.js,引入并导出该SDK,用于vue文件可以引入并使用。
const AgoraMiniappSDK = require('../static/Agora_Miniapp_SDK_for_WeChat.js');export default AgoraMiniappSDK -
第二种方式:npm 安装
npm install agora-miniapp-sdk
-
使用pinia存入音视频所需要的APP ID 和临时token
如果使用的是HBuilder X 可视化创建的项目,可以直接使用pinia,使用cli脚手架创建的需要手动通过npm install pinia安装
-
在main.js中初始化pinia,并在主目录创建store目录,创建options.js文件
//mian.js
import { createSSRApp } from 'vue'
import * as Pinia from 'pinia';
export function createApp() {const app = createSSRApp(App)app.use(Pinia.createPinia());return {app,Pinia}
}
//options.js import { defineStore } from "pinia"; import {reactive} from "vue";export const useOptionsStore = defineStore('options',() => {const options = reactive({appId: "Your APPID",token: "Your token",})return {options} })
-
-
引入uni ui组件库
如果使用HBuilder X ,可以直接通过uni ui组件库导入到项目中
-
编写路由文件Pages.json
暂定只有两个页面,index页面用于输入房间号和用户id,video文件用于视频通话
{"pages": [{"path": "pages/index/index","style": {"navigationBarTitleText": "主页"}},{"path": "pages/video/video","style": {"navigationStyle":"custom"}}],"globalStyle": {"navigationBarTextStyle": "black","navigationBarTitleText": "uni-app","navigationBarBackgroundColor": "#F8F8F8","backgroundColor": "#F8F8F8"},"uniIdRouter": {} } -
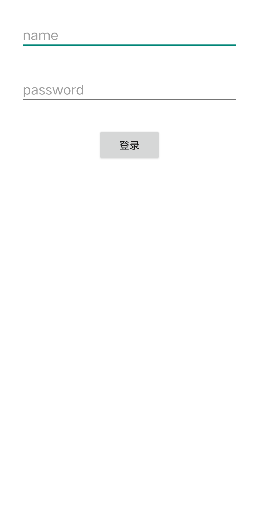
编写index页面
使用
uni-forms``````uni-forms-item``````uni-easyinput对用户的输入进行校验,校验通过后携带用户输入的参数进入到视频通话页面<template><view class="contain"><uni-forms :modelValue="formData" ref="form" :rules="rules"><uni-forms-item name="channle"><uni-easyinputtype="text"v-model="formData.channle"placeholder="请输入房间号"/></uni-forms-item><uni-forms-item name="uid"><uni-easyinputtype="text"v-model="formData.uid"placeholder="请输入用户uid"/></uni-forms-item><button @click="joinChannle">进入房间</button></uni-forms></view> </template><script setup> import { ref } from "vue";const formData = ref({channle: "",uid: "", });const form = ref(null);const rules = {channle: {rules: [{ required: true, errorMessage: "请输入房间号", trigger: "blur" }],},uid: {rules: [{ required: true, errorMessage: "请输入用户uid", trigger: "blur" }],}, };const joinChannle = async () => {await form.value.validate();uni.navigateTo({url: `/pages/video/video? channle=${formData.value.channle}&uid=${formData.value.uid}`,}); }; </script><style scoped lang="scss"> ::v-deep(.contain) {display: flex;flex-direction: column;align-items: center;height: 100vh;.uni-forms {width: 80%;margin-top: 40%;.uni-easyinput {.uni-easyinput__content {height: 90rpx;}}button {width: 100%;height: 80rpx;line-height: 80rpx;background-color: #409eff;color: #fff;border: none;border-radius: 10rpx;margin-top: 40rpx;}} } </style> -
编写video.vue
-
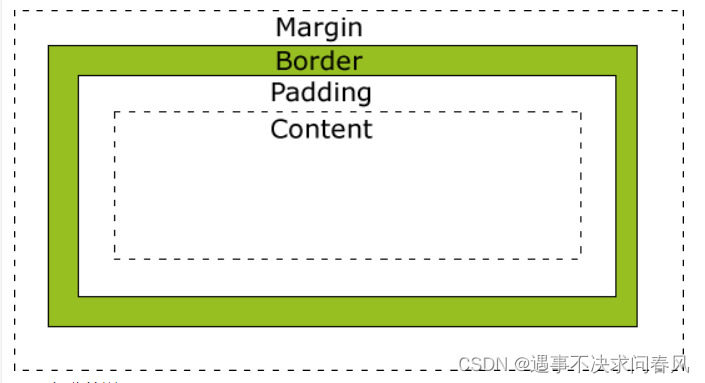
实现视频通话的步骤大致为:初始化客户端对象 -> 订阅远端流 -> 加入频道 -> 发布本地流 -> (通话) ->退出关闭本地流
-
可以用以下的图片概括

一、代码实现步骤
-
初始化客户端对象
引入SDK对象
import AgoraMiniappSDK from "../../utils/sdk"; 在setup中实例化客户端对象
let client = new AgoraMiniappSDK.Client();在setup中创建是因为可以最一开始就创建好对象,并且在全局可以访问到同一个客户端对象。实例化好客户端对象后,需要进行初始化,调用的是client.init(appId)方法,appId通过pinia取出,此方法是一个异步函数,返回一个promise对象,可以使用.then(),也可以使用async、await方法。但在setup语法糖中不能直接使用async修饰,所以需要将方法包裹在函数中。 在这里会使用微信小程序的onLoad生命周期函数,正好也可以接收从index页面传过来的路由参数。在vue3中,onLoad函数需要引入。
import { onLoad } from "@dcloudio/uni-app"; 到这里,代码就如同:
<template> </template><script setup> import AgoraMiniappSDK from "../../utils/sdk"; import { useOptionsStore } from "../../store/options"; import { onLoad } from "@dcloudio/uni-app;const store = useOptionsStore(); const { appId, token } = store.options;let client = new AgoraMiniappSDK.Client(); let channel,uid;onLoad(async (options) => {if (options) {channel = options.channle;uid = options.uid;}await client.init(appId); });</script> -
订阅远端流
当远端流发布到频道时,会触发
stream-added事件,需要通过client.on监听该事件并在回调中订阅新加入的远端流。当远端用户取消发布流或退出频道时,触发stream-remove事件,关闭及移除对应的流。为了用户能够在进入页面的时候及时监听到远端流,所以将监听事件放入onLoad中。onLoad(async (options) => {if (options) {channel = options.channle;uid = options.uid;}client.on("stream-added", handleAdd);client.on("stream-removed", handleRemove);await client.init(appId); }); 在
handleAdd函数中编写远端用户加入事件,远端用户加入事件中需要做的事情是通过调用client.subscribe(远端加入的用户uid)方法获取到远端用户的远端音视频地址,并将地址绑定在微信的<live-player>的src上,就可以在页面上显示远端用户的视频。所以需要在<template>写<live-player>组件,也需要定义一个变量livePlayer存入地址。 在
handleRemove函数中编写远端用户退出事件,就将livePlayer的值置为null,使其不再显示页面上。<template><view><!-- 远端拉流 start --><live-playerclass="live-view"id="player":src="livePlayer"mode="RTC":autoplay="true"/><!-- mode为模式,RTC为实时通话,autoplay一定要设置了true才会自动播放 --> <!-- 远端拉流 end --></view> </template><script setup> import {ref} from "vue" import AgoraMiniappSDK from "../../utils/sdk"; import { useOptionsStore } from "../../store/options"; import { onLoad } from "@dcloudio/uni-app;const store = useOptionsStore(); const { appId, token } = store.options;let client = new AgoraMiniappSDK.Client(); let channel,uid;const livePlayer = ref(null);const handleAdd = async (e) => {const { url } = await client.subscribe(e.uid);//远端用户uidlivePlayer.value = url; };const handleRemove = async (e) => {livePlayer.value = null; };onLoad(async (options) => {if (options) {channel = options.channle;uid = options.uid;}await client.init(appId); }); </script> -
加入频道
调用
client.join(yourToken, channel, uid)方法加入频道。此方法是异步函数 在
client.join中你需要将yourToken替换成你自己生成的 Token。并填入想要加入的频道名以及用户uid。为了能够及时加入频道,并且使得整个流程清晰,所以将join方法写在onLoad中。<template><view>...</view> </template><script setup> ...const joinChannle = async () => {await client.join(token, channel, uid); };...onLoad(async (options) => {if (options) {channel = options.channle;uid = options.uid;}await client.init(appId);await joinChannle(); }); </script> -
发布本地流
成功加入频道后,就能调用
client.publish方法将本地音视频流发布到频道中。成功发布后,SDK 会返回该路音视频流的 URL。URL用于微信小程序的组件<live-pusher>。同理,需要设置变量pusherPlayer存入地址。需要调用client.setRole(“broadcaster”)方法先将推流的角色设置为主播(broadcaster),才能推流,并且<live-pusher>的autopush需要设置为true。
const livePlayer = ref(null); const joinChannle = async () => {await client.setRole("broadcaster");await client.join(token, channel, uid);pusherPlayer.value = await client.publish(); };-
退出关闭本地流
调用
client.cleave()方法退出频道。
整体代码:
-
<template><view><!-- 本地推流 start --><live-pusher:url="pusherPlayer"mode="RTC":autopush="true"class="pusher"/><!-- 本地推流 end --><!-- 远端拉流 start --><live-playerclass="live-view":src="livePlayer"mode="RTC"style="width: 100vw; height: 100vh":autoplay="true"/><!-- 远端拉流 end --><!-- 功能按钮 start --><view> <i class="iconfont hang-up return-icon" @click="goBack"></i></view><!-- 功能按钮 end --></view> </template><script setup> import { ref, computed, watch } from "vue"; import AgoraMiniappSDK from "../../utils/sdk"; import { useOptionsStore } from "../../store/options"; import { onLoad } from "@dcloudio/uni-app";const store = useOptionsStore();const { appId, token } = store.options;let channel, uid;let client = new AgoraMiniappSDK.Client();const pusherPlayer = ref(null); const livePlayer = ref(null);const joinChannle = async () => {await client.init(appId);await client.setRole("broadcaster");await client.join(token, channel, uid);pusherPlayer.value = await client.publish(); };const handleAdd = async (e) => {const { url } = await client.subscribe(e.uid);livePlayer.value = url; };const handleRemove = async (e) => {livePlayer.value = null; };const goBack = () => {uni.showModal({title: "提示",content: "确定要退出直播吗?",success: (res) => {if (res.confirm) {client.leave();uni.navigateBack();}},}); };onLoad(async (options) => {if (options) {channel = options.channle;uid = options.uid;}client.on("stream-added", handleAdd);client.on("stream-removed", handleRemove);await joinChannle(); });</script> -
-