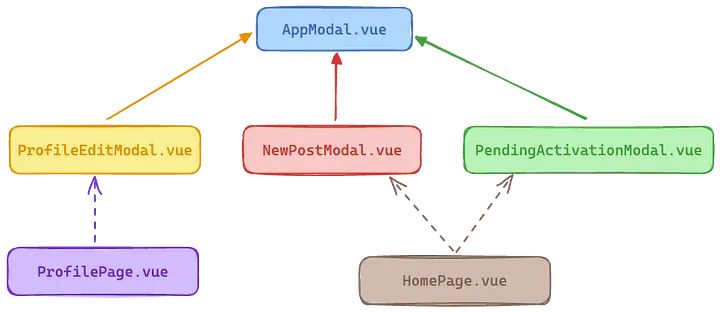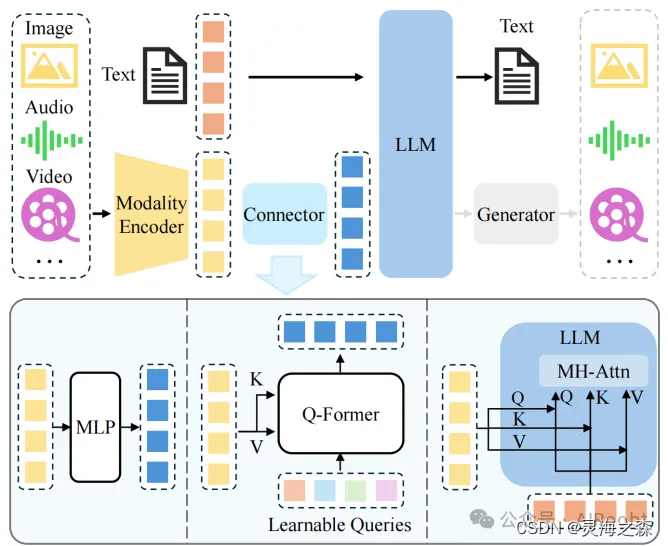
多模态大模型的结构如上,llava是用两层MLP作为连接器。该模式也是后续很多工作的基础。
本文主要参考了https://github.com/yuanzhoulvpi2017/zero_nlp/tree/main/train_llava的工作,最初是在b站看到的,讲解的很细致。
基础模型
大语言模型:Qwen2-1.5B-Instruct
视觉模型:clip-vit-large-patch14-336
连接器:MLP
框架:llava模型
1.LLM的处理
下载模型权重到本地后,修改Qwen2-1.5B-Instruct/tokenizer_config.json的added_tokens_decoder的值,添加
"151646": {"content": "<image>","lstrip": false,"normalized": false,"rstrip": false,"single_word": false,"special": true}
additional_special_tokens添加 "<image>"
2.初始化llava模型
# 模型权重路径
modify_qwen_tokenizer_dir = "autodl-tmp/Qwen2-1.5B-Instruct"
clip_model_name_or_path = ("autodl-tmp/clip-vit-large-patch14-336"
)# 加载qwen2
qwen_tokenizer = AutoTokenizer.from_pretrained(modify_qwen_tokenizer_dir)
qwen_model = AutoModelForCausalLM.from_pretrained(modify_qwen_tokenizer_dir, device_map='cuda:0', torch_dtype=torch.bfloat16)# 加载clip
clip_model = AutoModel.from_pretrained(clip_model_name_or_path, device_map="cuda:0")
processor = AutoProcessor.from_pretrained(clip_model_name_or_path)# 将clip模型和llm_model模型的config拿出来,初始化一个llava model
# Initializing a CLIP-vision config
vision_config = clip_model.vision_model.config
# Initializing a Llama config
text_config = qwen_model.config
# Initializing a Llava llava-1.5-7b style configuration
configuration = LlavaConfig(vision_config, text_config)
# Initializing a model from the llava-1.5-7b style configuration
model = LlavaForConditionalGeneration(configuration)
输出:
LlavaForConditionalGeneration((vision_tower): CLIPVisionModel((vision_model): CLIPVisionTransformer((embeddings): CLIPVisionEmbeddings((patch_embedding): Conv2d(3, 1024, kernel_size=(14, 14), stride=(14, 14), bias=False)(position_embedding): Embedding(577, 1024))(pre_layrnorm): LayerNorm((1024,), eps=1e-05, elementwise_affine=True)(encoder): CLIPEncoder((layers): ModuleList((0-23): 24 x CLIPEncoderLayer((self_attn): CLIPAttention((k_proj): Linear(in_features=1024, out_features=1024, bias=True)(v_proj): Linear(in_features=1024, out_features=1024, bias=True)(q_proj): Linear(in_features=1024, out_features=1024, bias=True)(out_proj): Linear(in_features=1024, out_features=1024, bias=True))(layer_norm1): LayerNorm((1024,), eps=1e-05, elementwise_affine=True)(mlp): CLIPMLP((activation_fn): QuickGELUActivation()(fc1): Linear(in_features=1024, out_features=4096, bias=True)(fc2): Linear(in_features=4096, out_features=1024, bias=True))(layer_norm2): LayerNorm((1024,), eps=1e-05, elementwise_affine=True))))(post_layernorm): LayerNorm((1024,), eps=1e-05, elementwise_affine=True)))(multi_modal_projector): LlavaMultiModalProjector((linear_1): Linear(in_features=1024, out_features=1536, bias=True)(act): GELUActivation()(linear_2): Linear(in_features=1536, out_features=1536, bias=True))(language_model): Qwen2ForCausalLM((model): Qwen2Model((embed_tokens): Embedding(151936, 1536)(layers): ModuleList((0-27): 28 x Qwen2DecoderLayer((self_attn): Qwen2SdpaAttention((q_proj): Linear(in_features=1536, out_features=1536, bias=True)(k_proj): Linear(in_features=1536, out_features=256, bias=True)(v_proj): Linear(in_features=1536, out_features=256, bias=True)(o_proj): Linear(in_features=1536, out_features=1536, bias=False)(rotary_emb): Qwen2RotaryEmbedding())(mlp): Qwen2MLP((gate_proj): Linear(in_features=1536, out_features=8960, bias=False)(up_proj): Linear(in_features=1536, out_features=8960, bias=False)(down_proj): Linear(in_features=8960, out_features=1536, bias=False)(act_fn): SiLU())(input_layernorm): Qwen2RMSNorm()(post_attention_layernorm): Qwen2RMSNorm()))(norm): Qwen2RMSNorm())(lm_head): Linear(in_features=1536, out_features=151936, bias=False))
)
这样得到了llava模型的结构,但是旧有的权重参数还没迁移过来,要将其移动到新model里。
# 权重复制
model.vision_tower.vision_model = clip_model.vision_model
model.language_model = qwen_model
然后保存到本地,注意要将autodl-tmp/processor的preprocessor_config.json复制到autodl-tmp/vlm_1
# 保存模型
model.save_pretrained("autodl-tmp/vlm_1")
qwen_tokenizer.save_pretrained("autodl-tmp/vlm_1")
processor.save_pretrained("autodl-tmp/processor")
3.数据集加载代码
采用该数据集:https://huggingface.co/datasets/OpenGVLab/ShareGPT-4o
主要代码:
class LlavaDataset(Dataset):def __init__(self, dataset_dir: str) -> None:super().__init__()self.chat_data, self.image_dir = self.build_dataset(dataset_dir)def build_dataset(self, data_dir: str) -> Tuple[List[Dict], Path]:# 得到对话文件和图像文件的路径data_dir = Path(data_dir) # 父文件夹路径chat_file = data_dir.joinpath("final_data.jsonl") # 对话文件image_dir = data_dir.joinpath("image") # 图像文件夹# 读取为记录,转为dictchat_data = pd.read_json(chat_file, lines=True).to_dict(orient="records")return chat_data, image_dirdef __len__(self):return len(self.chat_data)def __getitem__(self, index) -> Tuple[str, str, Path]:# 根据索引定位到记录cur_data = self.chat_data[index] # 定位conversations = cur_data.get("conversations") # 字典格式获取到对话记录human_input = conversations[0].get("value") # 查询chatbot_output = conversations[1].get("value") # 回复image_path = self.image_dir.joinpath(cur_data.get("image")) # 图片的路径,由图片文件夹+图片名构成return human_input, chatbot_output, image_path4.训练
使用deepseed训练,主要代码
def train():parser = transformers.HfArgumentParser((ModelArguments, DataArguments, TrainingArguments))model_args, data_args, training_args = parser.parse_args_into_dataclasses()model, processor = load_model_processor(model_args)data_collator = TrainLLavaModelCollator(processor, -100)train_dataset = load_dataset(data_args)trainer = Trainer(model=model,args=training_args,train_dataset=train_dataset,eval_dataset=None,data_collator=data_collator,)trainer.train()trainer.save_state()trainer.save_model(output_dir=training_args.output_dir)5.推理
没有训练的模型进行推理的结果:
很抱歉,我无法看到或描述图片,因为我是一个文本生成模型,无法处理图像。如果您需要帮助,可以提供文字描述,我会尽力帮助您。
训练后的模型推理:
The image depicts a scene of a person sitting on a chair with their
legs crossed. The person is wearing a white shirt and dark blue jeans.
The person’s hair is styled in a messy, tousled manner, which adds to
the casual and relaxed atmosphere of the image. The person’s eyes are
closed, and they appear to be in a state of deep thought or
contemplation.In the background, there is a small, white, rectangular object that
appears to be a piece of paper or a piece of writing. The object is
positioned in a manner that suggests it might be part of a document or
a note. The background is a light beige color, which contrasts with
the person’s clothing and the white object.The chair is a wooden chair with a simple design, featuring a single
armrest and a backrest. The chair is positioned on a dark wooden
floor, which adds to the overall casual and comfortable feel of the
scene. The floor is also light beige, which complements the background
and the person’s clothing.The lighting in the image is soft and diffused, giving the scene a
warm and inviting atmosphere. The person’s posture suggests they are
in a relaxed position, possibly after a long day or a moment of
reflection.In summary, the image captures a person sitting on a chair with their
legs crossed, wearing casual clothing, and in a relaxed position. The
background includes a small white object, and the lighting is soft and
diffused, creating a warm and inviting atmosphere.
我仅仅训练了三轮,使用了不到300条数据。虽然结果不是很好,但是可以看出来是有成效的。
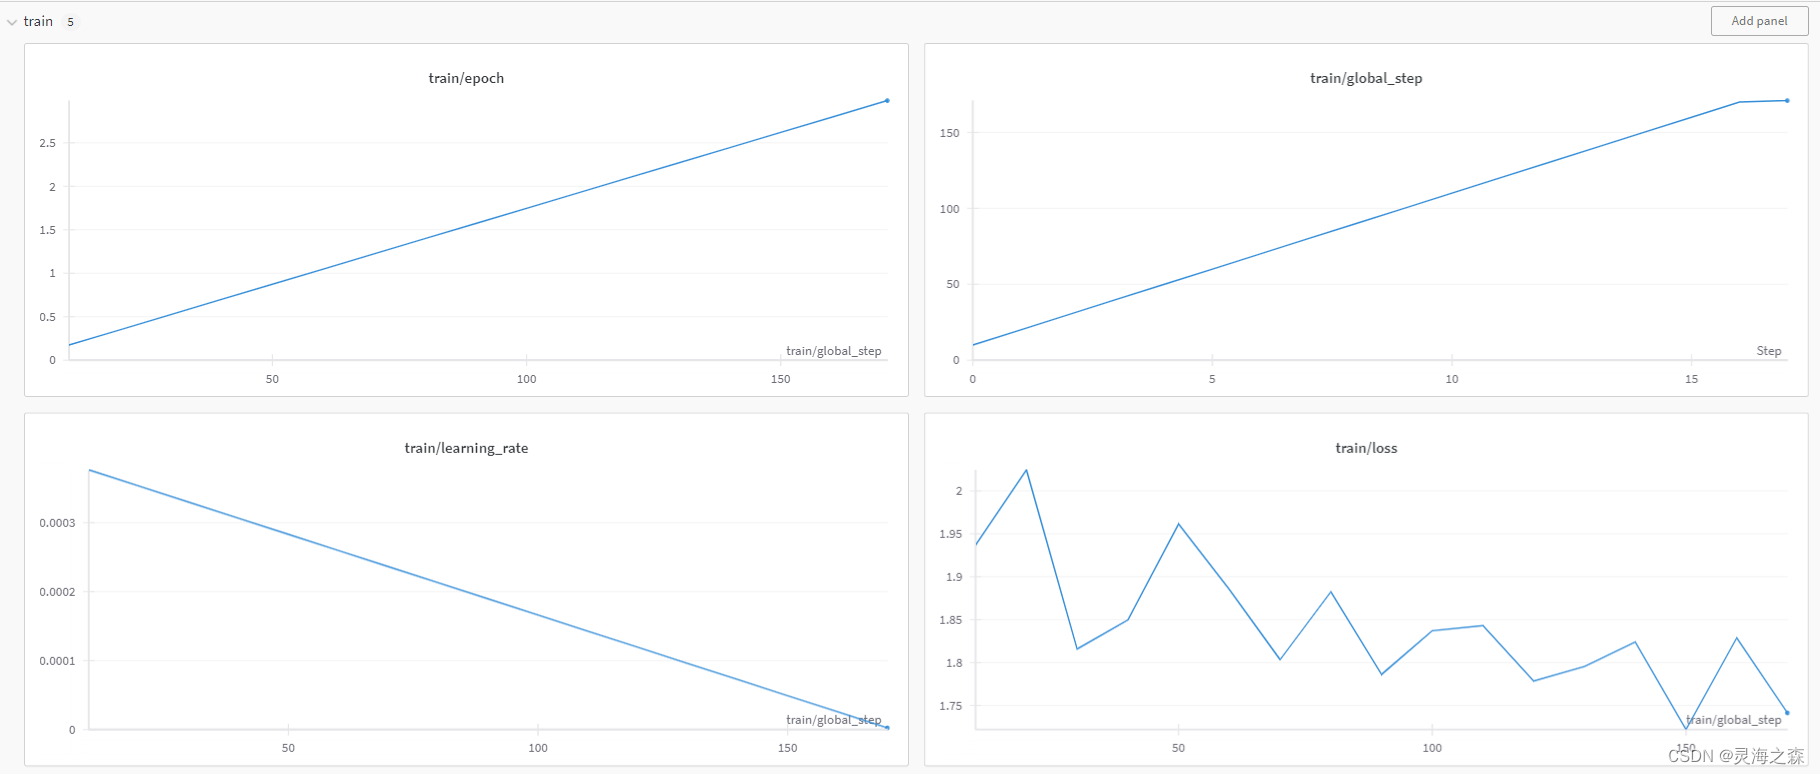
在我查找的多模态大模型实现中性价比是最高的,不用重写LLM的forward函数什么的。
相关代码放在https://github.com/stay-leave/enhance_llm。
参考:
https://github.com/yuanzhoulvpi2017/zero_nlp/tree/main/train_llava
https://github.com/OpenGVLab/InternVL/blob/main/internvl_chat
https://github.com/AviSoori1x/seemore
https://github.com/alexander-moore/vlm
https://github.com/WatchTower-Liu/VLM-learning
