对于 Web 开发人员来说,WebGPU 是一个 Web 图形 API,可提供对 GPU 的统一和快速访问。WebGPU 公开了现代硬件功能,并允许在 GPU 上进行渲染和计算操作,类似于 Direct3D 12、Metal 和 Vulkan。
虽然这是真的,但这个故事并不完整。WebGPU 是协作努力的结果,包括 Apple、Google、Intel、Mozilla 和 Microsoft 等大公司。其中一些人意识到 WebGPU 可能不仅仅是一个 JavaScript API,而是一个跨平台的图形 API,适用于除 Web 之外的跨生态系统的开发人员。
为了满足主要用例,Chrome 113 中引入了 JavaScript API。然而,与之一起开发的另一个重要项目是:webgpu.h C API。这个 C 头文件列出了 WebGPU 的所有可用过程和数据结构。它充当与平台无关的硬件抽象层,允许您通过在不同平台上提供一致的接口来构建特定于平台的应用程序。
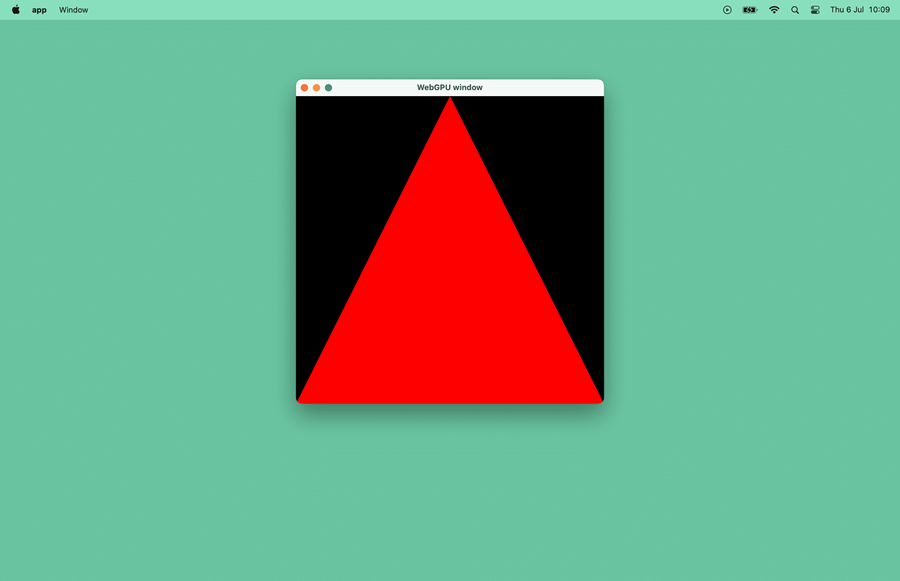
在本文档中,我们将学习如何使用 WebGPU 编写一个可在 Web 和特定平台上运行的小型 C++ 应用。剧透警告:只需对代码库进行少量调整,你就会获得浏览器窗口和桌面窗口中出现的相同红色三角形。

NSDT工具推荐: Three.js AI纹理开发包 - YOLO合成数据生成器 - GLTF/GLB在线编辑 - 3D模型格式在线转换 - 可编程3D场景编辑器 - REVIT导出3D模型插件 - 3D模型语义搜索引擎 - AI模型在线查看 - Three.js虚拟轴心开发包 - 3D模型在线减面 - STL模型在线切割 - 3D道路快速建模
1、它是如何工作的?
要查看完整的应用程序,请查看 WebGPU 跨平台应用程序存储库。
该应用程序是一个极简的 C++ 示例,展示了如何使用 WebGPU 从单个代码库构建桌面和 Web 应用程序。在底层,它通过名为 webgpu_cpp.h 的 C++ 包装器使用 WebGPU 的 webgpu.h 作为与平台无关的硬件抽象层。
警告:webgpu.h 和 webgpu_cpp.h API 可能会发生变化。
在 Web 上,该应用程序是针对 Emscripten 构建的,它在 JavaScript API 之上具有实现 webgpu.h 的绑定。在特定平台(如 macOS 或 Windows)上,可以针对 Chromium 的跨平台 WebGPU 实现 Dawn 构建此项目。值得一提的是,webgpu.h 的 Rust 实现 wgpu-native 也存在,但在本文档中未使用。
2、开始
首先,你需要一个 C++ 编译器和 CMake,以便以标准方式处理跨平台构建。在专用文件夹中,创建一个 main.cpp 源文件和一个 CMakeLists.txt 构建文件。
main.cpp 文件目前应包含一个空的 main() 函数。
int main() {}CMakeLists.txt 文件包含项目的基本信息。最后一行指定可执行文件名称为“app”,其源代码为 main.cpp。
cmake_minimum_required(VERSION 3.13) # CMake version check
project(app)                         # Create project "app"
set(CMAKE_CXX_STANDARD 20)           # Enable C++20 standardadd_executable(app "main.cpp")
运行 cmake -B build 在“build/”子文件夹中创建构建文件,并运行 cmake --build build 实际构建应用程序并生成可执行文件。
# Build the app with CMake.
$ cmake -B build && cmake --build build# Run the app.
$ ./build/app
应用程序运行但尚未输出,因为您需要一种在屏幕上绘制内容的方法。
3、获取 Dawn
要绘制三角形,你可以利用 Dawn,这是 Chromium 的跨平台 WebGPU 实现。这包括用于在屏幕上绘图的 GLFW C++ 库。下载 Dawn 的一种方法是将其作为 git 子模块添加到你的存储库。以下命令将其提取到“dawn/”子文件夹中。
$ git init
$ git submodule add https://dawn.googlesource.com/dawn
然后,按如下方式附加到 CMakeLists.txt 文件:
- CMake
DAWN_FETCH_DEPENDENCIES选项获取所有 Dawn 依赖项。 dawn/子文件夹包含在目标中。- 你的应用将依赖于
dawn::webgpu_dawn、glfw和webgpu_glfw目标,以便稍后可以在main.cpp文件中使用它们。
…
set(DAWN_FETCH_DEPENDENCIES ON)
add_subdirectory("dawn" EXCLUDE_FROM_ALL)
target_link_libraries(app PRIVATE dawn::webgpu_dawn glfw webgpu_glfw)
4、打开窗口
现在 Dawn 已可用,使用 GLFW 在屏幕上绘制内容。为方便起见,此库包含在 webgpu_glfw 中,允许你编写与平台无关的窗口管理代码。
要打开名为“WebGPU 窗口”且分辨率为 512x512 的窗口,请按如下方式更新 main.cpp 文件。请注意,此处使用 glfwWindowHint() 来请求不进行任何特定的图形 API 初始化。
#include <GLFW/glfw3.h>const uint32_t kWidth = 512;
const uint32_t kHeight = 512;void Start() {if (!glfwInit()) {return;}glfwWindowHint(GLFW_CLIENT_API, GLFW_NO_API);GLFWwindow* window =glfwCreateWindow(kWidth, kHeight, "WebGPU window", nullptr, nullptr);while (!glfwWindowShouldClose(window)) {glfwPollEvents();// TODO: Render a triangle using WebGPU.}
}int main() {Start();
}
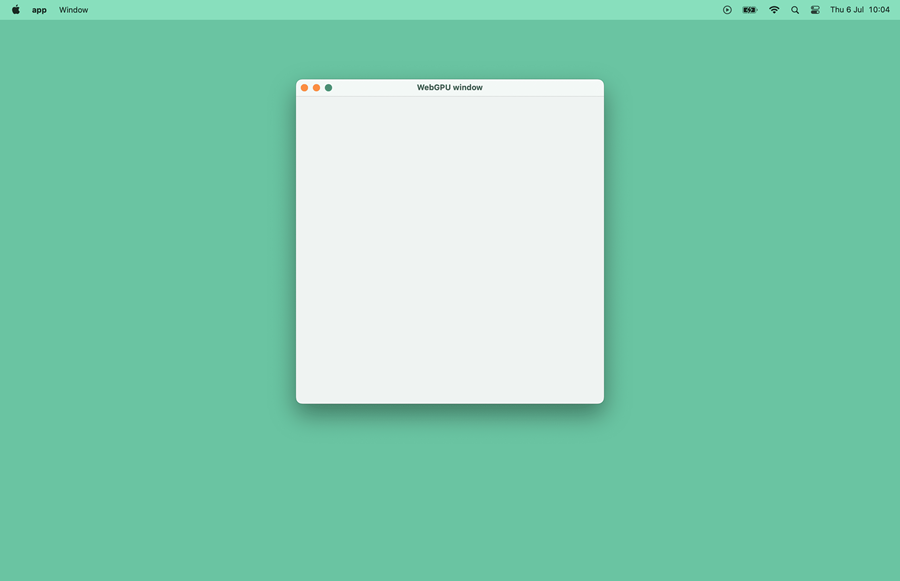
重建应用程序并像以前一样运行它现在会显示一个空窗口。我们正在取得进展!
5、获取 GPU 设备
在 JavaScript 中, navigator.gpu 是访问 GPU 的入口点。在 C++ 中,你需要手动创建一个用于相同目的的 wgpu::Instance 变量。为方便起见,在 main.cpp 文件顶部声明实例,并在 main() 中调用 wgpu::CreateInstance()。
…
#include <webgpu/webgpu_cpp.h>wgpu::Instance instance;
…int main() {instance = wgpu::CreateInstance();Start();
}
由于 JavaScript API 的形状,访问 GPU 是异步的。在 C++ 中,创建两个辅助函数,分别称为 GetAdapter() 和 GetDevice(),它们分别返回带有 wgpu::Adapter 和 wgpu::Device 的回调函数。
注意:当 WebAssembly JavaScript Promise Integration API 可用时,此示例会简化。撰写本文时情况并非如此。
#include <iostream>
…void GetAdapter(void (*callback)(wgpu::Adapter)) {instance.RequestAdapter(nullptr,[](WGPURequestAdapterStatus status, WGPUAdapter cAdapter,const char* message, void* userdata) {if (status != WGPURequestAdapterStatus_Success) {exit(0);}wgpu::Adapter adapter = wgpu::Adapter::Acquire(cAdapter);reinterpret_cast<void (*)(wgpu::Adapter)>(userdata)(adapter);}, reinterpret_cast<void*>(callback));
}void GetDevice(void (*callback)(wgpu::Device)) {adapter.RequestDevice(nullptr,[](WGPURequestDeviceStatus status, WGPUDevice cDevice,const char* message, void* userdata) {wgpu::Device device = wgpu::Device::Acquire(cDevice);device.SetUncapturedErrorCallback([](WGPUErrorType type, const char* message, void* userdata) {std::cout << "Error: " << type << " - message: " << message;},nullptr);reinterpret_cast<void (*)(wgpu::Device)>(userdata)(device);}, reinterpret_cast<void*>(callback));
}
为了方便访问,在 main.cpp文件顶部声明两个变量 wgpu::Adapter 和 wgpu::Device。更新 main() 函数以调用 GetAdapter() 并将其结果回调分配给适配器,然后调用 GetDevice() 并将其结果回调分配给设备,然后再调用 Start()。
wgpu::Adapter adapter;
wgpu::Device device;
…int main() {instance = wgpu::CreateInstance();GetAdapter([](wgpu::Adapter a) {adapter = a;GetDevice([](wgpu::Device d) {device = d;Start();});});
}
6、绘制三角形
交换链未在 JavaScript API 中公开,因为浏览器会处理它。在 C++ 中,你需要手动创建它。
再次,为了方便起见,在 main.cpp 文件的顶部声明一个 wgpu::Surface变量。在 Start() 中创建 GLFW 窗口后,立即调用 wgpu::glfw::CreateSurfaceForWindow() 函数来创建 wgpu::Surface(类似于 HTML 画布),并通过调用 InitGraphics() 中的新辅助程序 ConfigureSurface() 函数对其进行配置。你还需要调用 surface.Present() 来在 while 循环中呈现下一个纹理。这没有可见的效果,因为尚未发生渲染。
#include <webgpu/webgpu_glfw.h>
…wgpu::Surface surface;
wgpu::TextureFormat format;void ConfigureSurface() {wgpu::SurfaceCapabilities capabilities;surface.GetCapabilities(adapter, &capabilities);format = capabilities.formats[0];wgpu::SurfaceConfiguration config{.device = device,.format = format,.width = kWidth,.height = kHeight};surface.Configure(&config);
}void InitGraphics() {ConfigureSurface();
}void Render() {// TODO: Render a triangle using WebGPU.
}void Start() {…surface = wgpu::glfw::CreateSurfaceForWindow(instance, window);InitGraphics();while (!glfwWindowShouldClose(window)) {glfwPollEvents();Render();surface.Present();instance.ProcessEvents();}
}
现在是使用以下代码创建渲染管道的好时机。为了更方便访问,请在 main.cpp 文件顶部声明一个 wgpu::RenderPipeline 变量,并在 InitGraphics() 中调用辅助函数 CreateRenderPipeline()。
wgpu::RenderPipeline pipeline;
…const char shaderCode[] = R"(@vertex fn vertexMain(@builtin(vertex_index) i : u32) ->@builtin(position) vec4f {const pos = array(vec2f(0, 1), vec2f(-1, -1), vec2f(1, -1));return vec4f(pos[i], 0, 1);}@fragment fn fragmentMain() -> @location(0) vec4f {return vec4f(1, 0, 0, 1);}
)";void CreateRenderPipeline() {wgpu::ShaderModuleWGSLDescriptor wgslDesc{};wgslDesc.code = shaderCode;wgpu::ShaderModuleDescriptor shaderModuleDescriptor{.nextInChain = &wgslDesc};wgpu::ShaderModule shaderModule =device.CreateShaderModule(&shaderModuleDescriptor);wgpu::ColorTargetState colorTargetState{.format = format};wgpu::FragmentState fragmentState{.module = shaderModule,.targetCount = 1,.targets = &colorTargetState};wgpu::RenderPipelineDescriptor descriptor{.vertex = {.module = shaderModule},.fragment = &fragmentState};pipeline = device.CreateRenderPipeline(&descriptor);
}void InitGraphics() {…CreateRenderPipeline();
}
最后,在每帧调用的 Render()函数中向GPU发送渲染命令。
void Render() {wgpu::SurfaceTexture surfaceTexture;surface.GetCurrentTexture(&surfaceTexture);wgpu::RenderPassColorAttachment attachment{.view = surfaceTexture.texture.CreateView(),.loadOp = wgpu::LoadOp::Clear,.storeOp = wgpu::StoreOp::Store};wgpu::RenderPassDescriptor renderpass{.colorAttachmentCount = 1,.colorAttachments = &attachment};wgpu::CommandEncoder encoder = device.CreateCommandEncoder();wgpu::RenderPassEncoder pass = encoder.BeginRenderPass(&renderpass);pass.SetPipeline(pipeline);pass.Draw(3);pass.End();wgpu::CommandBuffer commands = encoder.Finish();device.GetQueue().Submit(1, &commands);
}
使用 CMake 重建应用程序并运行它,现在会在窗口中显示期待已久的红色三角形!
7、编译为 WebAssembly
现在让我们看一下调整现有代码库以在浏览器窗口中绘制此红色三角形所需的最小更改。同样,该应用程序是针对 Emscripten 构建的,Emscripten 是一种将 C/C++ 程序编译为 WebAssembly 的工具,它在 JavaScript API 之上具有实现 webgpu.h 的绑定。
7.1 更新 CMake 设置
安装 Emscripten 后,按如下方式更新 CMakeLists.txt 构建文件。突出显示的代码是你唯一需要更改的内容。
set_target_properties用于自动将“html”文件扩展名添加到目标文件。换句话说,你将生成一个“app.html”文件。USE_WEBGPU应用程序链接选项是启用 Emscripten 中的 WebGPU 支持所必需的。没有它,你的main.cpp文件就无法访问webgpu/webgpu_cpp.h文件。- 此处还需要
USE_GLFW应用程序链接选项,以便可以重用 GLFW 代码。
cmake_minimum_required(VERSION 3.13) # CMake version check
project(app)                         # Create project "app"
set(CMAKE_CXX_STANDARD 20)           # Enable C++20 standardadd_executable(app "main.cpp")if(EMSCRIPTEN)set_target_properties(app PROPERTIES SUFFIX ".html")target_link_options(app PRIVATE "-sUSE_WEBGPU=1" "-sUSE_GLFW=3")
else()set(DAWN_FETCH_DEPENDENCIES ON)add_subdirectory("dawn" EXCLUDE_FROM_ALL)target_link_libraries(app PRIVATE dawn::webgpu_dawn glfw webgpu_glfw)
endif()
7.2 更新代码
在 Emscripten 中,创建 wgpu::surface 需要 HTML 画布元素。为此,请调用 instance.CreateSurface() 并指定 #canvas 选择器以匹配 Emscripten 生成的 HTML 页面中的相应 HTML 画布元素。
不要使用 while 循环,而是调用 emscripten_set_main_loop(Render) 以确保以适当的平滑速率调用 Render() 函数,以便与浏览器和显示器正确对齐。
#include <GLFW/glfw3.h>
#include <webgpu/webgpu_cpp.h>
#include <iostream>
#if defined(__EMSCRIPTEN__)
#include <emscripten/emscripten.h>
#else
#include <webgpu/webgpu_glfw.h>
#endif
void Start() {if (!glfwInit()) {return;}glfwWindowHint(GLFW_CLIENT_API, GLFW_NO_API);GLFWwindow* window =glfwCreateWindow(kWidth, kHeight, "WebGPU window", nullptr, nullptr);#if defined(__EMSCRIPTEN__)wgpu::SurfaceDescriptorFromCanvasHTMLSelector canvasDesc{};canvasDesc.selector = "#canvas";wgpu::SurfaceDescriptor surfaceDesc{.nextInChain = &canvasDesc};surface = instance.CreateSurface(&surfaceDesc);
#elsesurface = wgpu::glfw::CreateSurfaceForWindow(instance, window);
#endifInitGraphics();#if defined(__EMSCRIPTEN__)emscripten_set_main_loop(Render, 0, false);
#elsewhile (!glfwWindowShouldClose(window)) {glfwPollEvents();Render();surface.Present();instance.ProcessEvents();}
#endif
}7.3 使用 Emscripten 构建应用程序
使用 Emscripten 构建应用程序所需的唯一更改是使用神奇的 emcmake shell 脚本添加 cmake 命令。这次,在 build-web 子文件夹中生成应用程序并启动 HTTP 服务器。最后,打开浏览器并访问 build-web/app.html。
# Build the app with Emscripten.
$ emcmake cmake -B build-web && cmake --build build-web# Start a HTTP server.
$ npx http-server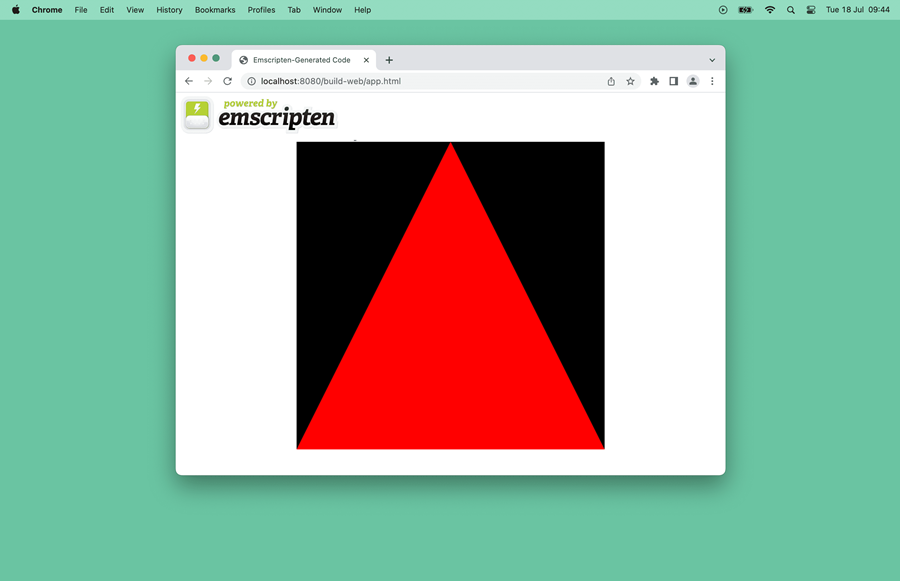
原文链接:WebGPU跨平台应用开发 - BimAnt


