1. CameraX架构
看官方文档 CameraX架构
有如下这一段话
使用CameraX,借助名为"用例"的抽象概念与设备的相机进行交互。
- 预览 : 接受用于显示预览的Surface,例如
PreviewView - 图片分析 : 为分析 (例如机器学习) 提供CPU可访问的缓冲区
- 图片拍摄 : 拍摄并保存图片
- 视频拍摄 : 通过
VideoCapture拍摄视频和音频
不同用例可以组合使用,也可以同时处于活跃状态。
例如,应用中可以加入预览用例,以便让用户查看进入相机视野的画面
加入图片分析用例,以确定照片里的人物是否在微笑
还可以加入图片拍摄用例,以便在人物微笑时拍摄照片
第一次看的时候,一脸懵逼,“用例”,是个什么鬼玩意。
后来,研究了一下,知道"用例"的英文原文叫做Use Case,CameraX中的每一项操作,对应着一种UseCase
- 预览 :
Preview.java - 图片分析 :
ImageAnalysis.java - 图片拍摄 :
ImageCapture.java - 视频拍摄 :
VideoCapture.java
可以看到,这几个类都是继承自UseCase.java类的
public final class Preview extends UseCase {//...
}
public final class ImageAnalysis extends UseCase {//...
}
public final class ImageCapture extends UseCase {//...
}
public final class VideoCapture extends UseCase {//...
}
接下来让我们来尝试使用一下。
2. 前置操作
首先,我们需要新建一个项目,然后引入依赖
// CameraX core library using the camera2 implementation
def camerax_version = "1.2.0-alpha02" //1.2.0-alpha02
// The following line is optional, as the core library is included indirectly by camera-camera2
implementation "androidx.camera:camera-core:${camerax_version}"
implementation "androidx.camera:camera-camera2:${camerax_version}"
// If you want to additionally use the CameraX Lifecycle library
implementation "androidx.camera:camera-lifecycle:${camerax_version}"
// If you want to additionally use the CameraX VideoCapture library
implementation "androidx.camera:camera-video:${camerax_version}"
// If you want to additionally use the CameraX View class
implementation "androidx.camera:camera-view:${camerax_version}"
// If you want to additionally add CameraX ML Kit Vision Integration
implementation "androidx.camera:camera-mlkit-vision:${camerax_version}"
// If you want to additionally use the CameraX Extensions library
implementation "androidx.camera:camera-extensions:${camerax_version}"
在AndroidManifest.xml里添加权限
<!--摄像头权限-->
<uses-permission android:name="android.permission.CAMERA" />
<!--具备摄像头-->
<uses-feature android:name="android.hardware.camera.any" />
<!--存储图像或者视频权限-->
<uses-permission android:name="android.permission.WRITE_EXTERNAL_STORAGE" />
<uses-permission android:name="android.permission.READ_EXTERNAL_STORAGE" />
<!--录制音频权限-->
<uses-permission android:name="android.permission.RECORD_AUDIO" />
别忘了申请权限
ActivityCompat.requestPermissions(this, arrayOf(Manifest.permission.CAMERA,Manifest.permission.WRITE_EXTERNAL_STORAGE,Manifest.permission.READ_EXTERNAL_STORAGE,Manifest.permission.RECORD_AUDIO), 123)
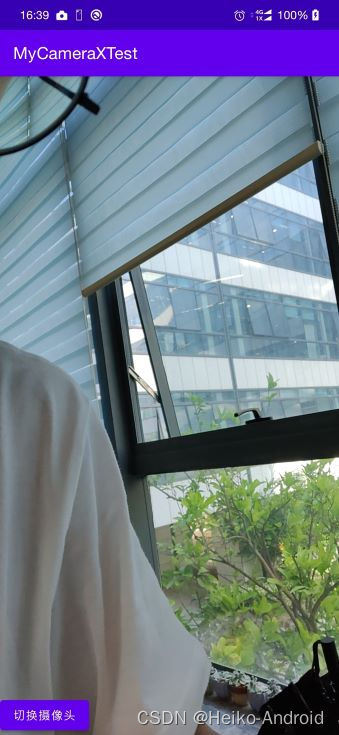
3. 预览 : Preview.java
首先修改activity_main.xml
<androidx.constraintlayout.widget.ConstraintLayout xmlns:android="http://schemas.android.com/apk/res/android"xmlns:app="http://schemas.android.com/apk/res-auto"android:id="@+id/camera_container"android:layout_width="match_parent"android:layout_height="match_parent"android:background="@android:color/black"><androidx.camera.view.PreviewViewandroid:id="@+id/previewView"android:layout_width="0dp"android:layout_height="0dp"app:layout_constraintBottom_toBottomOf="parent"app:layout_constraintLeft_toLeftOf="parent"app:layout_constraintRight_toRightOf="parent"app:layout_constraintTop_toTopOf="parent" /></androidx.constraintlayout.widget.ConstraintLayout>
修改MainActivity.kt
class MainActivity : AppCompatActivity() {private lateinit var binding: ActivityMainBindingprivate lateinit var cameraProvider: ProcessCameraProviderprivate var preview: Preview? = nullprivate var camera: Camera? = nulloverride fun onCreate(savedInstanceState: Bundle?) {super.onCreate(savedInstanceState)binding = ActivityMainBinding.inflate(layoutInflater)setContentView(binding.root)//TODO 省略了权限申请,具体看文章中 "前置操作" 部分setUpCamera(binding.previewView)}private fun setUpCamera(previewView: PreviewView) {val cameraProviderFuture: ListenableFuture<ProcessCameraProvider> =ProcessCameraProvider.getInstance(this)cameraProviderFuture.addListener({try {cameraProvider = cameraProviderFuture.get()bindPreview(cameraProvider, previewView)} catch (e: Exception) {e.printStackTrace()}}, ContextCompat.getMainExecutor(this))}private fun bindPreview(cameraProvider: ProcessCameraProvider,previewView: PreviewView) {//解除所有绑定,防止CameraProvider重复绑定到Lifecycle发生异常cameraProvider.unbindAll()preview = Preview.Builder().build()camera = cameraProvider.bindToLifecycle(this,CameraSelector.DEFAULT_BACK_CAMERA, preview)preview?.setSurfaceProvider(previewView.surfaceProvider)}
}
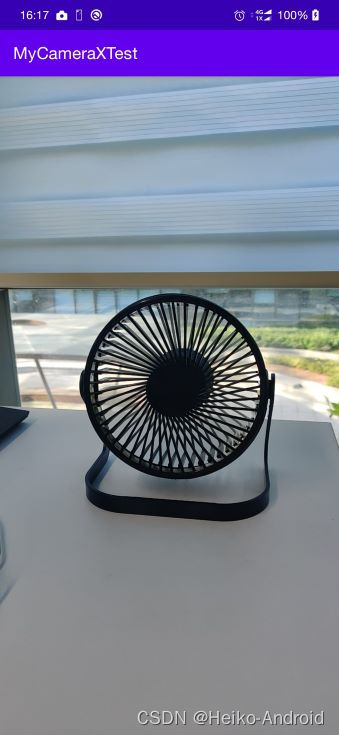
看下效果
4. 图像分析 : ImageAnalysis.java
图像分析用例ImageAnalysis为应用提供可实时分析的图像数据,我们可以对这些图像执行图像处理、计算机视觉或机器学习推断。
val imageAnalysis = ImageAnalysis.Builder()// enable the following line if RGBA output is needed.// .setOutputImageFormat(ImageAnalysis.OUTPUT_IMAGE_FORMAT_RGBA_8888).setTargetResolution(Size(1280, 720)).setBackpressureStrategy(ImageAnalysis.STRATEGY_KEEP_ONLY_LATEST).build()
imageAnalysis.setAnalyzer(executor, ImageAnalysis.Analyzer { imageProxy ->val rotationDegrees = imageProxy.imageInfo.rotationDegrees// insert your code here.// 在这里处理图片的解析,比如解析成二维码之类的...// after done, release the ImageProxy objectimageProxy.close()
})
在调用cameraProvider.bindToLifecycle()时,进行传入
cameraProvider.bindToLifecycle(this, CameraSelector.DEFAULT_BACK_CAMERA, preview, imageAnalysis
)
5. 拍照 : ImageCapture.java
5.1 仅拍照
这里,我们需要先创建一个imageCapture
imageCapture = ImageCapture.Builder().setCaptureMode(ImageCapture.CAPTURE_MODE_MINIMIZE_LATENCY)//.setTargetAspectRatio(screenAspectRatio)//.setTargetRotation(binding.previewView.display.rotation).build()
然后,在调用cameraProvider.bindToLifecycle()时,进行传入
camera = cameraProvider.bindToLifecycle(this,CameraSelector.DEFAULT_BACK_CAMERA, preview, imageCapture
)
增加takePicture()方法进行拍照
//进行拍照
private fun takePicture() {imageCapture?.let { imageCapture ->val mainExecutor = ContextCompat.getMainExecutor(this)imageCapture.takePicture(mainExecutor, object : ImageCapture.OnImageCapturedCallback() {override fun onCaptureSuccess(image: ImageProxy) {super.onCaptureSuccess(image)}override fun onError(exception: ImageCaptureException) {super.onError(exception)}})// 让画面闪一下,营造拍照的感觉// We can only change the foreground Drawable using API level 23+ APIif (Build.VERSION.SDK_INT >= Build.VERSION_CODES.M) {// Display flash animation to indicate that photo was capturedbinding.root.postDelayed({binding.root.foreground = ColorDrawable(Color.WHITE)binding.root.postDelayed({ binding.root.foreground = null }, 50L)}, 100L)}}
}
5.2 拍照并保存到本地存储
我们也可以拍照后,保存到本地存储中
/** Helper function used to create a timestamped file */
private fun createFile(baseFolder: File, format: String, extension: String) =File(baseFolder, SimpleDateFormat(format, Locale.US).format(System.currentTimeMillis()) + extension)/** Use external media if it is available, our app's file directory otherwise */
fun getOutputDirectory(context: Context): File {val appContext = context.applicationContextval mediaDir = context.externalMediaDirs.firstOrNull()?.let {File(it, appContext.resources.getString(R.string.app_name)).apply { mkdirs() }}return if (mediaDir != null && mediaDir.exists())mediaDir else appContext.filesDir
}companion object {private const val FILENAME = "yyyy-MM-dd-HH-mm-ss-SSS"private const val PHOTO_EXTENSION = ".jpg"
}//进行拍照并保存到本地
private fun takePictureSaveToDisk() {imageCapture?.let { imageCapture ->// Create output file to hold the imageval photoFile = createFile(getOutputDirectory(this), FILENAME, PHOTO_EXTENSION)Log.i(TAG, "photoFile:$photoFile")// Setup image capture metadataval metadata = ImageCapture.Metadata().apply {// Mirror image when using the front cameraisReversedHorizontal = lensFacing == CameraSelector.LENS_FACING_FRONT}// Create output options object which contains file + metadataval outputOptions = ImageCapture.OutputFileOptions.Builder(photoFile).setMetadata(metadata).build()// Setup image capture listener which is triggered after photo has been takenimageCapture.takePicture(outputOptions,ContextCompat.getMainExecutor(this),object : ImageCapture.OnImageSavedCallback {override fun onError(exc: ImageCaptureException) {Log.e(TAG, "Photo capture failed: ${exc.message}", exc)}override fun onImageSaved(output: ImageCapture.OutputFileResults) {val savedUri = output.savedUri ?: Uri.fromFile(photoFile)Log.d(TAG, "Photo capture succeeded: $savedUri")// Implicit broadcasts will be ignored for devices running API level >= 24// so if you only target API level 24+ you can remove this statementif (Build.VERSION.SDK_INT < Build.VERSION_CODES.N) {application.sendBroadcast(Intent(android.hardware.Camera.ACTION_NEW_PICTURE, savedUri))}// If the folder selected is an external media directory, this is// unnecessary but otherwise other apps will not be able to access our// images unless we scan them using [MediaScannerConnection]val mimeType = MimeTypeMap.getSingleton().getMimeTypeFromExtension(savedUri.toFile().extension)MediaScannerConnection.scanFile(application,arrayOf(savedUri.toFile().absolutePath),arrayOf(mimeType)) { _, uri ->Log.d(TAG, "Image capture scanned into media store: $uri")}}})// 让画面闪一下,营造拍照的感觉// We can only change the foreground Drawable using API level 23+ APIif (Build.VERSION.SDK_INT >= Build.VERSION_CODES.M) {// Display flash animation to indicate that photo was capturedbinding.root.postDelayed({binding.root.foreground = ColorDrawable(Color.WHITE)binding.root.postDelayed({ binding.root.foreground = null }, 50L)}, 100L)}}
}
然后,我们可以在相册里找到这张图片了,图片的真实位置位于/storage/emulated/0/Android/media/你的包名/项目名/中。
6. 视频录制 : VideoCapture.java
视频录制用的是VideoCapture
videoCapture = VideoCapture.Builder()//.setTargetRotation(previewView.getDisplay().getRotation()).setVideoFrameRate(25).setBitRate(3 * 1024 * 1024).build()
在调用cameraProvider.bindToLifecycle()时,进行传入。
camera = cameraProvider.bindToLifecycle(this,CameraSelector.DEFAULT_BACK_CAMERA, preview, videoCapture
)
需要注意的是,videoCapture无法和imageAnalysis、imageCapture一起使用。
如果同一个页面中这几个功能融合在一起,则需要通过标志位来进行判断。
if (isVideo) {mCamera = cameraProvider.bindToLifecycle(this, cameraSelector,preview, videoCapture);
} else {mCamera = cameraProvider.bindToLifecycle(this, cameraSelector,preview, imageCapture, imageAnalysis);
}
开始录制
private val RECORDED_FILE_NAME = "recorded_video"
private val RECORDED_FILE_NAME_END = "video/mp4"@SuppressLint("RestrictedApi")
private fun startRecording() {//TODO 这里省略了RECORD_AUDIO、PERMISSION_GRANTED权限的判断val contentValues = ContentValues()contentValues.put(MediaStore.MediaColumns.DISPLAY_NAME,RECORDED_FILE_NAME + "_" + System.currentTimeMillis())contentValues.put(MediaStore.MediaColumns.MIME_TYPE, RECORDED_FILE_NAME_END)val outputFileOptions = VideoCapture.OutputFileOptions.Builder(getContentResolver(),MediaStore.Video.Media.EXTERNAL_CONTENT_URI, contentValues).build()videoCapture.startRecording(outputFileOptions,ContextCompat.getMainExecutor(this),object : VideoCapture.OnVideoSavedCallback {override fun onVideoSaved(outputFileResults: VideoCapture.OutputFileResults) {Log.i(TAG, "视频保存成功:${outputFileResults.savedUri}")}override fun onError(videoCaptureError: Int,message: String,cause: Throwable?) {Log.i(TAG, "当出现异常 cause:$cause")}})
}
停止视频录制
videoCapture.stopRecording()
当我们执行停止视频录制之后,就可以在相册里看到多了一个录制的视频了。
介绍了CameraX里一些常用的UseCase,我们接下来来看下CameraX中的其他一些功能。
7. 切换前后摄像头
我们之前使用cameraProvider.bindToLifecycle()的时候,有一个参数是CameraSelector。
CameraX默认给我们提供了前置摄像头和后置摄像头的CameraSelector
public final class CameraSelector {@NonNullpublic static final CameraSelector DEFAULT_FRONT_CAMERA =new CameraSelector.Builder().requireLensFacing(LENS_FACING_FRONT).build();@NonNullpublic static final CameraSelector DEFAULT_BACK_CAMERA =new CameraSelector.Builder().requireLensFacing(LENS_FACING_BACK).build();//...
}
我们去切换摄像头的时候,就是重新调用一下bindPreview方法,传入新的cameraSelector值就好了
private fun bindPreview(cameraProvider: ProcessCameraProvider,previewView: PreviewView,cameraSelector : CameraSelector) {// 解除所有绑定,防止CameraProvider重复绑定到Lifecycle发生异常cameraProvider.unbindAll()preview = Preview.Builder().build()camera = cameraProvider.bindToLifecycle(this,cameraSelector, preview)preview?.setSurfaceProvider(previewView.surfaceProvider)}
CameraX还为我们提供了判断前置/后置摄像头是否存在的方法
/** Returns true if the device has an available back camera. False otherwise */
private fun hasBackCamera(): Boolean {return cameraProvider?.hasCamera(CameraSelector.DEFAULT_BACK_CAMERA) ?: false
}/** Returns true if the device has an available front camera. False otherwise */
private fun hasFrontCamera(): Boolean {return cameraProvider?.hasCamera(CameraSelector.DEFAULT_FRONT_CAMERA) ?: false
}
看下效果
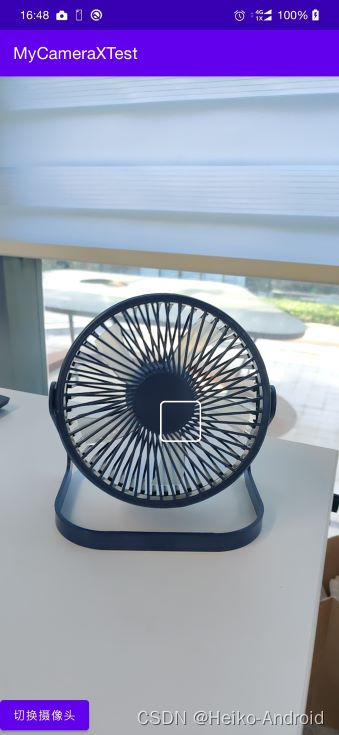
8. 对焦
当点击androidx.camera.view.PreviewView的时候,去调用CameraX的对焦方法startFocusAndMetering()就好了。
在onCreate()中添加如下代码
binding.previewView.setOnTouchListener { view, event ->val action = FocusMeteringAction.Builder(binding.previewView.getMeteringPointFactory().createPoint(event.getX(), event.getY())).build();showTapView(event.x.toInt(), event.y.toInt())camera?.getCameraControl()?.startFocusAndMetering(action)true
}
增加showTapView()
private fun showTapView(x: Int, y: Int) {val popupWindow = PopupWindow(ViewGroup.LayoutParams.WRAP_CONTENT,ViewGroup.LayoutParams.WRAP_CONTENT)val imageView = ImageView(this)imageView.setImageResource(R.drawable.ic_focus_view)popupWindow.contentView = imageViewpopupWindow.showAsDropDown(binding.previewView, x, y)binding.previewView.postDelayed({ popupWindow.dismiss() }, 600)binding.previewView.playSoundEffect(SoundEffectConstants.CLICK)
}
看下效果
9. 缩放
通过GestureDetector监听缩放事件,然后在回调的时候进行执行如下代码,就可以使用双指放大缩小图像
override fun zoom(delta: Float) {val zoomState = camera?.cameraInfo?.zoomStatezoomState?.value?.let {val currentZoomRatio = it.zoomRatiocamera?.cameraControl?.setZoomRatio(currentZoomRatio * delta)}
}
缩放操作具体详见这篇文章 Android使用CameraX实现相机快速实现放大缩小
10. 本文Demo下载
本文的源码Demo详见 : Android CameraX Demo : 实现预览/拍照/录制视频/图片分析/对焦/切换摄像头等操作
推荐阅读 我的另一篇关于Camera的文章 : Android 从零开发一个简易的相机App
参考
Android Developer | CameraX
新技术介绍来了,CameraX 一统江湖?