目录
一、Harbor 架构构成
二、部署harbor环境
1、安装docker-ce(所有主机)
2、阿里云镜像加速器
3、部署Docker Compose 服务
4、部署 Harbor 服务
5、启动并安装 Harbor
6、创建一个新项目
三、客户端上传镜像
1、在 Docker 客户端配置操作如下:
2、重启 Docker,再次登录
3、再次登录 Harbor
4、下载体积小一点的镜像进行测试
5、镜像打标签及上传到 123456789 项目里面
四、日常操作
1、 通过 Harbor Web 创建项目
2、创建Harbor用户
3、在客户端上用普通账户镜像操作
4、查看日志
5、管理 Harbor
1)、停止/启动/重启 Harbor
2)、修改 Harbor.cfg 配置文件
3)、移除 Harbor 服务容器同时保留镜像数据/数据库
4)、移除 Harbor 服务容器全部数据(重新部署时采用)
1、为Harbor配置https
1)创建自己的CA证书
2)生成证书签名请求
3)生成注册表主机的证书
4)查看证书情况
5)信任自签发的域名证书
6)将自签ca证书添加到系统信任
7)关闭现有harbor
8)修改harbor.cfg配置文件
9)重新安装harbor私有镜像仓库
一、Harbor 架构构成
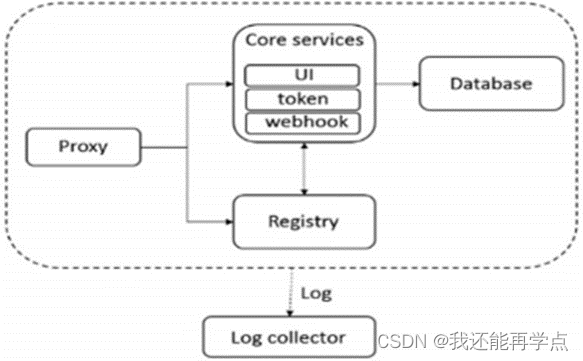
- Proxy:Harbor 的 Registry、UI、token 等服务。通过一个前置的反向代理统一接收浏览器Docker 客户端的请求,并将请求转发给后端不同的服务。
- Registry:负责储存Docker镜像,并处理 Docker push/pull 命令。由于要对用户进行访问控制,即不同用户对Docker image有不同的读写权限,Registry会指向一个 token服务,强制用户的每次 Docker pull/push 请求都要携带一个合法的token,Registry会通过公钥对 token 进行解密验证。
- Core services 这是 Harbor 的核心功能,主要提供以下服务
- UI(Harbor-ui):提供图形化界面,帮助用户管理 Registry 上的镜像(image), 并对用户进行授权。
- Webhook:为了及时获取 registry 上image状态变化的情况,在Registry上配置webhook,把状态变化传递给UI模块。
- 6.Token 服务:负责根据用户权限给每个Docker push/pull命令签发token.Docker客户端向 Regiøstry服务发起的请求,如果不包含token,会被重定向到这里,获得token后再重新向 Registry进行请求。
- Database(Harbor-db):为 core services 提供数据库服务,负责储存用户权限、审计日志、Docker image 分组信息等数据。
- Log collector(Harbor-log):为了帮助监控 Harbor 运行,负责收集其他组件的log,供日后进行分析。
Harbor的每个组件都是以Docker容器的形式构建的,因此,使用Docker Compose 来 对它进行部署。在源代码中(https://github.com/vmware/Harbor), 用于部署Harbor的Docker Compose 模板位于 Harbor/make/docker-compose.tpl。
案列环境
| 角色 | 操作系统 | 主机名 | IP地址 | 软件 |
| 仓库服务 | CentOS7.5-1 | master | 192.168.147.138 | docker-ce docker-compose Harbor-offline |
| 仓库服务 | CentOS7.5-2 | slave | 192.168.147.139 | docker-ce docker-compose Harbor-offline |
| Docker客户端 | CentOS7.5-3 | client | 192.168.147.140 | docker-ce |
二、部署harbor环境
1、安装docker-ce(所有主机)
[root@localhost ~]# wget -O /etc/yum.repos.d/CentOS-Base.repo http://mirrors.aliyun.com/repo/Centos-7.repo[root@localhost ~]# yum -y install yum-utils device-mapper-persistent-data lvm2
[root@localhost ~]# yum-config-manager --add-repo http://mirrors.aliyun.com/docker-ce/linux/centos/docker-ce.repo[root@localhost ~]# ls /etc/yum.repos.d/
backup  Centos-Base.repo  CentOS-Media.repo  docker-ce.repo[root@localhost ~]# yum -y install docker-ce
[root@localhost ~]# systemctl start docker
[root@localhost ~]# systemctl enable docker
Created symlink from /etc/systemd/system/multi-user.target.wants/docker.service to /usr/lib/systemd/system/docker.service.2、阿里云镜像加速器
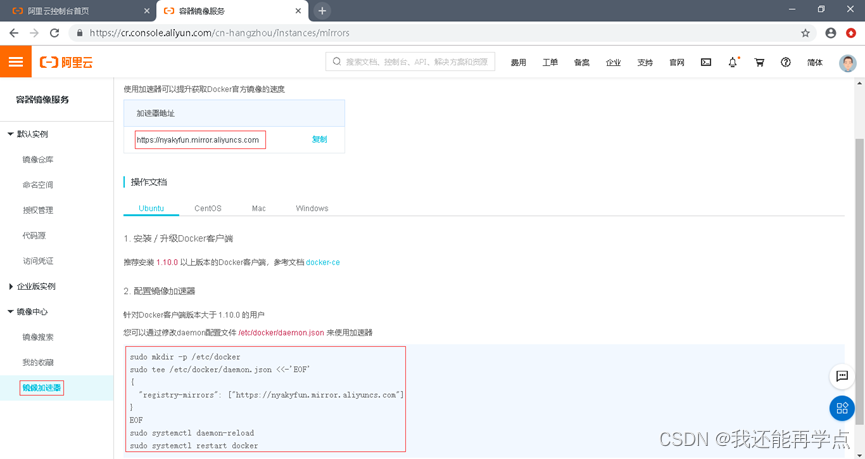
[root@master ~]#  cat << END > /etc/docker/daemon.json
> {
>         "registry-mirrors":[ "https://nyakyfun.mirror.aliyuncs.com" ]
> }
> END
3、部署Docker Compose 服务
下载最新 Docker-Compose(master、slave)
[root@slave ~]# ll-rw-r--r--. 1 root root 10867152 8月   3 19:22 docker-compose
[root@master ~]# chmod +x /usr/local/bin/docker-compose
查看 Docker-Compose 版本判断安装是否成功
[root@master ~]#  docker-compose --version
docker-compose version 1.21.1, build 5a3f1a3
4、部署 Harbor 服务
Harbor 被部署为多个 Docker 容器,因此可以部署在任何支持 Docker 的 Linux 发行版上。目标主机需要安装 Python、Docker 和 Docker Compose。
下载 Harbor 安装程序(master、slave)
[root@master ~]# ll
总用量 642752
-rw-------. 1 root root      1257 7月  18 16:47 anaconda-ks.cfg
-rw-r--r--. 1 root root 658170229 8月   7 10:32 harbor-offline-installer-v1.6.1.tgz
[root@master ~]# tar xf harbor-offline-installer-v1.6.1.tgz -C /usr/local/
[root@harbor01 ~]# vim /usr/local/harbor/harbor.cfg7 hostname = 192.168.147.138
关于 Harbor.cfg 配置文件中有两类参数,所需参数和可选参数。
所需参数:这些参数需要在配置文件 Harbor.cfg 中设置。如果用户更新它们并运行 install.sh 脚本重新安装 Harbor,参数将生效。具体参数如下:
- hostname:用于访问用户界面和 register 服务。它应该是目标机器的 IP 地址或完全限定的域名(FQDN),例如 192.168.200.111或 www.crushlinux.com。不要使用 localhost 或 127.0.0.1 为主机名。
- ui_url_protocol:(http 或 https,默认为 http)用于访问 UI 和令牌/通知服务的协议。如果公证处于启用状态,则此参数必须为 https。
- max_job_workers:镜像复制作业线程。
- db_password:用于 db_auth 的 MySQL 数据库 root 用户的密码。
- customize_crt:打开或关闭,默认打开。打开此属性时,准备脚本创建私钥和根证书,用于生成/验证注册表令牌。当由外部来源提供密钥和根证书时,将此属性设置为 off。
- ssl_cert:SSL 证书的路径,仅当协议设置为 https 时才应用。
- ssl_cert_key:SSL 密钥的路径,仅当协议设置为 https 时才应用。
- secretkey_path:用于在复制策略中加密或解密远程 register 密码的密钥路径。
可选参数:这些参数对于更新是可选的,即用户可以将其保留为默认值,并在启动时生效,随后对这些参数的更新,Harbor.cfg 将被忽略。
注意:如果选择通过 UI 设置这些参数,请确保在启动 Harbour 后立即执行此操作。具体来说,必须在注册或在 Harbor 中创建任何新用户之前设置所需的 auth_mode。当系统中有用户时(除了默认的 admin 用户), auth_mode 不能被修改。具体参数如下:
- 电子邮件设置:Harbor 需要这些参数才能向用户发送“密码重置”电子邮件,并且只有在需要该功能时才需要。请注意,在默认情况下 SSL 连接时没有启用。如果SMTP 服务器需要 SSL,但不支持 STARTTLS,那么应该通过设置启用 SSL email_ssl = TRUE。
- harbor_admin_password:管理员的初始密码,只在 Harbour 第一次启动时生效。之后,此设置将被忽略,并且应在 UI 中设置管理员的密码。请注意,默认的用户名/密码是 admin/Harbor12345。
- auth_mode:使用的认证类型,默认情况下,它是 db_auth,即凭据存储在数据库中。对于 LDAP 身份验证,请将其设置为 ldap_auth。
- self_registration:( 打开或关闭,默认打开)启用/禁用用户注册功能。禁用时,新用户只能由 Admin 用户创建,只有管理员用户可以在 Harbour 中创建新用户。注意:当 auth_mode 设置为 ldap_auth 时,自注册功能将始终处于禁用状态,并且该标志被忽略。
- token_expiration:由令牌服务创建的令牌的到期时间(分钟),默认为 30 分钟。
- project_creation_restriction:用于控制哪些用户有权创建项目的标志。默认情况下,每个人都可以创建一个项目。如果将其值设置为“adminonly”,那么只有admin 可以创建项目。
- verify_remote_cert:打开或关闭,默认打开。此标志决定了当 Harbour 与远程register 实例通信时是否验证 SSL/TLS 证书。将此属性设置为 off 将绕过 SSL/TLS验证,这在远程实例具有自签名或不可信证书时经常使用。
另外,默认情况下Harbor 将镜像存储在本地文件系统上。在生产环境中,可以考虑使用其他存储后端而不是本地文件系统,如 S3、Openstack Swif、Ceph 等。需要更新 common/templates/registry/config.yml 文件。
5、启动并安装 Harbor
[root@master ~]# sh /usr/local/harbor/install.sh
[Step 4]: starting Harbor ...
Creating network "harbor_harbor" with the default driver
Creating harbor-log ... done
Creating harbor-adminserver ... done
Creating registry           ... done
Creating harbor-db          ... done
Creating redis              ... done
Creating harbor-ui          ... done
Creating harbor-jobservice  ... done
Creating nginx              ... done✔ ----Harbor has been installed and started successfully.----Now you should be able to visit the admin portal at http://192.168.147.138.
For more details, please visit https://github.com/goharbor/harbor .
如果一切都正常,应该可以打开浏览器访问 http://192.168.147.138的管理页面,默认的管理员用户名和密码是 admin/Harbor12345。
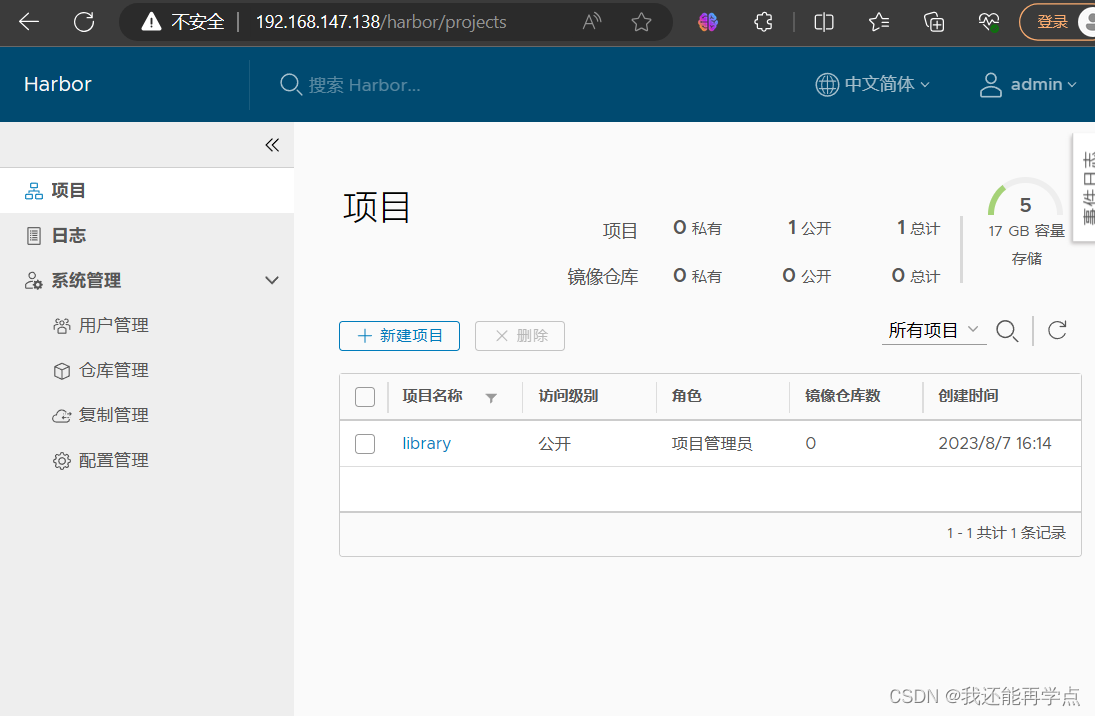
至此, Harbor已经搭建完成,具体在WEB UI下面操作也是非常的简单,只有几个选项。
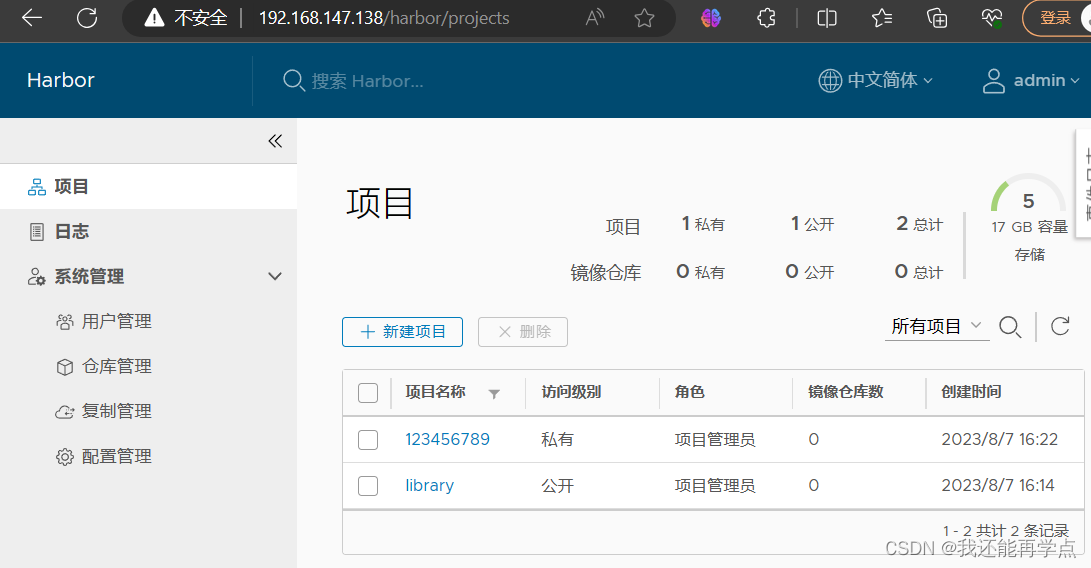
6、创建一个新项目
输入用户名和密码登录界面后可以创建一个新项目。点击“+项目”按钮。
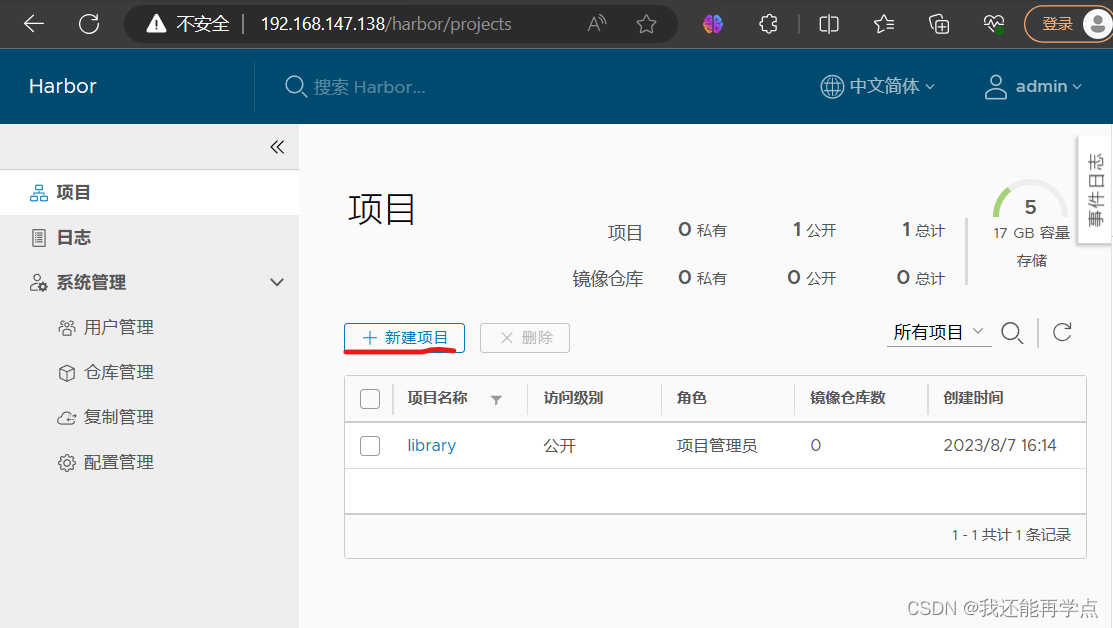
填写项目名称为“123456789”。点击确定。
可以使用 Docker 命令在Harbor本地通过 127.0.0.1 来登录和推送镜像了。默认情况下, Register 服务器在端口 80 上侦听。
登录 Harbor。
[root@master ~]# docker login -u admin -p Harbor12345 http://127.0.0.1
WARNING! Using --password via the CLI is insecure. Use --password-stdin.
WARNING! Your password will be stored unencrypted in /root/.docker/config.json.
Configure a credential helper to remove this warning. See
https://docs.docker.com/engine/reference/commandline/login/#credentials-storeLogin Succeeded
下载体积小点的镜像进行测试。
[root@master ~]# docker pull busybox
Using default tag: latest
latest: Pulling from library/busybox
5cc84ad355aa: Pull complete
Digest: sha256:5acba83a746c7608ed544dc1533b87c737a0b0fb730301639a0179f9344b1678
Status: Downloaded newer image for busybox:latest
docker.io/library/busybox:latest
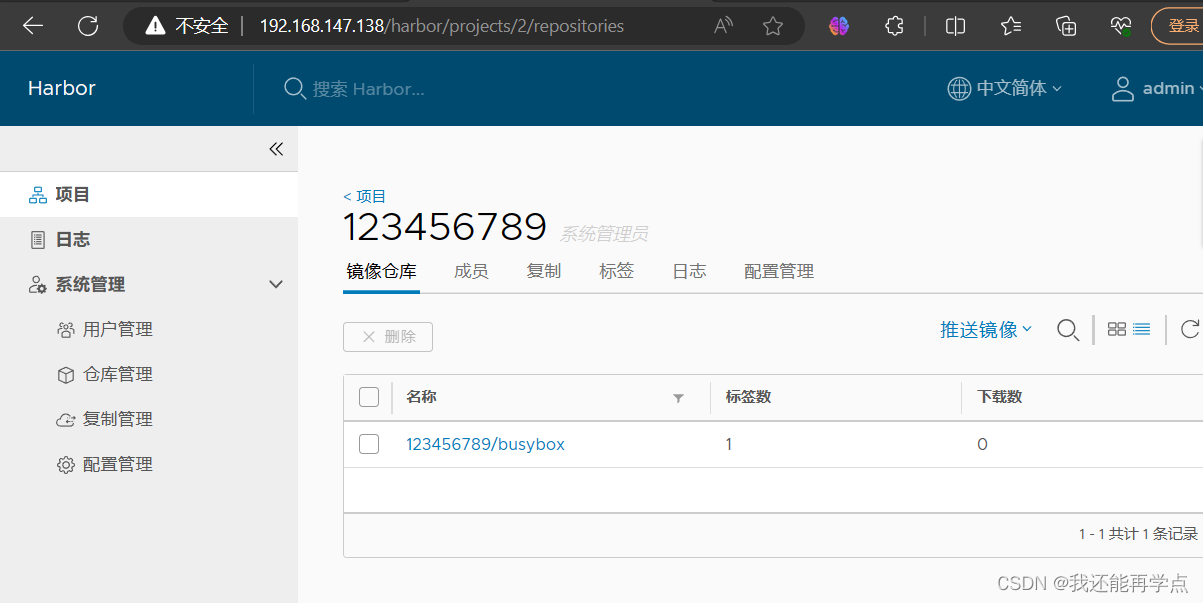
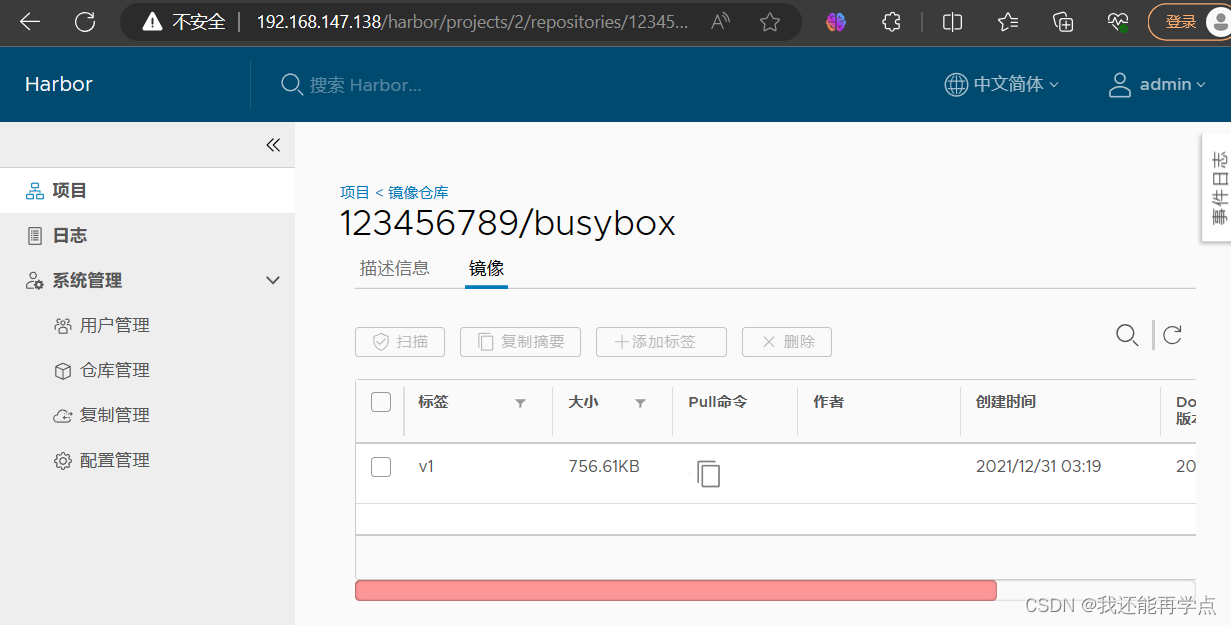
镜像打 tag。
[root@master ~]# docker tag busybox 127.0.0.1/123456789/busybox:v1上传镜像到 Harbor。
[root@master ~]# docker push 127.0.0.1/123456789/busybox:v1
The push refers to repository [127.0.0.1/123456789/busybox]
01fd6df81c8e: Pushed
v1: digest: sha256:62ffc2ed7554e4c6d360bce40bbcf196573dd27c4ce080641a2c59867e732dee size: 527
在 Harbor 界面 123456789目录下就可以看见这个镜像,以及这个镜像的一些信息。
三、客户端上传镜像
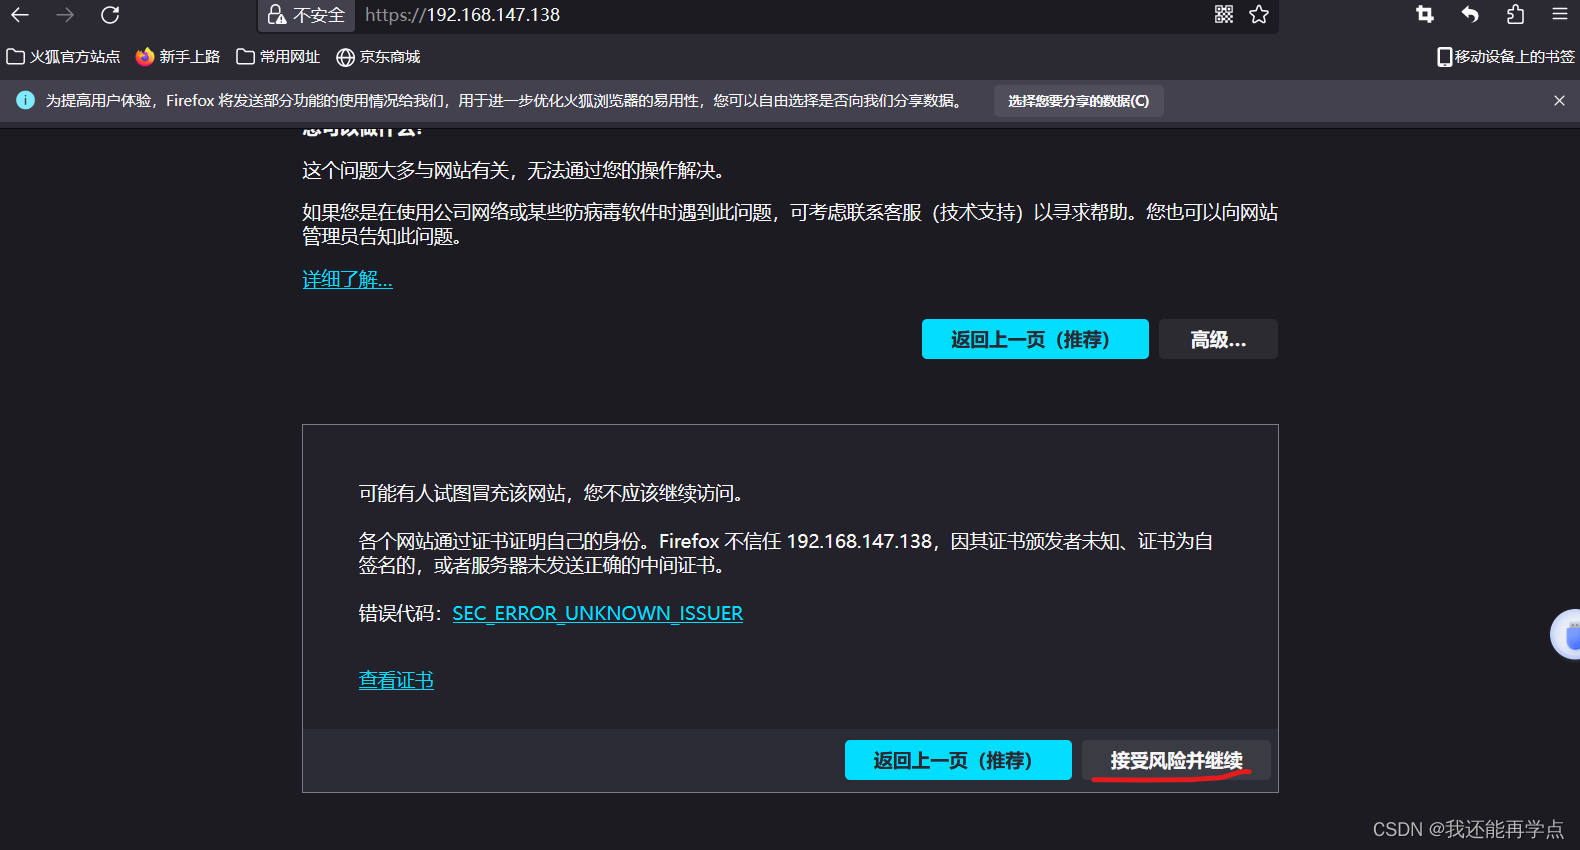
以上操作都是在 harbor01 服务器本地操作,如果其他客户端上传镜像到 Harbor,就会报如下错误。出现这问题的原因是 Docker 自从 1.3.X 之后 Docker Registry 交互默认使用的是 HTTPS,但是搭建私有镜像默认使用的是 HTTP 服务,所以与私有镜像交互时出现以下错误。
[root@client ~]# docker login -u admin -p Harbor12345 http://192.168.147.138
WARNING! Using --password via the CLI is insecure. Use --password-stdin.
Error response from daemon: Get "https://192.168.147.138/v2/": net/http: request canceled while waiting for connection (Client.Timeout exceeded while awaiting headers)
1、在 Docker 客户端配置操作如下:
解决办法是:在 Docker server 启动的时候,增加启动参数,默认使用 HTTP 访问
[root@client ~]# vim /usr/lib/systemd/system/docker.service
13 ExecStart=/usr/bin/dockerd -H fd:// --containerd=/run/containerd/containerd.sock --insecure-registry 192.168.147.138
2、重启 Docker,再次登录
[root@client ~]# systemctl daemon-reload
[root@client ~]# systemctl restart docker
3、再次登录 Harbor
[root@client ~]# docker login -u admin -p Harbor12345 192.168.147.138
WARNING! Using --password via the CLI is insecure. Use --password-stdin.
WARNING! Your password will be stored unencrypted in /root/.docker/config.json.
Configure a credential helper to remove this warning. See
https://docs.docker.com/engine/reference/commandline/login/#credentials-storeLogin Succeeded
4、下载体积小一点的镜像进行测试
[root@client ~]# docker pull cirros
Using default tag: latest
latest: Pulling from library/cirros
d0b405be7a32: Pull complete
bd054094a037: Pull complete
c6a00de1ec8a: Pull complete
Digest: sha256:1e695eb2772a2b511ccab70091962d1efb9501fdca804eb1d52d21c0933e7f47
Status: Downloaded newer image for cirros:latest
docker.io/library/cirros:latest
5、镜像打标签及上传到 123456789 项目里面
[root@client ~]# docker tag cirros 192.168.147.138/123456789/cirros:v1
[root@client ~]# docker push 192.168.147.138/123456789/cirros:v1
The push refers to repository [192.168.147.138/123456789/cirros]
984ad441ec3d: Pushed
f0a496d92efa: Pushed
e52d19c3bee2: Pushed
v1: digest: sha256:483f15ac97d03dc3d4dcf79cf71ded2e099cf76c340f3fdd0b3670a40a198a22 size: 943
查看 Harbor 的 web 管理界面,123456789项目里面有两个镜像。

四、日常操作
1、 通过 Harbor Web 创建项目
点击“+项目”时按规范填写项目名称。项目级别:私有即不勾选(勾选后会变为"公开")。如果设置为公共仓库,则所有人对此项目下的镜像拥有读权限,命令行中不需要执行"Docker login"即可下载镜像,镜像操作与Docker hub 一致。
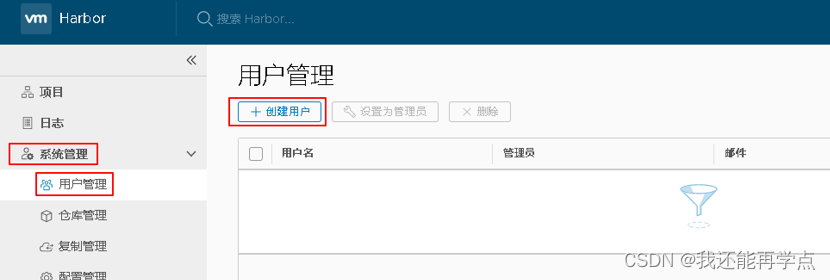
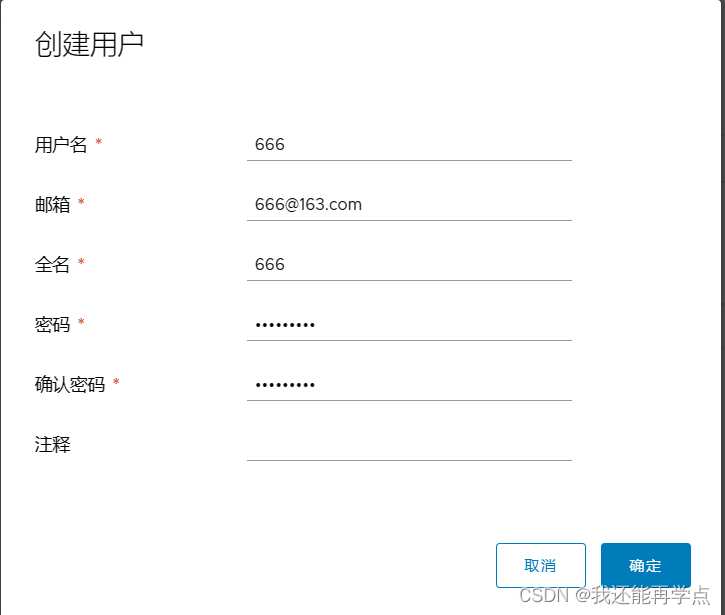
2、创建Harbor用户
创建用户并分配权限
系统管理->用户管理->创建用户,填写用户名为“666”,邮箱为 666@163.com,全名为“666”,密码为“Abc123456”,注释为“管理员”
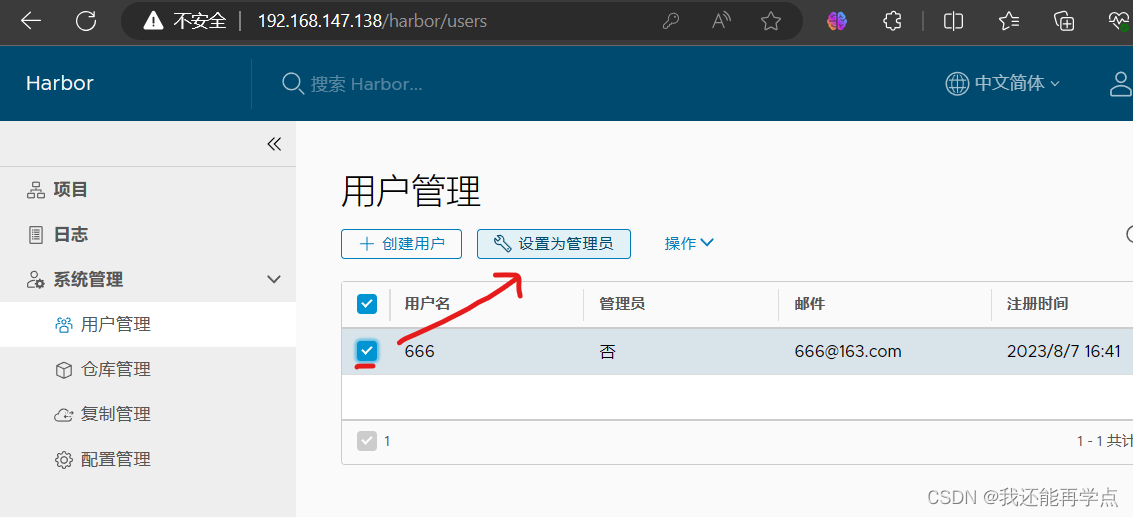
添加项目成员
项目-> 123456789->成员->+成员,填写上述创建的用户并分配角色为“项目管理员”。

3、在客户端上用普通账户镜像操作
删除上述打标签的本地镜像
[root@client ~]# docker rmi 192.168.147.138/123456789/cirros:v1
Untagged: 192.168.147.138/123456789/cirros:v1
Untagged: 192.168.147.138/123456789/cirros@sha256:483f15ac97d03dc3d4dcf79cf71ded2e099cf76c340f3fdd0b3670a40a198a22
[root@client ~]# docker images
REPOSITORY   TAG       IMAGE ID       CREATED       SIZE
cirros       latest    f9cae1daf5f6   2 years ago   12.6MB
首先退出当前用户,然后使用上述创建的账户666 登录。
[root@client ~]# docker logout 192.168.147.138
Removing login credentials for 192.168.147.138
[root@client ~]# docker login 192.168.147.138
Username: 666
Password:
WARNING! Your password will be stored unencrypted in /root/.docker/config.json.
Configure a credential helper to remove this warning. See
https://docs.docker.com/engine/reference/commandline/login/#credentials-storeLogin Succeeded
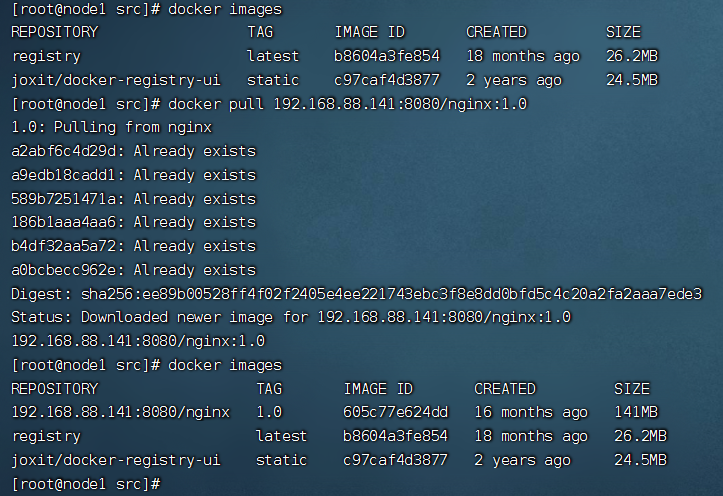
下载 192.168.147.138/123456789/cirros 标签为 v1 的镜像。
[root@client ~]# docker pull 192.168.147.138/123456789/cirros:v1
v1: Pulling from 123456789/cirros
Digest: sha256:483f15ac97d03dc3d4dcf79cf71ded2e099cf76c340f3fdd0b3670a40a198a22
Status: Downloaded newer image for 192.168.147.138/123456789/cirros:v1
192.168.147.138/123456789/cirros:v1
[root@client ~]# docker images
REPOSITORY                         TAG       IMAGE ID       CREATED       SIZE
192.168.147.138/123456789/cirros   v1        f9cae1daf5f6   2 years ago   12.6MB
cirros                             latest    f9cae1daf5f6   2 years ago   12.6MB
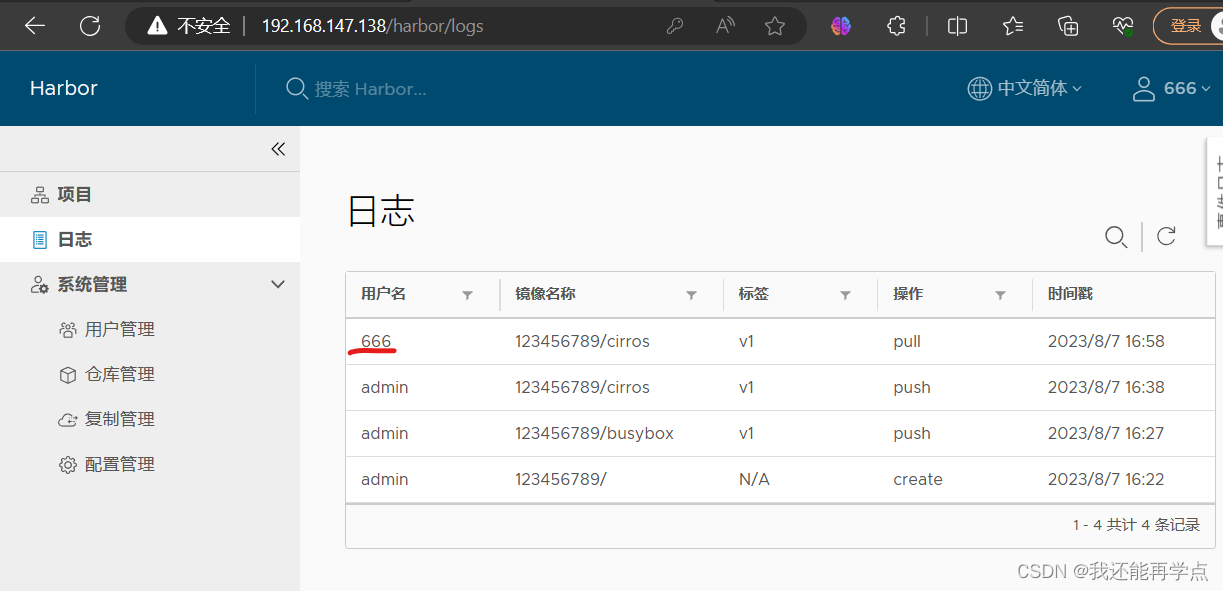
4、查看日志
Web 界面日志,操作日志按时间顺序记录用户相关操作。
5、管理 Harbor
可以使用 docker-compose来管理Harbor。一些有用的命令如下所示(必须在与docker-compose.yml 相同的目录中运行)。
1)、停止/启动/重启 Harbor
[root@master ~]# cd /usr/local/harbor/
[root@master harbor]# docker-compose stop | start | restart
2)、修改 Harbor.cfg 配置文件
要更改 Harbor 的配置文件时,请先停止现有的 Harbor 实例并更新 harbor.cfg;然后运行 prepare 脚本来填充配置;最后重新创建并启动 Harbour 的实例。
[root@master harbor]# docker-compose down -v
Removing nginx              ... done
Removing harbor-jobservice  ... done
Removing harbor-ui          ... done
Removing harbor-db          ... done
Removing redis              ... done
Removing registry           ... done
Removing harbor-adminserver ... done
Removing harbor-log         ... done
Removing network harbor_harbor
[root@master harbor]# vim harbor.cfg
[root@master harbor]# ./prepare
Clearing the configuration file: ./common/config/adminserver/env
Clearing the configuration file: ./common/config/ui/env
Clearing the configuration file: ./common/config/ui/app.conf
Clearing the configuration file: ./common/config/ui/private_key.pem
Clearing the configuration file: ./common/config/db/env
Clearing the configuration file: ./common/config/jobservice/env
Clearing the configuration file: ./common/config/jobservice/config.yml
Clearing the configuration file: ./common/config/registry/config.yml
Clearing the configuration file: ./common/config/registry/root.crt
Clearing the configuration file: ./common/config/registryctl/env
Clearing the configuration file: ./common/config/registryctl/config.yml
Clearing the configuration file: ./common/config/nginx/nginx.conf
Clearing the configuration file: ./common/config/log/logrotate.conf
loaded secret from file: /data/secretkey
Generated configuration file: ./common/config/nginx/nginx.conf
Generated configuration file: ./common/config/adminserver/env
Generated configuration file: ./common/config/ui/env
Generated configuration file: ./common/config/registry/config.yml
Generated configuration file: ./common/config/db/env
Generated configuration file: ./common/config/jobservice/env
Generated configuration file: ./common/config/jobservice/config.yml
Generated configuration file: ./common/config/log/logrotate.conf
Generated configuration file: ./common/config/registryctl/env
Generated configuration file: ./common/config/ui/app.conf
Generated certificate, key file: ./common/config/ui/private_key.pem, cert file: ./common/config/registry/root.crt
The configuration files are ready, please use docker-compose to start the service.
[root@master harbor]# docker-compose up -d
Creating network "harbor_harbor" with the default driver
Creating harbor-log ... done
Creating harbor-db          ... done
Creating harbor-adminserver ... done
Creating registry           ... done
Creating redis              ... done
Creating harbor-ui          ... done
Creating nginx              ... done
Creating harbor-jobservice  ... done
3)、移除 Harbor 服务容器同时保留镜像数据/数据库
[root@harbor harbor]# docker-compose down -v 4)、移除 Harbor 服务容器全部数据(重新部署时采用)
持久数据,如镜像,数据库等在宿主机的/data/目录下,日志在宿主机的
/var/log/Harbor/目录下
[root@master harbor]# rm -r /data/database/
[root@master harbor]# rm -r /data/registry/
五、Harbor安全设置
1、为Harbor配置https
1)创建自己的CA证书
[root@master harbor]# yum -y install openssl
[root@master harbor]# mkdir -p /data/ssl
[root@master harbor]# cd /data/ssl/
[root@master ssl]#  openssl req -newkey rsa:4096 -nodes -sha256 -keyout ca.key -x509 -days 365 -out ca.crt
Generating a 4096 bit RSA private key
..................................................................................................................++
................................++
writing new private key to 'ca.key'
-----
You are about to be asked to enter information that will be incorporated
into your certificate request.
What you are about to enter is what is called a Distinguished Name or a DN.
There are quite a few fields but you can leave some blank
For some fields there will be a default value,
If you enter '.', the field will be left blank.
-----
Country Name (2 letter code) [XX]:CN
State or Province Name (full name) []:beijing
Locality Name (eg, city) [Default City]:beijing
Organization Name (eg, company) [Default Company Ltd]:skl
Organizational Unit Name (eg, section) []:skl
Common Name (eg, your name or your server's hostname) []:www.skl.com
Email Address []:
2)生成证书签名请求
[root@master ssl]#  openssl req -newkey rsa:4096 -nodes -sha256 -keyout ca.key -x509 -days 365 -out ca.crt
Generating a 4096 bit RSA private key
..................................................................................................................++
................................++
writing new private key to 'ca.key'
-----
You are about to be asked to enter information that will be incorporated
into your certificate request.
What you are about to enter is what is called a Distinguished Name or a DN.
There are quite a few fields but you can leave some blank
For some fields there will be a default value,
If you enter '.', the field will be left blank.
-----
Country Name (2 letter code) [XX]:CN
State or Province Name (full name) []:beijing
Locality Name (eg, city) [Default City]:beijing
Organization Name (eg, company) [Default Company Ltd]:skl
Organizational Unit Name (eg, section) []:skl
Common Name (eg, your name or your server's hostname) []:www.skl.com
Email Address []:
[root@master ssl]# openssl req -newkey rsa:4096 -nodes -sha256 -keyout www.crushlinux.com.key -out www.crushlinux.com.csr
Generating a 4096 bit RSA private key
...............................................................................++
..........................................................................................................................................++
writing new private key to 'www.crushlinux.com.key'
-----
You are about to be asked to enter information that will be incorporated
into your certificate request.
What you are about to enter is what is called a Distinguished Name or a DN.
There are quite a few fields but you can leave some blank
For some fields there will be a default value,
If you enter '.', the field will be left blank.
-----
Country Name (2 letter code) [XX]:CN
State or Province Name (full name) []:beijing
Locality Name (eg, city) [Default City]:beijing
Organization Name (eg, company) [Default Company Ltd]:skl
Organizational Unit Name (eg, section) []:skl
Common Name (eg, your name or your server's hostname) []:www.skl.com
Email Address []:Please enter the following 'extra' attributes
to be sent with your certificate request
A challenge password []:
An optional company name []:
3)生成注册表主机的证书
[root@master ssl]# openssl x509 -req -days 365 -in www.crushlinux.com.csr -CA ca.crt -CAkey ca.key -CAcreateserial -out www.crushlinux.com.crt
Signature ok
subject=/C=CN/ST=beijing/L=beijing/O=skl/OU=skl/CN=www.skl.com
Getting CA Private Key
4)查看证书情况
[root@master ssl]# ls -l
总用量 24
-rw-r--r--. 1 root root 2000 8月   7 18:12 ca.crt
-rw-r--r--. 1 root root 3272 8月   7 18:12 ca.key
-rw-r--r--. 1 root root   17 8月   7 18:20 ca.srl
-rw-r--r--. 1 root root 1883 8月   7 18:20 www.crushlinux.com.crt
-rw-r--r--. 1 root root 1691 8月   7 18:19 www.crushlinux.com.csr
-rw-r--r--. 1 root root 3272 8月   7 18:19 www.crushlinux.com.key
5)信任自签发的域名证书
由于CA证书是我们自己签发的,Linux操作系统是不信任的,因此我们需要把证书加入到系统的信任证书里。
6)将自签ca证书添加到系统信任
[root@master ssl]# cp www.crushlinux.com.crt /etc/pki/ca-trust/source/anchors/
[root@master ssl]# update-ca-trust extract
[root@master ssl]# update-ca-trust enable
[root@master ssl]#  mkdir -p /etc/ssl/harbor
[root@master ssl]# cp /data/ssl/www.crushlinux.com.key /etc/ssl/harbor/
[root@master ssl]# cp /data/ssl/www.crushlinux.com.crt /etc/ssl/harbor/
[root@master ssl]#  ll /etc/ssl/harbor/
总用量 8
-rw-r--r--. 1 root root 1883 8月   7 18:22 www.crushlinux.com.crt
-rw-r--r--. 1 root root 3272 8月   7 18:22 www.crushlinux.com.key
7)关闭现有harbor
[root@master ssl]# cd /usr/local/harbor/
[root@master harbor]# docker-compose stop
Stopping harbor-jobservice  ... done
Stopping nginx              ... done
Stopping harbor-ui          ... done
Stopping redis              ... done
Stopping registry           ... done
Stopping harbor-adminserver ... done
Stopping harbor-db          ... done
Stopping harbor-log         ... done
[root@master harbor]# docker rm -f $(docker ps -qa)
8cbc99060b15
a610c0fe3eab
770b6b4fa0b0
00603caaec4e
1d7d980e55ba
cf1a1bf4b356
1dabb9d0cfca
62fa72f52efd
8)修改harbor.cfg配置文件
[root@master harbor]# vim harbor.cfg 7 hostname = www.skl.com11 ui_url_protocol = https23 ssl_cert = /etc/ssl/harbor/www.crushlinux.com.crt24 ssl_cert_key = /etc/ssl/harbor/www.crushlinux.com.key
9)重新安装harbor私有镜像仓库
[root@master harbor]#./install.sh --with-notary --with-clair ##--with-notary启用镜像签名;--with-clair启用漏洞扫描
正版要钱我没钱就不给你们演示了