微服务系列文章之 Springboot+Vue实现登录注册

一、springBoot

创建springBoot项目

分为三个包,分别为controller,service, dao以及resource目录下的xml文件。

UserController.java

1

2

3

4

5

6

7

8

9

10

11

12

13

14

15

16

17

18

19

20

21

22

23

24

25

26

27

28

29

30

31

32

33

34

35

36

37

38

39

40

package springbootmybatis.controller;

import org.springframework.web.bind.annotation.CrossOrigin;

import org.springframework.web.bind.annotation.PostMapping;

import org.springframework.web.bind.annotation.RequestBody;

import org.springframework.web.bind.annotation.RestController;

import springbootmybatis.pojo.User;

import springbootmybatis.service.UserService;

import javax.annotation.Resource;

@RestController

public class UserController {

    @Resource

    UserService userService;

    @PostMapping("/register/")

    @CrossOrigin("*")

    String register(@RequestBody User user) {

        System.out.println("有人请求注册!");

        int res = userService.register(user.getAccount(), user.getPassword());

        if(res==1) {

            return "注册成功";

        } else {

            return "注册失败";

        }

    }

    @PostMapping("/login/")

    @CrossOrigin("*")

    String login(@RequestBody User user) {

        int res = userService.login(user.getAccount(), user.getPassword());

        if(res==1) {

            return "登录成功";

        } else {

            return "登录失败";

        }

    }

}

UserService.java

1

2

3

4

5

6

7

8

9

10

11

12

13

14

15

16

17

18

19

20

package springbootmybatis.service;

import org.springframework.stereotype.Service;

import springbootmybatis.dao.UserMapper;

import javax.annotation.Resource;

@Service

public class UserService {

    @Resource

    UserMapper userMapper;

    public int register(String account, String password) {

        return userMapper.register(account, password);

    }

    public int login(String account, String password) {

        return userMapper.login(account, password);

    }

}

User.java (我安装了lombok插件)

1

2

3

4

5

6

7

8

9

package springbootmybatis.pojo;

import lombok.Data;

@Data

public class User {

    private String account;

    private String password;

}

UserMapper.java

1

2

3

4

5

6

7

8

9

10

package springbootmybatis.dao;

import org.apache.ibatis.annotations.Mapper;

@Mapper

public interface UserMapper {

    int register(String account, String password);

    int login(String account, String password);

}

UserMapper.xml

1

2

3

4

5

6

7

8

9

10

11

12

13

14

15

<?xml version="1.0" encoding="UTF-8" ?>

<!DOCTYPE mapper

        PUBLIC "-//mybatis.org//DTD Mapper 3.0//EN"

        "http://mybatis.org/dtd/mybatis-3-mapper.dtd">

<mapper namespace="springbootmybatis.dao.UserMapper">

    <insert id="register">

       insert into User (account, password) values (#{account}, #{password});

    </insert>

    <select id="login" resultType="Integer">

        select count(*) from User where account=#{account} and password=#{password};

    </select>

</mapper>

主干配置

application.yaml

1

2

3

4

5

6

7

8

9

10

11

12

server.port: 8000

spring:

  datasource:

    username: root

    password: 123456

    url: jdbc:mysql://localhost:3306/community?serverTimezone=UTC&useUnicode=true&characterEncoding=utf-8

    driver-class-name: com.mysql.cj.jdbc.Driver

mybatis:

    type-aliases-package: springbootmybatis.pojo

    mapper-locations: classpath:mybatis/mapper/*.xml

    configuration:

      map-underscore-to-camel-case: true

数据库需要建相应得到表

1

2

3

4

CREATE TABLE `user` (

  `account` varchar(255) COLLATE utf8_bin DEFAULT NULL,

  `password` varchar(255) COLLATE utf8_bin DEFAULT NULL

) ENGINE=InnoDB DEFAULT CHARSET=utf8 COLLATE=utf8_bin;

二、创建VUE项目

安装node,npm,配置环境变量。
配置cnpm仓库,下载的时候可以快一些。

1

npm i -g cnpm --registry=https://registry.npm.taobao.org

安装VUE

1

npm i -g vue-cli

初始化包结构

1

vue init webpack project

启动项目

1

2

3

4

5

6

# 进入项目目录

cd vue-01

# 编译

npm install

# 启动

npm run dev

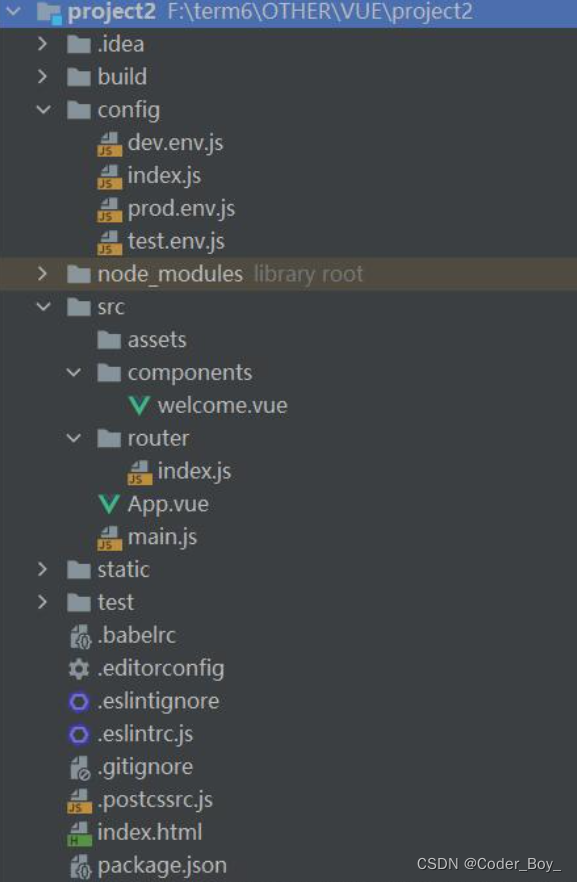
修改项目文件,按照如下结构


APP.vue

1

2

3

4

5

6

7

8

9

10

11

12

13

14

15

<template>

  <div id="app">

    <router-view/>

  </div>

</template>

<script>

export default {

  name: 'App'

}

</script>

<style>

</style>

welcome.vue

1

2

3

4

5

6

7

8

9

10

11

12

13

14

15

16

17

18

19

20

21

22

23

24

25

26

27

28

29

30

31

32

33

34

35

36

37

38

39

40

41

42

43

44

45

46

47

48

<template>

  <div>

    <el-input v-model="account" placeholder="请输入帐号"></el-input>

    <el-input v-model="password" placeholder="请输入密码" show-password></el-input>

    <el-button type="primary" @click="login">登录</el-button>

    <el-button type="primary" @click="register">注册</el-button>

  </div>

</template>

<script>

export default {

  name: 'welcome',

  data () {

    return {

      account: '',

      password: ''

    }

  },

  methods: {

    register: function () {

      this.axios.post('/api/register/', {

        account: this.account,

        password: this.password

      }).then(function (response) {

        console.log(response);

      }).catch(function (error) {

        console.log(error);

      });

      // this.$router.push({path:'/registry'});

    },

    login: function () {

      this.axios.post('/api/login/', {

        account: this.account,

        password: this.password

      }).then(function () {

        alert('登录成功');

      }).catch(function (e) {

        alert(e)

      })

      // this.$router.push({path: '/board'});

    }

  }

}

</script>

<style scoped>

</style>

main.js

1

2

3

4

5

6

7

8

9

10

11

12

13

14

15

16

17

18

19

20

21

// The Vue build version to load with the `import` command

// (runtime-only or standalone) has been set in webpack.base.conf with an alias.

import Vue from 'vue'

import App from './App'

import router from './router'

import ElementUI from 'element-ui'

import 'element-ui/lib/theme-chalk/index.css'

import axios from 'axios'

import VueAxios from 'vue-axios'

Vue.use(VueAxios, axios)

Vue.use(ElementUI)

Vue.config.productionTip = false

/* eslint-disable no-new */

new Vue({

  el: '#app',

  router,

  components: {App},

  template: '<App/>'

})

router/index.js

1

2

3

4

5

6

7

8

9

10

11

12

13

14

15

import Vue from 'vue'

import Router from 'vue-router'

import welcome from '@/components/welcome'

Vue.use(Router)

export default new Router({

  routes: [

    {

      path: '/',

      name: 'welcome',

      component: welcome

    }

  ]

})

config/index.js

1

2

3

4

5

6

7

8

9

10

11

12

13

14

15

16

17

18

19

20

21

22

23

24

25

26

27

28

29

30

31

32

33

34

35

36

37

38

39

40

41

42

43

44

45

46

47

48

49

50

51

52

53

54

55

56

57

58

59

60

61

62

63

64

65

66

67

68

69

70

71

72

73

74

75

76

77

78

79

80

81

82

83

84

85

86

'use strict'

// Template version: 1.3.1

// see http://vuejs-templates.github.io/webpack for documentation.

const path = require('path')

module.exports = {

  dev: {

    // Paths

    assetsSubDirectory: 'static',

    assetsPublicPath: '/',

    proxyTable: {

      '/api': {

        target: 'http://localhost:8000', // 后端接口的域名

        // secure: false,  // 如果是https接口,需要配置这个参数

        changeOrigin: true, // 如果接口跨域,需要进行这个参数配置

        pathRewrite: {

          '^/api': '' //路径重写,当你的url带有api字段时如/api/v1/tenant,

          //可以将路径重写为与规则一样的名称,即你在开发时省去了再添加api的操作

        }

      }

    },

    // Various Dev Server settings

    host: 'localhost', // can be overwritten by process.env.HOST

    port: 8080, // can be overwritten by process.env.PORT, if port is in use, a free one will be determined

    autoOpenBrowser: false,

    errorOverlay: true,

    notifyOnErrors: true,

    poll: false, // https://webpack.js.org/configuration/dev-server/#devserver-watchoptions-

    // Use Eslint Loader?

    // If true, your code will be linted during bundling and

    // linting errors and warnings will be shown in the console.

    useEslint: true,

    // If true, eslint errors and warnings will also be shown in the error overlay

    // in the browser.

    showEslintErrorsInOverlay: false,

    /**

     * Source Maps

     */

    // https://webpack.js.org/configuration/devtool/#development

    devtool: 'cheap-module-eval-source-map',

    // If you have problems debugging vue-files in devtools,

    // set this to false - it *may* help

    // https://vue-loader.vuejs.org/en/options.html#cachebusting

    cacheBusting: true,

    cssSourceMap: true

  },

  build: {

    // Template for index.html

    index: path.resolve(__dirname, '../dist/index.html'),

    // Paths

    assetsRoot: path.resolve(__dirname, '../dist'),

    assetsSubDirectory: 'static',

    assetsPublicPath: '/',

    /**

     * Source Maps

     */

    productionSourceMap: true,

    // https://webpack.js.org/configuration/devtool/#production

    devtool: '#source-map',

    // Gzip off by default as many popular static hosts such as

    // Surge or Netlify already gzip all static assets for you.

    // Before setting to `true`, make sure to:

    // npm install --save-dev compression-webpack-plugin

    productionGzip: false,

    productionGzipExtensions: ['js', 'css'],

    // Run the build command with an extra argument to

    // View the bundle analyzer report after build finishes:

    // `npm run build --report`

    // Set to `true` or `false` to always turn it on or off

    bundleAnalyzerReport: process.env.npm_config_report

  }

}

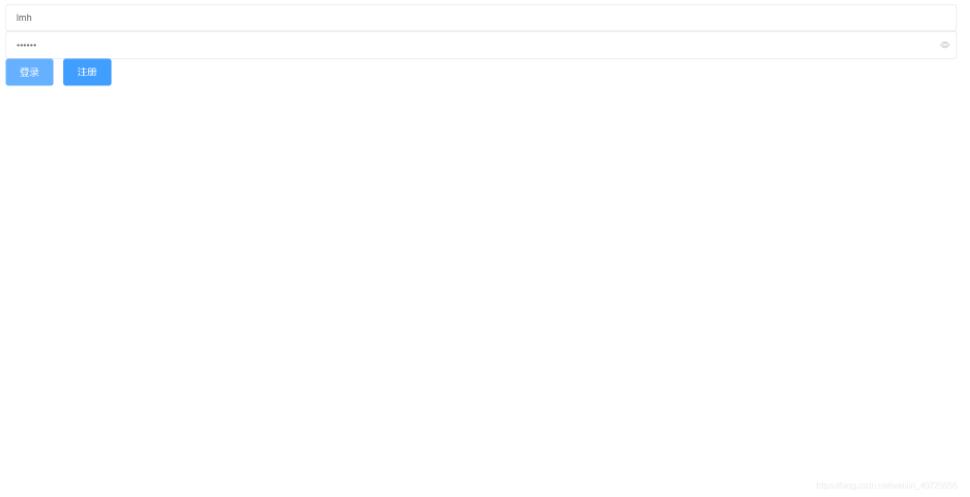
输入账号密码,实现简单的注册,登录功能。

本文来自互联网用户投稿,该文观点仅代表作者本人,不代表本站立场。本站仅提供信息存储空间服务,不拥有所有权,不承担相关法律责任。如若转载,请注明出处:http://www.rhkb.cn/news/95402.html

如若内容造成侵权/违法违规/事实不符,请联系长河编程网进行投诉反馈email:809451989@qq.com,一经查实,立即删除!

相关文章

matlab使用教程(17)—广度优先和深度优先搜索

1.可视化广度优先搜索和深度优先搜索 此示例说明如何定义这样的函数&#xff1a;该函数通过突出显示图的节点和边来显示 bfsearch 和 dfsearch 的可视化结果。 创建并绘制一个有向图。 s [1 2 3 3 3 3 4 5 6 7 8 9 9 9 10]; t [7 6 1 5 6 8 2 4 4 3 7 1 6 8 2]; G dig…

微服务—Eureka注册中心

eureka相当于是一个公司的管理人事HR,各部门之间如果有合作时&#xff0c;由HR进行人员的分配以及调度&#xff0c;具体选哪个人&#xff0c;全凭HR的心情&#xff0c;如果你这个部门存在没有意义&#xff0c;直接把你这个部门撤销&#xff0c;全体人员裁掉&#xff0c;所以不想…

信安通用基础知识

文章目录 密码学经典误区PGP优良保密协议信安经典其它安全手段XSS与CSRF cross site request forgeryCSRF的利用逻辑CSRF示例CSRF防范检查Referer字段添加校验token XSS cross site scripting common weakness enumeration常见密码api误用&#xff08;摘自毕设参考文献&#xf…

蓝蓝设计-ui设计公司-界面设计案例作品

泛亚高科-光伏电站控制系统界面设计 html前端 | 交互设计 | 视觉设计 | 图标设计 泛亚高科(北京)科技有限公司&#xff08;以下简称“泛亚高科”&#xff09;&#xff0c;一个以实时监控、高精度数值计算为基础的科技公司&#xff0c; 自成立以来&#xff0c;组成了以博士、硕…

vue中的路由缓存和解决方案

路由缓存的原因 解决方法 推荐方案二&#xff0c;使用钩子函数beforeRouteUpdate&#xff0c;每次路由更新前执行

3 Python的数据类型

概述 在上一节&#xff0c;我们介绍了Python的基础语法&#xff0c;包括&#xff1a;编码格式、标识符、关键字、注释、多行、空行、缩进、引号、输入输出、import、运算符、条件控制、循环等内容。Python是一种动态类型的编程语言&#xff0c;这意味着当你创建一个变量时&…

【Spring专题】Spring之Bean的生命周期源码解析——阶段二(一)(IOC之实例化)

目录 前言阅读准备阅读指引阅读建议 课程内容一、SpringIOC之实例化1.1 简单回顾1.2 概念回顾1.3 核心方法讲解 二、方法讲解2.1 AbstractBeanFactory#getMergedLocalBeanDefinition&#xff1a;合并BeanDefinition2.2 AbstractAutowireCapableBeanFactory#createBean&#xff…

QT处理日志文件

由于实际生产需要&#xff0c;软件系统的运行&#xff0c;会产生大量的日志文件&#xff0c;有时候一天就能产生超过百万条log记录&#xff0c;那么为了能够处理日志文件&#xff0c;查询并且找到我们想要的报错信息&#xff0c;因此不得不考虑怎么实现&#xff0c;打开大日志文…

CFD特性FPmarkets澳福认为了解这11种足够了

CFD在交易中很重要&#xff0c;但CFD特性很多投资者不了解&#xff0c;FPmarkets澳福认为了解这11种足够了&#xff1a; 1. 投资者通过标的资产价格价值的变化获利&#xff0c;而不拥有标的资产。 2. 差价合约交易没有固定的到期日。 3. 与期货交易类似&#xff0c;差价合约交易…

python自动化办公的一些小工具,函数组件

上一篇文章写了怎么自动化写一个月报&#xff0c;其中有很多很好用的函数组件&#xff0c;都被我封装为了函数&#xff0c;功能很好用。下面一一介绍&#xff1a; 1.添加汇总函数 输入一个pandas的数据框&#xff0c;就会返回一个加了汇总行的数据框。 def add_summary_row(d…

慎投!新增4本期刊被“On Hold”!快自查

又新增了被标记的期刊&#xff01;截至目前&#xff0c;小编从科睿唯安旗下的“Master Journal List”官网查到&#xff0c;本次新增4本ESCI期刊被标记&#xff0c;目前有8本SCIE期刊&#xff0c;1本SSCI期刊&#xff0c;13本ESCI期刊&#xff0c;共22本期刊被标记为“On Hold”…

c++游戏制作指南(四):c++实现数据的存储和读取(输入流fstream)

&#x1f37f;*★,*:.☆(&#xffe3;▽&#xffe3;)/$:*.★* &#x1f37f; &#x1f35f;欢迎来到静渊隐者的csdn博文&#xff0c;本文是c游戏制作指南的一部&#x1f35f; &#x1f355;更多文章请点击下方链接&#x1f355; &#x1f368; c游戏制作指南&#x1f3…

超声波传感器(HC-SR04)按时序图手撕驱动

目录 1、简介 2、传感器介绍 2.1 引脚介绍 2.2 时序图介绍 3、 需求与接线 3.1 任务需求 3.2 接线 4、Cubemax配置 4.1 SYS配置 4.2 RCC配置 4.3 时钟树配置 4.4 GPIO初始化 4.5 定时器配置 4.6 生成代码 5、 keil端代码编写 5.1 微妙函数封装 5.2 超声波驱动封装…

生信豆芽菜-差异基因富集分析

网址&#xff1a;http://www.sxdyc.com/enrichmentEnrich 该工具使用R 语言的clusterProfiler包对关键基因集进行GO和KEGG富集分析&#xff0c;注意这个的关键基因集可以是差异基因&#xff0c;WGCNA的module基因&#xff0c;也可以是表型相关的基因集 1、数据准备 准备一个基因…

SpringBoot系列之基于Jersey实现RESTFul风格文件上传API

前言 JAX-RS&#xff1a;JAX-RS是可以用可以用于实现RESTFul应用程序的JAVA API&#xff0c;给开发者提供了一系列的RESTFul注解Jersey&#xff1a;是基于JAX-RX API的实现框架&#xff0c;用于实现RESTful Web 服务的开源框架。 JAX-RX常用的注解&#xff1a; javax.ws.rs.Pa…

【网络编程·网络层】IP协议

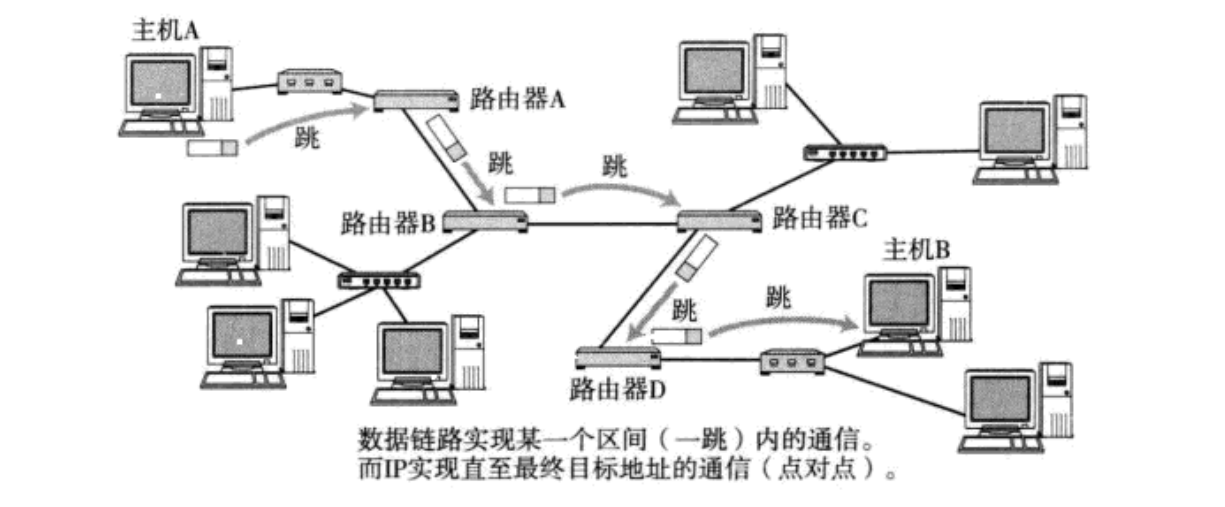
目录 一、IP协议的概念 二、IP协议的报头 1、四位首部长度 2、16位总长度&#xff08;解包&#xff09; 3、8位协议&#xff08;分用&#xff09; 4、16位首部校验和 5、8位生存时间 6、32位源IP和32位目的IP 7、4位版本/8位服务类型 8、16位标识 9、3位标志 10、1…

IDEA 设置为护眼的豆沙绿

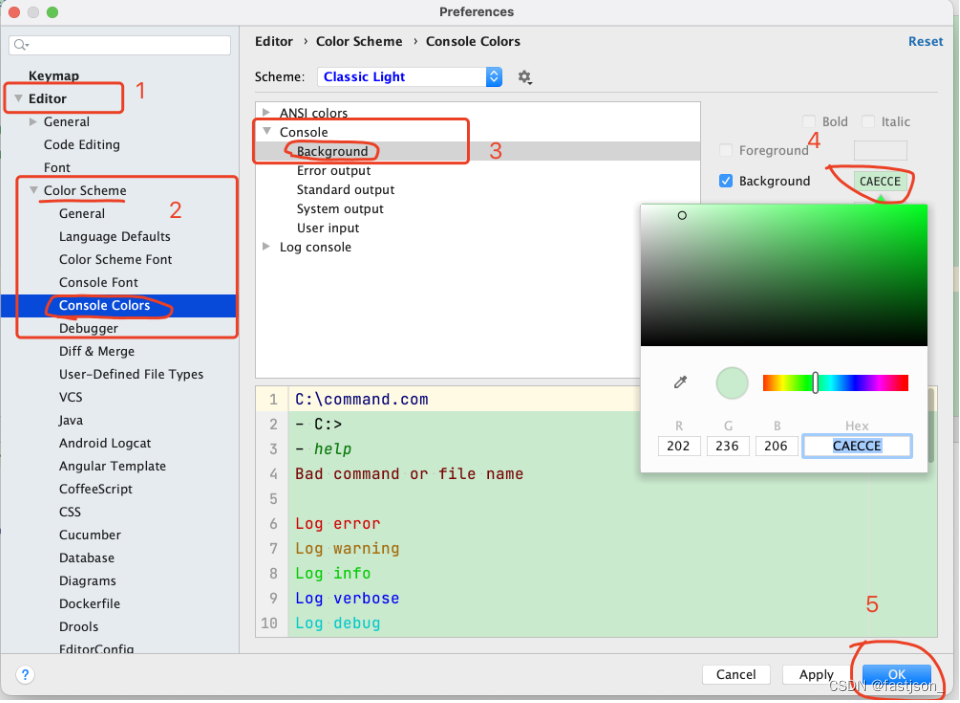
代码区域设置成护眼色 先打开 IDEA 的设置界面&#xff0c;然后按照下图按顺序店了设置就可以了 这个时候&#xff0c;可以看到&#xff0c;只有代码区域别成了护眼色&#xff0c;其他地方还是白的刺眼&#xff0c;我们来一个一个的解决掉 左侧的文件页修改为护眼色 还是先…

基于YOLOv8模型的五类动物目标检测系统(PyTorch+Pyside6+YOLOv8模型)

摘要&#xff1a;基于YOLOv8模型的五类动物目标检测系统可用于日常生活中检测与定位动物目标&#xff08;狼、鹿、猪、兔和浣熊&#xff09;&#xff0c;利用深度学习算法可实现图片、视频、摄像头等方式的目标检测&#xff0c;另外本系统还支持图片、视频等格式的结果可视化与…

【Vue-Router】路由传参

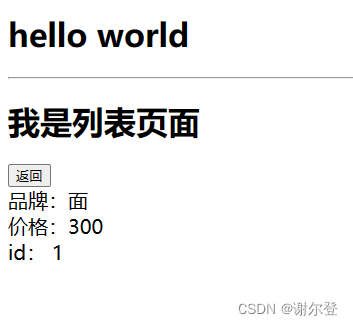
1. query 传参 list.json {"data": [{"name": "面","price":300,"id": 1},{"name": "水","price":400,"id": 2},{"name": "菜","price":500,"…

uniapp+uview封装小程序请求

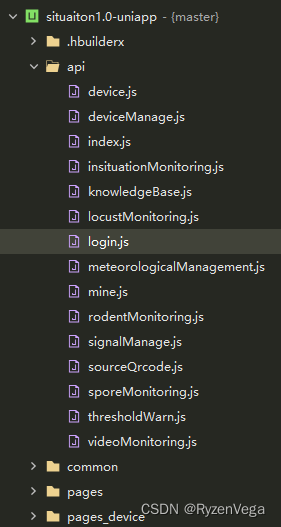
提要&#xff1a; uniapp项目引入uview库 此步骤不再阐述 1.创建环境文件 env.js&#xff1a; let BASE_URL;if (process.env.NODE_ENV development) {// 开发环境BASE_URL 请求地址; } else {// 生产环境BASE_URL 请求地址; }export default BASE_URL; 2.创建请求文件 该…