还要实习,每次时间好少呀,进度会比较慢一点
本文主要实现是用户管理相关功能。
前文项目建立
文章目录
- 验证码功能
- 验证码配置
- 验证码生成工具类
- 添加依赖
- 功能测试
- 编写controller接口
- 启动项目
- security配置
- 拦截器配置
- 验证码拦截器
- jwt拦截器
- 思考
- 用户登录
- jwt管理
- 验证
- 用户注销
- 流程小结
- 验证码
- jwt令牌管理
- 登录
- 注销
验证码功能
验证码采用的是hutool工具的验证码
hutool官方地址
工具模板采用有来开源组织
验证码配置
yml配置
CaptchaConfig:# 验证码缓存过期时间(单位:秒)ttl: 120l# 验证码内容长度length: 4# 验证码宽度width: 120# 验证码高度height: 40# 验证码字体font-name: Verdana# 验证码字体大小fontSize: 20
配置类
/*** EasyCaptcha 配置类* * @author haoxr* @since 2023/03/24*/
@ConfigurationProperties(prefix = "easy-captcha")
@Configuration
@Data
public class CaptchaConfig {// 验证码类型private CaptchaTypeEnum type = CaptchaTypeEnum.ARITHMETIC;// 验证码缓存过期时间(单位:秒)@Value("${captcha.ttl}")private long ttl;// 内容长度@Value("${captcha.length}")private int length;// 宽度@Value("${captcha.width}")private int width;// 验证码高度@Value("${captcha.height}")private int height;// 验证码字体@Value("${captcha.font-name}")private String fontName;// 字体风格private Integer fontStyle = Font.PLAIN;// 字体大小@Value("${captcha.font-size}")private int fontSize;}
验证码生成工具类
@Component
@RequiredArgsConstructor
public class EasyCaptchaProducer {private final CaptchaConfig captchaConfig;public Captcha getCaptcha() {Captcha captcha;int width = captchaConfig.getWidth();int height = captchaConfig.getHeight();int length = captchaConfig.getLength();String fontName = captchaConfig.getFontName();switch (captchaConfig.getType()) {case ARITHMETIC -> {captcha = new ArithmeticCaptcha(width, height);captcha.setLen(2);}case CHINESE -> {captcha = new ChineseCaptcha(width, height);captcha.setLen(length);}case CHINESE_GIF -> {captcha = new ChineseGifCaptcha(width, height);captcha.setLen(length);}case GIF -> {captcha = new GifCaptcha(width, height);//最后一位是位数captcha.setLen(length);}case SPEC -> {captcha = new SpecCaptcha(width, height);captcha.setLen(length);}default -> throw new RuntimeException("验证码配置信息错误!正确配置查看 CaptchaTypeEnum ");}captcha.setFont(new Font(fontName, captchaConfig.getFontStyle(), captchaConfig.getFontSize()));return captcha;}}
添加依赖
<!-- Java8 之后JavaScript引擎nashorn被移除导致验证码解析报错--><dependency><groupId>org.openjdk.nashorn</groupId><artifactId>nashorn-core</artifactId><version>${nashorn.version}</version></dependency>
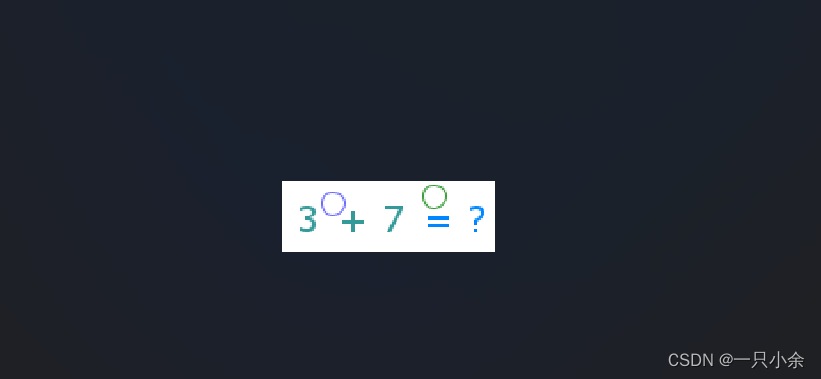
功能测试
Captcha captcha = easyCaptchaProducer.getCaptcha();try (OutputStream ops = new FileOutputStream("d://captcha.jpg")) {captcha.out(ops);} catch (Exception e) {e.printStackTrace();}System.out.println(captcha.text());
测试结果

编写controller接口
@Tag(name = "01-认证中心")
@RestController
@RequestMapping("/auth")
@RequiredArgsConstructor
@Slf4j
public class AuthController {private final EasyCaptchaService easyCaptchaService;@Operation(summary = "获取验证码")@GetMapping("/captcha")public Result<CaptchaResult> getCaptcha() {CaptchaResult captcha = easyCaptchaService.getCaptcha();return Result.success(captcha);}
}
启动项目
记住这里,这是你spring security 的密码

生成http

通过base64转图片的在线工具可以看到

说明编写成功了。
security配置
在上面我们默认的是spring security 自动的密码。我们现在需要自己设置密码。
spring security 框架捏,不太好说这玩意。挺忘记了。
不过spring boot3使用的是spring security6.0版本和以前的有很大差别,6.0通过配置bean来进行。所以也还好,反正都是从头学。
首先需要配置security的配置类
@Configuration
@EnableWebSecurity
@EnableMethodSecurity
@RequiredArgsConstructor
public class SecurityConfig {// 密码编码器@Beanpublic PasswordEncoder passwordEncoder() {return new BCryptPasswordEncoder();}/*** 不走过滤器链的放行配置* 默认放行静态资源、登录接口、验证码接口、Swagger接口文档*/@Beanpublic WebSecurityCustomizer webSecurityCustomizer() {return (web) -> web.ignoring().requestMatchers("/auth/captcha","/webjars/**","/doc.html","/swagger-resources/**","/swagger-ui/**","/ws/**");}
}/*** 认证管理器** @param authenticationConfiguration 认证配置* @return 认证管理器* @throws Exception 异常*/@Beanpublic AuthenticationManager authenticationManager(AuthenticationConfiguration authenticationConfiguration) throws Exception {return authenticationConfiguration.getAuthenticationManager();}@Beanpublic SecurityFilterChain securityFilterChain(HttpSecurity http) throws Exception {http.authorizeHttpRequests(requestMatcherRegistry ->requestMatcherRegistry.requestMatchers(SecurityConstants.LOGIN_PATH).permitAll().anyRequest().authenticated()).sessionManagement(configurer -> configurer.sessionCreationPolicy(SessionCreationPolicy.STATELESS)).exceptionHandling(httpSecurityExceptionHandlingConfigurer ->httpSecurityExceptionHandlingConfigurer.authenticationEntryPoint(authenticationEntryPoint).accessDeniedHandler(accessDeniedHandler)).csrf(AbstractHttpConfigurer::disable);// 验证码校验过滤器http.addFilterBefore(new VerifyCodeFilter(), UsernamePasswordAuthenticationFilter.class);// JWT 校验过滤器http.addFilterBefore(new JwtAuthenticationFilter(jwtTokenManager), UsernamePasswordAuthenticationFilter.class);return http.build();}
这里还用到了2个拦截器
拦截器配置
验证码拦截器
需求:对登录请求进行拦截,如果是登录则需要先校验验证码是否正常,如果正确则放行。其他请求则直接放行。
public class VerifyCodeFilter extends OncePerRequestFilter {private static final AntPathRequestMatcher LOGIN_PATH_REQUEST_MATCHER = new AntPathRequestMatcher(SecurityConstants.LOGIN_PATH, "POST");public static final String VERIFY_CODE_PARAM_KEY = "verifyCode";public static final String VERIFY_CODE_KEY_PARAM_KEY = "verifyCodeKey";@Overrideprotected void doFilterInternal(HttpServletRequest request, HttpServletResponse response, FilterChain filterChain) throws ServletException, IOException {// 如果是登录请求则校验验证码if (LOGIN_PATH_REQUEST_MATCHER.matches(request)){String code = request.getParameter(VERIFY_CODE_PARAM_KEY);String verifyCodeKey = request.getParameter(VERIFY_CODE_KEY_PARAM_KEY);// 由于这个不是bean,不能通过注入的方式获取,所以通过SpringUtil工具类获取RedisTemplate redisTemplate = SpringUtil.getBean("redisTemplate", RedisTemplate.class);String cacheCode =  Convert.toStr(redisTemplate.opsForValue().get(SecurityConstants.VERIFY_CODE_CACHE_PREFIX + verifyCodeKey));if (cacheCode == null) {// 验证码过期ResponseUtils.writeErrMsg(response, ResultCode.VERIFY_CODE_TIMEOUT);return;}if (!StrUtil.equals(cacheCode,code)) {// 验证码错误ResponseUtils.writeErrMsg(response, ResultCode.VERIFY_CODE_ERROR);return;}}filterChain.doFilter(request, response);}
}
jwt拦截器
需求:处理登录请求以外的请求,每次需要验证jwt令牌,如果没问题则在该线程请求附加权限身份。
public class JwtAuthenticationFilter extends OncePerRequestFilter {private static final AntPathRequestMatcher LOGIN_PATH_REQUEST_MATCHER = new AntPathRequestMatcher(SecurityConstants.LOGIN_PATH, "POST");private final JwtTokenManager tokenManager;public JwtAuthenticationFilter(JwtTokenManager jwtTokenManager) {this.tokenManager = jwtTokenManager;}@Overrideprotected void doFilterInternal(HttpServletRequest request, HttpServletResponse response, FilterChain chain) throws ServletException, IOException {if (!LOGIN_PATH_REQUEST_MATCHER.matches(request)) {String jwt = RequestUtils.resolveToken(request);if (StringUtils.hasText(jwt) && SecurityContextHolder.getContext().getAuthentication() == null) {try {Claims claims = this.tokenManager.parseAndValidateToken(jwt);Authentication authentication = this.tokenManager.getAuthentication(claims);SecurityContextHolder.getContext().setAuthentication(authentication);} catch (Exception e) {ResponseUtils.writeErrMsg(response, ResultCode.TOKEN_INVALID);}} else {ResponseUtils.writeErrMsg(response, ResultCode.TOKEN_INVALID);}}chain.doFilter(request, response);}
}
思考
这2个拦截器一个需要登录一个除去登录,那么是不是可以放到一个拦截器里面去。各走各的。这样也明确一点。也不用2个拦截器找了。
如果改了记得改securityFilterChain
用户登录
需求:输入用户名和密码,验证用户身份。
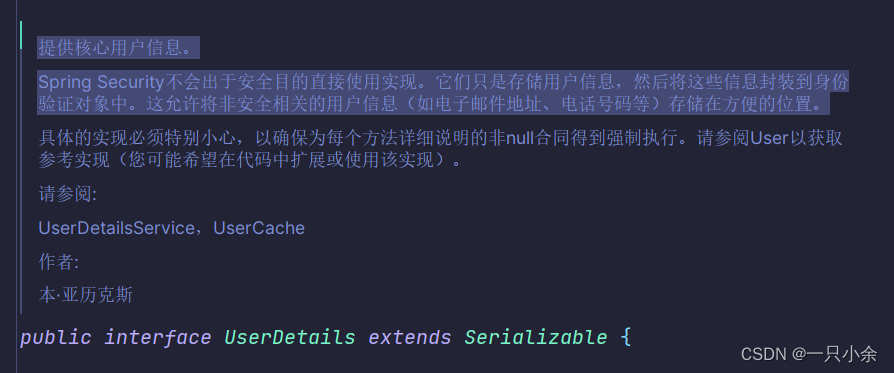
需要写一个类继承UserDetails
另一个实现类继承SysUserService(SysUserDetailsService)
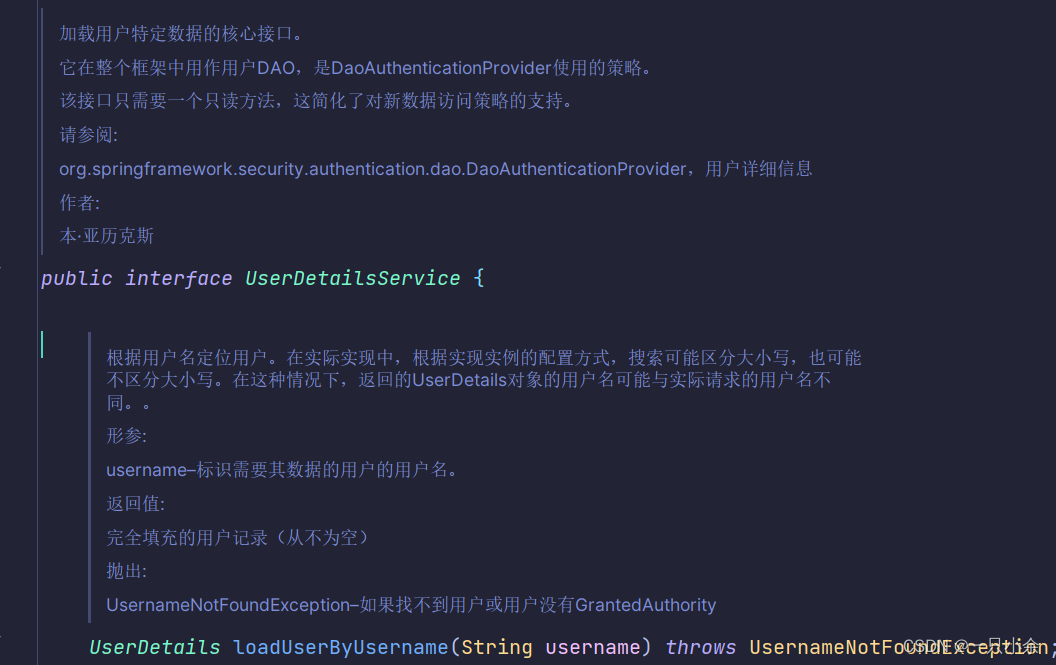
这2个一个是存储一个是查询。然后会自动和输入的username以及password进行比对
验证流程后面总结一个spring security的文。
SysUserDetailsService作用是查询该用户名的角色信息并返回UserDetails。
查询,调用SysUserService根据用户名查询所有的

由于认证信息需要角色信息和权限所以我们需要联表查询角色信息。
在依据角色信息查询权限。
select u.id userId,u.name username,u.password,u.role,u.avatar,u.email,u.status,r.codefrom sys_user uleft join sys_user_role sur on u.id = sur.user_idleft join sys_role r on sur.role_id = r.idwhere u.name = #{username}AND u.deleted = 0
然后在依据角色查询权限
不过我感觉这个type硬编码挺严重的,也算学习一下这种mybatis里面枚举了。
如果没用角色则m.id = -1让其没权限。
<select id="listRolePerms" resultType="java.lang.String">select distinct m.permfrom sys_menu minner join sys_role_menu rm on m.id = rm.menu_idinner join sys_role r on r.id = rm.role_idwhere m.type = '${@com.yu.common.enums.MenuTypeEnum@BUTTON.getValue()}'and m.perm is not null<choose><when test="roles!=null and roles.size()>0">and r.code in<foreach collection="roles" item="role" open="(" close=")" separator=",">#{role}</foreach></when><otherwise>and m.id = -1</otherwise></choose></select>
controller验证,很明确的流程就是封装输入的,然后进行验证。失败了会报错返回。
成功则生成token将权限放入redis,将角色,用户名,id封装进jwt
然后进行返回。接下来查看jwtTokenManager.createToken
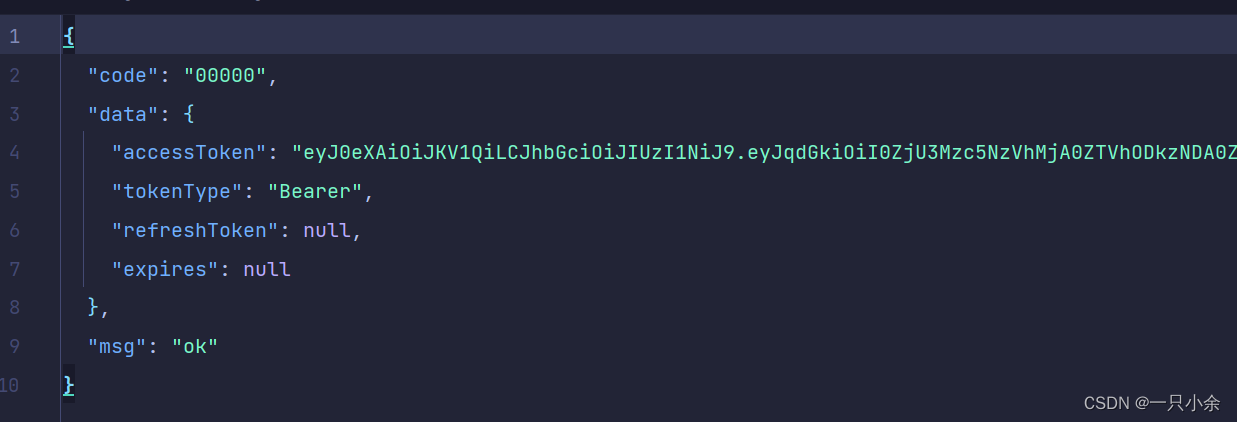
@Operation(summary = "登录")@PostMapping("/login")public Result<LoginResult> login(@Parameter(description = "用户名", example = "admin") @RequestParam String username,@Parameter(description = "密码", example = "123456") @RequestParam String password) {// 存储username和passwordUsernamePasswordAuthenticationToken authenticationToken = new UsernamePasswordAuthenticationToken(username.toLowerCase().trim(),password);// 验证用户名和密码Authentication authentication = authenticationManager.authenticate(authenticationToken);// 生成tokenString accessToken = jwtTokenManager.createToken(authentication);// 返回tokenLoginResult loginResult = LoginResult.builder().tokenType("Bearer").accessToken(accessToken).build();return Result.success(loginResult);}@Schema(description ="登录响应对象")@Builderpublic static record LoginResult(@Schema(description = "访问token")String accessToken,@Schema(description = "token 类型",example = "Bearer")String tokenType,@Schema(description = "刷新token")String refreshToken,@Schema(description = "过期时间(单位:毫秒)")Long expires) {}
jwt管理
采用hutool工具包进行jwt管理,以前用过java-jwt的,这次试试hutool。
/*** 创建token** @param authentication auth info* @return token*/public String createToken(Authentication authentication) {SysUserDetails userDetails = (SysUserDetails) authentication.getPrincipal();// 角色放入JWT的claimsSet<String> roles = userDetails.getAuthorities().stream().map(GrantedAuthority::getAuthority).collect(Collectors.toSet());// 权限数据多放入RedisSet<String> perms = userDetails.getPerms();redisTemplate.opsForValue().set(SecurityConstants.USER_PERMS_CACHE_PREFIX + userDetails.getUserId(), perms);Map<String, Object> claims = Map.of(JWTPayload.ISSUED_AT, DateTime.now(),JWTPayload.EXPIRES_AT, DateTime.now().offset(DateField.SECOND, tokenTtl),"jti", IdUtil.fastSimpleUUID(),"userId", userDetails.getUserId(),"username", userDetails.getUsername(),"authorities", roles);return JWTUtil.createToken(claims, getSecretKeyBytes());}
验证
http测试:
之前测试挺头疼的。
需要先发送验证码的。
然后去base64转图片(后面直接打印了结果了)
进行测试
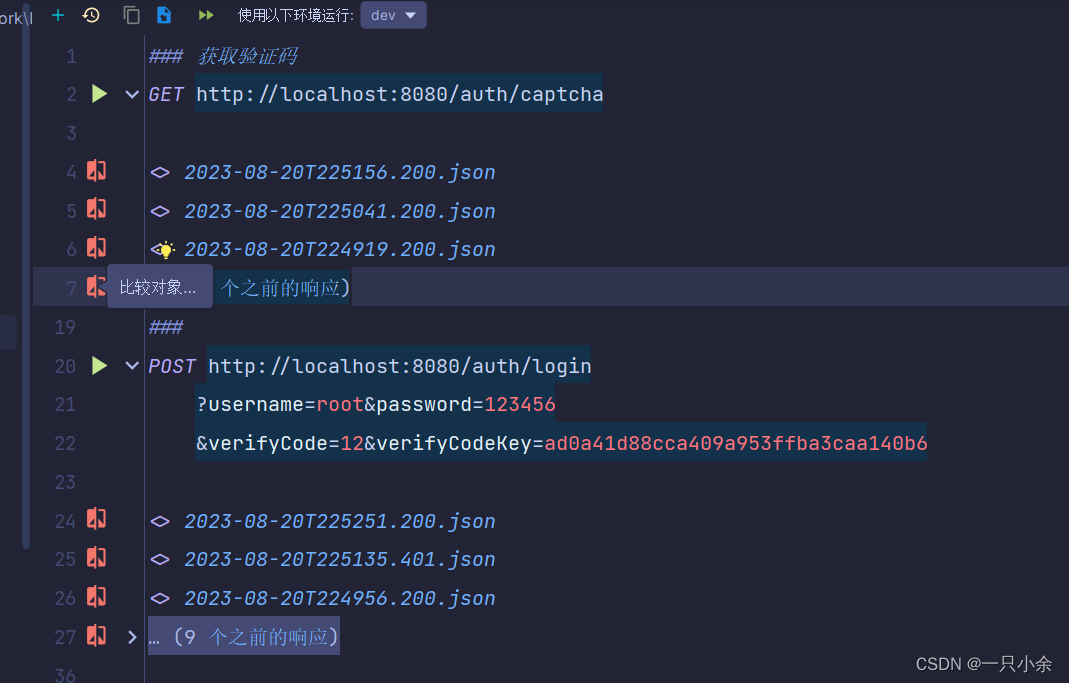
成功
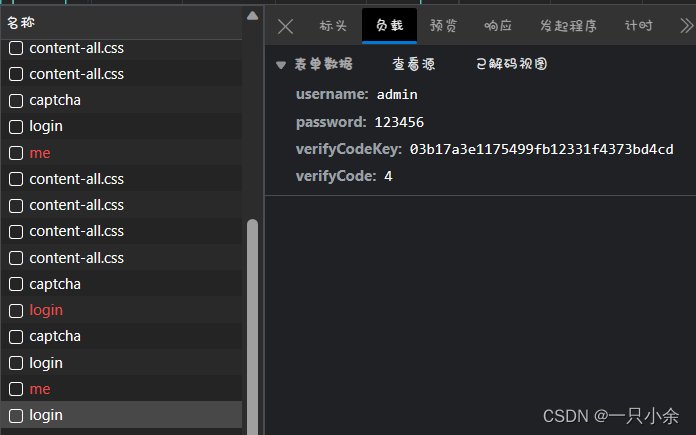
后面去vue3前端测了。用的是有来开源vue3-element-admin修改。
成功了!
用户注销
从jwt中获取我们设置的jti唯一表示
然后需要将redis中的删除就可以了
@Operation(summary = "注销", security = {@SecurityRequirement(name = SecurityConstants.TOKEN_KEY)})@DeleteMapping("/logout")public Result<String> logout(HttpServletRequest request) {String token = RequestUtils.resolveToken(request);if (StrUtil.isNotBlank(token)) {Claims claims = jwtTokenManager.getTokenClaims(token);String jti = StrUtil.toString(claims.getClaim("jti"));Date expiration = jwtTokenManager.getExpiration(claims);if (expiration != null) {// 有过期时间,在token有效时间内存入黑名单,超出时间移除黑名单节省内存占用long ttl = (expiration.getTime() - System.currentTimeMillis());redisTemplate.opsForValue().set(SecurityConstants.BLACK_TOKEN_CACHE_PREFIX + jti, null, ttl, TimeUnit.MILLISECONDS);} else {// 无过期时间,永久加入黑名单redisTemplate.opsForValue().set(SecurityConstants.BLACK_TOKEN_CACHE_PREFIX + jti, null);}}SecurityContextHolder.clearContext();return Result.success("注销成功");}
流程小结
验证码
获取随机验证码
- 验证码接口放行,无视security
- 存放redis用,key = SecurityConstants.VERIFY_CODE_CACHE_PREFIX +verifyCodeKey(生成)
验证验证码
- 拦截登录请求
- 查询redis
- 如果null,则过期
- 如果错误,则返回
- 正确放行
jwt令牌管理
- 拦截所有除了登录的请求
- 从jwt中解析获取Authentication
- 放入线程中
登录
-
框架校验
- 获取认证信息,依据user和role表获取角色基本信息和角色
- 依据角色获取权限
- Authentication存放id,用户名,密码,是否启用,权限,角色,数据权限
-
依据Authentication生成jwt
- 存放jti随机id,userid,用户名,角色信息,权限数据
- 过期时间5小时
注销
- 拉黑jwt的jti

![[管理与领导-52]:IT基层管理者 - 8项核心技能 - 7 - 决策](https://img-blog.csdnimg.cn/img_convert/f1b7ae8168218cb0e9b11d6fa23f2fd5.jpeg)


