op和layer结构
在runtime_ir.cpp中,我们上一节只构建了input和output,对于中间layer的具体实现一直没有完成:
for (const auto& kOperator : this->operators_) {if (kOperator->type == "pnnx.Input") {this->input_operators_maps_.insert({kOperator->name, kOperator});} else if (kOperator->type == "pnnx.Output") {this->output_operators_maps_.insert({kOperator->name, kOperator});} else {std::shared_ptr<Layer> layer = RuntimeGraph::CreateLayer(kOperator);CHECK(layer != nullptr) << "Layer create failed!";if (layer) {kOperator->layer = layer;}}这个CreateLayer就是创建层的过程:
std::shared_ptr<Layer> RuntimeGraph::CreateLayer(const std::shared_ptr<RuntimeOperator>& op) {LOG_IF(FATAL, !op) << "Operator is empty!";const auto& layer = LayerRegisterer::CreateLayer(op);LOG_IF(FATAL, !layer) << "Layer init failed " << op->type;return layer;
}
会根据我们输入的op里的type属性判断,之后返回给对应的
std::shared_ptr<Layer> LayerRegisterer::CreateLayer(const std::shared_ptr<RuntimeOperator> &op) {CreateRegistry ®istry = Registry();const std::string &layer_type = op->type;LOG_IF(FATAL, registry.count(layer_type) <= 0)<< "Can not find the layer type: " << layer_type;const auto &creator = registry.find(layer_type)->second;LOG_IF(FATAL, !creator) << "Layer creator is empty!";std::shared_ptr<Layer> layer;const auto &status = creator(op, layer);LOG_IF(FATAL, status != ParseParameterAttrStatus::kParameterAttrParseSuccess)<< "Create the layer: " << layer_type<< " failed, error code: " << int(status);return layer;
}这里的creator就是我们GetInstance的过程
由于代码进行了较多的修改, 下方的代码位于layer/details/convolution.cpp中:
ParseParameterAttrStatus ConvolutionLayer::GetInstance(const std::shared_ptr<RuntimeOperator>& op,std::shared_ptr<Layer>& conv_layer)
以convolution层的初始化为例, 来看算子初始化时的流程.GetInstance函数的用处和之前一样, 是被注册到全局注册表中的, 在框架初始化的时候填入到注册表, 在某个模型需要对该层进行初始化的时候从全局注册表中取出.
唯一变化的是接口的参数, 这里的conv_layer是一个待初始化的卷积层, 这里的op中包含了初始化需要的参数和权重信息. 我们要在GetInstance中根据op来完成对conv_layer的初始化.
CHECK(op != nullptr) << "Convolution operator is nullptr";const std::map<std::string, RuntimeParameter*>& params = op->params;if (params.find("dilation") == params.end()) {LOG(ERROR) << "Can not find the dilation parameter";return ParseParameterAttrStatus::kParameterMissingDilation;}const auto& dilation_param =dynamic_cast<RuntimeParameterIntArray*>(params.at("dilation"));const auto& in_channel =dynamic_cast<RuntimeParameterInt*>(params.at("in_channels"));if (!in_channel) {LOG(ERROR) << "Can not find the in channel parameter";return ParseParameterAttrStatus::kParameterMissingInChannel;}
首先我们通过 const std::map<:string runtimeparameter>& params = op->params;
获得op中的参数信息被保存在一个map中, map的key是string类型, value是我们之前说过的RuntimeParameter类型. 如果我们要得到Conv parameter中名字为xx的参数, 可以直接使用params.find("xx"), 但是在这个参数map有可能并不存在这个参数值, 例如我们想从params中得到卷积层关于输入通道大小的参数, 我们可以使用params.at("in_channels)"进行访问, at返回的值是一个指向RuntimeParameter的一个指针.
举个例子:
if (params.find("in_channels") == params.end()) {LOG(ERROR) << "Can not find the in channel parameter";return ParseParameterAttrStatus::kParameterMissingInChannel;}const auto& in_channel =dynamic_cast<RuntimeParameterInt*>(params.at("in_channels"));if (!in_channel) {LOG(ERROR) << "Can not find the in channel parameter";return ParseParameterAttrStatus::kParameterMissingInChannel;}这里就是首先搜寻In_channel这个param,如果诶呦的话那就报错,如果有的话那就添加进来,其余的也是,就是将pnnx.的param添加到我们的这个op的param中
我们在此处为什么要使用dynamic_cast呢? 原因就在于我们使用这种动态转换来将一个指向父类的指针转换到一个指向子类的指针, 如果这个指针确实属于这个子类那么他就会转换成功,否则就会返回nullptr. 也就是这里, 我们认为in_channels这个参数是属于RuntimeParameterInt子类的指针.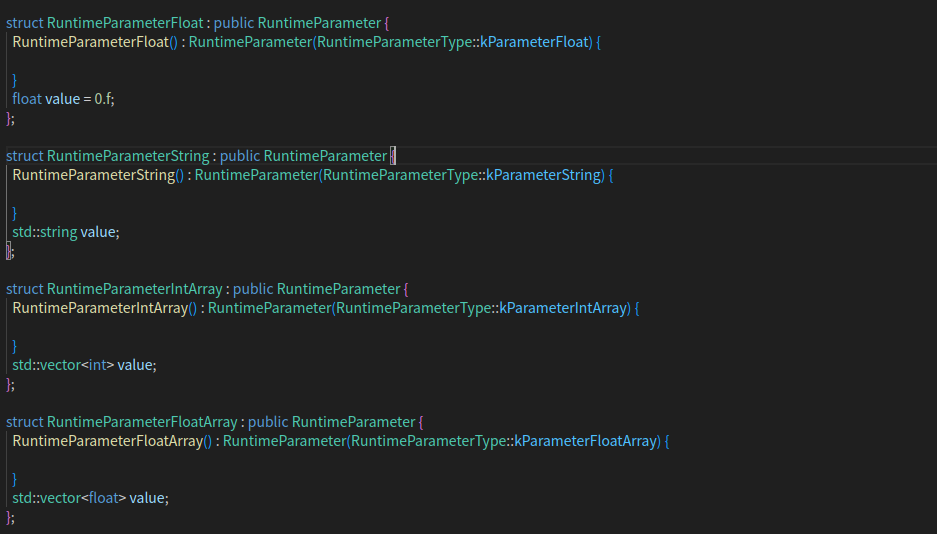
后续包括访问padding等参数的方法是同理的, 我们可以在代码中看到, 我们使用params.find("bias")的方法得到一个指向RuntimeParameter的指针, 再用动态转换的方法得到一个指向RuntimeParameterBool的子类指针. 如果此处通过params.find("bias")不是一个指向...Bool的指针, 在这里的动态转换就会返回一个空指针.
if (params.find("bias") == params.end()) {LOG(ERROR) << "Can not find the bias parameter";return ParseParameterAttrStatus::kParameterMissingUseBias;}const auto& use_bias = dynamic_cast<RuntimeParameterBool*>(params.at("bias"));if (!use_bias) {LOG(ERROR) << "Can not find the bias parameter";return ParseParameterAttrStatus::kParameterMissingUseBias;}
我们刚刚GetInstannce传进来的这个 conv_layer其实是一个空的指针。所以我们需要对其进行初始化:
Conv layer 初始化:
通过上面的流程, 我们已经获得了RuntimeOp中保存的层参数, 下面我们就要去得到这些参数中的值, 并且去初始化这个层.
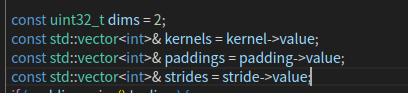
const uint32_t dims = 2;const std::vector<int>& kernels = kernel->value;const std::vector<int>& paddings = padding->value;const std::vector<int>& strides = stride->value;conv_layer = std::make_shared<ConvolutionLayer>(out_channel->value, in_channel->value, kernels.at(0), kernels.at(1),paddings.at(0), paddings.at(1), strides.at(0), strides.at(1),groups->value, use_bias->value);
- 此处的
kernel,padding,stride等参数都通过动态转换指向RuntimeParameterIntArray类型, 所以如果调用其中的value值, 会得到一个vector<int>类型的参数. - 此处的
group参数通过动态转换指向RuntimeParameterInt类型, 所以调用其中的value值, 会得到一个int类型的参数. - 此处的
use_bias参数通过动态转换指向RuntimeParameterBool类型, 所以调用其中的value值, 会得到一个bool类型的参数.
在流程结束后, conv layer中已经包含了卷积计算所需要的所有相关参数, 初始化这个层的方式是conv_layer = std::make_shared\<ConvolutionLayer>. 在初始化完成之后, 关于该层的所有参数就均会被保存到conv_layer的类内变量中.
ConvolutionLayer::ConvolutionLayer(uint32_t output_channel, uint32_t in_channel,uint32_t kernel_h, uint32_t kernel_w,uint32_t padding_h, uint32_t padding_w,uint32_t stride_h, uint32_t stride_w,uint32_t groups, bool use_bias): ParamLayer("Convolution"),use_bias_(use_bias),groups_(groups),padding_h_(padding_h),padding_w_(padding_w),stride_h_(stride_h),stride_w_(stride_w)
读取并初始化算子中的权重
在读取算子的参数之后, 我们就要开始读取算子中的权重了
在不单独将operator作为一个类之后, 我们将用layer指代算子(operator)和具体计算的层(layer). layer中已经保存了来自对于runtime_operator的参数信息.
如果将深度学习中的所有层分为两类, 那么肯定是"带权重"的层和"不带权重"的层, 我们对于基类layer有如下的定义, 该头文件位于include/layer.hpp中. Forwards方法我们在之前讲到过, 是所有层都必须实现的一个方法, 它定义了一个层的以下几个步骤:
- 怎么取得当前层的参数
- 怎么取得当前层的权重(如果有的话)
- 在得到参数和权重之后, 怎么通过定义好的计算过程来获得相应的结构
对于有参数的层, 我们规定他们必须从layer的一个子类param_layer中进行继承. param_layer中规定了怎么根据runtime_operator 的权重信息来初始化某个层中的权重和偏移量tensor. 我们来看一下param_layer中对参数初始化接口的实现.
void ParamLayer::InitWeightParam(const uint32_t param_count,const uint32_t param_channel,const uint32_t param_height,const uint32_t param_width) {this->weights_ = std::vector<sftensor>(param_count);for (uint32_t i = 0; i < param_count; ++i) {this->weights_.at(i) =std::make_shared<ftensor>(param_channel, param_height, param_width);}
}
我们根据参数的数量, 通道数, 高度和宽度来初始化权重保存的空间 this->weights. 这里的参数数量可以指的是卷积层中的卷积核的数量, 其他信息以此类推. ParamLayer::InitBiasParam同理. 现在是初始化好了空间, 但是具体的参数没有赋值进去, 接下来就是要将具体的参数赋值到参数空间当中.
const auto& weight = attrs.at("weight");const std::vector<int>& weight_shape = weight->shape;if (weight_shape.empty()) {LOG(ERROR) << "The attribute of weight shape is wrong";return ParseParameterAttrStatus::kAttrMissingWeight;}const std::vector<float>& weight_values = weight->get<float>();conv_layer->set_weights(weight_values);return ParseParameterAttrStatus::kParameterAttrParseSuccess;
}
get_weight:
template<class T>
std::vector<T> RuntimeAttribute::get() {/// 检查节点属性中的权重类型CHECK(!weight_data.empty());CHECK(type != RuntimeDataType::kTypeUnknown);std::vector<T> weights;switch (type) {case RuntimeDataType::kTypeFloat32: { /// 加载的数据类型是floatconst bool is_float = std::is_same<T, float>::value;CHECK_EQ(is_float, true);const uint32_t float_size = sizeof(float);CHECK_EQ(weight_data.size() % float_size, 0);for (uint32_t i = 0; i < weight_data.size() / float_size; ++i) {float weight = *((float *) weight_data.data() + i);weights.push_back(weight);}break;}default: {LOG(FATAL) << "Unknown weight data type";}}return weights;
}
先读出来:
const auto& weight = attrs.at("weight");再循环放入到weight中
for (uint32_t i = 0; i < weight_data.size() / float_size; ++i) {float weight = *((float *) weight_data.data() + i);weights.push_back(weight);set_weight
void ParamLayer::set_weights(const std::vector<float> &weights) {const uint32_t elem_size = weights.size();uint32_t weight_size = 0;const uint32_t batch_size = this->weights_.size();for (uint32_t i = 0; i < batch_size; ++i) {weight_size += this->weights_.at(i)->size();}CHECK_EQ(weight_size, elem_size);CHECK_EQ(elem_size % batch_size, 0);const uint32_t blob_size = elem_size / batch_size; //每个卷积核的参数数量for (uint32_t idx = 0; idx < batch_size; ++idx) {const uint32_t start_offset = idx * blob_size; //起始位置const uint32_t end_offset = start_offset + blob_size; //结束位置const auto &sub_values = std::vector<float>{weights.begin() + start_offset,weights.begin() + end_offset}; //提取参数this->weights_.at(idx)->Fill(sub_values); //赋值过程}
}
首先检查传入的float数组中的数据是否和原有的空间(由InitWeightParam创建的)是等大小的,空间要和权重数据的数量(float值数量)相等.
const uint32_t elem_size = weights.size();uint32_t weight_size = 0;const uint32_t batch_size = this->weights_.size();for (uint32_t i = 0; i < batch_size; ++i) {weight_size += this->weights_.at(i)->size();}CHECK_EQ(weight_size, elem_size);const uint32_t blob_size = elem_size / batch_size;
随后得到参数的个数batch_size(如果在卷积层中就是卷积核的个数), blob_size就是其中一个卷积核的参数数量
for (uint32_t idx = 0; idx < batch_size; ++idx) {const uint32_t start_offset = idx * blob_size;const uint32_t end_offset = start_offset + blob_size;const auto &sub_values = std::vector<float>{weights.begin() + start_offset,weights.begin() + end_offset};this->weights_.at(idx)->Fill(sub_values);}
我们得到当前的卷积核参数的开始和结束位置start_offset和end_offset. 随后将传入参数values中的数据去初始化当前的卷积核(如果是卷积层的情况)sub_values.最后通过this->weights_.at(idx)将当前的一块参数(卷积核)放到对应的空间中.
注册Resnet网络需要的所有算子
Resnet模型是一种很经典的分类模型, 这个了解过深度学习相关知识的同学就不用我多少了. 但是它也属于一个复杂模型, 需要多个算子来构成整个模型, 不仅需要我们在以往课程中讲过的convolution, maxpooling, relu等 , 也需要我们没有讲过的adaptive pooling, linear算子等. 下面是Resnet网络需要的所有算子的列举:
- adaptive average pooling
- convolution
- expression
- flatten
- linear
- max pooling
- relu
我们不讲解全部算子流程, 只挑选其中的Linear算子, 其余算子的实现在流程下大同小异, 而且最复杂的几个算子我们已经在之前的课程中讲解过了.
Flatten:
初始化接口如下:
ParseParameterAttrStatus FlattenLayer::GetInstance(const std::shared_ptr<RuntimeOperator> &op,std::shared_ptr<Layer> &flatten_layer) {获取参数param的start_dim和end_dim:
CHECK(op != nullptr) << "Flatten operator is nullptr";const auto ¶ms = op->params;if (params.find("end_dim") == params.end()) {LOG(ERROR) << "Can not find the dimension parameter";return ParseParameterAttrStatus::kParameterMissingDim;}if (params.find("start_dim") == params.end()) {LOG(ERROR) << "Can not find the dimension parameter";return ParseParameterAttrStatus::kParameterMissingDim;}获取到了之后创建一个layer
const auto &start_dim =dynamic_cast<RuntimeParameterInt *>(params.at("start_dim"));const auto &end_dim =dynamic_cast<RuntimeParameterInt *>(params.at("end_dim"));if (start_dim == nullptr || end_dim == nullptr) {return ParseParameterAttrStatus::kParameterMissingDim;}flatten_layer =std::make_shared<FlattenLayer>(start_dim->value, end_dim->value);运行,forward:
InferStatus FlattenLayer::Forward(const std::vector<std::shared_ptr<Tensor<float>>> &inputs,std::vector<std::shared_ptr<Tensor<float>>> &outputs) {传入input参数和output参数
检查input参数是否为空,并且input和output的size是否相等:
if (inputs.empty()) {LOG(ERROR) << "The input feature map of flatten layer is empty";return InferStatus::kInferFailedInputEmpty;}if (inputs.size() != outputs.size()) {LOG(ERROR) << "The input and output size is not adapting";return InferStatus::kInferFailedInputOutSizeAdaptingError;}
int start_dim = start_dim_;int end_dim = end_dim_;int total_dims = 4; // NCHWif (start_dim < 0) {start_dim = total_dims + start_dim;}if (end_dim < 0) {end_dim = total_dims + end_dim;}end_dim -= 1;start_dim -= 1;CHECK(end_dim > start_dim) << "End dim must greater than start dim";CHECK(end_dim <= 2 && start_dim >= 0)<< "end dim must less than two and start dim must greater than zero";
int start_dim = start_dim_;和int end_dim = end_dim_;:将构造函数中传入的start_dim_和end_dim_分别赋值给本地变量start_dim和end_dim,以便后续操作。
int total_dims = 4;:total_dims被设定为 4,这可能是用于表示输入数据的维度数量(例如 NCHW 表示 4 个维度)。
if (start_dim < 0) { ... }和if (end_dim < 0) { ... }:如果传入的start_dim_或end_dim_小于 0,那么就将它们调整为从最后一个维度往前数的绝对位置。例如,如果start_dim_为 -1,则start_dim会被设置为 4 - 1 = 3,即倒数第一个维度。
end_dim -= 1;和start_dim -= 1;:将end_dim和start_dim各自减 1,这可能是为了将它们从 0-based 索引改为 1-based 索引。
CHECK(end_dim > start_dim):检查结束维度必须大于起始维度。
CHECK(end_dim <= 2 && start_dim >= 0):检查结束维度必须小于等于 2,且起始维度必须大于等于 0。这可能与特定的设计要求有关,要求 Flatten 操作只能应用于某些特定的维度范围内。起始维度一般为channel维度,
const auto &shapes = input->shapes();uint32_t elements_size = 1;for (int s = start_dim; s <= end_dim; ++s) {elements_size *= shapes.at(s);}std::shared_ptr<Tensor<float>> output = outputs.at(i);if (output == nullptr || output->empty()) {output = input->Clone();outputs.at(i) = output;} else {CHECK(outputs.at(i)->shapes() == output->shapes());memcpy(output->data().memptr(), input->data().memptr(), sizeof(float) * input->size());}if (start_dim == 0 && end_dim == 2) {output->ReRawView({elements_size});} else if (start_dim == 1 && end_dim == 2) {uint32_t channels = input->channels();output->ReRawView({channels, elements_size});} else if (start_dim == 0 && end_dim == 1) {uint32_t cols = input->cols();output->ReRawView({elements_size, cols});} else {LOG(FATAL) << "Wrong flatten dim: "<< "start dim: " << start_dim << " end dim: " << end_dim;}
if (output == nullptr || output->empty()) { ... }:这个条件判断语句检查输出张量是否为空或者为空的情况。如果输出张量为空,或者其数据为空(empty()返回true),则执行大括号中的代码块。a.
output = input->Clone();:如果输出张量为空,通过调用输入张量的Clone()方法创建一个与输入张量具有相同形状的输出张量。b.
outputs.at(i) = output;:将新创建的输出张量存储在输出张量容器outputs的适当位置。
else { ... }:如果输出张量已经存在(不为空),则执行大括号中的代码块。a.
CHECK(outputs.at(i)->shapes() == output->shapes());:检查已存在的输出张量(outputs.at(i)) 的形状是否与新创建的输出张量(output) 形状相同。这是为了确保输出张量的形状一致性。b.
memcpy(output->data().memptr(), input->data().memptr(), sizeof(float) * input->size());:将输入张量的数据复制到输出张量中。memcpy函数用于内存数据的复制。这里使用sizeof(float) * input->size()来确定要复制的字节数,以确保数据正确复制。之后对于不同的起始维度进行Review。
SoftMax:

Forward:
InferStatus SoftmaxLayer::Forward(const std::vector<std::shared_ptr<Tensor<float>>> &inputs,std::vector<std::shared_ptr<Tensor<float>>> &outputs) {if (inputs.empty()) {LOG(ERROR) << "The input feature map of softmax layer is empty";return InferStatus::kInferFailedInputEmpty;}if (inputs.size() != outputs.size()) {LOG(ERROR) << "The input and output size is not adapting";return InferStatus::kInferFailedInputOutSizeAdaptingError;}const uint32_t batch_size = inputs.size();
#pragma omp parallel for num_threads(batch_size)for (uint32_t i = 0; i < batch_size; ++i) {const std::shared_ptr<Tensor<float>> &input = inputs.at(i);CHECK(input != nullptr && !input->empty()) << "The input feature map for softmax layer is empty";std::shared_ptr<Tensor<float>> output = outputs.at(i);if (output == nullptr || output->empty()) {output = std::make_shared<Tensor<float>>(input->shapes());outputs.at(i) = output;}CHECK(input->shapes() == output->shapes()) << "The output size of softmax is error";const arma::fcube &input_data = input->data();arma::fcube &output_data = output->data();const float max = input_data.max();const float sum = arma::accu(arma::exp(input_data - max));const float offset = max + logf(sum);output_data = arma::exp(input_data - offset);}return InferStatus::kInferSuccess;
}
for (uint32_t i = 0; i < batch_size; ++i) {:这个循环遍历了一个批次中的每个输入样本(特征图)。
const std::shared_ptr<Tensor<float>> &input = inputs.at(i);:获取当前循环中的输入张量,inputs可能是一个存储输入张量的容器。
CHECK(input != nullptr && !input->empty()):检查当前输入张量是否存在且非空。
std::shared_ptr<Tensor<float>> output = outputs.at(i);:获取当前循环中的输出张量,outputs可能是一个存储输出张量的容器。
if (output == nullptr || output->empty()) { ... }:如果当前输出张量为空,或者尚未创建,就创建一个新的输出张量,保持输入输出张量形状一致。
CHECK(input->shapes() == output->shapes()):检查输入张量和输出张量的形状是否相同。
const arma::fcube &input_data = input->data();:获取输入张量的数据,可能是一个三维矩阵(类似于张量)。
arma::fcube &output_data = output->data();:获取输出张量的数据。
const float max = input_data.max();:计算输入数据的最大值。
const float sum = arma::accu(arma::exp(input_data - max));:计算指数化后的输入数据减去最大值的和。
const float offset = max + logf(sum);:计算偏移量,用于数值稳定性。这里对输入数据进行了偏移,以防止指数溢出或下溢。
output_data = arma::exp(input_data - offset);:将输入数据减去偏移量后进行指数化,得到 Softmax 操作的结果。
Linear:
初始化过程:
ParseParameterAttrStatus LinearLayer::GetInstance(const std::shared_ptr<RuntimeOperator>& op,std::shared_ptr<Layer>& linear_layer) {也是一样的先获取op和linear_layer
const auto& params = op->params;获取当前层的参数
const auto& weight = attr.at("weight");const auto& bias = attr.at("bias");const auto& shapes = weight->shape;CHECK(shapes.size() == 2)<< "The graph only support two dimension matrix multiply";int32_t out_features = shapes.at(0);int32_t in_features = shapes.at(1);const bool use_bias = use_bias_param->value;linear_layer =std::make_shared<LinearLayer>(in_features, out_features, use_bias);if (use_bias) {linear_layer->set_bias(bias->get<float>());}// load weightslinear_layer->set_weights(weight->get<float>());这里也是获取attr,然后make_shared一个linear_layer,输入输出维度分别是shapes[1]和shapes[0]。之后将weight参数添加到这个Layer中。
Forward:
参数的各种检查...... ...// 直到这里开始正经内容uint32_t batch = inputs.size();const std::shared_ptr<Tensor<float>>& weight = weights_.front();arma::fmat weight_data(weight->data().memptr(), out_features_, in_features_);
我们先获取刚才通过set_weights进行初始化的权重信息 weight_, 并将它存到一个arma::fmat矩阵类中, 用于后续的矩阵计算.

#pragma omp parallel for num_threads(batch)for (uint32_t i = 0; i < batch; ++i) {// input matmul weightconst std::shared_ptr<Tensor<float>>& input = inputs.at(i);CHECK(input != nullptr && !input->empty())<< "The input feature map of linear layer is empty";const std::vector<uint32_t>& input_shapes = input->shapes();CHECK(input_shapes.size() == 3 && input_shapes.front() == 1);const uint32_t feature_dims = input_shapes.at(1);CHECK(weight_data.n_rows == out_features_);CHECK(weight_data.n_cols == feature_dims && feature_dims == in_features_);//检查矩阵相乘所对应是否相等const uint32_t input_dim = input_shapes.at(2);
arma::fmat col_vec(input->data().memptr(), in_features_, input_dim);std::shared_ptr<Tensor<float>> output = outputs.at(i);if (output == nullptr || output->empty()) {output = std::make_shared<Tensor<float>>(1, out_features_, input_dim);outputs.at(i) = output;}CHECK(output->channels() == 1 && output->rows() == out_features_ &&output->cols() == input_dim);const auto& output_raw_shapes = output->raw_shapes();CHECK(output_raw_shapes.size() == 2);CHECK(output_raw_shapes.at(0) == out_features_ &&output_raw_shapes.at(1) == input_dim);
检查output的所对应的shape是否相等,并且output的行数应该是之前weight和input不参与乘的列。
arma::fmat& result = output->slice(0);result = weight_data * col_vec;if (use_bias_) {CHECK(!this->bias_.empty() && this->bias_.size() == 1);const auto& bias_cube = this->bias_.front();CHECK(!bias_cube->empty());const auto& bias_data = bias_cube->data();CHECK(bias_data.n_slices == 1);CHECK(bias_data.n_rows == out_features_);result += bias_data.slice(0);}
output是我们用来保存结果的地方, 我们将输入col_vec和权重weight_data进行相乘, 得到最后的结果result.result被保存到output的第一个维度中.如果这个Linear层需要加偏移量的话, 是否需要放在
use_bias_中, 它是从runtime_op.param中获得一个参数. 如果需要加偏移量的话, 我们要先获得该层中的偏移量参数this->bias , 再将这个值加到最后的结果上.
Test:
TEST(test_model, resnet_classify_demo) {using namespace kuiper_infer;std::string path = "/home/wang/context/works/KuiperCourse/tmp/dog.jpg";cv::Mat image = cv::imread(path);// 图像预处理sftensor input = PreProcessImage(image);std::vector<sftensor> inputs;inputs.push_back(input);const std::string& param_path = "/home/wang/context/works/KuiperCourse/tmp/resnet18_batch1.pnnx.param";const std::string& weight_path = "/home/wang/context/works/KuiperCourse/tmp/resnet18_batch1.pnnx.bin";RuntimeGraph graph(param_path, weight_path);graph.Build("pnnx_input_0", "pnnx_output_0");// 推理const std::vector<sftensor> outputs = graph.Forward(inputs, true);const uint32_t batch_size = 1;// softmaxstd::vector<sftensor> outputs_softmax(batch_size);SoftmaxLayer softmax_layer;softmax_layer.Forward(outputs, outputs_softmax);assert(outputs_softmax.size() == batch_size);for (int i = 0; i < outputs_softmax.size(); ++i) {const sftensor& output_tensor = outputs_softmax.at(i);assert(output_tensor->size() == 1 * 1000);// 找到类别概率最大的种类float max_prob = -1;int max_index = -1;for (int j = 0; j < output_tensor->size(); ++j) {float prob = output_tensor->index(j);if (max_prob <= prob) {max_prob = prob;max_index = j;}}printf("class with max prob is %f index %d\n", max_prob, max_index);}
}
kuiper_infer::sftensor PreProcessImage(const cv::Mat& image) {using namespace kuiper_infer;assert(!image.empty());// 调整输入大小cv::Mat resize_image;cv::resize(image, resize_image, cv::Size(224, 224));cv::Mat rgb_image;cv::cvtColor(resize_image, rgb_image, cv::COLOR_BGR2RGB);rgb_image.convertTo(rgb_image, CV_32FC3);std::vector<cv::Mat> split_images;cv::split(rgb_image, split_images);uint32_t input_w = 224;uint32_t input_h = 224;uint32_t input_c = 3;sftensor input = std::make_shared<ftensor>(input_c, input_h, input_w);uint32_t index = 0;for (const auto& split_image : split_images) {assert(split_image.total() == input_w * input_h);const cv::Mat& split_image_t = split_image.t();memcpy(input->slice(index).memptr(), split_image_t.data,sizeof(float) * split_image.total());index += 1;}float mean_r = 0.485f;float mean_g = 0.456f;float mean_b = 0.406f;float var_r = 0.229f;float var_g = 0.224f;float var_b = 0.225f;assert(input->channels() == 3);input->data() = input->data() / 255.f;input->slice(0) = (input->slice(0) - mean_r) / var_r;input->slice(1) = (input->slice(1) - mean_g) / var_g;input->slice(2) = (input->slice(2) - mean_b) / var_b;return input;
}
本节课比较总要的就是这个预处理功能了:
cv::Mat resize_image;cv::resize(image, resize_image, cv::Size(224, 224));cv::Mat rgb_image;cv::cvtColor(resize_image, rgb_image, cv::COLOR_BGR2RGB);1. resize_image是原始图像,其色彩空间可能为BGR(OpenCV默认读取图片为BGR顺序)
2. 使用cvtColor函数将resize_image从BGR色彩空间转换为RGB色彩空间
3. 转换后的结果存储在rgb_image变量中
bgrbgrbgr ------> rgbrgbrgb
rgb_image.convertTo(rgb_image, CV_32FC3);std::vector<cv::Mat> split_images;cv::split(rgb_image, split_images);uint32_t input_w = 224;uint32_t input_h = 224;uint32_t input_c = 3;sftensor input = std::make_shared<ftensor>(input_c, input_h, input_w);1. rgb_image.convertTo(rgb_image, CV_32FC3)
将OpenCV图像数据类型转换为32位浮点数,每个通道占3个字节(RGB三通道)。
2. cv::split(rgb_image, split_images)
将RGB三个通道剥离出来分别存储到split_images向量中。
3. 定义Torch Tensor输入尺寸
输入通道数input_c为3(RGB),高input_h和宽input_w指定为224。
4. 创建Torch Tensor对象
用指定的通道、高、宽参数创建一个float型Tensor。
5. 将OpenCV图像数据copy到Torch Tensor中
rgbrgbrgb ------> rrr ggg bbb
for (const auto& split_image : split_images) {assert(split_image.total() == input_w * input_h);const cv::Mat& split_image_t = split_image.t();memcpy(input->slice(index).memptr(), split_image_t.data,sizeof(float) * split_image.total());index += 1;}
遍历split_images向量中的每个通道图像split_image
断言split_image的总元素数等于设定的形状input_w * input_h
将split_image转置为split_image_t,转置是因为OpenCV与Tensor存储数据的顺序不同
使用memcpy函数把split_image_t的数据复制到input张量对应的slice中
slice根据index索引取出对应的通道slice
memptr()获取该slice内存地址
数据数量为split_image总元素数数量 * 每个元素大小(float占4字节)
每复制一个通道后,index索引加1,切换到下一个通道slice
这样就实现了rrr ggg bbb ---> rrrgggbbb的转换 也就完成了toTensor的过程
对下面图片进行预测:
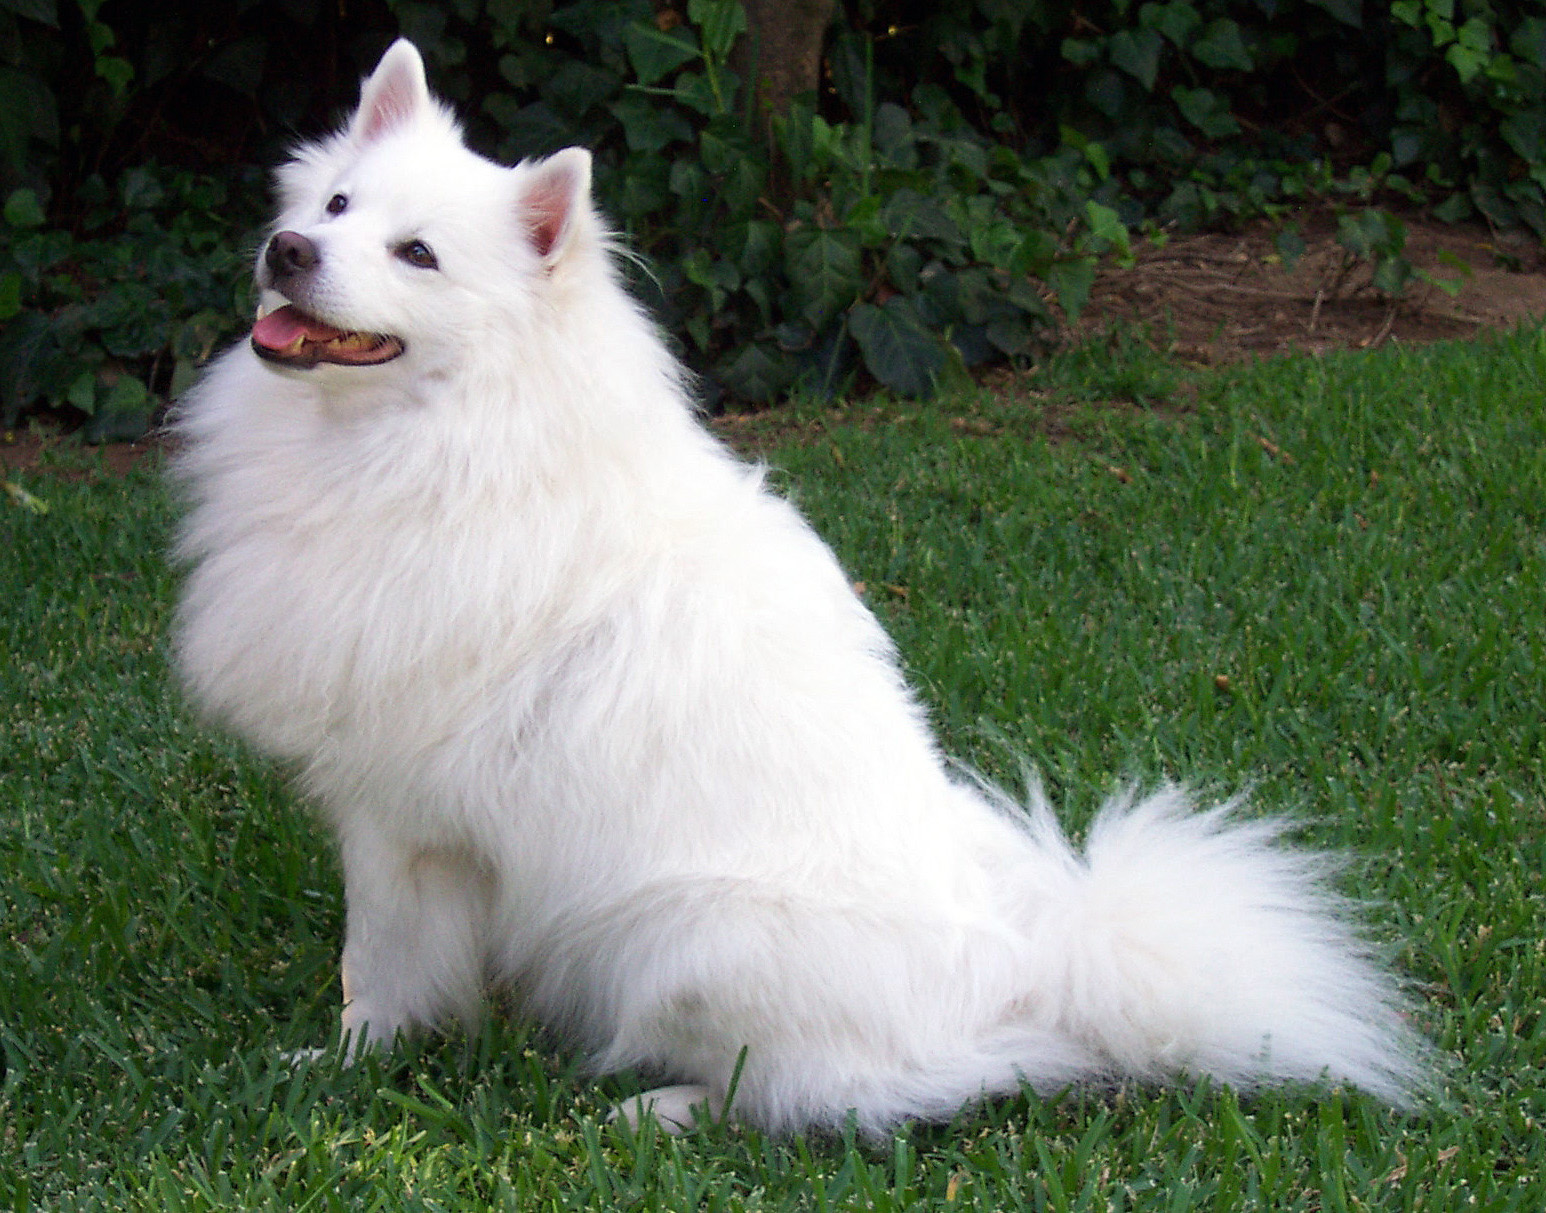

可以看到最后预测结果为258,萨摩耶,预测概率为0.903387

这里是259因为从1开始
至此,为时一个月的推理课程正式结束,我将在这个专栏的后续内容里引入我自制的layer,比如laplace之类的