综述
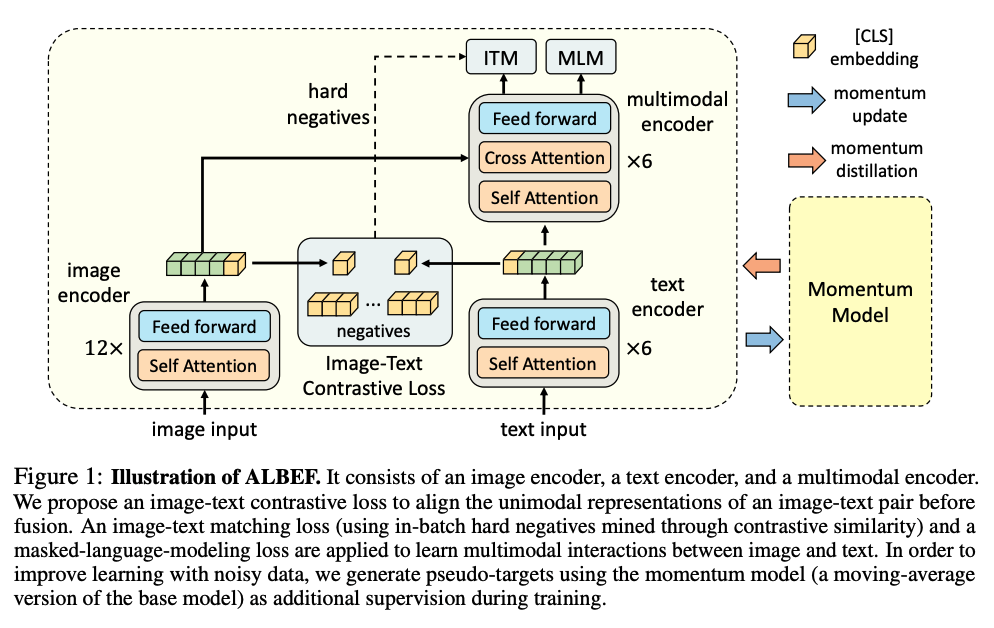
本文涉及到下图绿色背景部分的内容:

左侧位于Linux下,其中包括lighttpd和socket程序;右侧是WebSocket程序。两者通过网络交互。
本文介绍lighttpd的基本使用方式,并通过编程完成一个socket服务器与浏览器端的WebSocket客户端通信。
lighttpd
首先介绍lighttpd,因为它是后端(socket程序)和前端(WebSocket程序)交互的基础。
lighttpd是一款轻量级的开源Web服务器,跟Apache、Nginx功能差不多,对应的官网http://www.lighttpd.net/。
lighttpd目前只支持Linux,所以这里在虚拟机(安装Ubuntu20.04版本)上编译和使用lighttpd,对应的Linux版本:
jw@ubuntu:~/code/www/html$ uname -a
Linux ubuntu 5.15.0-82-generic #91~20.04.1-Ubuntu SMP Fri Aug 18 16:24:39 UTC 2023 x86_64 x86_64 x86_64 GNU/Linux
下载lighttpd最新版本,获取到lighttpd-1.4.71.tar.gz。
- 首先解压缩源代码:
jw@ubuntu:~/code$ tar -xzvf lighttpd-1.4.71.tar.gz
- 安装依赖程序:
jw@ubuntu:~/code/lighttpd-1.4.71$ sudo apt install zlib1g-dev libpcre2-dev
- 进入解压缩得到的目录,然后进行configure:
jw@ubuntu:~/code/lighttpd-1.4.71$ ./configure --prefix=/usr/local/lighttpd
- 编译:
jw@ubuntu:~/code/lighttpd-1.4.71$ make
- 安装:
jw@ubuntu:~/code/lighttpd-1.4.71$ sudo make install
安装的位置是/usr/local/lighttpd/:
w@ubuntu:~/code/lighttpd-1.4.71$ ls -al /usr/local/lighttpd/
total 20
drwxr-xr-x  5 root root 4096 Sep  3 07:03 .
drwxr-xr-x 11 root root 4096 Sep  3 07:03 ..
drwxr-xr-x  2 root root 4096 Sep  3 07:03 lib
drwxr-xr-x  2 root root 4096 Sep  3 07:03 sbin
drwxr-xr-x  3 root root 4096 Sep  3 07:03 share
- 进入到lighttpd所在的目录,后续以root进行操作:
root@ubuntu:/usr/local/lighttpd/sbin# ll
total 1992
drwxr-xr-x 2 root root    4096 Sep  3 07:03 ./
drwxr-xr-x 5 root root    4096 Sep  3 07:03 ../
-rwxr-xr-x 1 root root 2004088 Sep  3 07:03 lighttpd*
-rwxr-xr-x 1 root root   23048 Sep  3 07:03 lighttpd-angel*
- 为了使用lighttpd,需要有配置文件,下面是一个最简单的例子(test.conf):
server.document-root = "/home/jw/code/www/html"
server.port = 80
mimetype.assign = (".html" => "text/html",".txt" => "text/plain",".jpg" => "image/jpeg",".png" => "image/png"
)
index-file.names = ( "index.html" )
简单说明它们的意义:
server.document-root:指定了Web服务器目录,我们需要在这里放浏览器可以访问的文件,比如html文件。server.port:指定端口,默认非安全的Web服务器端口是80。mimetype.assign:指定支持的文件。index-file.names:指定入口文件。
- 在
server.document-root指定的目录中存放html文件,下面是一个例子(index.html ):
<html><body>Hello Wolrd!</body>
</html>
当通过浏览器登录服务器时,首先访问到的就是这个文件。
启动lighttpd的应用程序的命令如下:
root@ubuntu:/usr/local/lighttpd/sbin# ./lighttpd -D -f test.conf
2023-09-03 07:17:49: (server.c.1909) server started (lighttpd/1.4.71)
启动之后该服务器会持续运行,此时可以查看到网络状态:
root@ubuntu:/usr/local/lighttpd/sbin# netstat -ntlv
Active Internet connections (only servers)
Proto Recv-Q Send-Q Local Address           Foreign Address         State
tcp        0      0 0.0.0.0:80              0.0.0.0:*               LISTEN
tcp        0      0 127.0.0.1:631           0.0.0.0:*               LISTEN
tcp        0      0 127.0.0.53:53           0.0.0.0:*               LISTEN
tcp6       0      0 ::1:631                 :::*                    LISTEN
这里显示的第一行对应的就是lighttpd服务器,它监听80端口,IP显示全0表示没有限制。
通过浏览器访问lighttpd服务器,输入的IP就是Linux系统的IP,端口可以不写,默认就是80。测试结果如下图所示:

到这里一个简单的lighttpd服务器就已经开启了。
当然这只是一个开始,此时浏览器只能访问lighttpd中的简单html文件,要想要打通后端的socket程序和前端的WebSocket程序,还需要依赖于lighttpd的ws_tunnel插件。为了使lighttpd支持WebSocket,需要修改它的配置,以下是修改之后的test.conf :
server.modules += ("mod_wstunnel"
)server.document-root = "/home/jw/code/www/html"
server.port = 80
mimetype.assign = (".html" => "text/html",".txt" => "text/plain",".jpg" => "image/jpeg",".png" => "image/png"
)
static-file.exclude-extensions = ( ".fcgi", ".php", ".rb", "~", ".inc" )
index-file.names = ( "index.html" )$HTTP["url"] =~ "^/websocket.test" {wstunnel.server = ("" => (("host" => "127.0.0.1","port" => "888")))wstunnel.frame-type = "text"
}
这里的改动有以下的几个:
-
通过
server.modules引入lighttpd插件,在lighttpd中,通过插件的方式可以引入很多新的特性,比如这里的WebSocket(对应插件mod_wstunnel),还有CGI,代理,等等。 -
配置wstunnel,所有的参数可以在Docs ConfigurationOptions - Lighttpd - lighty labs找到,这里的配置主要针对特定格式的WebSocket,其配置有两个:一个是转发的地址和端口,指向了localhost(127.0.0.1)和888端口,注意它们需要跟Linux端的服务器有相同的配置,否则无法转发到指定的处理程序;另一个是WebSocket的数据格式,这里指定的是文本格式。
配置修改之后重新打开lighttpd:
root@ubuntu:/usr/local/lighttpd/sbin# ./lighttpd -D -f test.conf
2023-09-09 22:20:15: (server.c.1909) server started (lighttpd/1.4.71)
socket编程
编写Linux端的服务器程序,下面是一个示例:
#include <stdio.h>
#include <string.h>
#include <unistd.h>
#include <errno.h>
#include <sys/types.h>
#include <sys/socket.h>
#include <netinet/in.h>
#include <arpa/inet.h>
#include <stdlib.h>// Should be same with the one in lihttpd.conf and index.html.
#define DEFAULT_PORT 888
// Should be same with the one in lihttpd.conf.
#define DEFAULT_IP "127.0.0.1"int main(int argc, char **argv)
{int server_socket = -1;int client_socket = -1;struct sockaddr_in server_addr;struct sockaddr_in client_addr;char received_buffer[1024]; // Buffer for received.int received_len = -1;int sended_len = -1;int res = -1;socklen_t addr_len = sizeof(struct sockaddr);int index;// Create a socket.server_socket = socket(AF_INET, SOCK_STREAM, 0);if (server_socket < 0){printf("Create socket failed: %s\n", strerror(errno));return -1;}// Bind the created socket on special IP and port.server_addr.sin_family = AF_INET;server_addr.sin_port = htons(DEFAULT_PORT);server_addr.sin_addr.s_addr = inet_addr(DEFAULT_IP);if (bind(server_socket, (struct sockaddr *)&server_addr, sizeof(server_addr)) < 0){printf("Bind server failed: %s\n", strerror(errno));return -2;}printf("Socket[%d] has bond on port[%d] for IP address[%s]!\n",server_socket, DEFAULT_PORT, DEFAULT_IP);// Listen on the created socket.listen(server_socket, 10);while (1){printf("Waiting and accept new client connect...\n");client_socket = accept(server_socket, (struct sockaddr *)&client_addr, &addr_len);if (client_socket < 0){printf("Accept client socket failed: %s\n", strerror(errno));return -3;}printf("Accept new client[%d] socket[%s:%d]\n", client_socket,inet_ntoa(client_addr.sin_addr), ntohs(client_addr.sin_port));while (1){memset(received_buffer, 0, sizeof(received_buffer));received_len = read(client_socket, received_buffer, sizeof(received_buffer));if (received_len < 0){printf("Read data from client [%d] failed: %s\n", client_socket, strerror(errno));close(client_socket);break;}else if (0 == received_len){printf("Client [%d] disconnected!\n", client_socket);close(client_socket);break;}else{printf("Read %d bytes from client[%d] and the data is : %s\n",received_len, client_socket, received_buffer);// Send back the received buffer to client.sended_len = write(client_socket, received_buffer, received_len);if (sended_len < 0){printf("wWite data back to client[%d] failed: %s \n", client_socket,strerror(errno));close(client_socket);break;}}}sleep(1);}if (client_socket){close(client_socket);}close(server_socket);return 1;
}
这里使用了socket编程,注意socket和前面提到的WebSocket虽然都用来网络通信,但是它们不是同一个东西,关于它们的具体差别涉及到socket和WebSocket的基础,这里不展开。
这个程序的实现很简单,就是将服务器获取到的数据直接返回给发送端。编译和使用该程序:
root@ubuntu:/home/jw/code/www/html# gcc websocket_server.c
root@ubuntu:/home/jw/code/www/html# ./a.out
Socket[3] has bond on port[888] for IP address[127.0.0.1]!
Waiting and accept new client connect...
再次查看网络状态:
root@ubuntu:/usr/local/lighttpd/sbin# netstat -ntlv
Active Internet connections (only servers)
Proto Recv-Q Send-Q Local Address           Foreign Address         State
tcp        0      0 0.0.0.0:80              0.0.0.0:*               LISTEN
tcp        0      0 127.0.0.1:888           0.0.0.0:*               LISTEN
tcp        0      0 127.0.0.1:631           0.0.0.0:*               LISTEN
tcp        0      0 127.0.0.53:53           0.0.0.0:*               LISTEN
tcp6       0      0 ::1:631                 :::*                    LISTEN
可以看到多监听了一个端口888,IP是localhost(127.0.0.1),由于ligtttpd的配置,前端连接过来的特定WebSocket(满足^/websocket.test的格式)就会被本程序处理。
WebSocket程序
本节介绍浏览器端代码的编写。
前面的两步都在Linux系统中(这里使用了虚拟机中的Ubuntu系统),而这里的操作可以在任意的系统中使用,只要存在浏览器,且跟Linux系统可以通过网络通信即可。不过编写的程序还是在Linux系统中,且在lighttpd指定的目录下,其示例代码(index.html):
<h1>Websocket Test</h1>
<pre id="messages" style="height: 400px; overflow: scroll"></pre>
<input type="text" id="messageBox" placeholder="Type your message here"style="display: block; width: 100%; margin-bottom: 10px; padding: 10px;" />
<button id="send" title="Send Message!" style="width: 100%; height: 30px;">Send Message</button><script>(function () {const sendBtn = document.querySelector('#send');const messages = document.querySelector('#messages');const messageBox = document.querySelector('#messageBox');let ws;function showMessage(message) {messages.textContent += `\nReceived: ${message}`;messages.scrollTop = messages.scrollHeight;messageBox.value = '';}function init() {if (ws) {ws.onerror = ws.onopen = ws.onclose = null;ws.close();}ws = new WebSocket("ws://" + location.host + "/websocket.test");ws.onopen = () => {console.log('Connection opened!');}ws.onmessage = ({ data }) => showMessage(data);ws.onclose = function () {console.log('Connectino closed!');ws = null;}}sendBtn.onclick = function () {if (!ws) {showMessage("No WebSocket connection :(");return;}ws.send(messageBox.value);console.log("Sended: " + messageBox.value);}init();})();
</script>
注意这里的:
ws = new WebSocket("ws://" + location.host + "/websocket.test");
location.host对应的是Linux的IP,整个URL满足lighttpd中ws_tunnel的转发要求,所以会被第二步中的程序接收到。
通过浏览器访问location.host对应的地址,执行结果如下:

图中的虚拟机安装有Ubuntu20.04,开启两个进程,上面的是lighttpd作为Web服务器,下面是socket编写的服务器程序;虚拟机外面是浏览器,输入Ubuntu20.04系统的IP即可访问lighttpd,并显示指定目录下的index.html文件,在该界面下输入的内容会被lighttpd传递给服务器程序,而后者打印传递过来的内容然后返回,最后在浏览器显示出来。
