文章目录
- 前言
- 加快编辑器运行速度
- 素材
- (1)场景人物
- (2)工具
- 一、人物移动和动画切换
- 二、走路灰尘粒子效果
- 探究
- 实现
- 三、树木排序设计
- 方法一
- 方法二
- 四、绘制拿工具的角色动画
- 五、砍树实现
- 六、存储拾取物品
- 引入Unity 的可序列化字典类
- 七、实现靠近收获物品自动吸附
- 八、树木被砍掉的粒子效果
- 九、新增更多可收集物
- 十、更多工具切换
- 十一、扩展
- 源码
- 完结
前言
采集收集生存类游戏一直是我的最爱,今天就来用unity制作一个俯视角2DRPG类星露谷物语资源收集游戏
先来看看最终效果
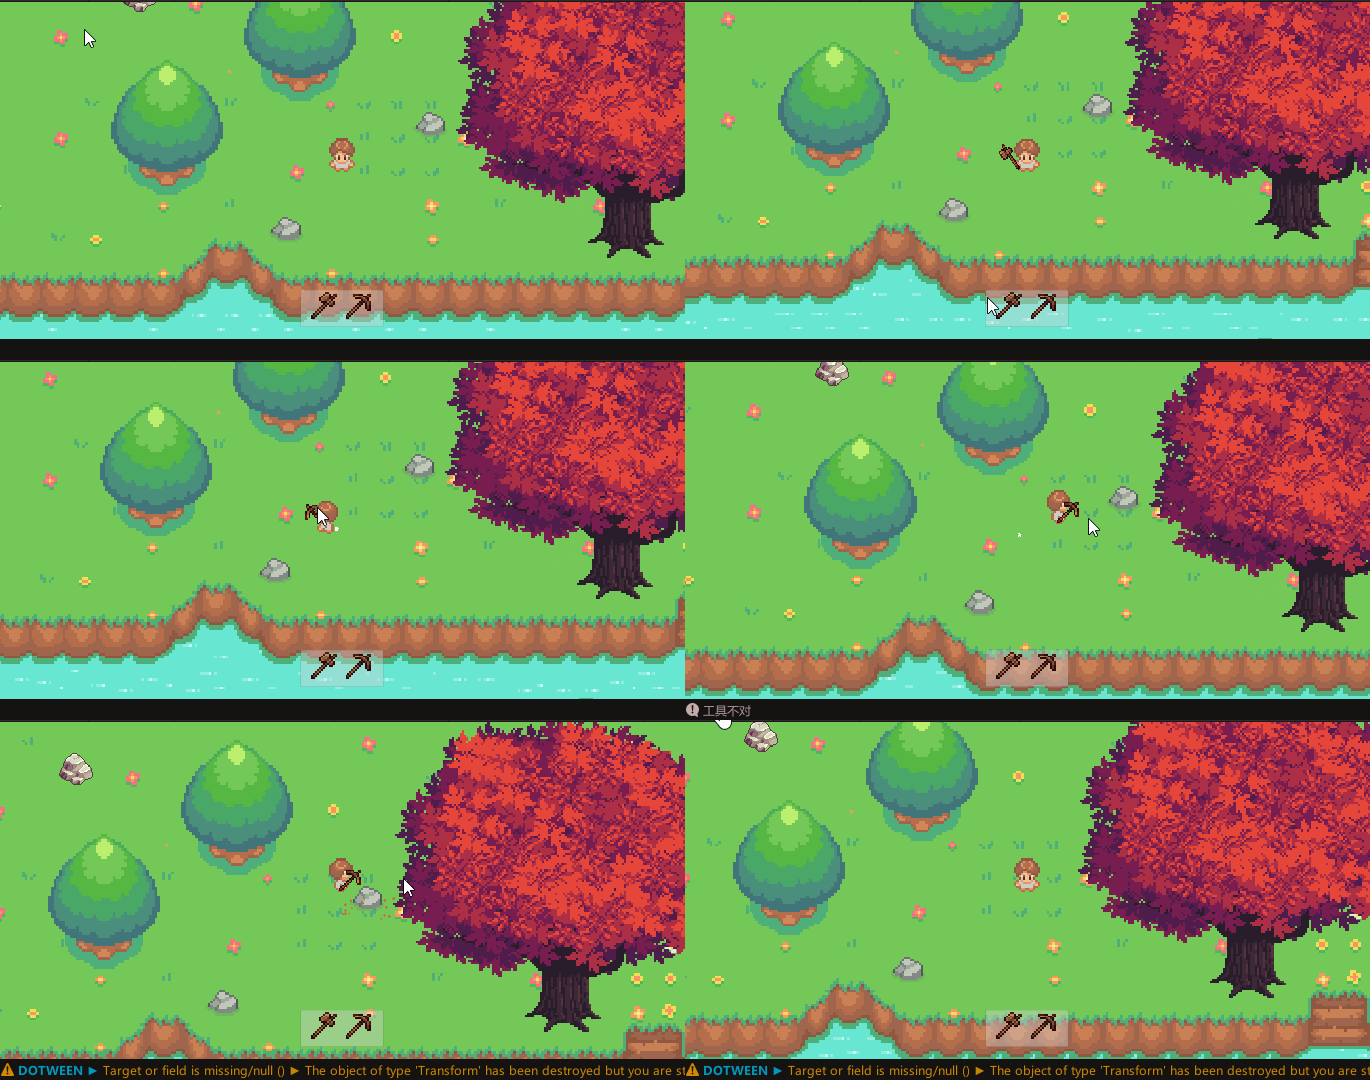
加快编辑器运行速度
修改项目配置
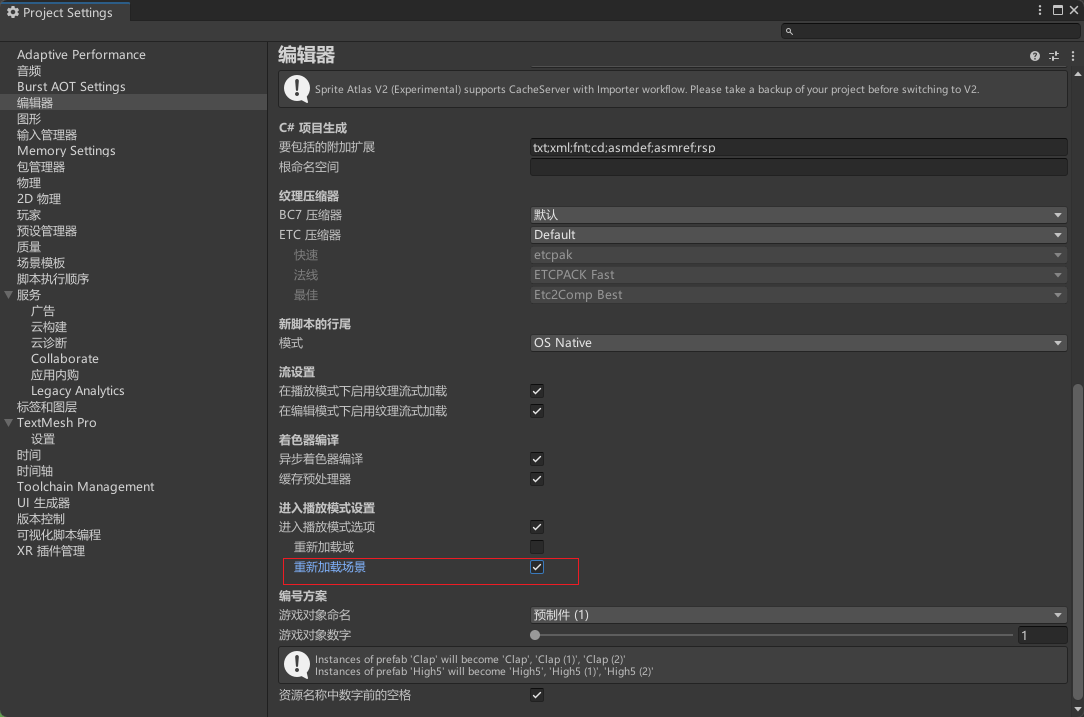
这样,运行时我们就不需要再等待很久了
素材
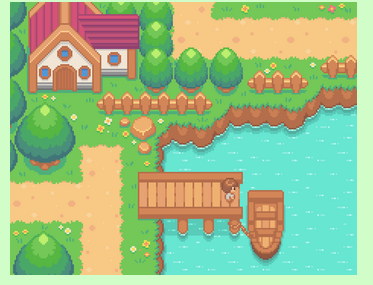
(1)场景人物
https://cypor.itch.io/12x12-rpg-tileset
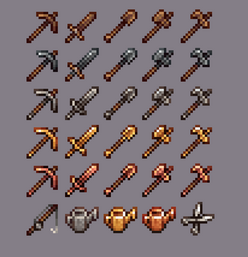
(2)工具
https://dantepixels.itch.io/tools-asset-16x16
一、人物移动和动画切换
这个直接功能实现我之前炸弹人那期文章已经说过了,直接抄答案就行了,这里就不再重复介绍了,具体实现可以看文章:
【用unity实现100个游戏之8】用Unity制作一个炸弹人游戏

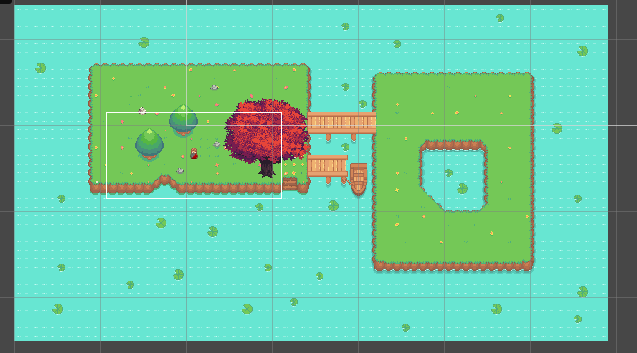
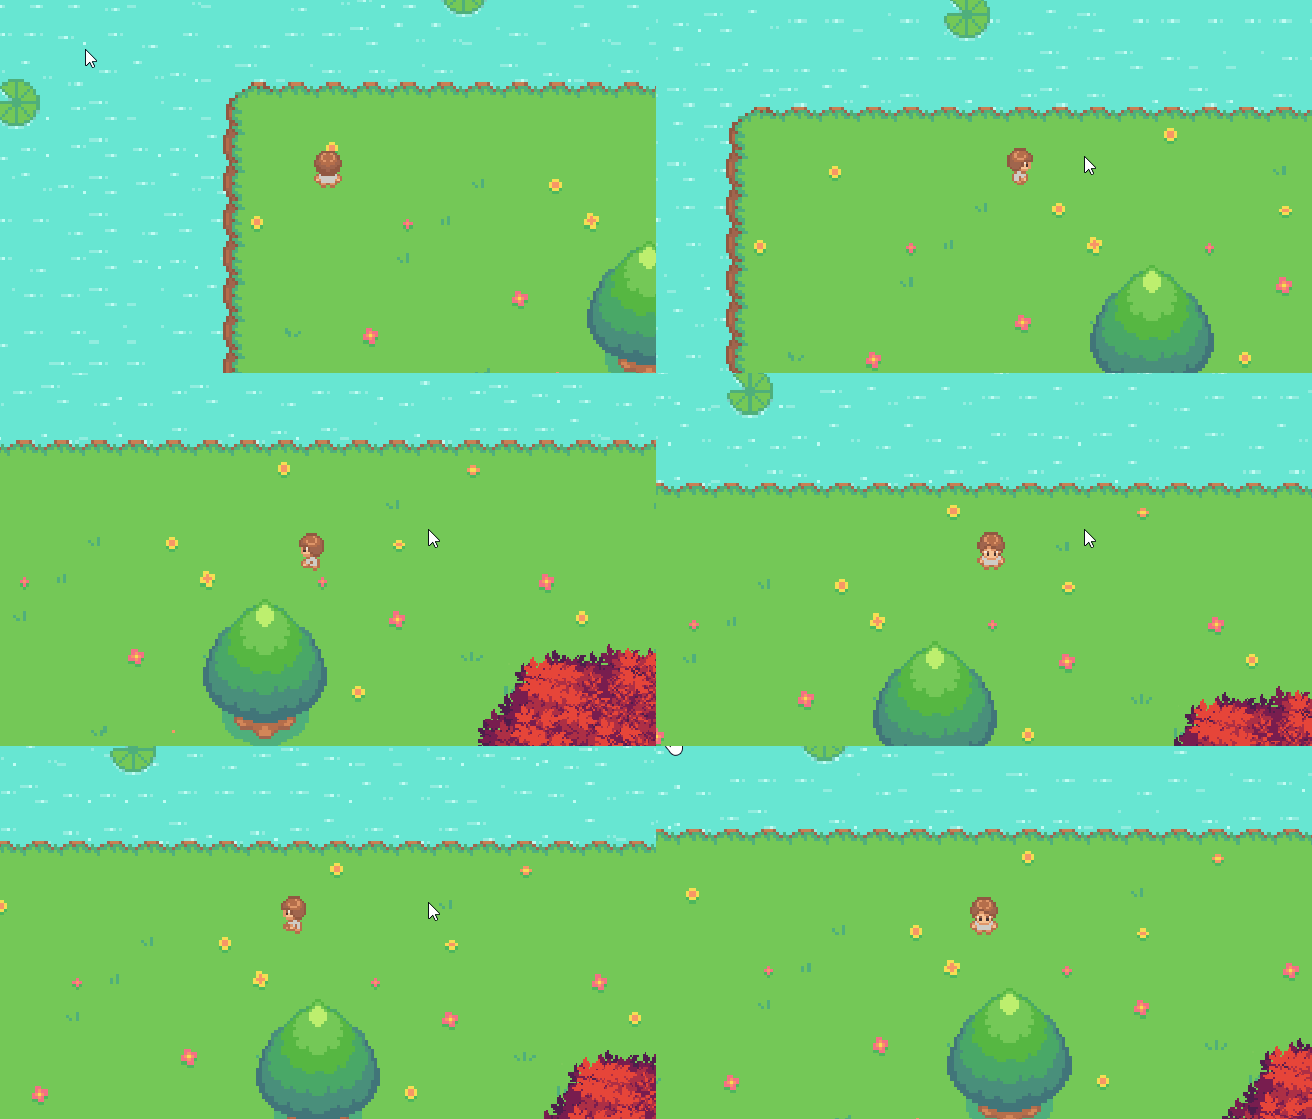
最终效果(这里用TileMap简单绘制了一下地图,TileMap的使用可以看我主页之前的文章)
二、走路灰尘粒子效果
探究
要实现走路灰尘效果,Unity的粒子系统(Particle System)中有属性RateOverDistance:根据移动距离发射粒子,不移动时不发射。恰好可满足当前需求
实际使用时发现,不管怎么移动都不发射粒子,但RateOverTime(随时间推移发射粒子)的功能是正常的
解决方案
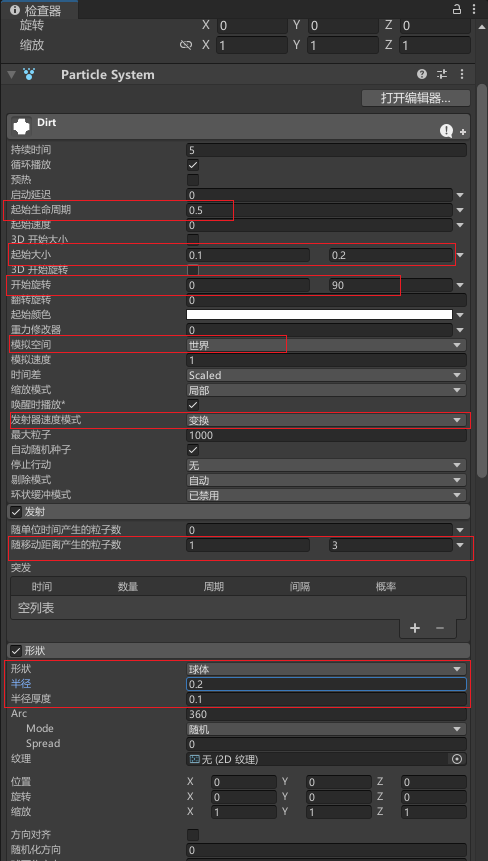
粒子系统有一属性:EmitterVelocity(发射器速度模式),它有2种模式
Transform:通过Transform中Position的变化计算粒子系统的移动速度
Rigidbody:将刚体(若有)的速度作为粒子系统的移动速度
看了上述解释即可想到,若EmitterVelocity设置为Rigidbody模式,当该粒子系统没有刚体时,系统会认为该发射器是不动的,因此移动速度为0,因此移动距离为0:因此RateOverDistance不会发射粒子
所以将EmitterVelocity(发射器速度模式)设置为Transform(变换)即可
实现
素材图片

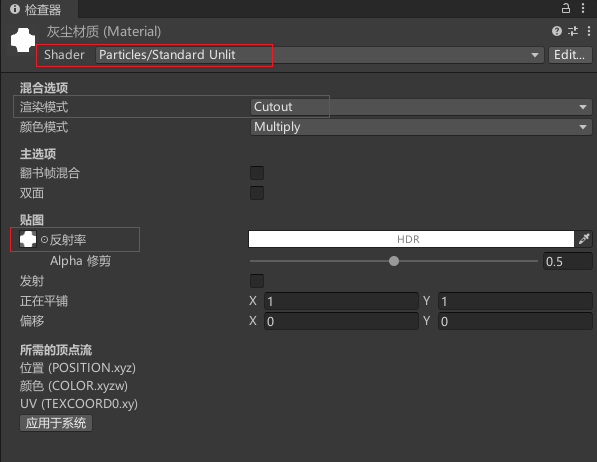
材质
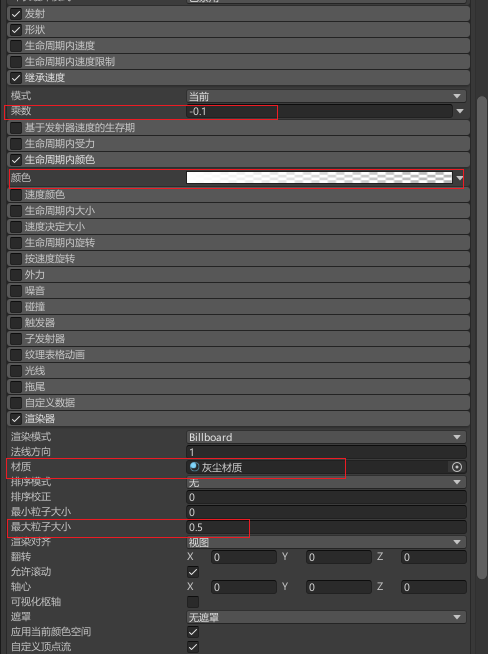
完整粒子系统配置
效果
三、树木排序设计
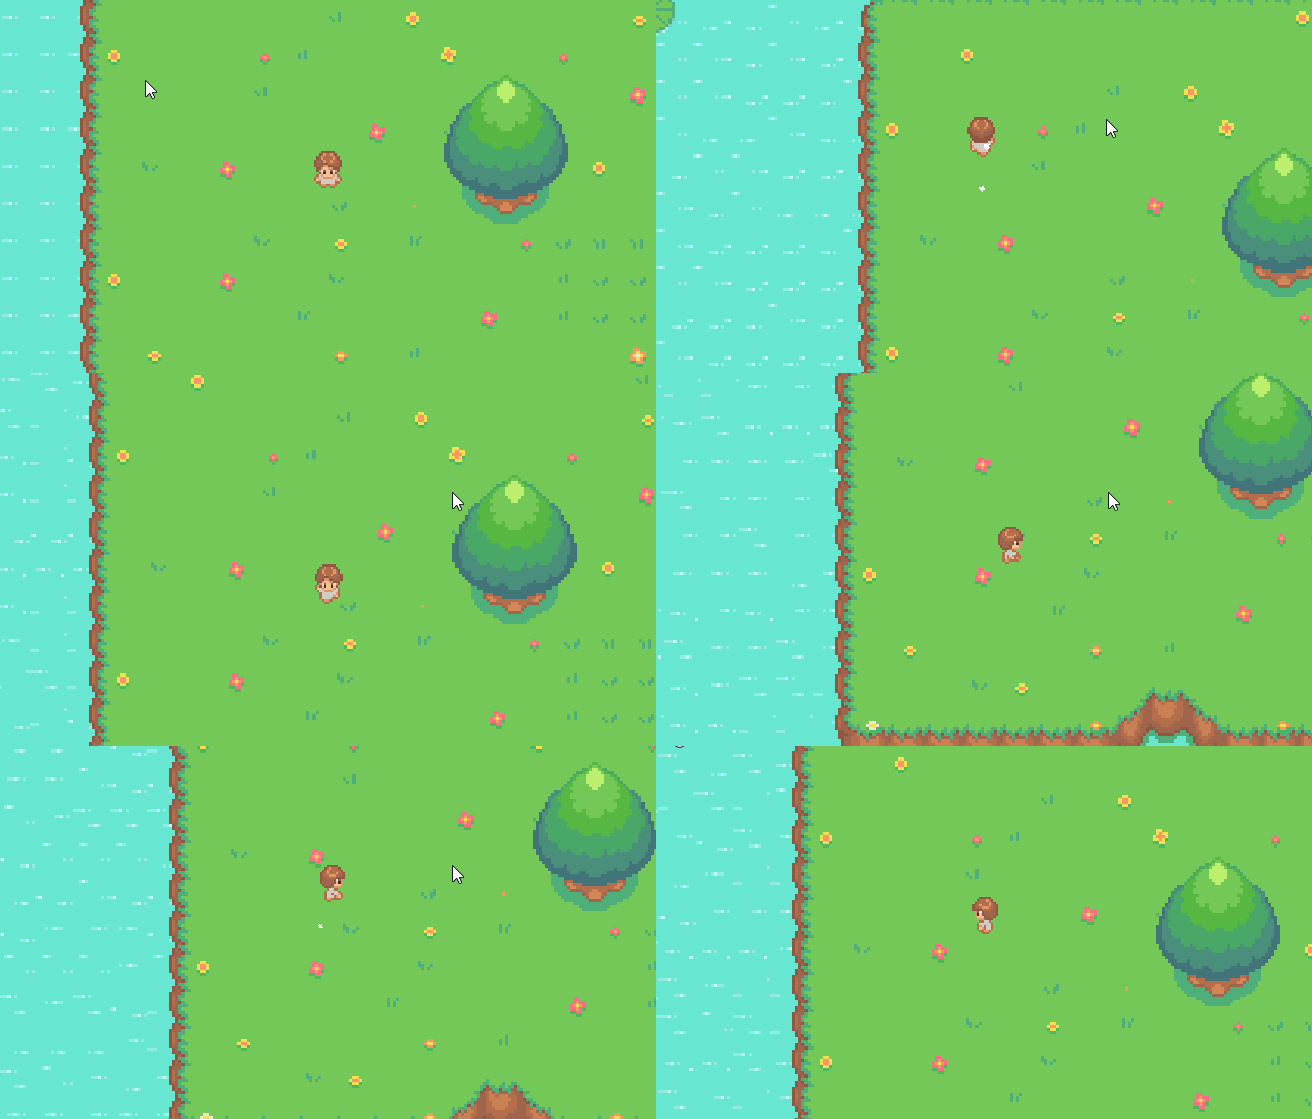
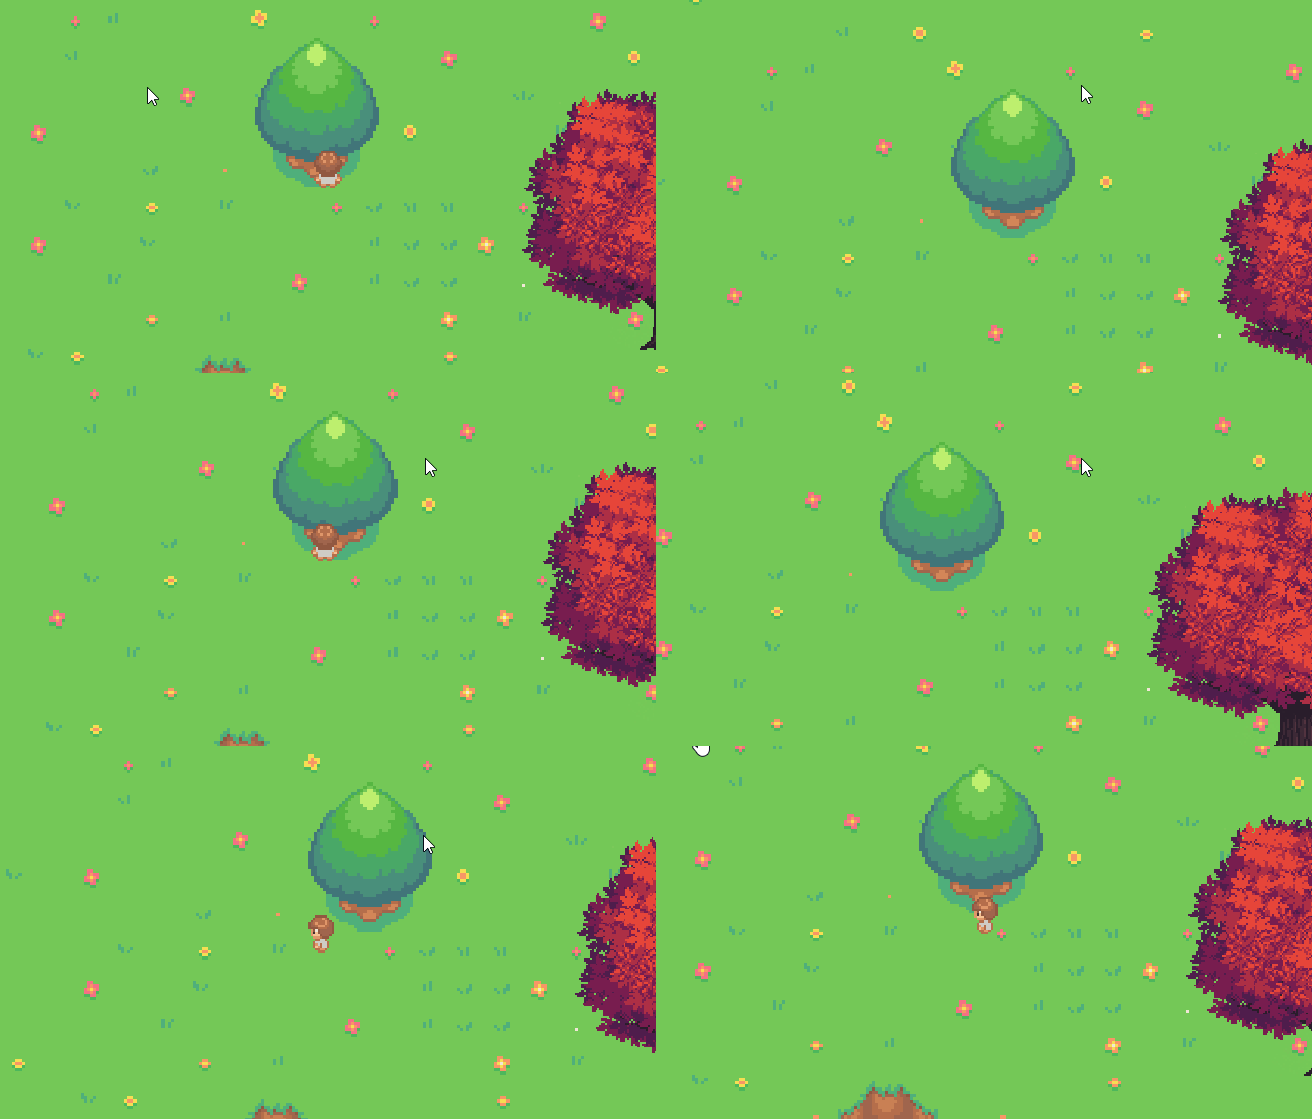
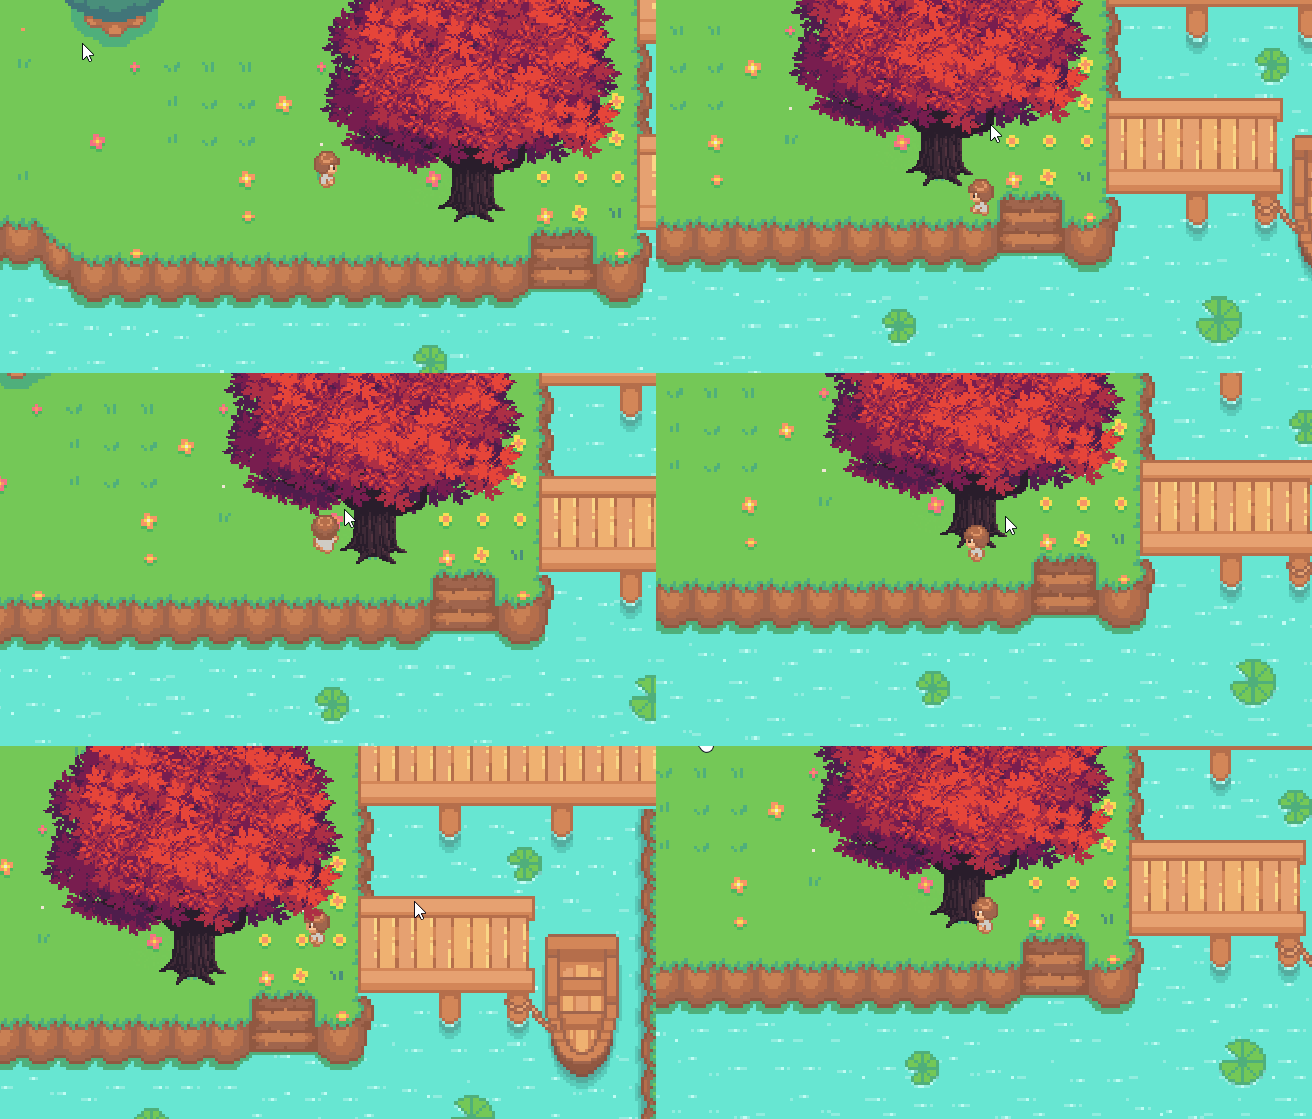
我们希望实现人物走到树前,人物遮挡树木,当人物走到树后,树又遮挡玩家
如果我们直接修改图层排序方式肯定是不行的,玩家要么直接被遮挡,要么直接遮挡树木
当然你可以通过代码的方式,动态的修改人物图层排序值,当时太麻烦了,这里我们就不探讨了
方法一
最简单的方法就是将树叶和树根分开,树叶图层排序比人物高,树根图层排序比人物低,当然这样绘制会比较麻烦一些

效果
方法二
使用透视排序。也就是“伪造”透视图。根据直觉,玩家希望角色在立方体前面时首先绘制角色,而角色在立方体后面时最后绘制角色。
如果用更技术性的语言来说,你需要做的是指示 Unity 根据游戏对象的 y 坐标来绘制游戏对象。屏幕上位置较低的游戏对象(y 坐标较小)应在屏幕上位置较高的游戏对象(y 坐标较大)之后绘制。这样将使位置较低的对象显示在上层。
要指示 Unity 根据游戏对象的 y 坐标来绘制游戏对象,请执行以下操作
-
选择 Edit > Project Settings。
-
在左侧类别菜单中,单击 Graphics
-
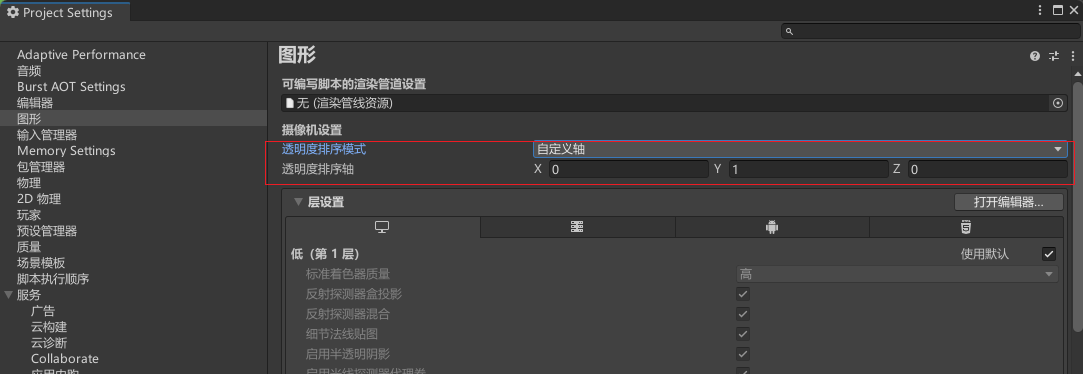
在 Camera Settings 中,找到 Transparency Sort Mode (透明度排序模式)字段。此字段决定了精灵的绘制顺序。使用下拉菜单将此设置从 Default 更改为 Custom Axis(自定义轴),修改Transparency Sort Axis(透明排序轴)为
(0,1,0),告诉Unity y轴绘制精灵
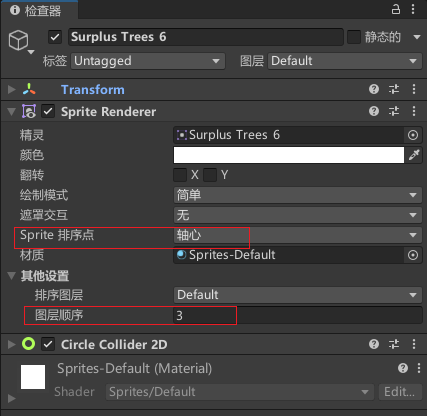
- 找到树木的 Sprite Sort Point (Sprite 排序点)字段。目前,此字段设置为 Center,这意味着会使用精灵的中心点来决定这个游戏对象应该在另一个游戏对象的前面还是后面。将 Sprite Sort Point (Sprite 排序点)更改为 Pivot(轴心)
注意:记得树木图层排序顺序要和主角人物设置为一样
- 修改树木图片的轴心位置到树木根部
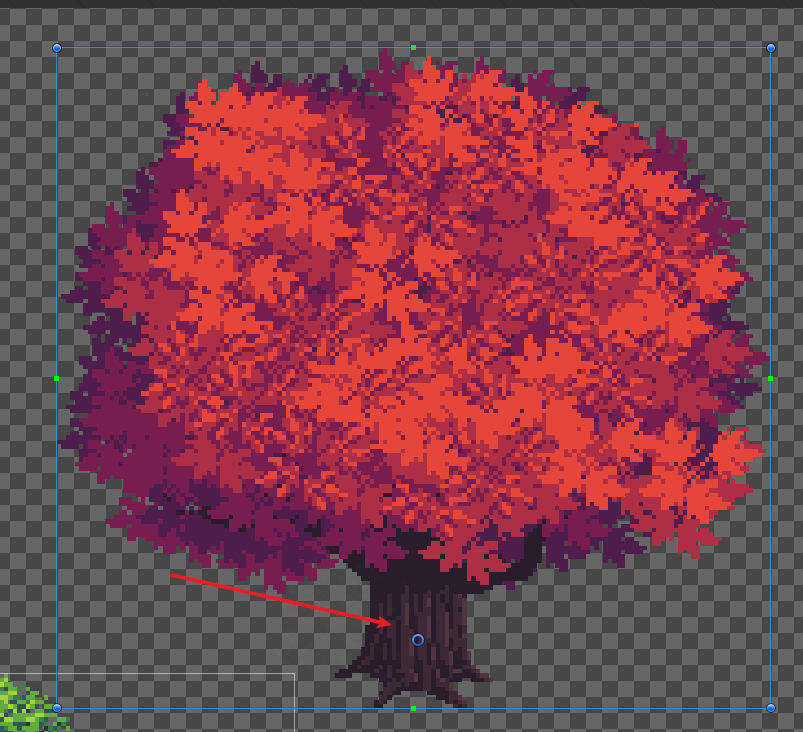
这样就实现了人物在树木轴心下面,先绘制树木,人物在轴心以上,先绘制角色
四、绘制拿工具的角色动画
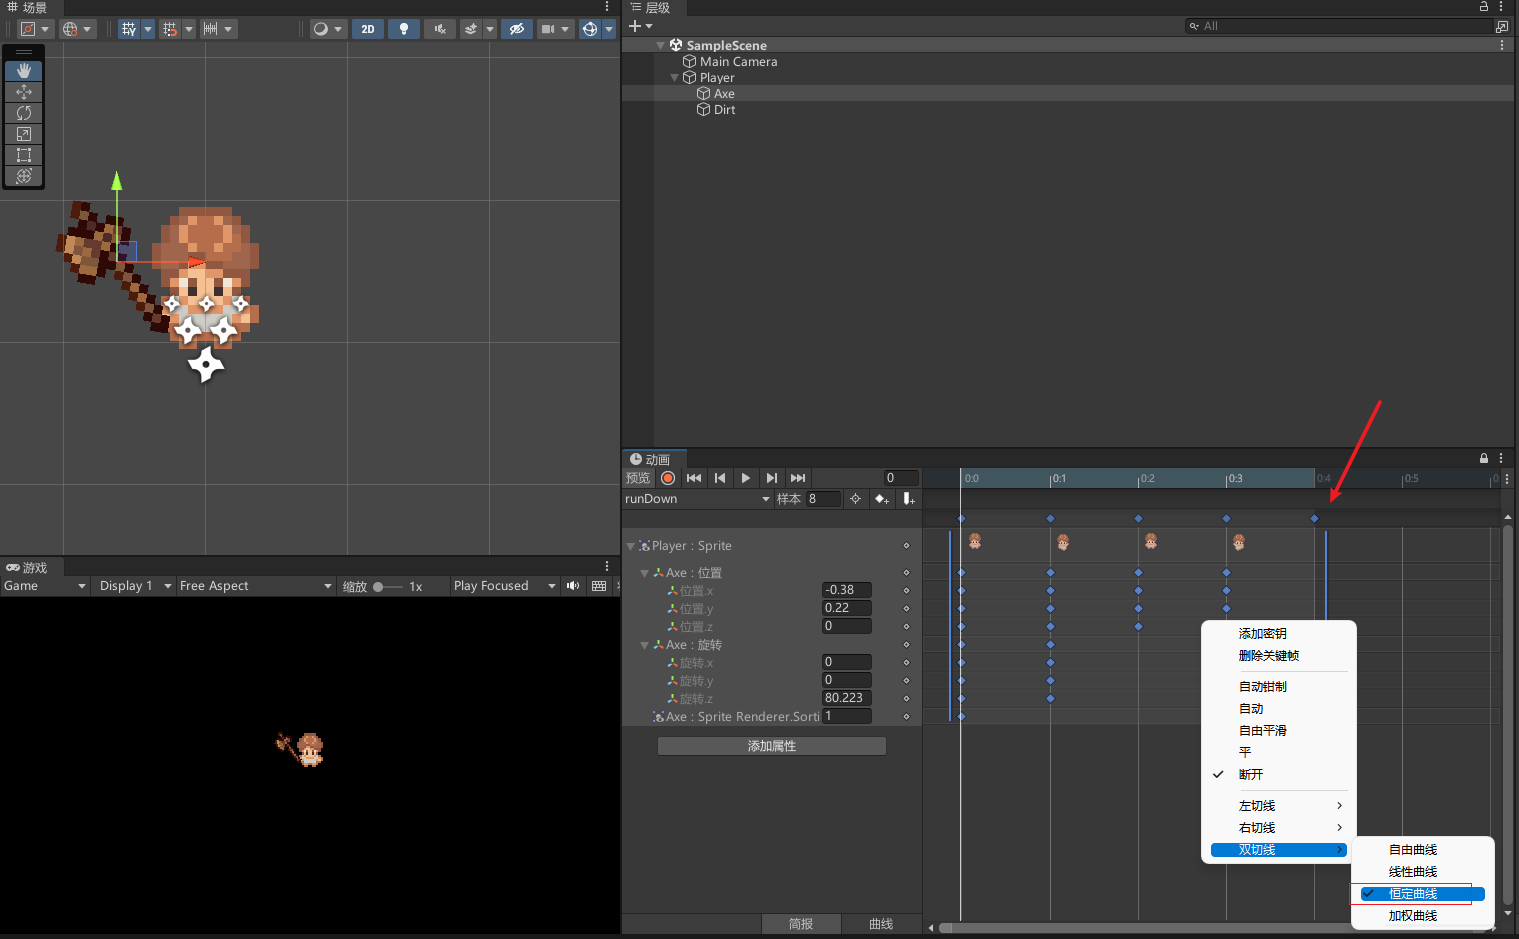
记得配置好动画后,修改为横定曲线,让动画过渡更加丝滑
效果
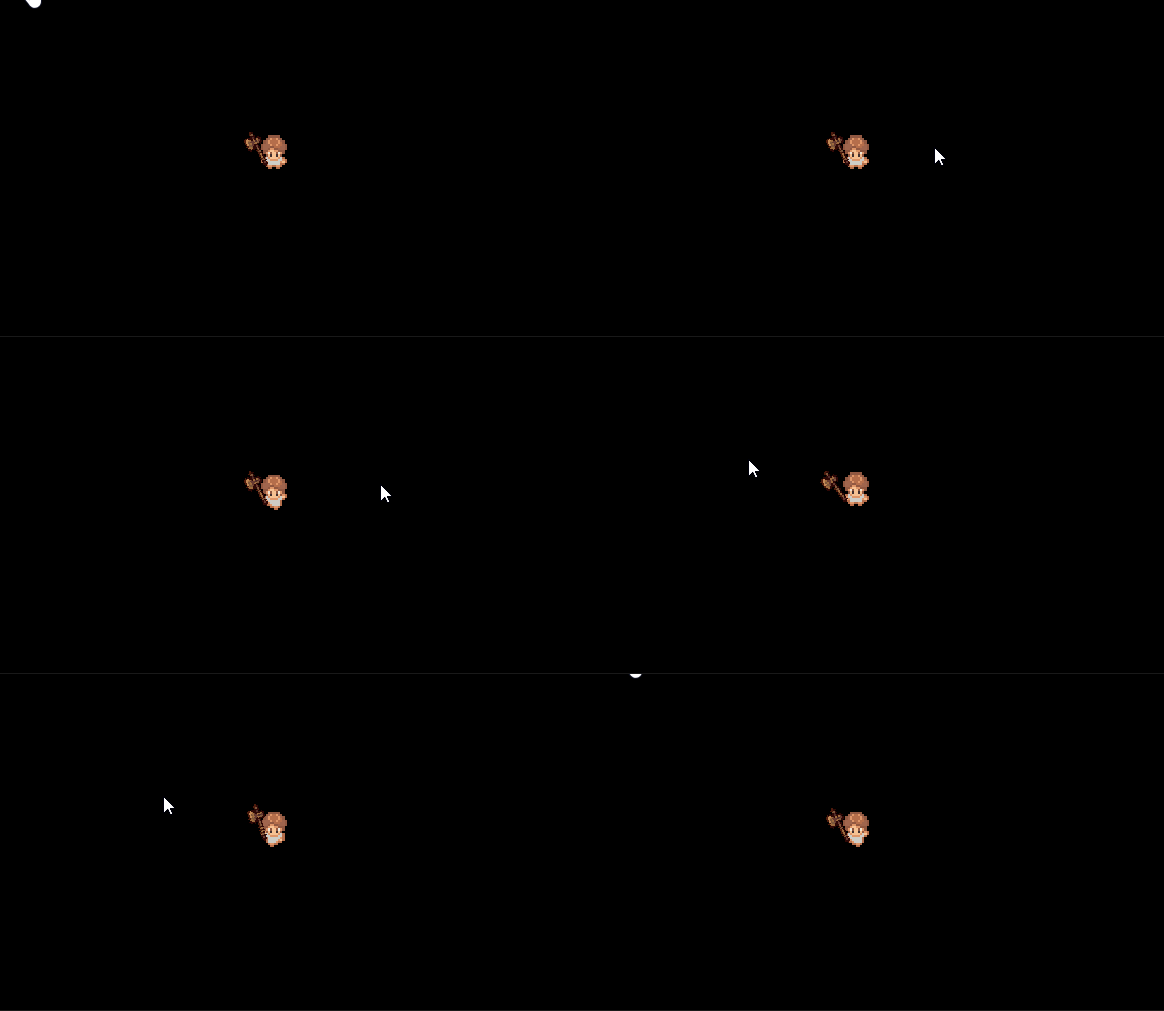
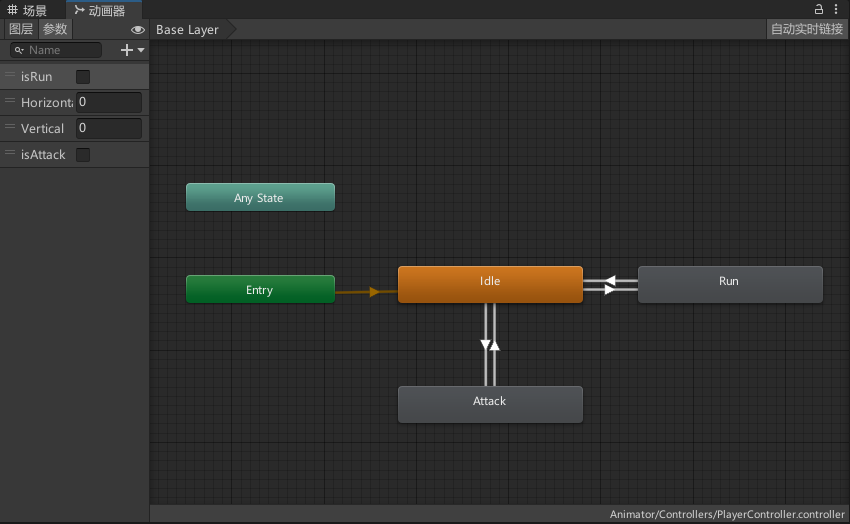
其他配置同理,并加入攻击动画和代码控制切换
if(Input.GetKeyDown(KeyCode.F)){animator.SetBool("isAttack", true);
}
if(Input.GetKeyUp(KeyCode.F)){animator.SetBool("isAttack", false);
}
动画控制器
最终效果
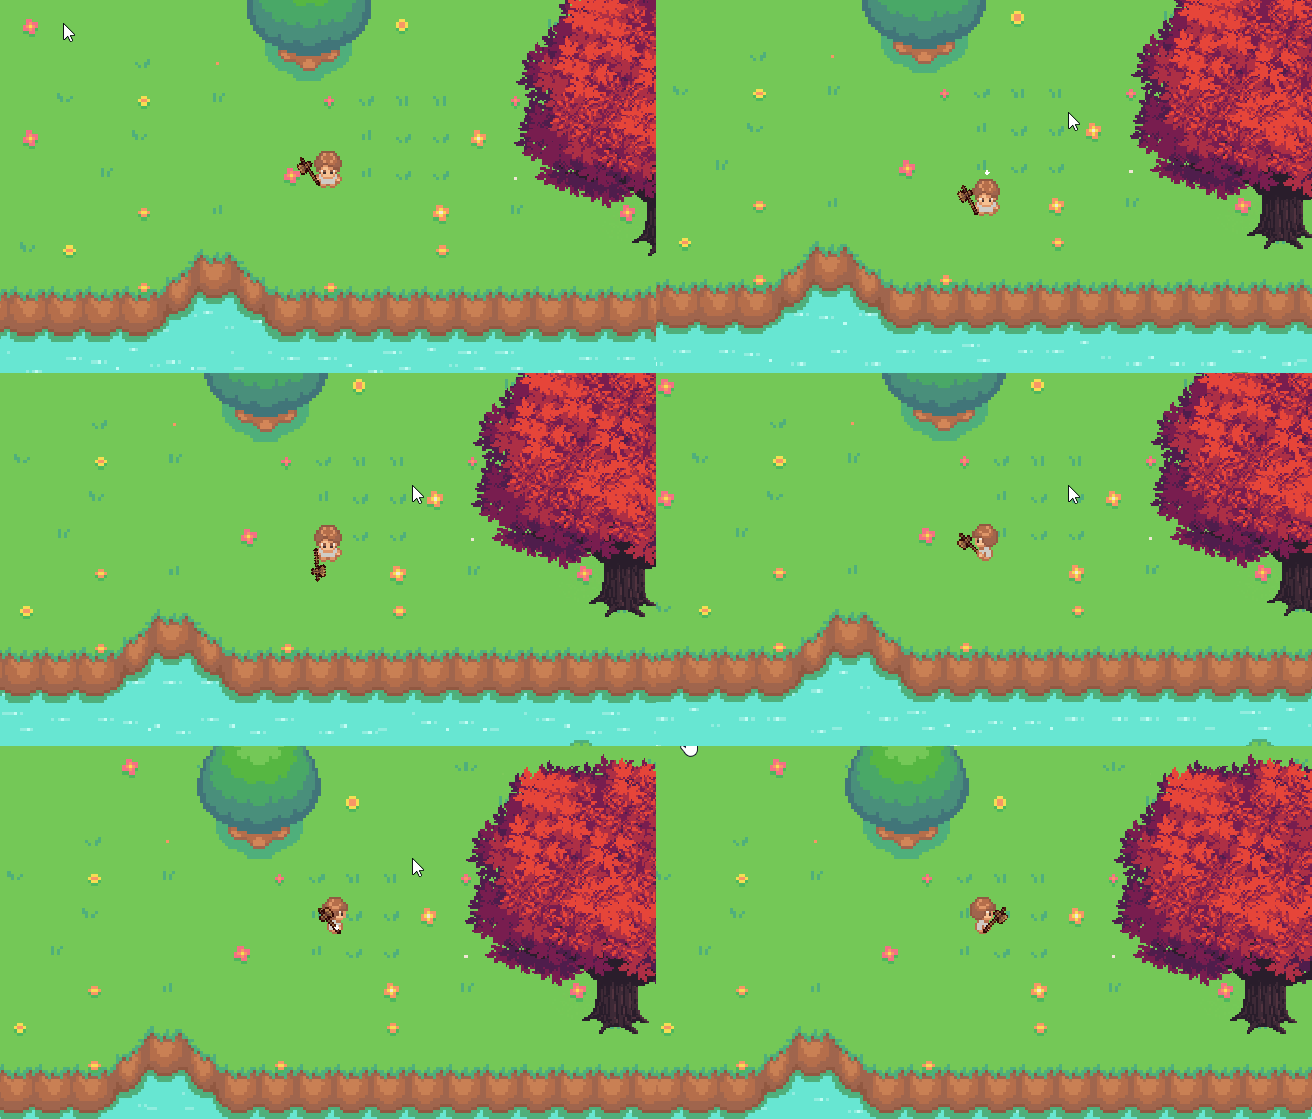
五、砍树实现
给树木添加代码,我已经加了详细注释就不过多解释了,其中使用了DOTween实现生成资源的弹出动画,不懂DOTween的小伙伴可以看我之前的文章
using UnityEngine;
using DG.Tweening;public class TreeController : MonoBehaviour
{public GameObject woodPrefab;   // 木头预制体public int minWoodCount = 2;    // 随机掉落的最小木头数量public int maxWoodCount = 3;    // 随机掉落的最大木头数量public int maxAttackCount = 3;  // 最大攻击次数public int maxCreateCount = 3;  // 最大生成物品次数public float maxOffsetDistance = 1f;  // 随机偏移的最大距离private int currentCreateCount; // 生成物品次数private int currentAttackCount; // 当前攻击次数void Start(){currentAttackCount = 0;currentCreateCount = 0;}private void OnTriggerEnter2D(Collider2D other) {//碰到带Axe标签物体if(other.CompareTag("Axe")){//攻击三次生成物品if(currentAttackCount >= maxAttackCount){TakeDamage();currentAttackCount = 0;}currentAttackCount ++;}}public void TakeDamage(){// 每次受到攻击时,生成随机数量的木头int woodCount = Random.Range(minWoodCount, maxWoodCount + 1);for (int i = 0; i < woodCount; i++){Vector3 randomOffset = new Vector3(Random.Range(-maxOffsetDistance, maxOffsetDistance), Random.Range(-maxOffsetDistance, maxOffsetDistance), 0f);GameObject wood = Instantiate(woodPrefab, transform.position + randomOffset, Quaternion.identity);// 使用DOJump方法实现物体的弹跳wood.transform.DOJump(wood.transform.position + new Vector3(randomOffset.x, randomOffset.y, 0f), 2, 1, 1).SetEase(Ease.OutSine);}currentCreateCount++;// 如果生成物品次数达到最大值,则销毁木头并重置生成物品次数if (currentCreateCount >= maxCreateCount){Destroy(gameObject);currentCreateCount = 0;}}
}
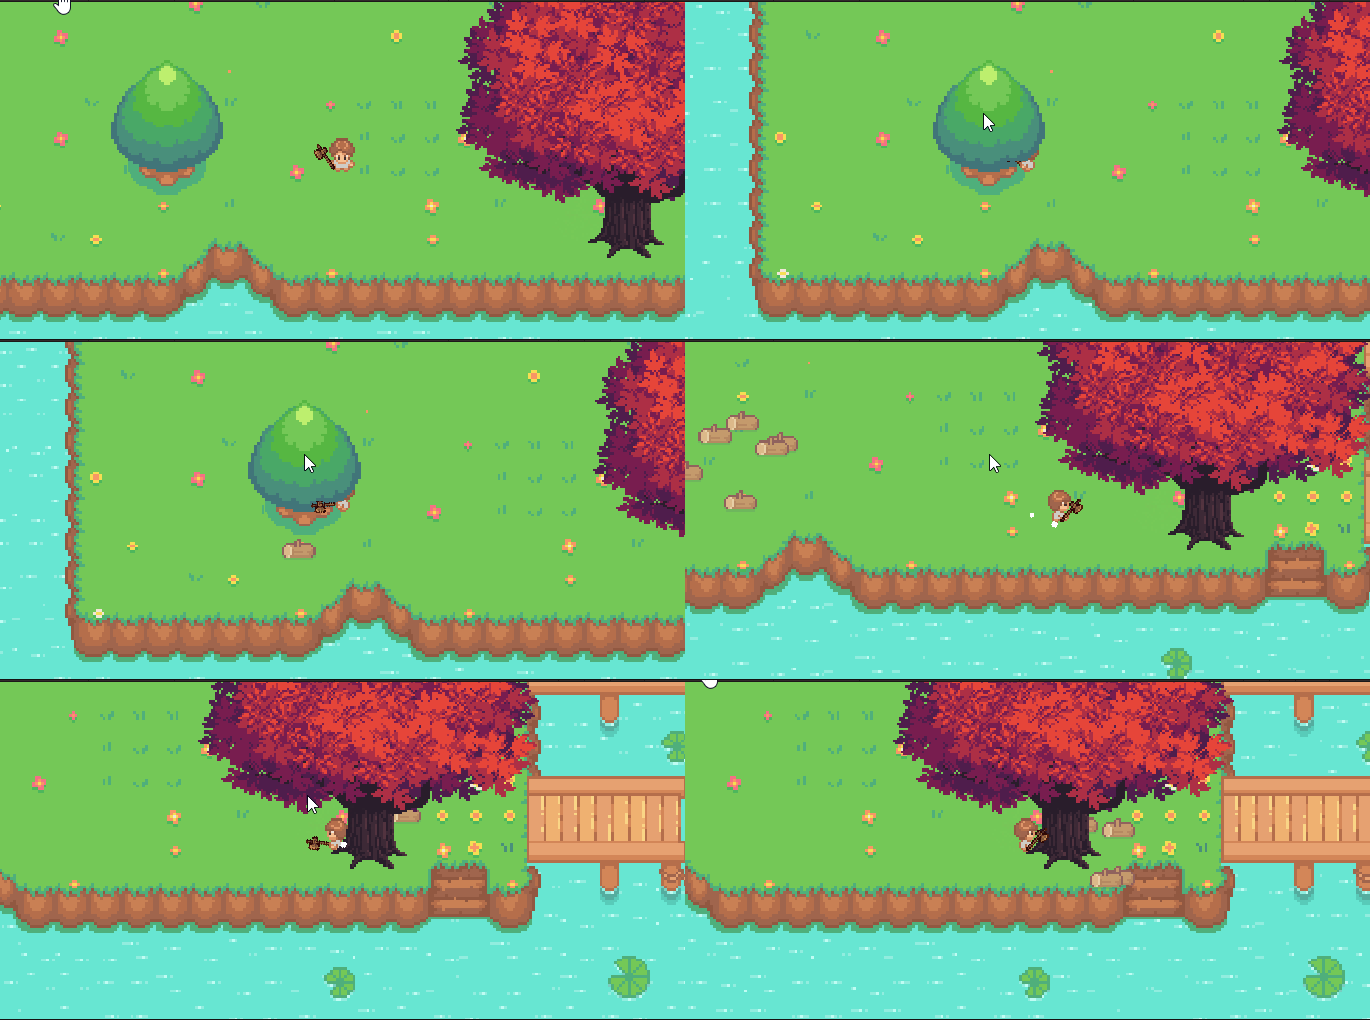
效果
六、存储拾取物品
使用ScriptableObject定义物品
using UnityEngine;[CreateAssetMenu(fileName = "Resource", menuName = "GathererTopDownRPG/Resource")]
public class Resource : ScriptableObject
{[field: SerializeField] public string DisplayName { get; private set; }[field: SerializeField] public Sprite Icon { get; private set; }[field: SerializeField] public string Description { get; private set; }[field: SerializeField] public float Value { get; private set; }
}
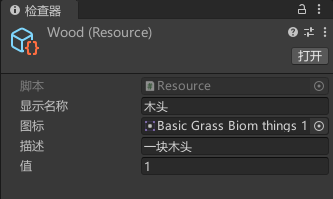
新建ScriptableObject物品,配置参数
物品脚本
using UnityEngine;public class ResourcePickup : MonoBehaviour
{[field: SerializeField] public Resource ResourceType { get; private set; }
}
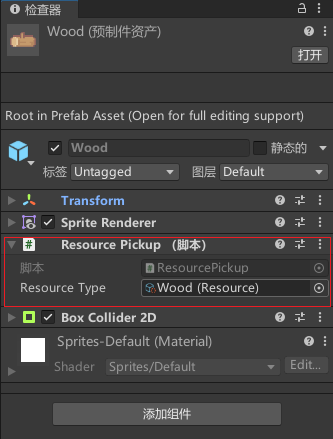
木头挂载脚本,并配置对应的ScriptableObject
引入Unity 的可序列化字典类
Unity 无法序列化标准词典。这意味着它们不会在检查器中显示或编辑,
也不会在启动时实例化。一个经典的解决方法是将键和值存储在单独的数组中,并在启动时构造字典。
我们使用gitthub大佬的源码即可,此项目提供了一个通用字典类及其自定义属性抽屉来解决此问题。
源码地址:https://github.com/azixMcAze/Unity-SerializableDictionary
你可以选择下载源码,也可以直接复制我下面的代码,我把主要代码提出来了
SerializableDictionary.cs
using System;
using System.Collections;
using System.Collections.Generic;
using System.Runtime.Serialization;
using UnityEngine;public abstract class SerializableDictionaryBase
{public abstract class Storage {}protected class Dictionary<TKey, TValue> : System.Collections.Generic.Dictionary<TKey, TValue>{public Dictionary() {}public Dictionary(IDictionary<TKey, TValue> dict) : base(dict) {}public Dictionary(SerializationInfo info, StreamingContext context) : base(info, context) {}}
}[Serializable]
public abstract class SerializableDictionaryBase<TKey, TValue, TValueStorage> : SerializableDictionaryBase, IDictionary<TKey, TValue>, IDictionary, ISerializationCallbackReceiver, IDeserializationCallback, ISerializable
{Dictionary<TKey, TValue> m_dict;[SerializeField]TKey[] m_keys;[SerializeField]TValueStorage[] m_values;public SerializableDictionaryBase(){m_dict = new Dictionary<TKey, TValue>();}public SerializableDictionaryBase(IDictionary<TKey, TValue> dict){	m_dict = new Dictionary<TKey, TValue>(dict);}protected abstract void SetValue(TValueStorage[] storage, int i, TValue value);protected abstract TValue GetValue(TValueStorage[] storage, int i);public void CopyFrom(IDictionary<TKey, TValue> dict){m_dict.Clear();foreach (var kvp in dict){m_dict[kvp.Key] = kvp.Value;}}public void OnAfterDeserialize(){if(m_keys != null && m_values != null && m_keys.Length == m_values.Length){m_dict.Clear();int n = m_keys.Length;for(int i = 0; i < n; ++i){m_dict[m_keys[i]] = GetValue(m_values, i);}m_keys = null;m_values = null;}}public void OnBeforeSerialize(){int n = m_dict.Count;m_keys = new TKey[n];m_values = new TValueStorage[n];int i = 0;foreach(var kvp in m_dict){m_keys[i] = kvp.Key;SetValue(m_values, i, kvp.Value);++i;}}#region IDictionary<TKey, TValue>public ICollection<TKey> Keys {	get { return ((IDictionary<TKey, TValue>)m_dict).Keys; } }public ICollection<TValue> Values { get { return ((IDictionary<TKey, TValue>)m_dict).Values; } }public int Count { get { return ((IDictionary<TKey, TValue>)m_dict).Count; } }public bool IsReadOnly { get { return ((IDictionary<TKey, TValue>)m_dict).IsReadOnly; } }public TValue this[TKey key]{get { return ((IDictionary<TKey, TValue>)m_dict)[key]; }set { ((IDictionary<TKey, TValue>)m_dict)[key] = value; }}public void Add(TKey key, TValue value){((IDictionary<TKey, TValue>)m_dict).Add(key, value);}public bool ContainsKey(TKey key){return ((IDictionary<TKey, TValue>)m_dict).ContainsKey(key);}public bool Remove(TKey key){return ((IDictionary<TKey, TValue>)m_dict).Remove(key);}public bool TryGetValue(TKey key, out TValue value){return ((IDictionary<TKey, TValue>)m_dict).TryGetValue(key, out value);}public void Add(KeyValuePair<TKey, TValue> item){((IDictionary<TKey, TValue>)m_dict).Add(item);}public void Clear(){((IDictionary<TKey, TValue>)m_dict).Clear();}public bool Contains(KeyValuePair<TKey, TValue> item){return ((IDictionary<TKey, TValue>)m_dict).Contains(item);}public void CopyTo(KeyValuePair<TKey, TValue>[] array, int arrayIndex){((IDictionary<TKey, TValue>)m_dict).CopyTo(array, arrayIndex);}public bool Remove(KeyValuePair<TKey, TValue> item){return ((IDictionary<TKey, TValue>)m_dict).Remove(item);}public IEnumerator<KeyValuePair<TKey, TValue>> GetEnumerator(){return ((IDictionary<TKey, TValue>)m_dict).GetEnumerator();}IEnumerator IEnumerable.GetEnumerator(){return ((IDictionary<TKey, TValue>)m_dict).GetEnumerator();}#endregion#region IDictionarypublic bool IsFixedSize { get { return ((IDictionary)m_dict).IsFixedSize; } }ICollection IDictionary.Keys { get { return ((IDictionary)m_dict).Keys; } }ICollection IDictionary.Values { get { return ((IDictionary)m_dict).Values; } }public bool IsSynchronized { get { return ((IDictionary)m_dict).IsSynchronized; } }public object SyncRoot { get { return ((IDictionary)m_dict).SyncRoot; } }public object this[object key]{get { return ((IDictionary)m_dict)[key]; }set { ((IDictionary)m_dict)[key] = value; }}public void Add(object key, object value){((IDictionary)m_dict).Add(key, value);}public bool Contains(object key){return ((IDictionary)m_dict).Contains(key);}IDictionaryEnumerator IDictionary.GetEnumerator(){return ((IDictionary)m_dict).GetEnumerator();}public void Remove(object key){((IDictionary)m_dict).Remove(key);}public void CopyTo(Array array, int index){((IDictionary)m_dict).CopyTo(array, index);}#endregion#region IDeserializationCallbackpublic void OnDeserialization(object sender){((IDeserializationCallback)m_dict).OnDeserialization(sender);}#endregion#region ISerializableprotected SerializableDictionaryBase(SerializationInfo info, StreamingContext context) {m_dict = new Dictionary<TKey, TValue>(info, context);}public void GetObjectData(SerializationInfo info, StreamingContext context){((ISerializable)m_dict).GetObjectData(info, context);}#endregion
}public static class SerializableDictionary
{public class Storage<T> : SerializableDictionaryBase.Storage{public T data;}
}[Serializable]
public class SerializableDictionary<TKey, TValue> : SerializableDictionaryBase<TKey, TValue, TValue>
{public SerializableDictionary() {}public SerializableDictionary(IDictionary<TKey, TValue> dict) : base(dict) {}protected SerializableDictionary(SerializationInfo info, StreamingContext context) : base(info, context) {}protected override TValue GetValue(TValue[] storage, int i){return storage[i];}protected override void SetValue(TValue[] storage, int i, TValue value){storage[i] = value;}
}[Serializable]
public class SerializableDictionary<TKey, TValue, TValueStorage> : SerializableDictionaryBase<TKey, TValue, TValueStorage> where TValueStorage : SerializableDictionary.Storage<TValue>, new()
{public SerializableDictionary() {}public SerializableDictionary(IDictionary<TKey, TValue> dict) : base(dict) {}protected SerializableDictionary(SerializationInfo info, StreamingContext context) : base(info, context) {}protected override TValue GetValue(TValueStorage[] storage, int i){return storage[i].data;}protected override void SetValue(TValueStorage[] storage, int i, TValue value){storage[i] = new TValueStorage();storage[i].data = value;}
}
库存基类
TryGetValue 方法会尝试从字典中获取指定键 type 对应的值。如果找到了该键,它会将对应的值赋值给 currentCount 变量,并返回 true。
using UnityEngine;public class Inventory : MonoBehaviour
{[field: SerializeField] private SerializableDictionary <Resource, int> Resources { get; set;}//<summary>// 查找并返回字典中某个资源的数量///</summary>//<param name="type">要检查的资源类型</param>//<returns>如果有资源则返回其数量,否则返回0</returns>public int GetResourceCount(Resource type){if (Resources.TryGetValue(type, out int currentCount))return currentCount;elsereturn 0;}/// <summary>/// 向字典中添加资源/// </summary>/// <param name="type">要添加的资源类型</param>/// <param name="count">要添加的数量</param>/// <returns>成功添加的数量</returns>public int AddResources(Resource type, int count){if (Resources.TryGetValue(type, out int currentCount)){return Resources[type] += count;}else{Resources.Add(type, count);return count;}}
}
拾取物品
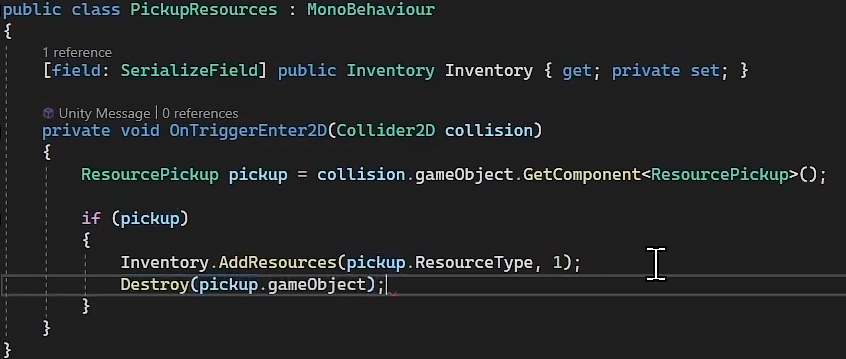
拾取物品代码,挂载在人物身上
using UnityEngine;public class PickupResources : MonoBehaviour
{[field: SerializeField] public Inventory Inventory { get; private set; }private void OnTriggerEnter2D(Collider2D collision){ResourcePickup pickup = collision.gameObject.GetComponent<ResourcePickup>();if (pickup){Inventory.AddResources(pickup.ResourceType, 1);Destroy(pickup.gameObject);}}
}
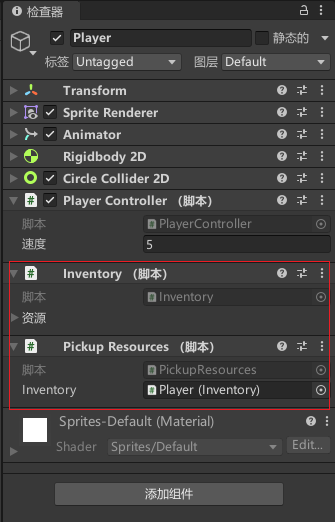
运行效果
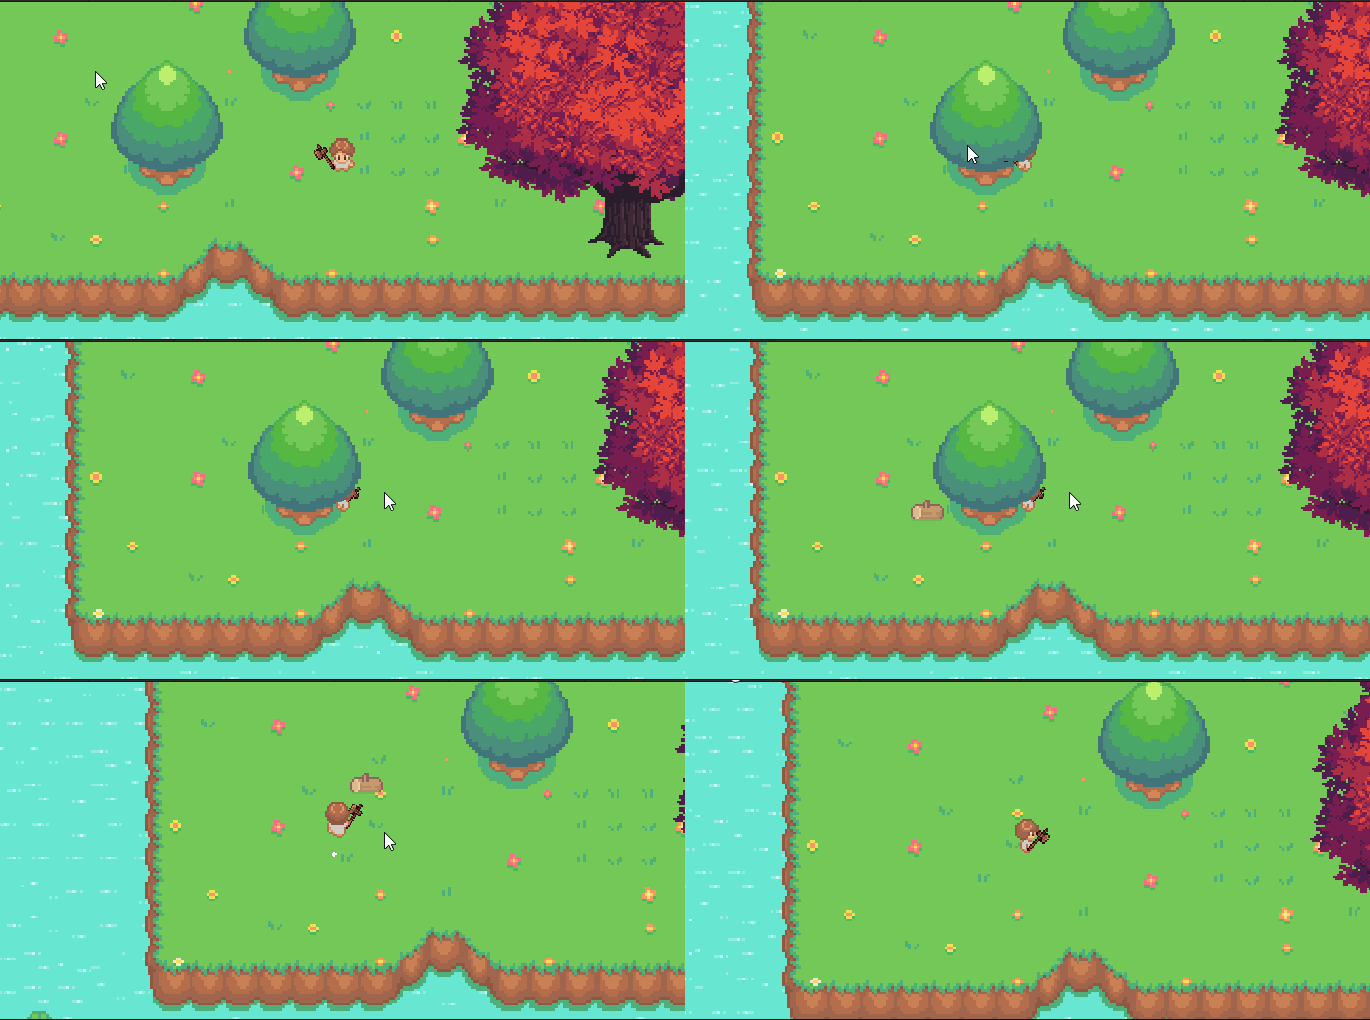
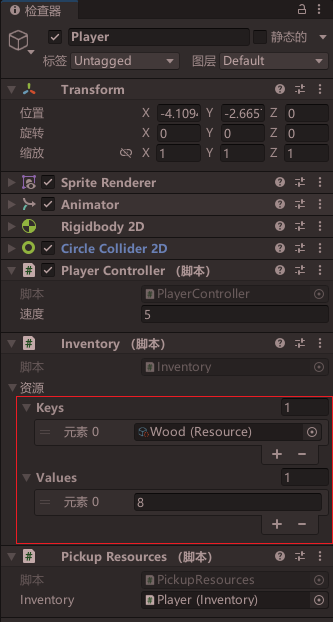
检测是否入库,数量是否增加
七、实现靠近收获物品自动吸附
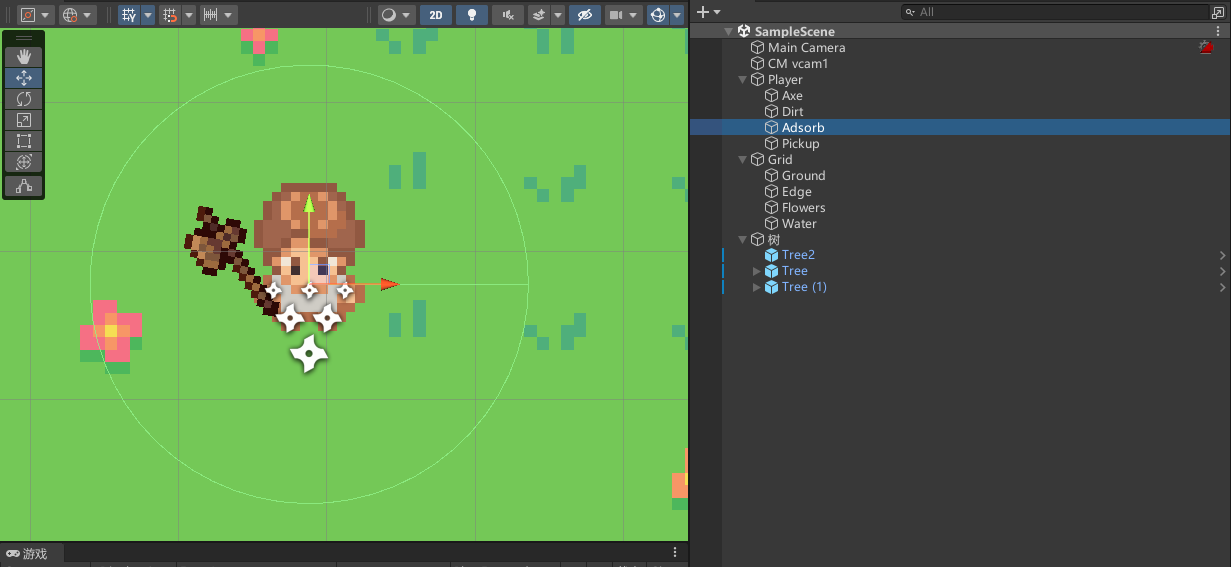
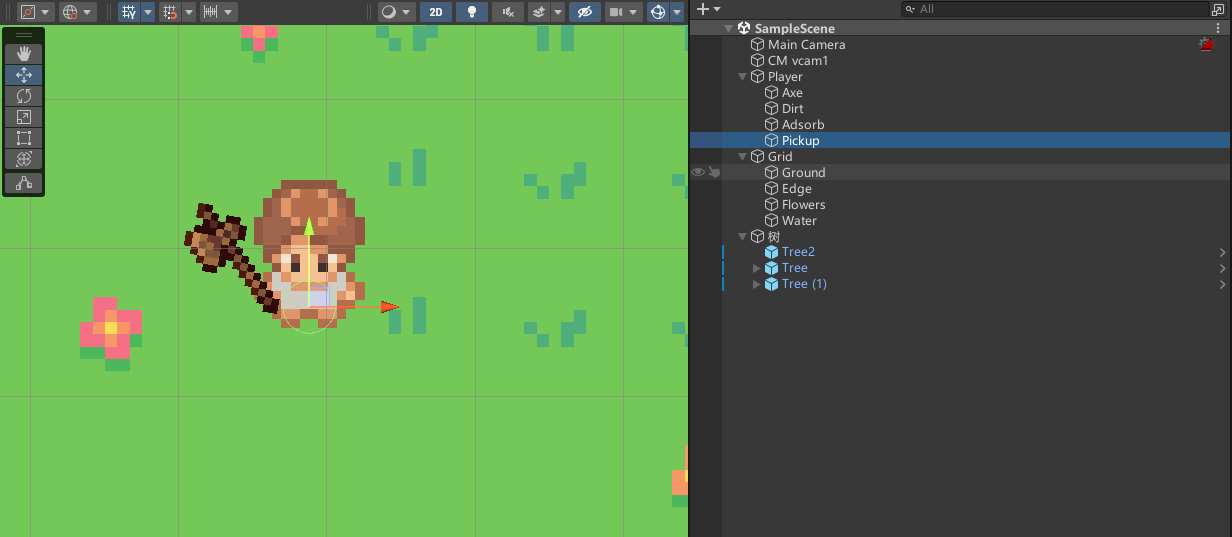
新增两个节点,一个为吸附范围,一个为拾取物品范围,同时去除原本角色的PickupResources脚本挂载
编写吸附脚本PickupGravity
using System.Collections;
using System.Collections.Generic;
using UnityEngine;
public class PickupGravity : MonoBehaviour
{public float GravitySpeed = 5f;private List<ResourcePickup> _nearbyResources = new();private void FixedUpdate(){foreach (ResourcePickup pickup in _nearbyResources){Vector2 directionToCenter = (transform.position - pickup.transform.position).normalized;pickup.transform.Translate(directionToCenter * GravitySpeed * Time.fixedDeltaTime);}}private void OnTriggerEnter2D(Collider2D collision){ResourcePickup pickup = collision.gameObject.GetComponent<ResourcePickup>();if (pickup) _nearbyResources.Add(pickup);}private void OnTriggerExit2D(Collider2D collision){ResourcePickup pickup = collision.gameObject.GetComponent<ResourcePickup>();if (pickup) _nearbyResources.Remove(pickup);}
}
也可以使用DOtween实现,会更加简单
using UnityEngine;
using DG.Tweening;
public class PickupGravity : MonoBehaviour
{public float speed = 0.6f;private void OnTriggerEnter2D(Collider2D collision){ResourcePickup pickup = collision.gameObject.GetComponent<ResourcePickup>();if (pickup){pickup.transform.DOMove(transform.position, speed);}}
}
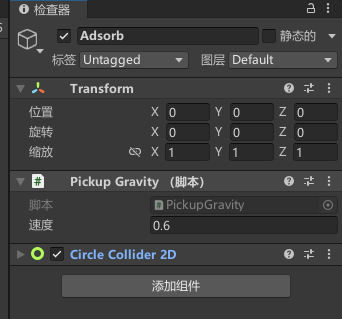
挂载脚本
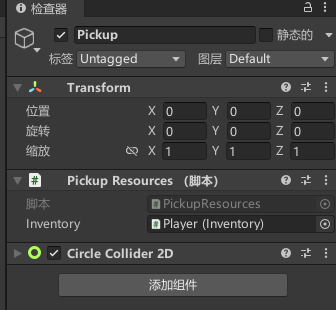
运行效果
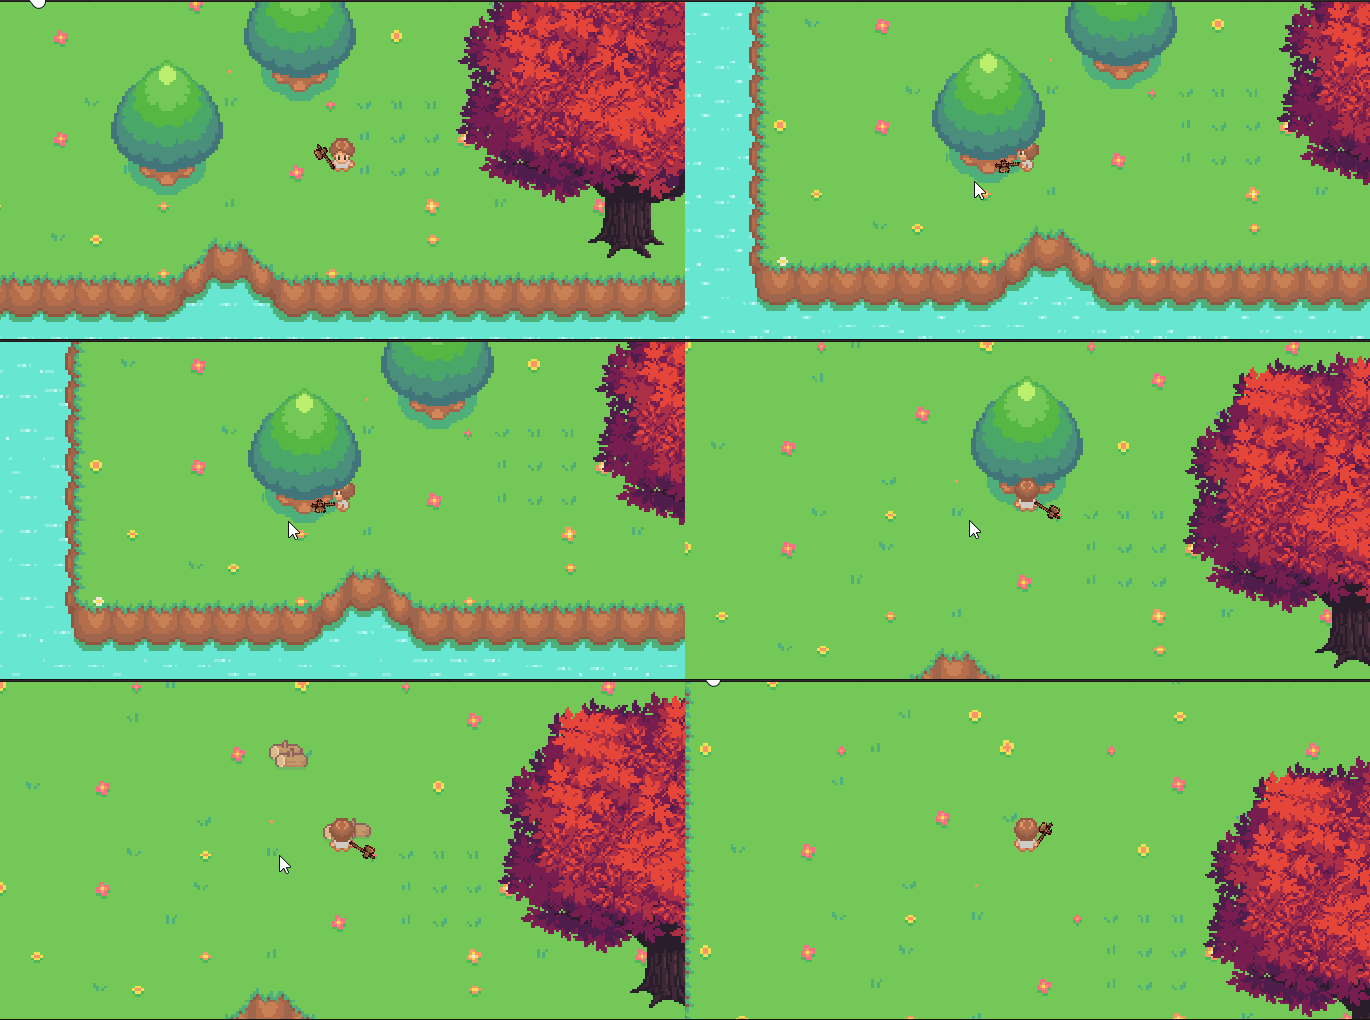
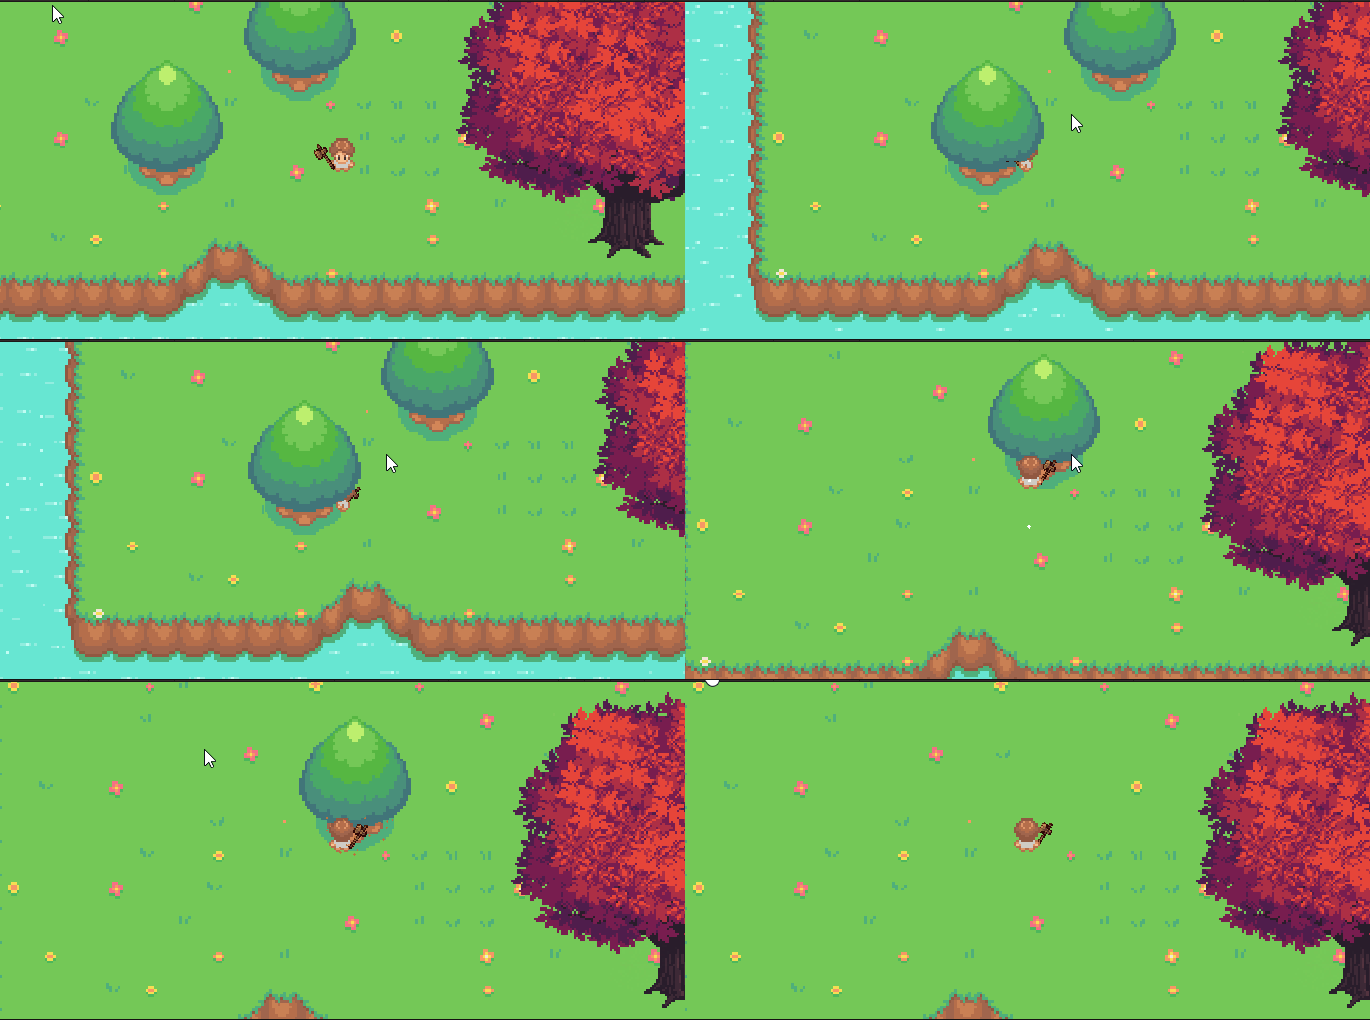
八、树木被砍掉的粒子效果
粒子效果配置,材质和颜色选择自己想要的就行
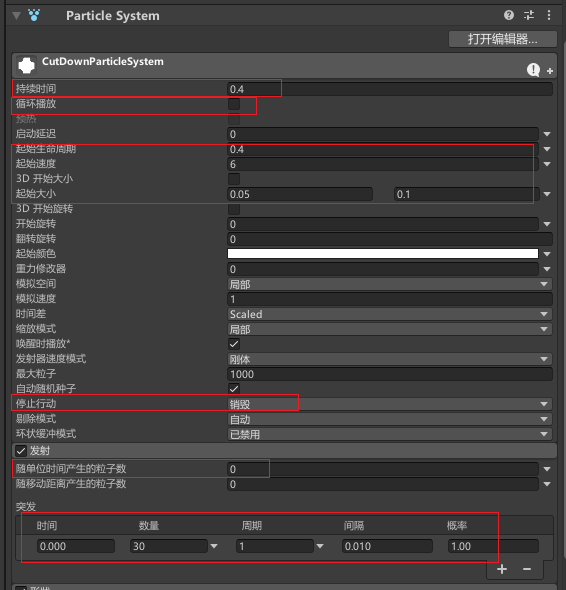
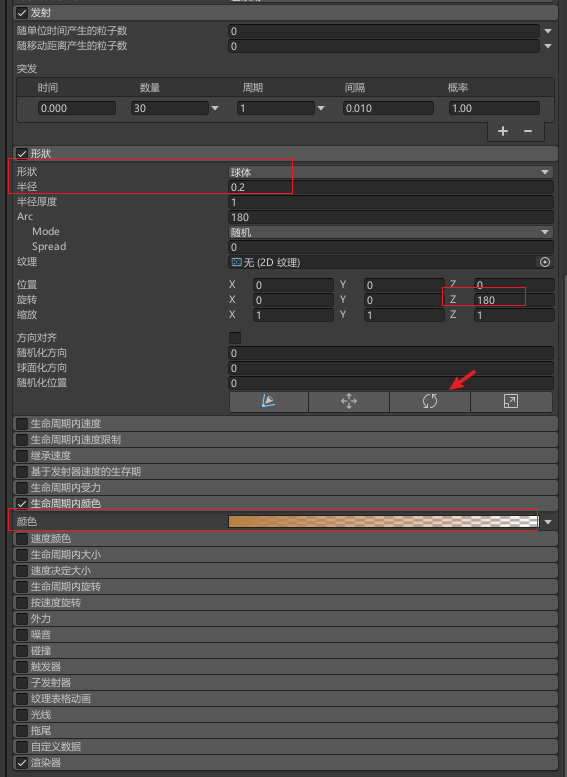
代码调用
public GameObject cutDownParticleSystem;//粒子效果//生成特效
Instantiate(cutDownParticleSystem, transform.position, Quaternion.identity);
效果
九、新增更多可收集物
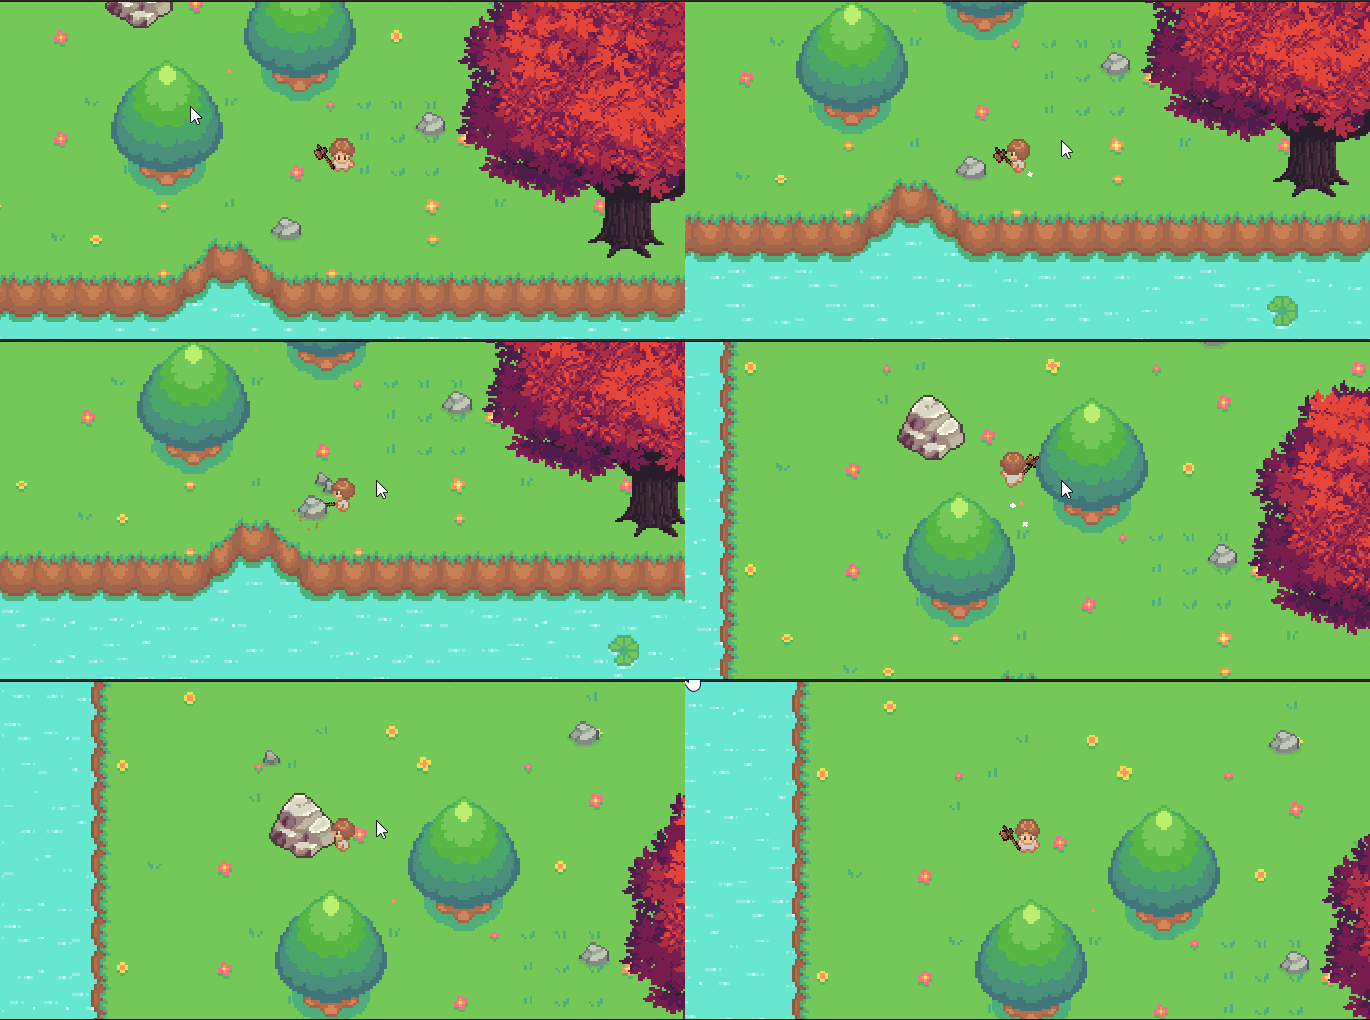
直接按前面的树木生成预制体变体
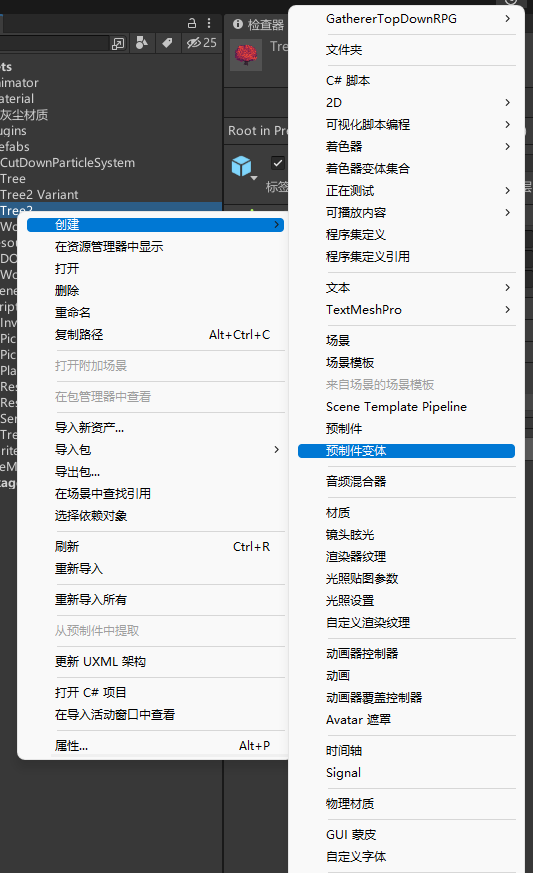
修改相应的配置即可,最终效果
十、更多工具切换
新增ScriptableObject Tool类,定义不同类型的工具
using System.Collections;
using System.Collections.Generic;
using UnityEngine;
using UnityEngine.UI;[CreateAssetMenu(fileName = "Tool", menuName = "GathererTopDownRPG/Tool")]
public class Tool : ScriptableObject
{[field: SerializeField] public string DisplayName { get; private set; }[field: SerializeField] public Sprite sprite { get; private set; }[field: SerializeField] public Sprite Icon { get; private set; }[field: SerializeField] public string Description { get; private set; }[field: SerializeField] public ToolType toolType { get; private set; }[field: SerializeField] public int minCount { get; private set; } = 1;//随机掉落的最小资源数量[field: SerializeField] public int maxCount { get; private set; } = 1;//随机掉落的最大资源数量
}// 在此添加其他工具类型
public enum ToolType
{Axe,//斧头Pickaxe,//镐子
}
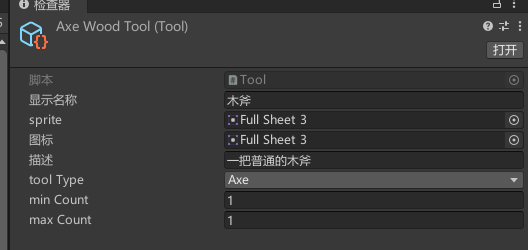
新增工具代码,挂载在工具节点上
public class ToolController : MonoBehaviour
{public Tool tool;
}
修改可破坏物(树,石头)的代码,及TreeController脚本
public ToolType toolType;private void OnTriggerEnter2D(Collider2D other)
{//碰到带Axe标签物体if (other.CompareTag("Axe")){//只有对应的工具才可以if (other.GetComponent<ToolController>().tool.toolType == toolType){//。。。TakeDamage(other.GetComponent<ToolController>().tool);//。。。}else{Debug.Log("工具不对");}}
}public void TakeDamage(Tool tool)
{int minWoodCount = tool.minCount;    // 随机掉落的最小木头数量int maxWoodCount = tool.maxCount;    // 随机掉落的最大木头数量
}
ps:我这里只配置了不同武器的 随机掉落的数量,你可以将其他数据也进行不同的工具配置,如最大攻击次数,最大生成物品次数
页面绘制不同武器的切换按钮
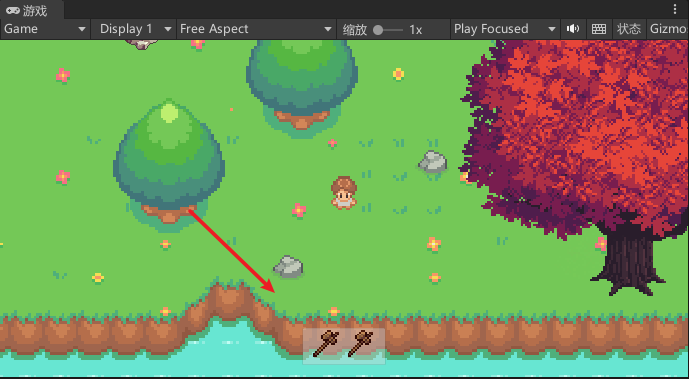
切换工具按钮脚本,脚本挂载各个按钮上即可
using UnityEngine;
using UnityEngine.UI;//切换工具
public class SwitchTool : MonoBehaviour
{public Tool tool;private ToolController toolController;private void Start(){toolController = FindObjectOfType<PlayerController>().GetComponentInChildren<ToolController>();//修改当前按钮icon图片GetComponent<Image>().sprite = tool.Icon;//绑定点击事件GetComponent<Button>().onClick.AddListener(ChangeTool);}//切换工具public void ChangeTool(){if (toolController != null){if(toolController.GetComponent<SpriteRenderer>().sprite != tool.sprite){toolController.tool = tool;//修改工具角色手拿工具图片toolController.GetComponent<SpriteRenderer>().sprite = tool.sprite;}else{toolController.tool = null;toolController.GetComponent<SpriteRenderer>().sprite = null;}}else{Debug.LogWarning("没找到目标ToolController组件");}}
}
最终效果

十一、扩展
音乐音效系统
背包系统
经验血量系统
制作系统,不同等级可以解锁不同品质的工具
种植系统
建造系统
钓鱼、烹饪系统
天气、四季变化系统
任务系统
打怪系统
种子、商城系统
后续大家可以自行扩展,这里就不过多赘述了。至于后续是否继续完善开发,就看大家想不想看了,点赞越多更新越快哦!
源码
整理好后我会放上来
完结
赠人玫瑰,手有余香!如果文章内容对你有所帮助,请不要吝啬你的点赞评论和关注,以便我第一时间收到反馈,你的每一次支持都是我不断创作的最大动力。点赞越多,更新越快哦!当然,如果你发现了文章中存在错误或者有更好的解决方法,也欢迎评论私信告诉我哦!
好了,我是向宇,https://xiangyu.blog.csdn.net
一位在小公司默默奋斗的开发者,出于兴趣爱好,于是最近才开始自习unity。如果你遇到任何问题,也欢迎你评论私信找我, 虽然有些问题我可能也不一定会,但是我会查阅各方资料,争取给出最好的建议,希望可以帮助更多想学编程的人,共勉~
