1.1静态布局

<template><div class="layout_container"><!-- 左侧导航 --><div class="layout_slider"></div><!-- 顶部导航 --><div class="layout_tabbar"></div><!-- 内容展示区 --><div class="layout_main"></div></div>
</template><!-- <script lang="ts"></script> --><style scoped lang="scss">
.layout_container {width: 100%;height: 100vh;.layout_slider {color: white;width: $base-menu-width;height: 100vh;background: $base-menu-background;transition: all 0.3s;.scrollbar {width: 100%;height: calc(100vh - $base-menu-logo-height);.el-menu {border-right: none;}}}.layout_tabbar {position: fixed;width: calc(100% - $base-menu-width);height: $base-tabbar-height;top: 0px;left: $base-menu-width;transition: all 0.3s;background-color: aqua;&.fold {width: calc(100vw - $base-menu-min-width);left: $base-menu-min-width;}}.layout_main {position: absolute;width: calc(100% - $base-menu-width);height: calc(100vh - $base-tabbar-height);left: $base-menu-width;top: $base-tabbar-height;padding: 20px;overflow: auto;transition: all 0.3s;&.fold {width: calc(100vw - $base-menu-min-width);left: $base-menu-min-width;}}
}
</style>
//项目提供scss全局变量
// 左侧菜单宽度
//定义项目主题颜色//左侧的菜单的宽度
$base-menu-width     :260px;
//左侧菜单的背景颜色
$base-menu-background:#001529;
$base-menu-min-width :50px;// 顶部导航的高度
$base-tabbar-height:50px;//左侧菜单logo高度设置
$base-menu-logo-height:50px;//左侧菜单logo右侧文字大小
$base-logo-title-fontSize:20px;
1.2动态logo和标题搭建
src下创建setting.ts

// 项目图标和标题
export default {title: 'v3后台管理系统', //项目标题设置logo: '../../../../../public/logo.png', //项目配置logologoHidden: true, //logo组件是否隐藏
}
<template><div class="logo" v-if="setting.logoHidden"><img :src="setting.logo" alt="" /><p>{{ setting.title }}</p></div>
</template>
<script setup lang="ts">
import setting from '@/setting'
</script>
<style scoped lang="scss">
.logo {width: 100%;height: $base-menu-logo-height;color: white;display: flex;align-items: center;padding: 10px;img {width: 40px;height: 40px;}p {font-size: $base-logo-title-fontSize;margin-left: 10px;}
}
</style>
1.3左侧静态布局

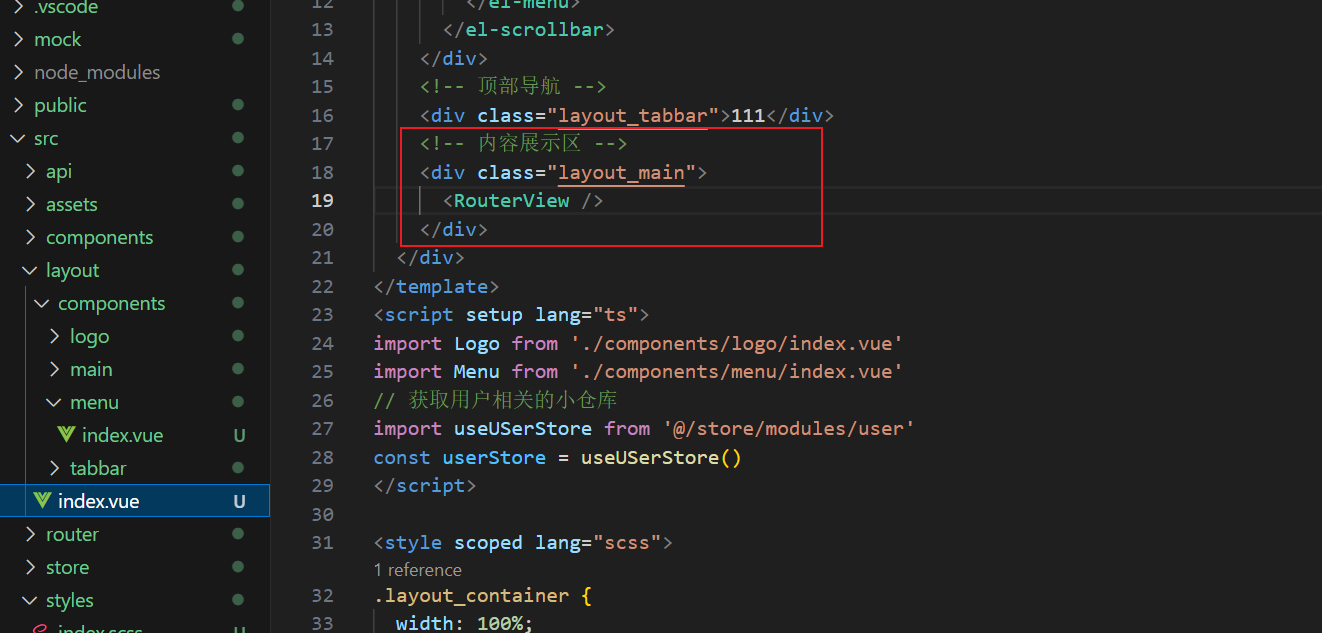
<template><div class="layout_container"><!-- 左侧导航 --><div class="layout_slider"><Logo /><!-- 展示菜单 --><!-- 滚动组件 --><el-scrollbar class="scrollbar"><!-- 菜单组件--><el-menu background-color="#001529" text-color="white" active-text-color="yellowgreen"><el-menu-item index="1">首页</el-menu-item><el-menu-item index="1">数据大屏</el-menu-item><el-sub-menu index="2"><template #title>权限管理</template><el-menu-item index="2-1">用户管理</el-menu-item><el-menu-item index="2-2">角色管理</el-menu-item><el-menu-item index="2-3">菜单管理</el-menu-item></el-sub-menu></el-menu></el-scrollbar></div><!-- 顶部导航 --><div class="layout_tabbar"></div><!-- 内容展示区 --><div class="layout_main"><h1 style="height: 22222px; background-color: red">我是一个段落</h1></div></div>
</template>
<script setup lang="ts">
import Logo from './components/logo/index.vue'
</script><style scoped lang="scss">
.layout_container {width: 100%;height: 100vh;.layout_slider {color: white;width: $base-menu-width;height: 100vh;background: $base-menu-background;.scrollbar {width: 100%;height: calc(100vh - $base-menu-logo-height);.el-menu {border-right: none;}}}.layout_tabbar {position: fixed;width: calc(100% - $base-menu-width);height: $base-tabbar-height;top: 0px;left: $base-menu-width;background-color: aqua;}.layout_main {position: absolute;width: calc(100% - $base-menu-width);height: calc(100vh - $base-tabbar-height);left: $base-menu-width;top: $base-tabbar-height;padding: 20px;overflow: auto;background-color: yellowgreen;}
}
</style>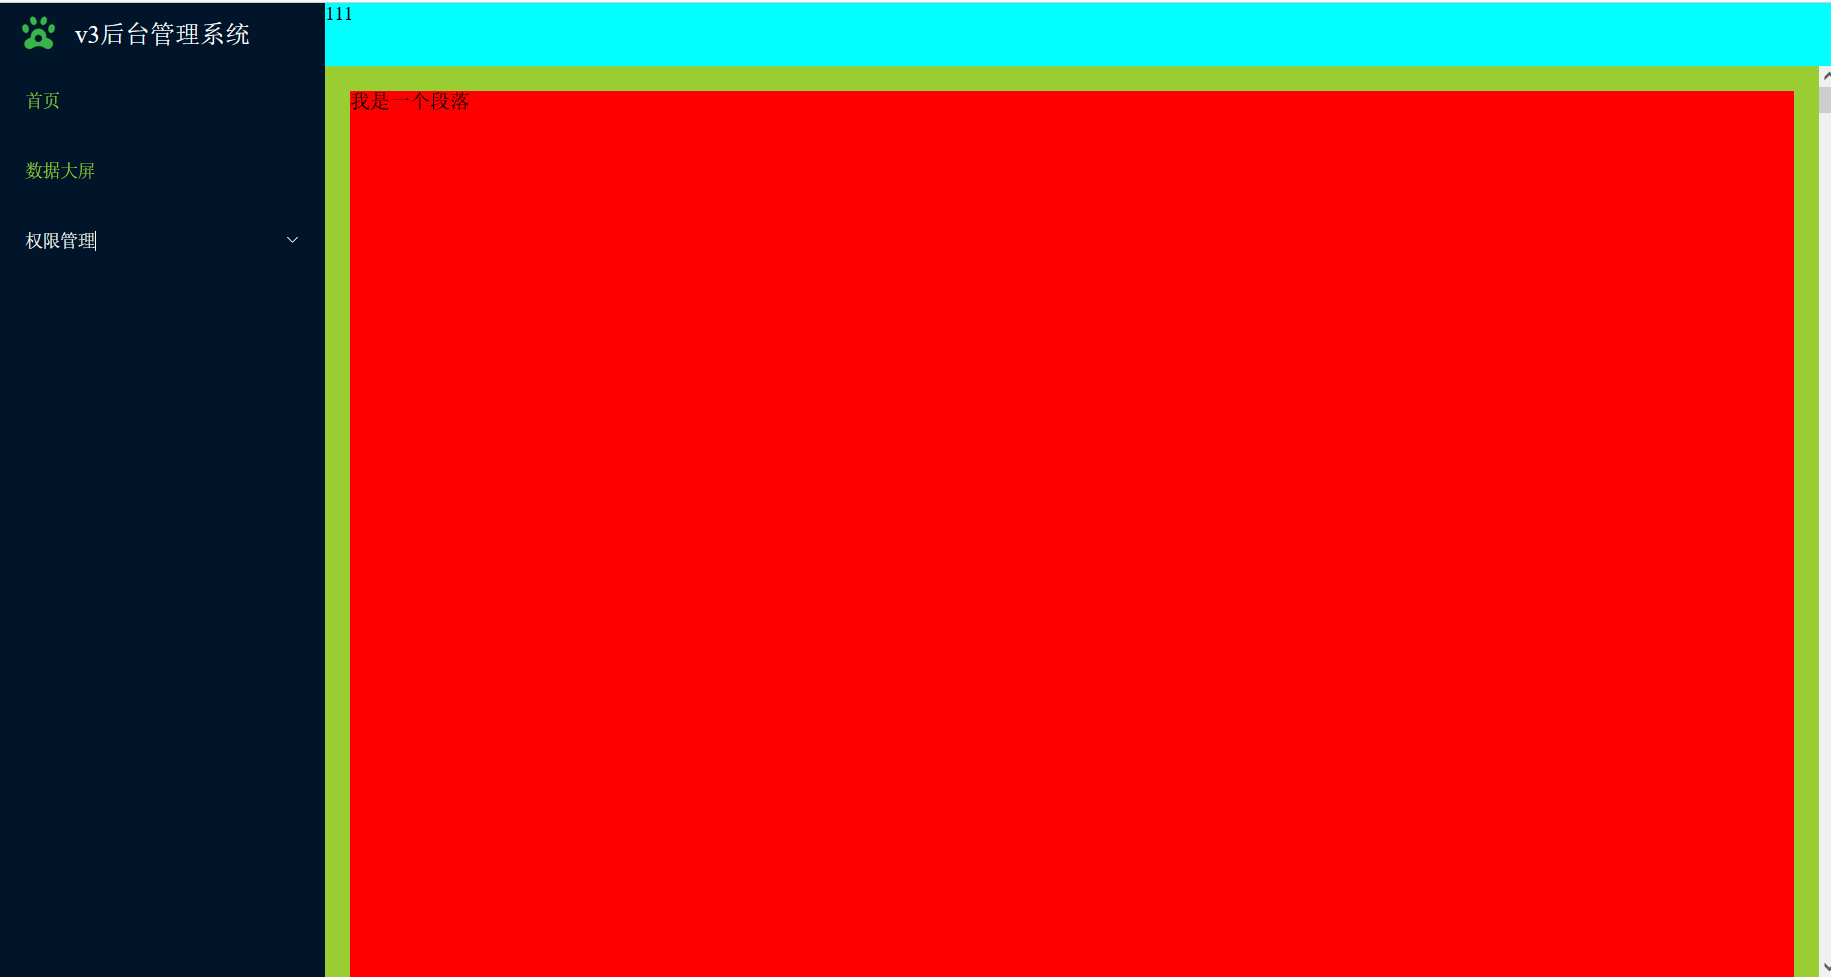
1.4配置左侧动态路由
store管理路由数组

//引入路由(常量路由)
import { constantRoute } from '@/router/routes'
const useUserStore = defineStore('User', {// 小仓库存储数据state: (): UserState => {return {token: GET_TOKEN(),menuRoutes: constantRoute, //仓库存储生成菜单需要数组(路由)}},
import type { RouteRecordRaw } from 'vue-router'
// 定义小仓库state数据类型
export interface UserState {token: string | nullmenuRoutes: RouteRecordRaw[]
}
传递路由数组到Menu组件

接收menuList


1.5递归组件生成菜单
修改router
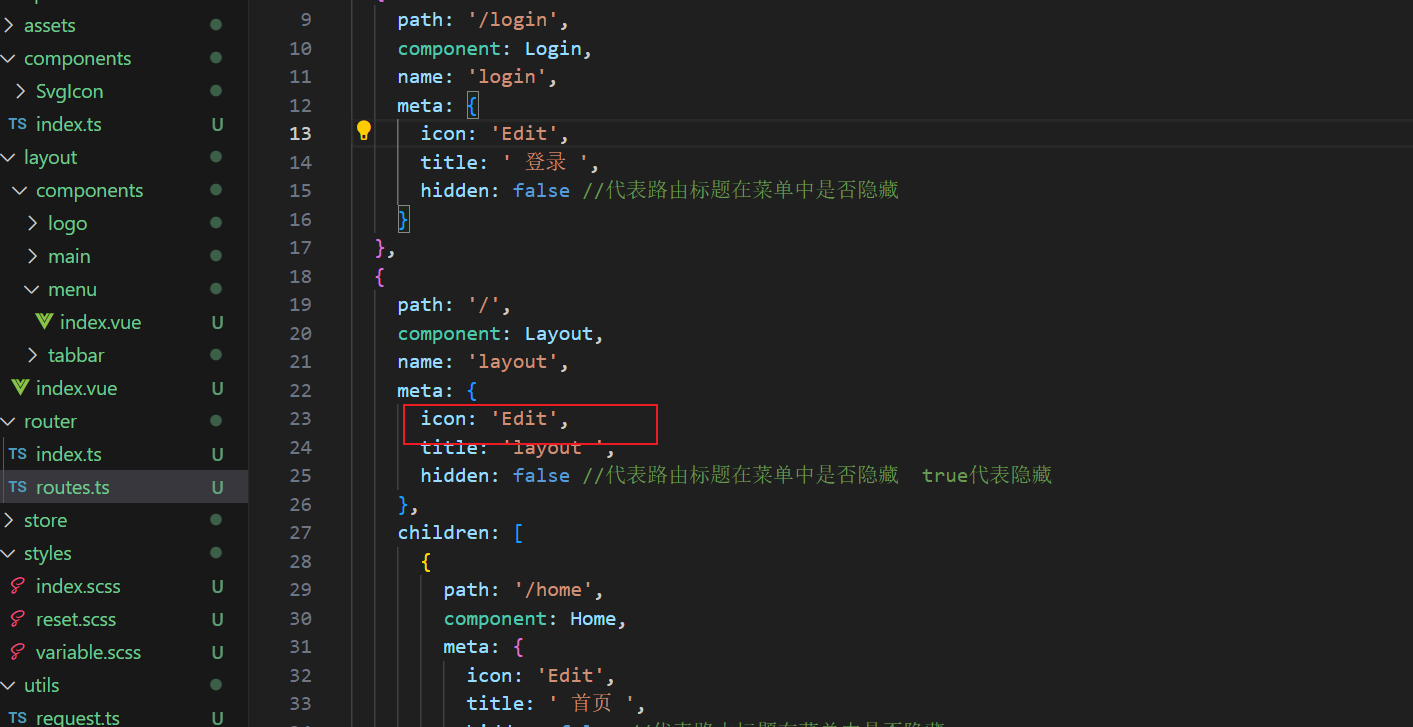
添加meta
meta: {
title: ' 登录 ',
hidden: false //代表路由标题在菜单中是否隐藏
}
hidden代表是否隐藏
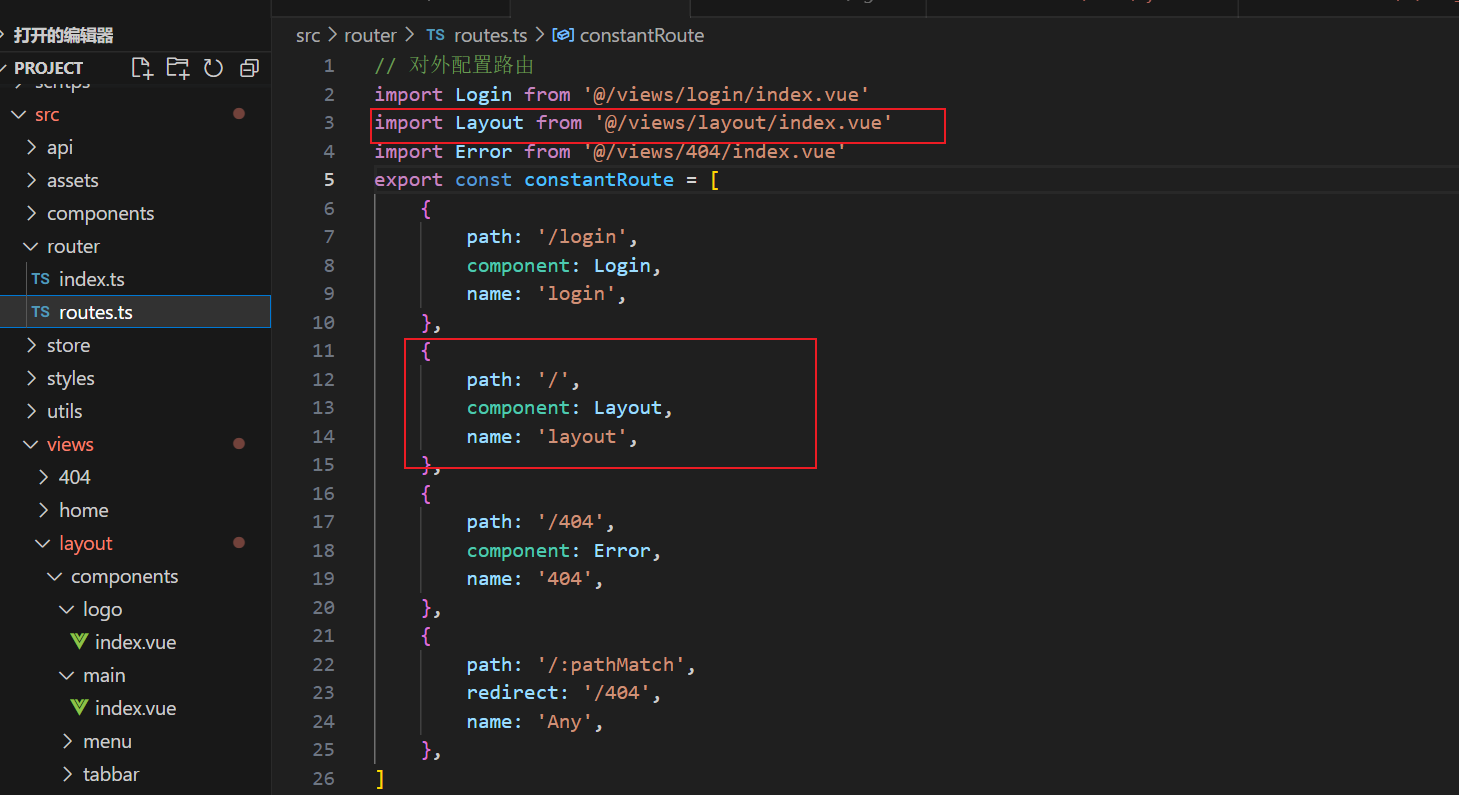
// 对外配置路由
import Login from '@/views/login/index.vue'
import Home from '@/views/home/index.vue'
import Error from '@/views/404/index.vue'
import Test from '@/views/test/index.vue'
import Layout from '@/layout/index.vue'
export const constantRoute = [{path: '/login',component: Login,name: 'login',meta: {title: ' 登录 ',hidden: false //代表路由标题在菜单中是否隐藏}},{path: '/',component: Layout,name: 'layout',meta: {title: 'layout ',hidden: false //代表路由标题在菜单中是否隐藏  true代表隐藏},children: [{path: '/home',component: Home,meta: {title: ' 首页 ',hidden: false //代表路由标题在菜单中是否隐藏}},{path: '/test',component: Test,meta: {title: ' 测试 ',hidden: false //代表路由标题在菜单中是否隐藏}}]},{path: '/404',component: Error,name: '404',meta: {title: ' 404 ',hidden: false //代表路由标题在菜单中是否隐藏}},{path: '/:pathMatch',redirect: '/404',name: 'Any',meta: {title: ' 任意路由 ',hidden: true //代表路由标题在菜单中是否隐藏}}
]
根据判断条件展示路由

<!-- eslint-disable vue/no-reserved-component-names -->
<template><template v-for="item in menuList" :key="item.path"><!-- 没有子路由 --><template v-if="!item.children"><el-menu-item :index="item.path" v-if="!item.meta.hidden"><template #title><!-- 图标 --><span>图标</span><span>{{ item.meta.title }}</span></template></el-menu-item></template><!-- 有子路由但是只有一个子路由 --><template v-if="item.children && item.children.length == 1"><el-menu-itemv-if="!item.children[0].meta.hidden":index="item.children[0].path"><template #title><!-- 图标 --><span>图标</span><span>{{ item.children[0].meta.title }}</span></template></el-menu-item></template><!-- 有子路由且个数大于一个 --><el-sub-menu:index="item.path"v-if="item.children && item.children.length > 1"><template #title><span>{{ item.meta.title }}</span></template><Menu :menuList="item.children"></Menu></el-sub-menu></template>
</template><script setup lang="ts">
defineProps(['menuList'])
</script>
<script lang="ts">
export default {// eslint-disable-next-line vue/no-reserved-component-namesname: 'Menu',
}
</script><style lang="scss" scoped></style>
递归组件实现


1.6配置菜单图标
注册所有图标#
您需要从 @element-plus/icons-vue 中导入所有图标并进行全局注册。
// main.ts// 如果您正在使用CDN引入,请删除下面一行。import * as ElementPlusIconsVue from '@element-plus/icons-vue'const app = createApp(App)for (const [key, component] of Object.entries(ElementPlusIconsVue)) {app.component(key, component)}
import SvgIcon from './SvgIcon/index.vue'
import type { App, Component } from 'vue'
import * as ElementPlusIconsVue from '@element-plus/icons-vue'
const components: { [name: string]: Component } = { SvgIcon }
export default {install(app: App) {// 注册项目全部的全局组件Object.keys(components).forEach((key: string) => {app.component(key, components[key])})// 将element-lpus提供的图标注册为全局组件for (const [key, component] of Object.entries(ElementPlusIconsVue)) {app.component(key, component)}},
}
在meta添加属性icon
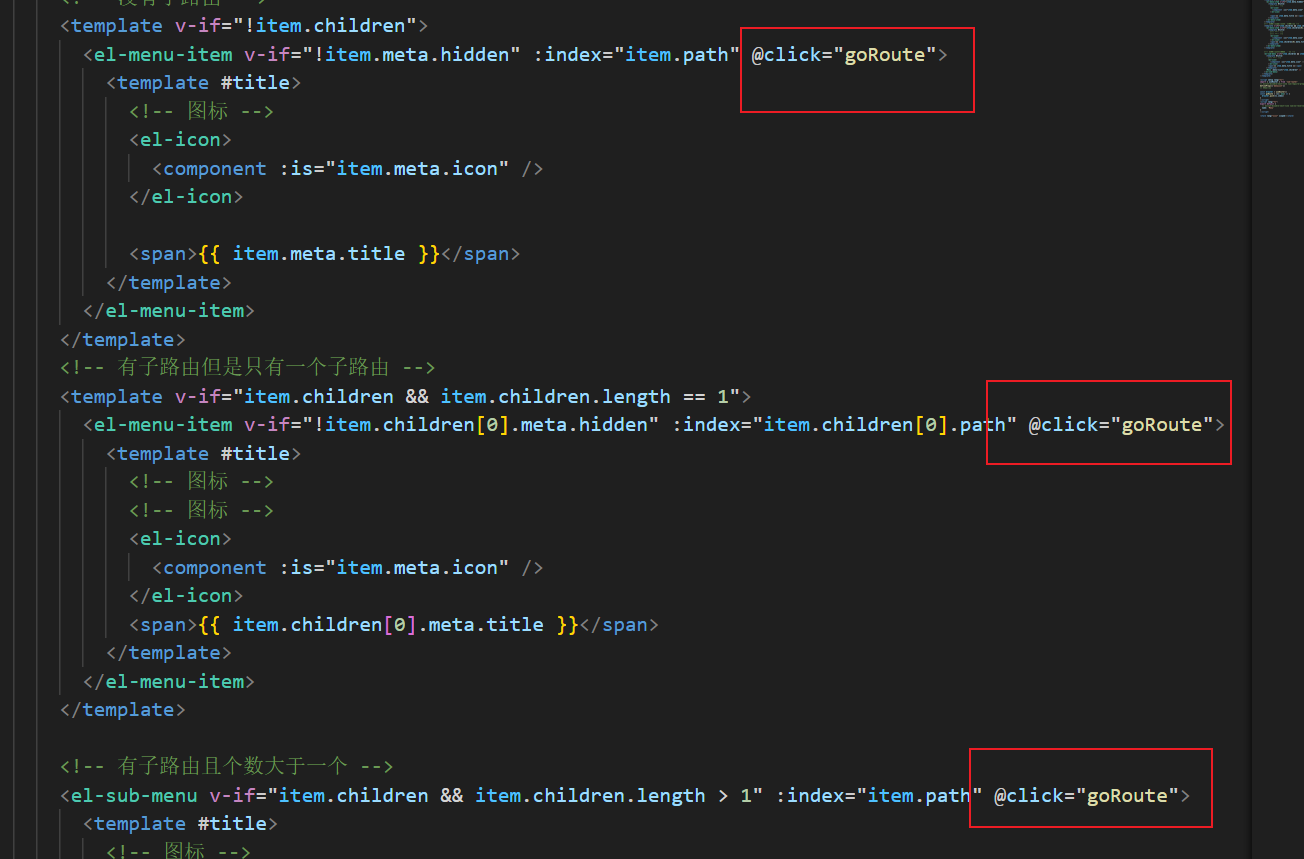
动态组件component
<!-- 图标 --><el-icon><component :is="item.meta.icon" /></el-icon>

<!-- eslint-disable vue/no-reserved-component-names -->
<template><template v-for="item in menuList" :key="item.path"><!-- 没有子路由 --><template v-if="!item.children"><el-menu-item:index="item.path"v-if="!item.meta.hidden"@click="goRoute"><template #title><!-- 图标 --><el-icon><component :is="item.meta.icon"></component></el-icon><span>{{ item.meta.title }}</span></template></el-menu-item></template><!-- 有子路由但是只有一个子路由 --><template v-if="item.children && item.children.length == 1"><el-menu-itemv-if="!item.children[0].meta.hidden":index="item.children[0].path"><template #title><!-- 图标 --><el-icon><component :is="item.children[0].meta.icon"></component></el-icon><span>{{ item.children[0].meta.title }}</span></template></el-menu-item></template><!-- 有子路由且个数大于一个 --><el-sub-menu:index="item.path"v-if="item.children && item.children.length > 1"><template #title><el-icon><component :is="item.meta.icon"></component></el-icon><span>{{ item.meta.title }}</span></template><Menu :menuList="item.children"></Menu></el-sub-menu></template>
</template><script setup lang="ts">
defineProps(['menuList'])
// 点击菜单的回调
const goRoute = (vc: any) => {console.log(vc.index)
}
</script>
<script lang="ts">
export default {// eslint-disable-next-line vue/no-reserved-component-namesname: 'Menu',
}
</script><style lang="scss" scoped></style>
1.7配置全部路由
一般后台管理系统都有登录、首页、数据大屏、权限管理这几个功能,所以接下来配置这些路由。

// 对外配置路由
import Login from '@/views/login/index.vue'
import Home from '@/views/home/index.vue'
import Error from '@/views/404/index.vue'
import Role from '@/views/acl/role/index.vue'
import User from '@/views/acl/user/index.vue'
import Scree from '@/views/scree/index.vue'
import Layout from '@/layout/index.vue'
export const constantRoute = [{path: '/login',component: Login,name: 'login',meta: {icon: 'Edit',title: ' 登录 ',hidden: true //代表路由标题在菜单中是否隐藏}},{path: '/',component: Layout,name: 'layout',meta: {title: 'layout ',hidden: false, //代表路由标题在菜单中是否隐藏  true代表隐藏icon: 'Promotion'},redirect: '/home',children: [{path: '/home',component: Home,meta: {title: ' 首页 ',hidden: false, //代表路由标题在菜单中是否隐藏icon: 'HomeFilled'}}]},{path: '/scree',component: Scree,name: 'Screen',meta: {title: '数据大屏',hidden: false,icon: 'Histogram'}},{path: '/acl',component: Layout,name: 'Acl',meta: {title: '权限管理 ',icon: 'Lock'},children: [{path: '/acl/user',component: User,meta: {title: '用户管理',hidden: false, //代表路由标题在菜单中是否隐藏icon: 'User'}},{path: '/acl/role',component: Role,meta: {title: '角色管理',hidden: false, //代表路由标题在菜单中是否隐藏icon: 'UserFilled'}}]},{path: '/404',component: Error,name: '404',meta: {icon: 'Edit',title: ' 404 ',hidden: true //代表路由标题在菜单中是否隐藏}},{path: '/:pathMatch',redirect: '/404',name: 'Any',meta: {title: ' 任意路由 ',hidden: true //代表路由标题在菜单中是否隐藏}}
]
渲染layout一级路由的子路由


1.8页面加载时默认激活菜单的 index