常见的请求对象requests.get()requests.post()requests.delete()requests.put()requests.request()常见的响应对象rep=requests.request()//返回字符串格式数据print(req.text)//返回字节格式数据print(req.content)//返回字典格式数据print(req.json)#状态码print(req.status_code)#返回状态信息print(req.reason)print(req.cookies)print(req.encoding)print(req.headers)
pytes用例框架
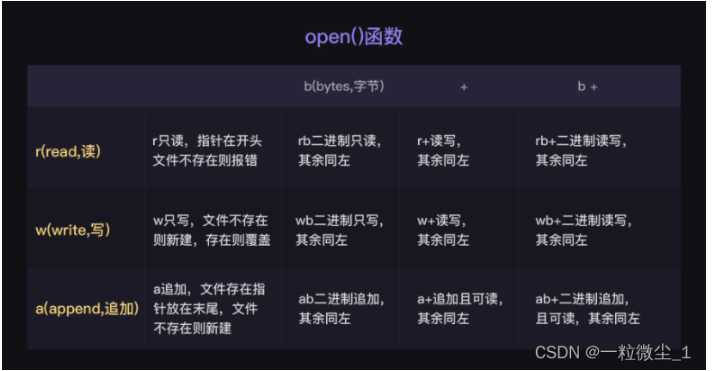
pytes用例框架默认规则:1、py文件必须以test_开头,或者_test结尾2、类名必须以Test开头3、测试用例必须以test_开头总结:文件名,类名,方法名,必须符合规则post请求参数到底是传data还是json,此时要看请求头里的content-type类型请求头中content-type为application/json, 为json形式,post请求使用json参数请求头中content-type为application/x-www-form-urlencoded为表单形式,post请求时使用使用data参数json.dumps(data) 将字典格式转换成str格式json.loads(data) 将str格式转换成字典格式pytest用例管理框架的作用发现用例:从多个py文件中找执行测试用例:升序条件判断测试结果:断言生成测试报告:html测试框架python: unittest或者pytestjava: junit,testng————————————————# 只执行冒烟用例#addopts = -vs -m "smoke"命令执行:pytest -vs (-v:输出详细信息 -s:输出调试信息 -n 多线程执行pytest插件的用法
pytest强大的插件 pytestpip install pytest-ordering 控制用例的执行顺序(重点)pip install pytest-xdist 分布式并发执行测试用例(重点)pip install pytest-dependency 控制用例的依赖关系 (了解)pip install pytest-rerunfailures 失败重跑(了解)pip install pytest-assume 多重较验(了解)pip install pytest-random-order 用例随机执行(了解)pip install pytest-html 测试报告(了解)pip install -r requests.txt
pytest-ordering 用法
没加排序
"""pytest 调整测试用例执行顺序
"""def test_01():print("test 01")def test_02():print("test 02")def test_03():print("test 03")def test_04():print("test 04")E:\Home_Work\Home_Work2\pytest01\test>pytest test_oder.py
collected 4 items
=========================执行结果================================
test_oder.py::test_01 test 01
PASSED
test_oder.py::test_02 test 02
PASSED
test_oder.py::test_03 test 03
PASSED
test_oder.py::test_04 test 04
PASSED========================================================= 4 passed in 0.54s =========================================================E:\Home_Work\Home_Work2\pytest01\test>
加了排序
"""pytest 调整测试用例执行顺序
"""
import pytest@pytest.mark.run(order=4)
def test_01():print("test 01")@pytest.mark.run(order=2)
def test_02():print("test 02")@pytest.mark.run(order=3)
def test_03():print("test 03")@pytest.mark.run(order=1)
def test_04():print("test 04")E:\Home_Work\Home_Work2\pytest01\test>pytest test_oder.py
collected 4 items
========================执行结果=================================test_oder.py::test_04 test 04
PASSED
test_oder.py::test_02 test 02
PASSED
test_oder.py::test_03 test 03
PASSED
test_oder.py::test_01 test 01
PASSED========================================================= 4 passed in 0.61s =========================================================E:\Home_Work\Home_Work2\pytest01\test>
pytest-xdist 用法
PYTEST 多进程并行与分布式执行 (PS:分布式采用的是多进程)
"""pytest 分布式执行测试用例
"""
import timeimport pytest@pytest.mark.run(order=4)
def test_01():time.sleep(1)print("test 01")@pytest.mark.run(order=2)
def test_02():time.sleep(1)print("test 02")@pytest.mark.run(order=3)
def test_03():time.sleep(1)print("test 03")@pytest.mark.run(order=1)
def test_04():time.sleep(1)print("test 04")==============================执行结果==========================E:\Home_Work\Home_Work2\pytest01\test>pytest -n 8 test_oder.py
testconfig-0.2.0, xdist-2.3.0
[gw0] win32 Python 3.8.7 cwd: E:\Home_Work\Home_Work2\pytest01\test
[gw1] win32 Python 3.8.7 cwd: E:\Home_Work\Home_Work2\pytest01\test
[gw2] win32 Python 3.8.7 cwd: E:\Home_Work\Home_Work2\pytest01\test
[gw3] win32 Python 3.8.7 cwd: E:\Home_Work\Home_Work2\pytest01\test
[gw4] win32 Python 3.8.7 cwd: E:\Home_Work\Home_Work2\pytest01\test
[gw5] win32 Python 3.8.7 cwd: E:\Home_Work\Home_Work2\pytest01\test
[gw6] win32 Python 3.8.7 cwd: E:\Home_Work\Home_Work2\pytest01\test
[gw7] win32 Python 3.8.7 cwd: E:\Home_Work\Home_Work2\pytest01\test
[gw0] Python 3.8.7 (tags/v3.8.7:6503f05, Dec 21 2020, 17:59:51) [MSC v.1928 64 bit (AMD64)]
[gw1] Python 3.8.7 (tags/v3.8.7:6503f05, Dec 21 2020, 17:59:51) [MSC v.1928 64 bit (AMD64)]
[gw2] Python 3.8.7 (tags/v3.8.7:6503f05, Dec 21 2020, 17:59:51) [MSC v.1928 64 bit (AMD64)]
[gw3] Python 3.8.7 (tags/v3.8.7:6503f05, Dec 21 2020, 17:59:51) [MSC v.1928 64 bit (AMD64)]
[gw4] Python 3.8.7 (tags/v3.8.7:6503f05, Dec 21 2020, 17:59:51) [MSC v.1928 64 bit (AMD64)]
[gw5] Python 3.8.7 (tags/v3.8.7:6503f05, Dec 21 2020, 17:59:51) [MSC v.1928 64 bit (AMD64)]
[gw6] Python 3.8.7 (tags/v3.8.7:6503f05, Dec 21 2020, 17:59:51) [MSC v.1928 64 bit (AMD64)]
[gw7] Python 3.8.7 (tags/v3.8.7:6503f05, Dec 21 2020, 17:59:51) [MSC v.1928 64 bit (AMD64)]
gw0 [4] / gw1 [4] / gw2 [4] / gw3 [4] / gw4 [4] / gw5 [4] / gw6 [4] / gw7 [4]
scheduling tests via LoadSchedulingtest_oder.py::test_02
test_oder.py::test_04
test_oder.py::test_03
test_oder.py::test_01
[gw1] PASSED test_oder.py::test_02
[gw3] PASSED test_oder.py::test_01
[gw0] PASSED test_oder.py::test_04
[gw2] PASSED test_oder.py::test_03======================================================== 4 passed in 14.16s =========================================================E:\Home_Work\Home_Work2\pytest01\test>pytest -n 8 test_oder.py
pytest.ini
pytest.ini:
pytest.ini 可以修改 pytest 的默认行为注意: pytest.ini 不能使用任何中文符号,包括汉字、空格、引号、冒号等等;更改默认命令行参数:
将常用的命令行参数设置为默认,省去重复输入的工作;# pytest.ini[pytest]addopts = -rsxX -l -strict --tb=short==========================================================================================
注册 mark 标记:
# pytest.ini[pytest]markers =demo : marks tests as demosmoke: marks tests as smoketest : marks tests as test切记,添加这个需要在每个用例的签名添加@pytest.markers.smoke(order=2)
==========================================================================================
控制台实时输出日志:
# pytest.ini[pytest]log_cli = 1==========================================================================================
指定 pytest 最低版本号:
# pytest.ini[pytest]minversion = 3.0==========================================================================================
指定 pytest 忽略某些目录:
pytest 收集测试用例时,会递归遍历所有子目录,包括某些你明知道没必要遍历的目录,遇到这种情况,可以使用 norecursedirs 参数简化 pytest 的搜索工作;norecursedirs 默认的设置是:.* build dist CVS _darcs {arch} *.egg ,多个路径用空格隔开。# pytest.ini[pytest]norecursedirs = .* build dist CVS _darcs {arch} *.egg venv src==========================================================================================
指定测试目录:
testpaths 限定测试用例的搜索范围,只有在 pytest 范围指定文件目录参数或测试用例标识符时,该选项才会启用;testpaths 指定的路径是以 testpaths 所在的目录为基准的相对路径;# pytest.ini[pytest]testpaths = test_path==========================================================================================
更改测试用例收集规则:
pytest 默认的用例收集规则:1、测试模块必须以 test_ 开头或以 _test 结尾;
2、测试类必须以 Test 开头,且不能有 __init__() ;
3、测试方法必须以 test_ 开头;下面我们来添加自己的收集规则:1、添加 check_ 开头的测试模块;
2、添加 Check 开头的测试类;
3、添加 check_ 开头的测试方法;
# pytest.ini[pytest]python_files =     test_*  *_test  check_*
python_classes =   Test*   Check*
python_functions = test_*  check_*==========================================================================================
禁用 XPASS:
将标记为 @pytest.mark.xfail 但实际通过的测试用例报告为失败;# pytest.ini[pytest]xfail_strict = true==========================================================================================
避免文件名冲突:
为所有的测试目录添加 __init__.py,当多个测试目录拥有重名文件时,__init__.py 可以避免文件名冲突;==========================================================================================
动态添加及获取 ini 配置参数:
# conftest.pyimport pytestdef pytest_addoption(parser):parser.addini('nice', type='bool', default=True, help='添加 ini 参数')@pytest.fixture(autouse=True)
def get_ini(pytestconfig):"""获取 ini 参数"""nice = pytestconfig.getini('nice')print(nice)执行时,只需要在相应的用例文件中输入执行命令pytest.main()
前后置夹具:
def setup(self):print("在每个用例前执行一次")def teardown(self):print("在每个用例后执行一次")setup_class/teardown_class 在每个类之前或者之后执行一次实现部分前置 如果想在其中一个用例做数据库的验证 @pytest.fixtrue(scope="作用域",params="数据驱动",autouse="自动执行",ids="自定义参数",name="重命名") 一般回合conftest.py一起使用作用域: 可以是个 function ,class,模块,或者是个包conftest.py 名称是固定的 功能强大conftest.py 文件是单独存放@pytest.fixtrue方法的,用处是可以在读个py文件中共享前置的配 conftest.py里面的方法调用时不需要导入,可以直接使用
用法:
# coding=utf-8
import json
import re
import pytest as pytest
import requests@pytest.fixture(scope="function")
def conn_databases():print("连接数据库的操作在里面")yieldprint("关闭数据库")# 发送 按住ctrl+鼠标左键
class TestSecondRequest:# 类变量,通过类名来访问access_token = ""csrf_token = ""cookies = ""session = requests.session()def test_get_toke(self, conn_databases):url = "https://api.weixin.qq.com/cgi-bin/token"data = {"grant_type": "client_credential","appid": "wx4a6bb065c448f76f","secret": "e2219aa93e7e2c788961be3edfe7654e"}# self.get_session()# 发送get请求  ,直接使用session来发送请求,这样会话就不会断# 原来  rep = requests.request('get',url=url, params=data)rep = TestSecondRequest.session.request('get', url=url, params=data)print(rep.json())# 通过key取value值TestSecondRequest.access_token = rep.json()['access_token']if __name__ == '__main__':pytest.main(['-vs'])def test_get_toke(self, conn_databases): 只有这个用例才会去执行链接数据库
执行结果: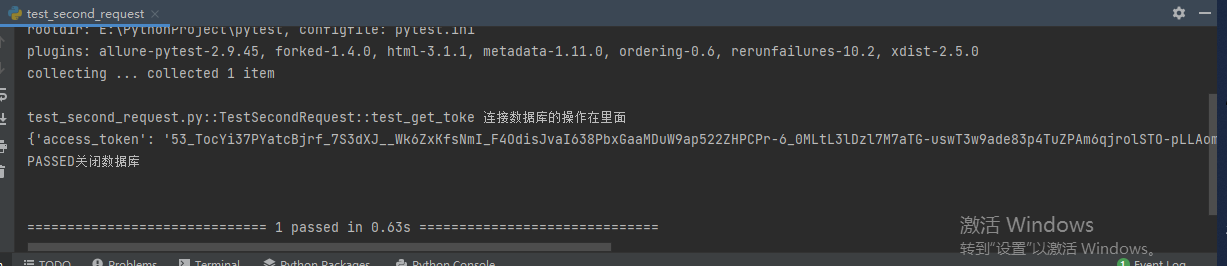
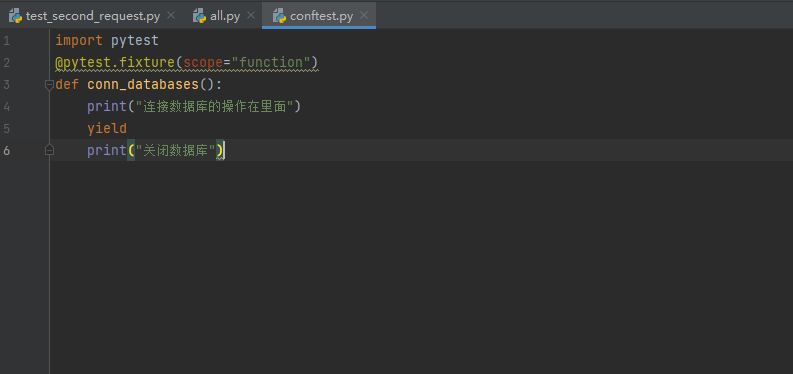
conftest.py文件
@pytest.fixtrue()一般回和contftest文件一起使用
1.上面一个案例是在同一个.py文件中,多个用例调用一个登陆功能,如果有多个.py的文件都需要调用这个登陆功能的话,那就不能把登陆写到用例里面去了。
此时应该要有一个配置文件,单独管理一些预置的操作场景,pytest里面默认读取conftest.py里面的配置
conftest.py配置需要注意以下点:
- conftest.py配置脚本名称是固定的,不能改名称
- conftest.py与运行的用例要在同一个pakage下,并且有__init__.py文件
- 不需要import导入 conftest.py,pytest用例会自动查找
1、作用是可以在多个文件中共享前置配置
2、contftest.py调用时不需要导入
3、contftest可以有多个,或者多个层级
目录结构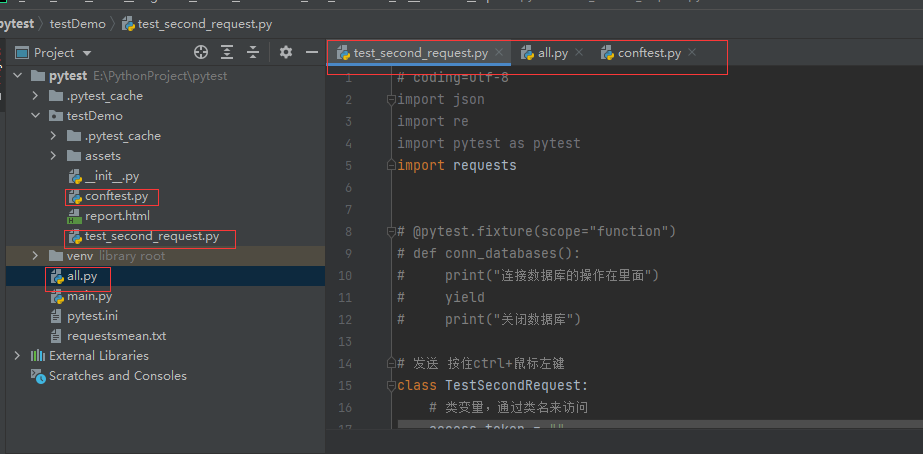
接口关联的封装
生成allure-pytest级别的报告
接口自动化测试框架yaml数据驱动封装
@pytest.mark.parametrize(args_name,args_value)
列表-基础用法
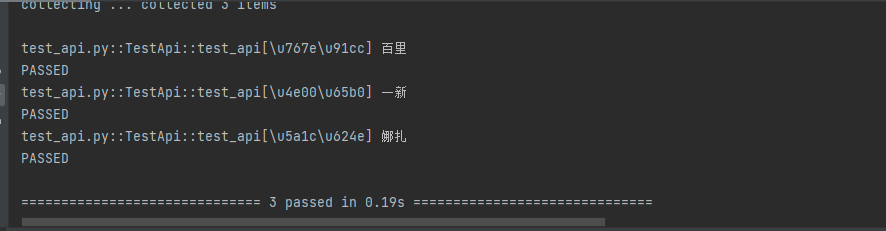
import pytestclass TestApi:@pytest.mark.parametrize('args',['百里','一新','娜扎'])def test_api(self,args):print(args)if __name__ == '__main__':pytest.main(['test_api.py'])
元组-相当于解剖
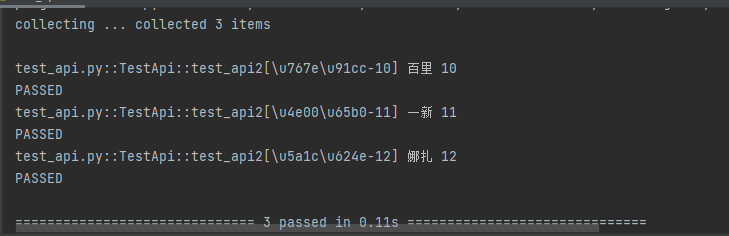
import pytestclass TestApi:@pytest.mark.parametrize('name,age',[['百里',10],['一新',11],['娜扎',12]])def test_api2(self,name,age):print(name,age)if __name__ == '__main__':pytest.main(['test_api.py'])
YAML详解
主要作用:
1、配置文件
2、测试用例
数据包的组成
1、map对象 : 键值 name:号的
2、列表,用- 开头
get_token.yml
msxy- name1:1- name2:2- name3:3
基础结构:
-name: 获得统一鉴权码tokenrequest:method:geturl:https://api.weixin.qq.com/cgi-bin/tokendata:grant_type: client_credentialappid: wx4a6bb065c448f76fsecret: "e2219aa93e7e2c788961be3edfe7654evalidate:None一个接口就用一个yaml文件
pytest运行的几种方式
运行用例的几种方式:主函数模式:1、运行所有: pytest.main()2、指定模块:pytest.main(['vs','test_login.py'])3、指定目录:pytest.main(['vs','./test_login.py'])4、通过nodeid指定运行用例:pytest.main(['vs','./文件夹名/test_login.py::test+04_fun']) 通过函数名称执行命令模式:1、运行所有:pytest2、指定模块:pytest -vs test_login.py3、指定目录:pytest -vs ./test_login.py
实战训练
目录结构
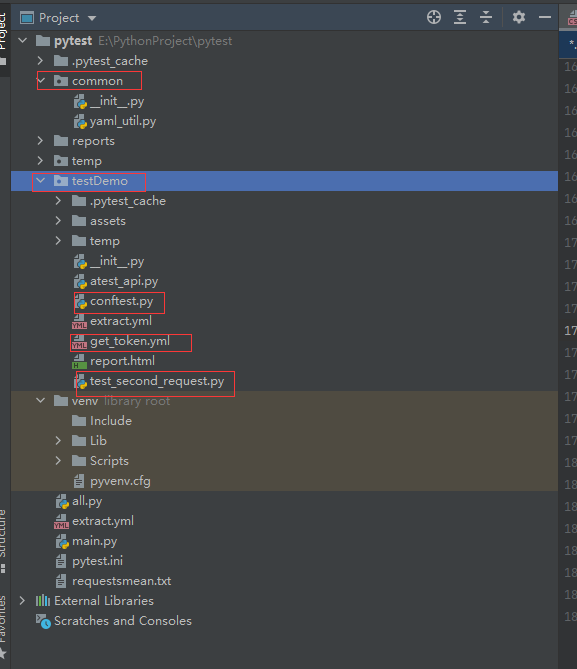
common.yaml_util.py
import os
import yamlclass YamlUtil:# 读取extract_yml文件 access_token值的获取def read_extract_yaml(self, key):with open(os.getcwd() + "/extract.yml", mode='r', encoding='utf-8')as f:value = yaml.load(stream=f, Loader=yaml.FullLoader)return value[key];# 写入extract_yml文件def write_extract_yaml(self, data):with open(os.getcwd() + "/extract.yml", mode='w', encoding='utf-8')as f:yaml.dump(data=data, stream=f, allow_unicode=True)def clear_yaml(self):with open(os.getcwd() + "/extract.yml", mode='w', encoding='utf-8')as f:f.truncate()# 读取测试用例的get_token/根据文件名而来的ymal文件def read_testcase_yaml(self,yaml_name):with open(os.getcwd() + "/testDemo/"+yaml_name, mode='r', encoding='utf-8')as f:value = yaml.load(stream=f, Loader=yaml.FullLoader)return value;
common.requests_util.py
import jsonimport requestsclass RequestsUtil:#类变量,通过session =requests.session()def send_request(self,method,url,data,**keyword):method = str(method).lower()rep =Noneif method == 'get':rep = RequestsUtil.session.request(method, url=url, params=data, **keyword)else:data=json.dumps(data)rep = RequestsUtil.session.request(method, url=url, data=data, **keyword)return rep.textreports
报告的生成文件
temp
临时文件
testDemo.conftest 前置文件
import pytestfrom common.yaml_util import YamlUtil@pytest.fixture(scope="function")
def conn_databases():print("连接数据库的操作在里面")yieldprint("关闭数据库")# 自动清除会话,就不需要在方法里面加
@pytest.fixture(scope="session",autouse=True)
def clear_all_yaml():YamlUtil().clear_yaml()
testDemo.get_token.ymal 用例文件,一个接口一个用例
-name: 获得统一鉴权码tokenrequest:method: geturl: https://api.weixin.qq.com/cgi-bin/tokendata:grant_type: client_credentialappid: wx4a6bb065c448f76fsecret: e2219aa93e7e2c788961be3edfe7654evalidate: None
testDemo.post_edit_id.ymal
-name: 编辑接口用例request:method: posturl: https://api.weixin.qq.com/cgi-bin/tags/updatedata: {"tag": {"id": 134, "name": "广东人"}}validate: None
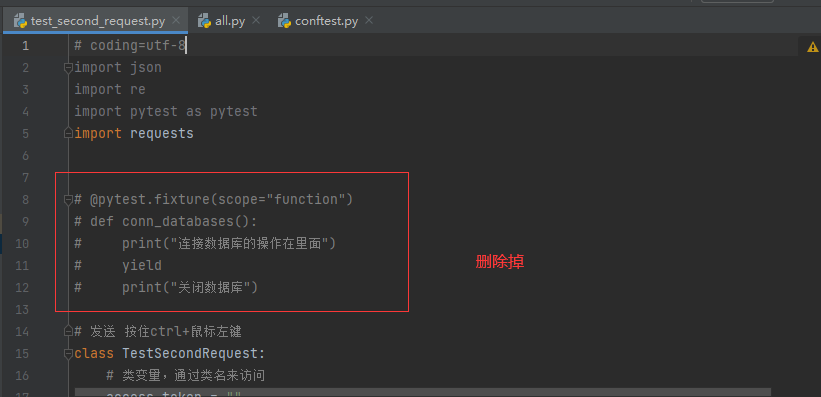
testDemo.test_second_request.py
# coding=utf-8
import json
import re
from unittest import resultimport pytest as pytest
import requests# @pytest.fixture(scope="function")
# def conn_databases():
#     print("连接数据库的操作在里面")
#     yield
#     print("关闭数据库")# 发送 按住ctrl+鼠标左键
from common.requests_util import RequestsUtil
from common.yaml_util import YamlUtilclass TestSecondRequest:@pytest.mark.parametrize('caseinfo',YamlUtil().read_testcase_yaml('get_token.yml'))def test_get_toke(self, caseinfo):print(caseinfo['name'])print(caseinfo['request']['method'])print(caseinfo['request']['url'])print(caseinfo['request']['data'])print(caseinfo['validate'])method=caseinfo['request']['method']url = caseinfo['request']['url']data = caseinfo['request']['data']# 请求result=RequestsUtil().send_request(method,url,data)# self.get_session()# 发送get请求  ,直接使用session来发送请求,这样会话就不会断# 原来  rep = requests.request('get',url=url, params=data)# result = TestSecondRequest.session.request(method, url=url, params=data)result=json.load(result)print(result)if 'access_token' in  result:# 通过key取value值 把access_token写入yaml中YamlUtil().write_extract_yaml({'access_token': result['access_token']})# 是否有返回这个字符船assert 'access_token' in resultelse:print("异常用例")# assert  result['errcode'] == 200
all.py
import osimport pytestif __name__ == '__main__':pytest.main()# os.system("allure generate temp -o reports --clear")// 生成allure报告
pytest.ini
[pytest]
addopts=-vs  --alluredir ./temp
testpaths=./testDemo
python_classes=Test*
python_functions=test_*markers =smoke:maoyan
问题:
在yml文件没法打实现动态参数
在yml没法实现动态上传
在yml没法实现断言
在yml文件里面数据量太大了怎么办