1. 摄像头的安装
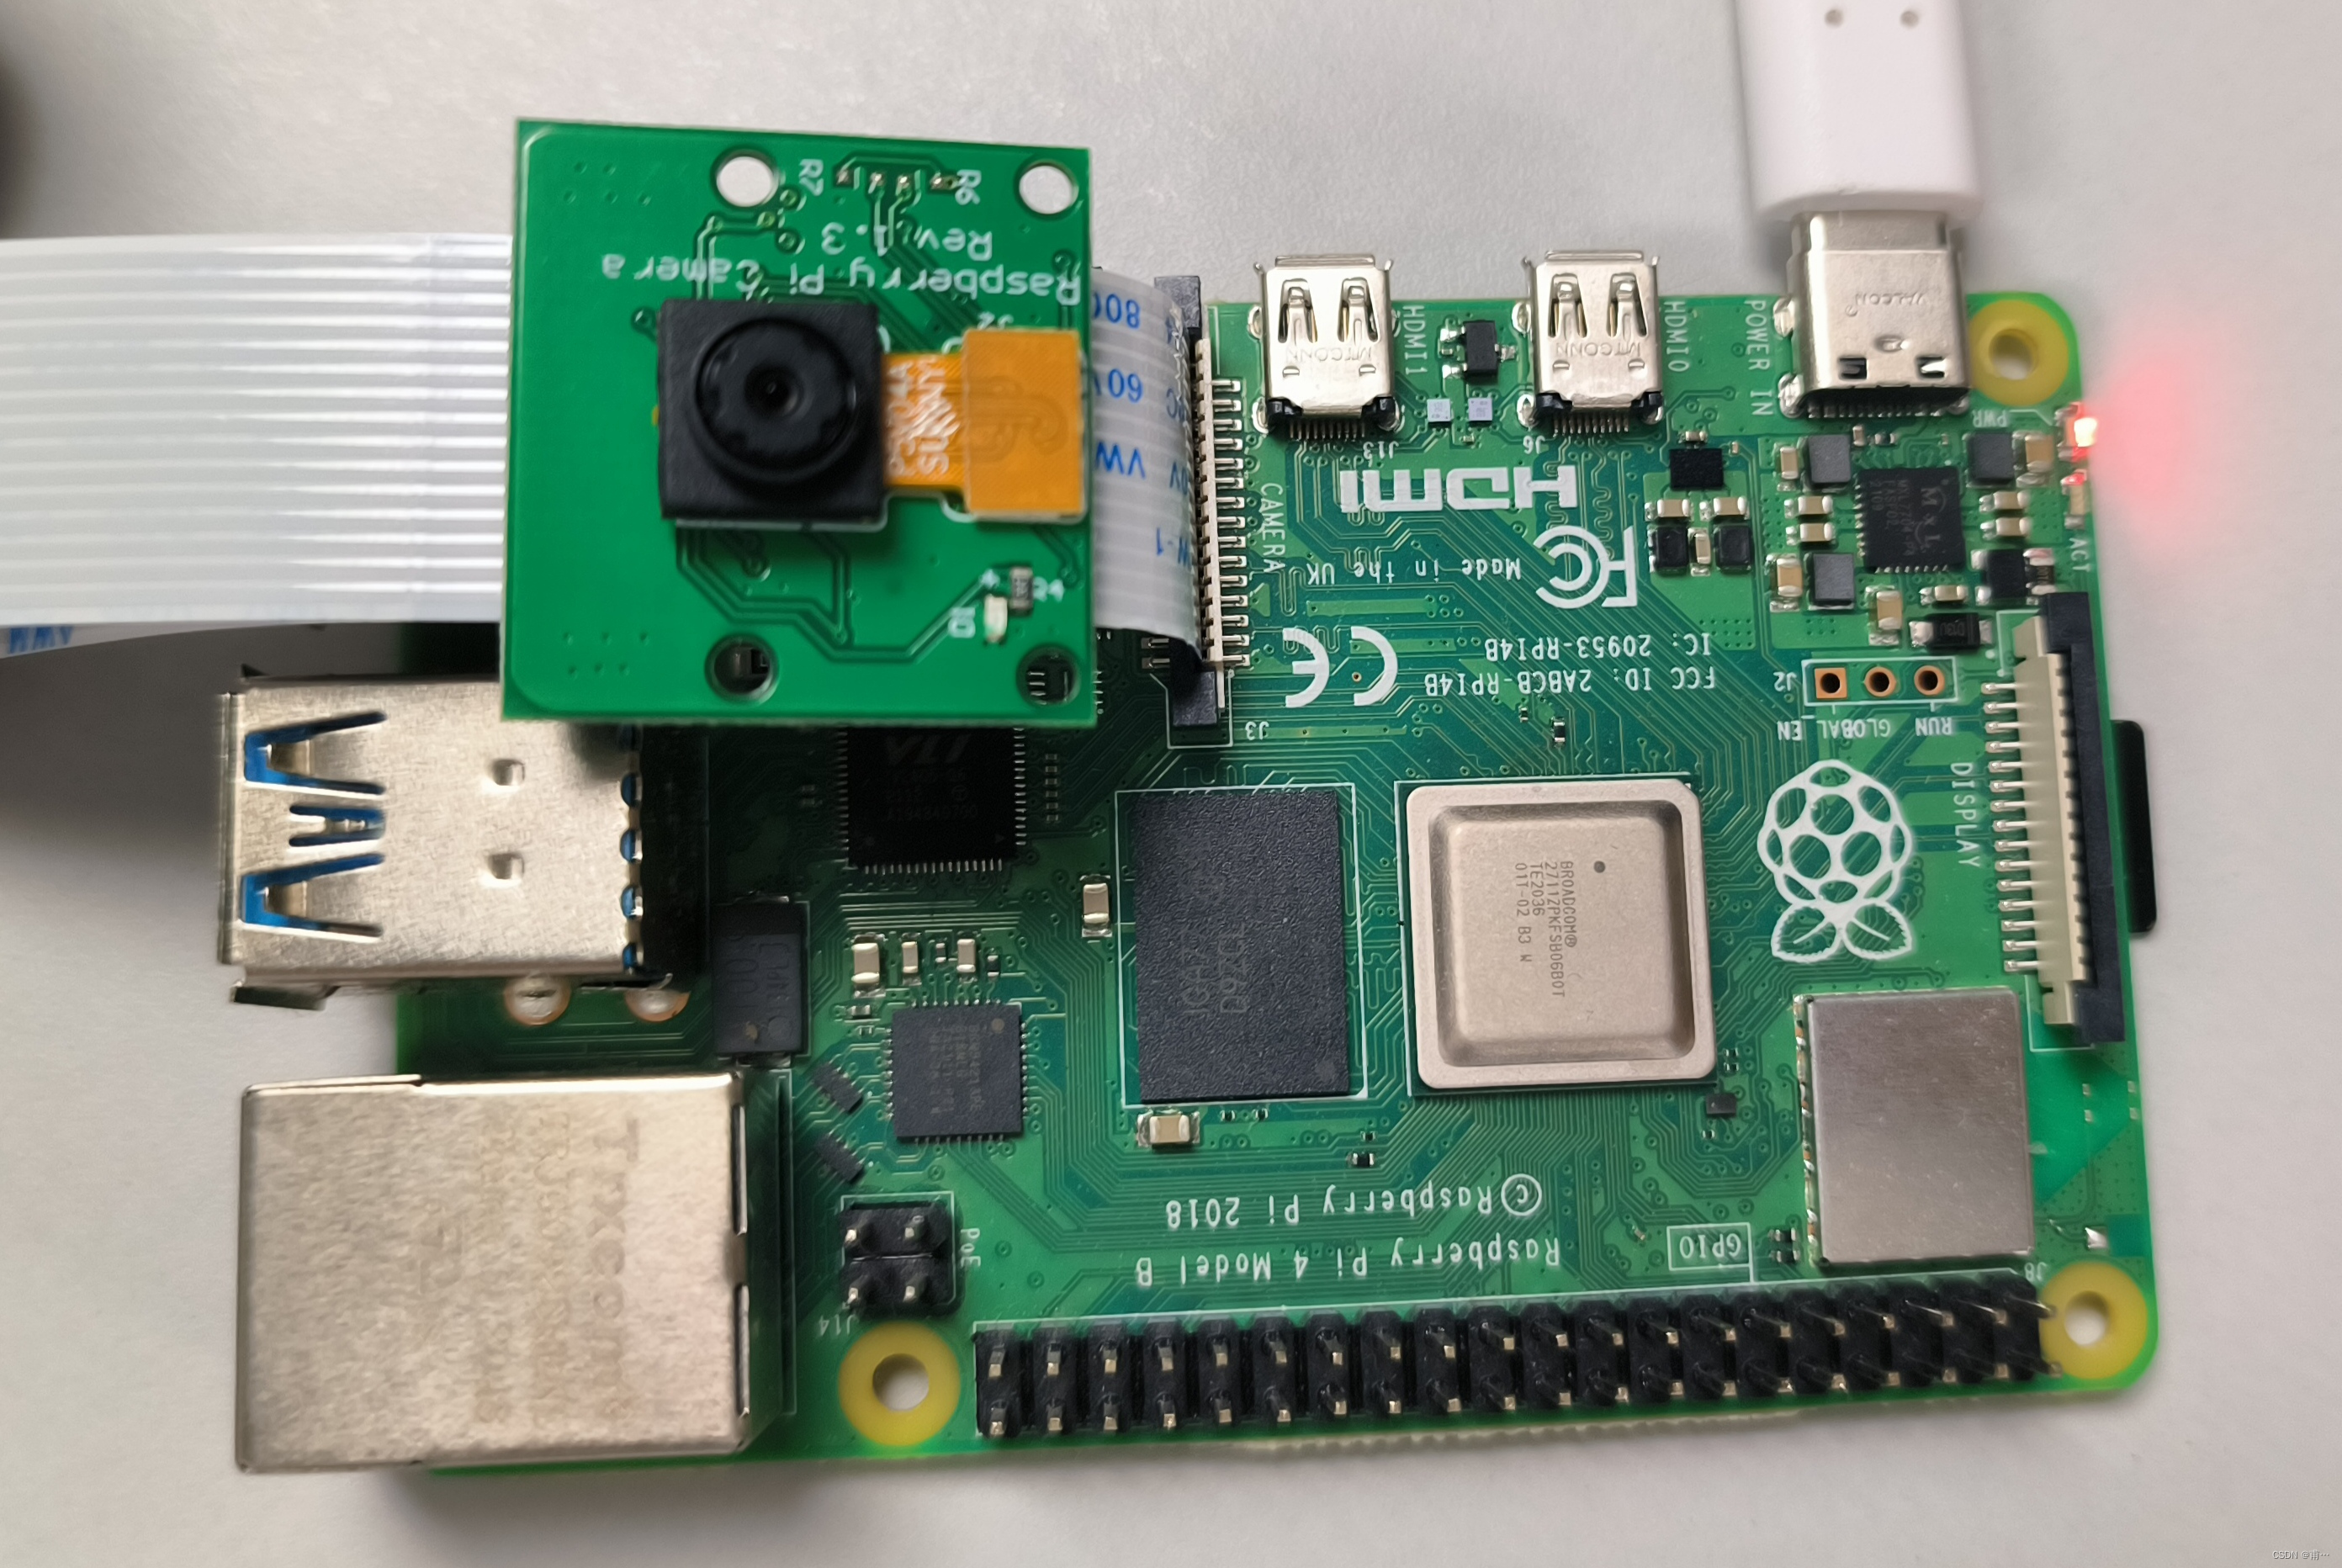
这里使用的是树莓派CSI (Camera Serial Interface)摄像头。引脚面朝micoHDMI接口处。关机后安装,热插拔可能无法检测到。
2. 启用摄像头
终端输入
sudo raspi-config 


之后重启即可
3. 使用命令行的基本操作
命令行用 raspistill 使用摄像头进行拍照。
raspistill -o test.jpg -t 20
-o : 设置文件名
-t : 设置延时 20 ms
可以用 -e png 指定生成jpg、png、gif、bmp格式的图片,后三种无损,生成速度会慢些。
raspistill -e png -o test2.png -t 20raspiyuv 生成yuv格式图像。
命令行用 raspivid 录制3s的视频:
raspivid -o testvideo.h264 -t 3000这两个命令行工具都可以用 -? 来查看所有参数
该命令生成的是未压缩的H.264视频流,可以转换为MP4更通用的视频格式。可以使用gpac 包的 MP4Box 来进行转换。
安装gpac
sudo apt-get install -y gpac
进行转换:30帧,原视频名testvideo.h264  新视频名 testvideo.mp4
MP4Box -fps 30 -add testvideo.h264 testvideo.mp4
一般树莓派无法查看图片和视频,可以用自带Chromium 浏览器来查看图片和MP4视频。
可以安装eog来查看图片。
sudo apt-get install eog可以安装vlc来播放视频(OMXPlayer 已在最新版本弃用,VLC现在是推荐的替代方案。)
sudo apt install -y vlc4. 使用VLC将树莓派摄像头获取的视频转为网络视频流
使用raspivid捕获视频,输入到VLC转为网络视频流。帧率25fps
局域网设备中能解码网络串流的应用可通过树莓派的IP地址及端口8090访问到视频。
sudo raspivid -o - -t 0 -w 640 -h 360 -fps 25|cvlc -vvv stream:///dev/stdin --sout '#standard{access=http,mux=ts,dst=:8090}' :demux=h264


5. 使用MOTION进行移动监控
Motion是Linux下一款开源的移动图像检测程序,拍摄一个画面进行监控,如画面中出现运动物体会进行抓拍。
安装Motion
sudo apt-get install motion修改配置文件
sudo nano /etc/motion/motion.conf更改几个参数
target_dir /home/pi/motion  # 设置拍摄图片视频的存储目录
locate_motion_mode on  # 探测到图像中有运动时,把运动区域用矩形框起来
output_pictures best # 将off改为best,还可以选first和center
stream_localhost off  # on 只能由本地主机能访问网络摄像头
stream_maxrate 30  # 以每秒帧数限制网络摄像头的帧速率。
stream_montion on # on时,则在未检测到运动时,会将网络摄像头流的速度减慢到每秒 1 张图片。检测到运动时,流将按照stream_maxrate值发送。off 时,网络摄像头流始终按照 stream_maxrate的规定发送
framerate 15 # 帧率
stream_port 8081 # 端口号
运行motion,需要给予写入的权限
sudo motion


一些参考资料:
树莓派文档 - 相机 (raspberrypi.com)![]() https://www.raspberrypi.com/documentation/accessories/camera.html
https://www.raspberrypi.com/documentation/accessories/camera.html
Raspberry Pi Documentation - Raspberry Pi OS![]() https://www.raspberrypi.com/documentation/computers/os.htmlMotion 的配置文件的说明:
https://www.raspberrypi.com/documentation/computers/os.htmlMotion 的配置文件的说明:
ConfigFileOptions < Motion < Foswiki (lavrsen.dk)![]() http://www.lavrsen.dk/foswiki/bin/view/Motion/ConfigFileOptions
http://www.lavrsen.dk/foswiki/bin/view/Motion/ConfigFileOptions
