准备工作:
1.下载相关的安装包放到/usr/local/ES下面
elasticsearch下载地址:Download Elasticsearch | Elastic
elasticsearch-head-master下载地址:https://github.com/mobz/elasticsearch-head/archive/master.zip
node下载地址:Index of /dist/
kibana地址:Download Kibana Free | Get Started Now | Elastic

2.创建普通用户
[root@master1 ~]# groupadd deployer
[root@master1 ~]# useradd deployer
[root@master1 ~]# chown deployer:deployer -R /usr/local/ES
[root@master1 ~]# su - deployer
3.先安装node因为后面安装elasticsearch需要
请参考node的安装方式<<< 非必要请安装node 18版本以下的
https://nodejs.org/dist/v14.18.0/node-v14.18.0-linux-x64.tar.gz[root@master1 local]# tar -zxvf node-v14.18.0-linux-x64.tar.gz
[root@master1 local]# mv node-v14.18.0-linux-x64 node
[root@master1 local]# cd node/bin/
[root@master1 bin]# ls
node npm npx
[root@master1 bin]# pwd
/usr/local/node/bin[root@master1 bin]# vim /etc/profile
在最后面加上一行:
#nodejs
export PATH=/usr/local/node/bin:$PATH[root@master1 bin]# source /etc/profile验证:
[root@master1 bin]# node -v
v14.18.0
[root@master1 bin]# npm -v
6.14.15安装elasticsearch和elasticsearch-head-master
1.下载需要的安装包并解压:
elasticsearc安装:
[deployer@master1 ES]$ ls
elasticsearch-8.12.2  elasticsearch-8.12.2-linux-x86_64.tar.gz  elasticsearch-head-master  kibana-8.12.2  kibana-8.12.2-linux-x86_64.tar.gz  master.zip
[deployer@master1 ES]$ mv elasticsearch-8.12.2 elasticsearch
[deployer@master1 ES]$ cd config
[deployer@master1 ES]$ vim elasticsearch.yml
在最后面添加跨域配置:
http.cors.enabled: true
http.cors.allow-origin: "*"
配置完后进到bin目录启动elasticsearch:
前台启动:./elasticsearch
后台启动:./elasticsearch -d
方法一:前端启动
如果elasticsearch开启安全认证登录则第一次启动,前台启动的时候会自己创建相应的token等登录信息,如果是后台启动则没有这些登录信息:
[deployer@master1 bin]$ ./elasticsearch
...
━━━━━━━━━━━━━━━━━━━━━━━━━━━━━━━━━━━━━━━━━━━━━━━━━━━━━━━━━━━━━━━━━━━━━━━━━━━━━━━━━━━━━━━━━━━━━━━━━━━━━━━━━━━━━━━━━━━━━━━━━━━━━━━━━━━━━━━━━━━━━━━━━━━━━━━━━━━━━━━━━━━━━━━━━━━━━━━━━━━━━━━━━━
✅ Elasticsearch security features have been automatically configured!
✅ Authentication is enabled and cluster connections are encrypted.ℹ️  Password for the elastic user (reset with `bin/elasticsearch-reset-password -u elastic`):uQIrmGkSPEDybGehN7Owℹ️  HTTP CA certificate SHA-256 fingerprint:c5ef1227cf14a593d41a24388b4d710dc819c6dd4c3accd0a354b49ac6f28b4fℹ️  Configure Kibana to use this cluster:
• Run Kibana and click the configuration link in the terminal when Kibana starts.
• Copy the following enrollment token and paste it into Kibana in your browser (valid for the next 30 minutes):eyJ2ZXIiOiI4LjEyLjIiLCJhZHIiOlsiMTAuMTAwLjIwOC4yMTo5MjAwIl0sImZnciI6ImM1ZWYxMjI3Y2YxNGE1OTNkNDFhMjQzODhiNGQ3MTBkYzgxOWM2ZGQ0YzNhY2NkMGEzNTRiNDlhYzZmMjhiNGYiLCJrZXkiOiJKelg2Wkk0QmU5cXRJWmF5VzRCbzotOGVyTEUtbVJyT0ZTbzh1UTktQkV3In0=ℹ️  Configure other nodes to join this cluster:
• On this node:⁃ Create an enrollment token with `bin/elasticsearch-create-enrollment-token -s node`.⁃ Uncomment the transport.host setting at the end of config/elasticsearch.yml.⁃ Restart Elasticsearch.
• On other nodes:⁃ Start Elasticsearch with `bin/elasticsearch --enrollment-token <token>`, using the enrollment token that you generated.
━━━━━━━━━━━━━━━━━━━━━━━━━━━━━━━━━━━━━━━━━━━━━━━━━━━━━━━━━━━━━━━━━━━━━━━━━━━━━━━━━━━━━━━━━━━━━━━━━━━━━━━━━━━━━━━━━━━━━━━━━━━━━━━━━━━━━━━━━━━━━━━━━━━━━━━━━━━━━━━━━━━━━━━━━━━━━━━━━━━━━━━━━━
...
方法二:后台启动
[deployer@master1 bin]$ ./elasticsearch -d
...
...
后台启动不显示elastic用户登录的信息但是可自定义设置elastic的密码(这个密码等下要登录kibana),进入bin目录下执行:
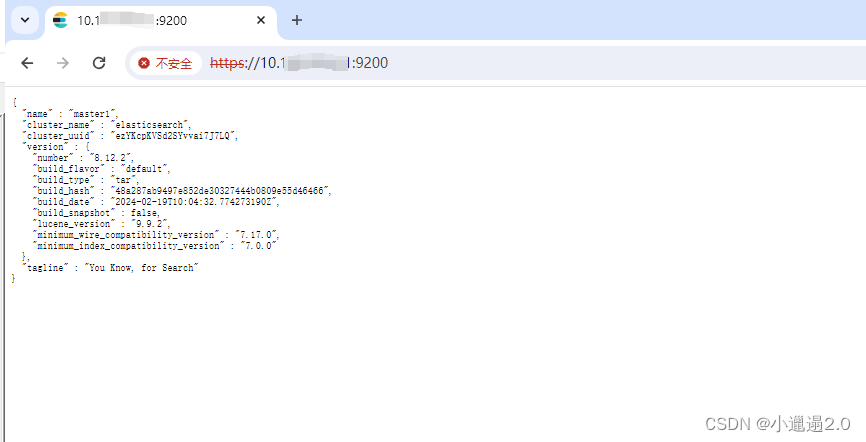
[deployer@master1 bin]$ ./elasticsearch-reset-password -u elastic -ielasticsearch验证,浏览器输入:https://10.10.10.10:9200 (账号密码是上面的elastic用户密码)
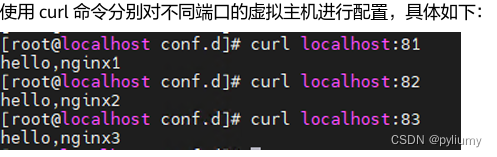
elasticsearch-head安装(可以参考 <<<):
[deployer@master1 elasticsearch-head-master]$ npm install grunt
...
安装完后验证:
[root@master1 bin]# pwd
/usr/local/ES/elasticsearch-head-master/node_modules/grunt/bin
[root@master1 bin]# ./grunt  -version
grunt-cli v1.4.3
grunt v1.6.1
[root@master1 bin]# grunt -version
grunt-cli v1.4.3
grunt v1.6.1
启动elasticsearch-head:
[root@master1 elasticsearch-head-master]# ls
crx         Dockerfile-alpine                   Gruntfile.js       index.html  node_modules  package-lock.json             proxy           _site  test
Dockerfile  elasticsearch-head.sublime-project  grunt_fileSets.js  LICENCE     package.json  plugin-descriptor.properties  README.textile  src
[root@master1 elasticsearch-head-master]# vim Gruntfile.jsconnect: {server: {options: {port: 9010,hostname: '0.0.0.0',base: '.',keepalive: true}}}
[root@master1 elasticsearch-head-master]# cd _site/
[root@master1 _site]# ls
app.css  app.js  background.js  base  fonts  i18n.js  index.html  lang  manifest.json  vendor.css  vendor.js
[root@master1 _site]# vim app.js
...app.App = ui.AbstractWidget.extend({defaults: {base_uri: null},init: function(parent) {this._super();this.prefs = services.Preferences.instance();this.base_uri = this.config.base_uri || this.prefs.get("app-base_uri") || "https://10.10.10.10:9200"; #将"http://localhost"改成"https://10.10.10.10",elasticsearch的ip和端口if( this.base_uri.charAt( this.base_uri.length - 1 ) !== "/" ) {// XHR request fails if the URL is not ending with a "/"this.base_uri += "/";}if( this.config.auth_user ) {var credentials = window.btoa( this.config.auth_user + ":" + this.config.auth_password );$.ajaxSetup({headers: {"Authorization": "Basic " + credentials}});}...
后台启动:
[root@master1 elasticsearch-head-master]# setsid grunt server
[root@master1 elasticsearch-head-master]# >> Local Npm module "grunt-contrib-jasmine" not found. Is it installed?Running "connect:server" (connect) task
Waiting forever...
Started connect web server on http://localhost:9010
验证:
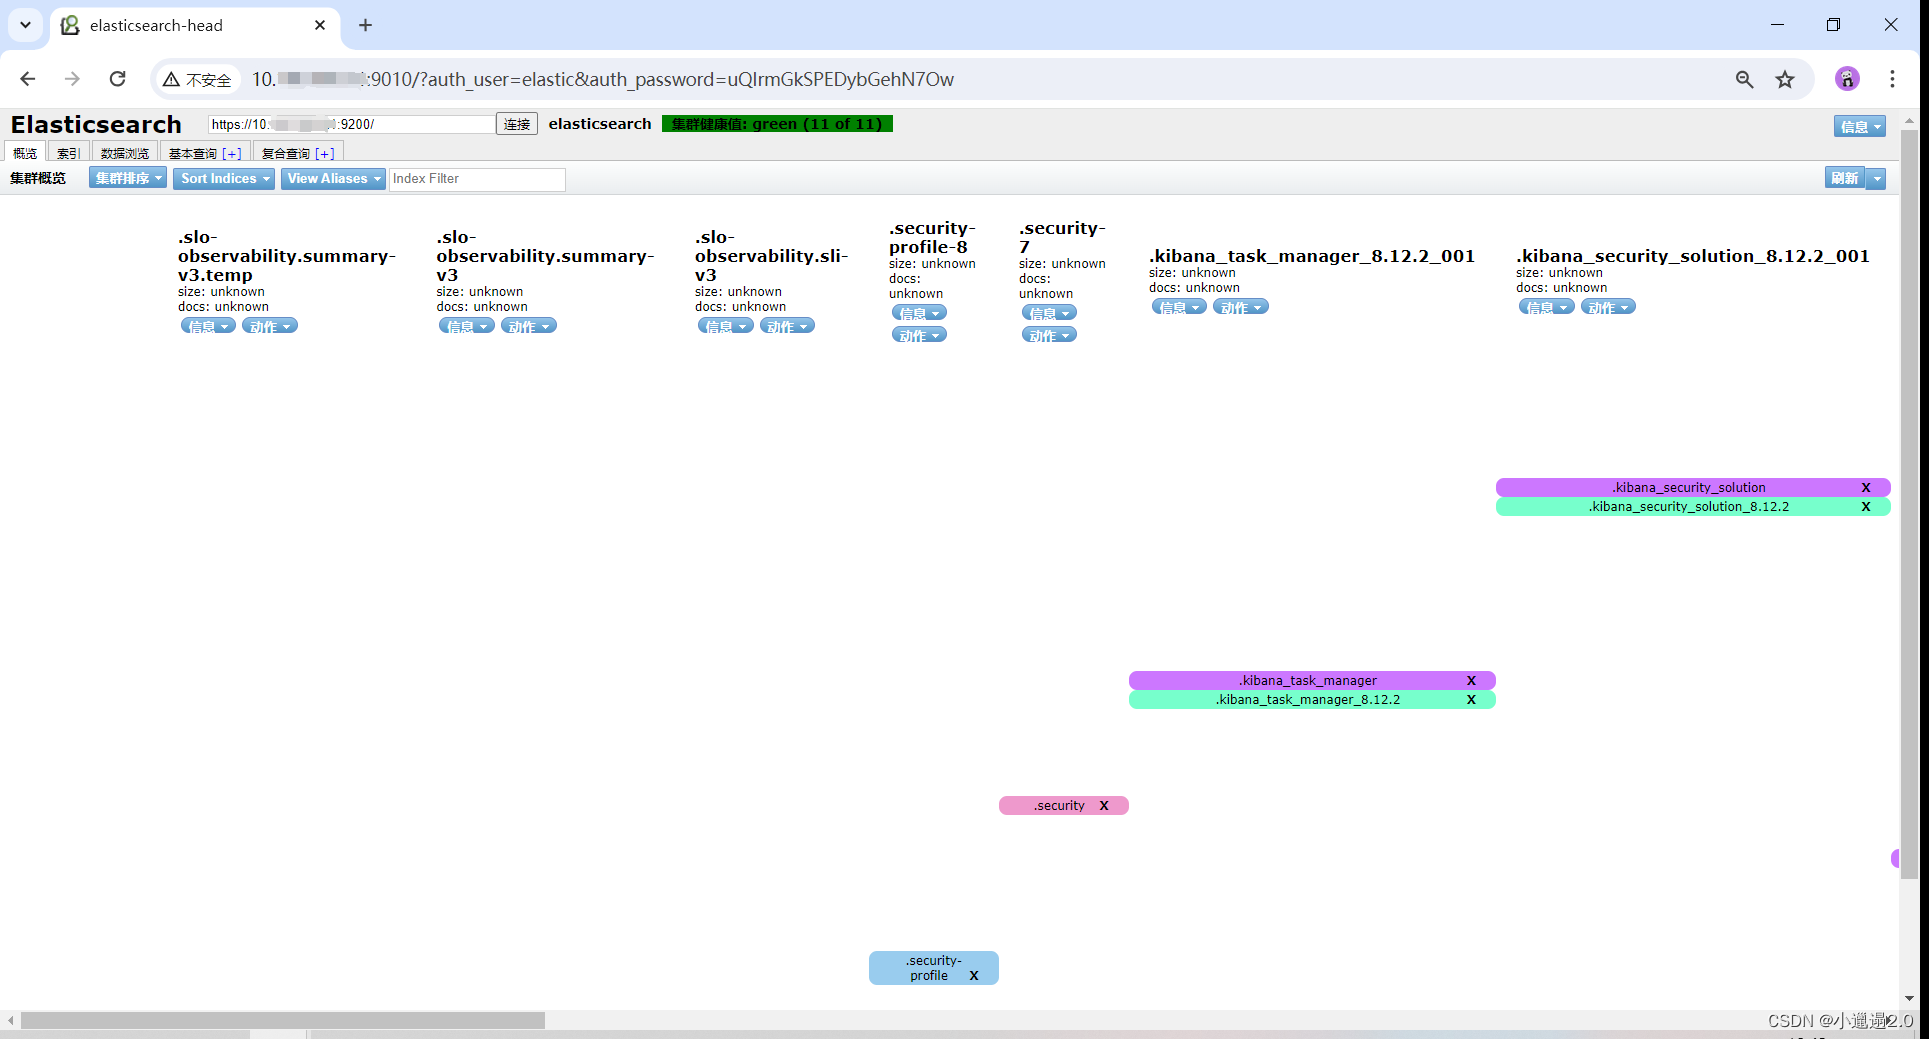
因为elasticsearch开启了安全认证模式,elasticsearch-head的访问方式不能直接IP:5601这样访问。
elasticsearch-head访问方式(目前好像只能带用户名和密码的方式访问,如果有其他的方式希望大佬们补充,谢谢 ):
http://10.100.208.21:9010/?auth_user=elastic&auth_password=elastic密码elastic用户如果自定义了密码就填自定义的密码 。
2.安装kibana
[deployer@master1 kibana-8.12.2]$ ls
bin  config  data  LICENSE.txt  logs  node  node_modules  NOTICE.txt  package.json  packages  plugins  README.txt  src  x-pack
[deployer@master1 kibana-8.12.2]$ cd config/
[deployer@master1 config]$ ls
kibana.yml  node.options
[deployer@master1 config]$ vim kibana.yml
添加下面两行:
server.host: "0.0.0.0"
i18n.locale: "zh-CN"
后台启动(需要普通用户):
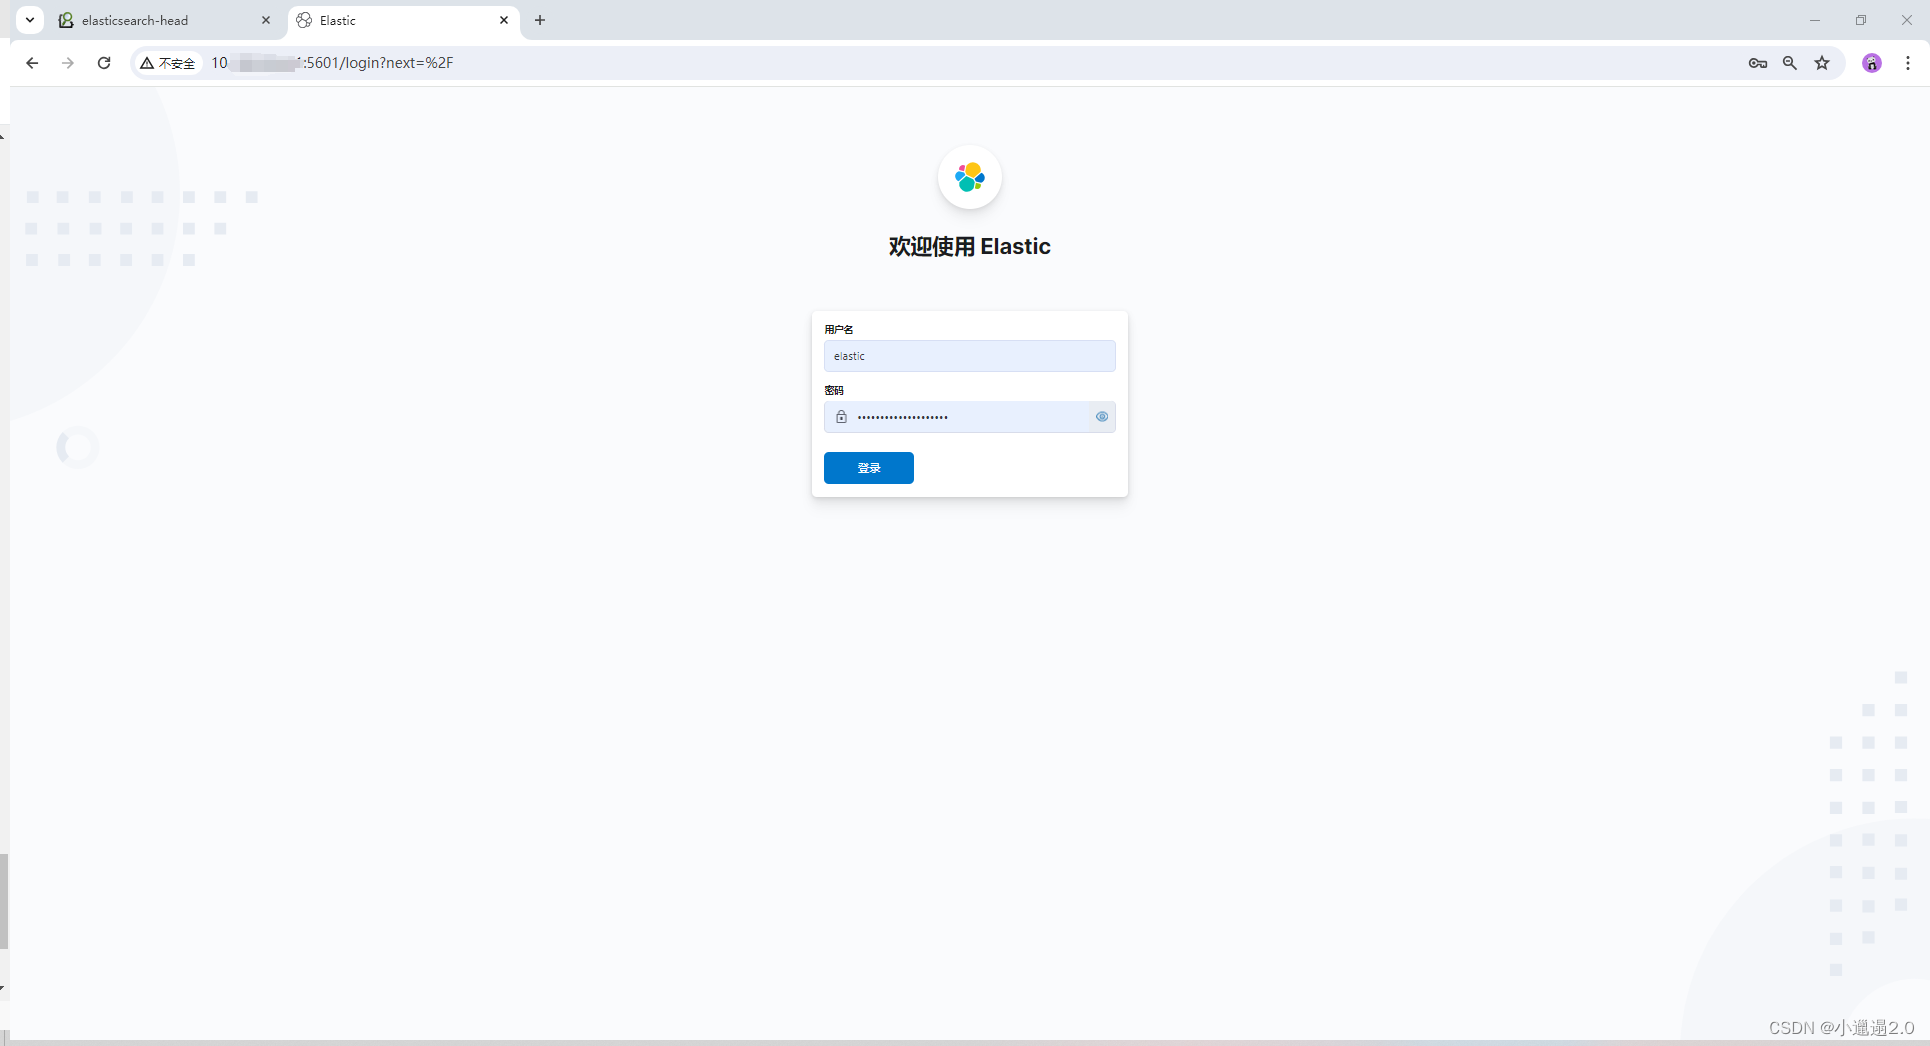
[deployer@master1 kibana-8.12.2]$ nohup ./bin/kibana >logs/kibana.log 2>&1 &验证方式,访问:
http://10.10.10.10:5601登录账号密码是前面elasticsearch中设置设置的elastic用户的账号密码: