对比学习Yolo 和 faster rcnn 两种目标检测
要求
Image Processing with Python Final Project
Derek TanLoad several useful packages that are used in this notebook:Image Processing with Python Final Project Project Goals: • Gain an understanding of the object detection pipeline. • Learn to develop anchor-based single-stage object detectors. • Learn to develop a two-stage object detector that combines a region proposal network with a recognition network. Coding:
Q1: The notebook single_stage_detector_yolo. ipynb will guide you through the implementation of a fully-convolutional single-stage object detector similar to YOLO (Redmon et al, CVPR 2016). You will train and evaluate your detector on the PASCAL VOC 2007 object detection dataset.
Q2: The notebook two_stage_detector_faster_rcnn. ipynb will guide you through the implementation of a two-stage object detector similar to Faster R-CNN (Ren et al, NeurIPS 2015). This will combine a fully-convolutional Region Proposal Network (RPN) and a second-stage recognition network.
Steps:
- Unzip the P24 file. You will find three *.py files, two *. ipynb files, and an ip24 folder which includes seven *.py files.
- Carefully read the two *. ipynb notebooks.
- Write the code in the *.py files as indicated. The Python files have clearly marked blocks where you are expected to write code. Do not write or modify any code outside of these blocks. You may only be allowed to ADD one block of code to save the final results. You will only get credit for code that has been run.
- Evaluate your implementation. When you are done, save single_stage_detector.py, two_stage_detector.py, and all the outputs (folder Results) in one folder called Coding. Writing: Write a comparative analysis paper comparing the two object detection algorithms
Steps:
Your paper should be written in English and should be clear and concise, with proper structure and formatting.Include images, graphs, and tables as necessary to support your analysis.Avoid extensive use of AI-generated content and plagiarism or copying from classmates.Save your final paper and the references that you used in one folder called Writing.The paper should be no less than 5 pages, and you will follow the template from (CVPR 2024), which can be found in PaperForReview.docx.Paper Structure:• Title,Abstract,Introduction• Methodology: •Description of YOLO-based single-stage object detector implementation.• Description of Faster R-CNN-based two-stage object detector implementation.• Experimental Setup: • Description of dataset: PASCAL VOC 2007 object detection dataset. • Evaluation metrics: mAP, inference speed, training time.• Results and Discussion: • Performance comparison between YOLO and Faster R-CNN. • Analysis of detection accuracy.• Conclusion, References Grading Criteria:Implementation of object detection algorithms (40%).Clarity and coherence of comparative analysis paper (30%).Depth of analysis and insights provided (20%).Presentation, formatting, and adherence to submission requirements (10%).Final Submission: 1. Zip file that should include the Coding folder and the Writing folder. The zip file should be named using your Chinese name and the English name. 2. No late submissions. Deadline: 1 June 2024, 8 p.m.
可以看到上面内容是英文。。。《Python图像处理》,一做一个不吱声。
下面只是我+AI的一个参考,并不是正确答案,毕竟也找不到正确答案,而且感觉这个代码好多年了,不仅不知道哪里少代码,还有几个版本上的问题。
关键都是英文,看起来不是很方便,为了方便,下面的介绍就中英结合了。
首先下载作业,压缩包。
Ⅰ [可选] 下载数据集
If you download the datasets yourself.
Datasets from VOC2007.
The PASCAL Visual Object Classes Challenge 2007 (VOC2007) (ox.ac.uk)

Unzip to a your local DIR.
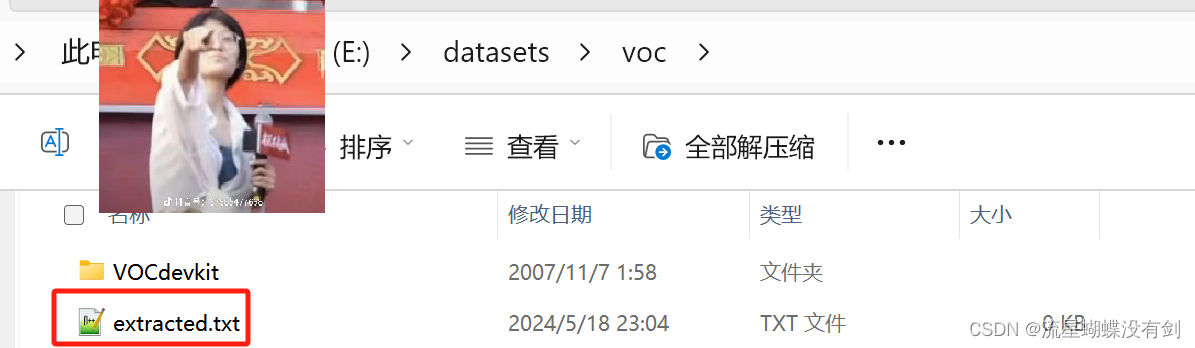
Example: E:\datasets\voc
Then create a empty TXT file in this DIR.
Because it’s in the a5_helper.py has function get_pascal_voc2007_data()
def get_pascal_voc2007_data(image_root, split='train'):"""Use torchvision.datasetshttps://pytorch.org/docs/stable/torchvision/datasets.html#torchvision.datasets.VOCDetection"""check_file = os.path.join(image_root, "extracted.txt")download = not os.path.exists(check_file)train_dataset = datasets.VOCDetection(image_root, year='2007', image_set=split,download=download)open(check_file, 'a').close()return train_dataset
Ⅱ 使用Pycharm 打开代码
此处省略1万字。。。
Ⅲ 安装 Jupyter lab
这个主要是为了执行笔记本文件.ipynb。这个也不介绍,省略。
Ⅳ 开始修改代码
-
将
IP24目录下所有导入eecs598都删掉。删除所有的
import eecs598 -
修改
single_stage_detector.pyEdit
single_stage_detector.py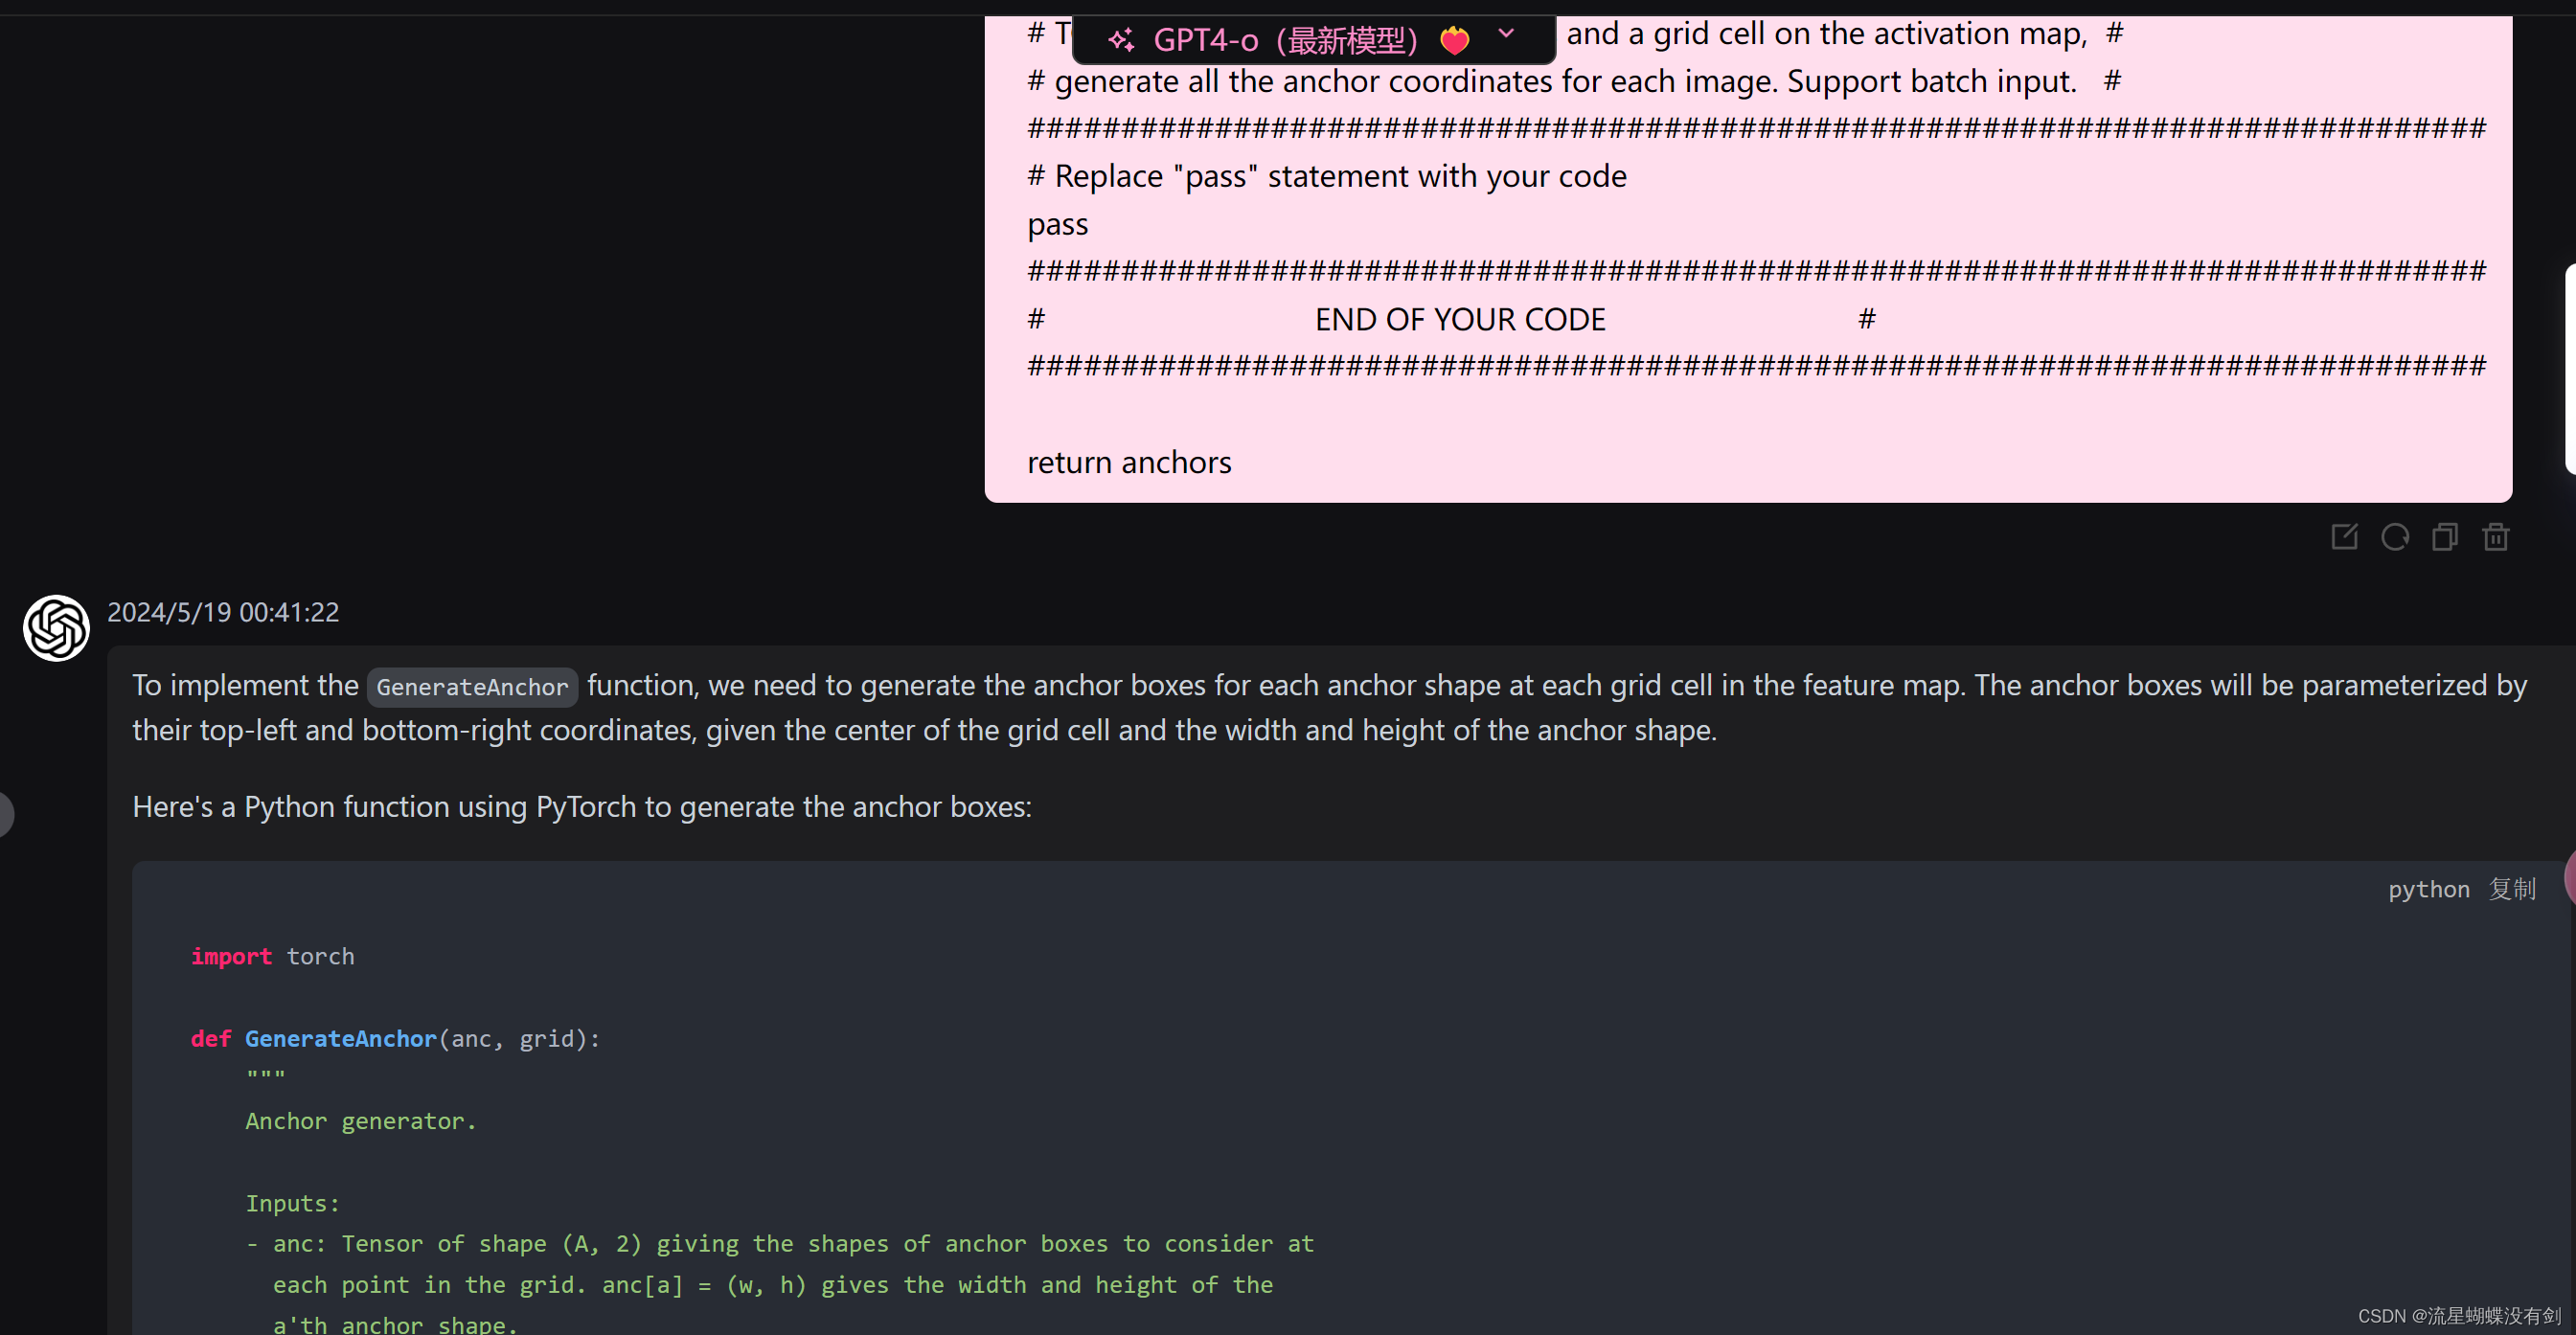
This code is long long, you can typing code yourself or get in my CSDN resource: 1. single-stage-detector.py.
看文章最后。Note: It’s best to write your own code for this part. Mine is just a reference code.
简单介绍一下几个函数的实现:AI 解释哈。
single_stage_detector.pydef GenerateAnchor(anc, grid): 为每个图像生成所有锚框(anchor boxes)的坐标,它们是在图像的不同位置和尺度上预定义的边界框,用于预测目标的位置和大小。输入: anc: 一个形状为 (A, 2) 的张量,表示要考虑的每个网格点上的锚框形状。anc[a] = (w, h) 给出第 a 个锚框形状的宽度和高度。 grid: 一个形状为 (B, H', W', 2) 的张量,给出从主干特征图中每个特征的中心坐标 (x, y)。这是从 GenerateGrid 函数返回的张量。 输出: anchors: 一个形状为 (B, A, H', W', 4) 的张量,给出整个图像的所有锚框的位置。anchors[b, a, h, w] 是一个中心位于 grid[b, h, w] 的锚框,其形状由 anc[a] 给出。锚框参数化为 (x_tl, y_tl, x_br, y_br),其中 (x_tl, y_tl) 和 (x_br, y_br) 分别给出框的左上角和右下角的 xy 坐标。实现: 代码获取输入张量 grid 和 anc 的形状信息,分别存储在 B, H, W 和 A 变量中。 然后,创建一个形状为 (B, A, H, W, 4) 的全零张量 anchors,用于存储所有锚框的坐标。这里假设使用 CUDA 设备进行计算。 使用四重嵌套循环遍历每个批次、每个锚框、每个高度和宽度。 在循环内部,计算每个锚框的左上角和右下角坐标: x_tl = grid[b, h, w, 0] - anc[a, 0] / 2:锚框左上角的 x 坐标,从网格中心的 x 坐标减去锚框宽度的一半。 y_tl = grid[b, h, w, 1] - anc[a, 1] / 2:锚框左上角的 y 坐标,从网格中心的 y 坐标减去锚框高度的一半。 x_br = grid[b, h, w, 0] + anc[a, 0] / 2:锚框右下角的 x 坐标,从网格中心的 x 坐标加上锚框宽度的一半。 y_br = grid[b, h, w, 1] + anc[a, 1] / 2:锚框右下角的 y 坐标,从网格中心的 y 坐标加上锚框高度的一半。 将计算出的坐标存储在 anchors 张量中。返回计算出的所有锚框的坐标张量 anchors。def GenerateProposal(anchors, offsets, method='YOLO'):用于根据给定的锚框(anchors)和偏移量(offsets)生成区域提议(proposals)。这个函数支持两种不同的转换方法:'YOLO' 和 'FasterRCNN'。输入: anchors: 一个形状为 (B, A, H', W', 4) 的张量,表示锚框的位置,其中 B 是批次大小,A 是锚框的数量,H' 和 W' 是特征图的高度和宽度,4 表示每个锚框由左上角和右下角坐标组成。 offsets: 一个形状为 (B, A, H', W', 4) 的张量,表示应用于每个锚框的偏移量。对于每个锚框,偏移量包括 (tx, ty, tw, th),分别表示中心点 x 和 y 的偏移以及宽度和高度的缩放因子。 method: 一个字符串,指定使用的转换方法,可以是 'YOLO' 或 'FasterRCNN'。输出: proposals: 一个形状为 (B, A, H', W', 4) 的张量,表示转换后的区域提议。代码实现: 首先,代码检查 method 是否为 'YOLO' 或 'FasterRCNN',并初始化 proposals 张量为零。 使用四重嵌套循环遍历每个批次、每个锚框、每个高度和宽度。 在循环内部,从 anchors 和 offsets 中提取相应的坐标和偏移量。 根据 method 的不同,应用不同的转换公式: 对于 'FasterRCNN',中心点的偏移量 tx 和 ty 是相对于锚框原始宽度和高度的比例。 对于 'YOLO',中心点的偏移量 tx 和 ty 是直接加到锚框的中心点上。 计算新的宽度和高度,使用 torch.exp(tw) 和 torch.exp(th) 来确保宽度和高度始终为正。 计算新的左上角和右下角坐标,并将它们存储在 proposals 张量中。返回值: 函数返回计算出的所有区域提议的坐标张量 proposals。 -
开始修改运行文件
single_stage_detector_yolo.ipynbYou can also write them together in
main.py.# 这里导入了包 import torch from a5_helper import *# 设置了路径 train_dataset = r"E:\datasets\voc" val_dataset = train_datasettrain_dataset = get_pascal_voc2007_data(train_dataset, 'train') # val_dataset = get_pascal_voc2007_data(train_dataset, 'val')train_dataset = torch.utils.data.Subset(train_dataset, torch.arange(0, 2500)) # use 2500 samples for training train_loader = pascal_voc2007_loader(train_dataset, 10) val_loader = pascal_voc2007_loader(train_dataset, 10) print("加载完成!")# 创建迭代器 train_loader_iter = iter(train_loader)# 获取下一个批次 img, ann, _, _, _ = train_loader_iter.__next__()print('img has shape: ', img.shape) print('ann has shape: ', ann.shape)print('Image 1 has only two annotated objects, so ann[1] is padded with -1:') print(ann[1])print('\nImage 2 has six annotated objects:, so ann[2] is not padded:') print(ann[2])print('\nEach row in the annotation tensor indicates (x_tl, y_tl, x_br, y_br, class).')……
评估
这部分有问题,我也不懂,反正写出来了,不知道啥问题。ap最后0.19
- 将上面的结果转一下格式,用于评估,所有类一样的放在一起
#!/usr/bin/python3.6
# -*- coding: utf-8 -*-
#
# Copyright (C) 2021 #
# @Time    : 2024/5/20 16:47
# @Author  : # @Email   : # @File    : 结果txt转换.py
# @Software: PyCharm
import osdef process_files(directory, outdir):# 创建一个字典来保存每个类型的数据data_by_type = {}# 遍历目录中的所有文件for filename in os.listdir(directory):if filename.endswith('.txt'):with open(os.path.join(directory, filename), 'r') as file:for line in file:# 解析每一行,提取类型和数据parts = line.strip().split()if len(parts) == 6:type_name, confidence, x1, y1, x2, y2 = parts# 将数据添加到对应类型的字典中if type_name not in data_by_type:data_by_type[type_name] = []data_by_type[type_name].append(' '.join([filename.split(".txt")[0], confidence, x1, y1, x2, y2]))# 将每个类型的数据写入到单独的文件中for type_name, data in data_by_type.items():print(type_name)with open(f'{outdir + type_name}.txt', 'w') as output_file:output_file.write('\n'.join(data))# 使用函数
process_files(r'./mAP/input/detection-results/', r'./mAP/input/detection-results-cls/')- 计算
import pickleimport osimport numpy as np
import matplotlib.pyplot as plt
import torchfrom a5_helper import idx_to_class, pascal_voc2007_loader, class_to_idx
from faster_rcnn_pytorch_master.lib.datasets.voc_eval import voc_ap, parse_rec
from faster_rcnn_pytorch_master.lib.datasets.voc_eval import voc_ap, parse_rec, voc_evaldef plot_pr_curve(precisions, recalls):plt.figure()plt.plot(recalls, precisions, lw=2)plt.xlabel('Recall')plt.ylabel('Precision')plt.title('Precision-Recall Curve')plt.savefig('pr_curve.png')plt.close()def evaluate_map(output_dir):# Compute AP for each categoryaps = []for i, cls in enumerate(class_to_idx):print(i, cls)if cls == '__background__':continuerec, prec, ap = voc_eval(r'D:\Python\work\python图像处理实践\Coding\mAP\input\detection-results-cls\{:s}.txt',r"E:\datasets\voc\VOCdevkit\VOC2007\Annotations\{:s}.xml",r"E:\datasets\voc\VOCdevkit\VOC2007\ImageSets\Main\train.txt", cls,"./cachedir", ovthresh=0.5, )# print(rec, prec, ap)print(cls, ap)aps += [ap]print(('AP for {} = {:.4f}'.format(cls, ap)))with open(os.path.join(output_dir, cls + '_pr.pkl'), 'wb') as f:pickle.dump({'rec': rec, 'prec': prec, 'ap': ap}, f)plot_pr_curve(prec, rec)print(('Mean AP = {:.4f}'.format(np.mean(aps))))print('~~~~~~~~')# print('Results:')# for ap in aps:#     print(('{:.3f}'.format(ap)))print(('{:.3f}'.format(np.mean(aps))))print('~~~~~~~~')print('')print('--------------------------------------------------------------')print('Results computed with the **unofficial** Python eval code.')print('Results should be very close to the official MATLAB eval code.')print('Recompute with `./tools/reval.py --matlab ...` for your paper.')print('-- Thanks, The Management')print('--------------------------------------------------------------')# Compute mAPmAP = np.mean(aps)return mAPdef main():mAP = evaluate_map('mAP/input')print(f'Mean Average Precision (mAP): {mAP}')if __name__ == '__main__':main()
Okay,这个代码真的太长了,不想粘贴了。
果然、训练模型花了十来个小时。。。这是作业?服!
Do you feel bad when you see this?
所有文件
It’s time for a showdown: I should give the attachment, otherwise I may be attacked by the Internet!
VOC2007 训练数据集
VOCtrainval_06-Nov-2007.tar
链接:https://pan.baidu.com/s/19hMEn-fwBjT5ikbWauSIfA?pwd=vapt
提取码:vapt
–来自百度网盘超级会员V6的分享
Yolo 和 Faster R-CNN 目标检测对比学习——作业原压缩包
IPFinal Project.rar
链接:https://pan.baidu.com/s/1h0g2SRsWfBZZ4VHziisGnw?pwd=sdvl
提取码:sdvl
–来自百度网盘超级会员V6的分享
CVPR 2024 word模板
链接:https://pan.baidu.com/s/1OAVuCH35UXTKNidsag4ELg?pwd=nycl
提取码:nycl
–来自百度网盘超级会员V6的分享
训练修改的文件、训练的结果
链接:https://pan.baidu.com/s/1r-dPd9W70LrNVsfeNDvd3A?pwd=li16
提取码:li16
–来自百度网盘超级会员V6的分享