这两天测试了一下如何通过 RP2040 的内置 ADC 获取一个待测量的电压数据,RP2040 内置了4路ADC,分辨率是12bit,也就是说,可以获取4096阶的变化量,但第4个 ADC 已经用于测量芯片的内部温度,所以实际能用的仅有3个 ADC。ADC的测量电压范围其实是 0 到 3.3V,这个其实是内置ADC的原因,范围已经是定死了,所以每一档的分辨率是0.8mV的样子。但由于片内LDO的电压并不是标准的3.3V,所以,实际测量结果会有误差。

这个测量电路非常简单,额外加一个电位器就行了,电位器的两端分别接3.3V,和A Gnd,版上能很容易找到3.3V的接口,接地要接AG,电位器中点接A0那个端口,就是GPIO 26。实际测量了一下电位器两端电压,是3.26V,并没有3.3V。
然后打开 Arduion,选择好开发板,在File -> Examples -> ADCInput 内选择 AnalogMicphone 这个例子。这个例子其实不需要改就可以运行。
/*Mono analog microphone example using electret mike on A0Run using the Arduino Serial Plotter to see waveform.Released to the Public Domain by Earle F. Philhower, IIIWire the mike's VCC to 3.3V on the Pico, connect the mike'sGND to a convenient Pico GND, and then connect mike OUT to A0
*/#include <ADCInput.h>ADCInput mike(A0);
// For stereo/dual mikes, could use this line instead
//   ADCInput(A0, A1);void setup() {Serial.begin(115200);mike.begin(8000);while (1) {Serial.printf("%d\n", mike.read());// For stereo/dual mikes, use this line instead//   Serial.printf("%d %d\n", mike.read(), mike.read());}
}void loop() {/* Nothing here */
}
代码非常简单,mike.begin 函数内的 8000 就是需要的采样率。然后只需要调用 mike.read() 就能获取到返回值。返回值是 int 类型。
执行结果如下:
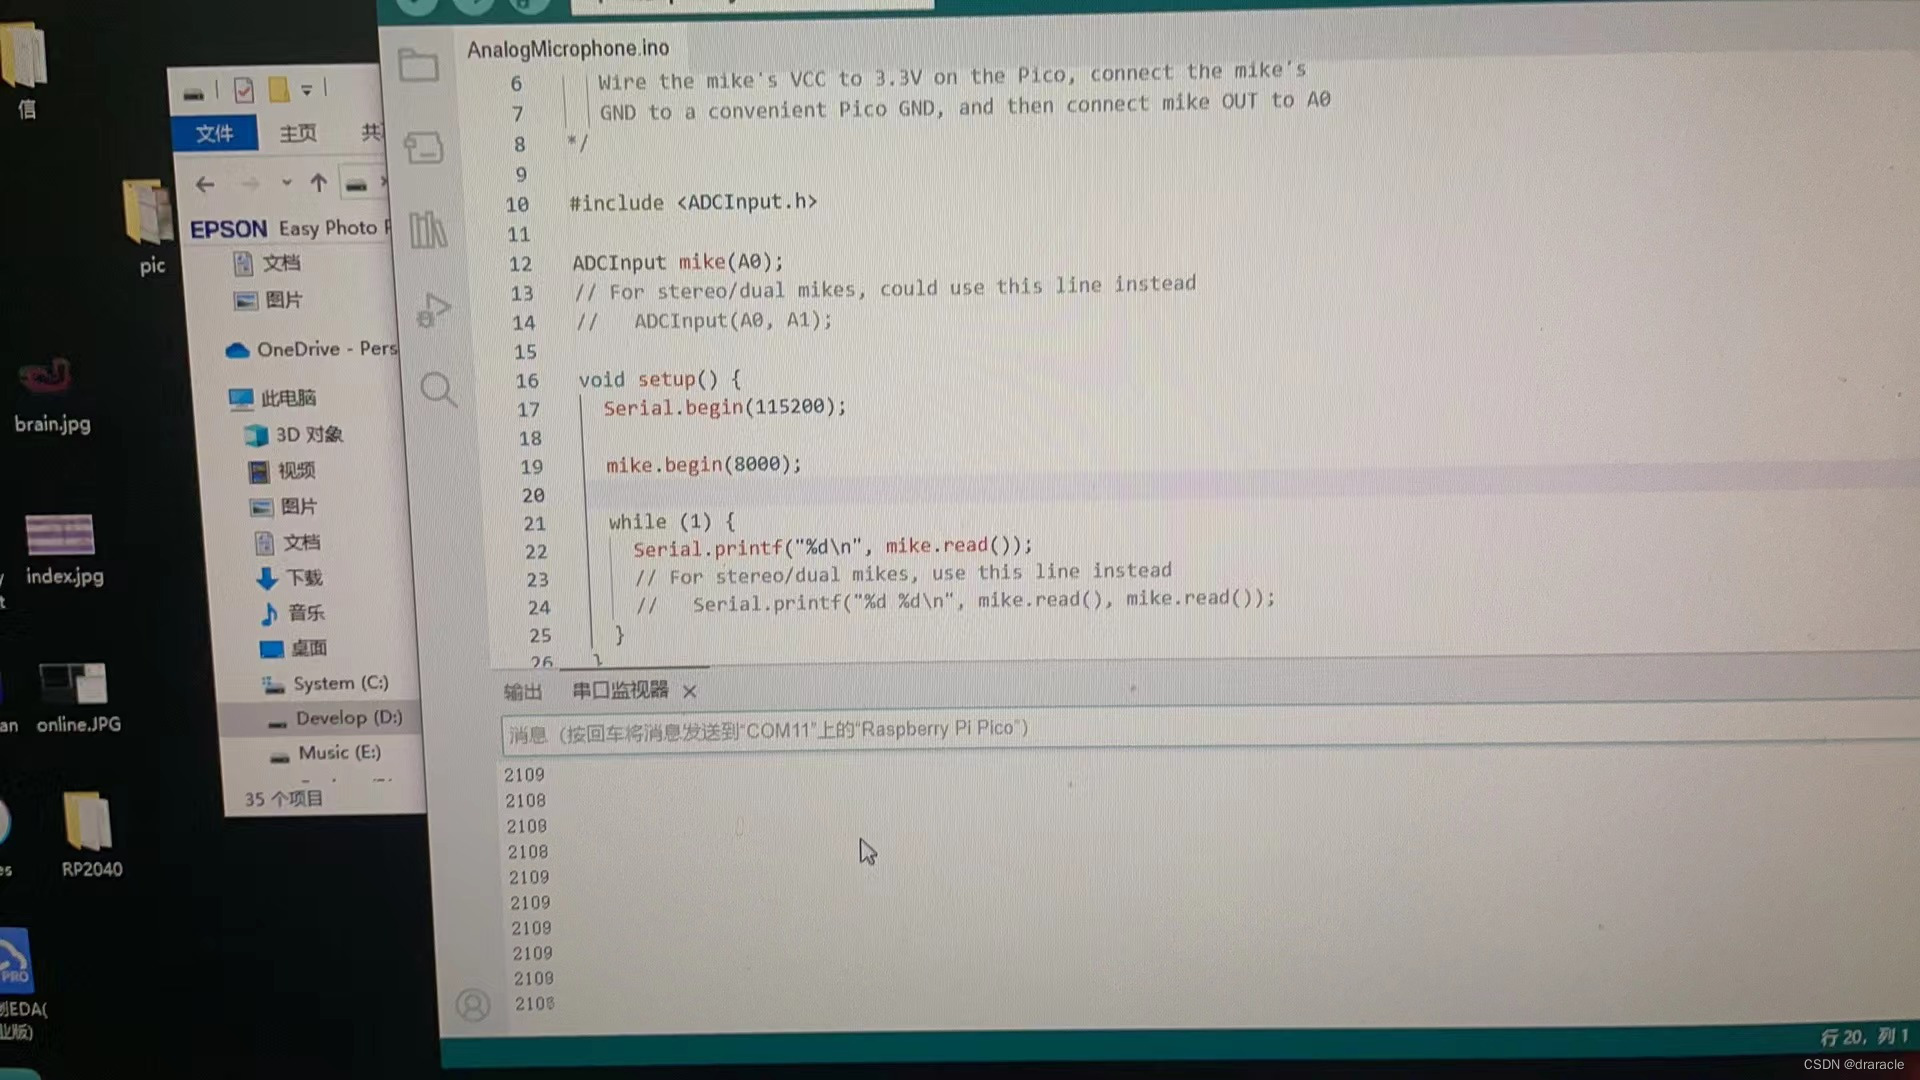
调整电位器,就可以看到返回值的不断变化。 是不是非常简单?
如果需要更精确的数据,就需要选用更高位的ADC,比如16或则24位,RP2040 用 SPI 或则 I2S 与 ADC 通讯并获取数据。

