本文主要介绍Batterystats和Battery Historian的基本使用步骤和工作流程,如果您要想学习怎样使用Battery Historian分析耗电详情,请参考文档: Analyze power use with Battery Historian。
Batterystats是一个Android framework中的工具,用于采集设备上的耗电数据。你可以用adb把采集到的耗电数据dump到你的电脑上,并且生成一个可以用Battery Historian分析的报告。Battery Historian把这个报告从Batterystats转换成可以在浏览器中查看的可视化HTML。
Battery Historian可以提供如下功能:
1、向你展示进程在哪里、怎样耗电。
2、为了改善电池生命周期,识别出你的app中可以被推迟或被移除的任务。
注意:Batterystats和Battery Historian只支持Android 5.0及以上的Android设备,且需要设备开启USB调试功能。
安装Battery Historian
安装Battery Historian最简单的方法就是使用Docker。也可以使用从源码编译的方法,详情参考Battery Historian项目在GitHub上的the Read Me。使用Docker来安装Battery Historian的步骤如下:
1、按照 the Docker website上的指导文档安装Docker Community Edition。
2、为确保Docker已经正确安装好,在命令行输入如下命令:
docker run hello-world
如果Docker已经正确安装好,你将会看到下面的输出:
Unable to find image 'hello-world:latest' locally
latest: Pulling from library/hello-world
78445dd45222: Pull complete
Digest:
sha256:c5515758d4c5e1e838e9cd307f6c6a0d620b5e07e6f927b07d05f6d12a1ac8d7
Status: Downloaded newer image for hello-world:latestHello from Docker!
This message shows that your installation appears to be working correctly.To generate this message, Docker took the following steps:
1. The Docker client contacted the Docker daemon.
2. The Docker daemon pulled the "hello-world" image from the Docker Hub.
3. The Docker daemon created a new container from that image which runs the
executable that produces the output you are currently reading.
4. The Docker daemon streamed that output to the Docker client, which sent it to your terminal
3、用如下的命令运行Battery Historian:
docker run -p port_number:9999 gcr.io/android-battery-historian/stable:3.0 --port 9999
Battery Historian将使用设备上的port_number指定的端口
注意:如果你使用的是Windows系统,你需要开启BIOS的虚拟配置。你可以查询关于怎样开启主板虚拟配置的文档。如果你的电脑能使用Android Emulator,那么虚拟配置就已经开启了。
4、为确保Battery Historian已经开启运行,在浏览器中输入如下地址打开Battery Historian(不同的操作系统,地址不一样):
Linux和Mac
Battery Historian的地址是:http://localhost:port_number
Windows
你打开Docker时,会得到一个电脑正在使用的IP地址。例如,如果IP地址是123.456.78.90,那么Battery Historian的地址是:http://123.456.78.90:port_number
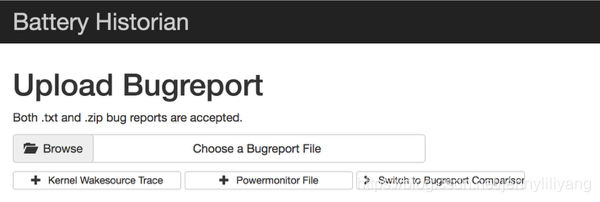
然后你会看到Battery Historian的首页,在这个界面你可以上传并查看耗电统计数据。
使用Batterystats采集数据
使用Batterystats采集设备的耗电数据,并在Battery Historian中打开的步骤如下:
1、连接手机与电脑。
2、在命令行终端中关闭正在运行的adb server。
adb kill-server
3、重启adb并检查设备是否已连接上。
adb devices
4、重置电池数据:
adb shell dumpsys batterystats --reset
设备会一直在后台采集电池状态数据和其它debug信息。重置操作会擦除已采集的旧有数据。如果不进行重置操作,那么就会输出大量的数据。
5、断开手机与电脑的连接,使电池只处于放电状态。
6、对APP执行测试操作。
7、重新连接手机和电脑。
8、确保手机能被电脑识别:
adb devices
9、dump所有的耗电数据:
adb shell dumpsys batterystats > [path/]batterystats.txt
10、生成raw格式的数据报告。
对于Android 7.0及以上的手机:
adb bugreport > [path/]bugreport.zip
对于Android 6.0及以下的手机:
adb bugreport > [path/]bugreport.txt
Bugreport可能需要几分钟才能完成。在导出数据的过程中,不要断开手机或取消导出任务。
11、在浏览器中打开Battery Historian。
12、点击Browse,然后选择步骤10中生成的bugreport文件。
13、点击Submit。Battery Historian将打开bugreport文件并生成相关图表。
查看Battery Historian中的数据图表
Battery Historian图表以时间为进度展示了耗电相关的事件。
每行用有颜色的进度条片段展示因系统组件的运行导致的耗电情况。图表不展示某个组建耗了多少电,而只展示APP所耗的电。图表按分类组织,每个分类用一个以时间为X轴的进度条表示。

如上图:
1、从下拉列表选择不同的统计维度。
2、鼠标滑过信息icon,能看到更多关于每个维度的信息,包括图表中的各颜色的关键信息。
3、鼠标滑过进度条,能看到更多关于某个维度在特定的时间点的耗电信息。
batterystats输出的额外信息
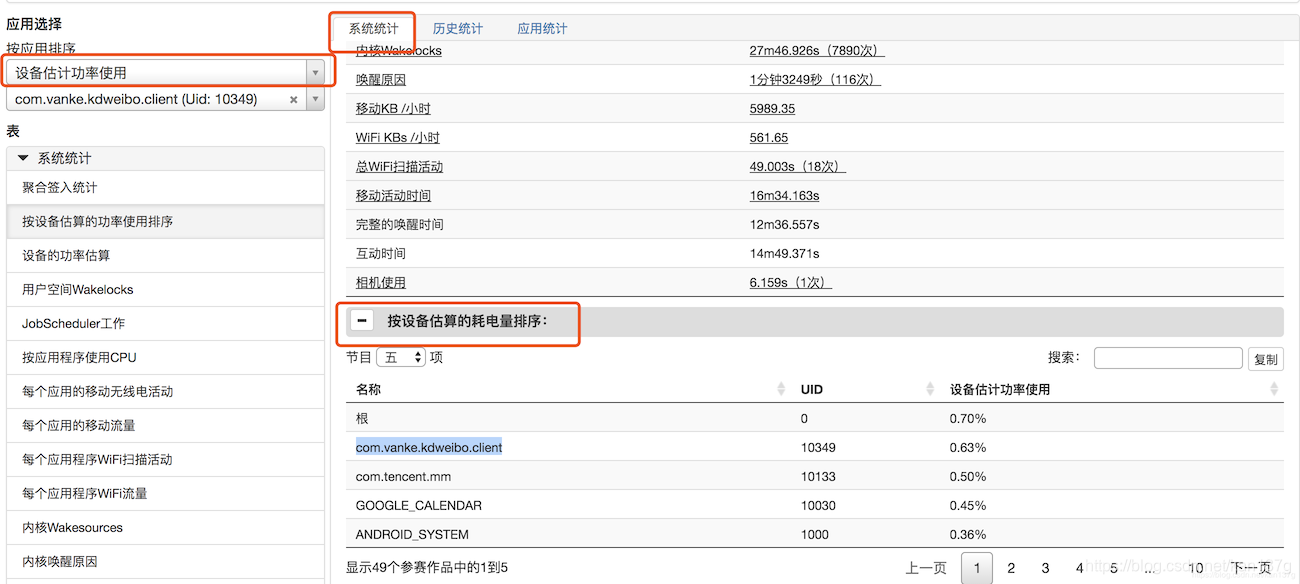
你可以通过Battery Historian图表的stats区域查看batterystats.txt的额外信息。

1、System Stats页包括系统维度的统计数据,比如移动网络信号level和屏幕亮度。这部分信息对当前设备正在进行的任务做了一个概览。这非常有利于确保没有其他事件正在影响你的测试。
2、App Stats页包含特定App的信息。“Sort apps by”下拉列表在左边的“App Selection”区域。你可以从apps下拉列表中选择一个特定的app然后查看它的stats。
参考文档
https://developer.android.com/topic/performance/power/setup-battery-historian

