控制反转IOC
+ 控制反转是一种思想 + 控制反转是为了降低程序耦合度,提高程序扩展力,达到OCP原则,达到DIP原则 + 控制反转,反转是什么? - 将对象的创建权利交出去,交给第三方容器负责 - 将对象和对象之间关系的维护权交出去,交给第三方容器负责 + 控制反转这种思想如何实现: - DI(Dependency Injection):依赖注入依赖注入DI
依赖注入 实现了控制反转的思想Spring通过依赖注入的方式来完成Bean管理
Bean管理:Bean对象的创建,Bean对象中属性的赋值(Bean对象之间关系的维护)
依赖注入:
- 依赖指的是对象和对象之间的关联关系
- 注入指的是一种数据传递行为,通过注入行为来让对象和对象之间产生关系
依赖注入常见的实现方式:
✅第一种:set注入
set注入是居于set方法实现的,底层通过反射机制调用属性对象的set方法然后给属性赋值,让两个对象之间产生关系。这种方式要求属性必须对外提供set方法。
✅第一种:构造方法注入
核心原理:通过调用构造方法来给属性赋值
依赖注入代码实例
set注入
> 注意点: > > 1. 在bean标签中class对标的都是类,所以在MVC架构中填写实现类的实现接口是不可行的 > 2. property的name是set方法的XXX,比如示例中userDao对应的方法就是实现类中的setUserDao方法 > + 通过property标签获取到属性名:userDao > + 通过属性名推断出set方法名:setUserDao > + 通过反射机制调用setUserDao()方法给属性赋值 > - property标签的`** name**`是属性名。 > - property标签的`** ref**`是要注入的bean对象的id。(** 通过ref属性来完成bean的装配,这是bean最简单的一种装配方式**。装配指的是:** 创建系统组件之间关联的动作**) > + 由此可以推断出: > - setUsername() 演变为 username > - setPassword() 演变为 password > - setUserDao() 演变为 userDao > - setUserService() 演变为 userService ><?xml version="1.0" encoding="UTF-8"?>
<beans xmlns="http://www.springframework.org/schema/beans"xmlns:xsi="http://www.w3.org/2001/XMLSchema-instance"xsi:schemaLocation="http://www.springframework.org/schema/beans http://www.springframework.org/schema/beans/spring-beans.xsd"><bean id="userDaoBean" class="com.powernode.Dao.UserDaoImpl"/><bean id="userServiceBean" class="com.powernode.Service.UserServiceImpl"><property name="userDao" ref="userDaoBean"/></bean>
</beans>
package com.powernode.Dao;/*** @Author: -* @Description: TODO* @DateTime: 2024/9/19 15:19*/
public interface UserDao {void add();void update();
}---------------------------------------------------------------------------------package com.powernode.Dao;/*** @Author: * @Description: TODO* @DateTime: 2024/9/19 15:19*/
public class UserDaoImpl implements UserDao{@Overridepublic void add() {System.out.println("Mysql数据库正在新增用户....");}@Overridepublic void update() {System.out.println("Mysql数据库正在修改用户....");}
}
package com.powernode.Service;/*** @Author: * @Description: TODO* @DateTime: 2024/9/19 15:19*/
public interface UserService {void add();void update();
}package com.powernode.Service;import com.powernode.Dao.UserDao;
import org.slf4j.Logger;
import org.slf4j.LoggerFactory;---------------------------------------------------------------------------------/*** @Author: * @Description: TODO* @DateTime: 2024/9/19 15:19*/
public class UserServiceImpl implements UserService{private static final Logger logger = LoggerFactory.getLogger(UserServiceImpl.class);public UserDao userDao;public void setUserDao(UserDao userDao){this.userDao = userDao;}@Overridepublic void add() {logger.info("add():userDao:{}", userDao);userDao.add();}@Overridepublic void update() {logger.info("update():userDao:{}", userDao);userDao.update();}
}
测试程序
package com.powernode.Test;import com.powernode.Service.UserService;
import org.slf4j.Logger;
import org.slf4j.LoggerFactory;
import org.springframework.context.ApplicationContext;
import org.springframework.context.support.ClassPathXmlApplicationContext;/*** @Author: * @Description: TODO* @DateTime: 2024/9/23 16:29*/
public class Test {private Logger logger = LoggerFactory.getLogger(Test.class);@org.junit.Testpublic void setTest(){ApplicationContext beans = new ClassPathXmlApplicationContext("beansSetDI.xml");UserService userServiceBean = (UserService) beans.getBean("userServiceBean");userServiceBean.add();/*** userDao:com.powernode.Dao.UserDaoImpl@6e4de19b* Mysql数据库正在新增用户....*/userServiceBean.update();/*** userDao:com.powernode.Dao.UserDaoImpl@6e4de19b* Mysql数据库正在修改用户....*/}
}
构造函数注入
> 构造函数的引用非简单类型和set一样,都是使用`** ref**`引用当前配置文件中已经定义的bean id > > 1. 构造函数的constructor-arg表示定义构造函数的参数,其中存在两种写法 > - index,index表示参数的个数,0表示第一个参数,以此类推 > - name标识参数名称,name所对应的并非参数类型,而是参数命名,比如参数为:"UserDao abcd",那么配置文件中应该这么写:name="abcd" ><?xml version="1.0" encoding="UTF-8"?>
<beans xmlns="http://www.springframework.org/schema/beans"xmlns:xsi="http://www.w3.org/2001/XMLSchema-instance"xsi:schemaLocation="http://www.springframework.org/schema/beans http://www.springframework.org/schema/beans/spring-beans.xsd"><bean id="userDaoBean" class="com.powernode.Dao.UserDaoImpl"/><!--第一种写法,使用index标识参数--><bean id="userServiceBean" class="com.powernode.Service.UserServiceImpl2"><constructor-arg index="0" ref="userDaoBean"/></bean><!--第二种写法,使用name标识参数,name所对应的并非参数类型,而是参数命名--><bean id="userServiceBean2" class="com.powernode.Service.UserServiceImpl2"><constructor-arg name="userDao" ref="userDaoBean"/></bean>
</beans>
package com.powernode.Dao;/*** @Author: * @Description: TODO* @DateTime: 2024/9/19 15:19*/
public interface UserDao {void add();void update();
}---------------------------------------------------------------------------------package com.powernode.Dao;/*** @Author: * @Description: TODO* @DateTime: 2024/9/19 15:19*/
public class UserDaoImpl implements UserDao{@Overridepublic void add() {System.out.println("Mysql数据库正在新增用户....");}@Overridepublic void update() {System.out.println("Mysql数据库正在修改用户....");}
}
package com.powernode.Service;/*** @Author: * @Description: TODO* @DateTime: 2024/9/19 15:19*/
public interface UserService {void add();void update();
}------------------------------------------------------------------------------------package com.powernode.Service;import com.powernode.Dao.UserDao;
import org.slf4j.Logger;
import org.slf4j.LoggerFactory;/*** @Author: * @Description: TODO* @DateTime: 2024/9/19 15:19*/
public class UserServiceImpl2 implements UserService{private static final Logger logger = LoggerFactory.getLogger(UserServiceImpl2.class);public UserDao userDao;public UserServiceImpl2(UserDao userDao){this.userDao = userDao;}@Overridepublic void add() {logger.info("add():userDao:{}", userDao);userDao.add();}@Overridepublic void update() {logger.info("update():userDao:{}", userDao);userDao.update();}
}
测试程序
package com.powernode.Test;import com.powernode.Service.UserService;
import org.slf4j.Logger;
import org.slf4j.LoggerFactory;
import org.springframework.context.ApplicationContext;
import org.springframework.context.support.ClassPathXmlApplicationContext;/*** @Author: * @Description: TODO* @DateTime: 2024/9/23 16:29*/
public class Test {private Logger logger = LoggerFactory.getLogger(Test.class);@org.junit.Testpublic void constructorTest(){ApplicationContext beans = new ClassPathXmlApplicationContext("beansConstructor.xml");UserService userServiceBean = (UserService) beans.getBean("userServiceBean2");userServiceBean.add();/**2024-09-23 17:00:10 397 [main] INFO com.powernode.Service.UserServiceImpl2 - add():userDao:com.powernode.Dao.UserDaoImpl@7adf16aaMysql数据库正在新增用户....*/userServiceBean.update();/**2024-09-23 17:00:10 410 [main] INFO com.powernode.Service.UserServiceImpl2 - update():userDao:com.powernode.Dao.UserDaoImpl@7adf16aaMysql数据库正在修改用户....*/}
}
set注入专题
注入外部Bean
注入外部Bean的意思是在配置property标签时,采用ref的形式配置<?xml version="1.0" encoding="UTF-8"?>
<beans xmlns="http://www.springframework.org/schema/beans"xmlns:xsi="http://www.w3.org/2001/XMLSchema-instance"xsi:schemaLocation="http://www.springframework.org/schema/beans http://www.springframework.org/schema/beans/spring-beans.xsd"><!-- set内外部注入bean --><bean id="userDaoBean" class="com.powernode.Dao.UserDaoImpl"/><!--外部注入--><bean id="userServiceBean" class="com.powernode.Service.UserServiceImpl"><property name="userDao" ref="userDaoBean"/></bean>
</beans>
@org.junit.Test
public void shapeTest(){ApplicationContext beans = new ClassPathXmlApplicationContext("beansShape.xml");UserService userServiceBean = (UserService) beans.getBean("userServiceBean");UserDao userDaoBean = (UserDao) beans.getBean("userDaoBean");logger.info("userDaoBean:{}", userDaoBean);// userDaoBean:com.powernode.Dao.UserDaoImpl@18518ccfuserServiceBean.add();/**add():userDao:com.powernode.Dao.UserDaoImpl@18518ccfMysql数据库正在新增用户....*/userServiceBean.update();/**update():userDao:com.powernode.Dao.UserDaoImpl@18518ccfMysql数据库正在修改用户....*/
}
注入内部Bean
注入外部Bean的意思是在配置property标签时,现阶段直接创建;与外部注入Bean的区别:外部注入Bean中ref引用的和userService使用的对象是同一个对象;内部注入因为是新创建的,所以每一个创建出来的bean对象都不一样
<?xml version="1.0" encoding="UTF-8"?>
<beans xmlns="http://www.springframework.org/schema/beans"xmlns:xsi="http://www.w3.org/2001/XMLSchema-instance"xsi:schemaLocation="http://www.springframework.org/schema/beans http://www.springframework.org/schema/beans/spring-beans.xsd"><!-- set内外部注入bean  --><bean id="userDaoBean" class="com.powernode.Dao.UserDaoImpl"/><!--内部注入--><bean id="userServiceBean" class="com.powernode.Service.UserServiceImpl"><property name="userDao"><bean class="com.powernode.Dao.UserDaoImpl"/></property></bean>
</beans>
@org.junit.Test
public void shapeTest(){ApplicationContext beans = new ClassPathXmlApplicationContext("beansShape.xml");UserService userServiceBean = (UserService) beans.getBean("userServiceBean");UserDao userDaoBean = (UserDao) beans.getBean("userDaoBean");logger.info("userDaoBean:{}", userDaoBean);// userDaoBean:com.powernode.Dao.UserDaoImpl@4c6daf0userServiceBean.add();/**add():userDao:com.powernode.Dao.UserDaoImpl@6d0b5bafMysql数据库正在新增用户....*/userServiceBean.update();/**update():userDao:com.powernode.Dao.UserDaoImpl@6d0b5bafMysql数据库正在修改用户....*/
}
注入简单类型
进行注入的时候,对象的属性是另外一个对象的时候,我们使用`set`+ `ref`注入。如果注入的对象属性是基本数据类型,也是采用set注入的方式给该属性赋值。注意点:
property标签的name属性为set方法去掉set后的首字母小写
<?xml version="1.0" encoding="UTF-8"?>
<beans xmlns="http://www.springframework.org/schema/beans"xmlns:xsi="http://www.w3.org/2001/XMLSchema-instance"xsi:schemaLocation="http://www.springframework.org/schema/beans http://www.springframework.org/schema/beans/spring-beans.xsd"><!--简化写法--><bean id="user" class="com.powernode.entity.User"><property name="age" value="20"/></bean><!--完整写法--><bean id="userBean" class="com.powernode.entity.User"><property name="age"><value>22</value></property></bean>
</beans>
@org.junit.Testpublic void userTest(){ApplicationContext beans = new ClassPathXmlApplicationContext("simpleType.xml");User user = (User) beans.getBean("user");User user2 = (User) beans.getBean("userBean");System.out.println(user.toString());// User{age=20}System.out.println(user2);}
简单类型
简单类型包括哪些? public static boolean isSimpleValueType(Class<?> type) {return !isVoidType(type) && (isPrimitiveOrWrapper(type) || Enum.class.isAssignableFrom(type) || CharSequence.class.isAssignableFrom(type) || Number.class.isAssignableFrom(type) || Date.class.isAssignableFrom(type) || Temporal.class.isAssignableFrom(type) || ZoneId.class.isAssignableFrom(type) || TimeZone.class.isAssignableFrom(type) || File.class.isAssignableFrom(type) || Path.class.isAssignableFrom(type) || Charset.class.isAssignableFrom(type) || Currency.class.isAssignableFrom(type) || InetAddress.class.isAssignableFrom(type) || URI.class == type || URL.class == type ||UUID.class == type || Locale.class == type || Pattern.class == type || Class.class == type);}// 分析 isPrimitiveOrWrapperpublic static boolean isPrimitiveOrWrapper(Class<?> clazz) {Assert.notNull(clazz, "Class must not be null");return clazz.isPrimitive() || isPrimitiveWrapper(clazz);}/*** Determines if the specified {@code Class} object represents a* primitive type.** <p> There are nine predefined {@code Class} objects to represent* the eight primitive types and void. These are created by the Java* Virtual Machine, and have the same names as the primitive types that* they represent, namely {@code boolean}, {@code byte},* {@code char}, {@code short}, {@code int},* {@code long}, {@code float}, and {@code double}.** <p> These objects may only be accessed via the following public static* final variables, and are the only {@code Class} objects for which* this method returns {@code true}.** @return true if and only if this class represents a primitive type** @see java.lang.Boolean#TYPE* @see java.lang.Character#TYPE* @see java.lang.Byte#TYPE* @see java.lang.Short#TYPE* @see java.lang.Integer#TYPE* @see java.lang.Long#TYPE* @see java.lang.Float#TYPE* @see java.lang.Double#TYPE* @see java.lang.Void#TYPE* @since 1.1*/@IntrinsicCandidatepublic native boolean isPrimitive();
由源码可知简单类型包括:
基本数据类型、基本类型对应的包装类、String或者其他的****CharSequence子类、Enum子类、Number子类、Date子类、URI、URL、Temporal子类、Local、Class、ZoneId、TimeZone、File、Path、Charset、Currency、InetAddress、UUID、Pattern
简单类型代码示例
> 注意:这里只测常见的,** Currency、InetAddress等**工具类不做测试 ><?xml version="1.0" encoding="UTF-8"?>
<beans xmlns="http://www.springframework.org/schema/beans"xmlns:xsi="http://www.w3.org/2001/XMLSchema-instance"xsi:schemaLocation="http://www.springframework.org/schema/beans http://www.springframework.org/schema/beans/spring-beans.xsd"><!--<!–简化写法–>--><!--<bean id="user" class="com.powernode.entity.User">--><!-- <property name="age" value="20"/>--><!--</bean>--><!--<!–完整写法–>--><!--<bean id="userBean" class="com.powernode.entity.User">--><!-- <property name="age">--><!-- <value>22</value>--><!-- </property>--><!--</bean>--><bean id="simpleTypeBean" class="com.powernode.entity.AllSimpleType"><!--基本数据类型--><property name="b" value="2"/><property name="s" value="3"/><property name="i" value="30"/><property name="l" value="20000000"/><property name="f" value="20.1"/><property name="d" value="20.222"/><property name="flag" value="true"/><property name="c" value="s"/><!--基本数据类的包装类--><property name="b1" value="3"/><property name="s1" value="4"/><property name="i1" value="40"/><property name="l1" value="999999999999999"/><property name="f1" value="21.1"/><property name="d1" value="21.222"/><property name="flag1" value="false"/><property name="c1" value="b"/><!--String--><property name="str" value="mySimpleType"/><!--注意:value后面的日期字符串格式必须是Date对象的toString()方法执行的结果--><!--如果想使用其他格式的日期字符串,就需要进行特殊处理--><property name="date" value="Fri Sep 30 15:26:38 CST 2022"/><!--枚举 Enum--><property name="season" value="WINTER"/><!--uri--><property name="uri" value="/save.do"/><!--url spring6之后,会自动检查url是否有效,如果无效会报错--><property name="url" value="http://www.baidu.com"/><!--localDate--><property name="localDate" value="EPOCH"/><!--localjava.util.Locale 主要在软件的本地化时使用。它本身没有什么功能,更多的是作为一个参数辅助其他方法完成输出的本地化。--><property name="locale" value="CHINESE"/><!--class--><property name="clazz" value="com.powernode.entity.AllSimpleType"/></bean>
</beans>
@org.junit.Testpublic void simpleType(){ApplicationContext beans = new ClassPathXmlApplicationContext("simpleType.xml");AllSimpleType simpleTypeBean = (AllSimpleType) beans.getBean("simpleTypeBean");System.out.println(simpleTypeBean);/**AllSimpleType{b=2, s=3, i=30, l=20000000, f=20.1, d=20.222, flag=true, c=s, b1=3, s1=4, i1=40, l1=999999999999999, f1=21.1, d1=21.222, flag1=false, c1=b, str='mySimpleType', date=Sat Oct 01 05:26:38 CST 2022, season=WINTER, uri=/save.do, url=http://www.baidu.com, localDate=1970-01-01, locale=chinese, clazz=class com.powernode.entity.AllSimpleType}*/}
- 如果把Date当做简单类型的话,日期字符串格式不能随便写。格式必须符合Date的toString()方法格式。显然这就比较鸡肋了。如果我们提供一个这样的日期字符串:2010-10-11,在这里是无法赋值给Date类型的属性的。
- spring6之后,当注入的是URL,那么这个url字符串是会进行有效性检测的。如果是一个存在的url,那就没问题。如果不存在则报错。
级联属性赋值(了解)
```xml <?xml version="1.0" encoding="UTF-8"?><property name="name" value="张三"/><!--要点1:以下两行配置的顺序不能颠倒-->
<property name="clazz" ref="clazzBean"/>
<!--要点2:clazz属性必须有getter方法-->
<property name="clazz.name" value="高三一班"/>
package com.rui.spring6.beans;public class Clazz {private String name;//无惨构造public Clazz() {}//有参构造public Clazz(String name) {this.name = name;}//setter and getterpublic void setName(String name) {this.name = name;}public String getName() {return name;}@Overridepublic String toString() {return "Clazz{" +"name='" + name + '\'' +'}';}
}
使用级联属性赋值需要注意两点:
1、配置的顺序不能颠倒
2、clazz属性必须提供getter方法
注入数组
注入数组根据数组类型分为两种:简单类型、非简单类型- 如果数组中是简单类型,使用
value标签 - 如果数组中是非简单类型,使用
ref标签
<?xml version="1.0" encoding="UTF-8"?>
<beans xmlns="http://www.springframework.org/schema/beans"xmlns:xsi="http://www.w3.org/2001/XMLSchema-instance"xsi:schemaLocation="http://www.springframework.org/schema/beans http://www.springframework.org/schema/beans/spring-beans.xsd"><bean id="goods1" class="com.powernode.entity.Goods"><property name="name" value="香蕉"/></bean><bean id="goods2" class="com.powernode.entity.Goods"><property name="name" value="苹果"/></bean><!--数组类型简单类型--><bean id="personBean" class="com.powernode.entity.Person"><property name="favariteFoods"><array><value>鸡排</value><value>汉堡</value><value>鹅肝</value></array></property></bean><!--数组类型非简单类型--><bean id="orderBean" class="com.powernode.entity.Order"><property name="goods"><array><!--使用ref标签定位 bean属性选择对象--><ref bean="goods1"/><ref bean="goods2"/></array></property></bean>
</beans>
@org.junit.Testpublic void simpleArrayType(){ApplicationContext beans = new ClassPathXmlApplicationContext("beans-array-type.xml");Person personBean = (Person) beans.getBean("personBean");System.out.println(personBean);//Person{favariteFoods=[鸡排, 汉堡, 鹅肝]}Order orderBean = (Order) beans.getBean("orderBean");System.out.println(orderBean);//Order{goods=[Goods{name='香蕉'}, Goods{name='苹果'}]}}
注入List集合
> List集合:有序可重复。 > > + 注入List集合的时候使用标签 > + List集合中是简单类型使用`value`标签,反之使用`ref`标签 ><?xml version="1.0" encoding="UTF-8"?>
<beans xmlns="http://www.springframework.org/schema/beans"xmlns:xsi="http://www.w3.org/2001/XMLSchema-instance"xsi:schemaLocation="http://www.springframework.org/schema/beans http://www.springframework.org/schema/beans/spring-beans.xsd"><bean id="goods1" class="com.powernode.entity.Goods"><property name="name" value="香蕉"/></bean><bean id="goods2" class="com.powernode.entity.Goods"><property name="name" value="苹果"/></bean><bean id="dataStructureBean" class="com.powernode.entity.DataStructure"><!--list 使用list标签 无序列表--><property name="list"><list><value>listOne</value><value>listTwo</value></list></property></bean>
</beans>
注入Set集合
> + 使用标签。 > + set集合中元素是简单类型的使用`value`标签,反之使用`ref`标签 ><?xml version="1.0" encoding="UTF-8"?>
<beans xmlns="http://www.springframework.org/schema/beans"xmlns:xsi="http://www.w3.org/2001/XMLSchema-instance"xsi:schemaLocation="http://www.springframework.org/schema/beans http://www.springframework.org/schema/beans/spring-beans.xsd"><bean id="goods1" class="com.powernode.entity.Goods"><property name="name" value="香蕉"/></bean><bean id="goods2" class="com.powernode.entity.Goods"><property name="name" value="苹果"/></bean><bean id="dataStructureBean" class="com.powernode.entity.DataStructure"><!--set 使用set 有序列表--><property name="set"><set><value>setOne</value><value>setThree</value><value>setOneW</value></set></property></bean>
</beans>
注入Map集合
> + 使用<?xml version="1.0" encoding="UTF-8"?>
<beans xmlns="http://www.springframework.org/schema/beans"xmlns:xsi="http://www.w3.org/2001/XMLSchema-instance"xsi:schemaLocation="http://www.springframework.org/schema/beans http://www.springframework.org/schema/beans/spring-beans.xsd"><bean id="goods1" class="com.powernode.entity.Goods"><property name="name" value="香蕉"/></bean><bean id="goods2" class="com.powernode.entity.Goods"><property name="name" value="苹果"/></bean><bean id="dataStructureBean" class="com.powernode.entity.DataStructure"><!--Map 分为简单类型、非简单类型value--><property name="simpleMap"><map><entry key="1" value="上海普陀区"/><entry key="2" value="上海浦东新区"/><entry key="3" value="上海长宁区"/></map></property><property name="classMap"><map><entry key="1" value-ref="goods1"/><entry key="2" value-ref="goods2"/></map></property></bean>
</beans>
注入Properties
> + java.util.Properties继承java.util.Hashtable,所以Properties也是一个Map集合 > + 使用 标签嵌套 标签完成 ><?xml version="1.0" encoding="UTF-8"?>
<beans xmlns="http://www.springframework.org/schema/beans"xmlns:xsi="http://www.w3.org/2001/XMLSchema-instance"xsi:schemaLocation="http://www.springframework.org/schema/beans http://www.springframework.org/schema/beans/spring-beans.xsd"><bean id="goods1" class="com.powernode.entity.Goods"><property name="name" value="香蕉"/></bean><bean id="goods2" class="com.powernode.entity.Goods"><property name="name" value="苹果"/></bean><bean id="dataStructureBean" class="com.powernode.entity.DataStructure"><property name="properties"><props><prop key="driver">com.mysql.cj.jdbc.Driver</prop><prop key="url">jdbc:mysql://localhost:3306/spring</prop><prop key="username">root</prop><prop key="password">root</prop></props></property></bean>
</beans>
注入null和空字符串
> 注入空字符串使用:`****` 或者 `**value=""**`**** > > 注入null使用:`****` 或者 **不为该属性赋值** ><?xml version="1.0" encoding="UTF-8"?>
<beans xmlns="http://www.springframework.org/schema/beans"xmlns:xsi="http://www.w3.org/2001/XMLSchema-instance"xsi:schemaLocation="http://www.springframework.org/schema/beans http://www.springframework.org/schema/beans/spring-beans.xsd"><bean id="goods1" class="com.powernode.entity.Goods"><property name="name" value="香蕉"/></bean><bean id="goods2" class="com.powernode.entity.Goods"><property name="name" value="苹果"/></bean><bean id="dataStructureBean" class="com.powernode.entity.DataStructure"><!--空字符串--><!--第一种写法--><!--<property name="emptyString">--><!-- <value/>--><!--</property>--><!--第二种写法--><property name="emptyString" value=""></property><!--null 第一种写法--><!--<property name="nullString">--><!-- <null/>--><!--</property>--><!--第二种写法 不写--></bean>
</beans>
注入的值含有特殊字符
XML中由5个特殊字符,分别是`<`、`>`、`'`、`"`、`&`。以上五个特殊字符在XML中会被特殊对待,会被当做XML语法中的一部分进行解析,如果这些特殊字符直接出现在注入的字符串当中,就会报错。解决方案
- 使用转义字符代替特殊符号
- 使用
<font style="color:#DF2A3F;"><![CDATA[]]></font>,将含有特殊符号的字符串放到<font style="color:#DF2A3F;"><![CDATA[]]></font>当中。放在CDATA区的数据不会被XML文件解析器解析。但是注意,使用CDATA时,不能使用value属性,要使用value标签。
| 特殊字符 | 转义字符 |
|---|---|
| > | > |
| < | < |
| ’ | ' |
| " | " |
| & | & |
<?xml version="1.0" encoding="UTF-8"?>
<beans xmlns="http://www.springframework.org/schema/beans"xmlns:xsi="http://www.w3.org/2001/XMLSchema-instance"xsi:schemaLocation="http://www.springframework.org/schema/beans http://www.springframework.org/schema/beans/spring-beans.xsd"><!--第一种方式--><bean id="mathBean" class="com.powernode.entity.MathBean"><!--当使用<![CDATA[]]> 时,只能使用value标签,不能使用value属性--><property name="compare"><value><![CDATA[2<3]]></value></property></bean><!--第二种方式--><bean id="mathBean2" class="com.powernode.entity.MathBean"><property name="compare"><value>2 < 3</value></property></bean>
</beans>
package com.powernode.entity;/*** @Author: * @Description: TODO* @DateTime: 2024/9/23 21:22*/
public class MathBean {private String compare;public String isCompare() {return compare;}public void setCompare(String compare) {this.compare = compare;}@Overridepublic String toString() {return "MathBean{" +"compare=" + compare +'}';}
} @org.junit.Testpublic void specialType(){ApplicationContext beans = new ClassPathXmlApplicationContext("beans-special-type.xml");MathBean mathBean = (MathBean) beans.getBean("mathBean");System.out.println(mathBean);//MathBean{compare=2<3}MathBean mathBean2 = (MathBean) beans.getBean("mathBean2");System.out.println(mathBean2);//MathBean{compare=2<3}}
P命名空间注入
1. P命名空间注入是为了简化set注入,本质上还是set注入,所以对应属性的Set方法依旧不可少 2. 使用P命名空间注入法需要添加 `xmlns:p="[http://www.springframework.org/schema/p"](http://www.springframework.org/schema/p")` 头 3. P命名注入法采用 `p:属性名="属性值"`的方法注入package com.powernode.entity;import java.util.Arrays;public class Table {private String name;private Clazz clazz;// 一个订单中有多个商品private Goods[] goods;public Table() {}public Table(String name, Clazz clazz, Goods[] goods) {this.name = name;this.clazz = clazz;this.goods = goods;}public String getName() {return name;}public void setName(String name) {this.name = name;}public Clazz getClazz() {return clazz;}public void setClazz(Clazz clazz) {this.clazz = clazz;}public Goods[] getGoods() {return goods;}public void setGoods(Goods[] goods) {this.goods = goods;}@Overridepublic String toString() {return "Table{" +"name='" + name + '\'' +", clazz=" + clazz +", goods=" + Arrays.toString(goods) +'}';}
}<?xml version="1.0" encoding="UTF-8"?>
<beans xmlns="http://www.springframework.org/schema/beans"xmlns:xsi="http://www.w3.org/2001/XMLSchema-instance"xmlns:p="http://www.springframework.org/schema/p"xsi:schemaLocation="http://www.springframework.org/schema/beans http://www.springframework.org/schema/beans/spring-beans.xsd"><bean id="goods1" class="com.powernode.entity.Goods"><property name="name" value="香蕉"/></bean><bean id="tableBean" class="com.powernode.entity.Table" p:name="chen" p:clazz="com.powernode.entity.Table" p:goods-ref="goods1"></bean></beans>
@org.junit.Testpublic void PSetType(){ApplicationContext beans = new ClassPathXmlApplicationContext("beans-P-type.xml");Table tableBean = (Table) beans.getBean("tableBean");System.out.println(tableBean);// Table{name='chen', clazz=Clazz{name='com.powernode.entity.Table'}, goods=[Goods{name='香蕉'}]}}
C命名空间注入
1. c命名空间是简化构造方法注入的。 2. 使用c命名空间的两个前提条件: + 第一:需要在xml配置文件头部添加信息: - ` xmlns: c ="http://www.springframework.org/schema/c"` + 第二:需要提供构造方法。3、使用c:_0 下标方式
c:name 参数名方式
package com.powernode.entity;/*** @Author: * @Description: TODO* @DateTime: 2024/9/23 21:22*/
public class MathBean {private String compare;public String isCompare() {return compare;}public MathBean(String compare) {this.compare = compare;}public void setCompare(String compare) {this.compare = compare;}@Overridepublic String toString() {return "MathBean{" +"compare=" + compare +'}';}
}
<?xml version="1.0" encoding="UTF-8"?>
<beans xmlns="http://www.springframework.org/schema/beans"xmlns:xsi="http://www.w3.org/2001/XMLSchema-instance"xmlns:c="http://www.springframework.org/schema/c"xsi:schemaLocation="http://www.springframework.org/schema/beans http://www.springframework.org/schema/beans/spring-beans.xsd"><bean id="MathBean" class="com.powernode.entity.MathBean" c:compare="sdasd"></bean></beans>
@org.junit.Testpublic void CSetType(){ApplicationContext beans = new ClassPathXmlApplicationContext("beans-C-type.xml");MathBean mathBean = (MathBean) beans.getBean("MathBean");System.out.println(mathBean);// MathBean{compare=sdasd}}
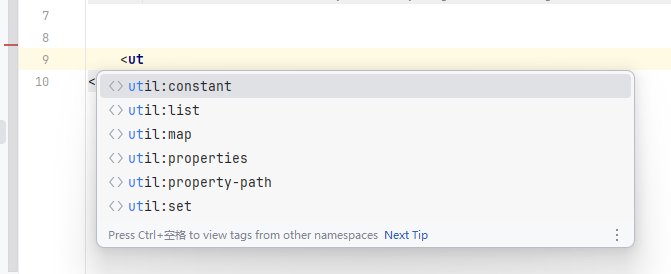
util命名空间
util命名空间的作用就是** 配置复用**。- 使用时需要配置头部文件:
- xmlns:util=“http://www.springframework.org/schema/util”
- http://www.springframework.org/schema/util http://www.springframework.org/schema/util/spring-util.xsd
- 标签名 —— util:类型

<?xml version="1.0" encoding="UTF-8"?>
<beans xmlns="http://www.springframework.org/schema/beans"xmlns:xsi="http://www.w3.org/2001/XMLSchema-instance"xmlns:util="http://www.springframework.org/schema/util"xsi:schemaLocation="http://www.springframework.org/schema/beans http://www.springframework.org/schema/beans/spring-beans.xsdhttp://www.springframework.org/schema/util http://www.springframework.org/schema/util/spring-util.xsd"><util:properties id="prop"><prop key="driver">com.mysql.cj.jdbc.Driver</prop><prop key="url">jdbc:mysql://localhost:3306/spring</prop><prop key="username">root</prop><prop key="password">root</prop></util:properties><bean id="dataSourceOne" class="com.powernode.entity.MyDataSource"><property name="properties" ref="prop"></property></bean><bean id="dataSourceTwo" class="com.powernode.entity.MyDataSource"><property name="properties" ref="prop"></property></bean>
</beans>
@org.junit.Test
public void utilTest(){ApplicationContext beans = new ClassPathXmlApplicationContext("beans-util.xml");MyDataSource myDataSource1 = (MyDataSource) beans.getBean("dataSourceOne");System.out.println(myDataSource1);// MyDataSource{properties={password=root, driver=com.mysql.cj.jdbc.Driver, url=jdbc:mysql://localhost:3306/spring, username=root}}MyDataSource myDataSource2 = (MyDataSource) beans.getBean("dataSourceTwo");System.out.println(myDataSource2);// MyDataSource{properties={password=root, driver=com.mysql.cj.jdbc.Driver, url=jdbc:mysql://localhost:3306/spring, username=root}}}
基于XML的自动装配
基于名称的自动装配
```java package com.powernode.Service;import com.powernode.Dao.UserDao;
import org.slf4j.Logger;
import org.slf4j.LoggerFactory;
/**
-
@Author:
-
@Description: TODO
-
@DateTime: 2024/9/19 15:19
*/
public class UserServiceImpl implements UserService{private static final Logger logger = LoggerFactory.getLogger(UserServiceImpl.class);
public UserDao aaa;
public void setAaa(UserDao userDao){
this.userDao = userDao;
}@Override
public void add() {
logger.info(“add():userDao:{}”, userDao);
userDao.add();
}@Override
public void update() {
logger.info(“update():userDao:{}”, userDao);
userDao.update();
}
}
```xml
<?xml version="1.0" encoding="UTF-8"?>
<beans xmlns="http://www.springframework.org/schema/beans"xmlns:xsi="http://www.w3.org/2001/XMLSchema-instance"xsi:schemaLocation="http://www.springframework.org/schema/beans http://www.springframework.org/schema/beans/spring-beans.xsd"><!--根据名字进行自动装配--><!--注意:自动装配也是基于set方式实现的。--><bean id="userService" class="com.powernode.Service.UserServiceImpl" autowire="byName"/><bean id="aaa" class="com.powernode.Dao.UserDaoImpl"/>
</beans>
@org.junit.Test
public void byNameTest(){ApplicationContext beans = new ClassPathXmlApplicationContext("spring-autowire.xml");UserService userService = (UserService) beans.getBean("userService");userService.add();userService.update();
}
✅UserService Bean中需要添加
**<font style="color:#DF2A3F;">autowire="byName"</font>**,表示进行名称装配✅UserService类中有一个UserDao属性,而UserDao属性的名字是aaa,对应的set方法是setAaa(),正好和UserDao Bean的id是一样的。这就是根据名称自动装配。
基于类型的自动装配
```java package com.powernode.Dao;public class AccountDao {
public void insert(){
System.out.println(“正在保存账户信息”);
}
}
```java
package com.powernode.Service;import com.powernode.Dao.AccountDao;public class AccountService {private AccountDao accountDao;public void setAccountDao(AccountDao accountDao) {this.accountDao = accountDao;}public void save(){accountDao.insert();}
}
<?xml version="1.0" encoding="UTF-8"?>
<beans xmlns="http://www.springframework.org/schema/beans"xmlns:xsi="http://www.w3.org/2001/XMLSchema-instance"xsi:schemaLocation="http://www.springframework.org/schema/beans http://www.springframework.org/schema/beans/spring-beans.xsd"><!--byType表示根据类型自动装配--><!--自动装配是基于set方法的--><!--根据类型进行自动装配的时候,在有效的配置文件当中,某种类型的实例只能有一个。--><bean id="accountService" class="com.powernode.Service.AccountService"autowire="byType"/><bean class="com.powernode.Dao.AccountDao"/>
</beans>
@org.junit.Testpublic void byNameTest(){ApplicationContext beans = new ClassPathXmlApplicationContext("spring-autowire.xml");UserService userService = (UserService) beans.getBean("userService");userService.add();userService.update();AccountService accountService = (AccountService) beans.getBean("accountService");accountService.save();}
如果根据类型装配(byType),在装配的时候都是基于set方法的,所以set方法是必须要提供的。当byType进行自动装配的时候,配置文件中某种类型的Bean必须是唯一的,不能出现多个。
Spring引入外部属性文件
1、引入context命名空间2、使用标签context
3、取值
以数据库配置为例,在实际开发中,数据库配置一般都是存放在properties/yaml文件中的,这样用户修改起来会更加的方便。当然可以。
第一步:实现一个数据源类,提供相关属性
package com.powernode.entity;import javax.sql.DataSource;
import java.io.PrintWriter;
import java.sql.Connection;
import java.sql.SQLException;
import java.sql.SQLFeatureNotSupportedException;
import java.util.logging.Logger;/*** @Author: * @Description: TODO* @DateTime: 2024/9/24 11:09*/
public class MyJdbcSource implements DataSource {private String driver;private String url;private String username;private String password;@Overridepublic String toString() {return "MyJdbcSource{" +"driver='" + driver + '\'' +", url='" + url + '\'' +", username='" + username + '\'' +", password='" + password + '\'' +'}';}public String getDriver() {return driver;}public void setDriver(String driver) {this.driver = driver;}public String getUrl() {return url;}public void setUrl(String url) {this.url = url;}public String getUsername() {return username;}public void setUsername(String username) {this.username = username;}public String getPassword() {return password;}public void setPassword(String password) {this.password = password;}@Overridepublic Connection getConnection() throws SQLException {return null;}@Overridepublic Connection getConnection(String username, String password) throws SQLException {return null;}@Overridepublic PrintWriter getLogWriter() throws SQLException {return null;}@Overridepublic void setLogWriter(PrintWriter out) throws SQLException {}@Overridepublic void setLoginTimeout(int seconds) throws SQLException {}@Overridepublic int getLoginTimeout() throws SQLException {return 0;}@Overridepublic Logger getParentLogger() throws SQLFeatureNotSupportedException {return null;}@Overridepublic <T> T unwrap(Class<T> iface) throws SQLException {return null;}@Overridepublic boolean isWrapperFor(Class<?> iface) throws SQLException {return false;}
}
第二步:在类路径下新建dataSource.properties文件,并配置信息
jdbc.driver=com.mysql.cj.jdbc.Driver
jdbc.url=jdbc:mysql://localhost:3306/spring
jdbc.username=root
jdbc.password=root
第三步:在Spring配置文件中引入context命名空间
<?xml version="1.0" encoding="UTF-8"?>
<beans xmlns="http://www.springframework.org/schema/beans"xmlns:xsi="http://www.w3.org/2001/XMLSchema-instance"xmlns:context="http://www.springframework.org/schema/context"xsi:schemaLocation="http://www.springframework.org/schema/beans http://www.springframework.org/schema/beans/spring-beans.xsdhttp://www.springframework.org/schema/context http://www.springframework.org/schema/context/spring-context.xsd"></beans>
第四步:在spring中配置使用dataSource.properties文件
<?xml version="1.0" encoding="UTF-8"?>
<beans xmlns="http://www.springframework.org/schema/beans"xmlns:xsi="http://www.w3.org/2001/XMLSchema-instance"xmlns:context="http://www.springframework.org/schema/context"xsi:schemaLocation="http://www.springframework.org/schema/beans http://www.springframework.org/schema/beans/spring-beans.xsdhttp://www.springframework.org/schema/context http://www.springframework.org/schema/context/spring-context.xsd"><!--引入properties文件:第一步:引入context命名空间第二步:使用context:property-placeholder的location属性来指定属性配置文件的路径location默认从类的根路径下开始加载资源。--><context:property-placeholder location="dataSource.properties"/><!--配置数据源--><bean id="dataSource" class="com.powernode.entity.MyJdbcSource"><property name="driver" value="${jdbc.driver}"/><property name="url" value="${jdbc.url}"/><property name="username" value="${jdbc.username}"/><property name="password" value="${jdbc.password}"/></bean>
</beans>
第五步:测试
@org.junit.Test
public void propertiesTest(){ApplicationContext beans = new ClassPathXmlApplicationContext("beans-dataSource.xml");MyJdbcSource jdbcSource = (MyJdbcSource) beans.getBean("dataSource");System.out.println(jdbcSource);// MyJdbcSource{driver='com.mysql.cj.jdbc.Driver', url='jdbc:mysql://localhost:3306/spring', username='root', password='root'}}
注意点:${}默认会先加载windows里面的环境变量
这也是大多数数据库配置源都是采用xxx.xxx.jdbc.driver的形式,因为xml在解析${}能够找到对应的键值内容