欢迎来到TensorFlow入门实操课程的学习
MOOC TensorFlow入门实操课程代码回顾总结(一)
MOOC TensorFlow入门实操课程代码回顾总结(三)
注:
用于表示python代码
粘贴运行结果
目录
- 5 图像分类基础应用——猫狗分类案例
- 5.1 导入库
- 5.2 下载数据集
- 5.3 查看样本数目
- 5.4 创建文件夹,存放训练测试数据
- 5.5 切分为训练数据和测试数据
- 5.6 模型构建
- 5.7 数据预处理
- 5.8 模型训练
- 5.9 训练结果可视化
- 5.10 模型推理
- 6 迁移学习——人马分类案例
- 6.1 下载数据集
- 6.2 导入库
- 6.3 样本分类存放至指定文件夹下
- 6.4 在存放的目录文件夹下分别读取10个人马数据
- 6.5 查看人马文件夹下样本数目
- 6.6 使用matplotlib将人马图像显示出来
- 6.7 构建网络及相关参数
- 6.8 数据预处理
- 6.9 训练网络
- 6.10 模型评估
- 6.11 查看特征图
- 7 图像多元分类——手写体识别案例
- 7.1 导入库
- 7.2 获取数据并查看标签大小
- 7.3 数据增强处理
- 7.4 模型搭建
- 7.5 模型训练 + 评估
- 7.6 可视化网络结果
- 8 图像多元分类——剪刀石头布手势识别
- 8.1 下载数据集
- 8.2 导库
- 8.3 查看样本数目
- 8.4 可视化样本
- 8.5 数据增强,搭建网络并训练
- 8.6 可视化训练模型
- 8.7 模型评估
- 9 自然语言处理
- 9 词条化和序列化
- 9.1 词条化——分词器基本原理
- 9.2 序列化句子
- 9.3 项目实战——讽刺数据集的词条化和序列化
5 图像分类基础应用——猫狗分类案例
5.1 导入库
import os
import zipfile
import random
import tensorflow as tf
from tensorflow.keras.optimizers import RMSprop
from tensorflow.keras.preprocessing.image import ImageDataGenerator
from shutil import copyfile
5.2 下载数据集
# If the URL doesn't work, visit https://www.microsoft.com/en-us/download/confirmation.aspx?id=54765
# And right click on the 'Download Manually' link to get a new URL to the dataset# Note: This is a very large dataset and will take time to download!wget --no-check-certificate \"https://download.microsoft.com/download/3/E/1/3E1C3F21-ECDB-4869-8368-6DEBA77B919F/kagglecatsanddogs_3367a.zip" \-O "/tmp/cats-and-dogs.zip"local_zip = '/tmp/cats-and-dogs.zip'
zip_ref   = zipfile.ZipFile(local_zip, 'r')
zip_ref.extractall('/tmp')
zip_ref.close()
5.3 查看样本数目
print(len(os.listdir('/home/zzr/data/cats-and-dogs/PetImages/Cat/')))
print(len(os.listdir('/home/zzr/data/cats-and-dogs/PetImages/Dog/')))# Expected Output:
# 12501
# 12501
12501
12501
5.4 创建文件夹,存放训练测试数据
try:os.mkdir('/home/zzr/data/cats-v-dogs')os.mkdir('/home/zzr/data/cats-v-dogs/training')os.mkdir('/home/zzr/data/cats-v-dogs/testing')os.mkdir('/home/zzr/data/cats-v-dogs/training/cats')os.mkdir('/home/zzr/data/cats-v-dogs/training/dogs')os.mkdir('/home/zzr/data/cats-v-dogs/testing/cats')os.mkdir('/home/zzr/data/cats-v-dogs/testing/dogs')
except OSError:pass
5.5 切分为训练数据和测试数据
import os
import shutil# 切分为训练集测试集
def split_data(SOURCE, TRAINING, TESTING, SPLIT_SIZE):files = []for filename in os.listdir(SOURCE):file = SOURCE + filenameif os.path.getsize(file) > 0:files.append(filename)else:print(filename + " is zero length, so ignoring.")training_length = int(len(files) * SPLIT_SIZE)testing_length = int(len(files) - training_length)shuffled_set = random.sample(files, len(files))training_set = shuffled_set[0:training_length]testing_set = shuffled_set[-testing_length:]for filename in training_set:this_file = SOURCE + filenamedestination = TRAINING + filenamecopyfile(this_file, destination)for filename in testing_set:this_file = SOURCE + filenamedestination = TESTING + filenamecopyfile(this_file, destination)CAT_SOURCE_DIR = "/home/zzr/data/cats-and-dogs/PetImages/Cat/"
TRAINING_CATS_DIR = "/home/zzr/data/cats-v-dogs/training/cats/"
TESTING_CATS_DIR = "/home/zzr/data/cats-v-dogs/testing/cats/"
DOG_SOURCE_DIR = "/home/zzr/data/cats-and-dogs/PetImages/Dog/"
TRAINING_DOGS_DIR = "/home/zzr/data/cats-v-dogs/training/dogs/"
TESTING_DOGS_DIR = "/home/zzr/data/cats-v-dogs/testing/dogs/"def create_dir(file_dir):if os.path.exists(file_dir):print('true')#os.rmdir(file_dir)shutil.rmtree(file_dir)#删除再建立os.makedirs(file_dir)else:os.makedirs(file_dir)create_dir(TRAINING_CATS_DIR)
create_dir(TESTING_CATS_DIR)
create_dir(TRAINING_DOGS_DIR)
create_dir(TESTING_CATS_DIR)split_size = .9
split_data(CAT_SOURCE_DIR, TRAINING_CATS_DIR, TESTING_CATS_DIR, split_size)
split_data(DOG_SOURCE_DIR, TRAINING_DOGS_DIR, TESTING_DOGS_DIR, split_size)# Expected output
# 666.jpg is zero length, so ignoring
# 11702.jpg is zero length, so ignoring
true
true
true
true
666.jpg is zero length, so ignoring.
11702.jpg is zero length, so ignoring.
print(len(os.listdir('/home/zzr/data/cats-v-dogs/training/dogs/')))
print(len(os.listdir('/home/zzr/data/cats-v-dogs/testing/cats/')))
print(len(os.listdir('/home/zzr/data/cats-v-dogs/testing/dogs/')))# Expected output:
# 11250
# 11250
# 1250
# 1250
5.6 模型构建
model = tf.keras.models.Sequential([tf.keras.layers.Conv2D(16, (3, 3), activation='relu', input_shape=(150, 150, 3)),tf.keras.layers.MaxPooling2D(2, 2),tf.keras.layers.Conv2D(32, (3, 3), activation='relu'),tf.keras.layers.MaxPooling2D(2, 2),tf.keras.layers.Conv2D(64, (3, 3), activation='relu'),tf.keras.layers.MaxPooling2D(2, 2),tf.keras.layers.Flatten(),tf.keras.layers.Dense(512, activation='relu'),tf.keras.layers.Dense(1, activation='sigmoid')
])model.compile(optimizer=RMSprop(lr=0.001), loss='binary_crossentropy', metrics=['acc'])
5.7 数据预处理
TRAINING_DIR = "/home/zzr/data/cats-v-dogs/training/"
train_datagen = ImageDataGenerator(rescale=1.0/255.)
train_generator = train_datagen.flow_from_directory(TRAINING_DIR,batch_size=100,class_mode='binary',target_size=(150, 150))VALIDATION_DIR = "/home/zzr/data/cats-v-dogs/testing/"
validation_datagen = ImageDataGenerator(rescale=1.0/255.)
validation_generator = validation_datagen.flow_from_directory(VALIDATION_DIR,batch_size=100,class_mode='binary',target_size=(150, 150))# Expected Output:
# Found 22498 images belonging to 2 classes.
# Found 2500 images belonging to 2 classes.
Found 22498 images belonging to 2 classes.
Found 2500 images belonging to 2 classes.
5.8 模型训练
# Note that this may take some time.
history = model.fit_generator(train_generator,epochs=2,verbose=1,validation_data=validation_generator)
WARNING:tensorflow:From :5: Model.fit_generator (from tensorflow.python.keras.engine.training) is deprecated and will be removed in a future version.
Instructions for updating:
Please use Model.fit, which supports generators.
Epoch 1/2
225/225 [] - 351s 2s/step - loss: 0.6867 - acc: 0.6334 - val_loss: 0.5689 - val_acc: 0.7128
Epoch 2/2
225/225 [] - 251s 1s/step - loss: 0.5186 - acc: 0.7429 - val_loss: 0.4599 - val_acc: 0.7896
5.9 训练结果可视化
%matplotlib inlineimport matplotlib.image  as mpimg
import matplotlib.pyplot as plt#-----------------------------------------------------------
# Retrieve a list of list results on training and test data
# sets for each training epoch
#-----------------------------------------------------------
acc=history.history['acc']
val_acc=history.history['val_acc']
loss=history.history['loss']
val_loss=history.history['val_loss']epochs=range(len(acc)) # Get number of epochs#------------------------------------------------
# Plot training and validation accuracy per epoch
#------------------------------------------------
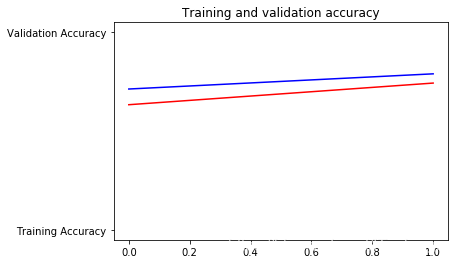
plt.plot(epochs, acc, 'r', "Training Accuracy")
plt.plot(epochs, val_acc, 'b', "Validation Accuracy")
plt.title('Training and validation accuracy')
plt.figure()#------------------------------------------------
# Plot training and validation loss per epoch
#------------------------------------------------
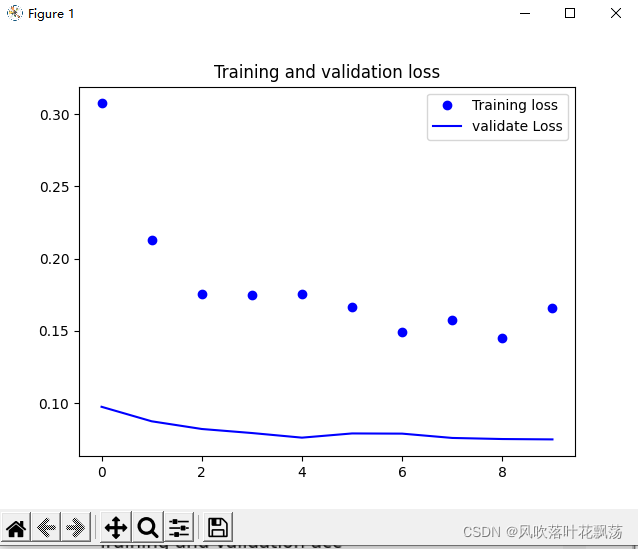
plt.plot(epochs, loss, 'r', "Training Loss")
plt.plot(epochs, val_loss, 'b', "Validation Loss")
plt.figure()# Desired output. Charts with training and validation metrics. No crash :)
Figure size 432x288 with 0 Axes
Figure size 432x288 with 0 Axes
5.10 模型推理
# Here's a codeblock just for fun. You should be able to upload an image here
# and have it classified without crashing
import numpy as np
from google.colab import files
from keras.preprocessing import imageuploaded = files.upload()for fn in uploaded.keys(): # predicting imagespath = '/content/' + fnimg = image.load_img(path, target_size=(150, 150))x = image.img_to_array(img)x = np.expand_dims(x, axis=0)images = np.vstack([x])classes = model.predict(images, batch_size=10)print(classes[0])if classes[0]>0.5:print(fn + " is a dog")else:print(fn + " is a cat")
6 迁移学习——人马分类案例
6.1 下载数据集
# https://storage.googleapis.com/laurencemoroney-blog.appspot.com/horse-or-human.zip(142.65M)
6.2 导入库
import os
import zipfile
import matplotlib.pyplot as plt
import matplotlib.image as mpimg
6.3 样本分类存放至指定文件夹下
local_zip = '/home/zzr/data/horse-or-human.zip'
zip_ref = zipfile.ZipFile(local_zip, 'r')
zip_ref.extractall('/home/zzr/data/zzr-tensorflow-person-horse')
zip_ref.close()# Directory with our training horse pictures
train_horse_dir = os.path.join('/home/zzr/data/zzr-tensorflow-person-horse/horses')# Directory with our training human pictures
train_human_dir = os.path.join('/home/zzr/data/zzr-tensorflow-person-horse/humans')
6.4 在存放的目录文件夹下分别读取10个人马数据
train_horse_names = os.listdir(train_horse_dir)
print(train_horse_names[:10])train_human_names = os.listdir(train_human_dir)
print(train_human_names[:10])
[‘horse31-8.png’, ‘horse49-1.png’, ‘horse26-2.png’, ‘horse46-5.png’, ‘horse30-9.png’, ‘horse09-0.png’, ‘horse47-8.png’, ‘horse45-6.png’, ‘horse34-3.png’, ‘horse11-0.png’]
[‘human15-13.png’, ‘human07-27.png’, ‘human08-05.png’, ‘human01-05.png’, ‘human10-03.png’, ‘human02-13.png’, ‘human08-19.png’, ‘human01-19.png’, ‘human17-11.png’, ‘human09-18.png’]
6.5 查看人马文件夹下样本数目
print('total training horse images:', len(os.listdir(train_horse_dir)))
print('total training human images:', len(os.listdir(train_human_dir)))
total training horse images: 500
total training human images: 527
6.6 使用matplotlib将人马图像显示出来
%matplotlib inline# Parameters for our graph; we'll output images in a 4x4 configuration
nrows = 4
ncols = 4# Index for iterating over images
pic_index = 0
# Set up matplotlib fig, and size it to fit 4x4 pics
fig = plt.gcf()
fig.set_size_inches(ncols * 4, nrows * 4)pic_index += 8
next_horse_pix = [os.path.join(train_horse_dir, fname) for fname in train_horse_names[pic_index-8:pic_index]]
next_human_pix = [os.path.join(train_human_dir, fname) for fname in train_human_names[pic_index-8:pic_index]]for i, img_path in enumerate(next_horse_pix+next_human_pix):# Set up subplot; subplot indices start at 1sp = plt.subplot(nrows, ncols, i + 1)sp.axis('Off') # Don't show axes (or gridlines)img = mpimg.imread(img_path)plt.imshow(img)plt.show()
6.7 构建网络及相关参数
import tensorflow as tf
from tensorflow.keras.optimizers import RMSprop
model = tf.keras.models.Sequential([# Note the input shape is the desired size of the image 300x300 with 3 bytes color# This is the first convolutiontf.keras.layers.Conv2D(16, (3,3), activation='relu', input_shape=(300, 300, 3)),tf.keras.layers.MaxPooling2D(2, 2),# The second convolutiontf.keras.layers.Conv2D(32, (3,3), activation='relu'),tf.keras.layers.MaxPooling2D(2,2),# The third convolutiontf.keras.layers.Conv2D(64, (3,3), activation='relu'),tf.keras.layers.MaxPooling2D(2,2),# The fourth convolutiontf.keras.layers.Conv2D(64, (3,3), activation='relu'),tf.keras.layers.MaxPooling2D(2,2),# The fifth convolutiontf.keras.layers.Conv2D(64, (3,3), activation='relu'),tf.keras.layers.MaxPooling2D(2,2),# Flatten the results to feed into a DNNtf.keras.layers.Flatten(),# 512 neuron hidden layertf.keras.layers.Dense(512, activation='relu'),# Only 1 output neuron. It will contain a value from 0-1 where 0 for 1 class ('horses') and 1 for the other ('humans')tf.keras.layers.Dense(1, activation='sigmoid')
])
model.summary()
model.compile(loss='binary_crossentropy',optimizer=RMSprop(lr=0.001),metrics=['acc'])
6.8 数据预处理
from tensorflow.keras.preprocessing.image import ImageDataGenerator# All images will be rescaled by 1./255
train_datagen = ImageDataGenerator(rescale=1/255)# Flow training images in batches of 128 using train_datagen generator
train_generator = train_datagen.flow_from_directory('/home/zzr/data/zzr-tensorflow-person-horse/',  # This is the source directory for training imagestarget_size=(300, 300),  # All images will be resized to 150x150batch_size=128,# Since we use binary_crossentropy loss, we need binary labelsclass_mode='binary')
Found 1027 images belonging to 2 classes.
6.9 训练网络
history = model.fit_generator(train_generator,steps_per_epoch=8, epochs=10,verbose=1)
6.10 模型评估
import numpy as np
from google.colab import files
from keras.preprocessing import image
uploaded = files.upload()for fn in uploaded.keys():# predicting imagespath = '/home/zzr/图片/' + fnimg = image.load_img(path, target_size=(300, 300))x = image.img_to_array(img)x = np.expand_dims(x, axis=0)images = np.vstack([x])classes = model.predict(images, batch_size=10)print(classes[0])if classes[0]>0.5:print(fn + " is a human")else:print(fn + " is a horse")
6.11 查看特征图
import numpy as np
import random
from tensorflow.keras.preprocessing.image import img_to_array, load_img
# Let's define a new Model that will take an image as input, and will output
# intermediate representations for all layers in the previous model after
# the first.
successive_outputs = [layer.output for layer in model.layers[1:]]
#visualization_model = Model(img_input, successive_outputs)
visualization_model = tf.keras.models.Model(inputs = model.input, outputs = successive_outputs)
# Let's prepare a random input image from the training set.
horse_img_files = [os.path.join(train_horse_dir, f) for f in train_horse_names]
human_img_files = [os.path.join(train_human_dir, f) for f in train_human_names]
img_path = random.choice(horse_img_files + human_img_files)img = load_img(img_path, target_size=(300, 300))  # this is a PIL image
x = img_to_array(img)  # Numpy array with shape (150, 150, 3)
x = x.reshape((1,) + x.shape)  # Numpy array with shape (1, 150, 150, 3)# Rescale by 1/255
x /= 255# Let's run our image through our network, thus obtaining all
# intermediate representations for this image.
successive_feature_maps = visualization_model.predict(x)# These are the names of the layers, so can have them as part of our plot
layer_names = [layer.name for layer in model.layers]# Now let's display our representations
for layer_name, feature_map in zip(layer_names, successive_feature_maps):if len(feature_map.shape) == 4:# Just do this for the conv / maxpool layers, not the fully-connected layersn_features = feature_map.shape[-1]  # number of features in feature map# The feature map has shape (1, size, size, n_features)size = feature_map.shape[1]# We will tile our images in this matrixdisplay_grid = np.zeros((size, size * n_features))for i in range(n_features):# Postprocess the feature to make it visually palatablex = feature_map[0, :, :, i]x -= x.mean()x /= x.std()x *= 64x += 128x = np.clip(x, 0, 255).astype('uint8')# We'll tile each filter into this big horizontal griddisplay_grid[:, i * size : (i + 1) * size] = x# Display the gridscale = 20. / n_featuresplt.figure(figsize=(scale * n_features, scale))plt.title(layer_name)plt.grid(False)plt.imshow(display_grid, aspect='auto', cmap='viridis')
7 图像多元分类——手写体识别案例
7.1 导入库
import csv
import numpy as np
import tensorflow as tf
from tensorflow.keras.preprocessing.image import ImageDataGenerator
from google.colab import files
# 加载数据
uploaded = files.upload()
7.2 获取数据并查看标签大小
def get_data(filename):with open(filename) as training_file:csv_reader = csv.reader(training_file, delimiter=',')first_line = Truetemp_images = []temp_labels = []for row in csv_reader:if first_line:# print("Ignoring first line")first_line = Falseelse:temp_labels.append(row[0])image_data = row[1:785]image_data_as_array = np.array_split(image_data, 28)temp_images.append(image_data_as_array)images = np.array(temp_images).astype('float')labels = np.array(temp_labels).astype('float')return images, labelstraining_images, training_labels = get_data('/home/zzr/data/sign_mnist_train.csv')
testing_images, testing_labels = get_data('/home/zzr/data/sign_mnist_test.csv')print(training_images.shape)
print(training_labels.shape)
print(testing_images.shape)
print(testing_labels.shape)
(27455, 28, 28)
(27455,)
(7172, 28, 28)
(7172,)
7.3 数据增强处理
training_images = np.expand_dims(training_images, axis=3)
testing_images = np.expand_dims(testing_images, axis=3)train_datagen = ImageDataGenerator(rescale=1. / 255,rotation_range=40,width_shift_range=0.2,height_shift_range=0.2,shear_range=0.2,zoom_range=0.2,horizontal_flip=True,fill_mode='nearest')validation_datagen = ImageDataGenerator(rescale=1. / 255)print(training_images.shape)
print(testing_images.shape)
(27455, 28, 28, 1)
(7172, 28, 28, 1)
7.4 模型搭建
model = tf.keras.models.Sequential([tf.keras.layers.Conv2D(64, (3, 3), activation='relu', input_shape=(28, 28, 1)),tf.keras.layers.MaxPooling2D(2, 2),tf.keras.layers.Conv2D(64, (3, 3), activation='relu'),tf.keras.layers.MaxPooling2D(2, 2),tf.keras.layers.Flatten(),tf.keras.layers.Dense(128, activation=tf.nn.relu),tf.keras.layers.Dense(26, activation=tf.nn.softmax)])# After modification
model.compile(optimizer = tf.optimizers.Adam(),loss = 'sparse_categorical_crossentropy',metrics=['accuracy'])
7.5 模型训练 + 评估
history = model.fit_generator(train_datagen.flow(training_images, training_labels, batch_size=32),steps_per_epoch=len(training_images) / 32,epochs=10,validation_data=validation_datagen.flow(testing_images, testing_labels, batch_size=32),validation_steps=len(testing_images) / 32)# 评估
model.evaluate(testing_images, testing_labels)
7.6 可视化网络结果
import matplotlib.pyplot as pltacc = history.history['accuracy']
val_acc = history.history['val_accuracy']
loss = history.history['loss']
val_loss = history.history['val_loss']epochs = range(len(acc))plt.plot(epochs, acc, 'r', label='Training accuracy')
plt.plot(epochs, val_acc, 'b', label='Validation accuracy')
plt.title('Training and validation accuracy')
plt.legend()
plt.figure()plt.plot(epochs, loss, 'r', label='Training Loss')
plt.plot(epochs, val_loss, 'b', label='Validation Loss')
plt.title('Training and validation loss')
plt.legend()plt.show()
8 图像多元分类——剪刀石头布手势识别
8.1 下载数据集
!wget --no-check-certificate \https://storage.googleapis.com/laurencemoroney-blog.appspot.com/rps.zip \-O /tmp/rps.zip
!wget --no-check-certificate \https://storage.googleapis.com/laurencemoroney-blog.appspot.com/rps-test-set.zip \-O /tmp/rps-test-set.zip
8.2 导库
import os
import zipfile
import matplotlib.pyplot as plt
import matplotlib.image as mpimg
import tensorflow as tf
import numpy as np
from google.colab import files
from keras.preprocessing import image
import keras_preprocessing
from keras_preprocessing import image
from keras_preprocessing.image import ImageDataGenerator
8.3 查看样本数目
rock_dir = os.path.join('/home/zzr/data/rps/rock')
paper_dir = os.path.join('/home/zzr/data/rps/paper')
scissors_dir = os.path.join('/home/zzr/data/rps/scissors')print('total training rock images:', len(os.listdir(rock_dir)))
print('total training paper images:', len(os.listdir(paper_dir)))
print('total training scissors images:', len(os.listdir(scissors_dir)))rock_files = os.listdir(rock_dir)
print(rock_files[:10])paper_files = os.listdir(paper_dir)
print(paper_files[:10])scissors_files = os.listdir(scissors_dir)
print(scissors_files[:10])
total training rock images: 840
total training paper images: 840
total training scissors images: 840
[‘rock02-070.png’, ‘rock06ck02-055.png’, ‘rock06ck02-070.png’, ‘rock07-k03-096.png’, ‘rock02-037.png’, ‘rock05ck01-066.png’, ‘rock02-034.png’, ‘rock05ck01-031.png’, ‘rock06ck02-094.png’, ‘rock02-060.png’]
[‘paper02-037.png’, ‘paper01-076.png’, ‘paper04-074.png’, ‘paper05-039.png’, ‘paper05-062.png’, ‘paper01-075.png’, ‘paper04-113.png’, ‘paper05-069.png’, ‘paper04-111.png’, ‘paper03-100.png’]
[‘testscissors02-006.png’, ‘scissors04-100.png’, ‘testscissors01-032.png’, ‘scissors03-074.png’, ‘testscissors02-024.png’, ‘scissors03-089.png’, ‘scissors04-020.png’, ‘scissors04-024.png’, ‘testscissors02-081.png’, ‘scissors01-035.png’]
8.4 可视化样本
%matplotlib inlinepic_index = 2next_rock = [os.path.join(rock_dir, fname) for fname in rock_files[pic_index-2:pic_index]]
next_paper = [os.path.join(paper_dir, fname) for fname in paper_files[pic_index-2:pic_index]]
next_scissors = [os.path.join(scissors_dir, fname) for fname in scissors_files[pic_index-2:pic_index]]for i, img_path in enumerate(next_rock+next_paper+next_scissors):print(img_path)img = mpimg.imread(img_path)plt.imshow(img)plt.axis('Off')plt.show()
8.5 数据增强,搭建网络并训练
TRAINING_DIR = "/home/zzr/data/rps/"
training_datagen = ImageDataGenerator(rescale = 1./255,rotation_range=40,width_shift_range=0.2,height_shift_range=0.2,shear_range=0.2,zoom_range=0.2,horizontal_flip=True,fill_mode='nearest')VALIDATION_DIR = "/home/zzr/data/rps-test-set/"
validation_datagen = ImageDataGenerator(rescale = 1./255)train_generator = training_datagen.flow_from_directory(TRAINING_DIR,target_size=(150,150),class_mode='categorical'
)validation_generator = validation_datagen.flow_from_directory(VALIDATION_DIR,target_size=(150,150),class_mode='categorical'
)model = tf.keras.models.Sequential([# Note the input shape is the desired size of the image 150x150 with 3 bytes color# This is the first convolutiontf.keras.layers.Conv2D(64, (3,3), activation='relu', input_shape=(150, 150, 3)),tf.keras.layers.MaxPooling2D(2, 2),# The second convolutiontf.keras.layers.Conv2D(64, (3,3), activation='relu'),tf.keras.layers.MaxPooling2D(2,2),# The third convolutiontf.keras.layers.Conv2D(128, (3,3), activation='relu'),tf.keras.layers.MaxPooling2D(2,2),# The fourth convolutiontf.keras.layers.Conv2D(128, (3,3), activation='relu'),tf.keras.layers.MaxPooling2D(2,2),# Flatten the results to feed into a DNNtf.keras.layers.Flatten(),tf.keras.layers.Dropout(0.5),# 512 neuron hidden layertf.keras.layers.Dense(512, activation='relu'),tf.keras.layers.Dense(3, activation='softmax')
])model.summary()model.compile(loss = 'categorical_crossentropy', optimizer='rmsprop', metrics=['accuracy'])history = model.fit_generator(train_generator, epochs=10, validation_data = validation_generator, verbose = 1)model.save("/home/zzr/data/rps.h5")
8.6 可视化训练模型
acc = history.history['accuracy']
val_acc = history.history['val_accuracy']
loss = history.history['loss']
val_loss = history.history['val_loss']epochs = range(len(acc))plt.plot(epochs, acc, 'r', label='Training accuracy')
plt.plot(epochs, val_acc, 'b', label='Validation accuracy')
plt.title('Training and validation accuracy')
plt.legend(loc=0)
plt.figure()plt.show()
Figure size 432x288 with 0 Axes
8.7 模型评估
# 数据加载
uploaded = files.upload()
# 预测
for fn in uploaded.keys():# predicting imagespath = fnimg = image.load_img(path, target_size=(150, 150))x = image.img_to_array(img)x = np.expand_dims(x, axis=0)images = np.vstack([x])classes = model.predict(images, batch_size=10)print(fn)print(classes)
9 自然语言处理
9 词条化和序列化
9.1 词条化——分词器基本原理
from tensorflow.keras.preprocessing.text import Tokenizer
sentences = ['i love my dog','I, love my cat'
]
tokenizer = Tokenizer(num_words = 100)
tokenizer.fit_on_texts(sentences)
word_index = tokenizer.word_index
print(word_index)
{‘i’: 1, ‘love’: 2, ‘my’: 3, ‘dog’: 4, ‘cat’: 5}
sentences = ['i love my dog','I, love my cat','You love my dog!'
]
tokenizer = Tokenizer(num_words = 100)
tokenizer.fit_on_texts(sentences)
word_index = tokenizer.word_index
print(word_index)
{‘love’: 1, ‘my’: 2, ‘i’: 3, ‘dog’: 4, ‘cat’: 5, ‘you’: 6}
9.2 序列化句子
import tensorflow as tf
from tensorflow import kerasfrom tensorflow.keras.preprocessing.text import Tokenizer
from tensorflow.keras.preprocessing.sequence import pad_sequencessentences = ['I love my dog','I love my cat','You love my dog!','Do you think my dog is amazing?'
]tokenizer = Tokenizer(num_words = 100, oov_token="<OOV>")
tokenizer.fit_on_texts(sentences)
word_index = tokenizer.word_indexsequences = tokenizer.texts_to_sequences(sentences)padded = pad_sequences(sequences,maxlen = 8)
print("\nWord Index = " , word_index)
print("\nSequences = " , sequences)
print("\nPadded Sequences:")
print(padded)# Try with words that the tokenizer wasn't fit to
test_data = ['i really love my dog','my dog loves my manatee'
]test_seq = tokenizer.texts_to_sequences(test_data)
print("\nTest Sequence = ", test_seq)padded = pad_sequences(test_seq,maxlen = 5)
print("\nPadded Test Sequence: ")
print(padded)
9.3 项目实战——讽刺数据集的词条化和序列化
# https://storage.googleapis.com/laurencemoroney-blog.appspot.com/sarcasm.json import jsonwith open("/home/zzr/data/sarcasm.json", 'r') as f:datastore = json.load(f)sentences = []
labels = []
urls = []
for item in datastore:sentences.append(item['headline'])labels.append(item['is_sarcastic'])urls.append(item['article_link'])from tensorflow.keras.preprocessing.text import Tokenizer
from tensorflow.keras.preprocessing.sequence import pad_sequences
tokenizer = Tokenizer(oov_token="<OOV>")
tokenizer.fit_on_texts(sentences)word_index = tokenizer.word_index
print(len(word_index))
print(word_index)
sequences = tokenizer.texts_to_sequences(sentences)
padded = pad_sequences(sequences, padding='post')
print(sentences[2])
print(padded[2])
print(padded.shape)
29657
{’’: 1, ‘to’: 2, ‘of’: 3, ‘the’: 4, ‘in’: 5, ‘for’: 6, ‘a’: 7, ‘on’: 8, ‘and’: 9, ‘with’: 10, ‘is’: 11, ‘new’: 12, ‘trump’: 13, ‘man’: 14, ‘from’: 15, ‘at’: 16, ‘about’: 17, ‘you’: 18, ‘this’: 19, ‘by’: 20, ‘after’: 21, ‘up’: 22, ‘out’: 23, ‘be’: 24, ‘how’: 25, ‘as’: 26, ‘it’: 27, ‘that’: 28, ‘not’: 29, ‘are’: 30, ‘your’: 31, ‘his’: 32, ‘what’: 33, ‘he’: 34, ‘all’: 35, ‘just’: 36, ‘who’: 37, ‘has’: 38, ‘will’: 39, ‘more’: 40, ‘one’: 41, ‘into’: 42, ‘report’: 43, ‘year’: 44, ‘why’: 45, ‘have’: 46, ‘area’: 47, ‘over’: 48, ‘donald’: 49, ‘u’: 50, ‘day’: 51, ‘says’: 52, ‘s’: 53, ‘can’: 54, ‘first’: 55, ‘woman’: 56, ‘time’: 57, ‘like’: 58, ‘her’: 59, “trump’s”: 60, ‘old’: 61, ‘no’: 62, ‘get’: 63, ‘off’: 64, ‘an’: 65, ‘life’: 66, ‘people’: 67, ‘obama’: 68, ‘now’: 69, ‘house’: 70, ‘still’: 71, “’”: 72, ‘women’: 73, ‘make’: 74, ‘was’: 75, ‘than’: 76, ‘white’: 77…(省略一大堆)…“zimbabwe’s”: 29651, ‘gonzalez’: 29652, ‘breached’: 29653, “‘basic’”: 29654, ‘hikes’: 29655, ‘gourmet’: 29656, ‘foodie’: 29657}
mom starting to fear son’s web series closest thing she will have to grandchild
[ 145 838 2 907 1749 2093 582 4719 221 143 39 46
2 10736 0 0 0 0 0 0 0 0 0 0
0 0 0 0 0 0 0 0 0 0 0 0
0 0 0 0]
(26709, 40)
