目录
Pod(容器组):Pod是Kubernetes中最小的部署单元,可以包含一个或多个容器。Pod提供了一种逻辑上的封装,使得容器可以一起共享网络和存储资源
1、创建一个pod
2、pod管理
pod操作
目录
创建Pod会很慢
Pod(容器组):Pod是Kubernetes中最小的部署单元,可以包含一个或多个容器。Pod提供了一种逻辑上的封装,使得容器可以一起共享网络和存储资源
1、创建一个pod
2、pod管理
pod操作
使用 Kubectl 工具容器资源Kubectl 是管理Kubernetes集群的命令行工具,通过生成的 json 格式传递给 API Server 进行创建、查看、管理的操作。使用 kubectl --help 命令可以查看 Kubectl 帮助命令,其中包括基本命令、部署命令、群集管理命令、调试命令以及高级命令等。
创建Podkubectl run 命令可以创建并运行一个或多个Pod,也可以创建一个 deployment 或job 来管理Pod。此命令和 docker run 相类似,也是实现Pod的创建,先从仓库中拉取基础镜像,然后对容器进行操作。
发布服务容器资源创建完成,就需要完成发布工作,确保 Pod 能够对外提供服务,保证客户端能够正常访问,使用 kubectl expose 命令可以实现该目的。
创建Pod会很慢
Pod(容器组):Pod是Kubernetes中最小的部署单元,可以包含一个或多个容器。Pod提供了一种逻辑上的封装,使得容器可以一起共享网络和存储资源
1、创建一个pod
1)创建yuml文件
[root@k8s-master ~]# mkdir k8s
[root@k8s-master ~]# vim ./k8s/nginx.yaml
piVersion: v1
kind: Pod
metadata:
name: nginx
labels:
app: web
spec:
containers:
- name: nginx
image: nginx:1.13
ports:
- containerPort: 80
2)创建容器
方法一. yum安装
[root@k8s-master ~]#yum install *rhsm*
方法二
执行命令:
[root@k8s-master ~]#wget http://mirror.centos.org/centos/7/os/x86_64/Packages/python-rhsm-certificates-1.19.10-1.el7_4.x86_64.rpm
[root@k8s-master ~]# yum -y install *rhsm*
[root@k8s-master ~]# wget http://mirror.centos.org/centos/7/os/x86_64/Packages/python-rhsm-certificates-1.19.10-1.el7_4.x86_64.rpm
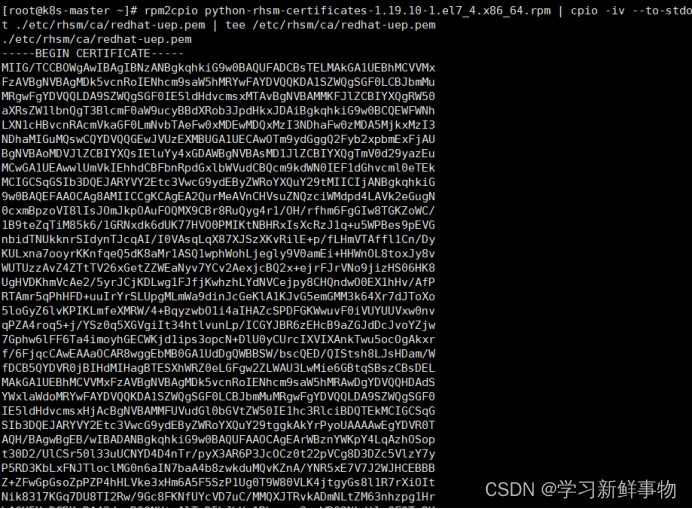
[root@k8s-master ~]# rpm2cpio python-rhsm-certificates-1.19.10-1.el7_4.x86_64.rpm | cpio -iv --to-stdout ./etc/rhsm/ca/redhat-uep.pem | tee /etc/rhsm/ca/redhat-uep.pem
前两个命令会生成/etc/rhsm/ca/redhat-uep.pem文件.
[root@k8s-master ~]# docker pull registry.access.redhat.com/rhel7/pod-infrastructure:latest
Trying to pull repository registry.access.redhat.com/rhel7/pod-infrastructure ...
latest: Pulling from registry.access.redhat.com/rhel7/pod-infrastructure
26e5ed6899db: Downloading 34.95 MB/74.87 MB
66dbe984a319: Download complete
9138e7863e08: Download complete
创建pod
[root@k8s-master ~]# kubectl create -f ./k8s/nginx.yaml
pod "nginx" created
3)查看所有pod创建运行状态
[root@k8s-master ~]# kubectl get pod
NAME READY STATUS RESTARTS AGE
nginx 0/1 ContainerCreating 0 17s
4)查看指定pod资源
[root@k8s-master ~]# kubectl get pod nginx
NAME READY STATUS RESTARTS AGE
nginx 0/1 ContainerCreating 0 41s
5)查看pod运行的详细信息
[root@k8s-master ~]# kubectl describe pod nginx
Name: nginx
Namespace: default
Node: k8s-node2/192.168.50.51
Start Time: Thu, 10 Aug 2023 20:33:09 +0800
Labels: app=web
Status: Pending
IP:
Controllers: <none>
Containers:
nginx:
Container ID:
Image: nginx:1.13
Image ID:
Port: 80/TCP
State: Waiting
Reason: ContainerCreating
Ready: False
Restart Count: 0
Volume Mounts: <none>
Environment Variables: <none>
Conditions:
Type Status
Initialized True
Ready False
PodScheduled True
No volumes.
QoS Class: BestEffort
Tolerations: <none>
Events:
FirstSeen LastSeen Count From SubObjectPath Type ReasonMessage
--------- -------- ----- ---- ------------- -------- -------------
1m 1m 1 {default-scheduler } Normal Scheduled Successfully assigned nginx to k8s-node2
25s 25s 1 {kubelet k8s-node2} Warning FailedSync Error syncing pod, skipping: failed to "StartContainer" for "POD" with ImagePullBackOff: "Back-off pulling image \"registry.access.redhat.com/rhel7/pod-infrastructure:latest\""
1m 4s 3 {kubelet k8s-node2} Warning FailedSync Error syncing pod, skipping: failed to "StartContainer" for "POD" with ErrImagePull: "image pull failed for registry.access.redhat.com/rhel7/pod-infrastructure:latest, this may be because there are no credentials on this request. details: (open /etc/docker/certs.d/registry.access.redhat.com/redhat-ca.crt: no such file or directory)"
显示调度节点 验证运行的pod
[root@k8s-master ~]# kubectl get pod nginx -o wide
NAME READY STATUS RESTARTS AGE IP NODE
nginx 0/1 ContainerCreating 0 2m <none> k8s-node2
2、pod管理
1)删除pod
[root@k8s-master ~]# kubectl delete pod nginx
pod "nginx" deleted
2)查看删除pod无法找到
[root@k8s-master ~]# kubectl get pod nginx -o wide
Error from server (NotFound): pods "nginx" not found
3)创建pod
[root@k8s-master ~]# kubectl create -f ./k8s/nginx.yaml
pod "nginx" created
4)发现最先创建的pod运行在k8s-master节点上,下载镜像速度太慢没法运行
[root@k8s-master ~]# kubectl get pod nginx -o wide
NAME READY STATUS RESTARTS AGE IP NODE
nginx 0/1 ContainerCreating 0 38s <none> k8s-master
5)访问pod节点中的服务
[root@k8s-master ~]# kubectl get pod nginx -o wide
NAME READY STATUS RESTARTS AGE IP NODE
nginx 1/1 Running 0 21m 172.16.48.2 k8s-master
[root@k8s-master ~]# curl -l http://172.16.48.2
<!DOCTYPE html>
<html>
<head>
<title>Welcome to nginx!</title>
<style>
body {
width: 35em;
margin: 0 auto;
font-family: Tahoma, Verdana, Arial, sans-serif;
}
</style>
</head>
<body>
<h1>Welcome to nginx!</h1>
<p>If you see this page, the nginx web server is successfully installed and
working. Further configuration is required.</p><p>For online documentation and support please refer to
<a href="http://nginx.org/">nginx.org</a>.<br/>
Commercial support is available at
<a href="http://nginx.com/">nginx.com</a>.</p><p><em>Thank you for using nginx.</em></p>
</body>
</html>
pod操作
1)在一个pod中修改配置文件运行多个业务容器
[root@k8s-master ~]# vim ./k8s/nginx.yaml
apiVersion: v1
kind: Pod
metadata:
name: test3
labels:
app: web
spec:
containers:
- name: nginx02
image: nginx:1.13
ports:
- containerPort: 80
- name: busybox
image: docker.io/busybox:latest
command: ["sleep","3600"]
ports:
- containerPort: 80
~
2)创建资源
[root@k8s-master ~]# kubectl create -f ./k8s/nginx.yaml
3)查看资源使用情况 Pod会 分配了各自的 IP 过程会有点慢正常现象
[root@k8s-master ~]# kubectl get pod -o wide
NAME READY STATUS RESTARTS AGE IP NODE
nginx 1/1 Running 0 25m 172.16.48.2 k8s-master
test1 0/2 ContainerCreating 0 9m <none> k8s-node2
test2 2/2 Running 0 5m 172.16.48.3 k8s-master
test3 0/2 ContainerCreating 0 4m <none> k8s-node2
使用 Kubectl 工具容器资源
Kubectl 是管理Kubernetes集群的命令行工具,通过生成的 json 格式传递给 API Server 进行创建、查看、管理的操作。
使用 kubectl --help 命令可以查看 Kubectl 帮助命令,其中包括基本命令、部署命令、群集管理命令、调试命令以及高级命令等。
[root@k8s-master ~]# kubectl --help
kubectl controls the Kubernetes cluster manager.Find more information at: https://kubernetes.io/docs/reference/kubectl/overview/
Basic Commands (Beginner):
create Create a resource from a file or from stdin.
expose 使用 replication controller, service, deployment 或者 pod
并暴露它作为一个 新的 Kubernetes Service
run 在集群中运行一个指定的镜像
set 为 objects 设置一个指定的特征Basic Commands (Intermediate):
explain 查看资源的文档
get 显示一个或更多 resources
edit 在服务器上编辑一个资源
delete Delete resources by filenames, stdin, resources and names, or by resources and label
selectorDeploy Commands:
rollout Manage the rollout of a resource
scale Set a new size for a Deployment, ReplicaSet or Replication Controller
autoscale 自动调整一个 Deployment, ReplicaSet, 或者 ReplicationController
的副本数量
创建Pod
kubectl run 命令可以创建并运行一个或多个Pod,也可以创建一个 deployment 或job 来管理Pod。此命令和 docker run 相类似,也是实现Pod的创建,先从仓库中拉取基础镜像,然后对容器进行操作。
通过 kubectl run 命令创建 Nginx 容器, 指定名称为 nginx-deployment,指定基础镜像为 Nginx 目前最新版本,指定对外暴露的端口为 80 以及副本数为 3。Nginx 容器创建完成后使用 get pod 命令查看 Pod 的信息,可以发现确实有 3 个容器资源,并且处于 Running状态。还可以查看 deployment,也显示的是 3。
[root@k8s-master ~]# kubectl run nginx-do --image=nginx:1.14 --port=80 --replicas=2
deployment "nginx-do" created
[root@k8s-master ~]# kubectl get pods
NAME READY STATUS RESTARTS AGEnginx-do 1/1 Running 0 1m
nginx-do 1/1 Running 0 1m
发布服务
容器资源创建完成,就需要完成发布工作,确保 Pod 能够对外提供服务,保证客户端能够正常访问,使用 kubectl expose 命令可以实现该目的。
通过 kubectl expose 命令创建 Service,设置内部通信端口和外部暴露的端口均为 80、名称为 nginx-service、类型是 NodePort。创建 Service 完后,就可以通过 kubectl get svc命令查看到对外暴露的端口是30464,内部通信的地址是10.254.108.146。
[root@k8s-master ~]# kubectl expose deployment nginx-do --port=80 --target-port=80 --name=nginx --type=NodePort
service "nginx" exposed
查看
[root@k8s-master ~]# kubectl get pods,svc
NAME READY STATUS RESTARTS AGE
po/nginx-do-3943939860-d925b 1/1 Running 0 1m
po/nginx-do-3943939860-fq4zh 1/1 Running 0 1mNAME CLUSTER-IP EXTERNAL-IP PORT(S) AGE
svc/kubernetes 10.254.0.1 <none> 443/TCP 1d
svc/nginx 10.254.229.91 <nodes> 80:30040/TCP 38s
svc/nginx-service 10.254.108.146 <nodes> 80:30233/TCP 5m
执行 kubectl get endpoints 查看容器自带的负载均衡。从执行结果可以得知容器自带的负载均衡分别是 10.254.0.1 10.254.229.91 10.254.108.146
[root@k8s-master ~]# kubectl get endpoints
NAME ENDPOINTS AGE
kubernetes 192.168.1.117:6443 1d
nginx 172.16.48.6:80 25m
nginx-service 172.16.48.4:80 30m
执行 kubectl get pods 命令时加参数 -o wide 可以查看到 Node 真实节点上的分布。
[root@k8s-master ~]# kubectl get pods -o wide
NAME READY STATUS RESTARTS AGE IP NODE NOMINATED NODE READINESS GATESnginx-do-3943939860-d925b 1/1 Running 0 27m 172.16.48.6 k8s-master
nginx-do-3943939860-fq4zh 0/1 ContainerCreating 0 27m <none> k8s-node2
完成上述步骤就已经完成了发布,并且可以进行对其访问。
[root@k8s-master ~]# curl 192.168.50.53:30040
<!DOCTYPE html>
<html>
<head>
<title>Welcome to nginx!</title>
<style>
body {
width: 35em;
margin: 0 auto;
font-family: Tahoma, Verdana, Arial, sans-serif;
}
</style>
</head>
<body>
<h1>Welcome to nginx!</h1>
<p>If you see this page, the nginx web server is successfully installed and
working. Further configuration is required.</p><p>For online documentation and support please refer to
<a href="http://nginx.org/">nginx.org</a>.<br/>
Commercial support is available at
<a href="http://nginx.com/">nginx.com</a>.</p><p><em>Thank you for using nginx.</em></p>
</body>
</html>
修改其配置文件
[root@k8s-master ~]# docker exec -it 0a163ad392dc /bin/bash
root@nginx-do-3943939860-d925b:/# cd /usr/share/nginx/html/
root@nginx-do-3943939860-d925b:/usr/share/nginx/html# echo "sdfsdfsdfsd" > index.html
验证
[root@k8s-master ~]# curl 192.168.50.53:30040
sdfsdfsdfsd
今天先到这里再见
