目录
- 一、延迟消息
- 1.基于死信实现延迟消息
- 1.1 消息的TTL(Time To Live)
- 1.2 死信交换机 Dead Letter Exchanges
- 1.3 代码实现
- 2.基于延迟插件实现延迟消息
- 2.1 插件安装
- 2.2 代码实现
- 3.基于延迟插件封装消息
一、延迟消息
延迟消息有两种实现方案:
1,基于死信队列
2,集成延迟插件
1.基于死信实现延迟消息
使用RabbitMQ来实现延迟消息必须先了解RabbitMQ的两个概念:
消息的TTL(存活时间)和死信交换机Exchange,通过这两者的组合来实现延迟队列
1.1 消息的TTL(Time To Live)
消息的TTL就是消息的存活时间。RabbitMQ可以对队列和消息分别设置TTL。对队列设置就是队列没有消费者连着的保留时间,也可以对每一个单独的消息做单独的设置。超过了这个时间,我们认为这个消息就死了,称之为死信。
如何设置TTL:
我们创建一个队列queue.temp,在Arguments 中添加x-message-ttl 为5000 (单位是毫秒),那所在压在这个队列的消息在5秒后会消失。
1.2 死信交换机 Dead Letter Exchanges
一个消息在满足如下条件下,会进死信路由,记住这里是路由而不是队列,一个路由可以对应很多队列。
(1) 一个消息被Consumer拒收了,并且reject方法的参数里requeue是false。也就是说不会被再次放在队列里,被其他消费者使用。
(2)上面的消息的TTL到了,消息过期了。
(3)队列的长度限制满了。排在前面的消息会被丢弃或者扔到死信路由上。
Dead Letter Exchange其实就是一种普通的exchange,和创建其他exchange没有两样。只是在某一个设置Dead Letter Exchange的队列中有消息过期了,会自动触发消息的转发,发送到Dead Letter Exchange中去。

我们现在可以测试一下延迟队列。
(1)创建死信队列
(2)创建交换机
(3)建立交换器与队列之间的绑定
(4)创建队列
1.3 代码实现
在service-mq 中添加配置类
import org.springframework.amqp.core.DirectExchange;
import org.springframework.amqp.core.Queue;
import org.springframework.context.annotation.Bean;
import org.springframework.context.annotation.Configuration;@Configuration
public class DeadLetterMqConfig {// 声明一些变量public static final String exchange_dead = "exchange.dead";public static final String routing_dead_1 = "routing.dead.1";public static final String routing_dead_2 = "routing.dead.2";public static final String queue_dead_1 = "queue.dead.1";public static final String queue_dead_2 = "queue.dead.2";// 定义交换机@Beanpublic DirectExchange exchange(){return new DirectExchange(exchange_dead,true,false,null);}@Beanpublic Queue queue1(){// 设置如果队列一 出现问题,则通过参数转到exchange_dead,routing_dead_2 上!HashMap<String, Object> map = new HashMap<>();// 参数绑定 此处的key 固定值,不能随意写map.put("x-dead-letter-exchange",exchange_dead);map.put("x-dead-letter-routing-key",routing_dead_2);// 设置延迟时间map.put("x-message-ttl ", 10 * 1000);// 队列名称,是否持久化,是否独享、排外的【true:只可以在本次连接中访问】,是否自动删除,队列的其他属性参数return new Queue(queue_dead_1,true,false,false,map);}@Beanpublic Binding binding(){// 将队列一 通过routing_dead_1 key 绑定到exchange_dead 交换机上return BindingBuilder.bind(queue1()).to(exchange()).with(routing_dead_1);}// 这个队列二就是一个普通队列@Beanpublic Queue queue2(){return new Queue(queue_dead_2,true,false,false,null);}// 设置队列二的绑定规则@Beanpublic Binding binding2(){// 将队列二通过routing_dead_2 key 绑定到exchange_dead交换机上!return BindingBuilder.bind(queue2()).to(exchange()).with(routing_dead_2);}
}
配置发送消息
@RestController
@RequestMapping("/mq")
@Slf4j
public class MqController {@Autowiredprivate RabbitTemplate rabbitTemplate;@Autowiredprivate RabbitService rabbitService;@GetMapping("sendDeadLettle")public Result sendDeadLettle() {SimpleDateFormat sdf = new SimpleDateFormat("yyyy-MM-dd HH:mm:ss");this.rabbitTemplate.convertAndSend(DeadLetterMqConfig.exchange_dead, DeadLetterMqConfig.routing_dead_1, "ok");System.out.println(sdf.format(new Date()) + " Delay sent.");return Result.ok();}
}
消息接收方
@Component
public class DeadLetterReceiver {@RabbitListener(queues = DeadLetterMqConfig.queue_dead_2)public void getMessage(String msg, Message message, Channel channel) throws IOException {//时间格式化SimpleDateFormat simpleDateFormat=new SimpleDateFormat("yyyy-MM-dd  HH:mm:ss");System.out.println("消息接收的时间:\t"+simpleDateFormat.format(new Date()));System.out.println("消息的内容"+msg);channel.basicAck(message.getMessageProperties().getDeliveryTag(),true);}
}
2.基于延迟插件实现延迟消息
2.1 插件安装
Rabbitmq实现了一个插件x-delay-message来实现延时队列
- 首先我们将刚下载下来的rabbitmq_delayed_message_exchange-3.9.0.ez文件上传到RabbitMQ所在服务器,下载地址:https://www.rabbitmq.com/community-plugins.html
- 切换到插件所在目录,执行 docker cp rabbitmq_delayed_message_exchange-3.9.0.ez rabbitmq:/plugins 命令,将刚插件拷贝到容器内plugins目录下
- 执行 docker exec -it rabbitmq /bin/bash 命令进入到容器内部,并 cd plugins 进入plugins目录
- 执行 ls -l|grep delay 命令查看插件是否copy成功
- 在容器内plugins目录下,执行 rabbitmq-plugins enable rabbitmq_delayed_message_exchange 命令启用插件
- exit命令退出RabbitMQ容器内部,然后执行 docker restart rabbitmq 命令重启RabbitMQ容器
2.2 代码实现
配置队列
@Configuration
public class DelayedMqConfig {public static final String exchange_delay = "exchange.delay";public static final String routing_delay = "routing.delay";public static final String queue_delay_1 = "queue.delay.1";@Beanpublic Queue delayQeue1() {// 第一个参数是创建的queue的名字,第二个参数是是否支持持久化return new Queue(queue_delay_1, true);}@Beanpublic CustomExchange delayExchange() {Map<String, Object> args = new HashMap<String, Object>();args.put("x-delayed-type", "direct");return new CustomExchange(exchange_delay, "x-delayed-message", true, false, args);}@Beanpublic Binding delayBbinding1() {return BindingBuilder.bind(delayQeue1()).to(delayExchange()).with(routing_delay).noargs();}
}
发送消息
@GetMapping("sendelay")
public Result sendDelay() {SimpleDateFormat sdf = new SimpleDateFormat("yyyy-MM-dd HH:mm:ss");this.rabbitTemplate.convertAndSend(DelayedMqConfig.exchange_delay, DelayedMqConfig.routing_delay, sdf.format(new Date()), new MessagePostProcessor() {@Overridepublic Message postProcessMessage(Message message) throws AmqpException {message.getMessageProperties().setDelay(10 * 1000);System.out.println(sdf.format(new Date()) + " Delay sent.");return message;}});return Result.ok();
}
接收消息
@Component
public class DelayReceiver {@RabbitListener(queues = DelayedMqConfig.queue_delay_1)public void get(String msg) {SimpleDateFormat sdf = new SimpleDateFormat("yyyy-MM-dd HH:mm:ss");System.out.println("Receive queue_delay_1: " + sdf.format(new Date()) + " Delay rece." + msg);}}
3.基于延迟插件封装消息
/*** 封装发送延迟消息方法* @param exchange* @param routingKey* @param msg* @param delayTime* @return*/
public Boolean sendDelayMsg(String exchange,String routingKey, Object msg, int delayTime){//  将发送的消息 赋值到 自定义的实体类GmallCorrelationData gmallCorrelationData = new GmallCorrelationData();//  声明一个correlationId的变量String correlationId = UUID.randomUUID().toString().replaceAll("-","");gmallCorrelationData.setId(correlationId);gmallCorrelationData.setExchange(exchange);gmallCorrelationData.setRoutingKey(routingKey);gmallCorrelationData.setMessage(msg);gmallCorrelationData.setDelayTime(delayTime);gmallCorrelationData.setDelay(true);//  将数据存到缓存this.redisTemplate.opsForValue().set(correlationId,JSON.toJSONString(gmallCorrelationData),10,TimeUnit.MINUTES);//  发送消息this.rabbitTemplate.convertAndSend(exchange,routingKey,msg,message -> {//  设置延迟时间message.getMessageProperties().setDelay(delayTime*1000);return message;},gmallCorrelationData);//  默认返回return true;
}
修改retrySendMsg方法 – 添加判断是否属于延迟消息
//  判断是否属于延迟消息
if (gmallCorrelationData.isDelay()){//  属于延迟消息this.rabbitTemplate.convertAndSend(gmallCorrelationData.getExchange(),gmallCorrelationData.getRoutingKey(),gmallCorrelationData.getMessage(),message -> {//  设置延迟时间message.getMessageProperties().setDelay(gmallCorrelationData.getDelayTime()*1000);return message;},gmallCorrelationData);
}else {//  调用发送消息方法 表示发送普通消息  发送消息的时候,不能调用 new RabbitService().sendMsg() 这个方法this.rabbitTemplate.convertAndSend(gmallCorrelationData.getExchange(),gmallCorrelationData.getRoutingKey(),gmallCorrelationData.getMessage(),gmallCorrelationData);
}
利用封装好的工具类 测试发送延迟消息
//  基于延迟插件的延迟消息
@GetMapping("sendDelay")
public Result sendDelay(){//  声明一个时间对象SimpleDateFormat simpleDateFormat = new SimpleDateFormat("yyyy-MM-dd HH:mm:ss");System.out.println("发送时间:"+simpleDateFormat.format(new Date()));this.rabbitService.sendDelayMsg(DelayedMqConfig.exchange_delay,DelayedMqConfig.routing_delay,"iuok",3);return Result.ok();
}
重试了4次,所以我们需要保证幂等性
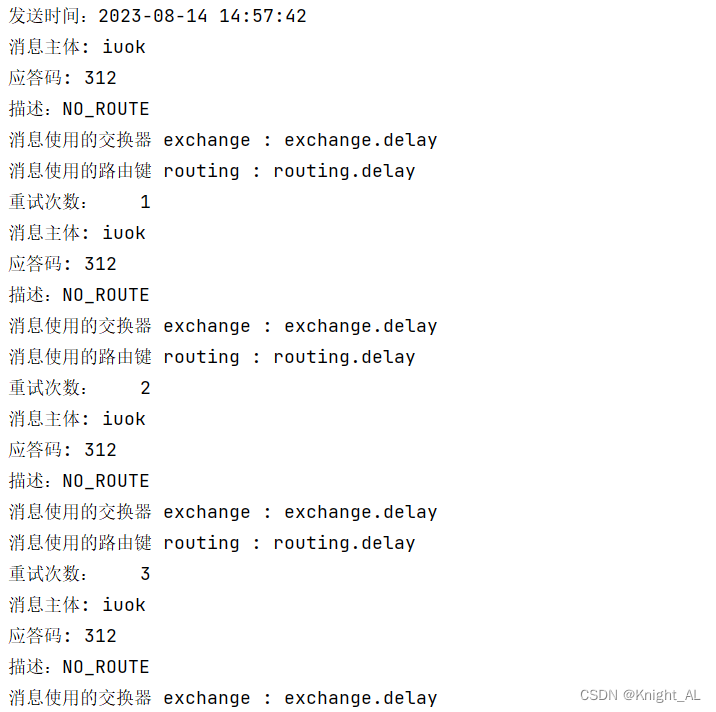
结果会 回发送三次,也被消费三次!
如何保证消息幂等性?
1.使用数据方式
2.使用redis setnx 命令解决 — 推荐
@SneakyThrows
@RabbitListener(queues = DelayedMqConfig.queue_delay_1)
public void getMsg2(String msg,Message message,Channel channel){//  使用setnx 命令来解决 msgKey = delay:iuokString msgKey = "delay:"+msg;Boolean result = this.redisTemplate.opsForValue().setIfAbsent(msgKey, "0", 10, TimeUnit.MINUTES);//  result = true : 说明执行成功,redis 里面没有这个key ,第一次创建, 第一次消费。//  result = false : 说明执行失败,redis 里面有这个key//  不能: 那么就表示这个消息只能被消费一次!  那么第一次消费成功或失败,我们确定不了!  --- 只能被消费一次!//        if (result){//            SimpleDateFormat simpleDateFormat = new SimpleDateFormat("yyyy-MM-dd HH:mm:ss");//            System.out.println("接收时间:"+simpleDateFormat.format(new Date()));//            System.out.println("接收的消息:"+msg);//            //  手动确认消息//            channel.basicAck(message.getMessageProperties().getDeliveryTag(),false);//        } else {//          //    不能消费!//        }//  能: 保证消息被消费成功    第二次消费,可以进来,但是要判断上一个消费者,是否将消息消费了。如果消费了,则直接返回,如果没有消费成功,我消费。//  在设置key 的时候给了一个默认值 0 ,如果消费成功,则将key的值 改为1if (!result){//  获取缓存key对应的数据String status = (String) this.redisTemplate.opsForValue().get(msgKey);if ("1".equals(status)){//  手动确认channel.basicAck(message.getMessageProperties().getDeliveryTag(),false);return;} else {//  说明第一个消费者没有消费成功,所以消费并确认SimpleDateFormat simpleDateFormat = new SimpleDateFormat("yyyy-MM-dd HH:mm:ss");System.out.println("接收时间:"+simpleDateFormat.format(new Date()));System.out.println("接收的消息:"+msg);//  修改redis 中的数据this.redisTemplate.opsForValue().set(msgKey,"1");channel.basicAck(message.getMessageProperties().getDeliveryTag(),false);return;}}SimpleDateFormat simpleDateFormat = new SimpleDateFormat("yyyy-MM-dd HH:mm:ss");System.out.println("接收时间:"+simpleDateFormat.format(new Date()));System.out.println("接收的消息:"+msg);//  修改redis 中的数据this.redisTemplate.opsForValue().set(msgKey,"1");//  手动确认消息channel.basicAck(message.getMessageProperties().getDeliveryTag(),false);
}