前言
前言:本系列博客尝试结合官网案例,阐述百度 AI 开放平台里的组件使用方式,核心是如何在spring项目中快速上手应用。
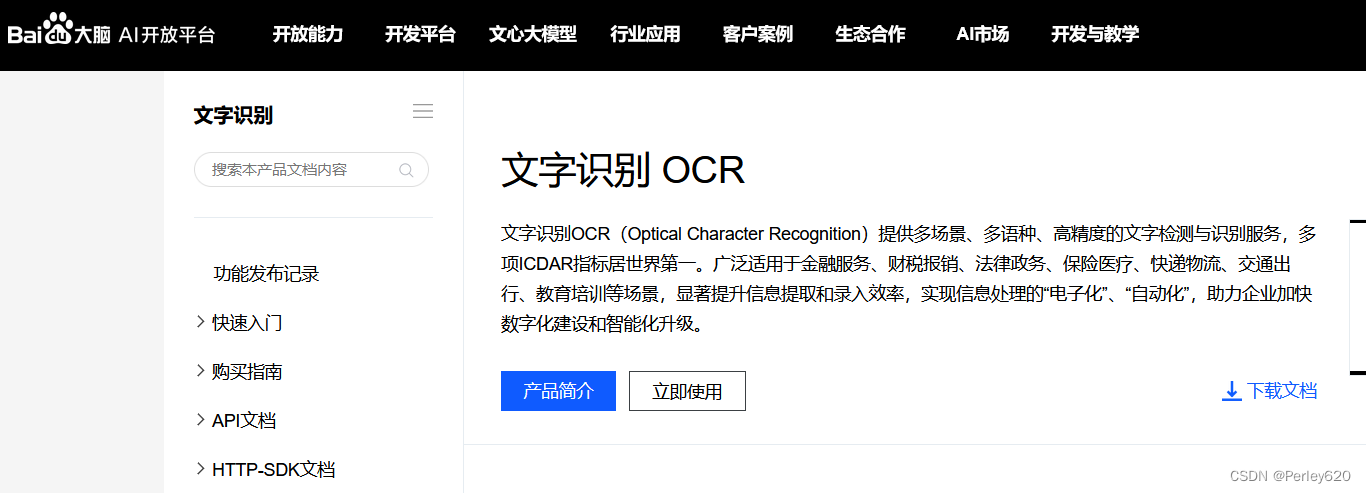
本文介绍如何在Springboot中使用百度AI的文字识别OCR

其他相关的使用百度AI的文章列表如下:
如何在Springboot中使用语音文件识别 & ffmpeg的安装和使用

文章目录
- 前言
- 引出
- 小经验:如何使用官方文档
- 1.API文档的使用
- 2.HTTP-SDK文档的使用
- 基于官网案例demo的实现
- 1.使用AipOcr客户端
- 2.使用官网的HttpUtil工具类
- 附录:官网的工具类
- 1.Base64Util图片编码工具
- 2.FileUtil读取文件工具类
- 3.基于Google的gson的Json工具类
- 4.Http请求发起和获得响应工具类
- 总结
引出
1.从官网demo到idea中使用;
2.如何阅读官网的说明文档,小经验分享;
小经验:如何使用官方文档
https://ai.baidu.com/ai-doc/index/OCR
https://ai.baidu.com/ai-doc/OCR/Ek3h7xypm

1.API文档的使用
万里长征第一步,Ctrl c + v,复制粘贴
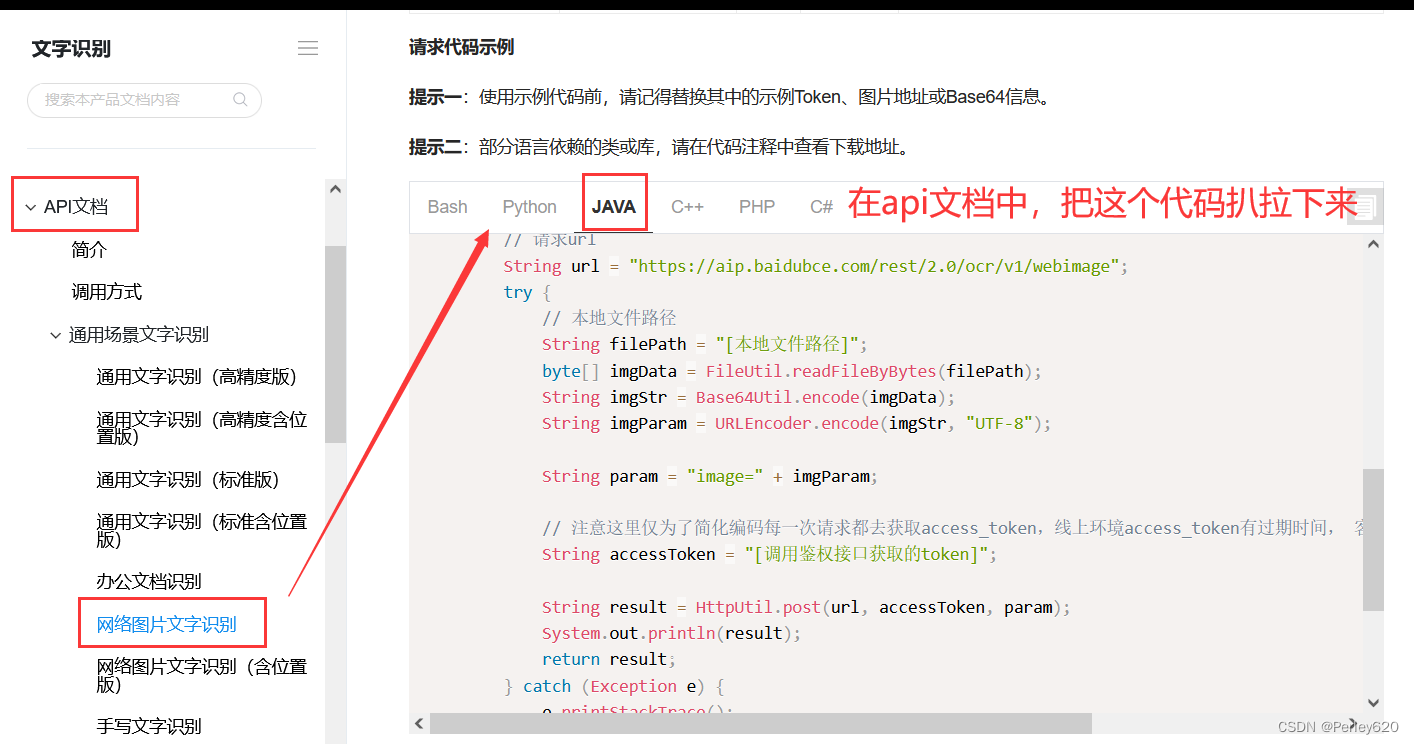
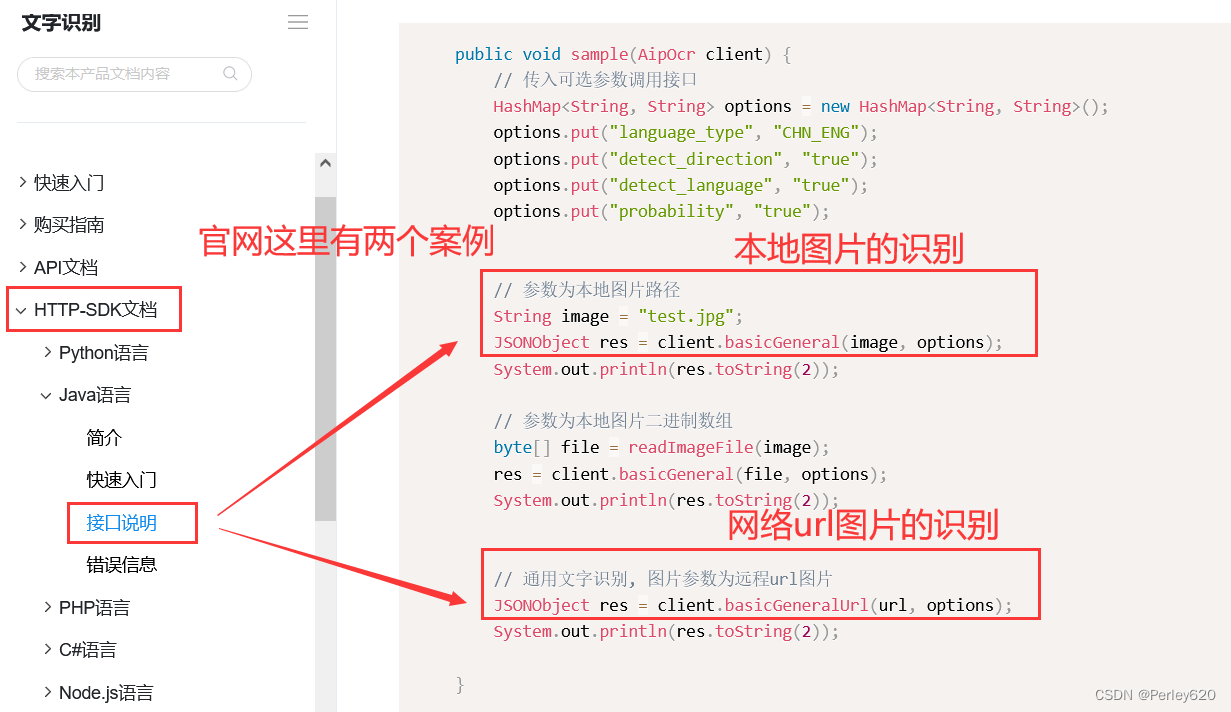
2.HTTP-SDK文档的使用
网络请求SDK案例
基于官网案例demo的实现
从官网的案例到spring项目整合
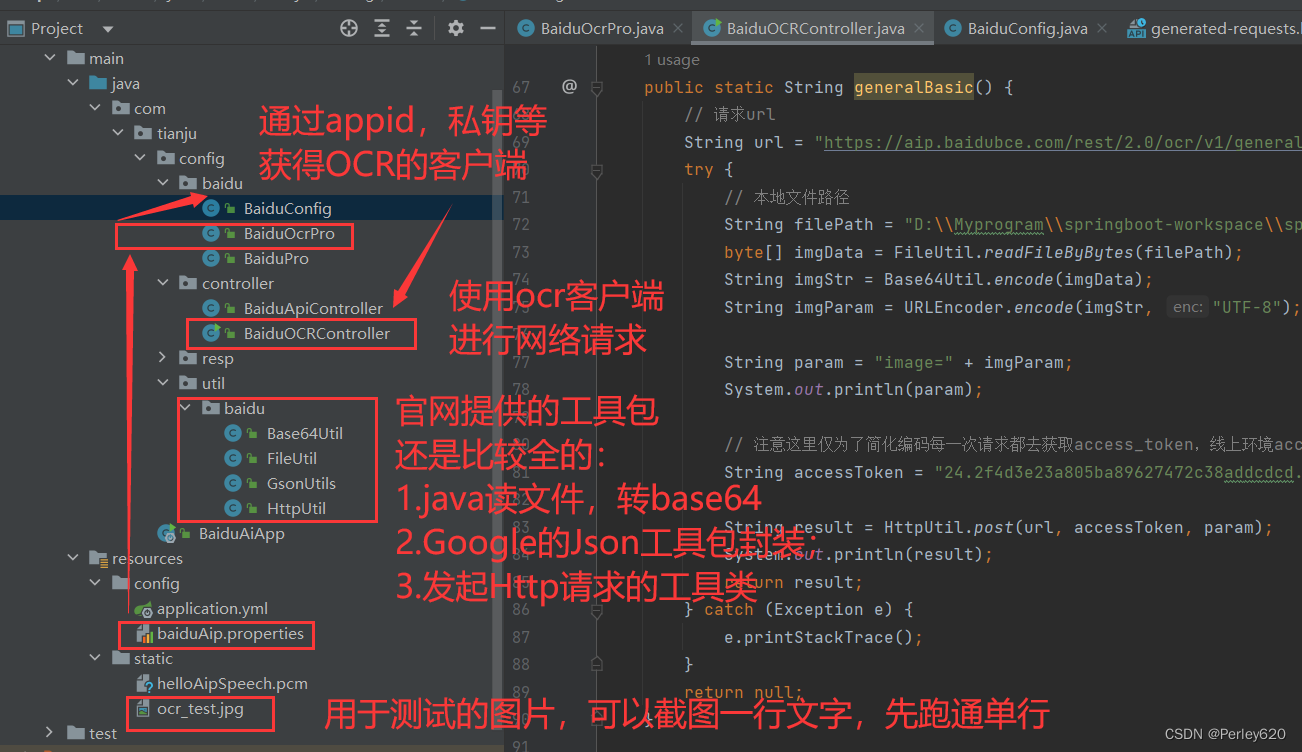
1.使用AipOcr客户端
BaiduOcrPro实体类
package com.tianju.config.baidu;import lombok.AllArgsConstructor;
import lombok.Data;
import lombok.NoArgsConstructor;
import org.springframework.boot.context.properties.ConfigurationProperties;
import org.springframework.context.annotation.PropertySource;
import org.springframework.stereotype.Component;/*** OCR相关的配置*/@Component
@ConfigurationProperties(prefix = "baidu.ocr")
@PropertySource("classpath:config/baiduAip.properties")@Data
@NoArgsConstructor
@AllArgsConstructor
public class BaiduOcrPro {private String appId;private String apiKey;private String secretKey;
}
初始化AipOcr,放到spring容器中
package com.tianju.config.baidu;import com.baidu.aip.ocr.AipOcr;
import com.baidu.aip.speech.AipSpeech;
import org.springframework.beans.factory.annotation.Autowired;
import org.springframework.context.annotation.Bean;
import org.springframework.context.annotation.Configuration;/*** 百度相关的配置文件*/
@Configuration
public class BaiduConfig {@Autowiredprivate BaiduOcrPro baiduOcrPro;/*** 图像相关的 AipOcr* @return AipOcr 放容器中*/@Beanpublic AipOcr aipOcr(){AipOcr aipOcr = new AipOcr(baiduOcrPro.getAppId(),baiduOcrPro.getApiKey(),baiduOcrPro.getSecretKey());// 可选:设置网络连接参数aipOcr.setConnectionTimeoutInMillis(2000);aipOcr.setSocketTimeoutInMillis(60000);return aipOcr;}}
controller层进行调用
package com.tianju.config.controller;import com.baidu.aip.ocr.AipOcr;
import com.tianju.config.resp.HttpResp;
import com.tianju.config.util.baidu.Base64Util;
import com.tianju.config.util.baidu.FileUtil;
import com.tianju.config.util.baidu.HttpUtil;
import org.json.JSONArray;
import org.json.JSONObject;
import org.springframework.beans.factory.annotation.Autowired;
import org.springframework.web.bind.annotation.GetMapping;
import org.springframework.web.bind.annotation.RequestMapping;
import org.springframework.web.bind.annotation.RestController;import java.net.URLEncoder;
import java.util.HashMap;@RestController
@RequestMapping("/api/baidu/ocr")
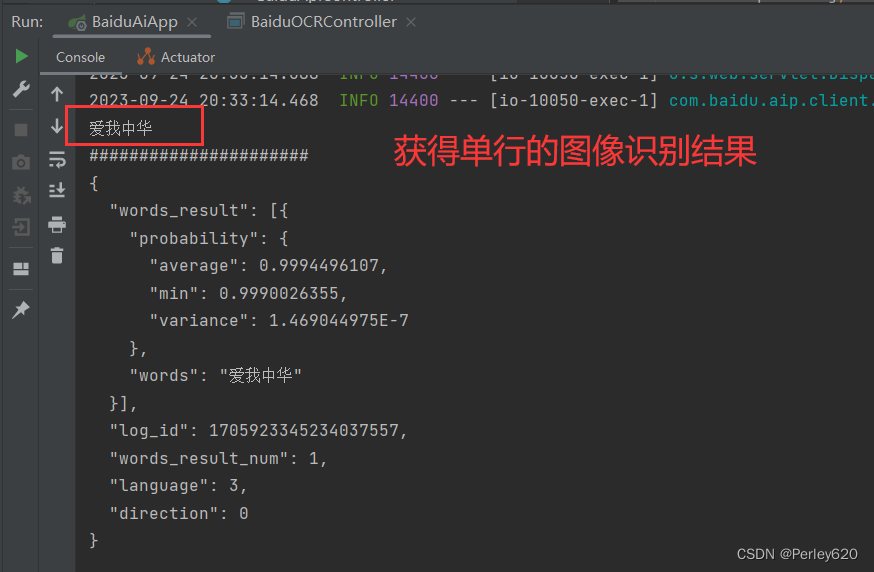
public class BaiduOCRController {@Autowiredprivate AipOcr aipOcr;// http://124.70.138.34:9000/hello/1.jpg@GetMapping("/imgUrl")public HttpResp ocrFromImgUrl(String imgUrl){// 传入可选参数调用接口HashMap<String, String> options = new HashMap<String, String>();options.put("language_type", "CHN_ENG");options.put("detect_direction", "true");options.put("detect_language", "true");options.put("probability", "true");/*** 网络图像*/JSONObject res = aipOcr.basicGeneralUrl(imgUrl,options);/*** {"words_result":* [{"probability":{"average":0.9994496107,"min":0.9990026355,"variance":1.469044975E-7},* "words":"爱我中华"}],* "log_id":1705920508293856573,"words_result_num":1,"language":3,"direction":0}*/JSONArray wordsResult = (org.json.JSONArray)res.get("words_result");JSONObject o = (JSONObject) wordsResult.get(0);Object words = o.get("words");System.out.println(words);System.out.println("######################");System.out.println(res.toString(2));return HttpResp.success(words);}}
2.使用官网的HttpUtil工具类
package com.tianju.config.controller;import com.baidu.aip.ocr.AipOcr;
import com.tianju.config.resp.HttpResp;
import com.tianju.config.util.baidu.Base64Util;
import com.tianju.config.util.baidu.FileUtil;
import com.tianju.config.util.baidu.HttpUtil;
import org.json.JSONArray;
import org.json.JSONObject;
import org.springframework.beans.factory.annotation.Autowired;
import org.springframework.web.bind.annotation.GetMapping;
import org.springframework.web.bind.annotation.RequestMapping;
import org.springframework.web.bind.annotation.RestController;import java.net.URLEncoder;
import java.util.HashMap;@RestController
@RequestMapping("/api/baidu/ocr")
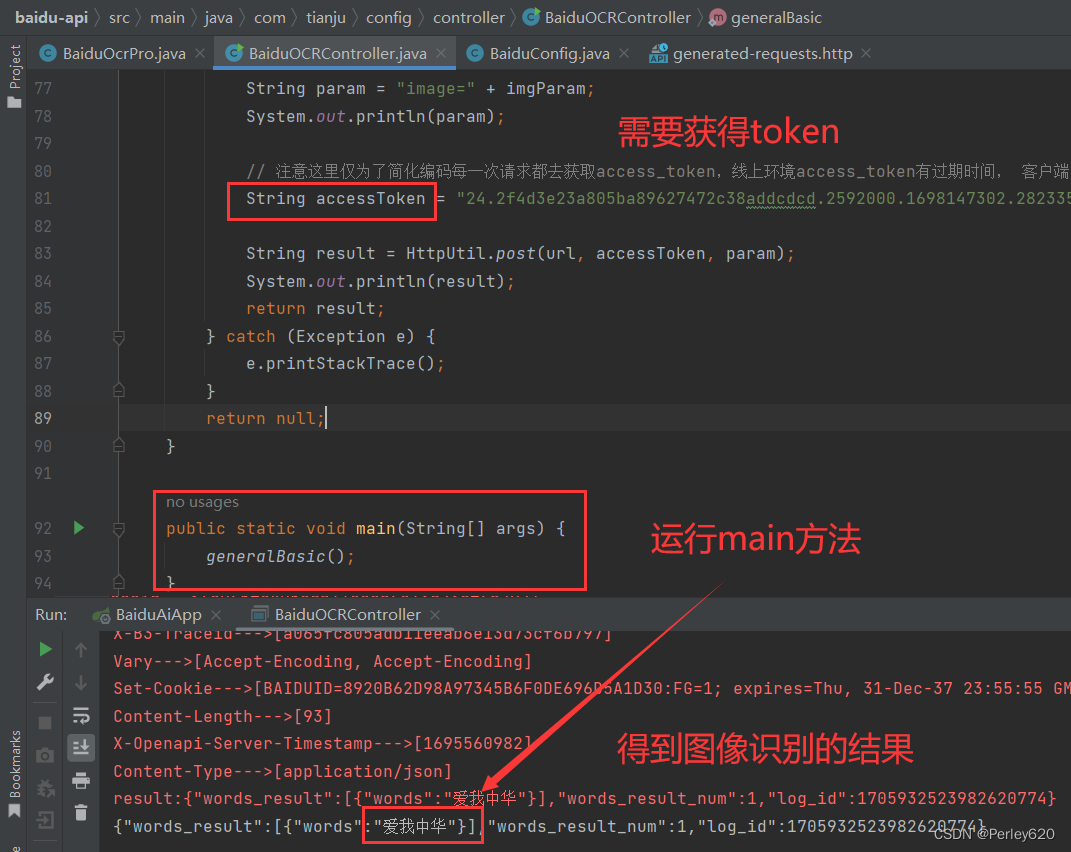
public class BaiduOCRController {/*** 以下为官网的案例,token的方式* https://ai.baidu.com/ai-doc/OCR/zk3h7xz52*/public static String generalBasic() {// 请求urlString url = "https://aip.baidubce.com/rest/2.0/ocr/v1/general_basic";try {// 本地文件路径String filePath = "D:\\Myprogram\\springboot-workspace\\spring-project\\baidu-api\\src\\main\\resources\\static\\ocr_test.jpg";byte[] imgData = FileUtil.readFileByBytes(filePath);String imgStr = Base64Util.encode(imgData);String imgParam = URLEncoder.encode(imgStr, "UTF-8");String param = "image=" + imgParam;System.out.println(param);// 注意这里仅为了简化编码每一次请求都去获取access_token,线上环境access_token有过期时间, 客户端可自行缓存,过期后重新获取。String accessToken = "24.2f4d3e23a805ba89627472c38addcdcd.2592000.1698147302.282335-38781099";String result = HttpUtil.post(url, accessToken, param);System.out.println(result);return result;} catch (Exception e) {e.printStackTrace();}return null;}public static void main(String[] args) {generalBasic();}
}
附录:官网的工具类
1.Base64Util图片编码工具
package com.tianju.config.util.baidu;/*** Base64 工具类*/
public class Base64Util {private static final char last2byte = (char) Integer.parseInt("00000011", 2);private static final char last4byte = (char) Integer.parseInt("00001111", 2);private static final char last6byte = (char) Integer.parseInt("00111111", 2);private static final char lead6byte = (char) Integer.parseInt("11111100", 2);private static final char lead4byte = (char) Integer.parseInt("11110000", 2);private static final char lead2byte = (char) Integer.parseInt("11000000", 2);private static final char[] encodeTable = new char[]{'A', 'B', 'C', 'D', 'E', 'F', 'G', 'H', 'I', 'J', 'K', 'L', 'M', 'N', 'O', 'P', 'Q', 'R', 'S', 'T', 'U', 'V', 'W', 'X', 'Y', 'Z', 'a', 'b', 'c', 'd', 'e', 'f', 'g', 'h', 'i', 'j', 'k', 'l', 'm', 'n', 'o', 'p', 'q', 'r', 's', 't', 'u', 'v', 'w', 'x', 'y', 'z', '0', '1', '2', '3', '4', '5', '6', '7', '8', '9', '+', '/'};public Base64Util() {}public static String encode(byte[] from) {StringBuilder to = new StringBuilder((int) ((double) from.length * 1.34D) + 3);int num = 0;char currentByte = 0;int i;for (i = 0; i < from.length; ++i) {for (num %= 8; num < 8; num += 6) {switch (num) {case 0:currentByte = (char) (from[i] & lead6byte);currentByte = (char) (currentByte >>> 2);case 1:case 3:case 5:default:break;case 2:currentByte = (char) (from[i] & last6byte);break;case 4:currentByte = (char) (from[i] & last4byte);currentByte = (char) (currentByte << 2);if (i + 1 < from.length) {currentByte = (char) (currentByte | (from[i + 1] & lead2byte) >>> 6);}break;case 6:currentByte = (char) (from[i] & last2byte);currentByte = (char) (currentByte << 4);if (i + 1 < from.length) {currentByte = (char) (currentByte | (from[i + 1] & lead4byte) >>> 4);}}to.append(encodeTable[currentByte]);}}if (to.length() % 4 != 0) {for (i = 4 - to.length() % 4; i > 0; --i) {to.append("=");}}return to.toString();}
}
2.FileUtil读取文件工具类
package com.tianju.config.util.baidu;import java.io.*;/*** 文件读取工具类*/
public class FileUtil {/*** 读取文件内容,作为字符串返回*/public static String readFileAsString(String filePath) throws IOException {File file = new File(filePath);if (!file.exists()) {throw new FileNotFoundException(filePath);} if (file.length() > 1024 * 1024 * 1024) {throw new IOException("File is too large");} StringBuilder sb = new StringBuilder((int) (file.length()));// 创建字节输入流  FileInputStream fis = new FileInputStream(filePath);  // 创建一个长度为10240的Bufferbyte[] bbuf = new byte[10240];  // 用于保存实际读取的字节数  int hasRead = 0;  while ( (hasRead = fis.read(bbuf)) > 0 ) {  sb.append(new String(bbuf, 0, hasRead));  }  fis.close();  return sb.toString();}/*** 根据文件路径读取byte[] 数组*/public static byte[] readFileByBytes(String filePath) throws IOException {File file = new File(filePath);if (!file.exists()) {throw new FileNotFoundException(filePath);} else {ByteArrayOutputStream bos = new ByteArrayOutputStream((int) file.length());BufferedInputStream in = null;try {in = new BufferedInputStream(new FileInputStream(file));short bufSize = 1024;byte[] buffer = new byte[bufSize];int len1;while (-1 != (len1 = in.read(buffer, 0, bufSize))) {bos.write(buffer, 0, len1);}byte[] var7 = bos.toByteArray();return var7;} finally {try {if (in != null) {in.close();}} catch (IOException var14) {var14.printStackTrace();}bos.close();}}}
}
3.基于Google的gson的Json工具类
/** Copyright (C) 2017 Baidu, Inc. All Rights Reserved.*/
package com.tianju.config.util.baidu;import com.google.gson.Gson;
import com.google.gson.GsonBuilder;
import com.google.gson.JsonParseException;import java.lang.reflect.Type;/*** Json工具类.*/
public class GsonUtils {private static Gson gson = new GsonBuilder().create();public static String toJson(Object value) {return gson.toJson(value);}public static <T> T fromJson(String json, Class<T> classOfT) throws JsonParseException {return gson.fromJson(json, classOfT);}public static <T> T fromJson(String json, Type typeOfT) throws JsonParseException {return (T) gson.fromJson(json, typeOfT);}
}
4.Http请求发起和获得响应工具类
package com.tianju.config.util.baidu;import java.io.BufferedReader;
import java.io.DataOutputStream;
import java.io.InputStreamReader;
import java.net.HttpURLConnection;
import java.net.URL;
import java.util.List;
import java.util.Map;/*** http 工具类*/
public class HttpUtil {public static String post(String requestUrl, String accessToken, String params)throws Exception {String contentType = "application/x-www-form-urlencoded";return HttpUtil.post(requestUrl, accessToken, contentType, params);}public static String post(String requestUrl, String accessToken, String contentType, String params)throws Exception {String encoding = "UTF-8";if (requestUrl.contains("nlp")) {encoding = "GBK";}return HttpUtil.post(requestUrl, accessToken, contentType, params, encoding);}public static String post(String requestUrl, String accessToken, String contentType, String params, String encoding)throws Exception {String url = requestUrl + "?access_token=" + accessToken;return HttpUtil.postGeneralUrl(url, contentType, params, encoding);}public static String postGeneralUrl(String generalUrl, String contentType, String params, String encoding)throws Exception {URL url = new URL(generalUrl);// 打开和URL之间的连接HttpURLConnection connection = (HttpURLConnection) url.openConnection();connection.setRequestMethod("POST");// 设置通用的请求属性connection.setRequestProperty("Content-Type", contentType);connection.setRequestProperty("Connection", "Keep-Alive");connection.setUseCaches(false);connection.setDoOutput(true);connection.setDoInput(true);// 得到请求的输出流对象DataOutputStream out = new DataOutputStream(connection.getOutputStream());out.write(params.getBytes(encoding));out.flush();out.close();// 建立实际的连接connection.connect();// 获取所有响应头字段Map<String, List<String>> headers = connection.getHeaderFields();// 遍历所有的响应头字段for (String key : headers.keySet()) {System.err.println(key + "--->" + headers.get(key));}// 定义 BufferedReader输入流来读取URL的响应BufferedReader in = null;in = new BufferedReader(new InputStreamReader(connection.getInputStream(), encoding));String result = "";String getLine;while ((getLine = in.readLine()) != null) {result += getLine;}in.close();System.err.println("result:" + result);return result;}
}
总结
1.从官网demo到idea中使用;
2.如何阅读官网的说明文档,小经验分享;